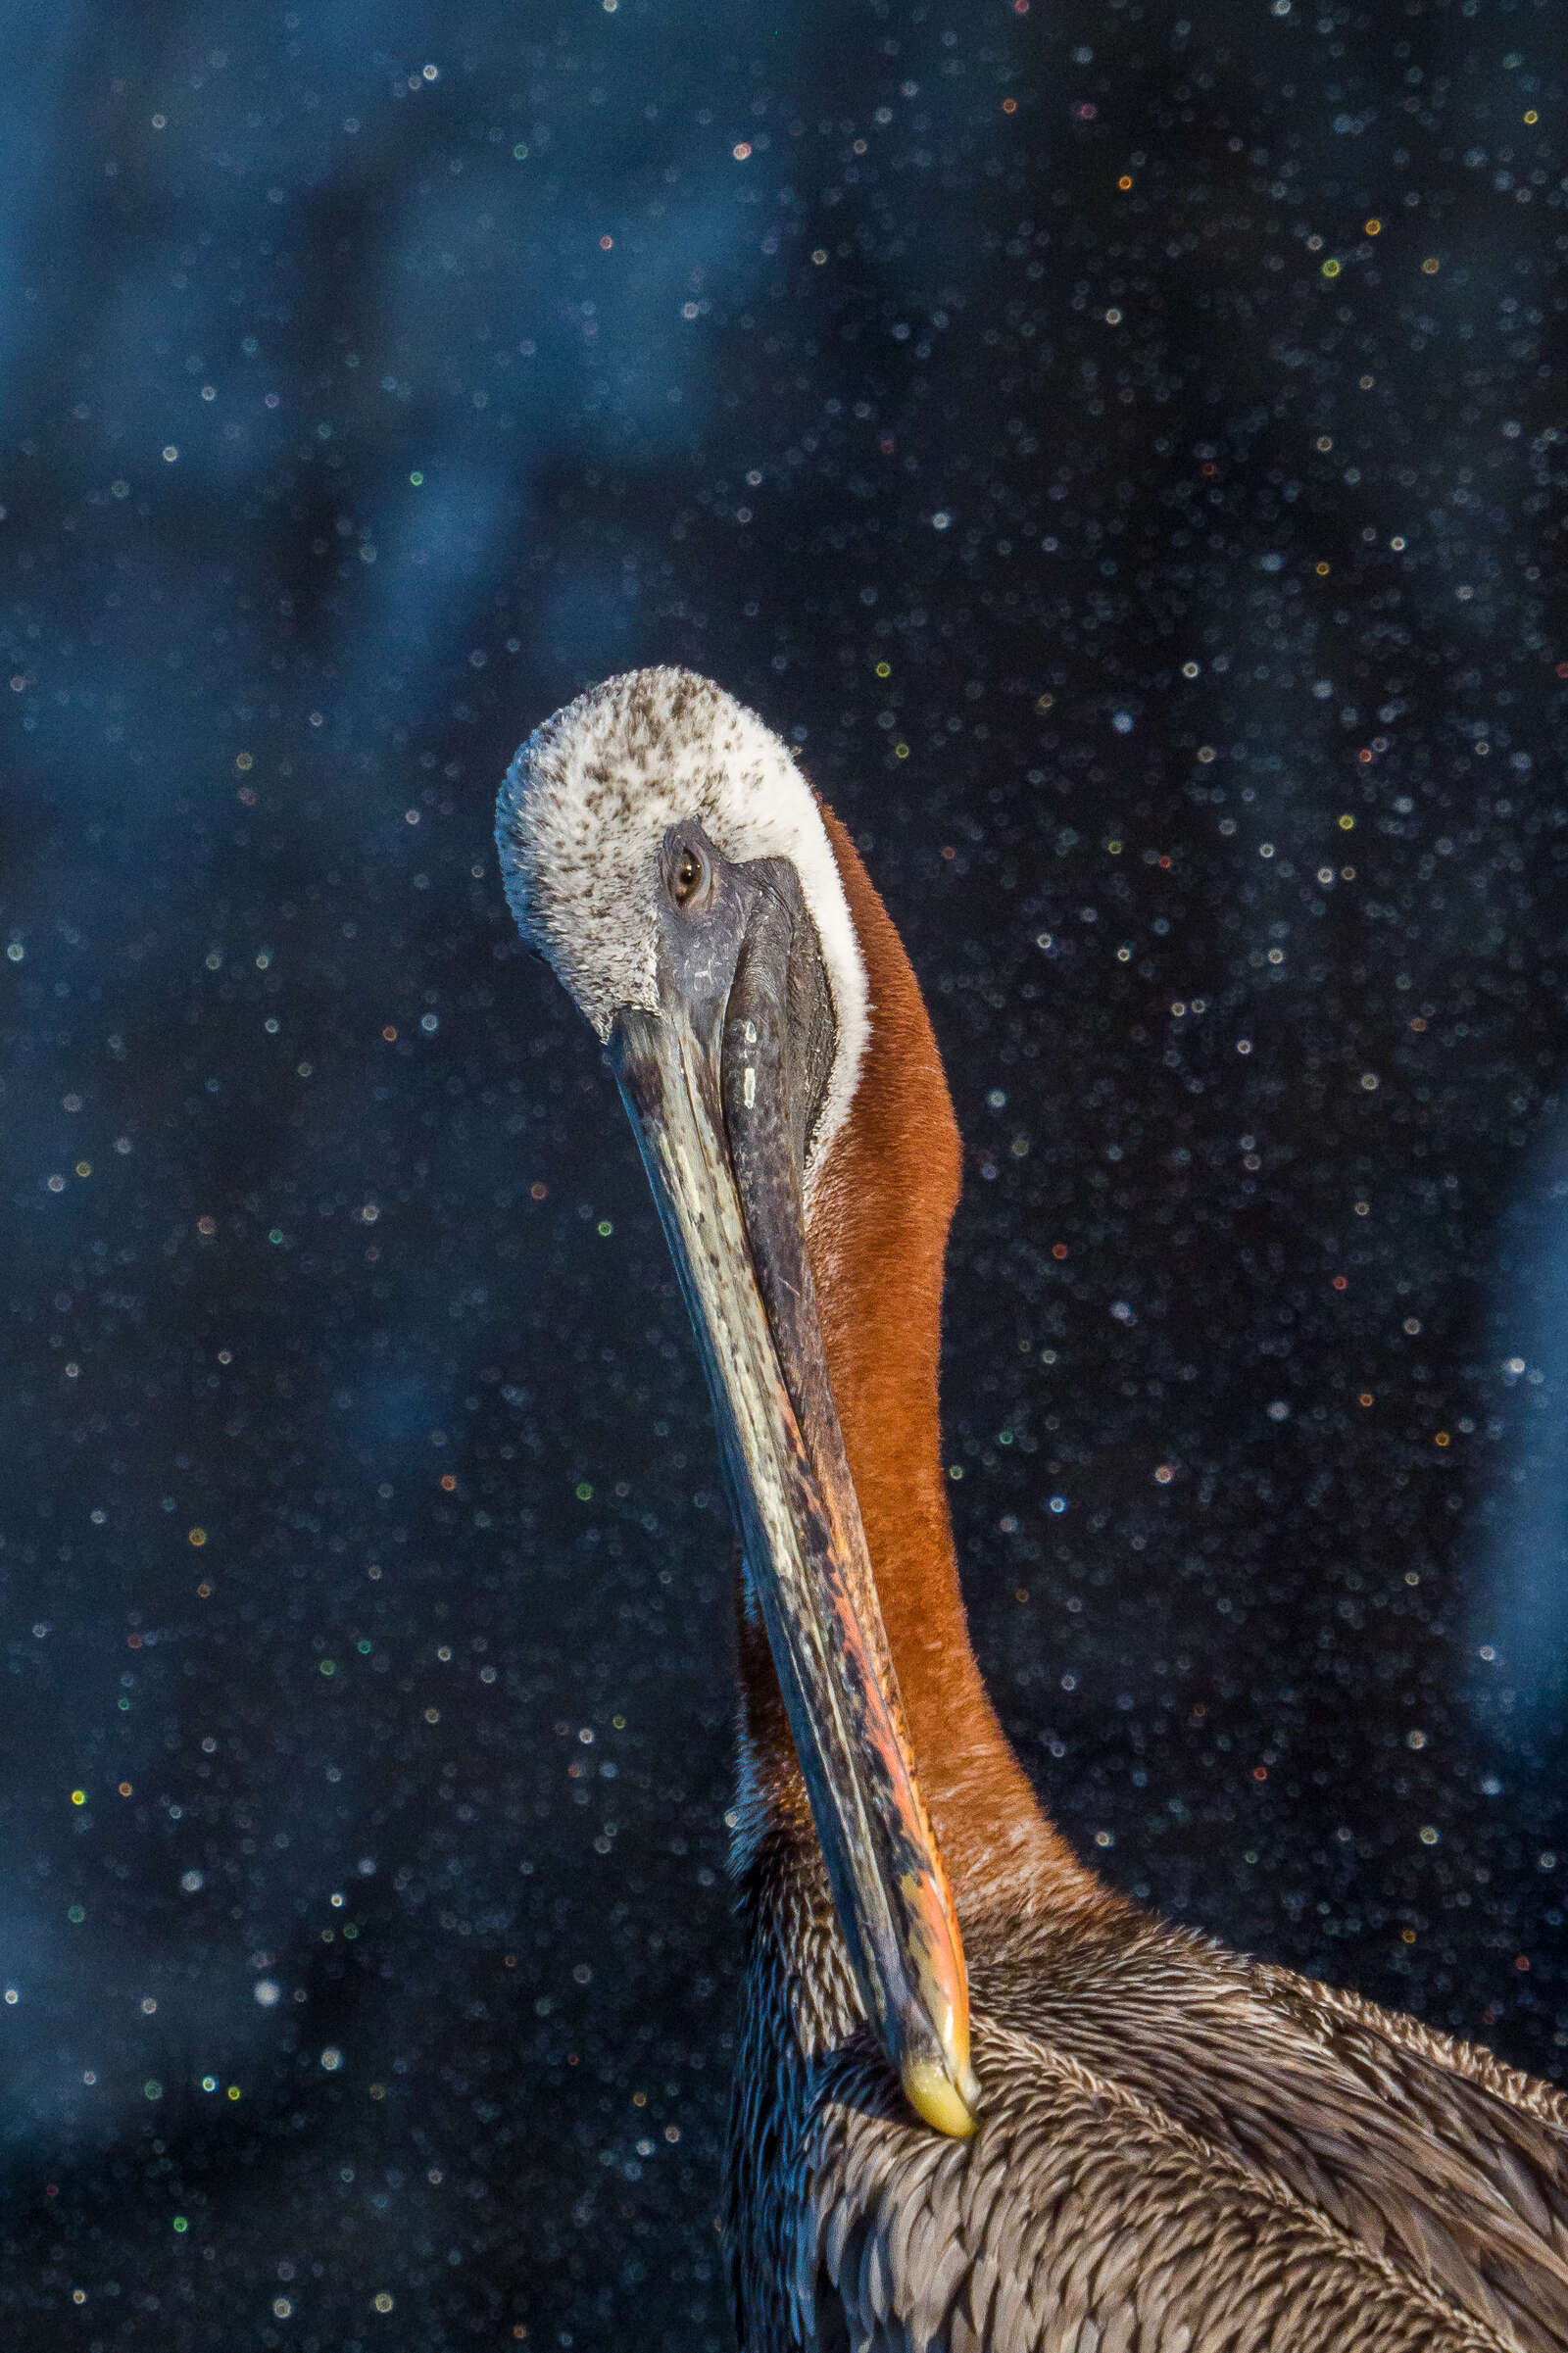
One of the most important skills when it comes to wildlife and macro photography is mastering your autofocus system. Many photographers don’t understand how extensive the options and features are in the OM-D camera system. While focusing for a landscape image is relatively un-challenging, capturing a bird in flight, bison in battle, or a tiny insect requires the photographer to not only be quick in the moment to acquire autofocus, but making sure all the various autofocus options are set correctly to give the photographer the advantage in any situation.
This article will walk you through a few of the critical autofocus options and features. I focused on the OM-D E-M1X and OM-D E-M1 Mark III which both offer 121-cross point type autofocus points that nearly cover the entire viewfinder. These points are the most accurate of any type as they search for contrast along both the vertical and horizontal plane.
Autofocus points search for contrast and thus, it is important to keep this in mind as it is possible to give your autofocus too many options in many wildlife photography scenes. We can do this by using too many autofocus points and not utilizing autofocus settings that are geared towards accuracy, speed, and control. The more specific, refined, and tuned in we have our autofocus approach the more likely we are to master our autofocus system and capture those images we once thought weren't possible for our skill level.
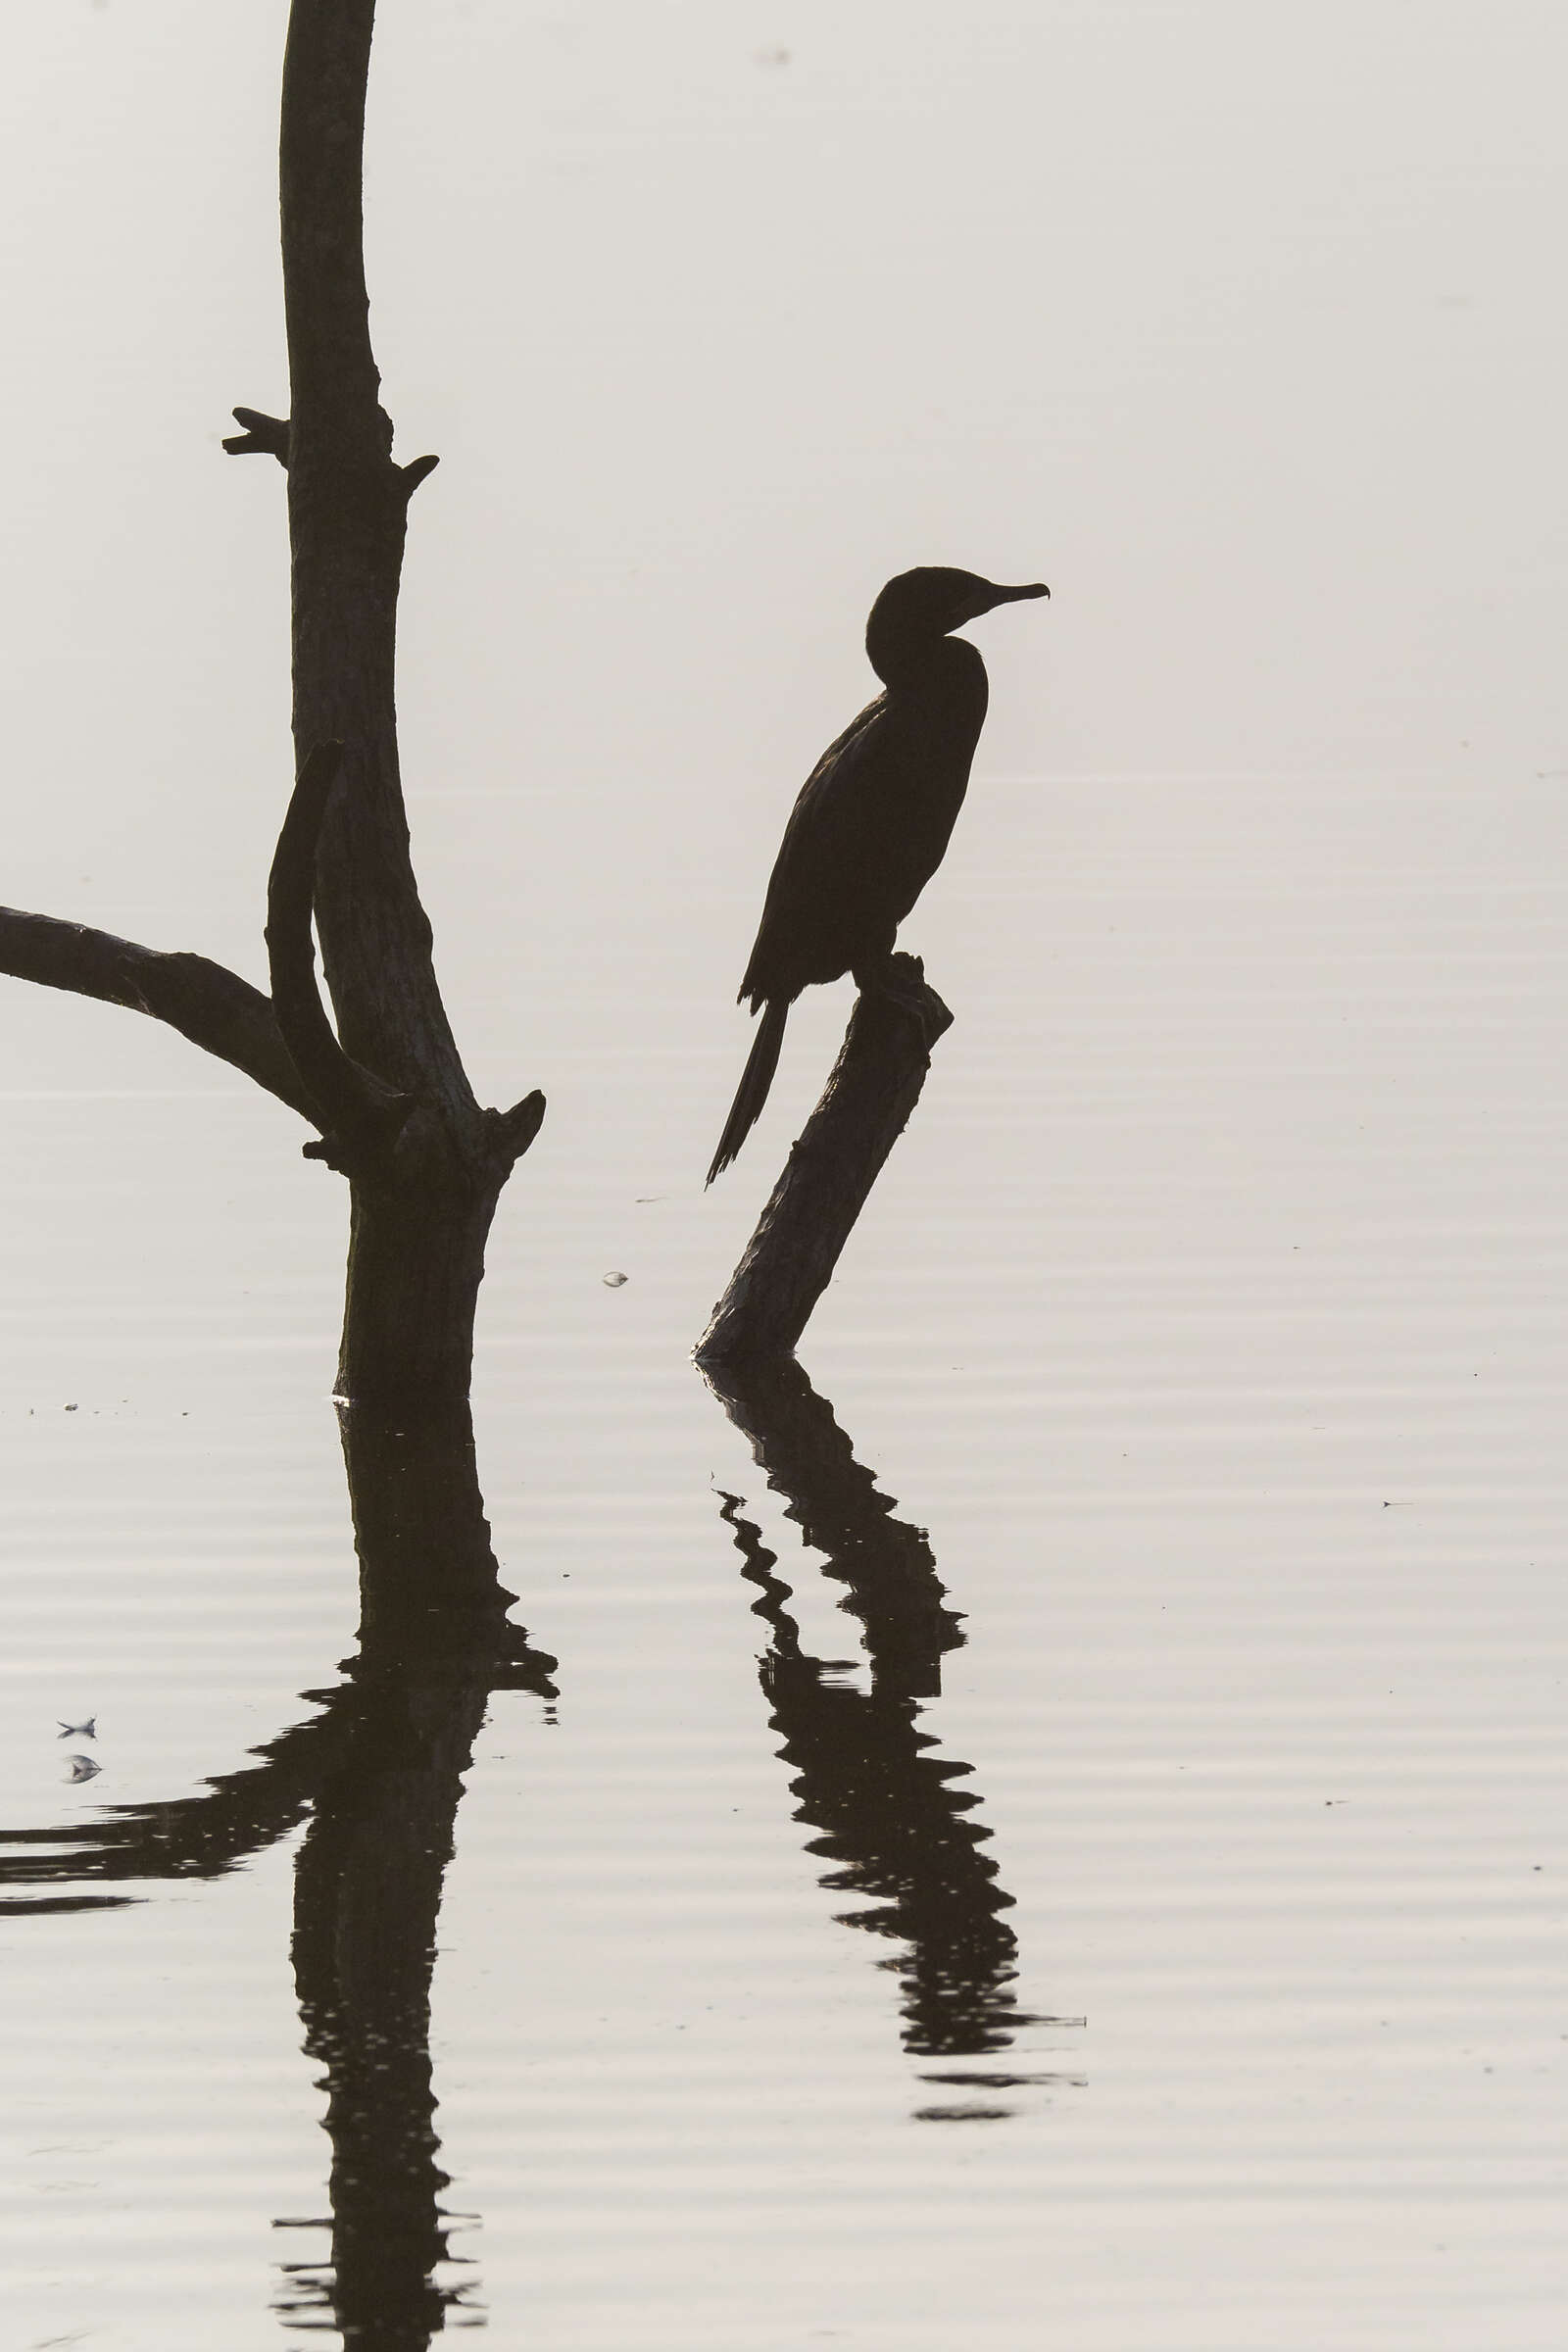
OM-D E-M1X
M.Zuiko Digital 300mm F4.0 PRO + MC-14
Handheld
1/1600 | F10 | ISO 500
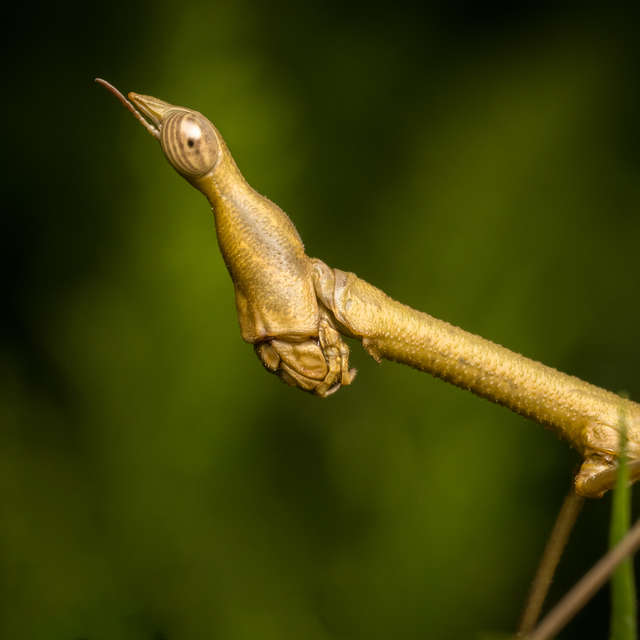
OM-D E-M1X
M.Zuiko Digital 60mm F2.8 MACRO
Handheld, Flash
1/250 | F11 | ISO 800

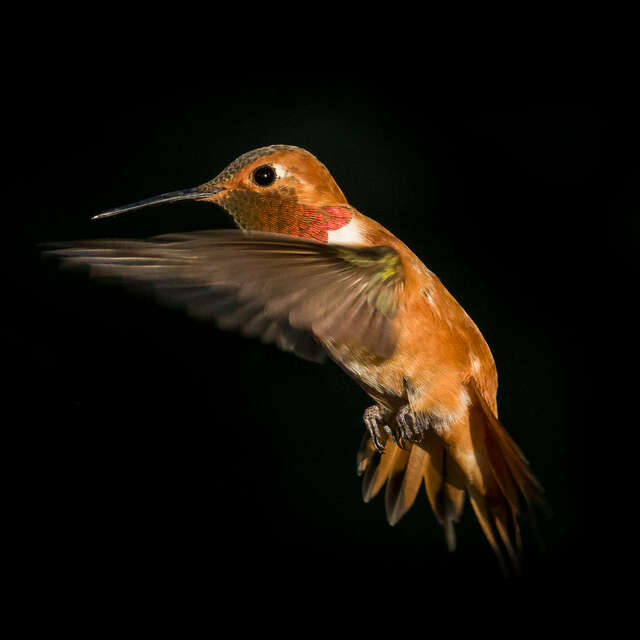
OM-D E-M1X
M.Zuiko Digital 40-150mm F2.8 PRO @ 82mm + MC-20
Handheld, Flash
1/250 | F6.3 | ISO 1250
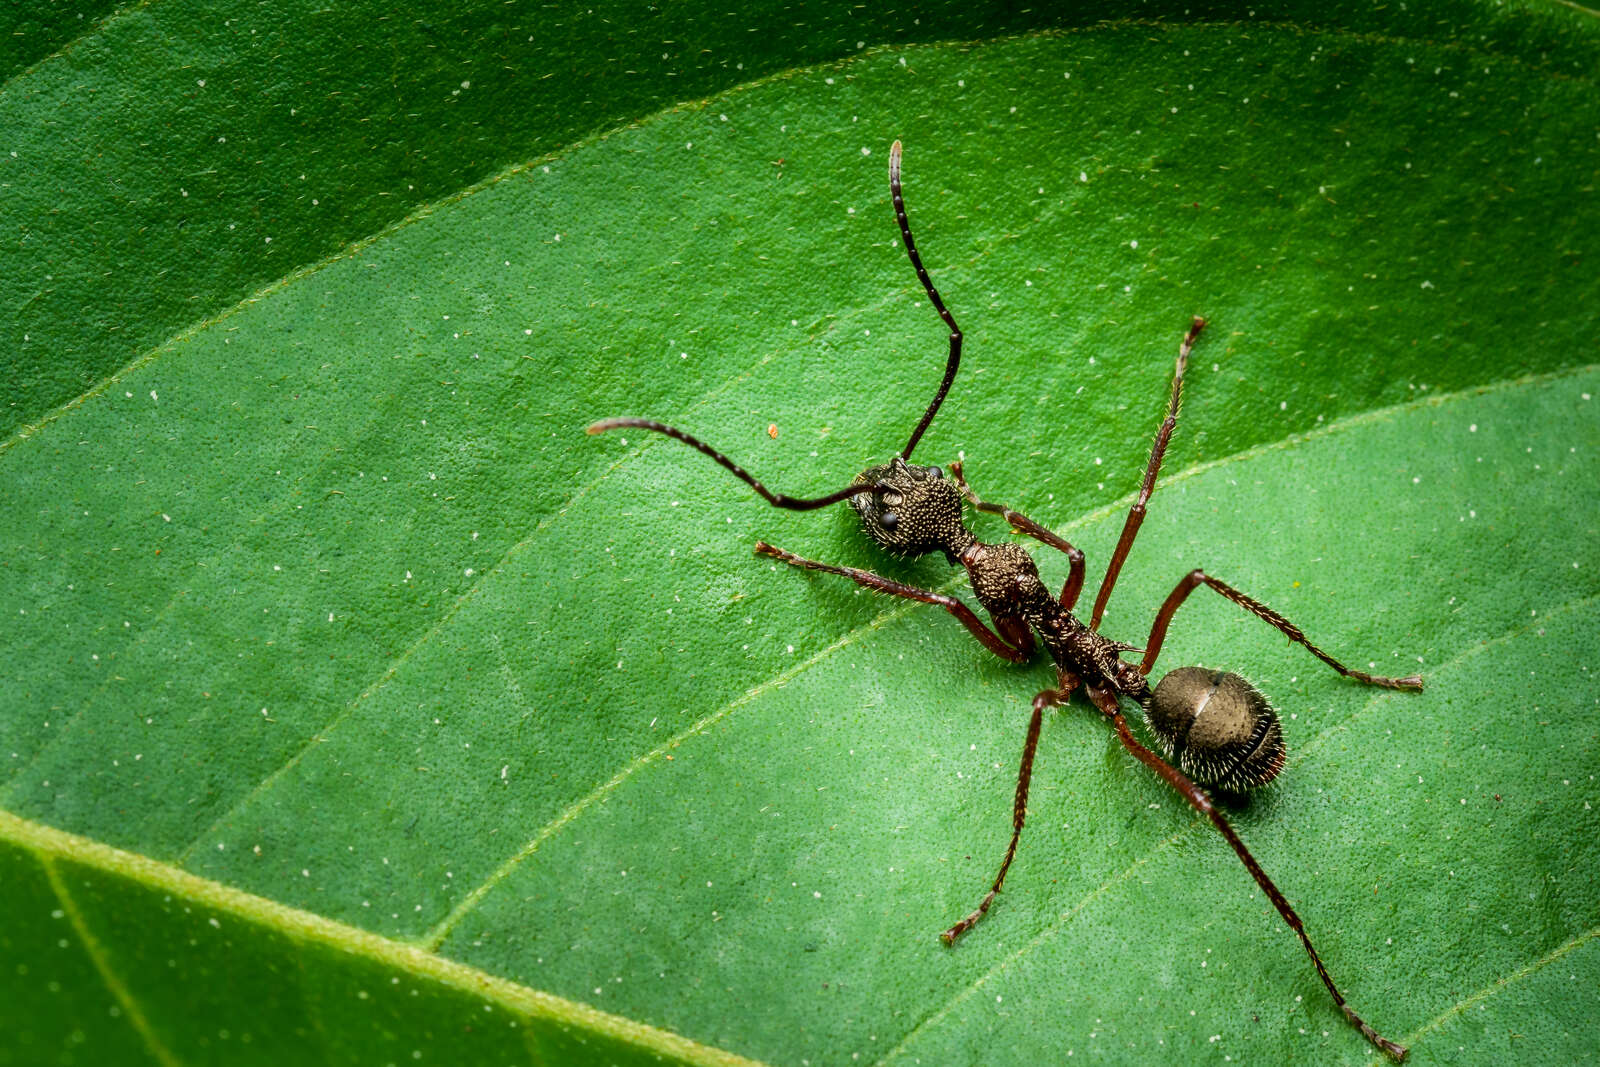
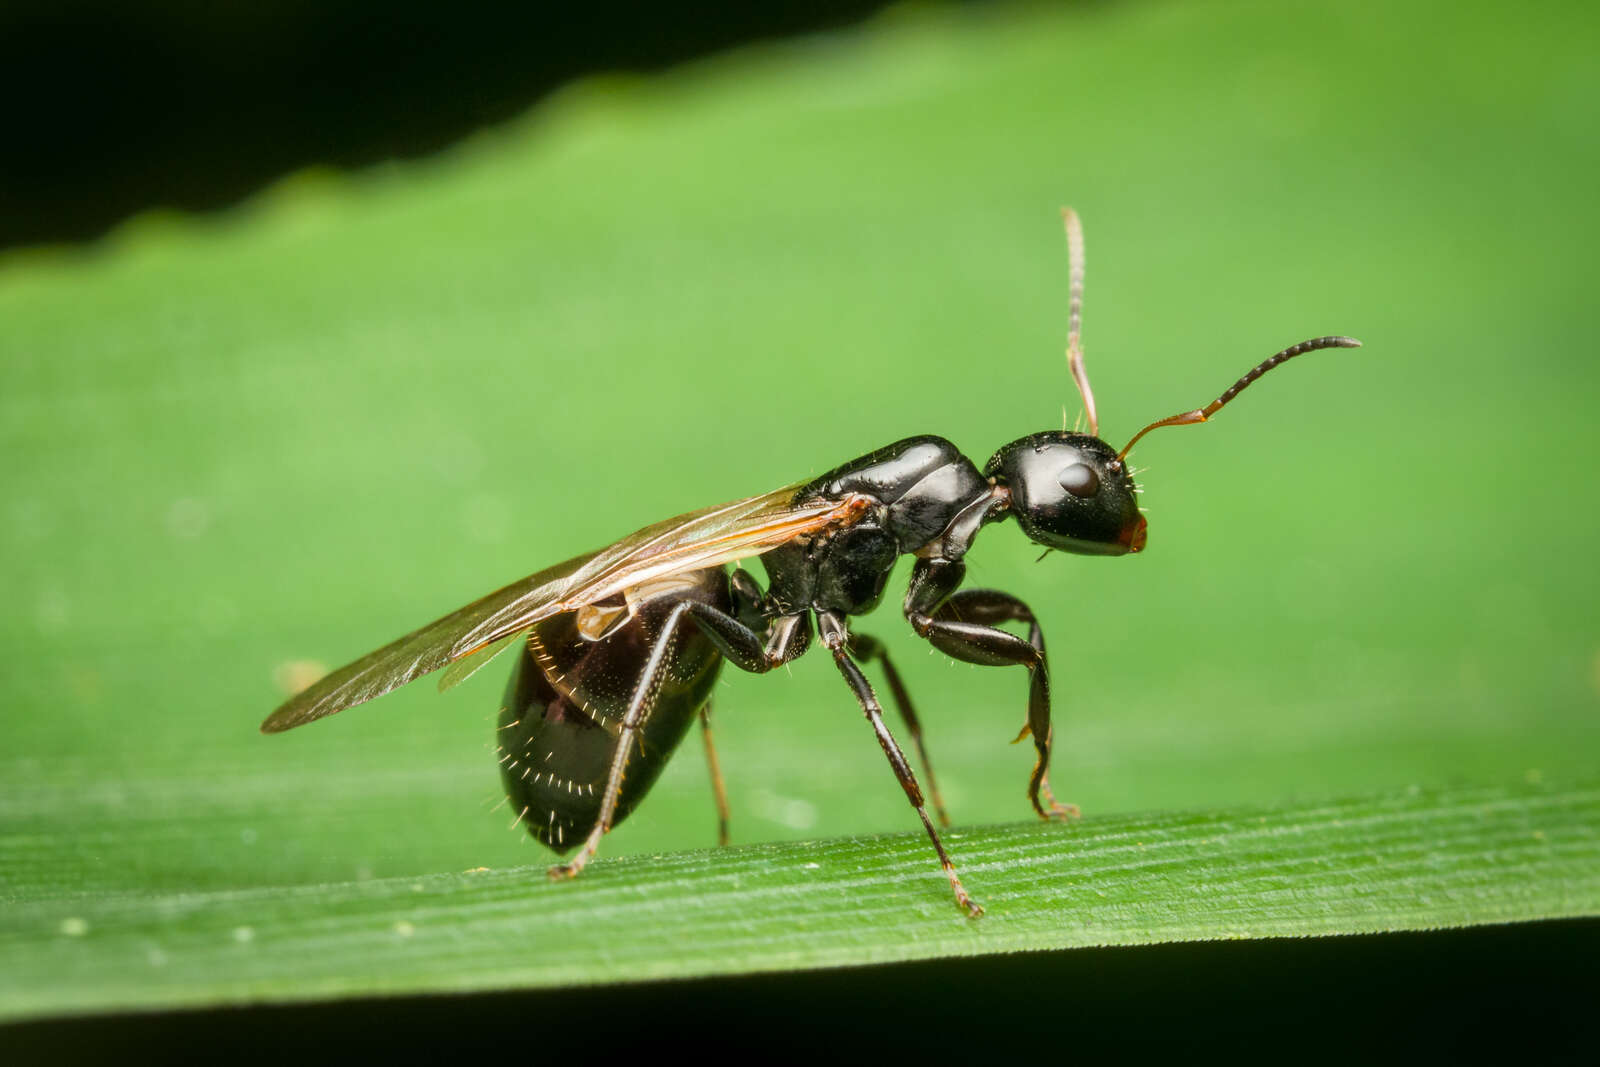
OM-D E-M1X
M.Zuiko Digital 60mm F2.8 MACRO
Handheld, Flash
1/250 | F10 | ISO 800
Back-button Autofocus
The O-MD E-M1X and the E-M1 Mark III both have the capability of back-button autofocus and this technique, in my estimation, is one of the greatest advantages for mastering your autofocus system. As you are aware, autofocus comes tied to the shutter button because plain and simple, this is how it has always been; however, this is one of those “traditions” that should be completely eliminated as there isn’t a single advantage to using front-button focus other than some might argue you only have to use one finger. The real issue is that there are so many instances in which front-button focus is going to fail you, lead to blurry images, or prevent you from shooting a long lens panoramic and immediately photographing a bird in flight without having to change any autofocus settings in the camera. Back-button autofocus combines the best of Continuous AF and Single AF modes into one and eliminates any need to change from one to the other.
Once you have become accustomed to using two fingers with one for pressing the shutter and one for focusing, you will wonder why you didn’t use this technique a long time ago! I don’t have enough space to argue all the advantages of back-button autofocus but you can find plenty of articles online explaining them. Next, we will take a look at some Olympus specific autofocus settings.
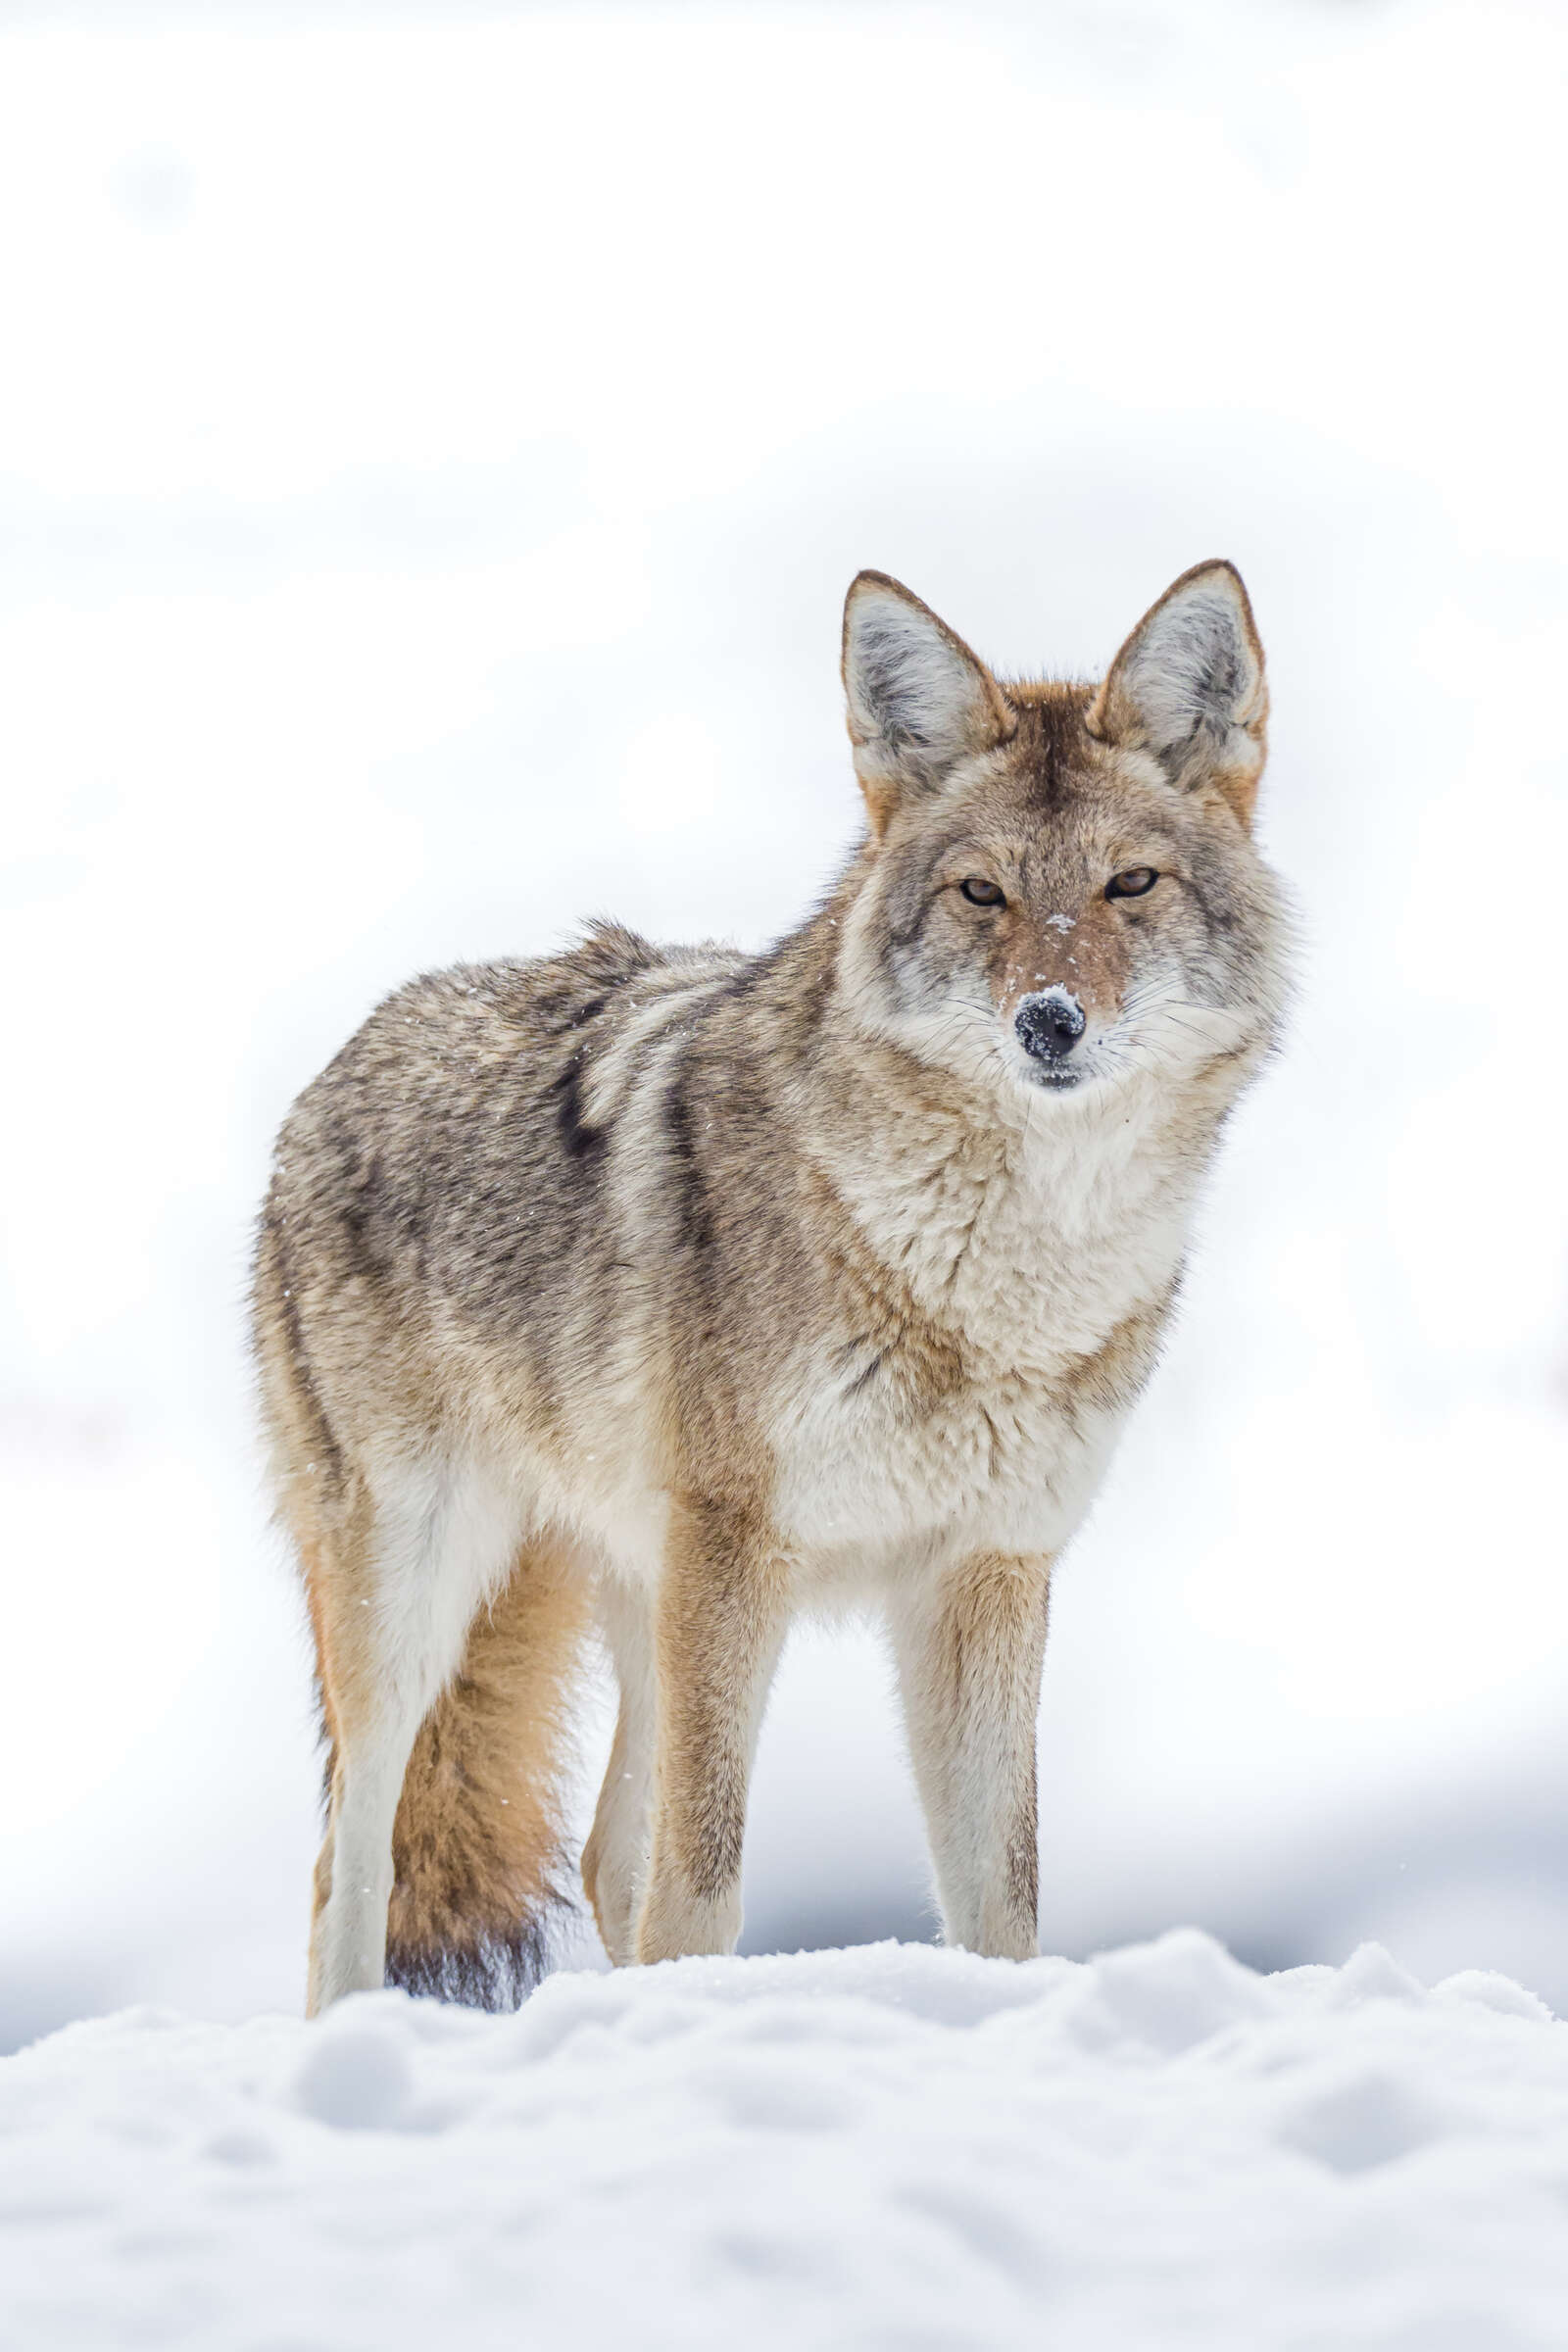
OM-D E-M1X
M.Zuiko Digital 300mm F4.0 PRO + MC-14
Handheld
1/1250 | F6.3 | ISO 800
Autofocus Feature: AF-Target Mode
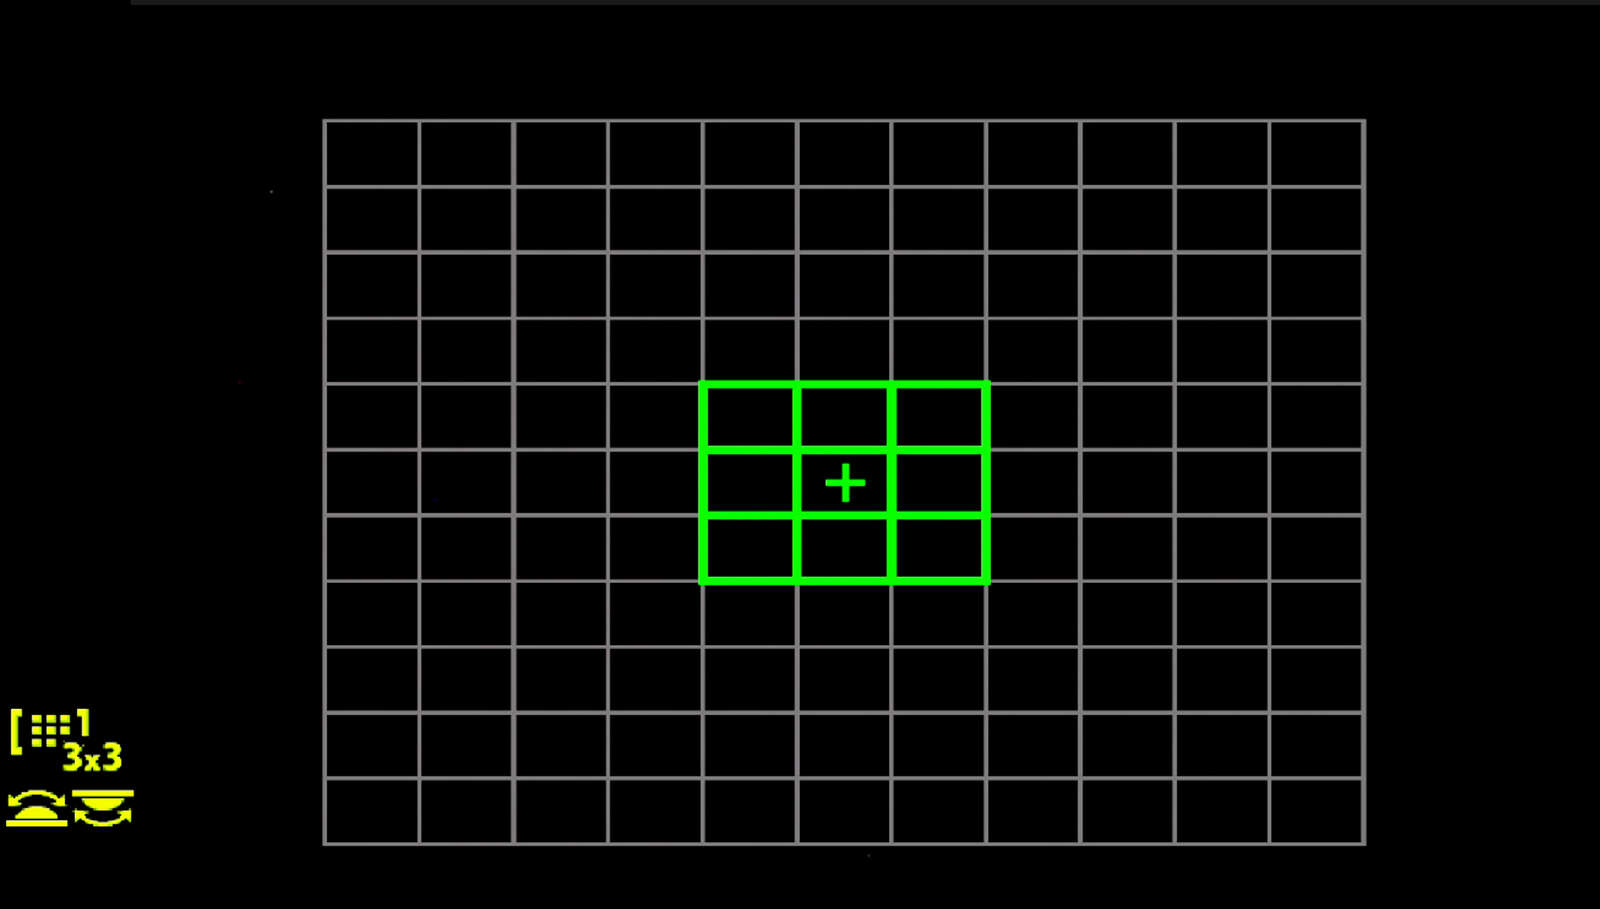
The AF-Target Mode refers to the number and configuration of autofocus points. This is a critical aspect of any autofocus technique. For example, our initial inclination might be to think that the more autofocus points we have selected, the better. In reality, it is the exact opposite since the more autofocus points we have, the more likely it is that it may well select an object beside our intended subject(s) we are attempting to photograph. We may also think it is best to have the smallest point possible as that would provide the most accurate autofocus possible. This too can be misleading since the small, single target may have difficulty finding contrast on a bird, mam-mal, reptile or such. Below, I show the six primary AF-Target Modes and when I tend to employ them.
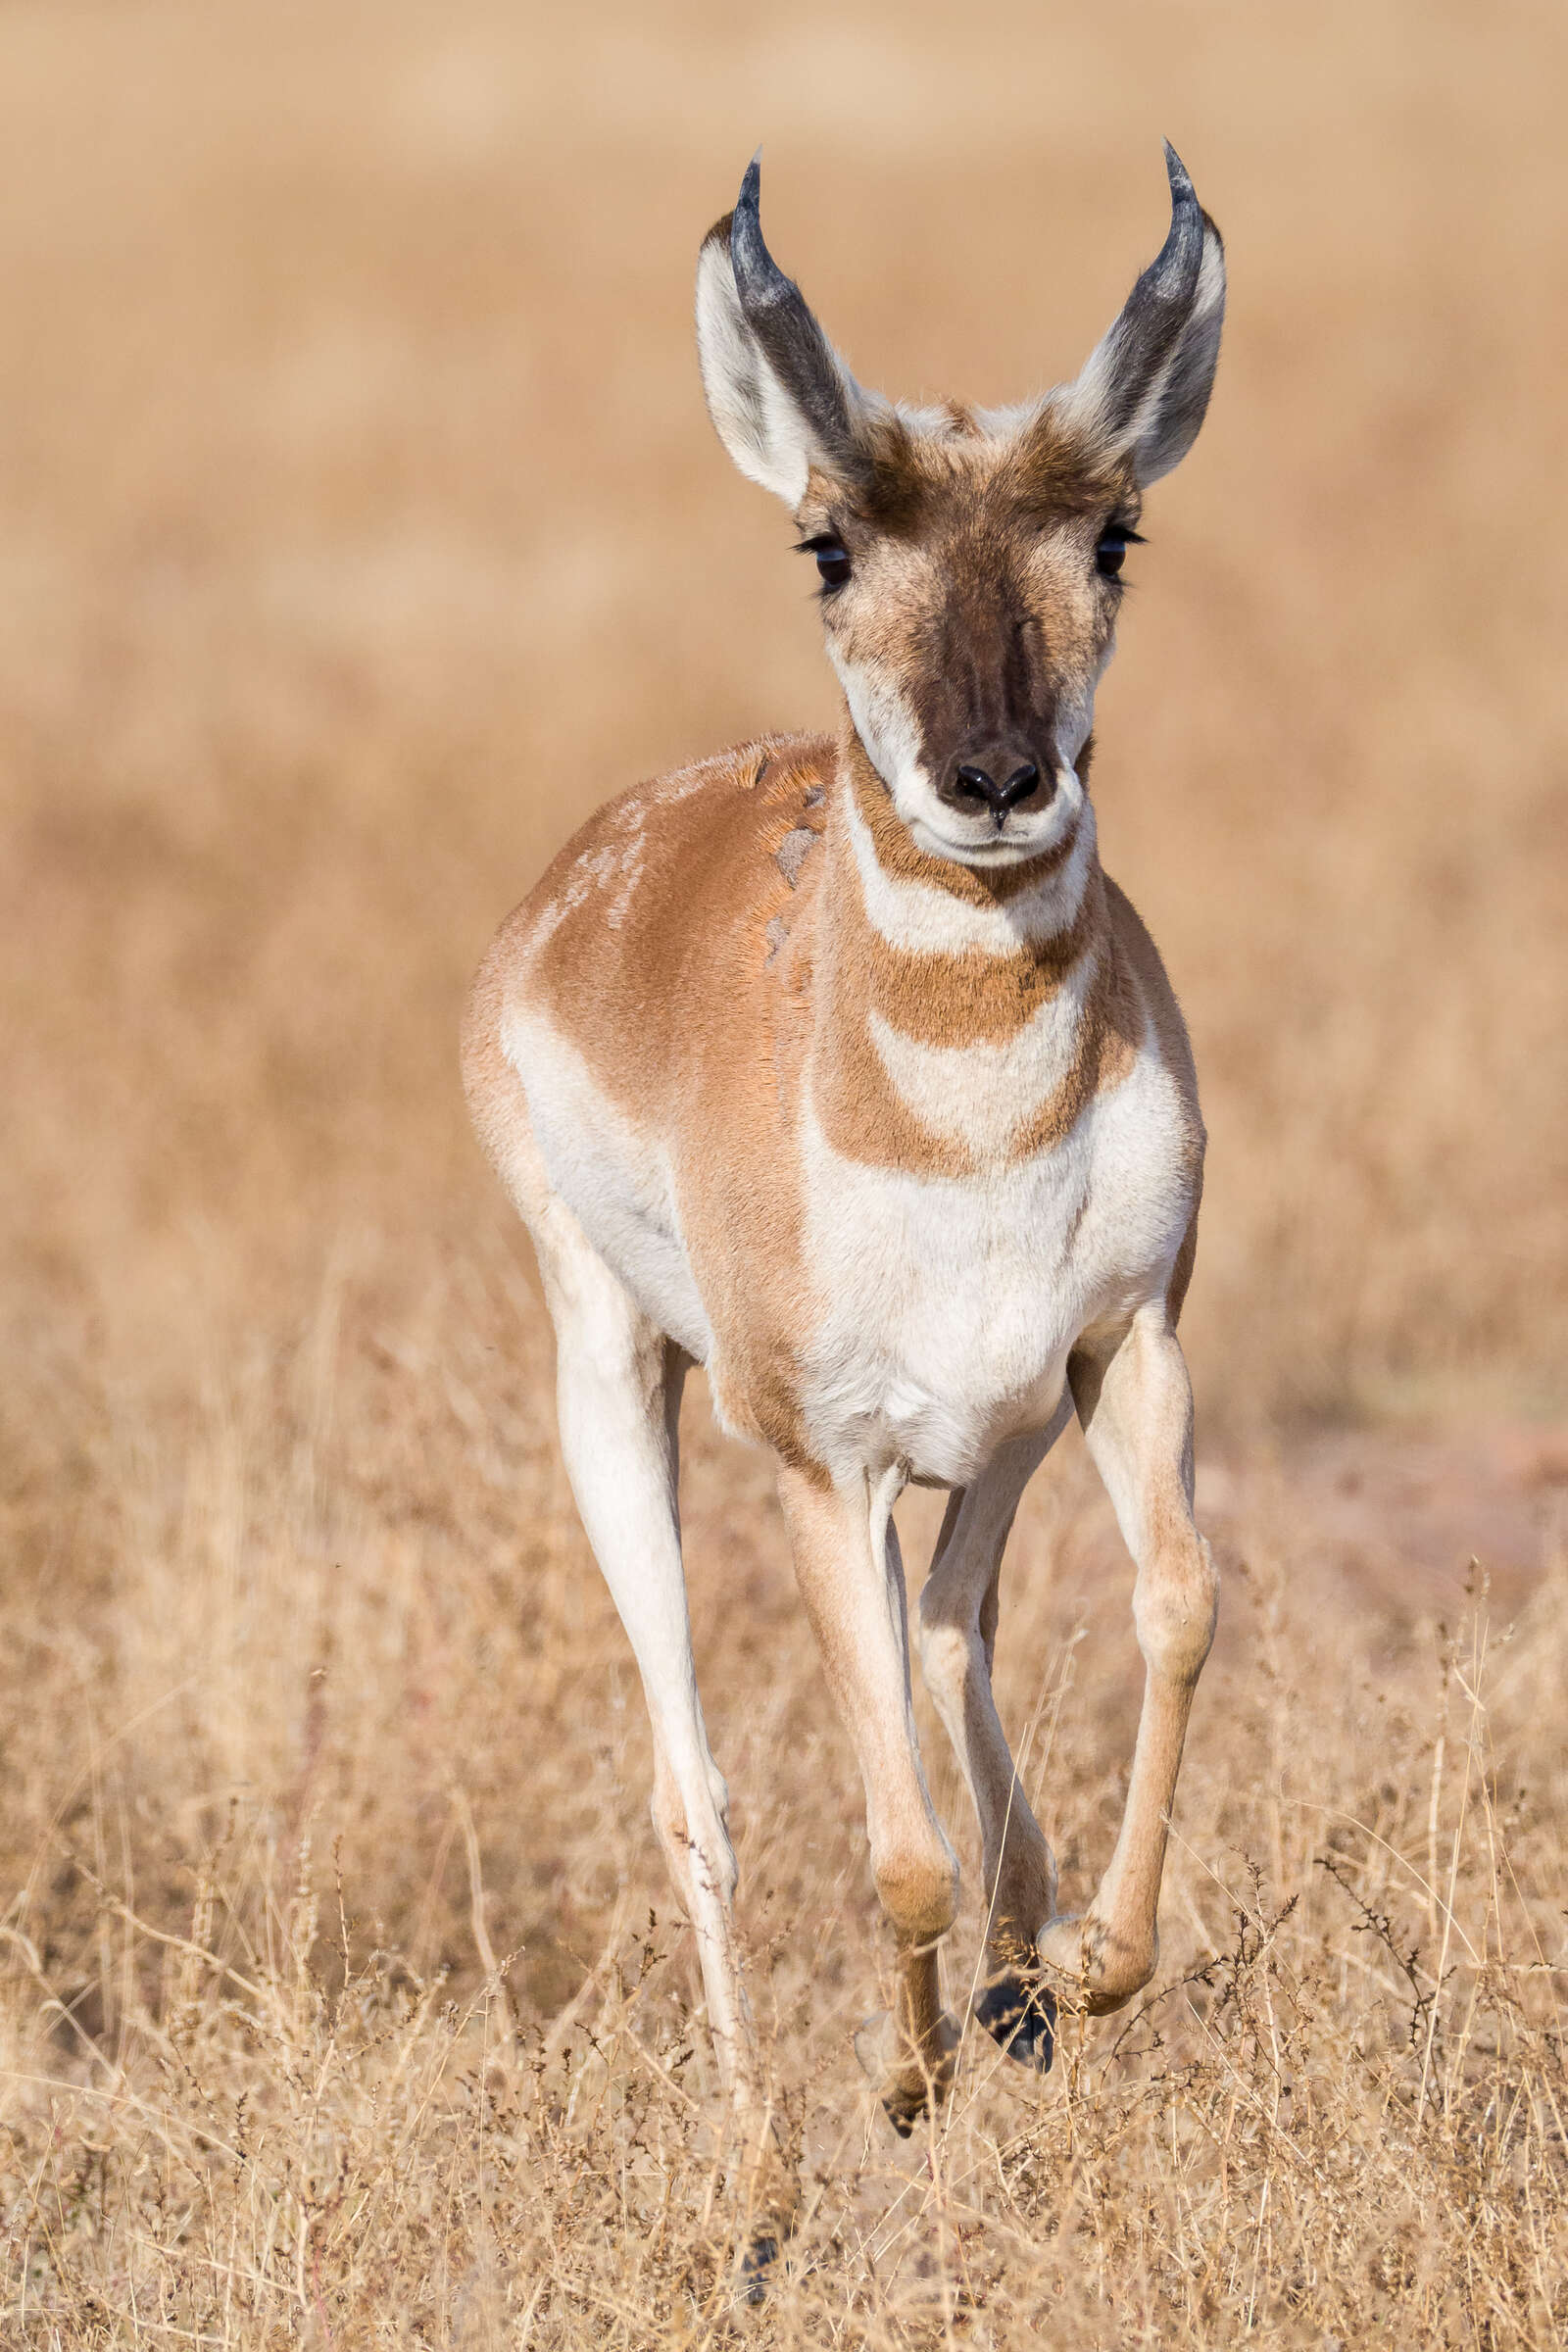
OM-D E-M1X
M.Zuiko Digital 300mm F4.0 PRO + MC-14
Handheld
1/1250 | F8.0 | ISO 800

Single Point Target
The single point target is my go-to AF-Target Mode for perched bird and birds within foliage when I am not using bird tracking AF. By utilizing the large of the two single points, I am working to insure that the point will find some contrast on either the vertical or horizontal plane. I am also regularly moving this point around the screen to get it as close to the subject’s eye as possible. The multi-selector makes moving these point quickly and accurately as easy as possible (who said playing video games was just a waste of time)!

Small Point Target
The small target is used for macro photography where my subjects are mostly small and finding contrast within such as small box is easier. Using this smaller point helps to keep my autofocus as accurate as possible and try to prevent it from catching an insect’s leg where the depth-of-field would most likely result in the eye being out of focus.
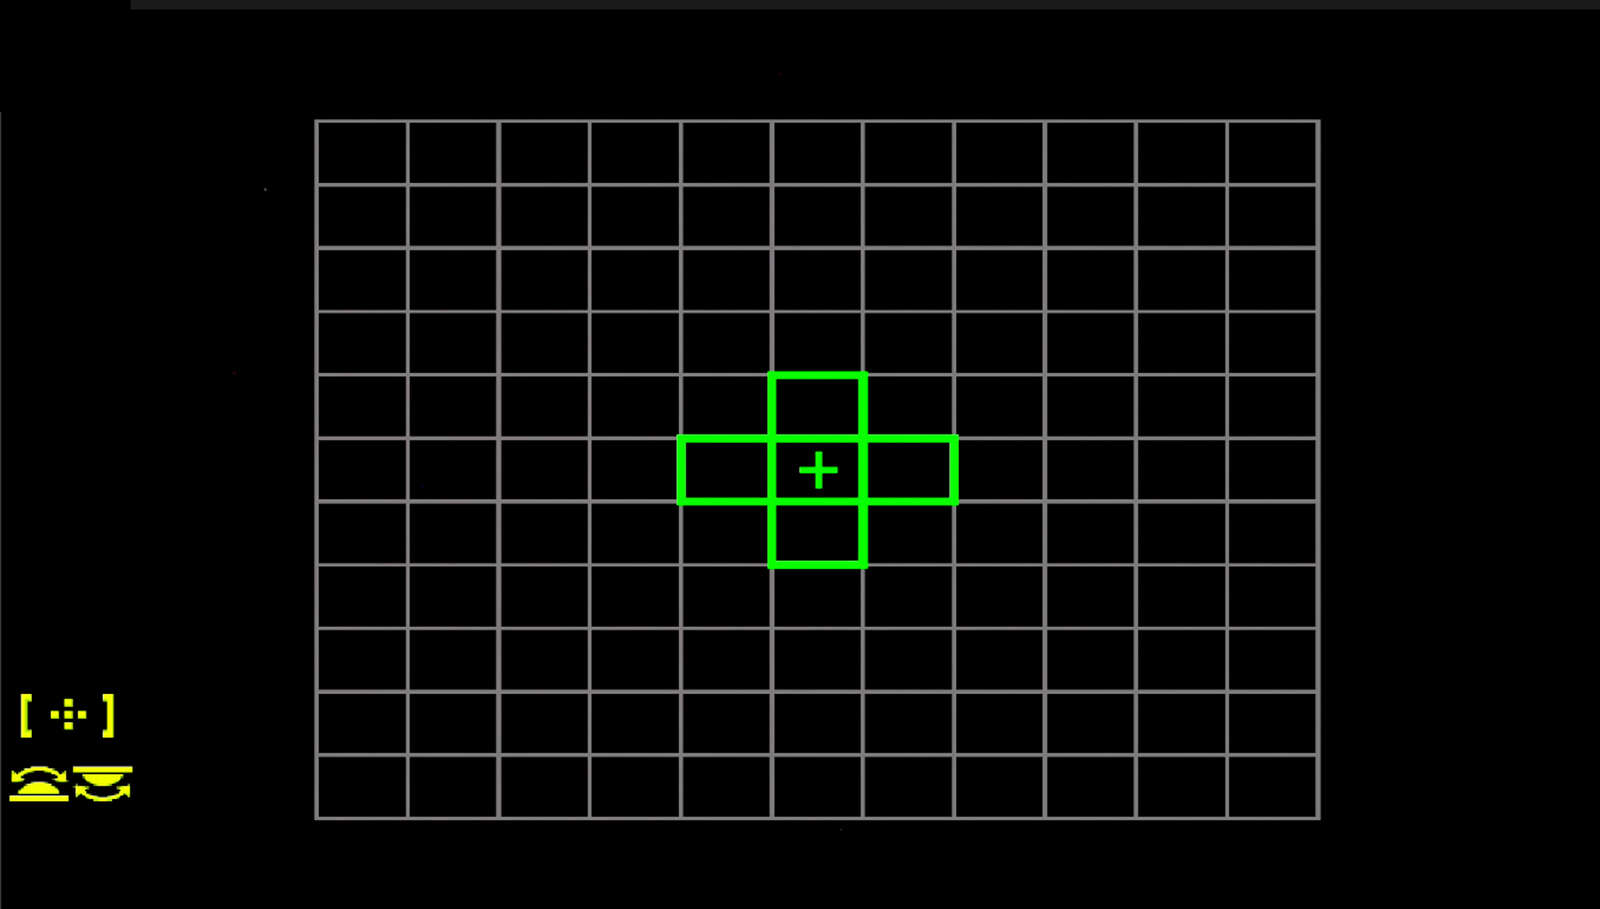
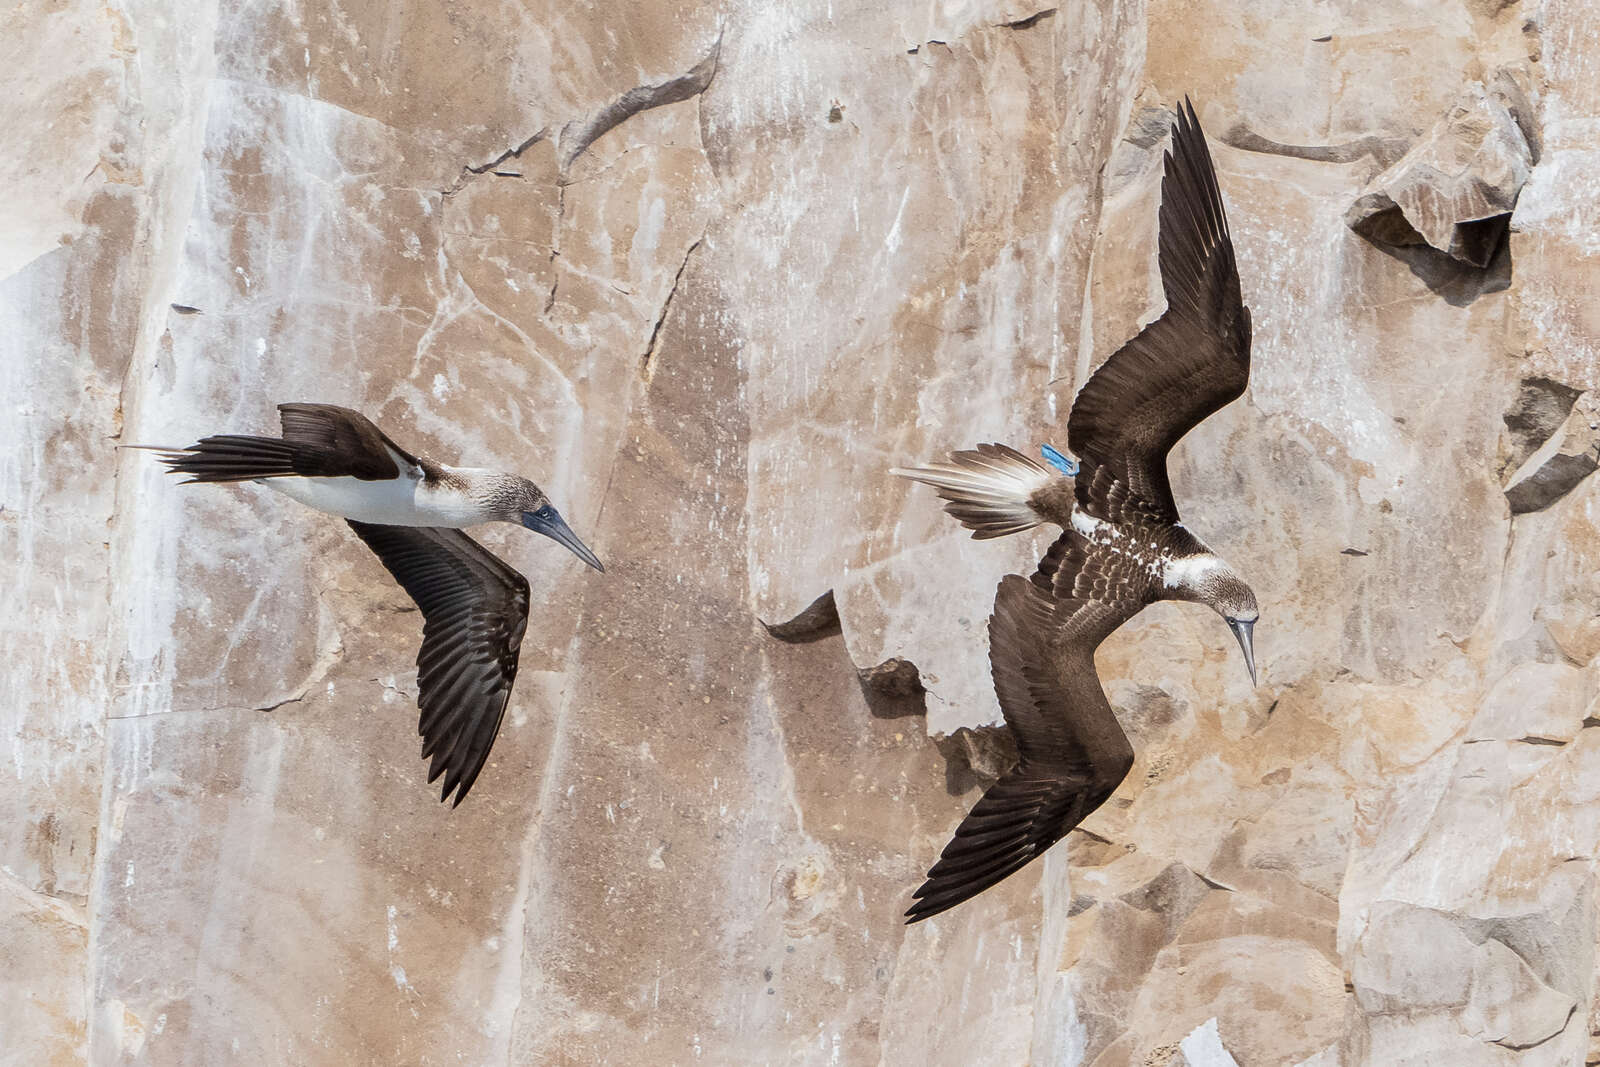
5-Target Group
The 5-target group is my primary AF-Target Mode for birds in flight whether or not I am using bird tracking. With birds in flight, our desire would be to have autofocus acquire on the face or body so that the plane of focus in on the eye and not the wingtip which can happen when we have too many autofocus points operational. I do move this group around with the multi-selector.
9-Target Group
The 9-target group is used when I am photographing hummingbirds in flight whether photo-graphing with natural light or a high speed flash setup. Since hummingbirds are so fast and move so readily, here is a situation where the background is usually distant or blurry to begin with and I am doing what I can to make sure my subjects are in focus. On occasion, I might also use this target group for swifts and swallows in flight which are challenging regardless of the configuration.

25-Target Group
The 25-target group is not something I use as I find that it too often selects objects other than the desired subject. I have been experimenting with this configuration and bird tracking AF to see how well it will work in a variety of situations. I have only begun these experiments and hope to learn more in the days ahead. This configuration could possibly be useful when photographing birds at the beach or in the ocean when you have little in the background.
OM-D E-M1X
M.Zuiko Digital 40-150mm F2.8 PRO @ 95mm + MC-20
Handheld
1/2000 | F8.0 | ISO 1250

OM-D E-M1X
M.Zuiko Digital 300mm F4.0 PRO + MC-14
Handheld
1/500 | F5.6 | ISO 1600

OM-D E-M1X
M.Zuiko Digital 40-150mm F2.8 PRO @ 150mm + MC-20
Handheld
1/500 | F9.0 | ISO 800
Turning Autofocus from Your Enemy into Your Friend
Here are some suggestions on how to get your autofocus system working for you and not against you:
- Practice moving your autofocus targets quickly while looking through the viewfinder using a pet, a child or grandchild, a willing spouse, or any object that can move at variable speeds and at different angles. Move the autofocus point(s) as close to the eye of the subject as quickly as possible.
- Program the L-Fn button on your longer lenses to AF Area Select so that with the press of a button you can quickly change the AF-Target Mode and position. Your support hand on your lens is often over or very close to the L-Fn button to begin with and you don’t have to move your shooting hand or pull the camera away from your face to make these changes. This is important as there is no one AF-Target Mode or location that works all the time.
- Be sure that Face/Eye Priority is always turned off as this is not the same as bird tracking AF and it will be constantly hunting for a face or eye and this can cause serious issues for wildlife and macro photography.
- Set the C-AF Tracking Sensitivity to +1 or +2 if you want your autofocus to quickly grab onto a subject. Set the C-AF Tracking Sensitivity to -1 or -2 if you want the autofocus to remain locked onto your subject even when it passes behind another object. In my experience, I prefer to have autofocus be very sensitive (+1 or so it picks up a subject quickly even though I occasionally risk having it grab something else.
- We have all had a situation where due to low light or low contrast autofocus struggles acquiring the subject. What photographers tend to do is just keep the autofocus button pushed and let the lens scan from close focus too infinity and back again, over and over all the while being frustrated. The C-AF Lens Scanning menu item allows you to control what your lens will do in these situations. There are three modes and my preference is Mode 2 where you lens will scan once through the entire range. The reason I only need it to scan once is I practice focus bumping. There are several ways to employ focus bumping but for this purpose, when autofocus is struggling, it is better too quickly press and release focus multiple times until it acquires focus.
- Assuming our goal is to get the center focal point, regardless of AF-Target Mode, on the key part of our subject, I set C-AF Starting Focus Point and C-AF Center Target Priority to on for each C-AF Target Mode I use. You do this by checking the box next to each target mode on the respective menus.
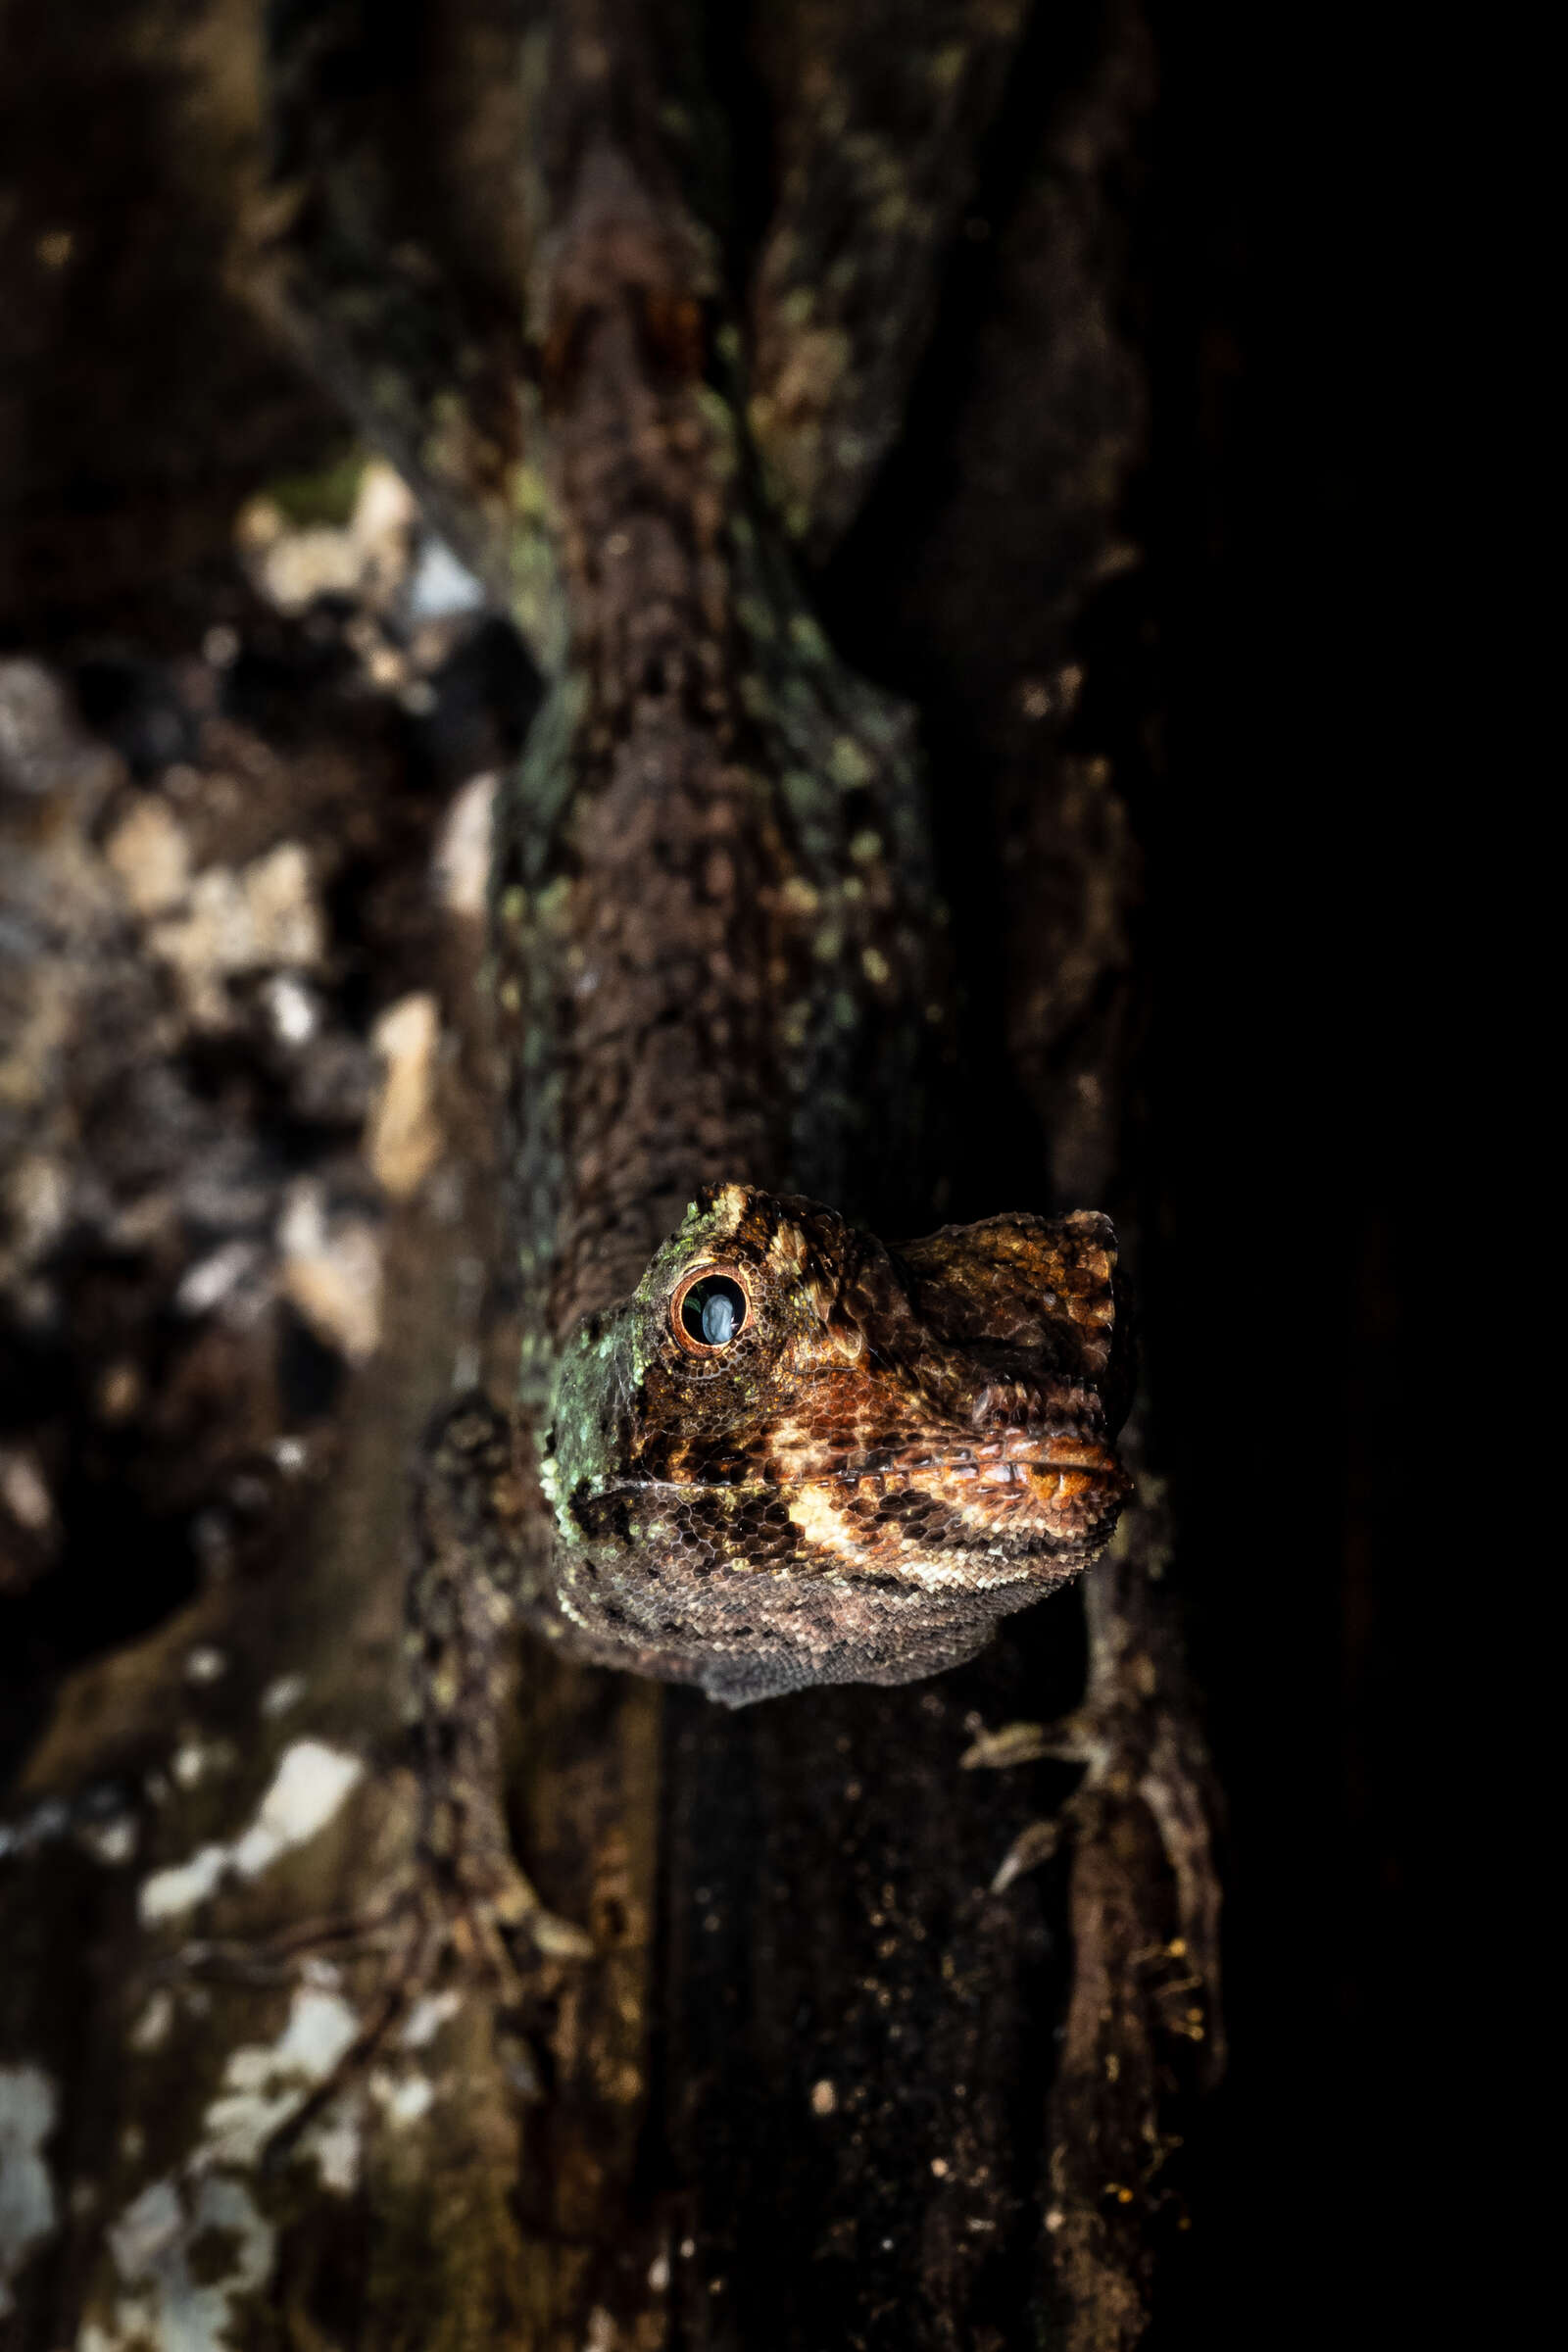
- Olympus recently released the Bird Tracking AF as well and here are some tips for using it to its best. First, understand that no autofocus is perfect and there will be times that it might struggle to acquire a subject. If a bird turns its head away from the camera, the tracking will begin to search for an eye and this might cause it to jump off the subject; however, in my experience this is very limited. Second, understand that bird tracking AF is always working. So, if you are hiking or moving around with it on, it is constantly hunting for a bird and can drain your battery quicker than regular C-AF. To solve this issue, I programmed the Fn Lever so that position one is single target C-AF and position two is 5-target group bird tracking AF. This allows me to switch back and forth quite regularly and preserve battery life when bird tracking AF isn’t necessary. So far, I have had great luck with bird tracking AF with mammals and reptiles.
Following these few steps should take your autofocus system and skill to the next level in your photography. There are always small tweaks we can make to our settings to get it just how you like it and to a place where what we have works best for us.
OM-D E-M1X
M.Zuiko Digital 60mm F2.8 MACRO
Handheld
1/40 | F13 | ISO 400
OM-D E-M1X
M.Zuiko Digital 40-150mm F2.8 PRO @ 135mm + MC-20
Handheld
1/3200 | F7.1 | ISO 1250

Instagram: @bigbendbirdingphototours
Lee is a professional photographer and owner/guide of Big Bend Birding & Photo Tours and also leads photography workshops for Wildside Nature Tours. He lives in the Davis Mountains of west Texas where the night sky and wildlife keep him busy!