If you’re running out of photographic ideas while spending time at home, you can add control and creativity to your images by fashioning a small studio near any available window. The magic of window light has been recognized by artists for centuries. Perhaps most famously, Rembrandt defined his painting style by wrapping his portrait and still life subjects with the diffuse and moody light cast from a bank of windows in his Amsterdam studio. Photographers without a dedicated studio space can use the same technique to make beautiful images with minimal space, gear and expense.
Here are a few tips to use painterly light to create stunning images.

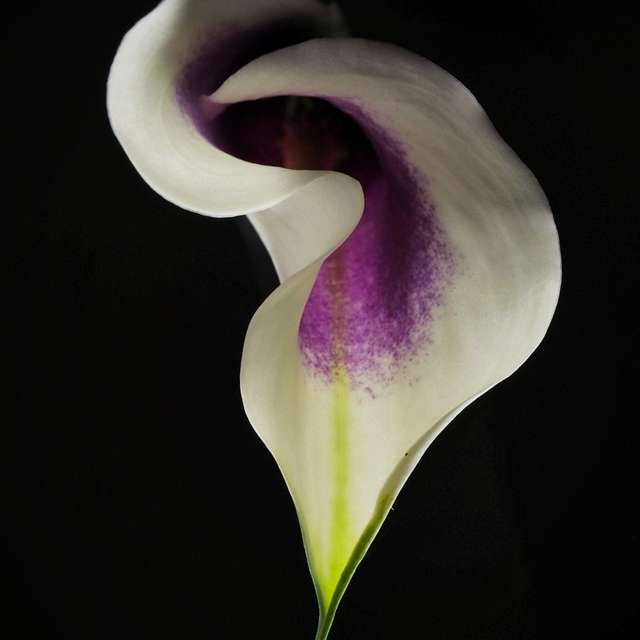
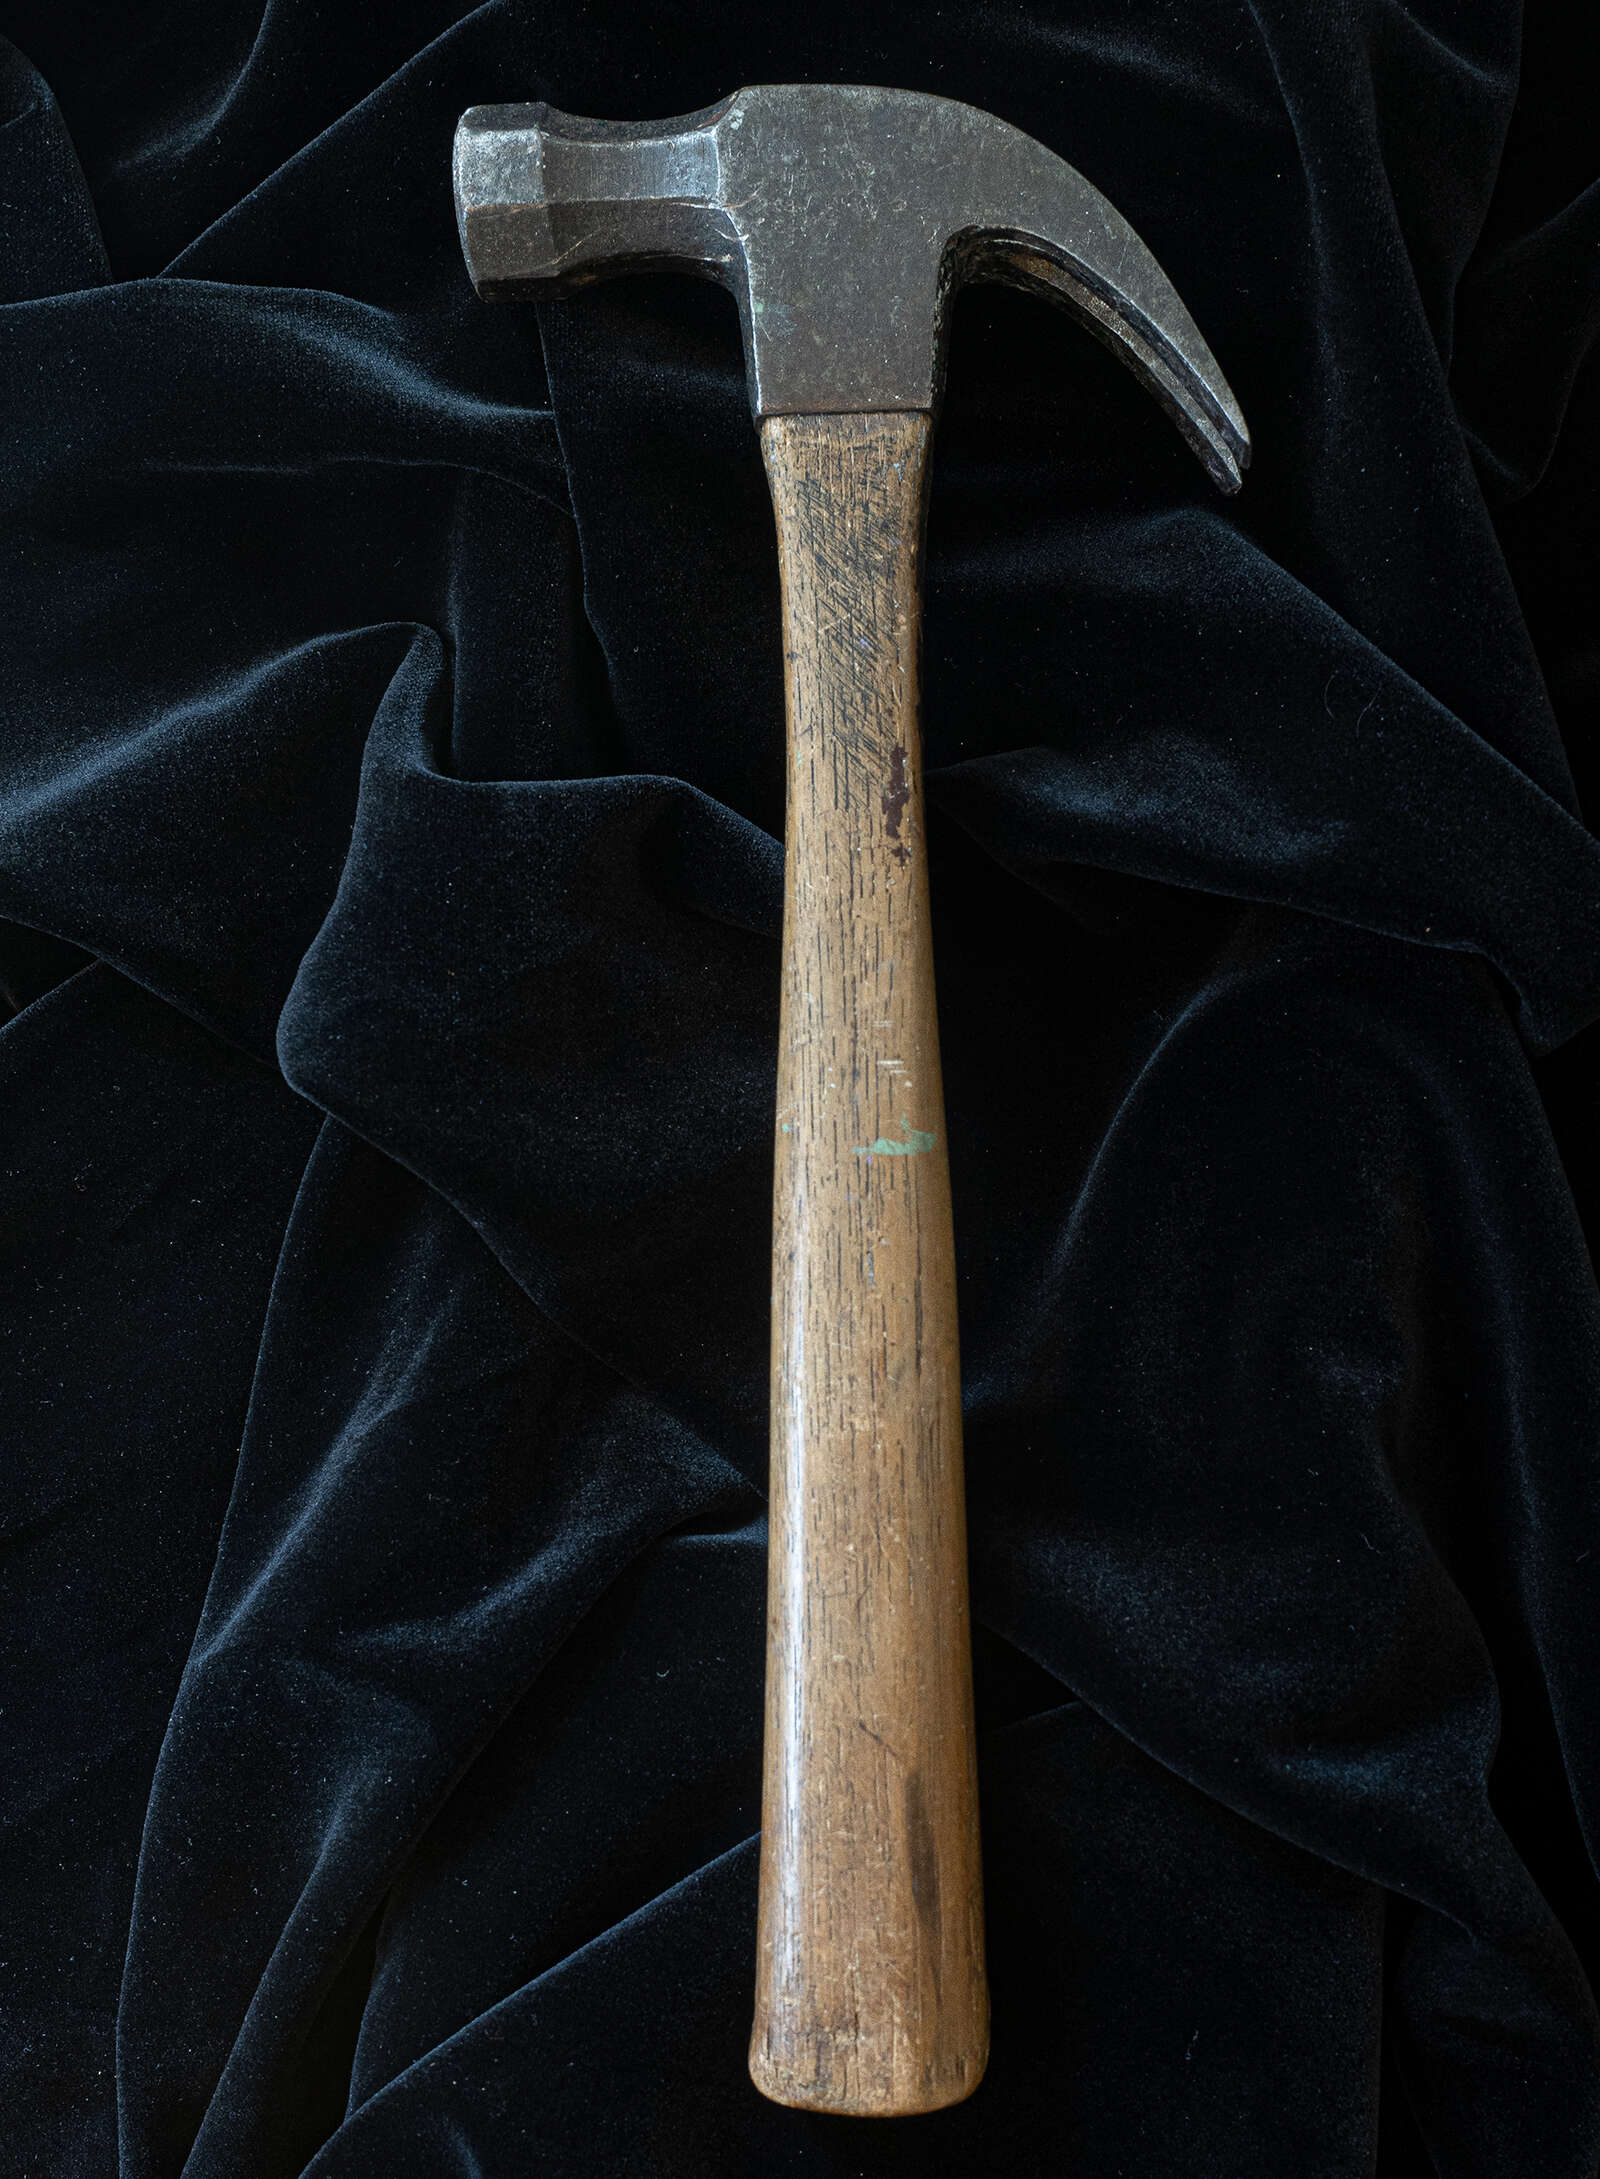
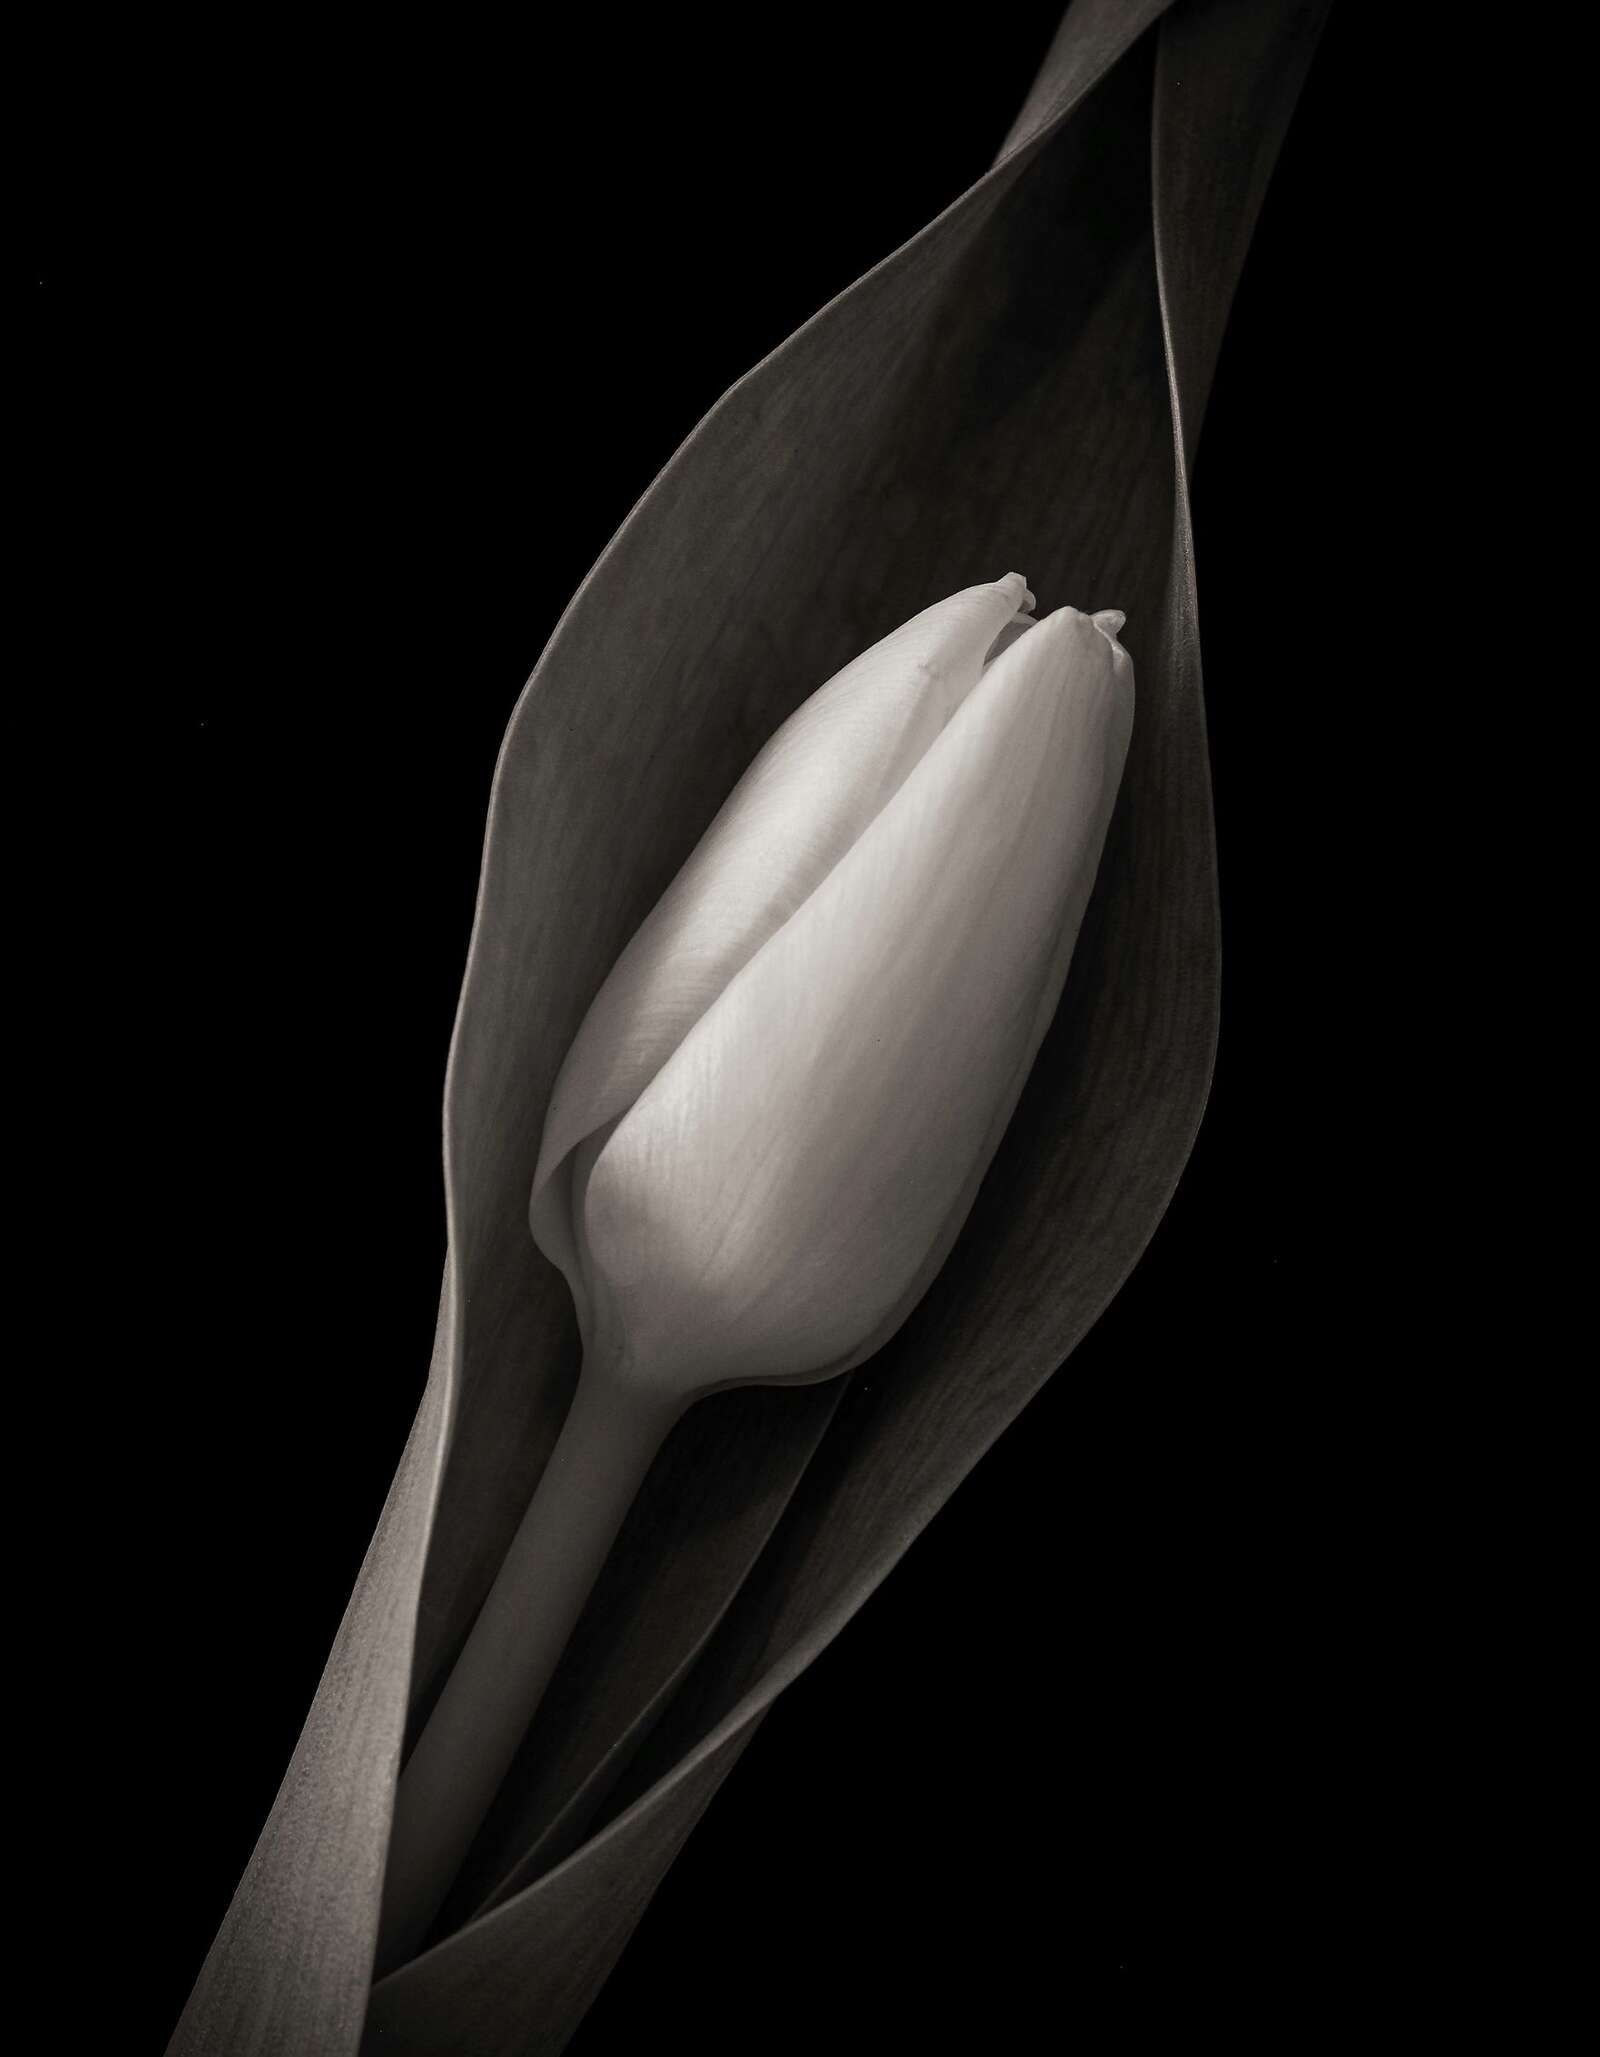
OM-D E-M1 Mark III | M.Zuiko Digital ED 60mm F2.8 Macro
1/100s | F2.8 | ISO 400
GATHER YOUR MATERIALS
Try to find a dedicated, uncluttered space near a window. If you’re lucky, your new “studio” window will face north. This is the painter’s preference since the light quality tends to stay consistent and soft. If you work near a south-facing window, be prepared for the light to change radically as the sun makes it arc. Neither approach is best, just realize southern light can change dramatically.
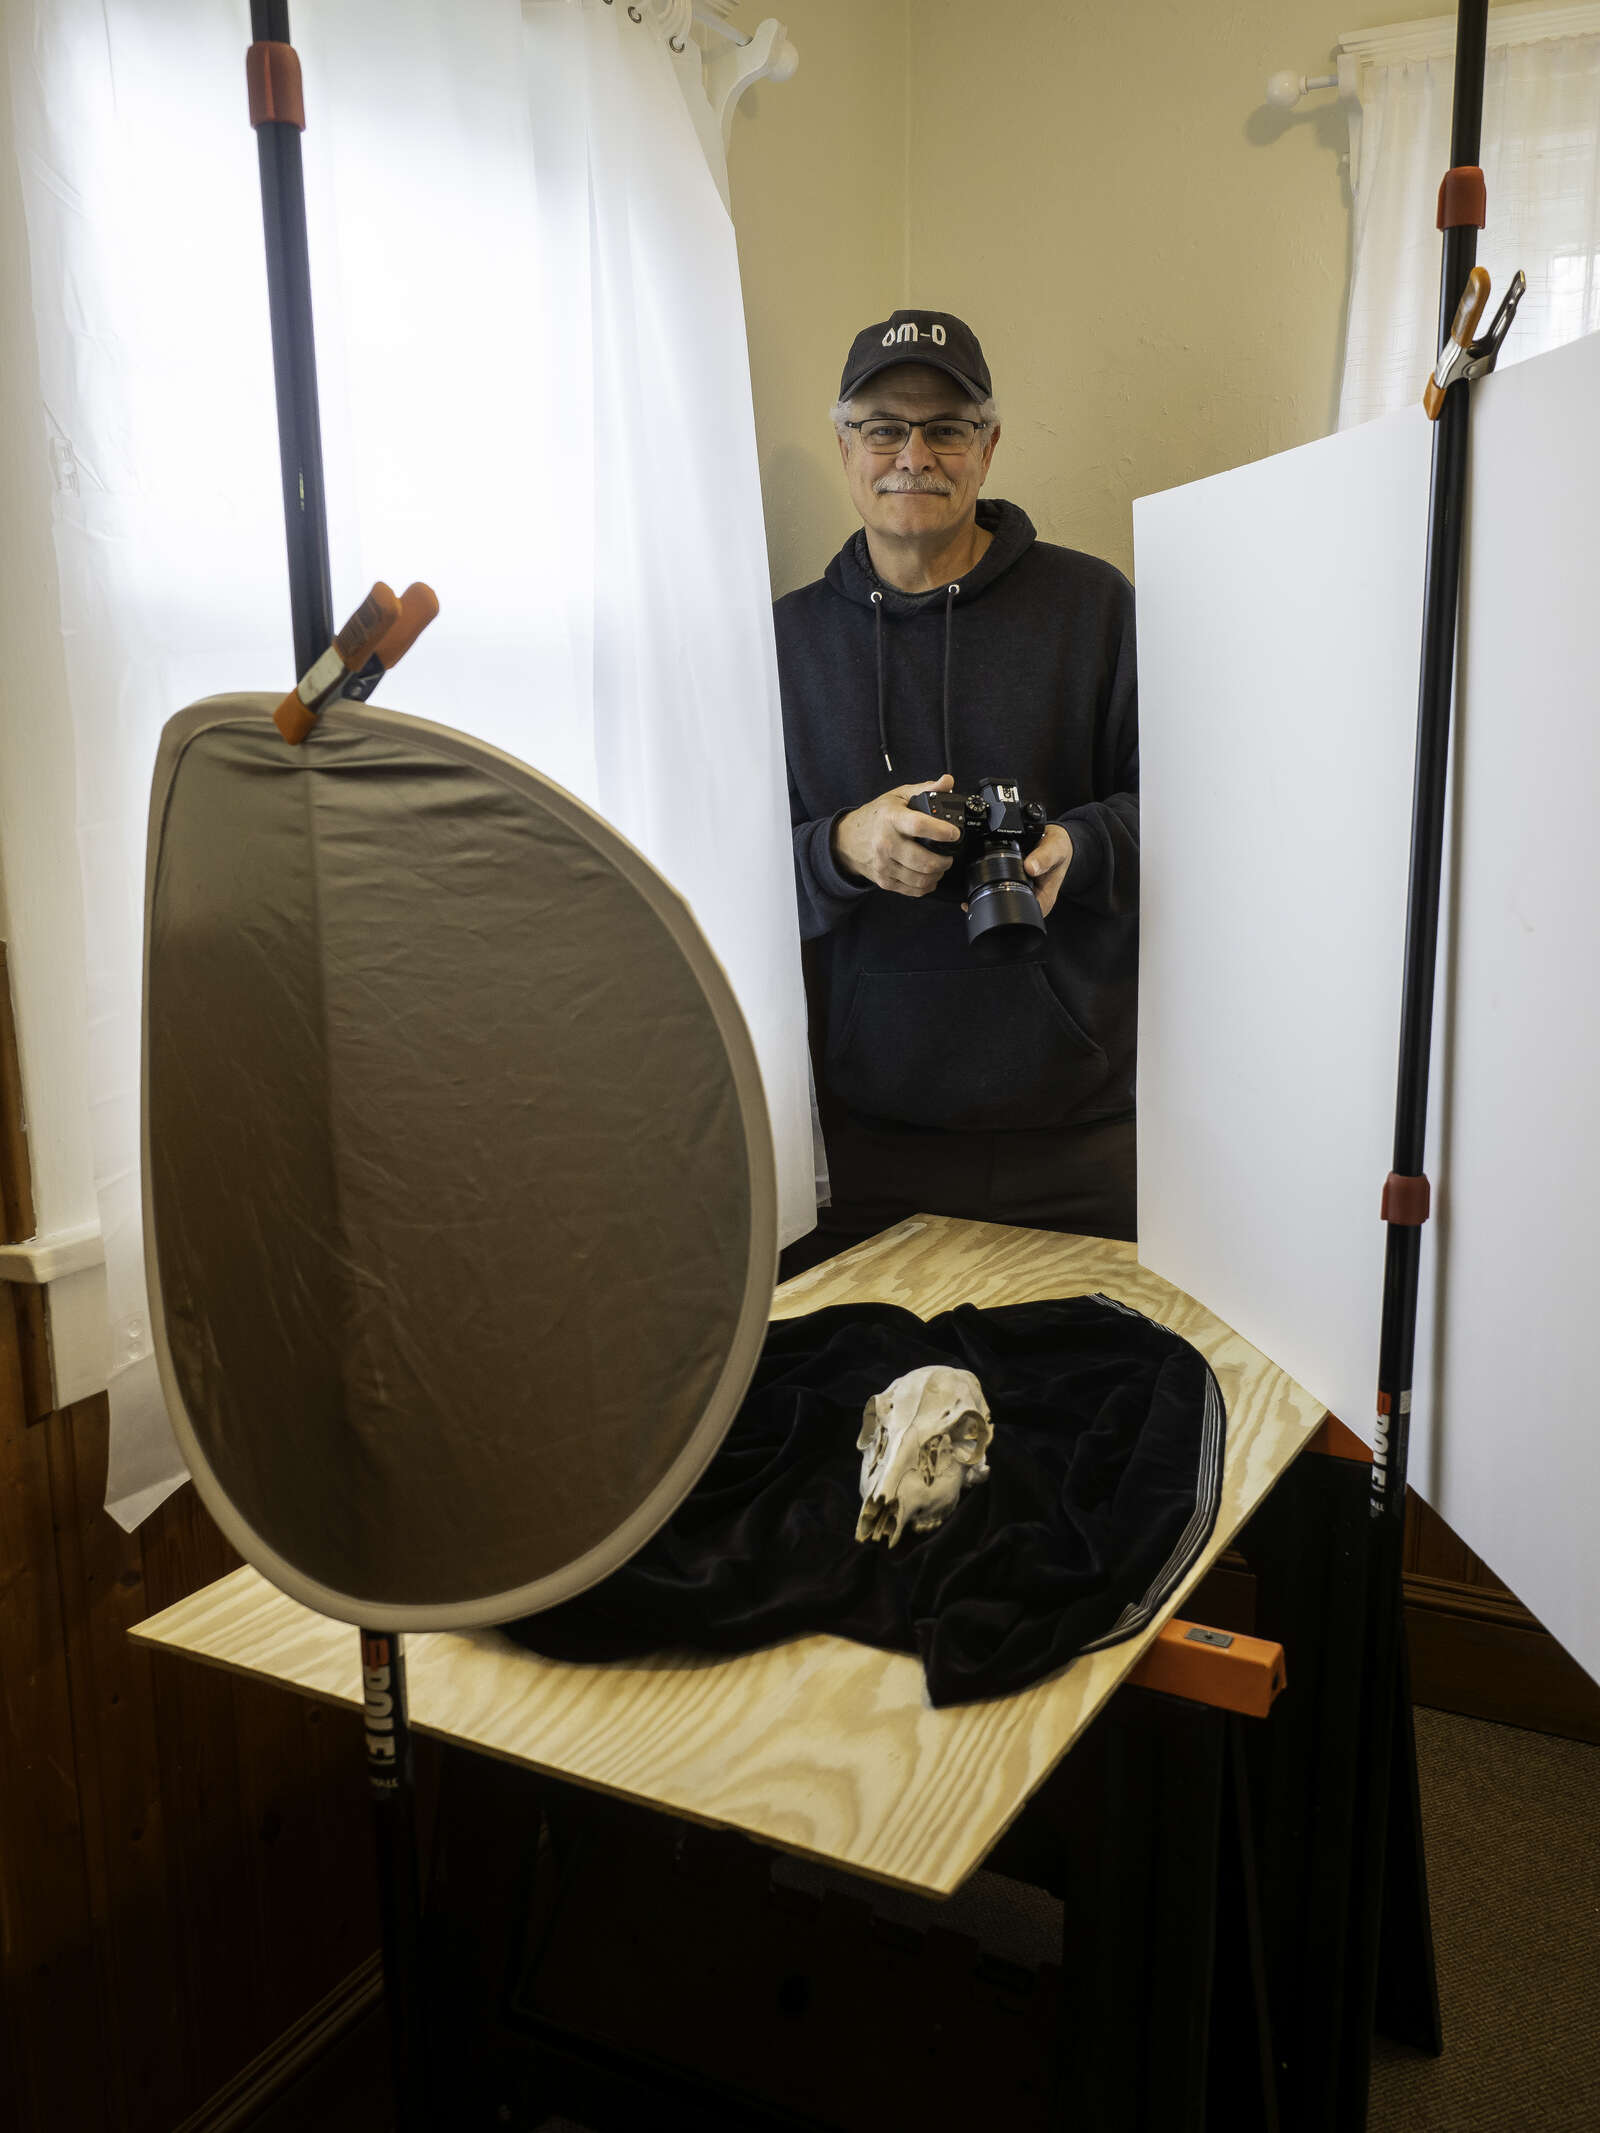
Next, look around your home for a “set” table. This can simply be any repurposed table or desk. I prefer a sawhorse arrangement with a plank of plywood–it’s simple and portable. Mine’s about 2X3 feet and works great for medium-sized still life work and macro photography.
To control your window light, you’ll need to find a few “modifiers.” Again, think outside the box and press some household items into service. A couple of old bedsheets, one white and one light yellow, will work for diffusers. Place one over the window to create a giant softbox. The yellow one can be used to mimic the color balance of early morning or late afternoon sunlight. My favorite diffuser is a frosted white plastic shower curtain. It’s easy to fold and doesn’t show wrinkles if pressed into service as a background.
To control contrast, reflectors are the ticket. A couple of white foam board panels are all you need to control the shadow detail in your images. These can be cut to size with a craft knife and are easy to clamp or tape in place.
If you have access to a couple of portable light stands to support your reflector or backgrounds, your setups will be easier to manage. My home studio “stands” are two spring-loaded painter’s poles used to hold plastic sheeting in place. Mine collapse to four feet but extend to ceiling height. Internal springs eliminate the need for legs. Best of all, these are more portable and less expensive than traditional light stands.
For backgrounds, keep it simple. Black often works best for simple setups. It’s dramatic and easy to control. Foam board comes in black and works fine but even better is a piece of black velvet fabric. For a white background, another piece of foam board will give a beautifully smooth effect.
Finally, a few extra bits help on set: A few spring clamps to secure your reflectors and backgrounds. Duct tape, or better, “gaffer’s tape” will hold anything together. Modeling clay is great for prop management.
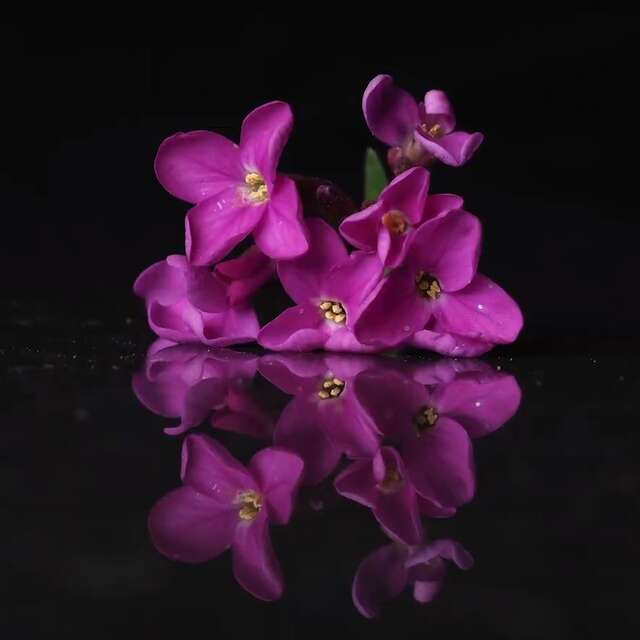
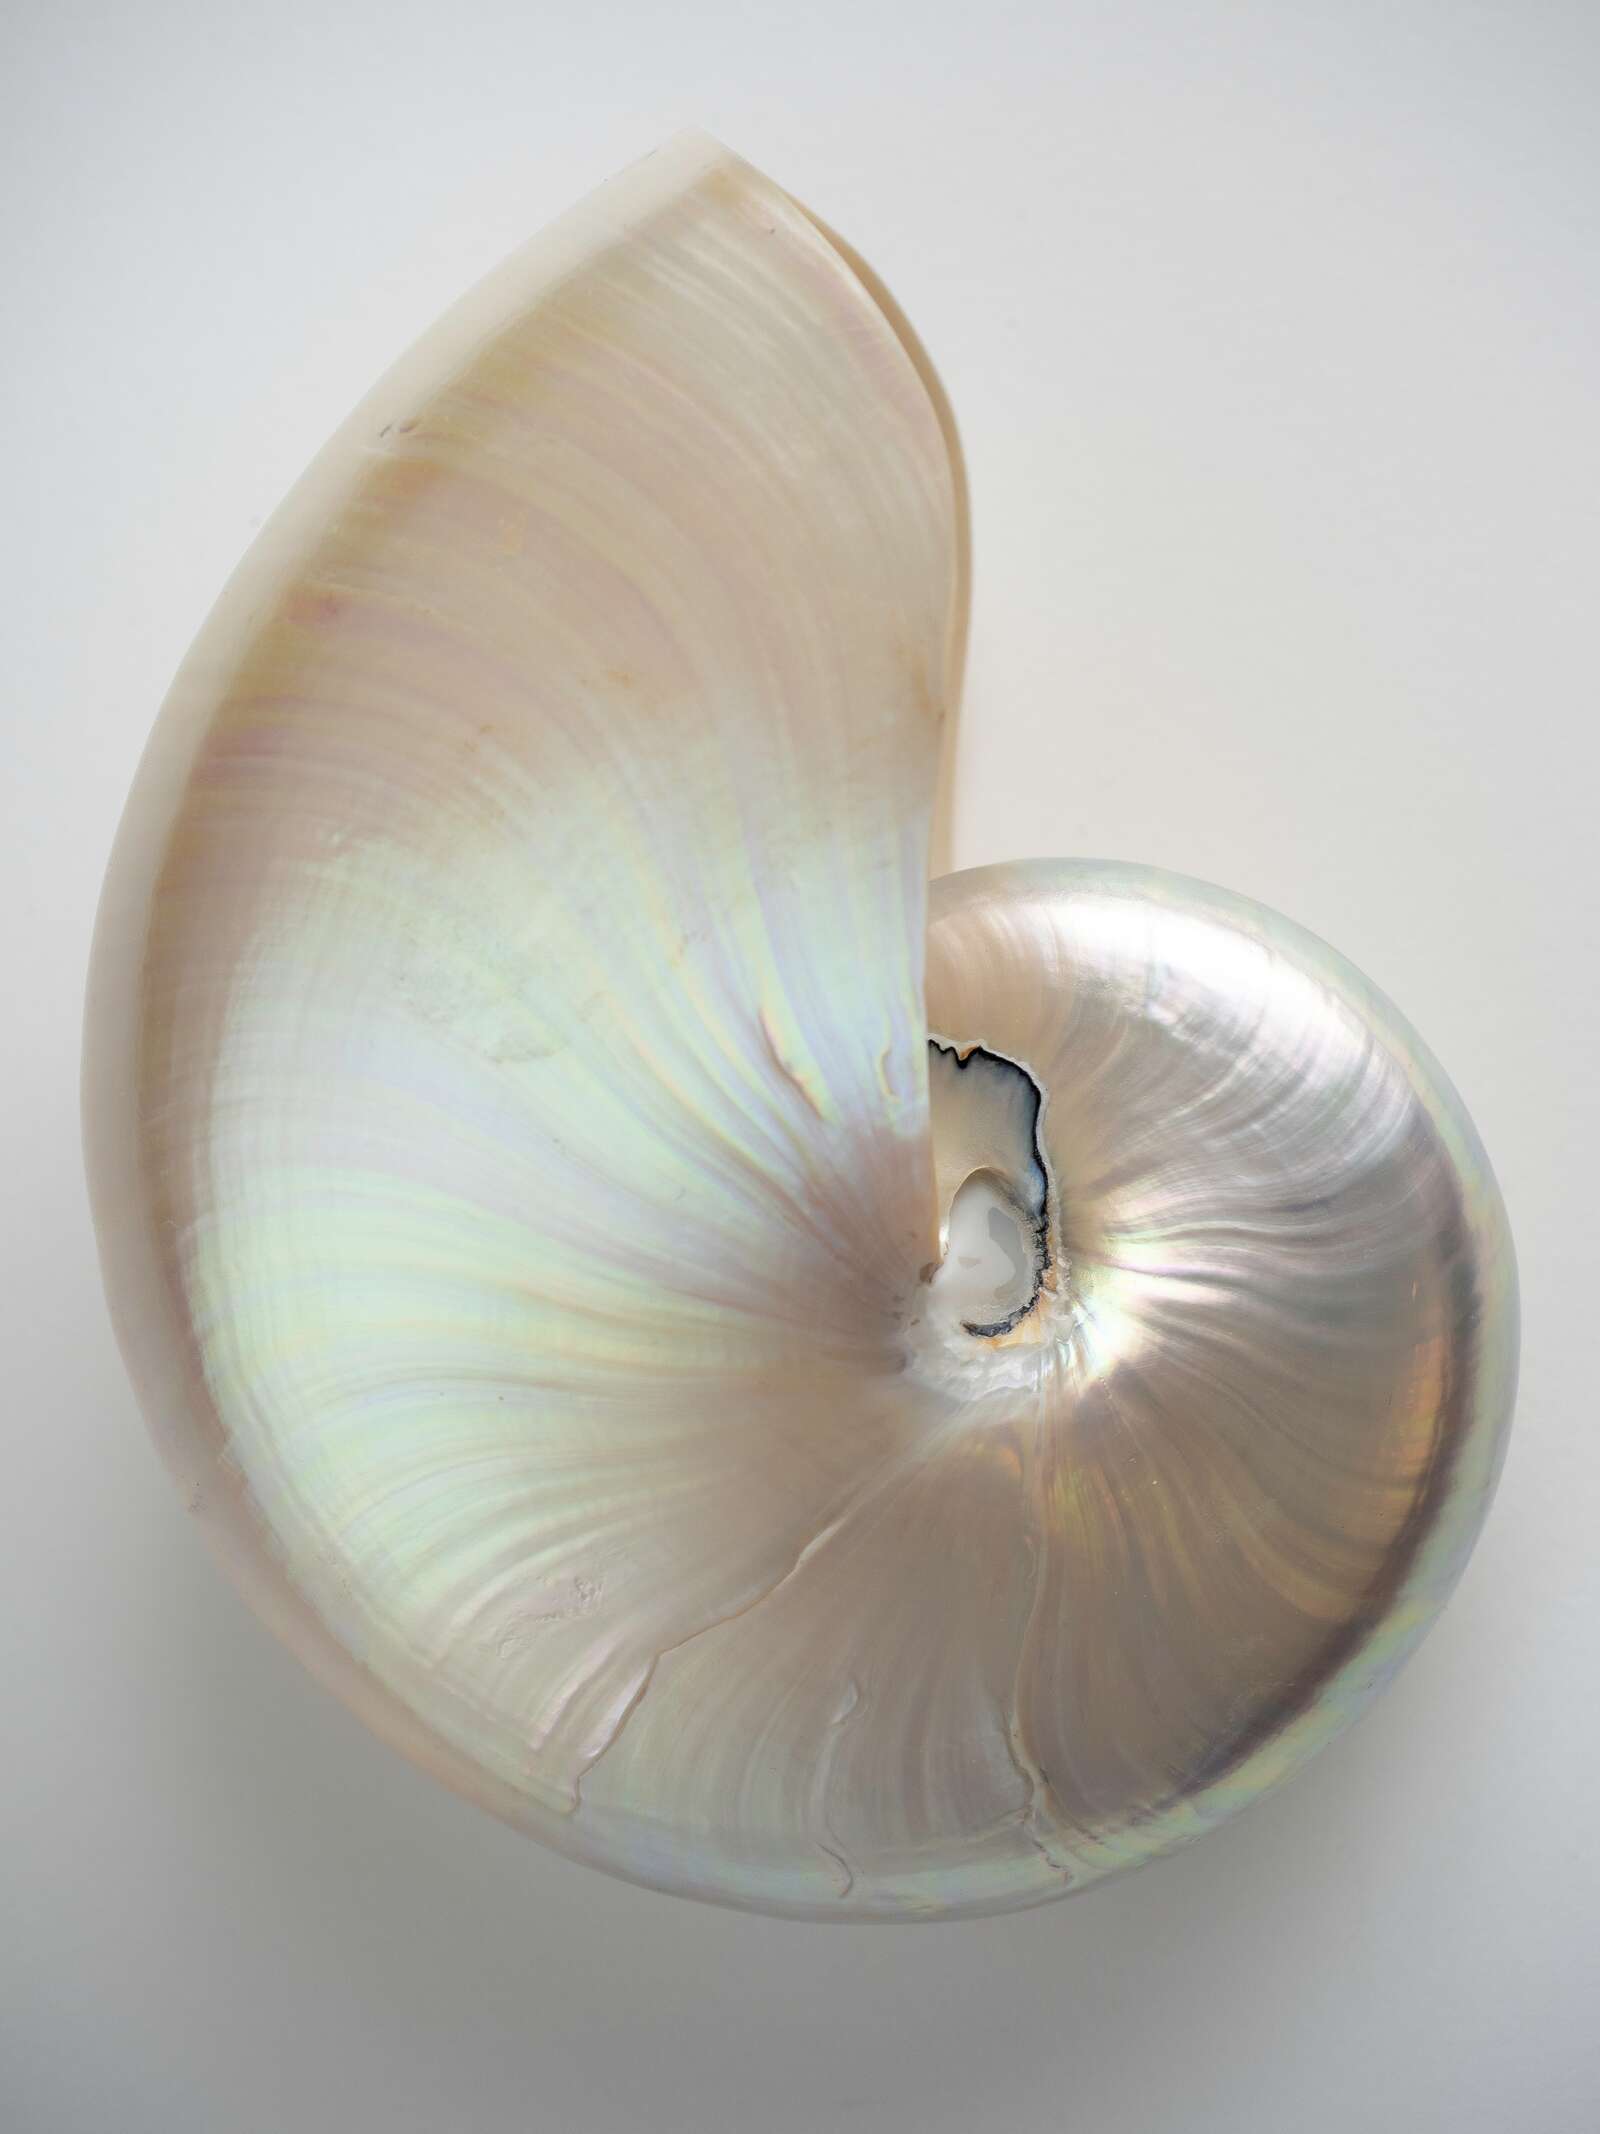
OM-D E-M1 Mark III | M.Zuiko Digital ED 12-40mm F2.8 PRO
1/20s | F5.6 | ISO 400
FIND YOUR PROPS
This is where the fun begins. Search the house for artistic objects you have an emotional or visual reaction to. The sky’s the limit–desk drawers, bookcase objects, favorite toys, items tucked away in your desk drawer. I enjoy photographing flowers, plants, fruits and other vegetables so don’t forget to scour the fridge. I encourage you to assemble your “subjects” where you can contemplate them for a while. I try to conceptualize an image before I shoot and work out the best lighting approach for each image.
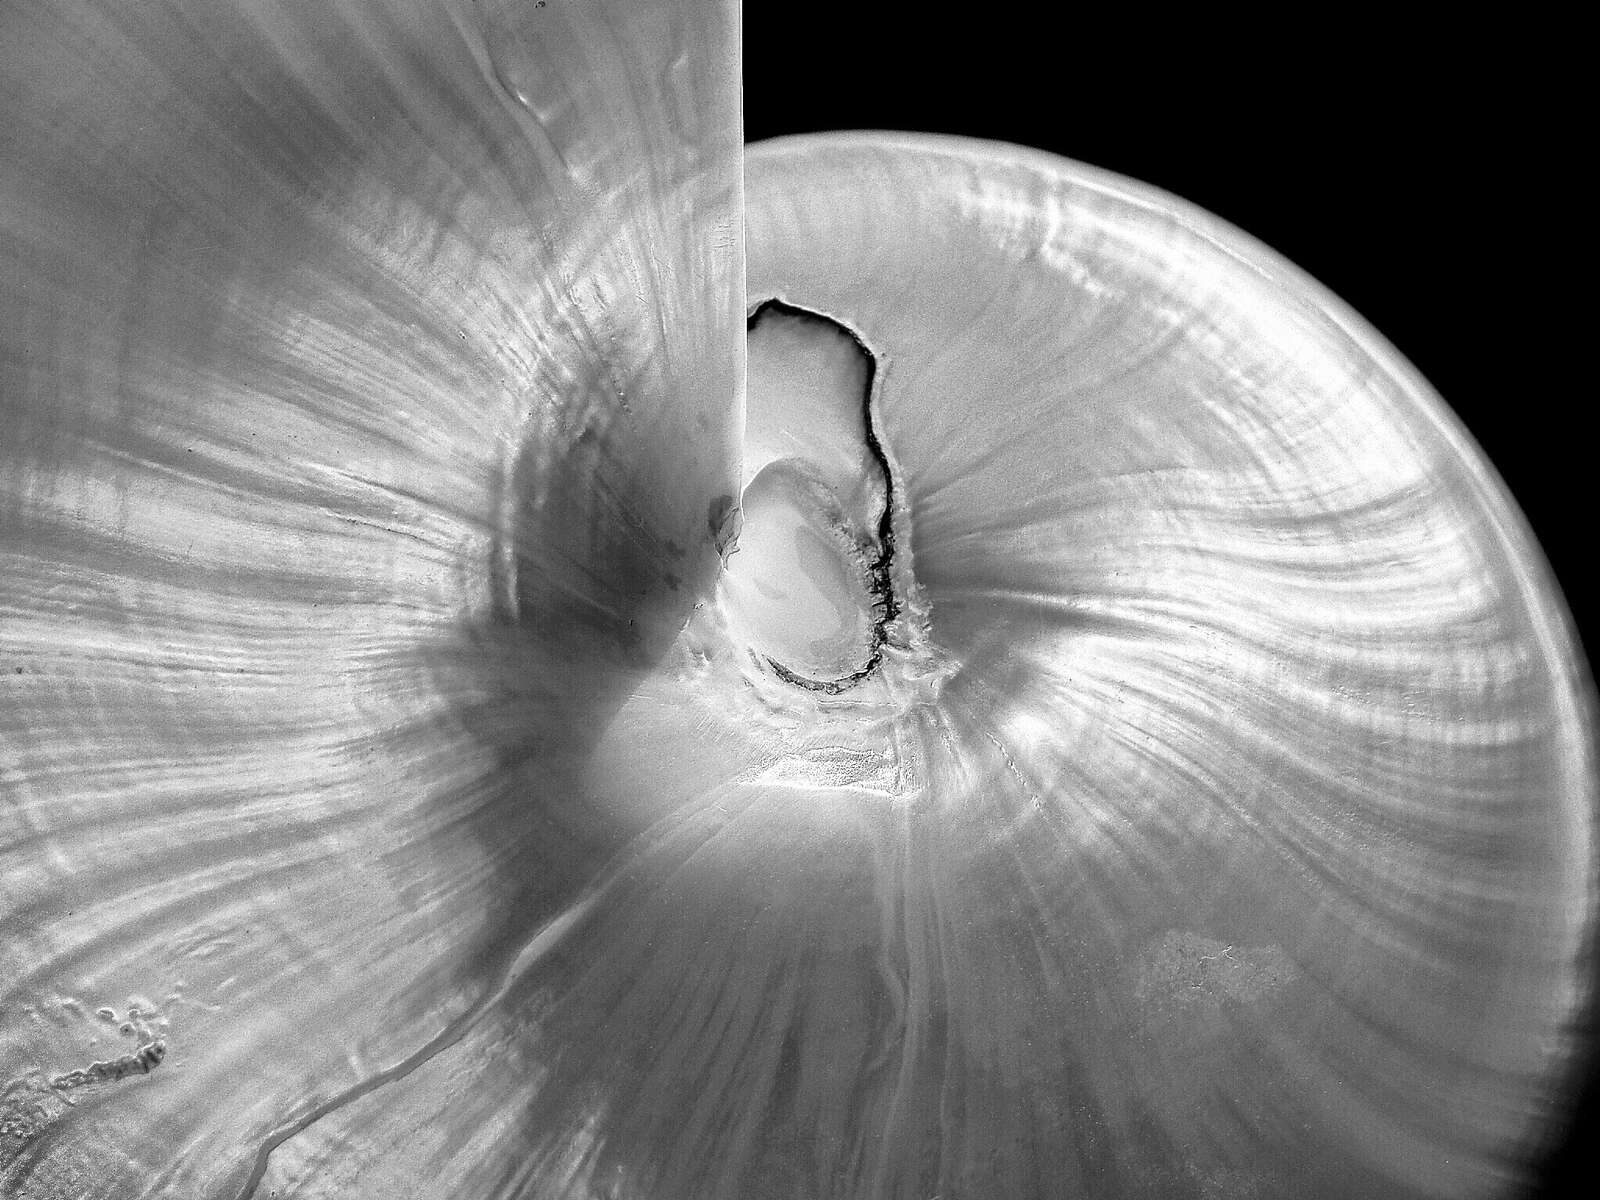
OM-D E-M1 Mark III | M.Zuiko Digital ED 12-40mm F2.8 PRO
1/8s | F5.6 | ISO 400
DECIDE ON THE LIGHT
Embrace simplicity and don’t overthink the lighting scheme. At first, you might just hang your sheet or shower curtain over the entire window to create a bank of soft light. Next, decide on the background. For a dramatically soft look, use a black background with lighter subjects. For a high-key look, shoot with a white background. Keep in mind that the overall contrast of the light will change with the distance you place your setup from your window. The closer you are the softer the effect. Shooting five or so feet away from a window will dramatically increase contrast and lower your shadow detail.

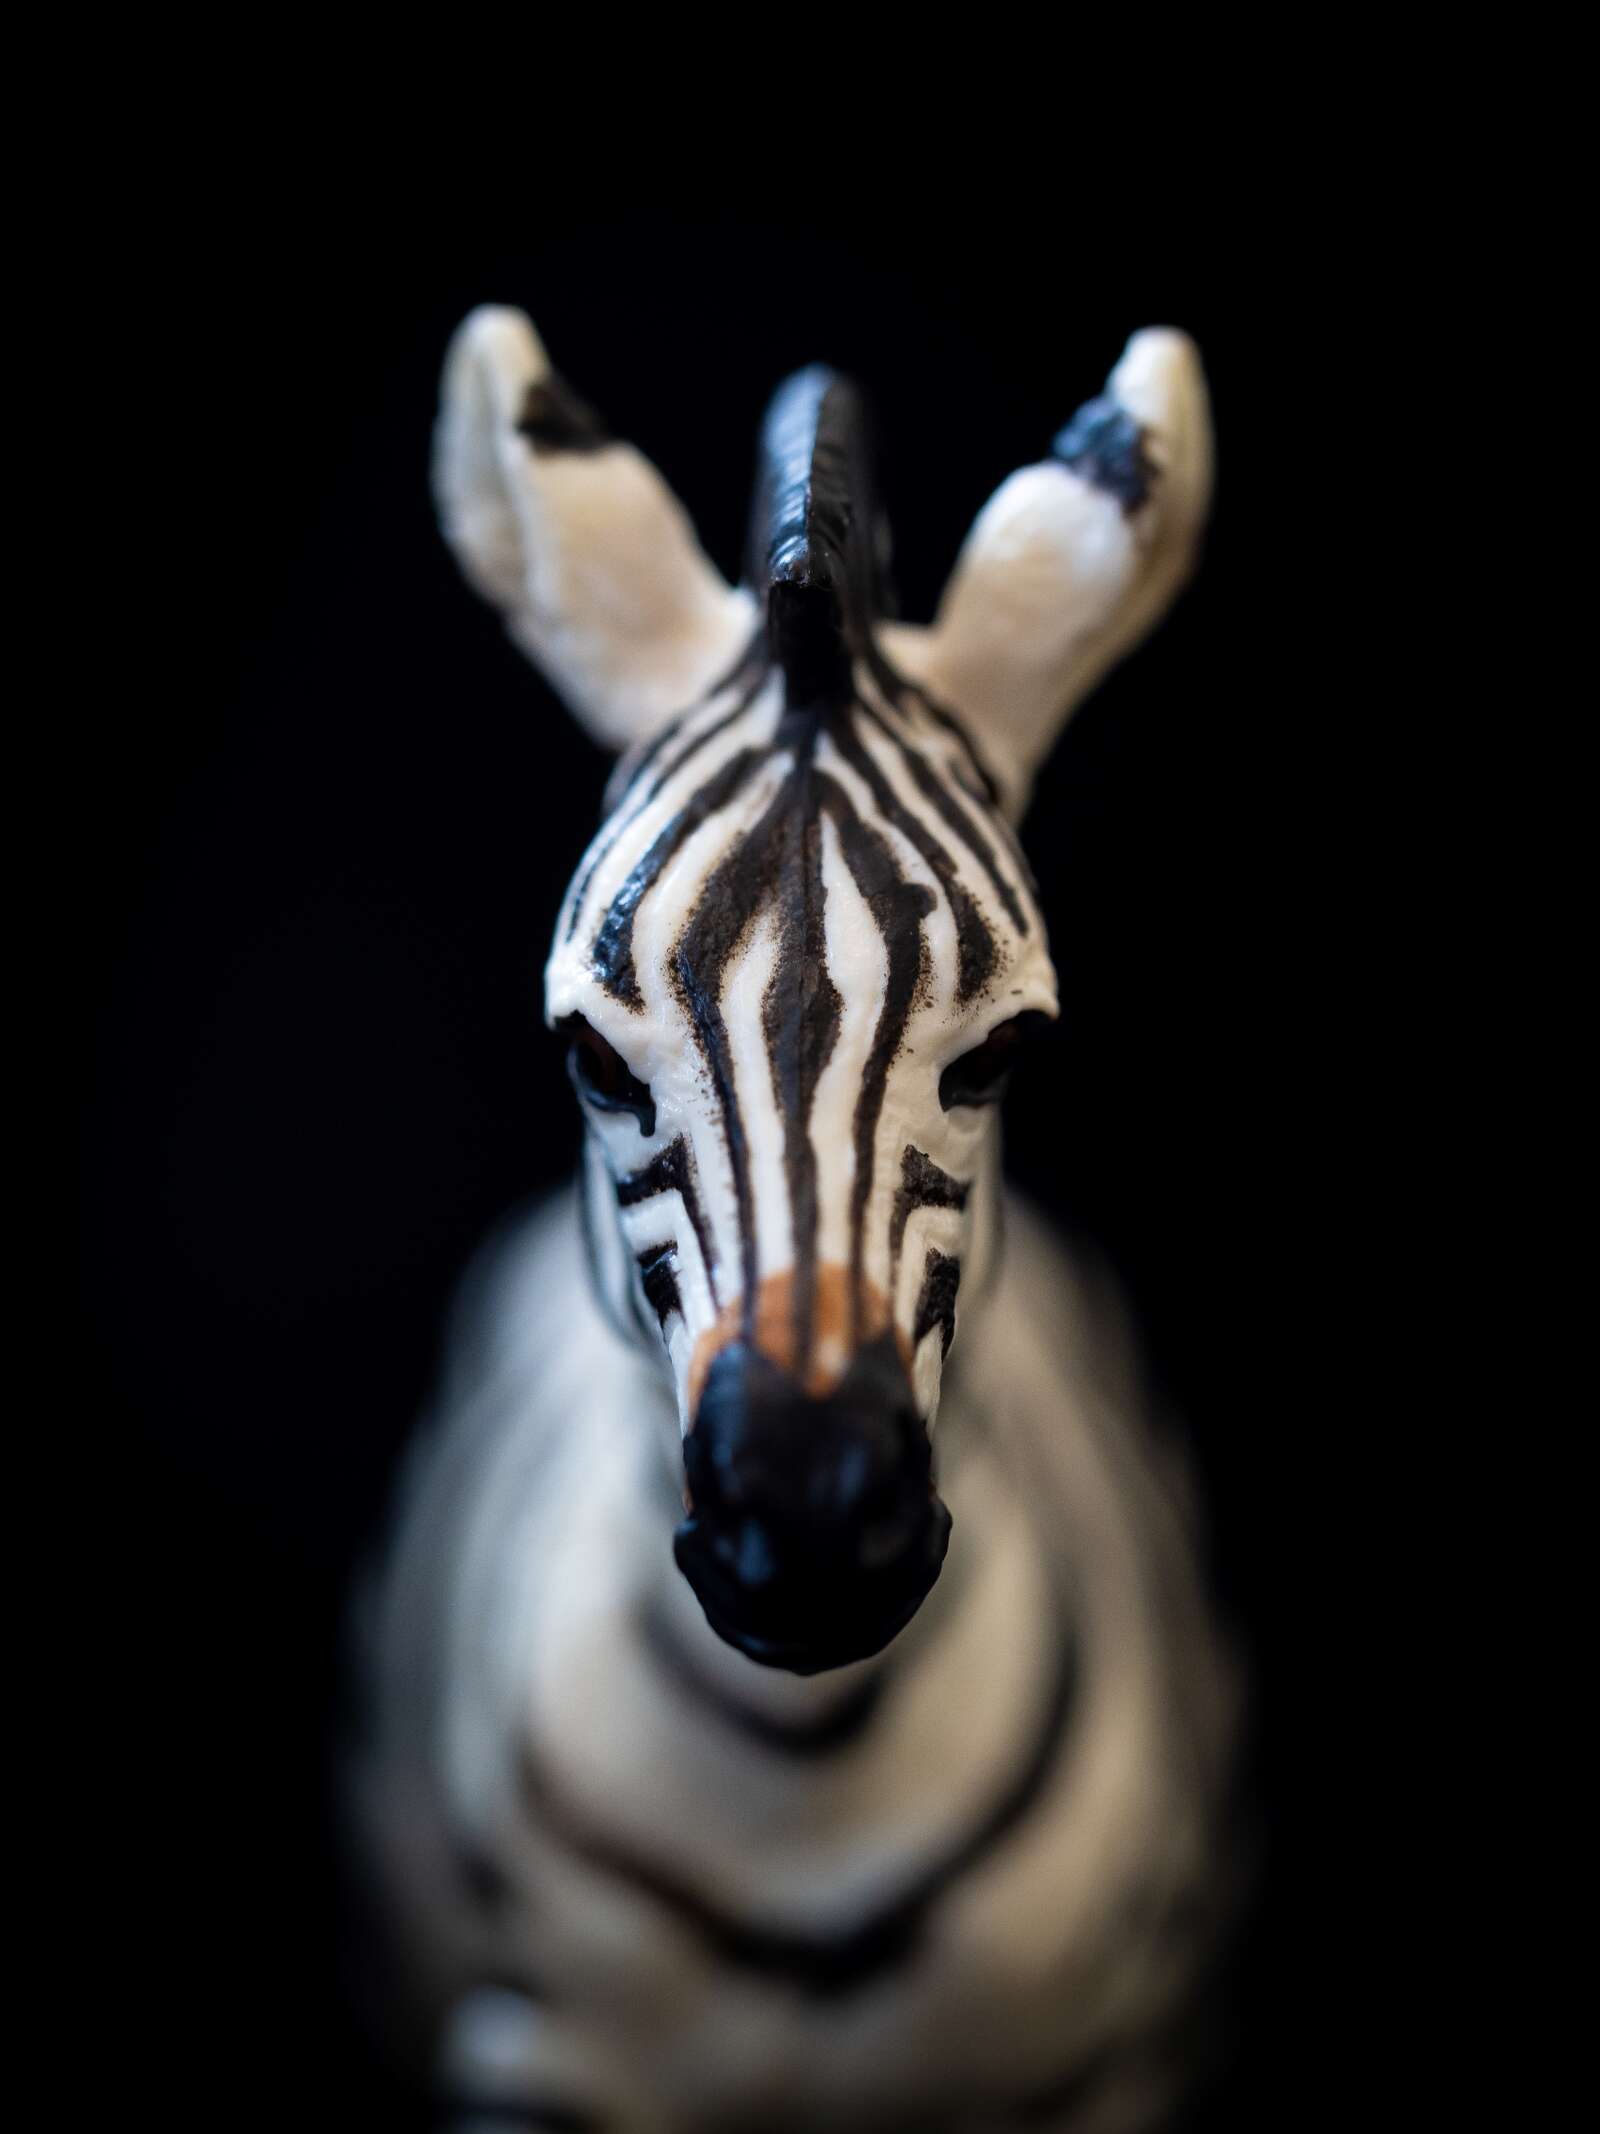
OM-D E-M1 Mark III | M.Zuiko Digital ED 60mm F2.8 Macro
1/100s | F2.8 | ISO 400
LIGHTING DIRECTION
As with any photograph, lighting direction acts to define and sculpt the final image. Backlighting and sidelighting adds drama. Front light or axis light can create a flat, high-key look. Just remember that you control the light in your window studio by moving the subject, NOT by moving the light. The process is a bit more challenging in a small space, but the results are worth it.

OM-D E-M1 Mark III | M.Zuiko Digital ED 30mm F3.5 Macro
1/8s | F3.5 | ISO 200
OM-D E-M1 Mark III | M.Zuiko Digital ED 12-40mm F2.8 PRO
1/50s | F4.5 | ISO 200

OM-D E-M1 Mark III | M.Zuiko Digital ED 60mm F2.8 Macro
1/30s | F2.8 | ISO 400
SHOOT!
Once you’ve settled on your subject and lighting, assemble your setup and decide on a lens. Avoid wide-angle lenses because they rarely work in a studio setting. I tend you shoot with a macro lens, my favorite being the excellent M.Zuiko 30mm F3.5 Macro. It close-focus ability is excellent, and the focal length is perfect for working in tight quarters and imparting a realistic-looking perspective to most table-top setups. As you compose your props, use your modeling clay to subtly change positions of your objects. Make sure to check the viewfinder to finalize the composition. Clay is great for lifting the corner of an irregular object to bring your subjects into visual harmony.
After your prop is placed, take a close look at the overall relationship between the highlights and shadows. If you want open shadows with lots of detail, use your white reflector to bounce some of that window light back into the dark areas. Don’t be afraid to get the reflector really close to the subject. I usually do a test shot with the reflector as close as I can get it without intruding into the frame, then adjust accordingly depending on the contrast I’m after.
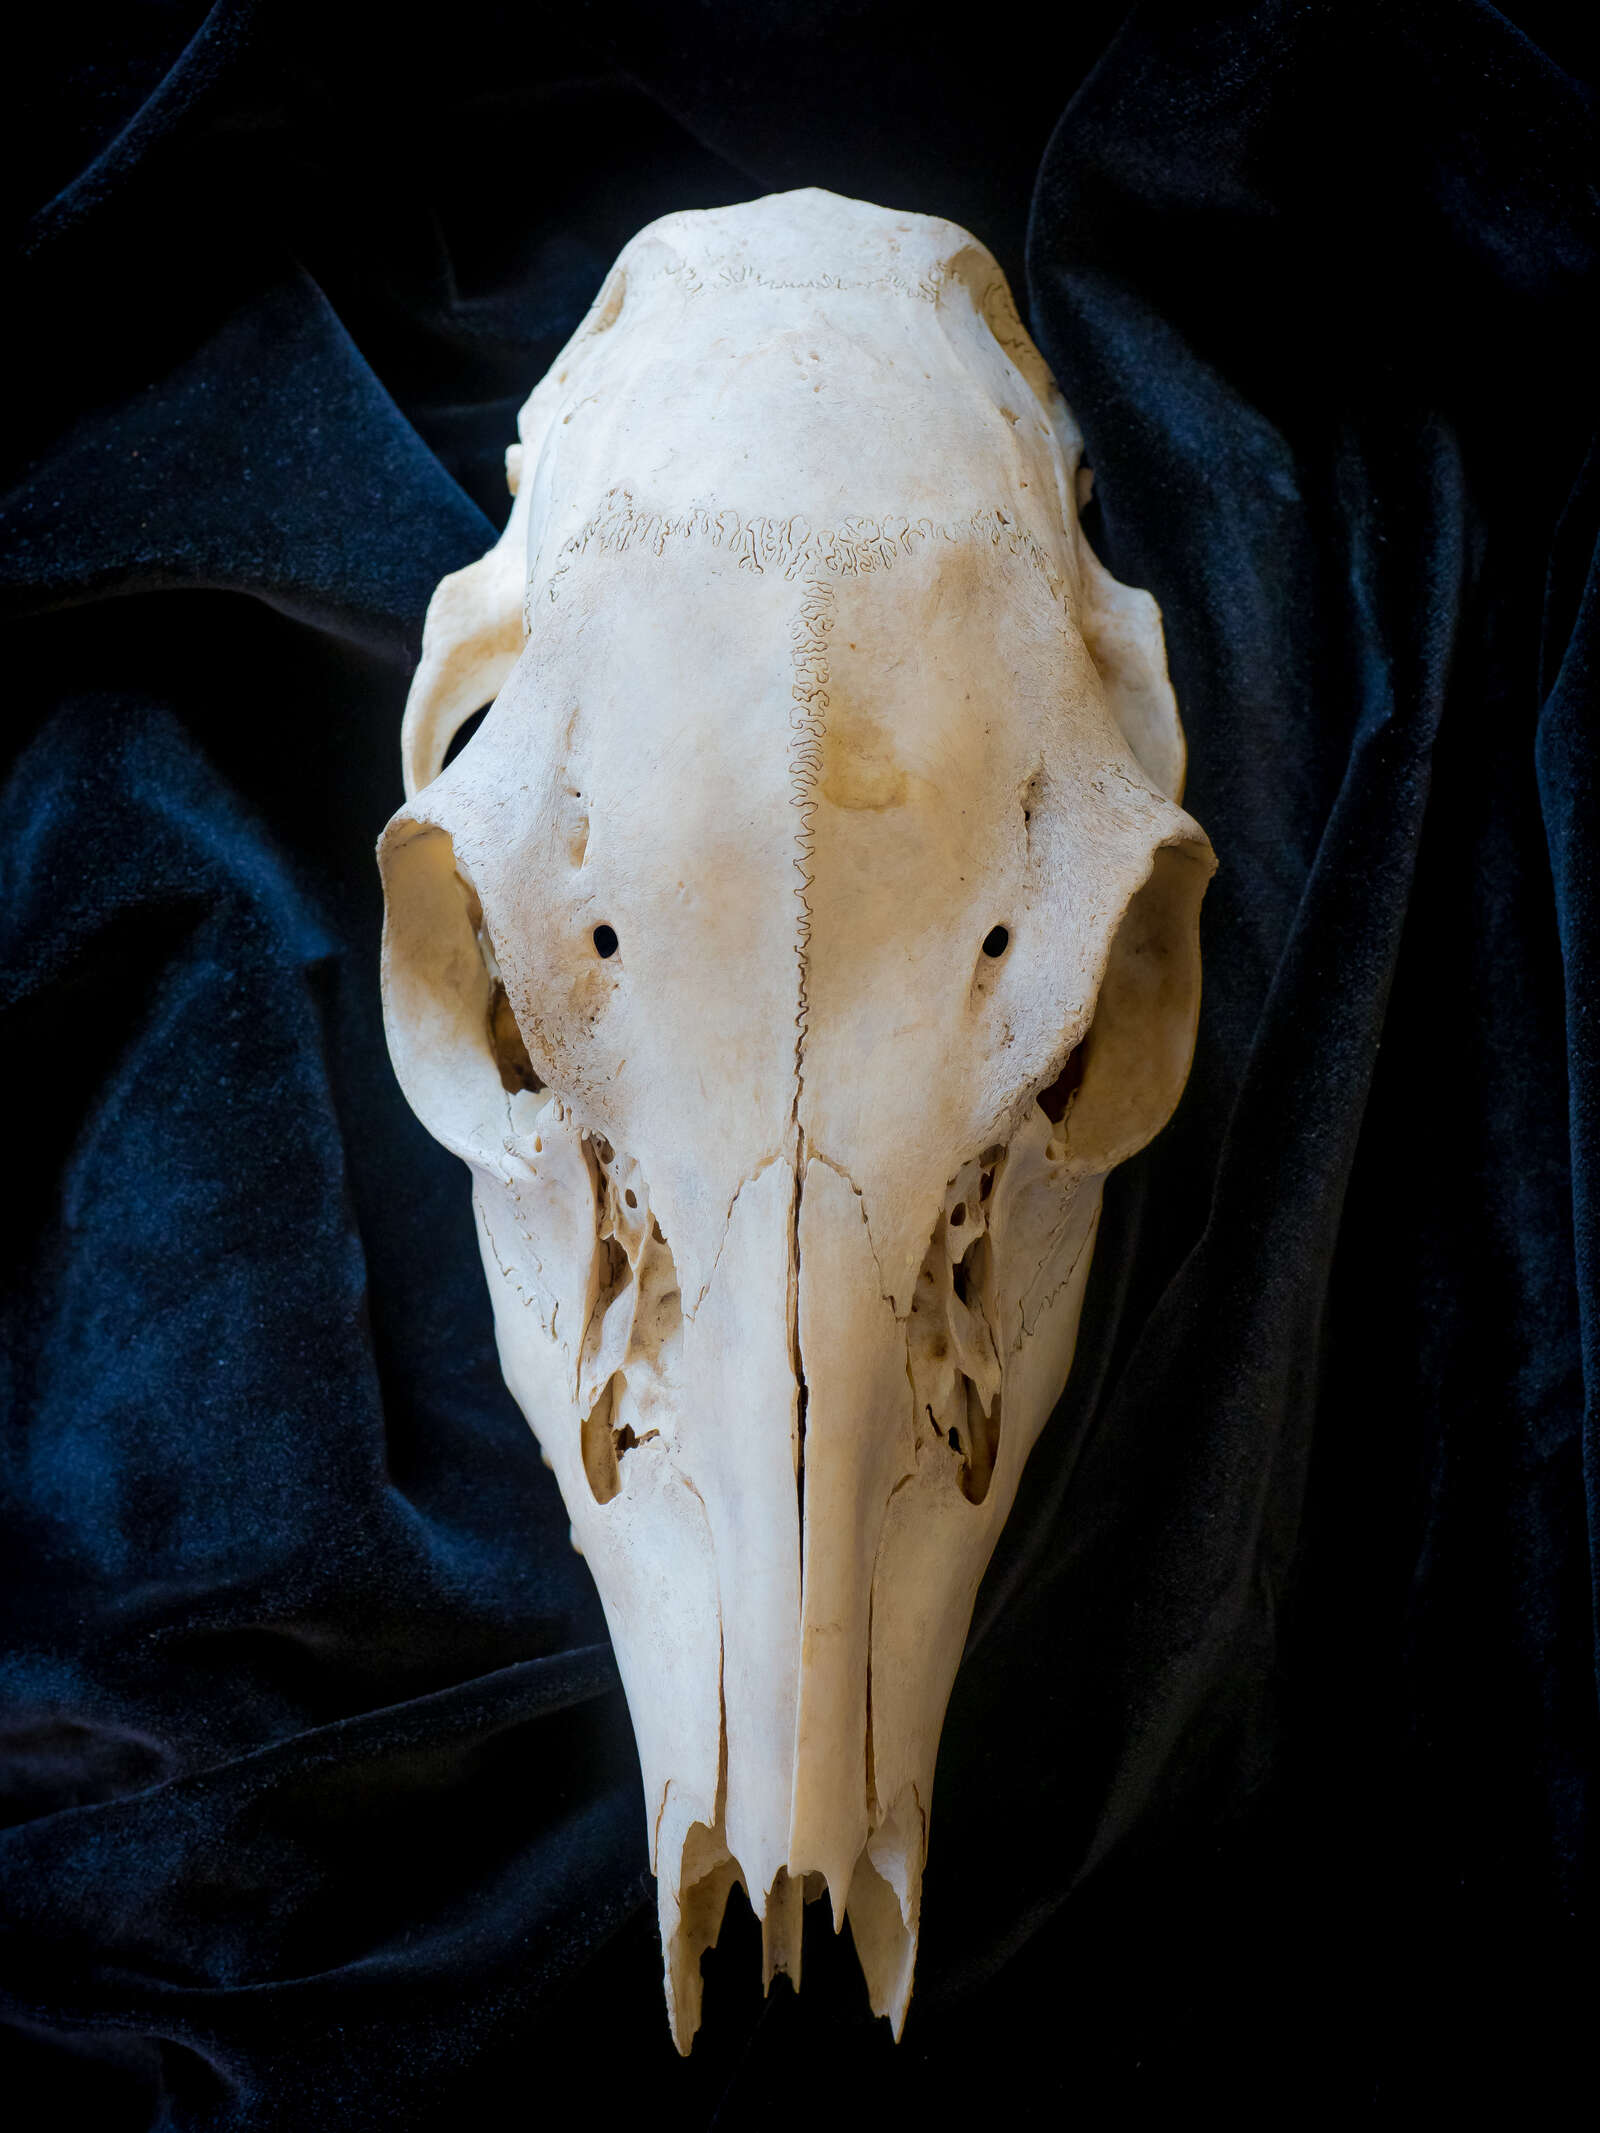
PEN-F | M.Zuiko Digital ED 60mm F2.8 Macro
.6s | F11 | ISO 200
THE TRIPOD QUESTION
I have to admit, I generally shoot without a tripod. I find the image-stabilization technology built into modern Olympus cameras to be perfectly suited to these types of photographs. Besides, as you get into the rhythm of shooting by window light, you’ll discover the light changes dramatically…sometime from second to second. Save time and be ready to react to these changes without obsessing over tripod placement. If you shoot at an exposure index of 200, your typical exposure with be around 1/30 second at about F4. I don’t hesitate to shoot at wide apertures as I love the dreamy look of shallow depth of field.
OM-D E-M1 Mark III | M.Zuiko Digital ED 60mm F2.8 Macro
1/30s | F2.8 | ISO 400
IT’S A WRAP!
As you work, try bracketing your exposures a bit. Window light has the ability to reveal very delicate highlight detail but it’s also easy to overexpose if you’re using a solid black or white background. If your subject is static, this is easy. I usually bracket by about a stop over and under the indicated exposure. Using these simple techniques, it’s easy to create beautiful images by applying basic studio techniques using inexpensive gear. Take a tip from the Old Masters and learn to control light the simple way.
PEN-F | M.Zuiko Digital ED 60mm F2.8 Macro
.3s | F8 | ISO 200

ABOUT LARRY C. PRICE
Over his storied career, Larry has worked for some of North America’s largest newspapers, including The Philadelphia Inquirer, The Baltimore Sun, Fort Worth Star-Telegram and The Denver Post. He is currently at work on a longterm project about global pollution with support from the Pulitzer Center on Crisis Reporting in Washington, D.C.