The OM-1 has arrived and with that comes a whole new menu system, computational photography and higher image quality than ever seen before from Olympus. While some of the base settings are not that different from the previous cameras, there are is so much more that the OM-1 offers in the world of bird photography and setting up a custom mode is the best way to take advantage of the OM-1.
SETTINGS
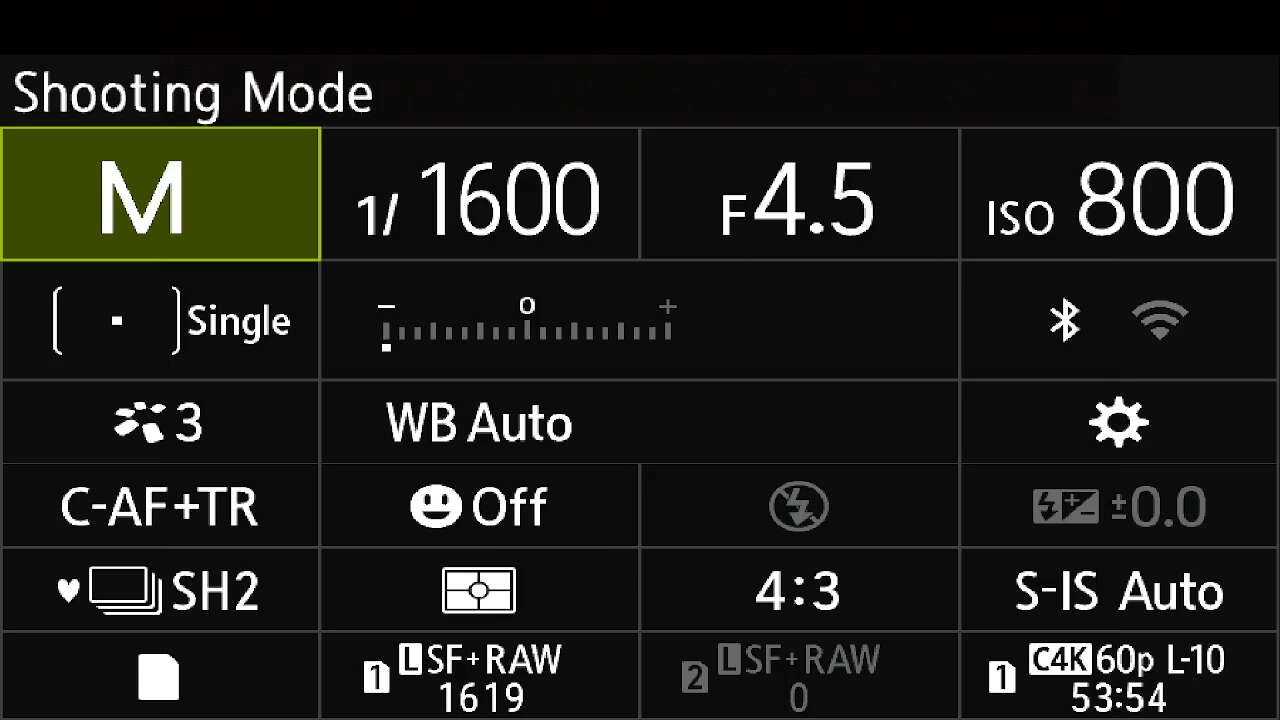
C1 SETTINGS
The key to setting up this mode is to utilize an auto ISO set. With the OM-1 is it pretty amazing, I was able to bump the high end of the range to 12,800 ISO and can still recover images to be printable and up to high image quality standards. I primarily use the M.Zuiko 150-400mm F4.5 TC1.25X IS PRO so setting the aperture wide open to F4.5 is key to allowing the most light into the lens as possible.
SHUTTER SPEED
The base shutter speed I like to start with is 1/1600th of a second. This will set you up for the ability to capture birds in flight with now blur and still maintain a lower ISO while shooting.
APERTURE
I like to leave my aperture wide open. For me, that is F4.5 but with any Olympus lens you will want to make sure you set your aperture to its lowest setting.
ISO
The ISO is one of the most important settings within this custom mode. You will need to utilize an auto ISO set. I have mine set to 200 on the low end and 12,800 on the high end.
AF MODE
The key to birds in flight on the OM-1 is to use the AI Subject Detection AF for Birds.
AF TARGET MODE
While the OM-1 has focus points virtually all over the sensor I like to limit those points a little so that the focus points do not pick up the background while tracking a bird through trees and other more busy backgrounds.
DRIVE MODE: SH2
By using SH2 coupled with the M.Zuiko 150-400mm F4.5 TC1.25X IS PRO you will have blistering speed at 50fps. On top of 50fps the camera will focus and meter in between each and every frame. This is essential in making sure that you expose the bird correctly as it flies within different lighting.
EXPOSURE COMPENSATION
By using an auto ISO set and a changeable “constant” aperture this enables exposure compensation. This is a key technique to my photography as exposing to the right is vital to retaining detail in bird photography. Exposure compensation means that it will actively meter the scene and automatically adjust the ISO according to how much you want to over or under expose the image. I like to start at +0.7 to make sure that I expose to the right. Please note that this setting can vary quite a lot depending on the scene. For example, a backlit scene might have the opposite and be more like -0.7 to expose for the highlights in the image.
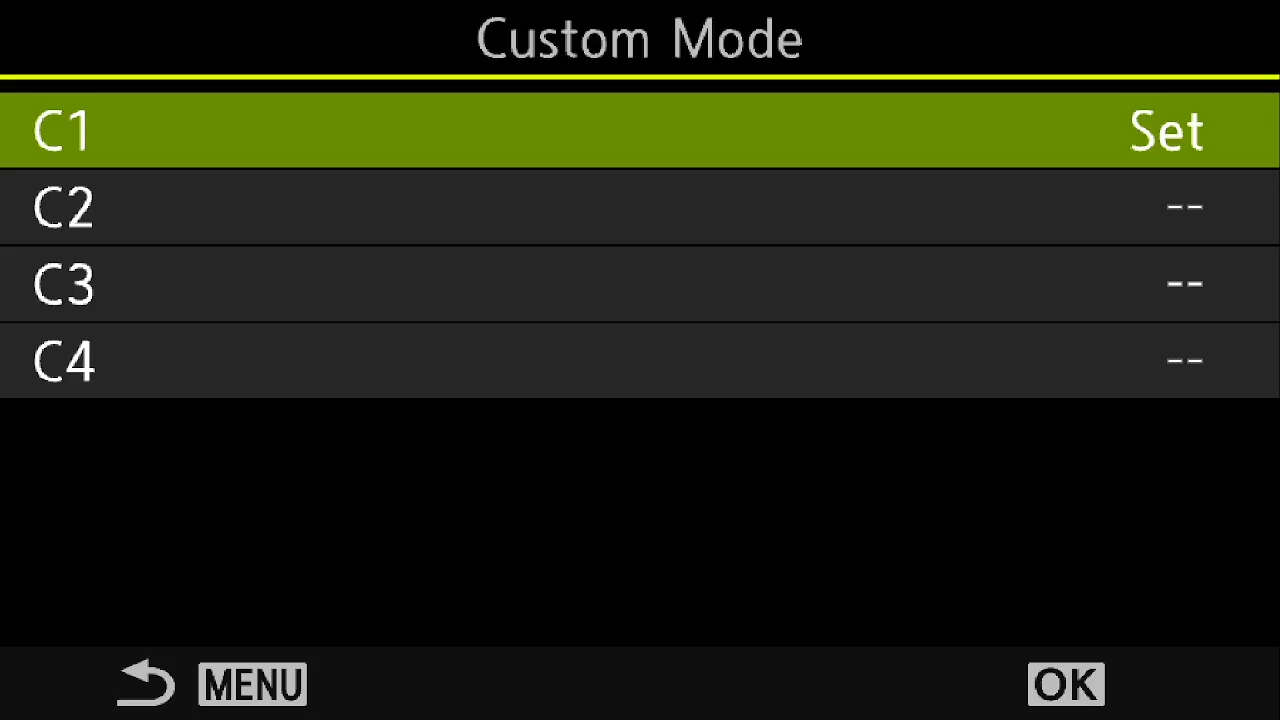
SAVING YOUR MODE
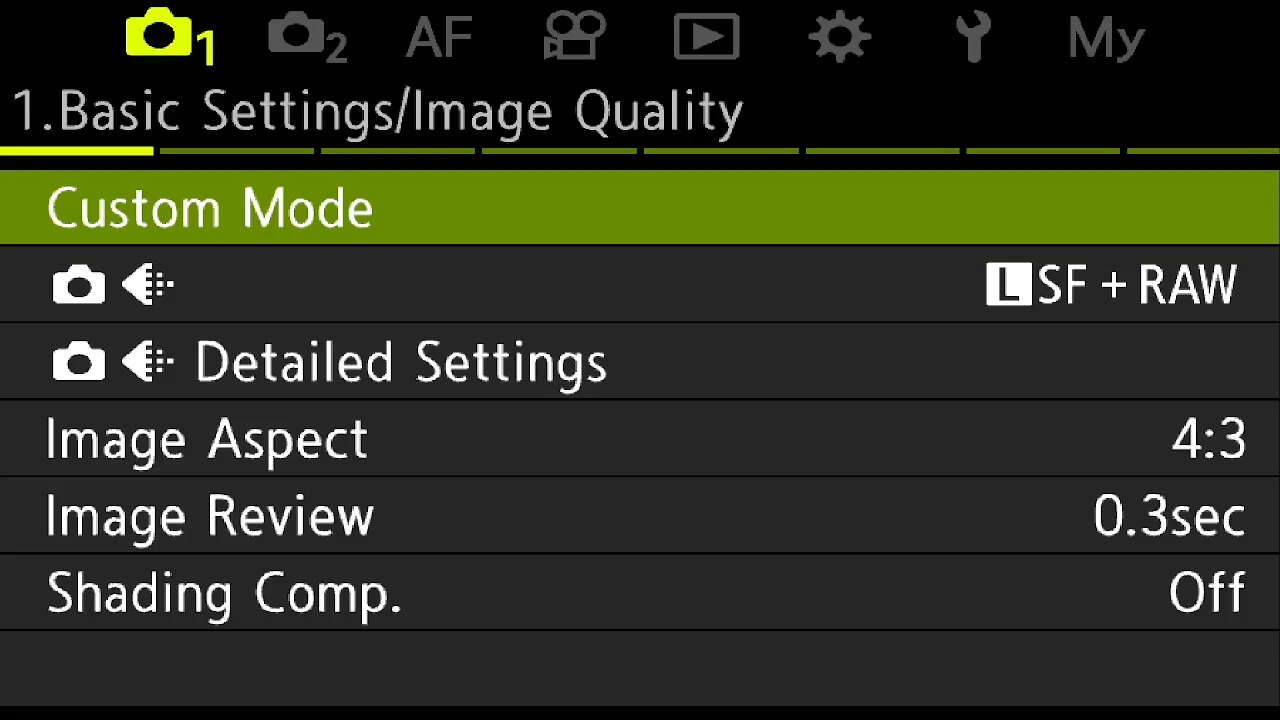
After you get the base settings down and are ready to assign it to a custom mode you simply go into the first screen of the OM-1’s menu: Menu > Camera 1 > Tab 1. Basic Settings/Image Quality > Custom Mode.
Choose C1, C2, C3, or C4 and then ‘Assign’ and ‘Set’ to commit the settings.

EXTRA SETTINGS
In addition to the settings explained above, I also make sure to do the following:
Image Quality: RAW
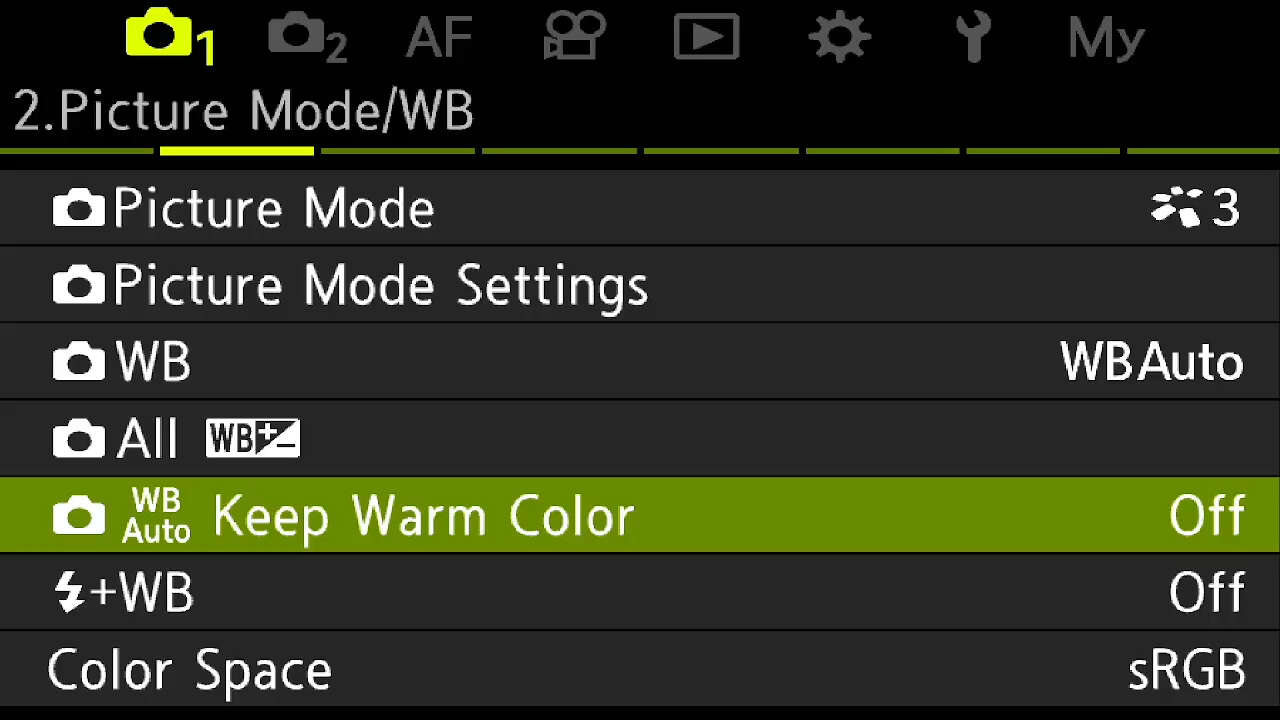
White Balance: Auto
Picture Mode: Natural
Image Stabilization: S-IS Auto
Keep Warm Color: Off (Menu > Camera 1 > Tab 2. Picture Mode/WB > WB Auto Keep Warm Color > Off)
BUTTON ASSIGNMENTS
Back Dial
The back dial is a crucial to these settings and therefore I use it for exposure compensation. By simply turning the dial the auto ISO set will automatically adjust to the appropriate exposure for the scene. This being done quickly is key to bird photography given how fast birds move.
AF-ON Button
I use back button focus so this is the ideal button to use in the exact way it was made. This is a setting that all comes down to personal preference, if you use back button this one is for you!
AEL Button
I have the AEL button set to toggle between Bird Detection AI Tracking and normal single point AF. This is a huge help when a bird is perched in dense trees and has branches in the way because it allows you to customize focus to the scene a bit easier.
FN Switch
I set up the Function Switch to toggle between the large focus area and single point AF. This is vital if a bird is perched, versus flying.
If you're looking to set up your OM-1 with my settings, download my Custom Mode here, and use OM-Workspace to install on your OM-1!

Instagram: @keithw3
Keith Wallach is a wildlife and nature photographer based on the North Coast of Oregon. He specializes in bird photography and aims to bring awareness to coastal birds and wildlife by creating emotive imagery to spark conversation within the conservation space.