The holidays are upon us and it’s a great month to spend time with family and decorate the house. This time of year also provides photographers with a great opportunity to get creative with ornaments.
Today, I’ll give you a few tips on how to celebrate a macro Christmas as you prepare your house for the holidays. We will do this through a technique called refraction by capturing a background subject into a foreground water drop. If all goes as planned, you will immortalize your holiday season in a bubble.
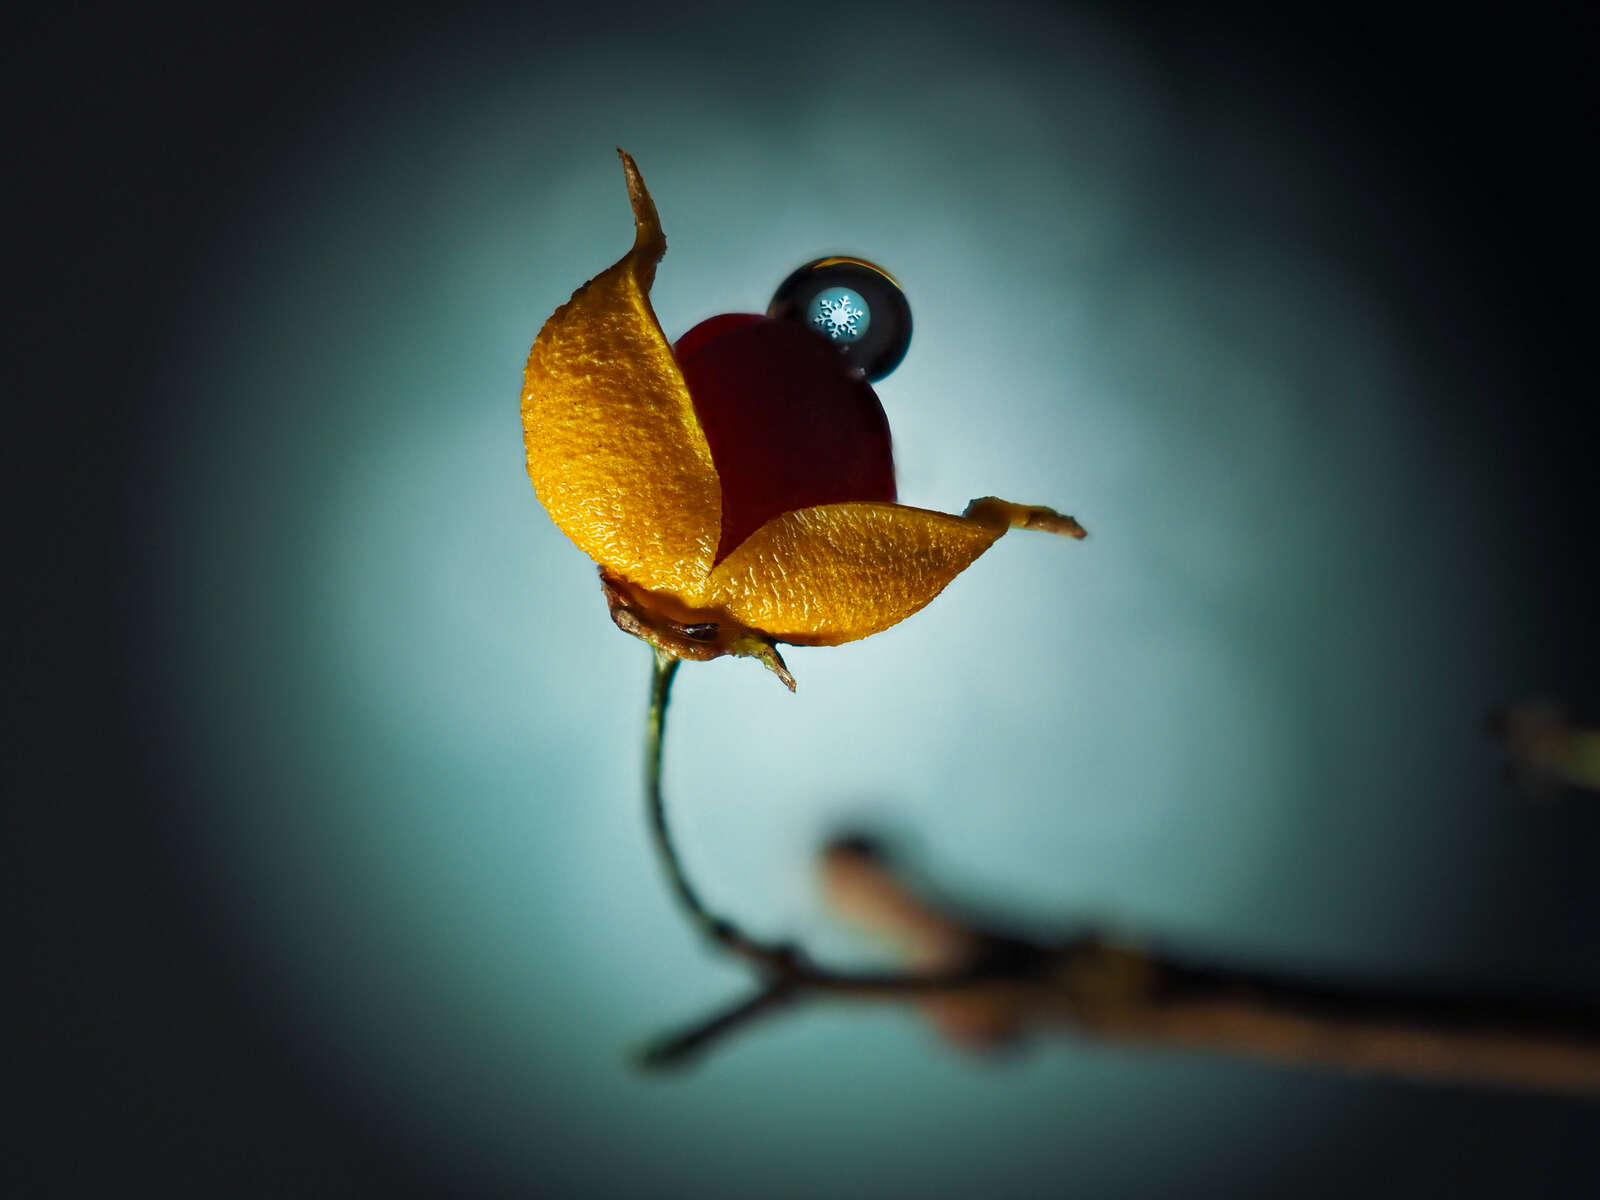
OM-D E-M1 Mark III | M.Zuiko 30mm F3.5 Macro
1/25s | F3.2 | ISO 200
8 images focused stacked in camera
Gear
-
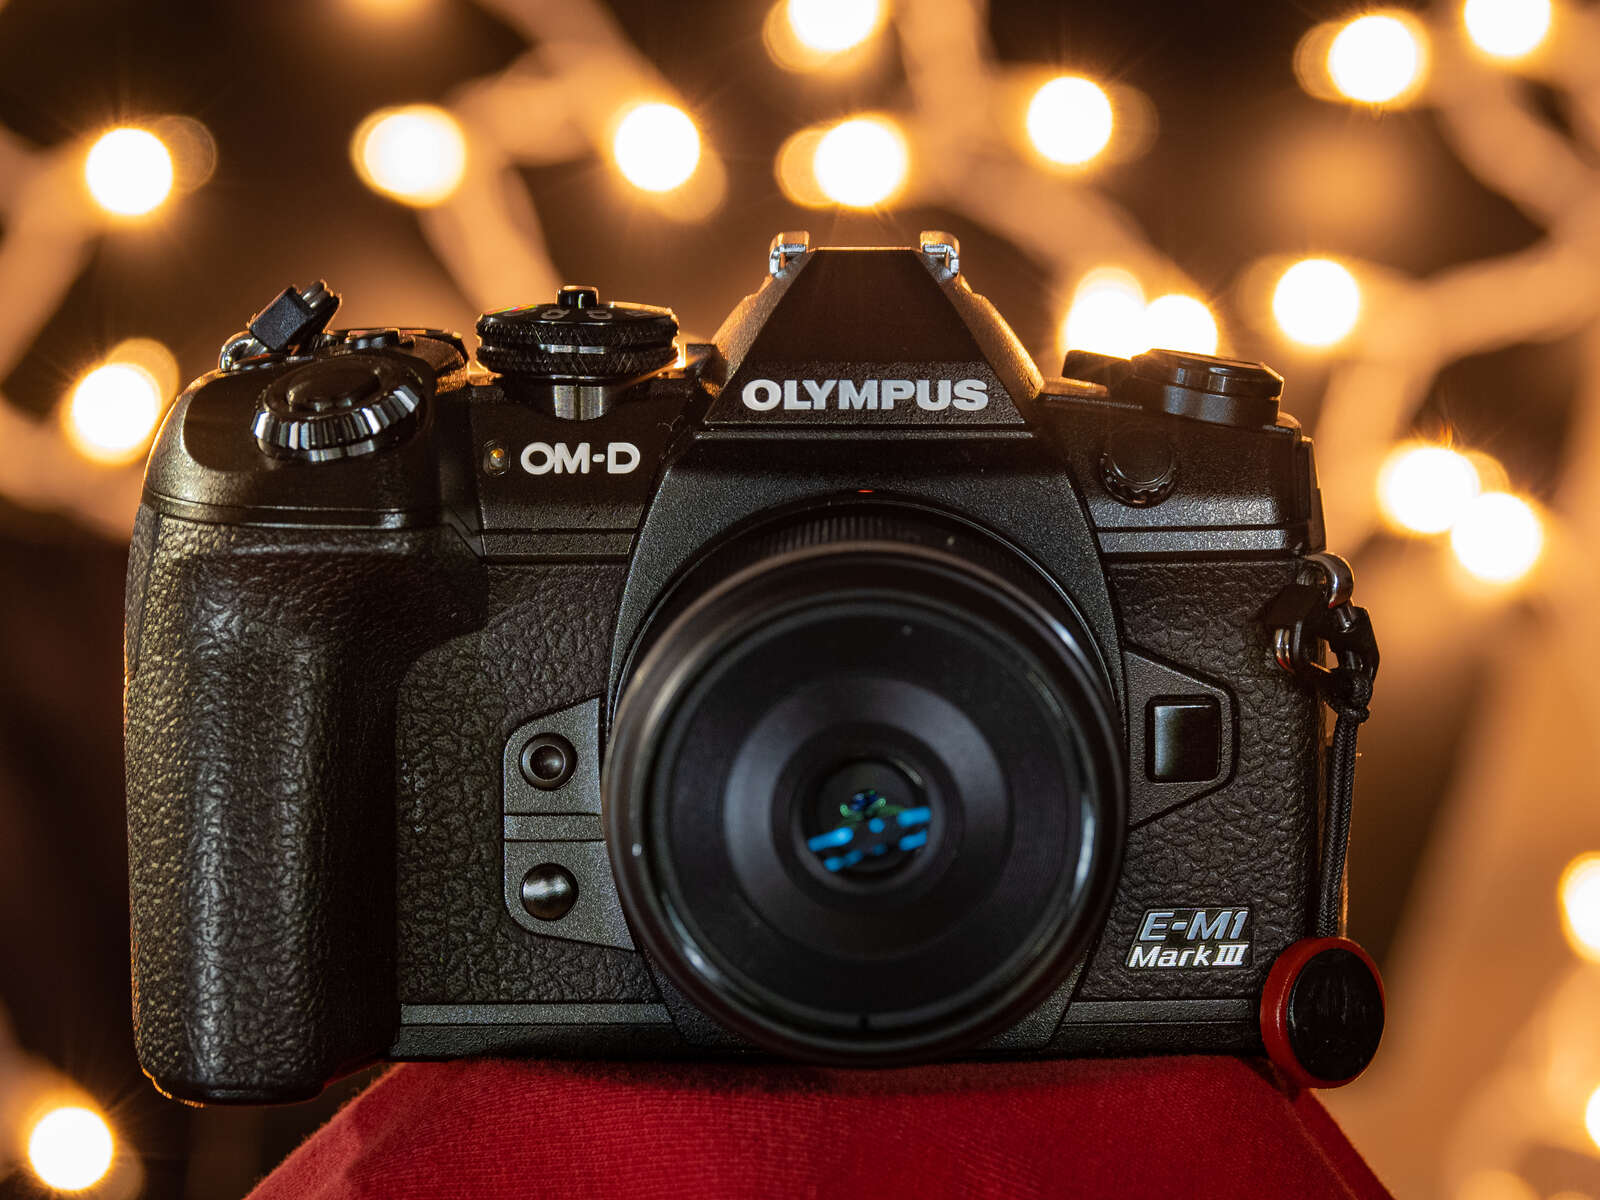
A camera – Mine is the OM-D E-M1 Mark III.
-
A macro lens – I use the M.Zuiko 30mm F3.5 Macro. It is the perfect companion for refraction as it boosts a 2.5x image magnification and has a blacked-out front that minimizes the reflection. The 14mm (0.55 inches) minimum working distance allows you to get very close to your subject and capture details. The M.Zuiko 60mm F2.8 Macro is also a good option.
-
Props – Find your best small Christmas ornaments. Extra bonus if they shine as it will allow for great bokeh in the background. If possible, go in search of berries or small plants to put water drop(s) on.
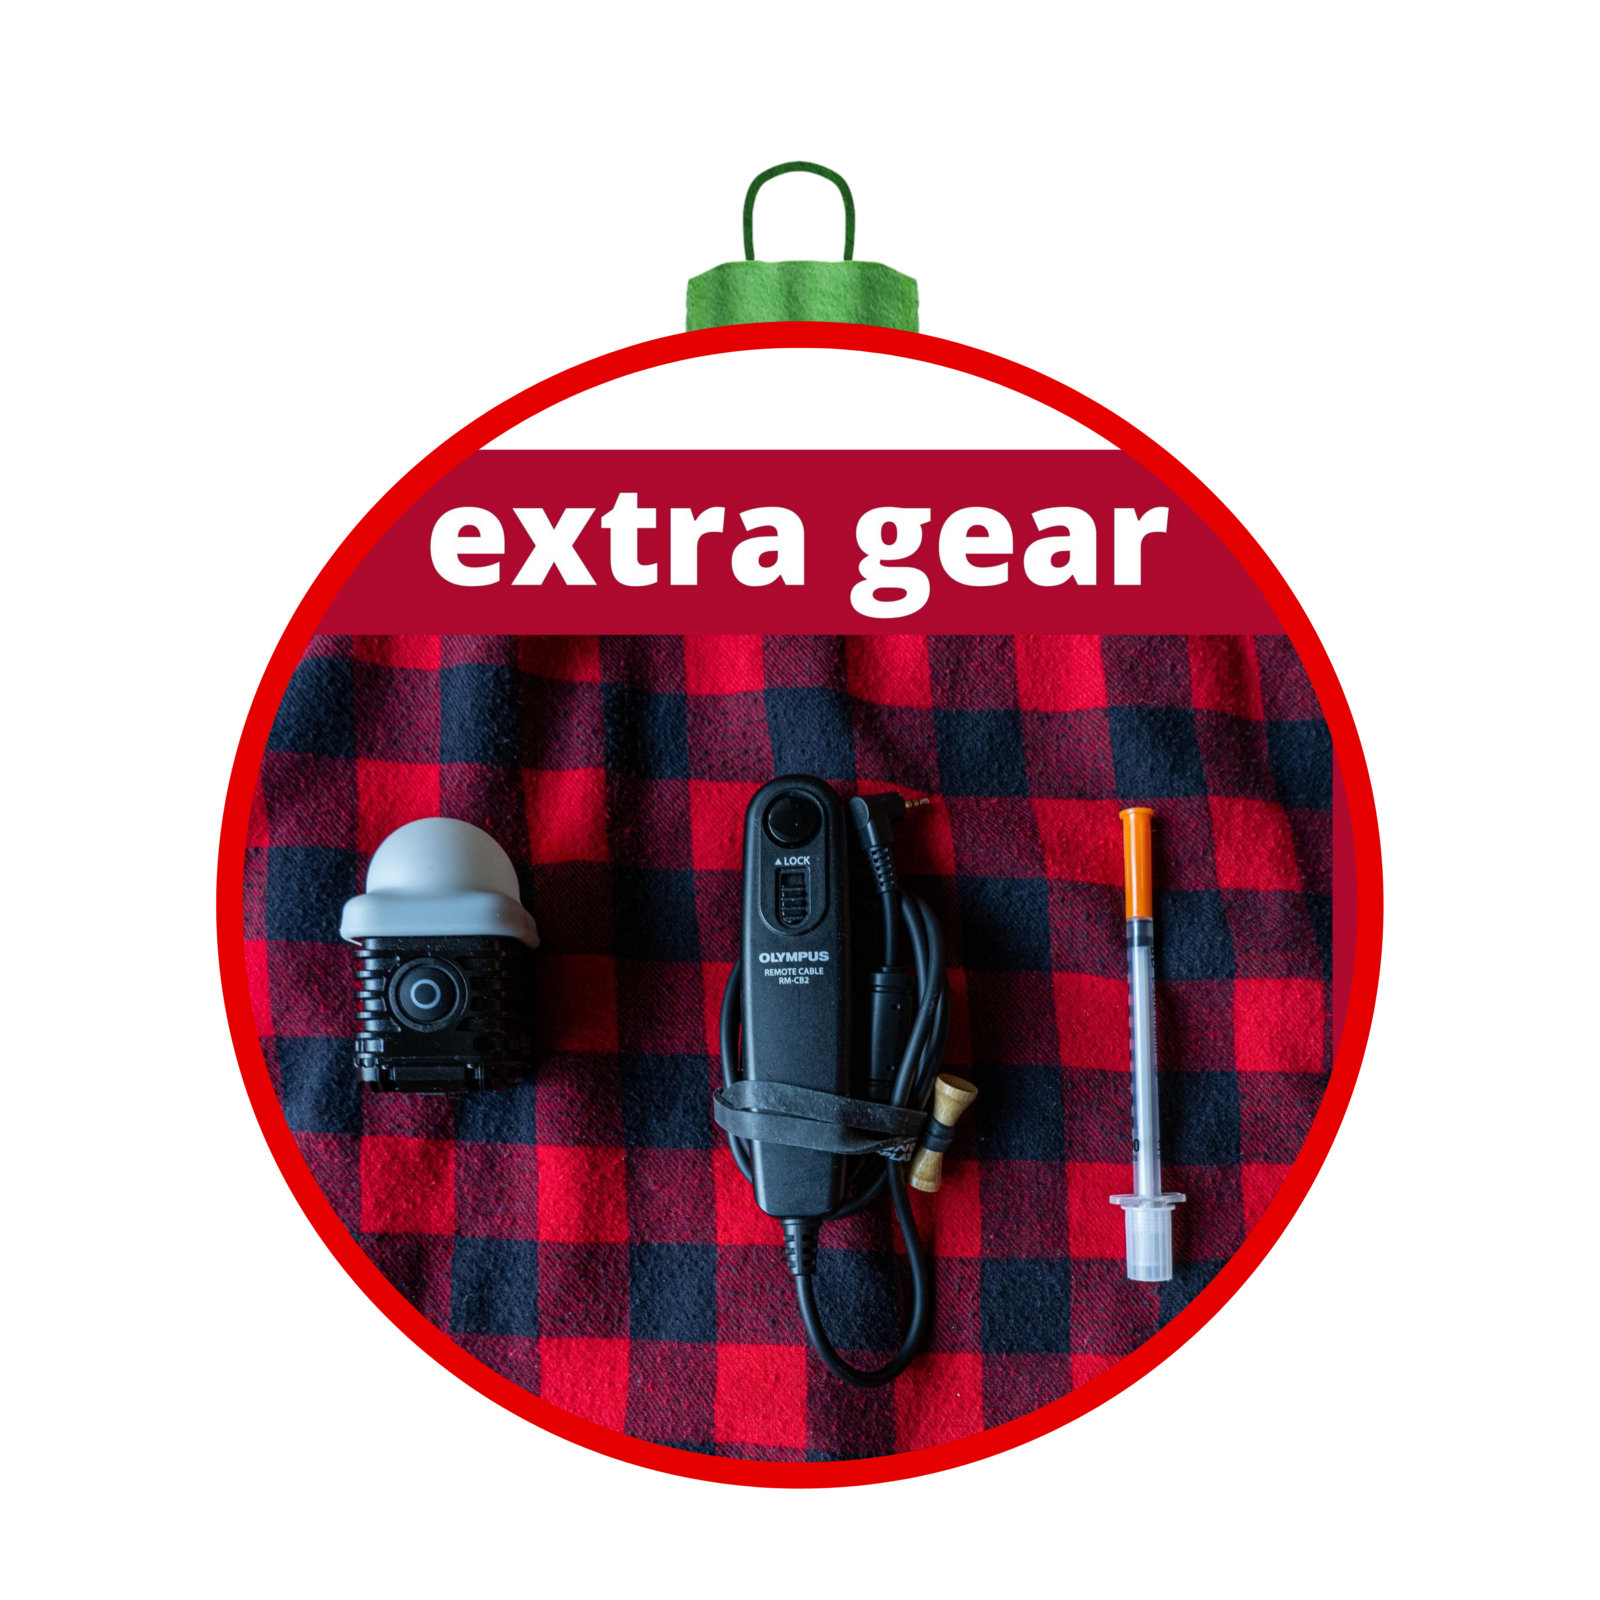
Optional Gear
-
A remote cable release (RM-CB2). This cable helps capture your scene without the vibration associated with using the shutter release button. It also gives you some extra working distance, so you can press the remote while holding a flashlight a few steps away from your camera.
-
A flashlight. Highlighting your background is key in refraction and will make your photo pop. I used a Litra Torch 2.0 for all the photos in this article. The light will travel to the waterdrop and make the subject inside your drop more radiant. In a pinch, just use the flashlight of your phone.
-
An insulin syringe. This will make life easier as it allows you to place the drops exactly where you want them, as well as regulate their size. You can also use an eyedropper or spray bottle but it is less precise. Some might recommend a glycerin mixture to keep the water drop in place longer but, personally, I just use water.
-
A tripod. Although I am not a fan of tripods (I primarily shoot handheld thanks to Olympus’ amazing image stabilization), I do use a Platypod or tripod when I do refraction.
Setting Up Your Shot
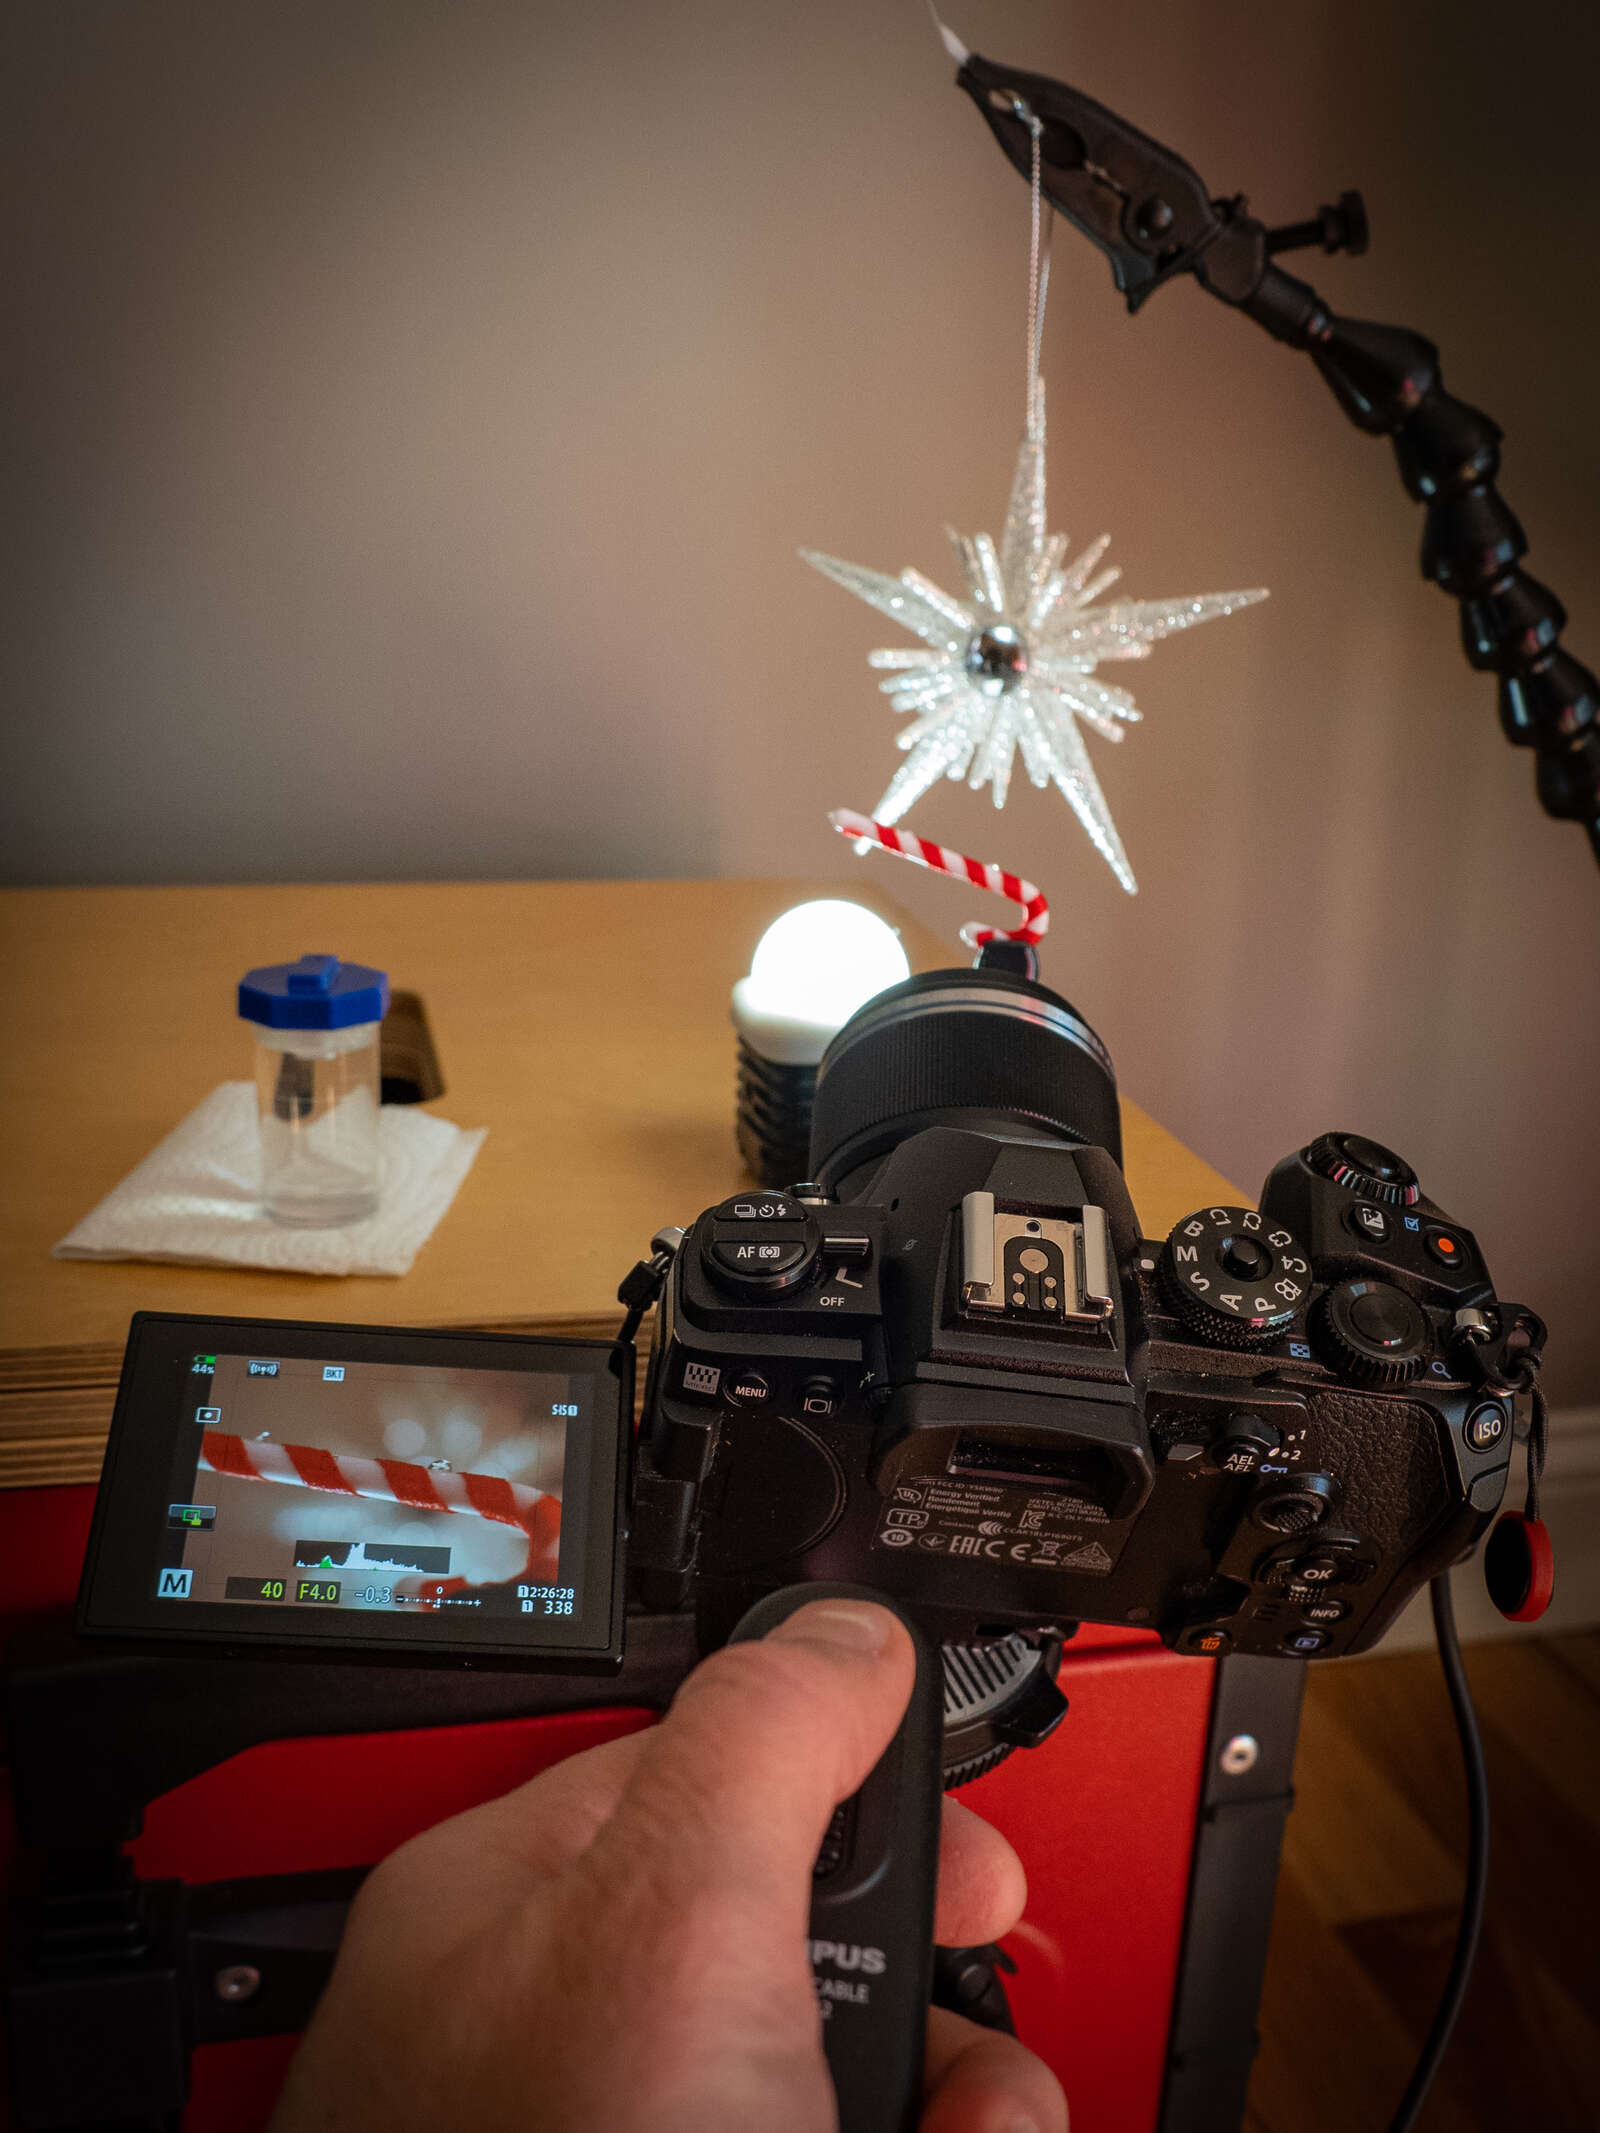
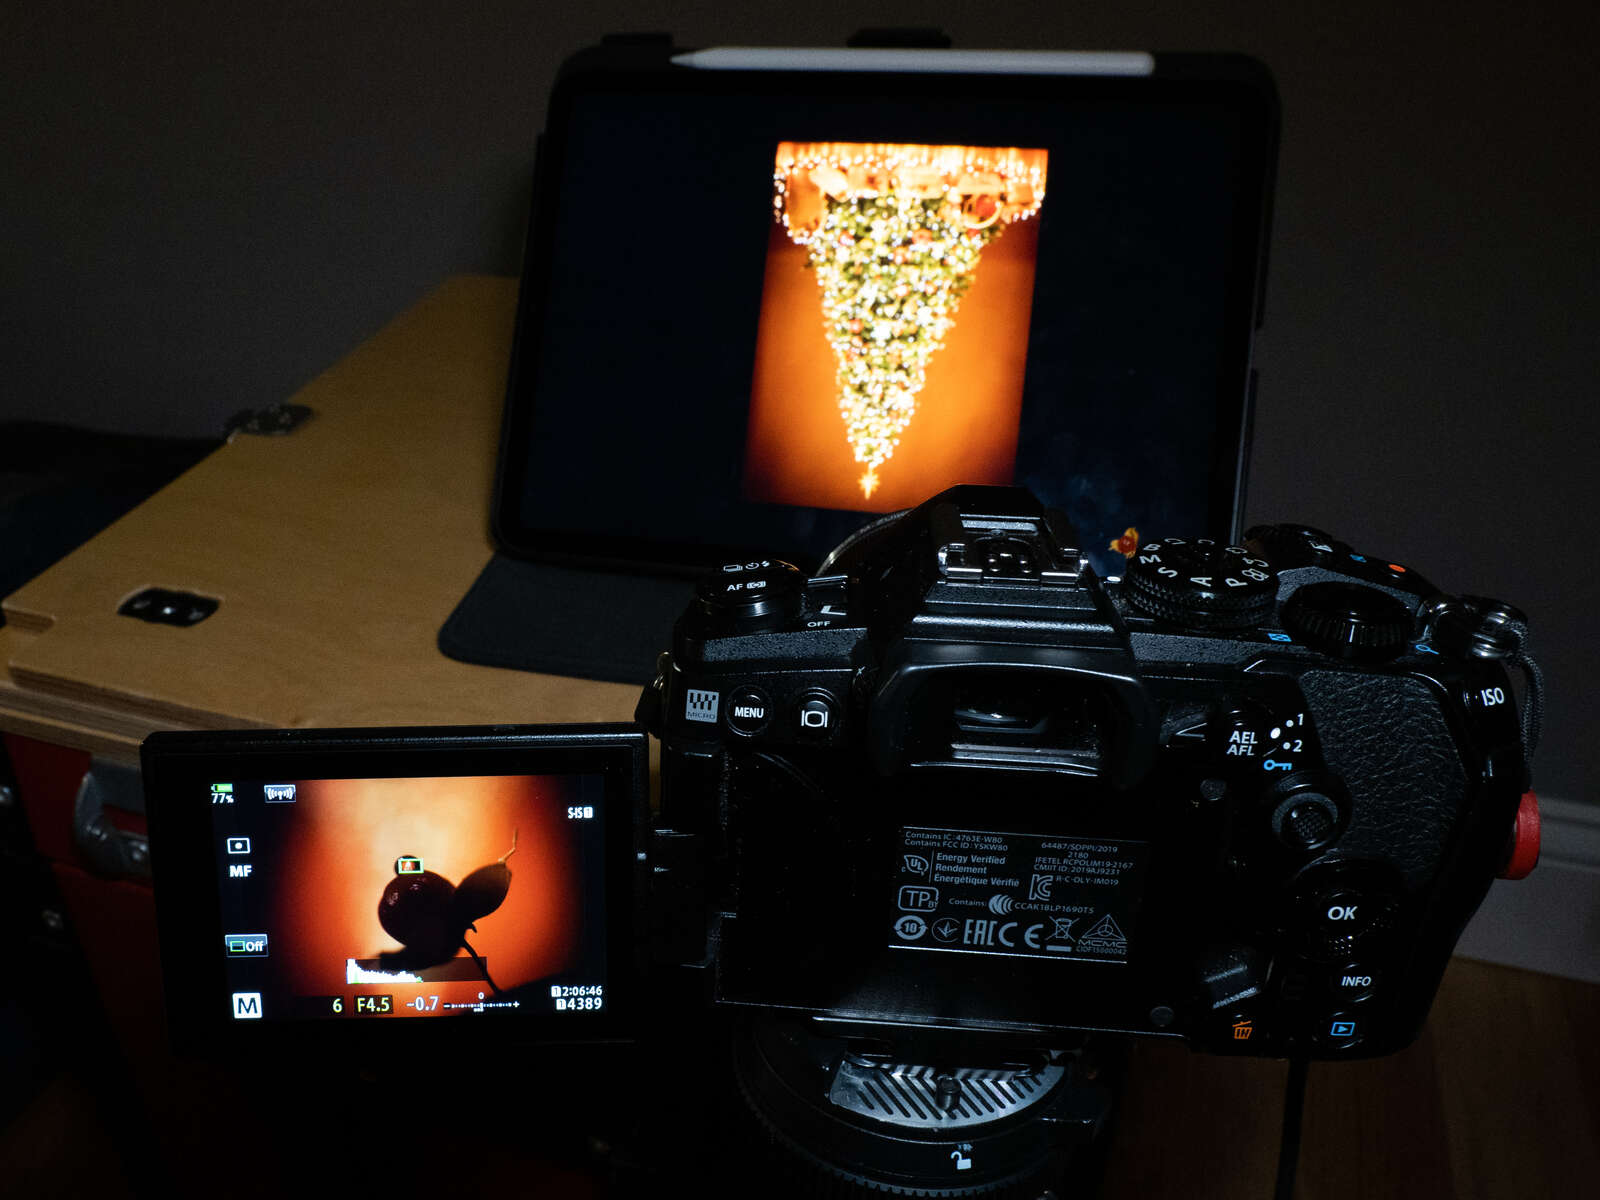
Finding the right angle requires a lot of rearranging. First, place a drop of water on your foreground subject - in my case a fake candy cane. Then, start experimenting by placing your background object at various distances to see how it will refract in your water drop(s). You will have to move the background object so that it fits inside your drop. Everything will vary depending on the size and the distance of your subject. That is why experimenting is key.
Once you are happy with your composition, use a flashlight to illuminate the background subject. Remember that the background (the sparkling star in my case) needs to be brighter than the foreground (the candy cane). This way, the light will go through the droplet making it brighter.

1/40s | F4 | ISO 200
Settings
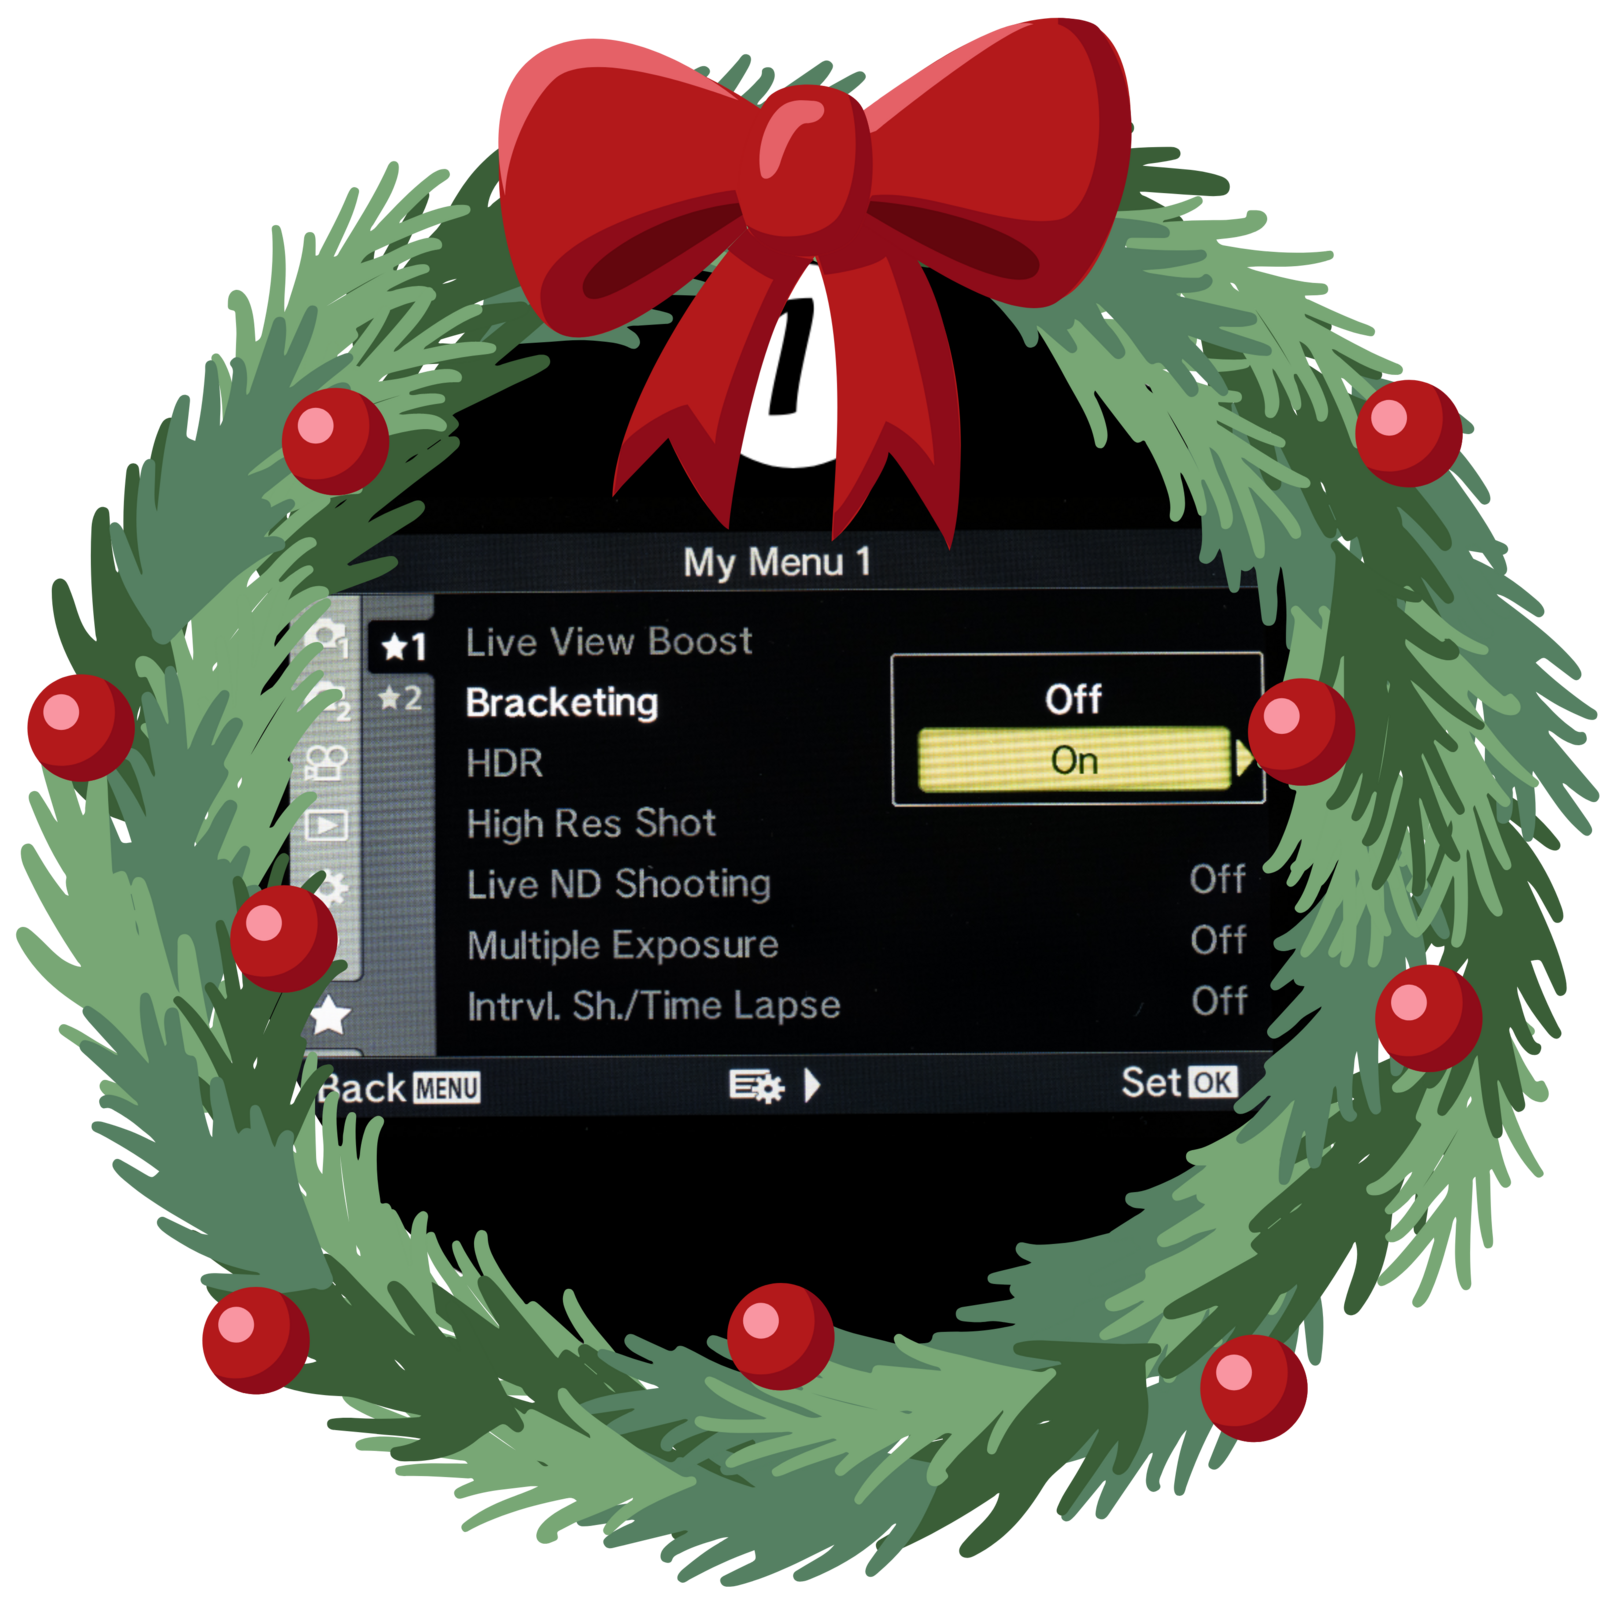
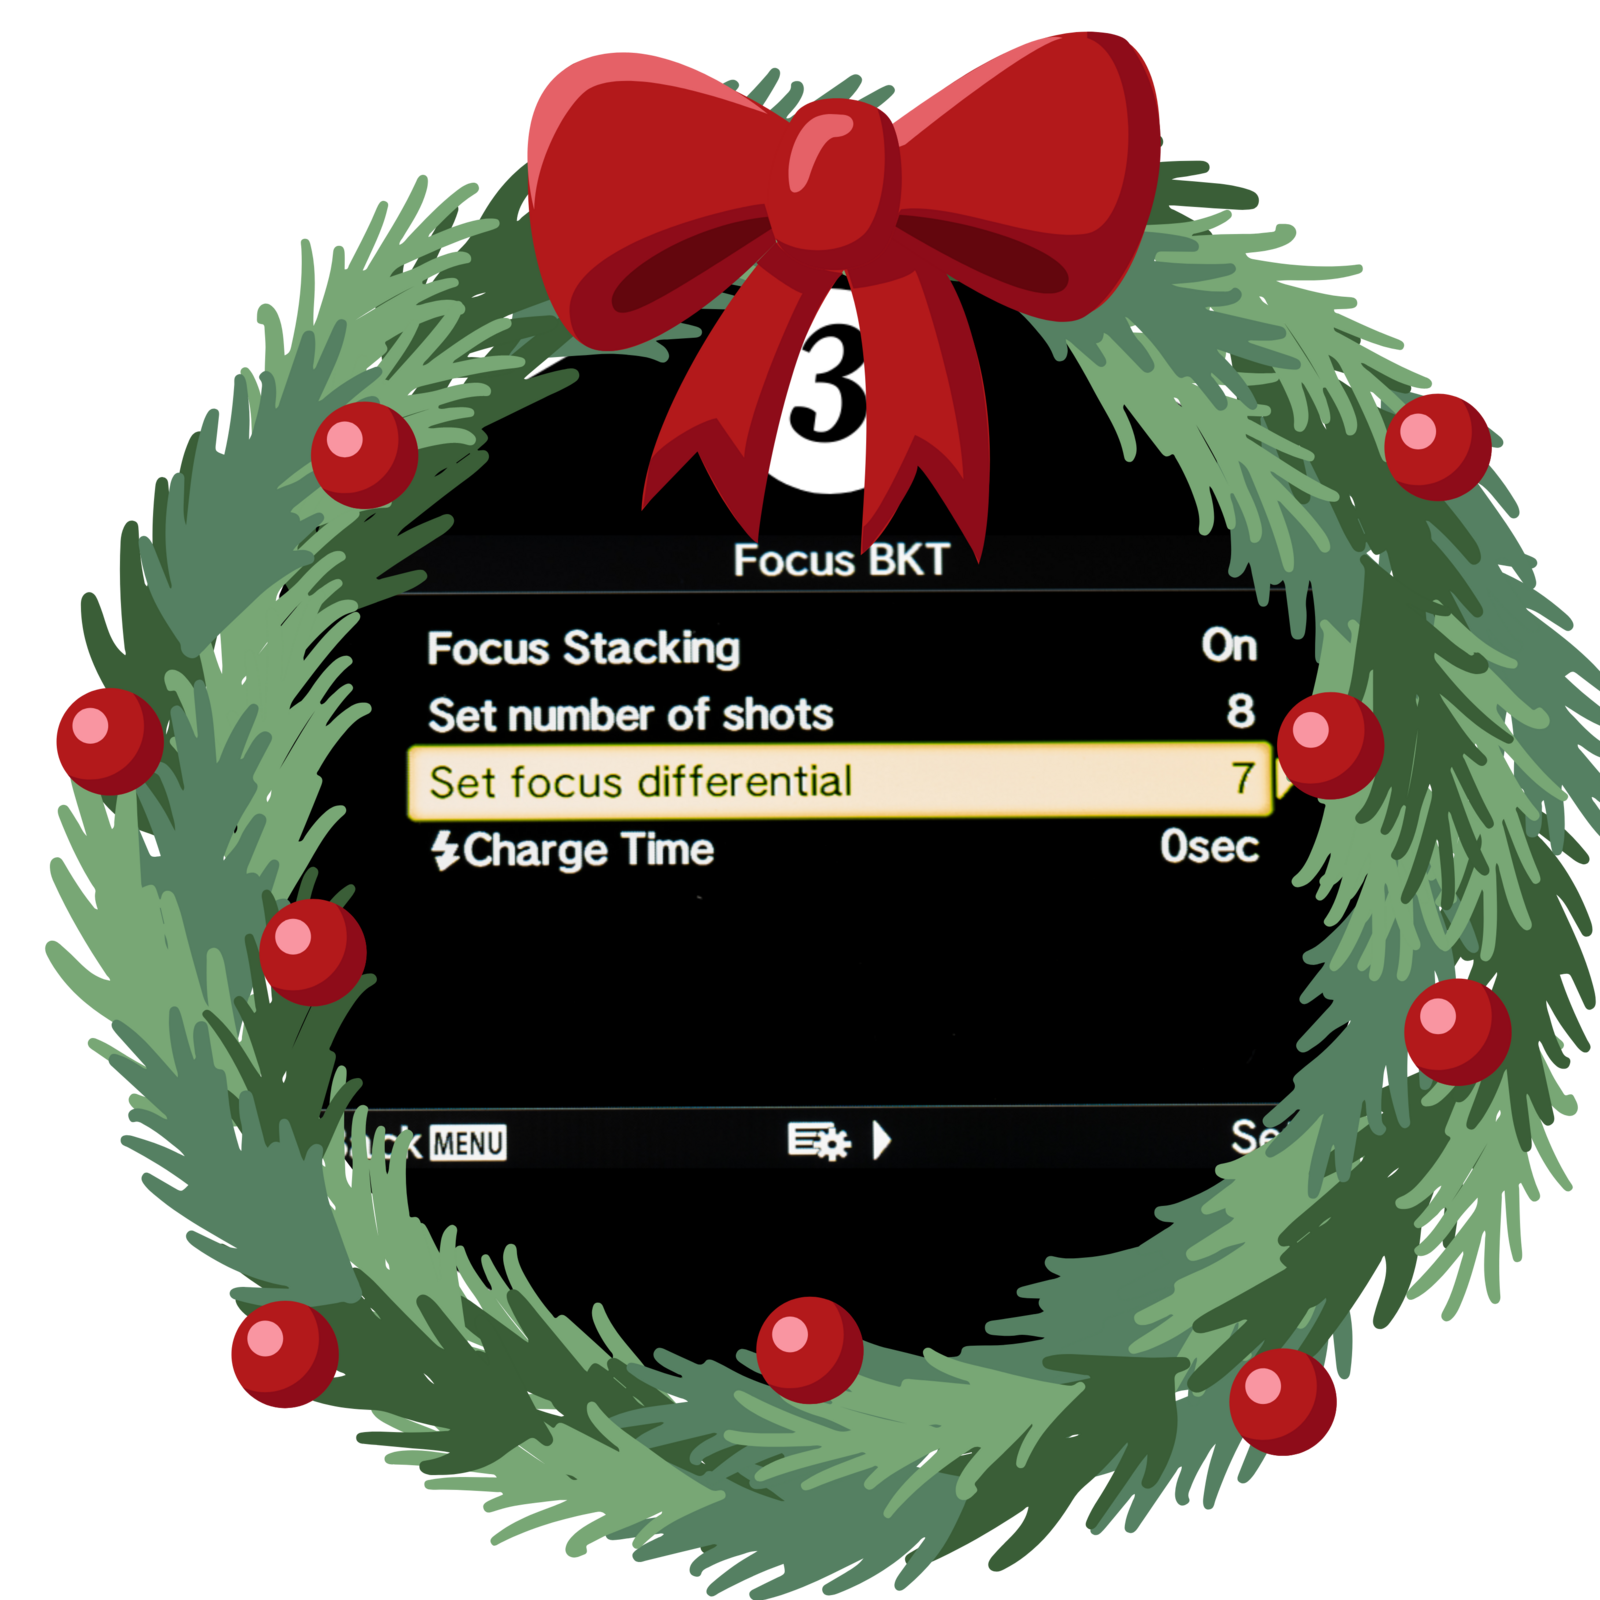
Start with one shot to see what you can get. I like to start at f/7.1 and then play with ISO and speed. I love the in-camera focus stacking as it gives me a great finished image in camera 95% of the time. I usually start with 8 for the number of shots and 7 for the focus differential and go from there. If my foreground subject is completely parallel to my lens, I will go for a lower f-stop to get as much light as possible and will play with the focus differential until I get a satisfying image.
I am always looking for a blurred background with a sharp and detailed subject captured in my water drop as well as a mostly sharp foreground subject. You will have to experiment and practice to get it right, so don’t limit yourself to one shot. Try a single shot, then focus stack and play with all the tools available.

Be Creative and Have Fun
Don’t have Christmas decorations out yet? Maybe you have an old photo on your computer or tablet that you can use as a background and main subject. One of the huge perks of using a photo is that you can put it upside down on your tablet or computer and it will show up like normal in your water drop. Try putting your Christmas tree upside down in real life - probably not an option, right? Another advantage of using an iPad is that you can set the brightness of the display on high to make your water drop stand out. To make this image, I used a stock photo of a Christmas tree I got from an online design and publishing platform I subscribe to.
Once you understand the basic concept, experiment and have fun. There are so many ways to capture refractions and be creative.

1.6s | F4.5 | ISO 200
Tips
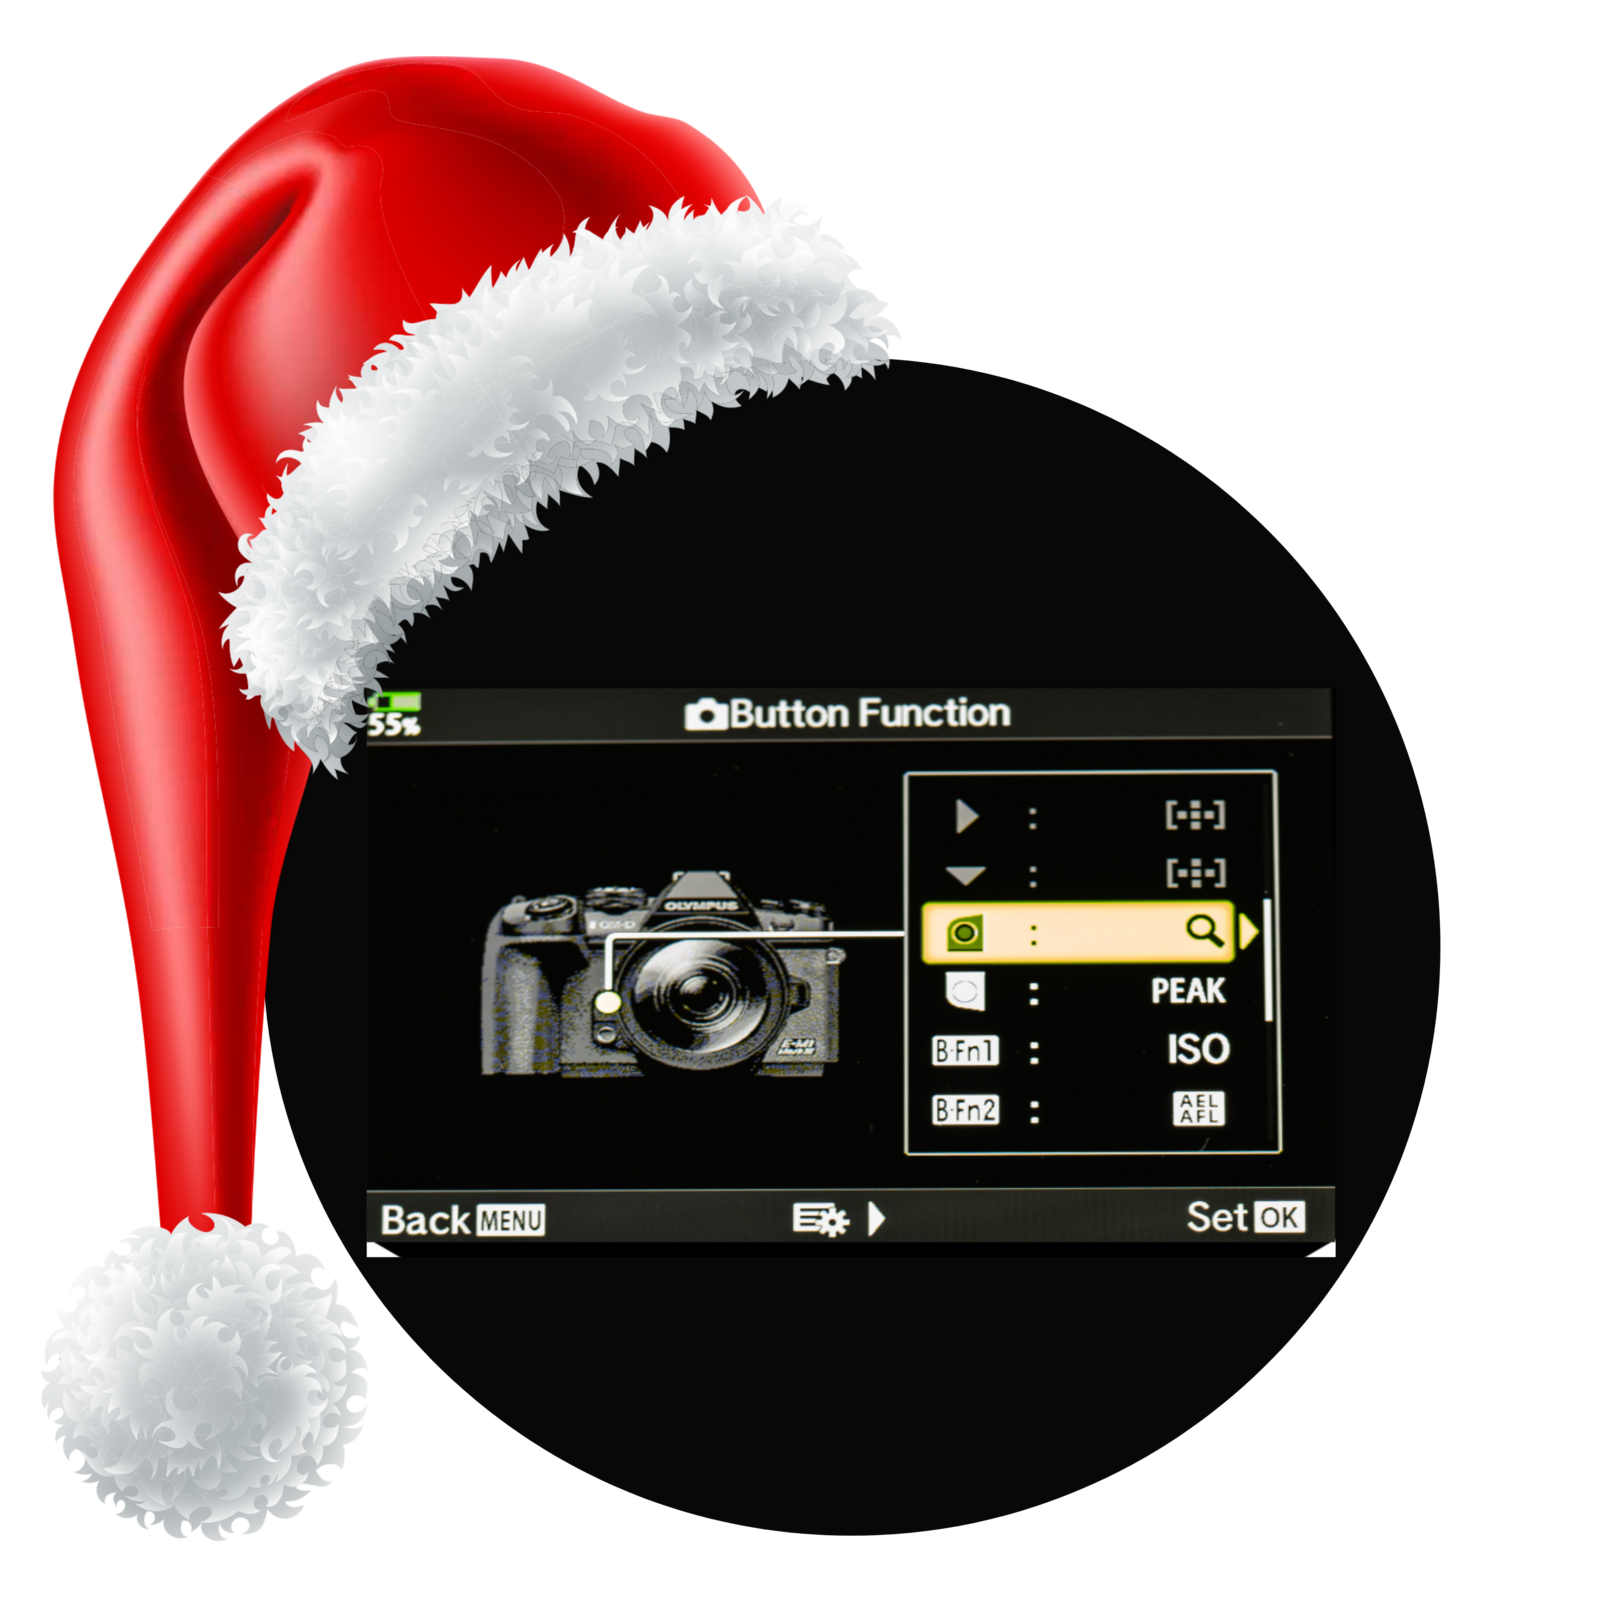
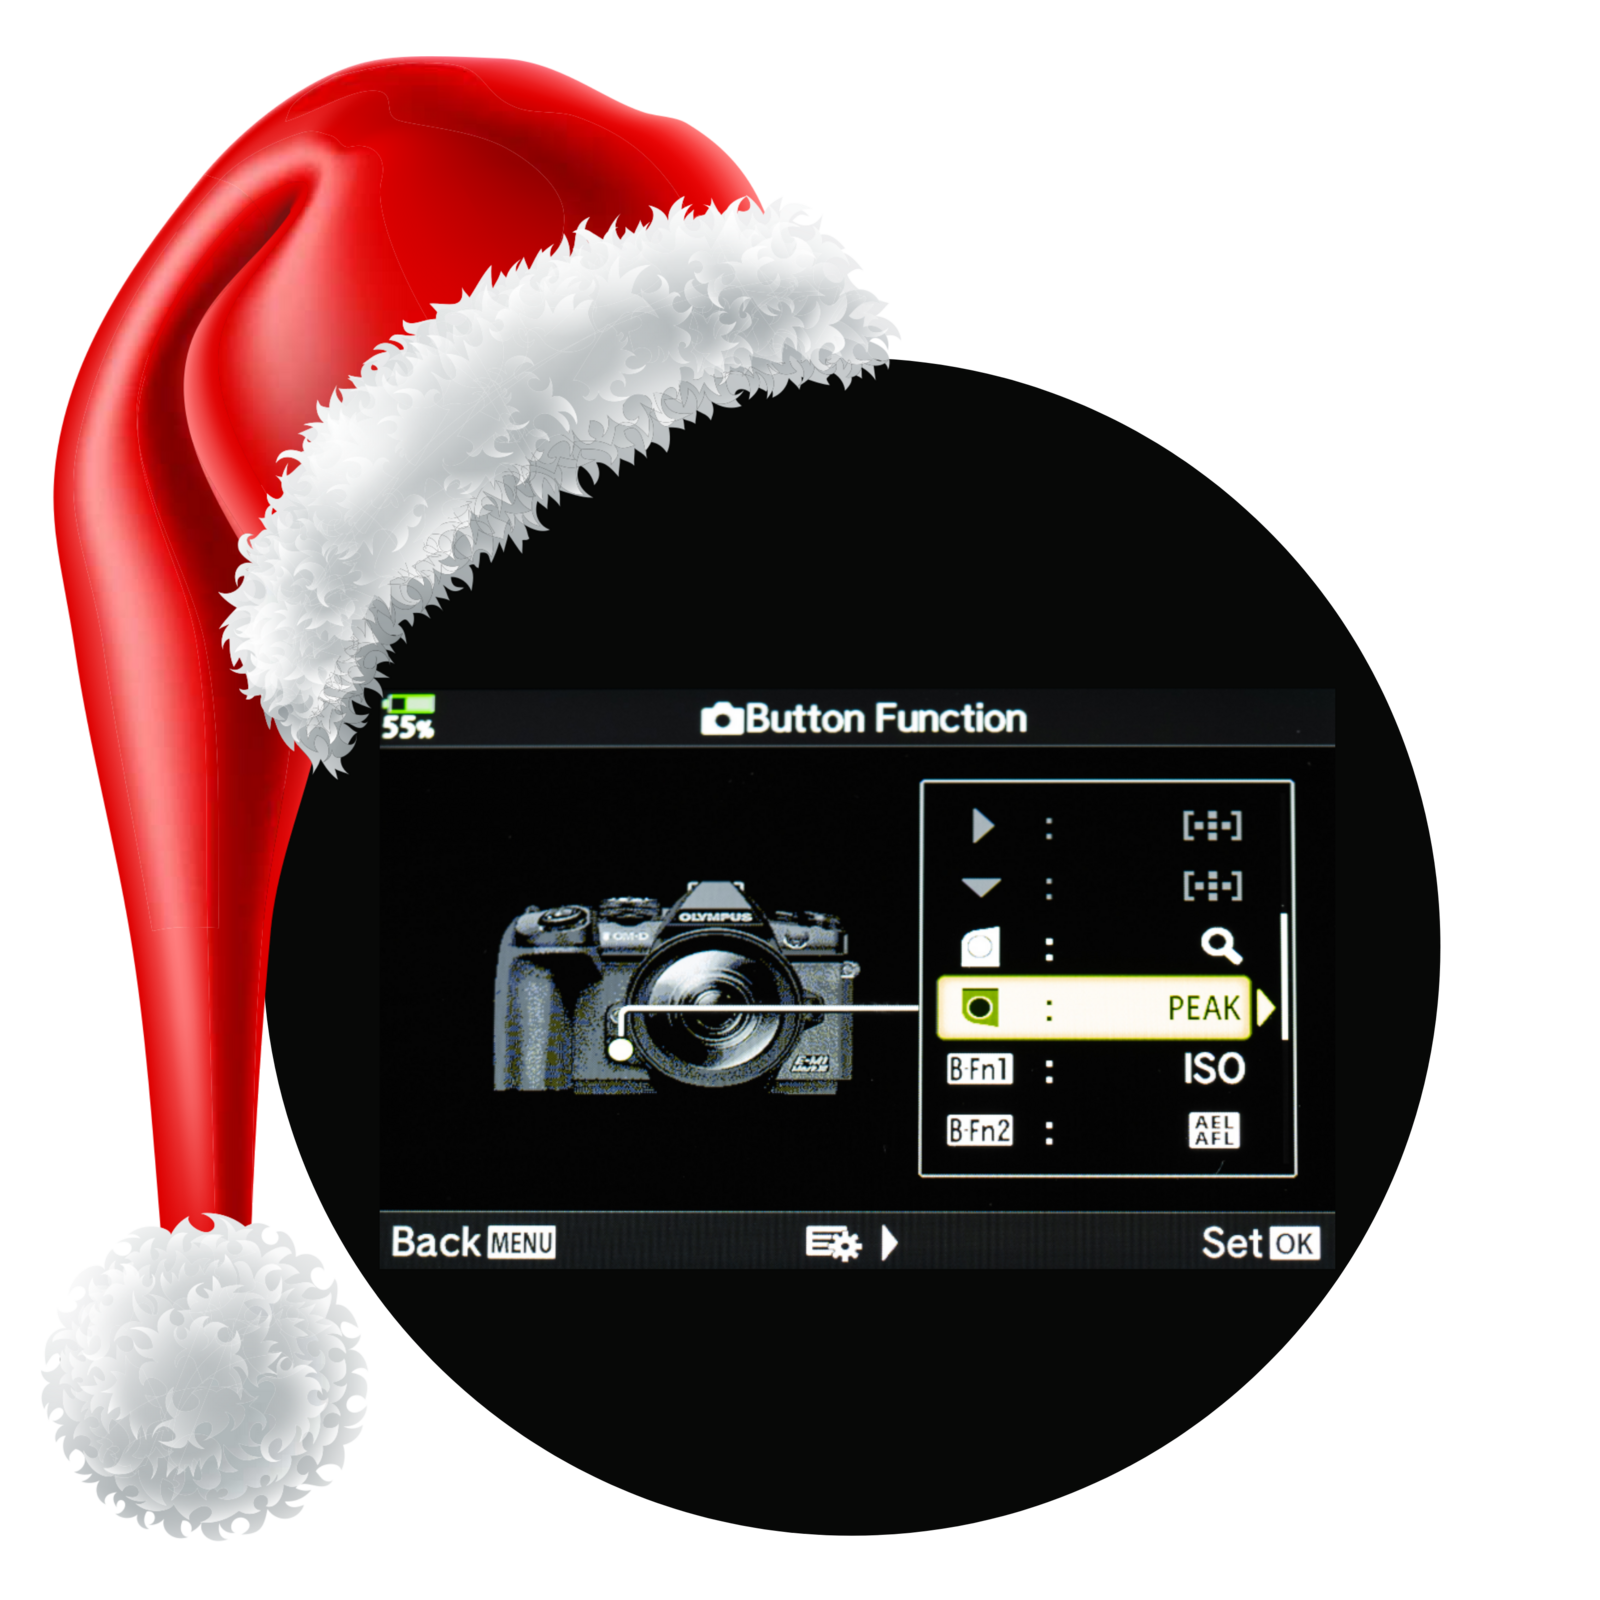
My last tip before wishing you a ho ho ho happy holiday is to remember to use the magnification and peaking function of your camera. Setting up a dedicated button for those two tasks will ensure a sharp image. You can use both functions to make sure your subject is sharp in all your drops.
Instagram: @emilietalpin
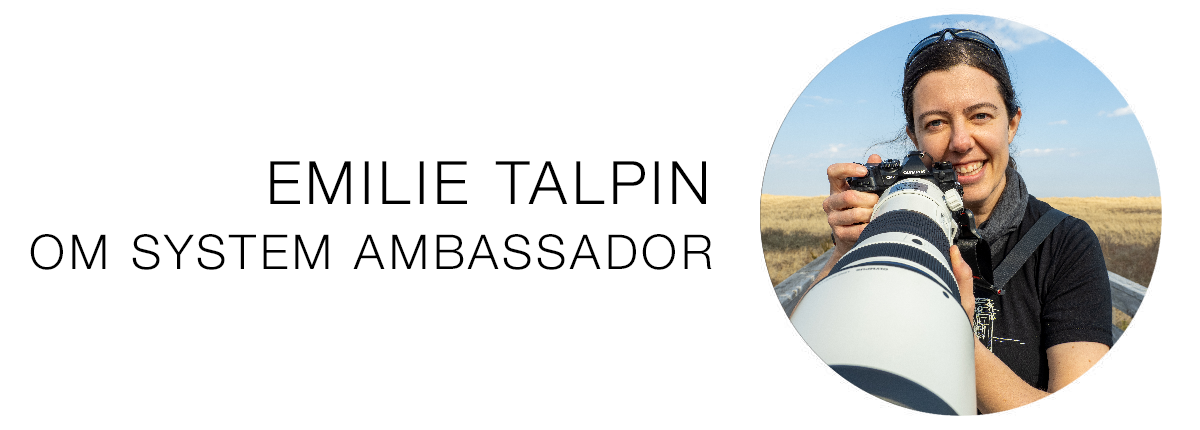
Emilie Talpin is a French teacher and photographer based in New Hampshire who is passionate about macro, wildlife, night sky and videography. When not in front of her classroom, she loves traveling, exploring the outdoors, and chasing her next photo.