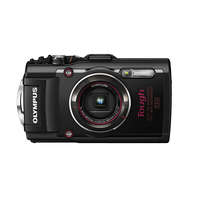
Tough TG-4 Support Topics
What kinds of SCN (Scene) modes are available?
In SCN (Scene) mode, you can shoot in an appropriate setting by selecting a subject or shooting scene.
Set the mode dial to SCN, and then select a sub mode from 22 modes.

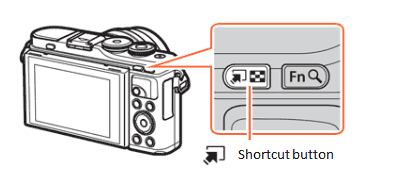
When the mode dial is already set to SCN (Scene) mode, press the
button to select other sub modes
Camera settings are limited to maximize the effect of each Scene mode.
Available SCN (Scene) modes:
| Sub mode 1 | Sub mode 2 | Description |
|---|---|---|

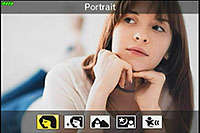
|
Suitable for portrait shooting. Brings out skin texture. |
|
|
|
Smooths out skin tones and texture. This mode is suitable when viewing images on a high-definition TV. The camera records two pictures: one with the effect applied and one without. |
|
|
|
Suitable for portraits with a landscape in the background. Blues, greens, and skin tones are captured beautifully. |
|
| Suitable for portrait shooting against a background of night view.Raise the flash manually. The use of a tripod and remote control via OI.Share is recommended. |
||
| Suitable for photographs of children or other active subjects. | ||

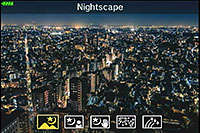
|
|
Suitable for shooting of night scenes using a tripod to hold the camera steady. The camera uses a slower shutter speed than normal.The use of a tripod and remote control via OI.Share is recommended. |
| Suitable for portrait shooting against a background of night view.Raise the flash manually. The use of a tripod and remote control via OI.Share is recommended. |
||
| Suitable for shooting night scenes without using a tripod. Reduces blur when shooting low light/illuminated scenes. The camera makes eight exposures and combines them into a single photograph. |
||
|
|
Suitable for shooting fireworks at night. The camera uses a slower shutter speed than normal. The use of a tripod and remote control via OI.Share is recommended. |
|
| With normal long exposure, an image of light trace such as star trails with bright buildings tends to get too bright. Using Live Composite mode, you can capture such images without over exposure while checking the progress on the monitor. Press the shutter button to start shooting. While the camera automatically shoots multiple images, you can view the changing result on the monitor. Press the shutter button again to end shooting once the desired result is achieved (maximum 3 hours). The use of a tripod and remote control via OI.Share is recommended. |
||
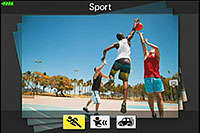
|
|
Suitable for fast action shooting. |
| Suitable for photographs of children or other active subjects. | ||
| Suitable for photographs of moving subjects with a blurred background. The camera chooses the optimal shutter speed for panning shots based on camera motion. | ||

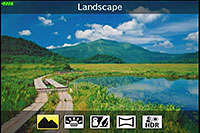
|
|
Suitable for landscape shooting. |
| Suitable for shooting the sunset. | ||
| Suitable for shooting at snow-capped mountains, seascapes in the sun, and other whitish scenes. | ||
|
|
You can shoot and combine multiple images to create an image with a wide angle of view (panoramic image), approximately double that of normal shots. | |
|
|
Suitable for high-contrast scenes. Each time the shutter button is pressed, the camera takes four shots and subsequently merges them into one properly exposed image. |
|
|
|
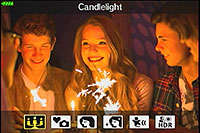
Suitable for shots of candlelit scenes. Warm colors are preserved. |
| Disable camera sounds and lights in situations in which they may be unwelcome. | ||
| Suitable for portrait shooting. Brings out skin texture. |
||
| Smooths out skin tones and texture. This mode is suitable when viewing images on a high-definition TV. The camera records two pictures: one with the effect applied and one without. |
||
| Suitable for photographs of children or other active subjects. | ||
| Suitable for high-contrast scenes. Each time the shutter button is pressed, the camera takes four shots and subsequently merges them into one properly exposed image. |
||

|
|
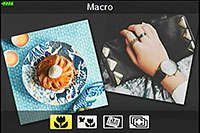
Suitable for close-ups. |
|
|
Suitable for vivid close-ups of flowers or insects. | |
|
|
Suitable for photos of timetables or other documents. The camera heightens the contrast between the letters and background. |
|
| The camera takes up to eight images at once at different focus positions. |
What differentiates the AUTO mode from P (Program shooting) mode?
The followings describes the differences:
In AUTO mode, the camera determines the appropriate settings for the shooting conditions and subjects.
The camera automatically sets to the best suited shooting mode such as Landscape, Portrait, Portrait + Nightscape or Macro. AUTO mode is convenient for beginners.
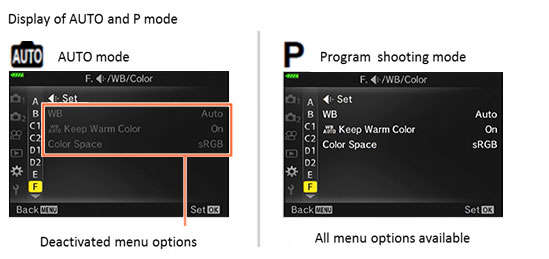
Camera settings cannot be changed, except some menu options, because this is a fully automatic mode. Use the Live Guide to easily adjust color, brightness and background blurring.
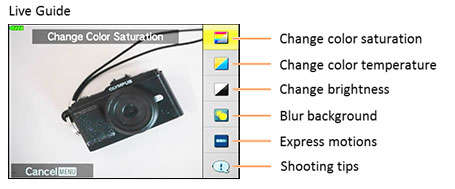
P mode is for program shooting. The camera automatically sets the optimum aperture and shutter speed based on the lighting conditions. Shooting settings such as exposure compensation, white balance and sequential shooting can be changed.
After getting used to shooting with the camera using the AUTO mode, SCN mode or AP mode, we recommend you to use the P mode for changing to the desired settings manually.
Note:
In AUTO mode, the camera may not set to the desired shooting mode depending on the shooting condition.
What differentiates the E-M1 Mark II from the E-M1?
|
|
|
|---|---|---|
| Type | ||
| Lens Mount | Micro Four Thirds Mount | |
| Image Sensor | ||
| Image Processor | TruePic VIII | TruePic VII |
| Effective Pixels | 20.37 million pixels | 16.28 million pixels |
| Sensor Type | 4/3 Live MOS Sensor | |
| Image Stabilization | ||
| System Type | Built-in image stabilization (5-axis sensor-shift) |
|
| Viewfinder | ||
| Finder Type | Built-in Eye-level electronic viewfinder, approx. 2.36 million dots | |
| Field of View / Viewfinder Magnification |
|
|
| Frame Rate / Time Lag | Maximum frame rate: 120 fps Minimum display time lag: 5 msec |
Maximum frame rate: 60 fps Minimum display time lag: 16 msec |
| Monitor | ||
| Monitor | 3.0 inches, 2-axis movable LCD Approx. 1,040,000 dots (3:2) Electric capacity touch panel |
3.0 inches, movable (tilt) LCD Approx. 1,040,000 dots (3:2) Electric capacity touch panel |
| Focus | ||
| AF System | High-speed imager AF
|
|
| AF Area | 121 points (maximum), cross-type detection (When a Four Thirds lens is attached: 121 points) All target (121 points) Group target (9 points or 5 points) Single target (1 point) |
81 points (maximum), vertical detection (When a Four Thirds lens is attached: 37 points.) All target (81 points) Group target (9 points) Single target (1 point) |
| Focus Modes | Single AF (S-AF), Continuous AF (C-AF), Manual Focus (MF), S-AF+MF (combined use of S-AF and MF) AF tracking (C-AF+TR) Preset MF (Distance setting values are rough estimates and only AF lenses can be used.) |
Single AF (S-AF) Continuous AF (C-AF) Manual Focus (MF) S-AF+MF (combined use of S-AF and MF) AF tracking (C-AF+TR) |
| Zoom Frame AF / Zoom AF | 3x, 5x, 7x, 10x, 14x Autofocusing is possible in the magnified frame. On / OFF/ Magnify is possible by the magnified button. Selection of AF points from over 800 is possible. |
|
| AF Targeting Pad | Available | Not available |
| ISO Sensitivity / Shutter | ||
| ISO Sensitivity | Auto: ISO LOW (equivalent to approx. 64) - 6400 (Auto Standard: ISO 200 - 6400, changeable) Manual: LOW, ISO200 - 25600 |
Auto: ISO LOW (equivalent to 100) - 1600 (Auto standard: ISO 200 -25600, changeable) Manual: LOW, ISO 200 - 25600 |
| Shutter Speed | 60 sec. - 1/8000 sec. Electronic Shutter (in Silent Mode) 60 sec. - 1/32000sec. |
60 sec. - 1/8000 sec. Electronic Shutter (in Silent Mode) 1/8 sec. - 1/16000 sec. |
| Drive | ||
| Sequential Shooting Speed |
|
|
| Flash | ||
| Bundled Flash | External flash FL-LM3 (Hot shoe included) GN 9.1 (ISO100) / GN 12.9 (ISO200) Bounce capable |
External flash FL-LM2 (Hot shoe included) GN 7 (ISO100) / GN 10 (ISO100) |
| Shooting Features | ||
| Picture Mode | i-Enhance, Vivid, Natural, Muted, Portrait, Monotone, Custom, e Portrait, Underwater,Color Creator, Art Filters | |
| Art Filter |
|
|
| 50M High Res Shot | Available *1
|
Not available |
| Function Lever | Available | |
| Multi Function Settings | Highlight & Shadow Control Color Creator Magnify Image Aspect S-OVF (Simulated OVF) ISO sensitivity / White Balance White Balance / ISO sensitivity Peaking |
Highlight & Shadow Control Color Creator Magnify Image Aspect S-OVF (Simulated OVF) |
| Pro Capture Mode | Available | Not available |
| Focus Stacking Mode | Available Compatible lenses: 7 types |
Available Compatible lenses: 3 types (7 types are compatible with E-M1 firmware ver. 4.2.) |
| Multi-Exposure | 2 frames max. | |
| Electronic Zoom Speed | Low / Normal / High | |
| Lens Info Settings | Available Save lens info for up to 10 lenses that do not automatically supply info to the camera. |
Not available |
| Video | ||
| Video Recording Format | MOV (MPEG-4AVC/H.264), AVI (Motion JPEG) | |
| 4K Video | C4K [Cinema4K] (4096 x 2160) 4K (3840 x 2160) |
Not available |
| HD Video | Full HD (1920 x 1080) | |
| Level Gauge | ||
| Detection | 2-axis | |
| Wi-Fi Function | ||
| Built-in Wi-Fi (using Smartphone application OI.Share) |
|
|
| Menu Language | ||
| Language Setting | 34 languages (including Japanese and English) | |
| Input / Output | ||
| Live View Shooting on a Computer | Available using OLYMPUS Capture |
|
| HDMI Output Mode | Available Monitor Mode (Video and information display to the monitor) Record Mode (Outputs video only to record video with a device) |
Not available |
| HDMI Connector | HDMI Micro Connector (Type D) | |
| USB Connector | CB-USB11 (USB Type C / USB3.0) | CB-USB6 (Multi Connector / USB2.0 Hi-Speed) |
| Remote Cable | RM-CB2 (L type, Pin Jack) | RM-UC1 (RM-UC1 connects to the USB connector port) |
| Accessory Port (AP2) | Not available | Available |
| Headphone Connector | Available | Not available |
| Power Requirements | ||
| Number of Recordable Pictures |
|
|
| Battery Status Display | Battery icon (4 steps) and Percentage display | Battery icon (3 steps) display |
| Battery | Lithium-ion rechargeable battery BLH-1 (7.4V 1720mAh) |
Lithium-ion rechargeable battery BLN-1 (7.6V 1220mAh) |
| Battery Charger | BCH-1 (Charging takes about 2 hours) |
BCN-1 (Charging takes about 4hours) |
| Power Battery Holder (Sold Separately) |
HLD-9 | HLD-7 |
| Body | ||
| Dimensions (Excluding Protrusions) | 134.1 mm (W) x 90.9 mm (H) x 68.9 mm (D) / 5.3" (W) x 3.6" (H) x 2.7" (D) | 130.4 mm (W) x 93.5 mm (H) x 63.1 mm (D) / 5.1" (W) x 3.7" (H) x 2.5" (D) |
| Weight |
|
|
| Color | Black | Black, Silver |
| Material | Magnesium alloy | |
| Dust-proof, Splash-proof | Available | |
| Underwater Housing (Sold Separately) |
PT-EP14 | PT-EP11 |
| Memory | ||
| Number of Card Slots | 2 card slots | 1 card slot |
| Memory | SD cards (SDHC, SDXC, UHS-I / II compatible) Eye-Fi card
|
SD cards (SDHC, SDXC, UHS-I compatible) Eye-Fi card |
| Folder Creation and Selection | Available | Not available |
| Other | ||
| Release Date | December 2016 | Black: October 2013 Silver: October 2014 |
| Refer to the Product's Page | E-M1 Mark II | E-M1 |
What comes packaged with the camera?
The following items are packaged with the camera:
- E-M1 MarkII camera body
- Lithium-ion Rechargeable Battery (BLH-1)
- Lithium-ion Battery Charger (BCH-1)
- Eyecup (EP-12)
- Flash (FL-LM3)
- USB cable (CB-USB11, USB Type C)
- Body Cap
- Cable Clip (CC-1)
(The Cable Clip prevents the USB cable or HDMI cable from coming off the camera.) - Strap
- Flash Case
- Instruction Manual
- Warranty Card
What does the computer screen look like when a camera with two inserted SD cards is connected to the computer?
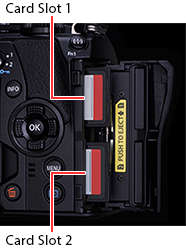
When connecting the camera to a computer using the USB cable, with SD cards inserted in both of the camera's card slot 1 and 2
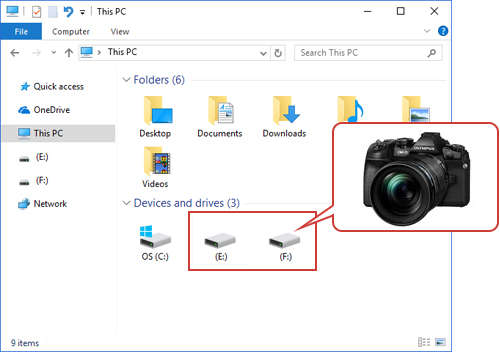
When the E-M1 Mark II is connected to the computer, the camera will be recognized as the external drive (removable disk). Two separate drives are displayed on the computer, each one for the camera's card slot 1 and slot 2.
Windows:
When connecting the camera to a computer using the USB cable, two drive letters for card slot 1 and slot 2 are displayed in ascending alphabetical order. In the following illustration, for example, drive "E:" is slot 1 and "F:" is slot 2.
Macintosh:
When connecting the camera to a computer using the USB cable, card slot 1 and slot 2 are displayed as "NO NAME".
When transferring images to the computer using OLYMPUS Viewer 3 software
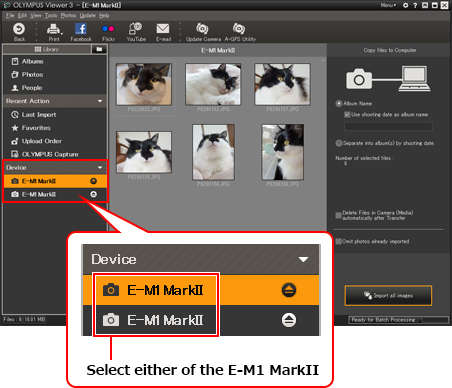
When a camera with two inserted media cards is connected to the computer using the USB cable, each card is displayed as "E-M1 Mark II" in the left side of the OLYMPUS Viewer 3 window. You can switch the display of card slot 1 and slot 2 by selecting either of the listed "E-M1 Mark II". For displaying the images in card slot 1, select the upper "E-M1 Mark II".
How do I set the options for shooting still images with two cards inserted into the camera?
 Save Settings how to record the shooting data to each card.
The available settings are Standard, Auto Switch, Dual Independent and Dual Same. Standard is the default setting. In Auto Switch, the recording switches to the other card when the card in use becomes full. In Dual Independent, the images in the two cards are recorded in different image quality modes. In Dual Same, the images in the two cards are recorded in the same image quality mode.
These settings are available for still image shooting.
Note:
In video shooting, you can select the card slot (card slot 1 or 2) for the recording.
- Press the [OK] button to display the LV super control and use the arrow pad button to select
 Save Settings.
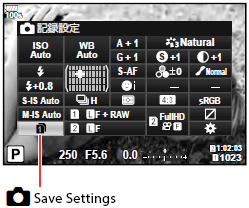
- Select a menu using the front dial.
You can also change the setting in the following procedure:
Press the [Menu] button to display
 Record / Erase, select Card Slot Settings. Select the desired setting in
  Save Settings.
| Save Settings | Description |
|---|---|
|
|
This setting is applied if only one card with available space is in the camera. If two cards with available space are in the camera, images are recorded to the card specified in |
|
|
When the card specified in |
|
|
Images are recorded at the image quality mode specified for each card in slot 1 and 2. Shooting will no longer be possible when either of the cards becomes full. Note that the image quality mode changes when Dual independent |
|
|
Images are recorded at the image quality mode specified for each card in slot 1 and 2. When either of the cards becomes full, recording switches to the card with available space. Note that the image quality mode changes when Dual independent |
|
|
Images are recorded at the same image quality mode for both cards. Shooting will no longer be possible when either of the cards becomes full. |
|
|
Images are recorded at the same image quality mode for both cards. When either of the cards becomes full, recording switches to the card with available space. |
- The image quality mode may change if you change the option selected for
 Save Settings or replace a memory card with one that can contain a different amount of additional photographs. Check the image quality mode before taking photographs.
 - Do not remove the battery or card while the card write indicator is displayed on the upper left of the monitor.
- Turn off the camera before loading or removing the card.
- Cards must be formatted with the camera before first use.
- If a UHS-II card is inserted into the slot 2 (UHS-I compatible), the card operates as the UHS-I.
- Do not forcibly insert a damaged or deformed card. Doing so may damage the card slot.
- Multiple Eye-Fi cards cannot be used at the same time.
I want to record still images and videos on a different SD card. What should I do?
When there are SD cards in both card slots, you can select whether to record still images and videos in the same card or record them in a separate card.

Note:
The following procedure explains how to change the Card Slot Settings:- Press the [MENU] button to display
 Custom Menu. In
  Record / Erase, select Card Slot Settings and press the [OK] button.
 - Select the card slot where to save still images.
Use the arrow pad Up and Down button to select Save Slot. Press the arrow pad Right button to select
  (Slot 1) or
  (Slot 2) and press the [OK] button.
 - Select the card slot where to save videos.
In Card Slot Settings, use the arrow pad Up and Down button to select Save Slot. Press the arrow pad Right button to select
  (Slot 1) or
  (Slot 2) and press the [OK] button.
- Do not remove the battery or card while the card write indicator is displayed on the upper left of the monitor.
- Turn off the camera before loading or removing the card.
- Cards must be formatted with the camera before first use.
- If a UHS-II card is inserted into the slot 2 (UHS-I compatible), the card operates as the UHS-I.
- Do not forcibly insert a damaged or deformed card. Doing so may damage the card slot.
- Multiple Eye-Fi cards cannot be used at the same time.
How do I switch to the other card slot during playback?
You can switch the card slot (Card Slot 1 or Card Slot 2) during playback by turning the Front dial or Rear dial while depressing the ![]() (Playback) button.
(Playback) button.
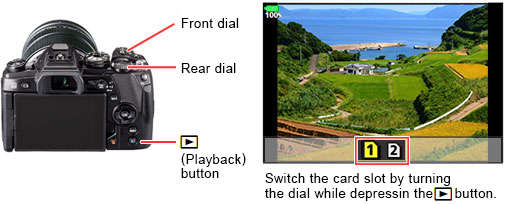
Note:
The change of playback card by this operation does not affect the ![]() Slot setting of Card Slot Settings.
Slot setting of Card Slot Settings.
What is the available recording time for movies, in each movie mode?
| Recording Format | Imge Size (Number of Pixels) |
Compression | Frame Rate (Image per second) *3 |
Bit Rate *4 | Storable Recording Time (in 32 GB SDHC card) |
|---|---|---|---|---|---|
| MOV (MPEG-4AVC/H.264) *1 |
C4K 4096 x 2160 |
- | 24p | Approx. 237 Mbps | Approx. 17 min. |
| 4K 3840 x 2160 |
- | 30p, 25p, 24p | Approx. 102 Mbps | Approx. 40 min. | |
| Full HD 1920 x 1080 |
ALL-Intra (A-I) *5 | 30p, 25p, 24p | Approx. 202 Mbps | Approx. 20 min. | |
| Super Fine | 60p, 50p, 30p, 25p, 24p | Approx. 52 Mbps | Approx. 1 h 20 min. | ||
| Fine | Approx. 30 Mbps | Approx. 2 h 19 min. | |||
| Normal | Approx. 18 Mbps | Approx. 3 h 55 min. | |||
| HD 1280 x 720 |
ALL-Intra | 60p, 50p, 30p, 25p, 24p | Approx. 102 Mbps | Approx. 40 min. | |
| Super Fine | Approx. 26 Mbps | Approx. 2 h 41 min. | |||
| Fine | Approx. 14 Mbps | Approx. 5 h 5 min. | |||
| Normal | Approx. 10 Mbps | Approx. 7 h 14 min. | |||
| AVI (Motion JPEG) *2 |
HD 1280 x 720 |
- | 30p | - | Approx. 1 h 50 min. |
- *1 The maximum file size of a movie is limited to 4 GB. When a movie exceeds 4 GB, the movie is saved as a new file.
The maximum recording time per movie is 29 min. - *2 The maximum file size of a movie is limited to 2 GB.
- *3 Frame rate may vary based on the selected art filter or movie effect.
- *4 When set to the maximum frame rate.
- The actual recorded bit rate varies depending on the shooting scene or combination of frame rates.
- *5 All-Intra refers to a movie recorded without inter-frame compression. Movies in this format are suitable for editing but have a larger data size.
How to change the image size, compression and frame rate
You can change the image size (Full HD / HD), compression and frame rate (image per second) of MOV format movies in the following procedure:
- Change the setting from menu screen
Press the [MENU] button. In Video Menu, select
  Specification Settings. Change the settings in
  .
. - Change the setting from the super control panel
In the super control panel, select and press the [OK] button. Press the [Info] button to change the setting.
Use a Speed Class 10 SD card for movie recording. When shooting in ALL-Intra, use a Class 3 UHS-II or UHS-I card.
 Compatibility table for Media Card ( OM-D / PEN series )
- You cannot change the image size, compression and frame rate in AVI format movies.
- Depending upon the memory card, the recording may stop without utilizing the maximum time.
