Tough TG-4 Support Topics
What differentiates the iAUTO (AUTO) mode from P (Program shooting) mode?
The followings describes the differences:
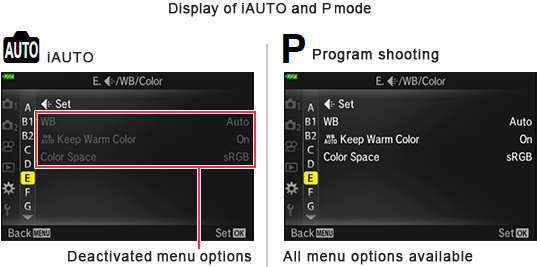
In iAUTO (AUTO) mode, the camera determines the appropriate settings for the shooting conditions and subjects such as people, scenery or nightscapes. The camera then sets to the best suited shooting mode (e.g. Portrait, Macro or Scenery). Camera settings cannot be changed, except some menu options, because this is a fully automatic mode.
P mode is for program shooting. The camera automatically sets the optimum aperture and shutter speed based on the lighting conditions. Shooting settings such as exposure compensation, white balance and sequential shooting can be changed.
iAUTO mode is convenient for beginners. After getting used to shooting with the camera using the iAUTO mode, we recommend you to use the P mode for changing to the desired settings manually.

Available settings for iAUTO mode and P mode:
✔: Setting possible- : Setting not possible
| Menu option | Shooting mode | Note | |
|---|---|---|---|
| iAUTO mode | P mode | ||
| Exposure Compensation | - | ✔ | |
| Picture Mode | - | ✔ | |
| ISO | - | ✔ | |
| White Balance | - | ✔ | |
| AF Mode | - | ✔ | |
| Aspect | ✔ | ✔ | |
| Image quality (still images) | ✔ | ✔ | |
| Record Mode (movies) | * | * | 4K or HS is selectable in movie mode. |
| Flash | * | ✔ | Flash Auto or Flash Off is selectable when iAUTO is used. |
| Flash Compensation | - | ✔ | |
| Image stabilizer(still images) | - | ✔ | |
| Image stabilizer (movies) | - | - | |
| Drive / Self-timer | * | ✔ | Pro capture shooting is not selectable when iAUTO is used. |
| Metering Mode | - | ✔ | |
| Face Priority | - | ✔ | |
| Accessory | * | ✔ | FD-1 is not selectable when iAUTO is used. |
| Reset/Assign Custom Modes | ✔ | ✔ | |
| AF Area | ✔ | ✔ | |
| AF Illuminator | ✔ | ✔ | |
| Interval Shooting | - | ✔ | |
| Focus BKT | - | ✔ | |
| Movie Recording | ✔ | ✔ | |
| Recording Volume | ✔ | ✔ | |
| Video Frame Rate | ✔ | ✔ | |
| Video Bet Rate | ✔ | ✔ | |
In iAUTO mode, the camera may not set to the desired shooting mode depending on the shooting condition.
What kinds of SCN (Scene) modes are available?
Set the mode dial to SCN, and then select a sub mode from 16 modes.

When the mode dial is already set to SCN (Scene) mode, press the arrow pad Left button to select other sub modes.
Available SCN (Scene) modes:
| Sub mode 1 | Sub mode 2 | Description |
|---|---|---|
|
|
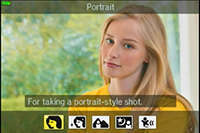
Suitable for portrait shooting. |
|
|
Smoothes out skin tones and texture. This mode is suitable when viewing images on a high-definition TV. | |
|
|
Suitable for portraits with a landscape in the background. | |
|
|
Suitable for portrait shooting against a background of night view. | |
|
|
Suitable for photographs of children or other active subjects. | |
|
|
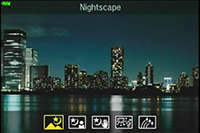
Suitable for shooting of night scenes using a tripod to hold the camera steady. |
|
|
Suitable for portrait shooting against a background of night view. | |
|
|
Suitable for shooting night scenes without a tripod. Reduces blur when shooting low light/illuminated scenes. | |
|
|
Suitable for shooting fireworks at night. | |
|
|
The camera automatically shoots multiple images and composites them into a single image, composing only the newly taken bright areas. With normal long exposure, an image of light trace such as star trails with bright buildings tends to get too bright. Using Live Composite mode, you can capture such images without over exposure while checking the progress on the monitor. | |
|
|
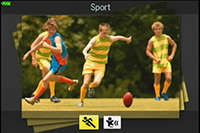
Suitable for fast action shooting. |
|
|
Suitable for photographs of children or other active subjects. | |
|
|
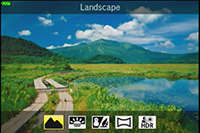
Suitable for landscape shooting. |
|
|
Suitable for shooting the sunset. | |
|
|
Suitable for shooting at snow-capped mountains, seascapes in the sun, and other whitish scenes. | |
|
|
You can shoot and combine multiple images to create an image with a wide angle of view (panoramic image). | |
|
|
Suitable for contrasting scenes. This mode captures multiple images and merges them into one properly exposed image. | |
|
|
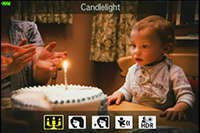
Suitable for shots of candlelit scenes. Warm colors are preserved. |
|
|
Suitable for portrait shooting. | |
|
|
Smoothes out skin tones and texture. This mode is suitable when viewing images on a high-definition TV. | |
|
|
Suitable for photographs of children or other active subjects. | |
|
|
Suitable for contrasting scenes. This mode captures multiple images and merges them into one properly exposed image. |
What kinds of shooting modes are available for underwater photography?
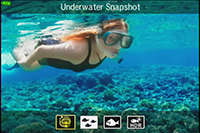
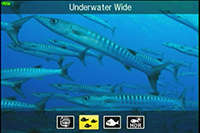
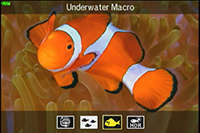
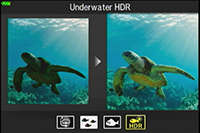
Underwater mode enables you to take underwater pictures in appropriate settings by selecting a sub mode best suited for the subject or scene.
The TG-5 camera is waterproof up to depths of 15 meters without a separate sold underwater protector.
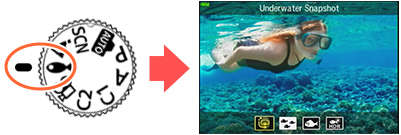
Turn the mode dial to ![]() (Underwater mode) for underwater photography. Select the appropriate shooting mode from
(Underwater mode) for underwater photography. Select the appropriate shooting mode from ![]() (Underwater Snapshot),
(Underwater Snapshot), ![]() (Underwater Wide),
(Underwater Wide), ![]() (Underwater Macro) and
(Underwater Macro) and ![]() (Underwater HDR) using the arrow pad Right and Left button or the control dial.
(Underwater HDR) using the arrow pad Right and Left button or the control dial.
When the mode dial is already set to ![]() (Underwater mode), press the arrow pad Left button to select other sub modes.
(Underwater mode), press the arrow pad Left button to select other sub modes.
Available Underwater modes:
| Sub mode | Description |
|---|---|
|
|
|
|
|
|
|
|
|
|
|
|
- The camera should not be used underwater exceeding 60 minutes or at depths that exceed 15 meters.
- For using the camera at the depths exceeding 15 meters, use the underwater housing PT-058 (sold separately) that protects the camera down to depths of 45 meters.
While using the underwater housing, sensor systems such as GPS and atmosphere pressure do not operate correctly.
What kinds of Microscope modes are available?
![]() (Microscope mode) lets you shoot from as close as 1 cm and as close as 30 cm to your subject. You can shoot images with long depth of field, and perform focus bracket shooting with setting the number of shots. (In normal shooting mode like P mode, you can shoot from 10 cm at the closest distance.)
(Microscope mode) lets you shoot from as close as 1 cm and as close as 30 cm to your subject. You can shoot images with long depth of field, and perform focus bracket shooting with setting the number of shots. (In normal shooting mode like P mode, you can shoot from 10 cm at the closest distance.)
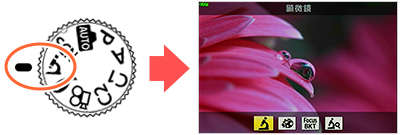
Turn the mode dial to ![]() (Microscope mode). Select the appropriate sub mode from Microscope, Focus Stacking, Focus Bracketing and Microscope Control.
(Microscope mode). Select the appropriate sub mode from Microscope, Focus Stacking, Focus Bracketing and Microscope Control.
When the mode dial is already set to ![]() (Microscope mode), press the arrow pad Left button to select other sub modes.
(Microscope mode), press the arrow pad Left button to select other sub modes.
Available Microscope modes:
| Sub mode | Description |
|---|---|
|
|
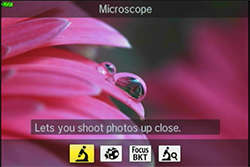
|
|
|
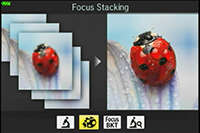
|
|
(Focus Bracketing) |
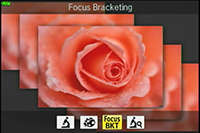
The number of images and shooting steps can be set after selecting a sub mode in |
|
|
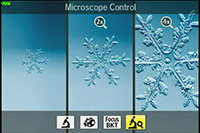
You can change the magnification level to 1x, 2x or 4x by pressing the arrow pad Right button. Up to 44.4x ( 35 mm equivalent: 28x) is possible when using the zoom simultaneously. For example, when shooting from as close as 1 cm to the subject, a 1 mm subject can be magnified to up to 44 mm on the monitor. At high magnification levels, the image may become grainy. |
- Shooting distance in Microscope mode is from 1 cm to 30 cm.
- The use of tripod is recommended for shooting in Focus Stacking or Focus BKT.
Accessories (sold separately) useful for shooting in Microscope mode:
Useful accessories (sold separately) are available to utilize the built-in flash or LED illuminator of the TG-5 for shooting in Microscope mode.- Flash Diffuser FD-1
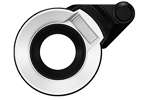
The FD-1 can be utilized under water.
- LED Light Guide LG-1
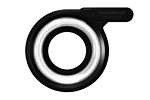
The LG-1 cannot be utilized under water.
What differentiates the LED Light Guide LG-1 from the Flash Diffuser FD-1?
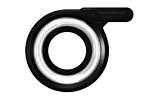
LG-1 |
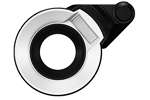
FD-1 |
|
| Compatible Cameras | TG-5, TG-4, TG-3, TG-2, TG-1 | TG-5, TG-4* (*Firmware update is required for the TG-4) |
| Light Source | Built-in LED light | Built-in flash |
| Shooting Distance | 1 - 10 cm *The distance from the lens front |
2 - 30 cm *The distance from the lens front |
| Underwater Usage | Not usable | Usable |
| Light Control | Not available | Available * 2 light volumes can be selected on the FD-1:  (Normal) and
 (Low)
(Low) |
LED Light Guide LG-1
The LED Light Guide LG-1 uses the LED on the front of the camera to illuminate your subject.
In addition to lighting your subject while the image is taken, the LG-1 also assists in composing your image, as the constant light source illuminates the subject. When using the LG-1 the camera's closest focusing distance is 1 cm, allowing the camera to lay flat on the subject and still focus.
Flash Diffuser FD-1
The Flash Diffuser FD-1 uses the in-camera flash to illuminate your subject.
The in-camera flash offers a significant increase in the amount of light. This increase in light allows for usage of lower ISO settings and faster shutter speeds, as well as an increased working distance. The FD-1 can also be utilized under water. The camera's closest focusing distance to the subject is 2cm.
When using the FD-1
- To use the Light Control on TG-4, update the firmware of your camera.
- You can attach the FD-1 to the TG-3, TG-2 and TG-1 camera, but results may vary because the firmware does not support these products.
Where can I find the instruction manual for my camera?
You can find the manual online. You can either read it online or download the instruction manual for your camera.
See the following Web page to find the available manuals:
 Download Manuals
I want to shoot pictures using the LED light guide (LG-1). What should I do?
You can avoid uneven LED illumination using the LED light guide (LG-1, sold separately).
The LG-1 enables the camera to illuminate the subject evenly when shooting at close distances.
The following explains how to attach the LED light guide (LG-1) to the camera and how to activate the built-in LED.
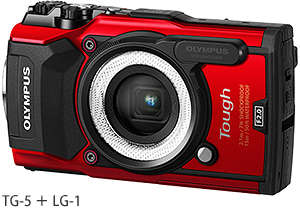
- The LED light guide (LG-1) cannot be used underwater.
- When the LED light guide is attached to the camera, do not utilize the flash.
Attaching the LED light guide (LG-1) to the camera
Before attaching the LED light guide (LG-1) to the camera, remove the lens ring from the camera.
How to remove the lens ring:
To remove the lens ring, rotate the lens ring in the remove direction (to the left) while pressing down the remove button (![]() ).
).

How to attach the LED light guide (LG-1):
To attach the LED light guide, align the white circle marks on the camera and LED light guide, and then rotate the LED light guide to the right until you hear a click.
Do not press the remove button while attaching the light guide.

You can remove the LED light guide and attach the lens ring in the same procedure.
Required camera settings for the LED light guide
For shooting pictures using the LED light guide (LG-1), the built-in LED of the camera is required for illumination. Press the arrow pad Right button to select ![]() (LED On) in flash mode, and press the [OK] button.
(LED On) in flash mode, and press the [OK] button.
Once activated, the built-in LED turns on when you press the shutter button halfway down. You can take a picture when you fully depress the shutter button.
How do I attach the Flash Diffuser (FD-1) to the camera and what settings are required?
The following explains how to attach the Flash Diffuser (FD-1, sold separately) to the camera and the required camera setting.
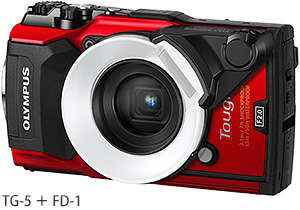
Attaching the Flash Diffuser (FD-1) to the camera
Before attaching the Flash Diffuser (FD-1) to the camera, remove the lens ring from the camera.
How to remove the lens ring:
To remove the lens ring, rotate the lens ring in the remove direction (to the left) while pressing down the remove button (![]() ).
).

How to attach the Flash Diffuser (FD-1):
To attach the Flash Diffuser, align the white circle marks on the camera and Flash Diffuser, and then rotate the Flash Diffuser to the right until you hear a click.
Do not press the remove button while attaching the flash diffuser.
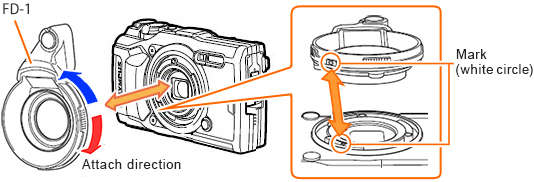
You can remove the Flash Diffuser and attach the lens ring in the same procedure.
Required camera settings for the Flash Diffuser
For shooting in the appropriate settings using the flash diffuser, select FD-1 in the Accessory settings of the camera. You can change the Accessory setting in Live Control.
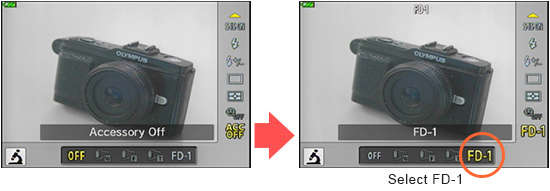
- You can change the accessory setting to FD-1 in shooting mode P, A and Microscope.
- Change the accessory setting to OFF when the flash diffuser is not used.
How do I attach a converter or a lens filter to the TG-5 using the converter lens adapter CLA-T01?
Converter lens adapter CLA-T01:
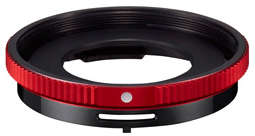
The converter lens adapter CLA-T01 (sold separately) is required to attach the Teleconverter TCON-T01 or Fisheye converter FCON-T01 to the TG-5. You can also use the converter lens adapter CLA-T01 to attach a 40.5 mm lens filter that is 6 mm thick or less.
Before attaching the CLA-T01 to the TG-5, remove the lens ring from the camera.
- A lens cap is included with the CLA-T01.
- The lens ring on the TG-5 is only cosmetic and has no effect on the waterproof or dustproof ability of the camera.
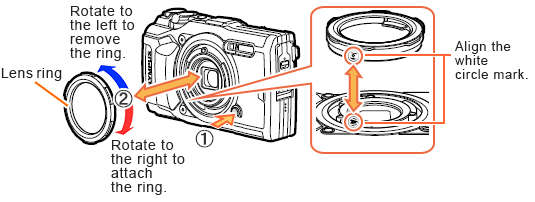
How to attach or remove the lens ring:
- To remove the lens ring, rotate the lens ring in the remove direction (to the left) while pressing down the remove button (
 ).
). - To attach the lens ring, align the white circle marks on the camera and lens ring, and then rotate the lens ring to the right until you hear a click. Do not press the remove button while attaching the lens ring.
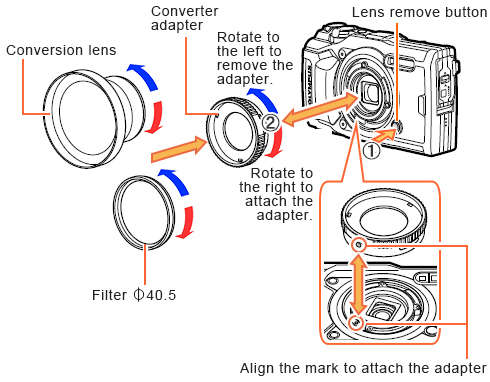
How to attach a conversion lens / filter using the CLA-T01
- * You can attach and remove the CLA-T01 in the same procedure as attaching or removing a lens ring.
Note:
- Filters cannot be attached directly to the camera.
- When a filter that is 6 mm thick or more is attached, vignetting may occur in the corners of the images. In that case, use a thin mount or slim type of filter instead.
- The image quality when using a filter is not guaranteed.
- A filter and a Fisheye converter FCON-T01 cannot be used simultaneously.
What types of JPEG image modes are available?
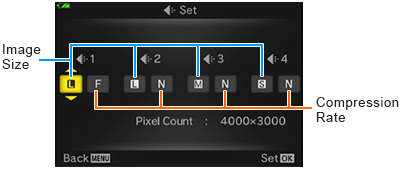
If you want to shoot, for example, in SF (Super Fine) compression, change the setting to the desired combination.
You can set 4 JPEG image quality modes in image quality setting. 12 JPEG image quality combinations are available, selecting from 3 types of image size (L, M, S) and 4 types of compression (SF, F, N, B).
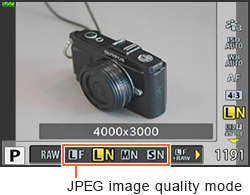
How to set the image quality mode to RAW
You can change the image quality mode to RAW or RAW+JPEG in Live Control. Press the [OK] button to display the Live Control and select the desired image quality.
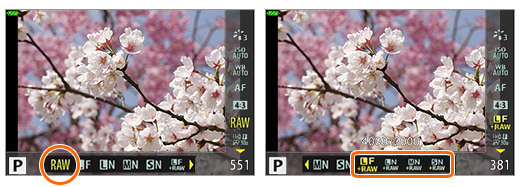
- * If the image quality mode is set to RAW, image size (4000 x 3000) and compression mode cannot be changed.
- * This page explains the image quality setting for changing the combination of JPEG image quality modes.
Available Size and Compression for JPEG Image
| Size of JPEG Image | Image Size (Pixel Size) |
|---|---|
| L (Large) |
4000 x 3000 (12 million pixel) |
| M (Middle) |
3200 x 2400 (7.68 million pixel) |
| S (Small) |
1280 x 960 (1.22 million pixel) |
| Compression Mode | Compression Rate |
|---|---|
| SF (Super Fine) |
1/2.7 |
| F (Fine) |
1/4 |
| N (Normal) |
1/8 |
| B (Basic) |
1/12 |
How to change the combination of JPEG image quality mode
Press the [MENU] button. In ![]() (Custom Menu), select E.
(Custom Menu), select E. ![]() /WB/Color. In
/WB/Color. In ![]() Set, change the image size and compression rate to the desired mode.
Set, change the image size and compression rate to the desired mode.
