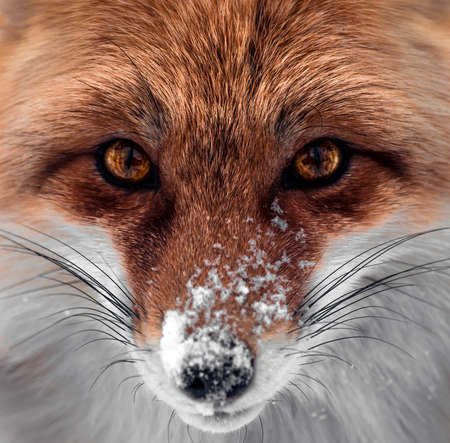
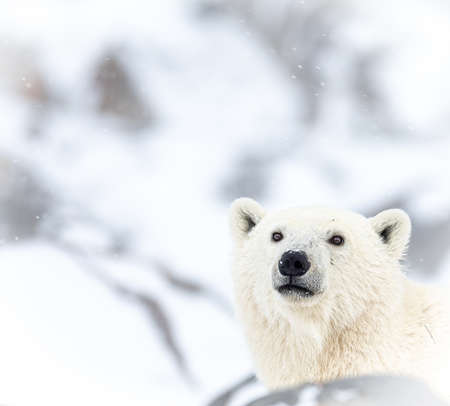
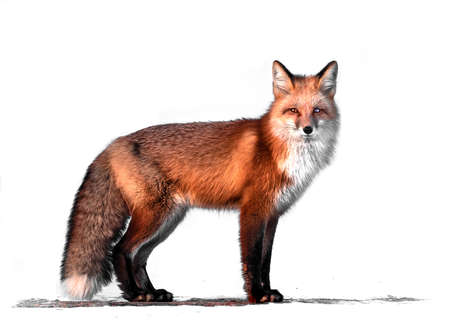
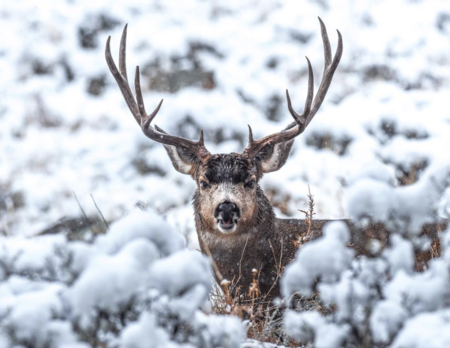
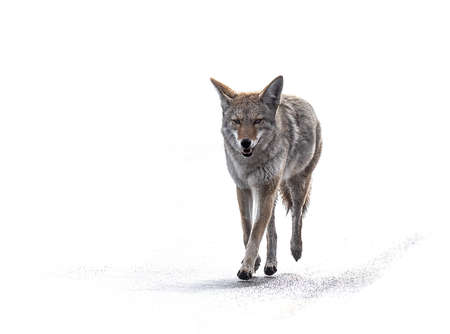
There are few feelings as freeing as feeling the cold breeze lick at your cheeks while you follow animal tracks through the freshly fallen snow. Fat snowdrops plop off the tree branches above your head, and the only sound in the winter wood is the sound of your own breath and the snow crunching beneath your feet. For those who live in regions with lots of snow, winter can be the best time to find and photograph wildlife.
WINTER IS YOUR FRIEND
The temptation to spend the afternoon curled up on the couch with a mug of hot cocoa or a glass of red wine is strong when you can hear the winter wind rattling against your windows. After all, the wind and the snow it carries with it can seem so inhospitable. But as any wildlife photographer quickly learns, the winter is your friend. The cold wind that shakes the tree branches outside your window is winter waving at you - calling you outside to come look for animal tracks in the snow… but make sure you go prepared:
- Dress warm - Put on your waterproof winter pants, your warmest jacket, your sturdiest boots. Do you feel warm enough? Yes? Good, now put on an extra sweater. Nothing cuts a shoot short quite like cold fingers and toes. You can always remove layers, but once you’re in the woods you can’t add more. Always dress for the long haul, and maybe consider sticking hand warmers in your gloves and socks for good measure.
- Get your gear acclimated - I am fortunate to live high up in the mountains where the air is dry year round. When I started traveling for wildlife photography, I quickly learned that condensation on lenses and camera bodies can be a huge inconvenience in cold, damp climates. Taking your gear between a warm heated house and the dank outdoors can cause condensation to build up on the glass components of the camera. If you can manage it, by storing your lenses and body in areas that will have the same climate as the outdoors where you’ll be shooting you can cut down on the amount of times condensation builds up on your glass. I’ve stored my gear in cars, garages, unheated cabin entryways, so that it is already cold and acclimated when it is time to shoot. If you live in an area where you can’t necessarily leave your gear unattended safely, make sure you are leaving you are leaving your home early enough to allow time for the condensation to clear, or bring plenty of dry lens cloths to wipe it before it freezes.
- Be safe - Winter is wild, and like all wild things, its unpredictability can’t be forgotten. Rapidly changing weather conditions, rough terrain, and bitter winds can turn dangerous quickly. Try to avoid venturing out alone to photograph wildlife in the winter. But if you must, give someone a heads up about where you plan to shoot and when you plan to be back - just in case.
ANIMAL TRACKS TELL A STORY
The best part about photographing wildlife in the winter is that you don’t have to be an expert in bushcraft to track your subjects. Their tracks are easy to spot in the snow, and the cold, white landscape preserves other animals signs that can aid you in your search.
- Paw and hoof prints - Animal prints in the snow can give you loads of information about your subject. Study the print to determine how recently an animal has been in the area. Older tracks looks more like unspecific holes in the snow, and aren’t typically your best bet to follow as the animal that left them is likely long gone. Fresh tracks are sharp and clear imprints with lots of details. With enough time and determination, they will lead you right to your subject.
- Animal body imprints - Sometimes, tracks will lead to body imprints in the snow where an animal bedded down for the night. Finding these is like finding a gold mine in wildlife photography. If you can determine where an animal has been sleeping, you can make it a point to be in the area at sunrise or sunset - the hours when they are most likely to be in that spot.
- Other animal signs - The pristine white snow makes it easy to spot the contrast where an animal has marked it with their urine or feces (animal “sign”). Keeping an eye out for sign as you follow animal tracks can help you determine how recently an animal has passed through the area. Fresh sign means it is time to get your camera ready, cause your subject isn’t far ahead.
THE COMPOSITION
While winter can be the easiest time to find wildlife to photograph, it can be the hardest time to actually properly expose and compose your image. The blinding white snow can be easy to overexpose, and the close winter sun can make the light harsh for most of the short daylight hours. Your cold fingers and toes make it tempting to rush your shots so you can head back to your warm car. But you worked so hard to find your animal despite the conditions, make it worth the effort, slow down and take a moment to consider your composition.
- Frame your subject - Drifts of snow and bare trees make for a different landscape than summer. The absence of color can make your background bleak if you’re not thoughtful in your framing. Move slowly around your subject if you can, and use the landscape to frame them. Shoot with a pile of snow or small branch close to your lens to force a blurry frame on one corner of your image, or crouch as low as you can and shoot looking upward from ground level. Really focus on making your subject stand out against their otherwise barren surroundings.
- Keep your distance - Deep snow can make it difficult to retreat quickly if your subject starts showing signs of discomfort or aggression. Bringing telephoto lenses is essential, they enable you to remain a safe and respectful distance from your subject, while still giving you the field of view you need to capture intimate, detailed images.
Get tips from Brooke about cropping in wildlife photography, to help keep yourself at a respectful distance and your subject safe. - Embrace the imperfection - After hours of trudging through the snow, you found your subject. He struck his most majestic pose and sniffed the wind before turning and disappearing back into the snowy landscape. You managed to fire off a rapid burst of sharp images before he slipped away, and the clouds are starting to roll in promising snow or rain so you turn and head back toward home. When you get home and upload your images onto your computer, you notice that your shots were all over exposed, and the white of the snow was so blown out that you lost all the details of the background behind your subject. Don’t be afraid to embrace the blow out, let the too-white snow serve as a stark contrast for your subject. High contrast images can be hard to capture other times of the year, so embrace them when you can.
THE SETTINGS
A lot of trial and error goes into winter wildlife photography. The setting you use in the frigid shade of the forest may be entirely different from the settings you’ll need in the blindingly white snow glades. Below are some of my recommended settings and gear - but remember - conditions change rapidly in the winter, so your settings will probably need to too.
- Camera: OM-D E-M1 Mark III or OM-D E-M5 Mark III. The E-M1 Mark III is great for wildlife because you're able to adjust your focus point effortlessly using the joystick feature. A camera with the Pro Capture Mode setting is my preferred option for wildlife, as it ensures I don’t miss the moment just because I was a half a second too late on hitting the shutter. Additionally, I opt for a body with great image stabilization so I can lighten my load by leaving my tripod at home.
- Lenses: M.Zuiko 40-150mm F2.8 PRO or M.Zuiko 300mm F4.0 PRO. A proper telephoto lens is a necessity for winter wildlife photography to make sure you are keeping yourself safe, give your subject the distance it deserves, and still come away with sharp images.
- Mode: Manual with Pro Capture or Continuous Shooting Mode enabled.
- Shutter Speed: 1/250 - 1/1500 depending on the activeness of the animal and the light/shadows.
- Aperture: F2.8-F5.6 is the sweet spot for me. This range gives the background a bit of blur, and lets your subject pop. If I’m shooting an animal with antlers, I might shoot closer to F5.6 to ensure that all of the antlers are still sharp. If the animal doesn’t have antlers, I feel more comfortable dropping the aperture lower.
- ISO: I adjust this according to what I decide for aperture and shutter speed, trying to keep it as low as possible to prevent noise.
- Focusing: Auto
Instagram: @brookelittlebear
Brooke is a wildlife photographer based out of Salt Lake City, Utah. She has always been a lover of animals, and when she first began shooting she was naturally hooked on photographing wildlife right from the start. Her ultimate goal is to photograph all the core species of megafauna found in North America. When Brooke is not actively photographing, tracking, or scouting for wildlife, you can find her snowboarding.
