Gardner Raymond is the owner and executive producer of Consequence Video Designs, LLC, an independent video company that creates product launch videos for companies like Cannondale and Eastern Dance Supply, as well as sporting event coverage and promotional videos for the Leukemia and Lymphoma Society. He has recorded all over the place, from intimate work parties to college football games. He shared with us his tips on how to get the sound you want, wherever your video takes you.
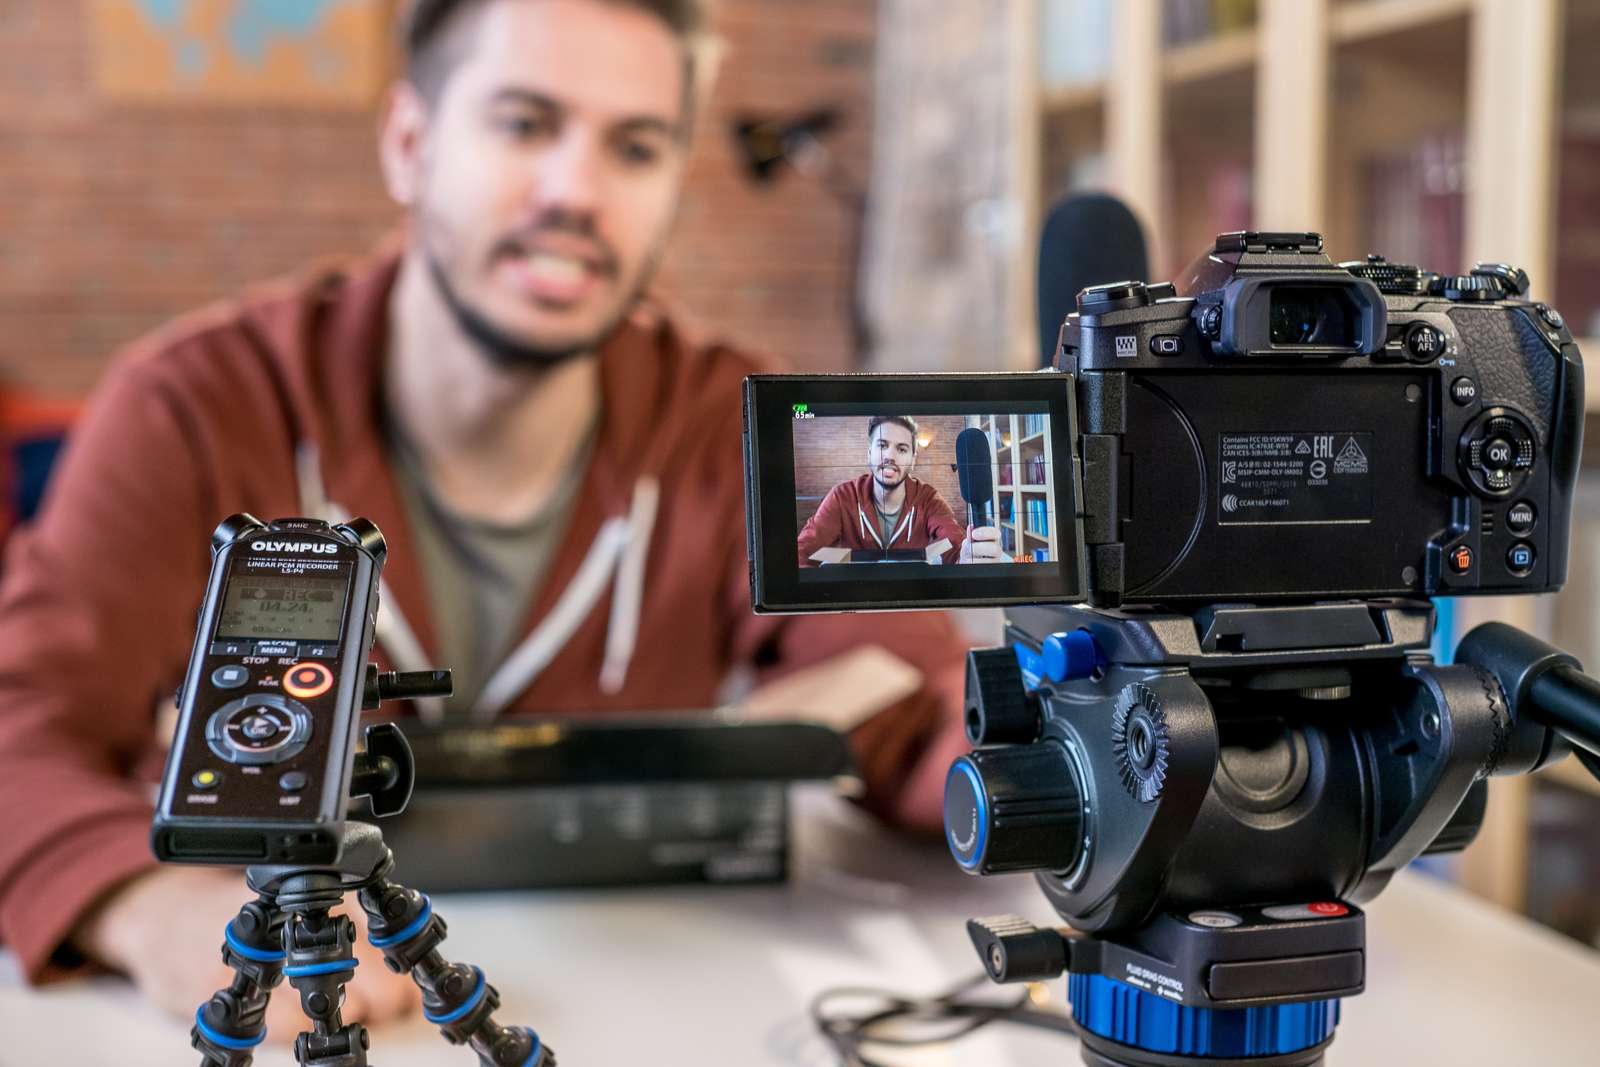
First things first, Raymond suggests always recording the audio separately while wearing headphones to monitor it, like the Olympus Monaural Earphone. That ⅛-inch style directly into a DSLR is never going to produce the most quality, cleanest audio. “The microphone you choose to use for recording really does depend on what the audio need is,” said Raymond. Below, he outlines three microphone styles he uses most often, explains when they are most useful, and how to get the best sound recording from each one.
For Single Voices: A Lavalier Microphone
“For people talking directly to the camera, or someone giving a presentation to a large room of people, I usually use a wired or wireless lavalier microphone that you pin on a lapel to get real specific audio of one person,” said Raymond. We recommend the affordable Olympus Tie-Clip Microphone. Pin it on the speaker’s clothing about 6 inches below their chin, which is the direction and range these tiny microphones are designed for. “You don’t want them hidden behind a shirt or a jacket because that’s when you start to get fabric noise.”
For Distant and Ambient Sound: A Shotgun-Style Microphone
If it’s just you on the shoot, you can find a shotgun mic that will fit nicely on a hot shoe camera mount if you’re shooting with a DSLR. Bigger shotgun mics are also usually used as a secondary recording on a boom during an interview. “Depending on the room tone, having a boom mic above someone’s head might end up sounding better than a lapel mic that might pick up clothing movement in certain situations,” said Raymond. “When you get into the really expensive directional microphones like this, those are incredible. That’s how you get the sound of NFL guys calling plays from 40 yards away.” Position the microphone on the boom above the person’s head pointing down towards their face, as close as you can be while staying outside the frame, or stick it on a hot shoe if you’re working on your own.
For Room Noise and Voices: A Compact Shotgun-Style Microphone
If you’re filming something like a party or wedding where you’re trying not to be super obtrusive, try a compact shotgun-style microphone like the Compact Zoom Microphone (ME-34) or the Olympus Compact Gun Microphone. It’s a portable option that’s convenient for both ambiance and voice, especially if you’re working solo because it is capable of doing both. Smaller shotgun mics are great if you want the general room noise (think crowd chattering, plates clinking, laugher) and will still work to record a quick interview where you wouldn’t have time to mic a bunch of people up. “I’d say it’s better with ambient noise than direct, clean audio, but it works well in a pinch,” said Raymond.
If you’re trying to record general ambiance, you can just run this mic straight into the camera. If you get up pretty close to a person’s mouth, you can also get pretty good audio but you’re still going to pick up noise from around the room. “If I’m doing something where audio is a bit more critical, like an interview, I’d recommend connecting it to an external recorder like the Olympus LP-S4 so you can monitor and adjust the sound as needed, and then sync it afterwards,” said Raymond. “The Olympus recorder is nice and discreet—it fits in my pocket and I can pop it out to record and it’s not in-your-face.”
For the Cleanest Sound: Mount Your Microphones
One thing newer videographers might not take into consideration before recording is the effect that motion of your hands can have on the microphone. “I recorded some interviews and when I got back and listened to the audio I could hear my fingers and my hand on the case any time was hand-holding my recorder,” said Raymond. “Or even when it was mounted to the camera, it can pick up that motion and friction against the camera body.”
To avoid this, mount your microphone so it’s more suspended and isolated from that vibration that hand-holding would introduce. The Olympus 2-Channel Professional Microphone Kit equps users with two high-quality directional microphones that each come with tripods and 8-foot cables, offering a stable system that plugs into the wall so you don’t have to worry about battery replacement. Some professionals use a shotgun-style mic in a shock mount at end of the boom, which is then attached to a tripod. If the microphone is attached to your camera, put that on a tripod. You can also get little shock mounts that hook onto your hot shoe so your microphone is more suspended and isolated from that vibration that hand-holding would introduce. Raymond also suggests keeping some gaffers tape in your camera bag, which is great for mounting mics to something stable, or attaching lav mics to someone’s shirt if you lose the clip. If you absolutely can’t mount your mic to anything? Put a windscreen on your microphone to help damp the excess noise. “[They] definitely help, especially for stuff outdoors.”
Written by: Riley Missel