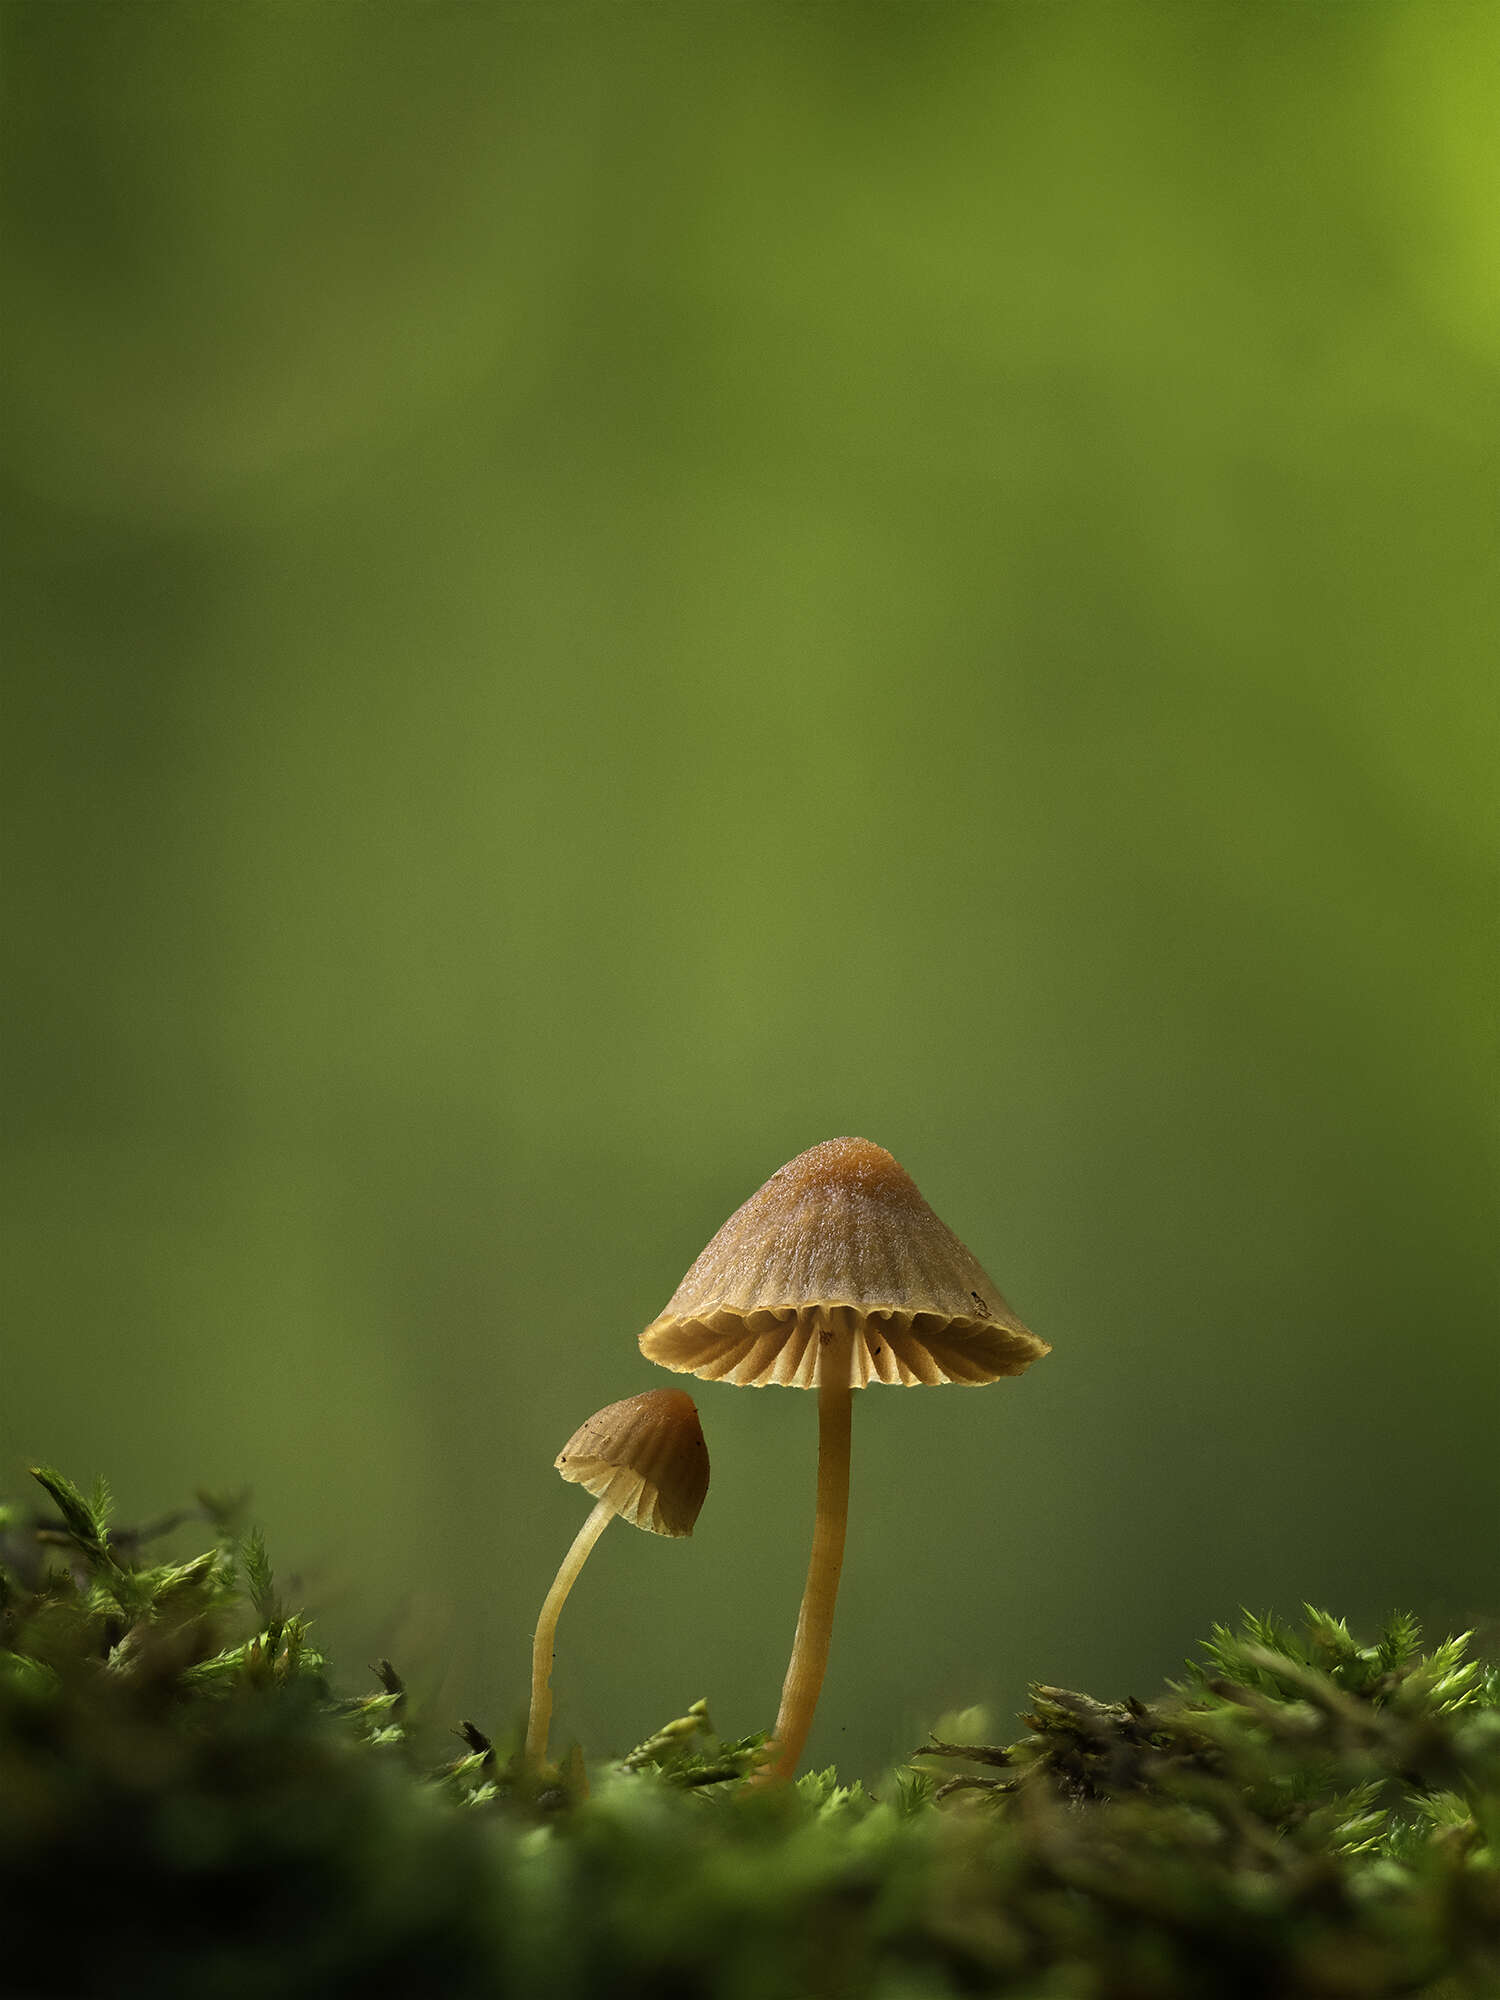
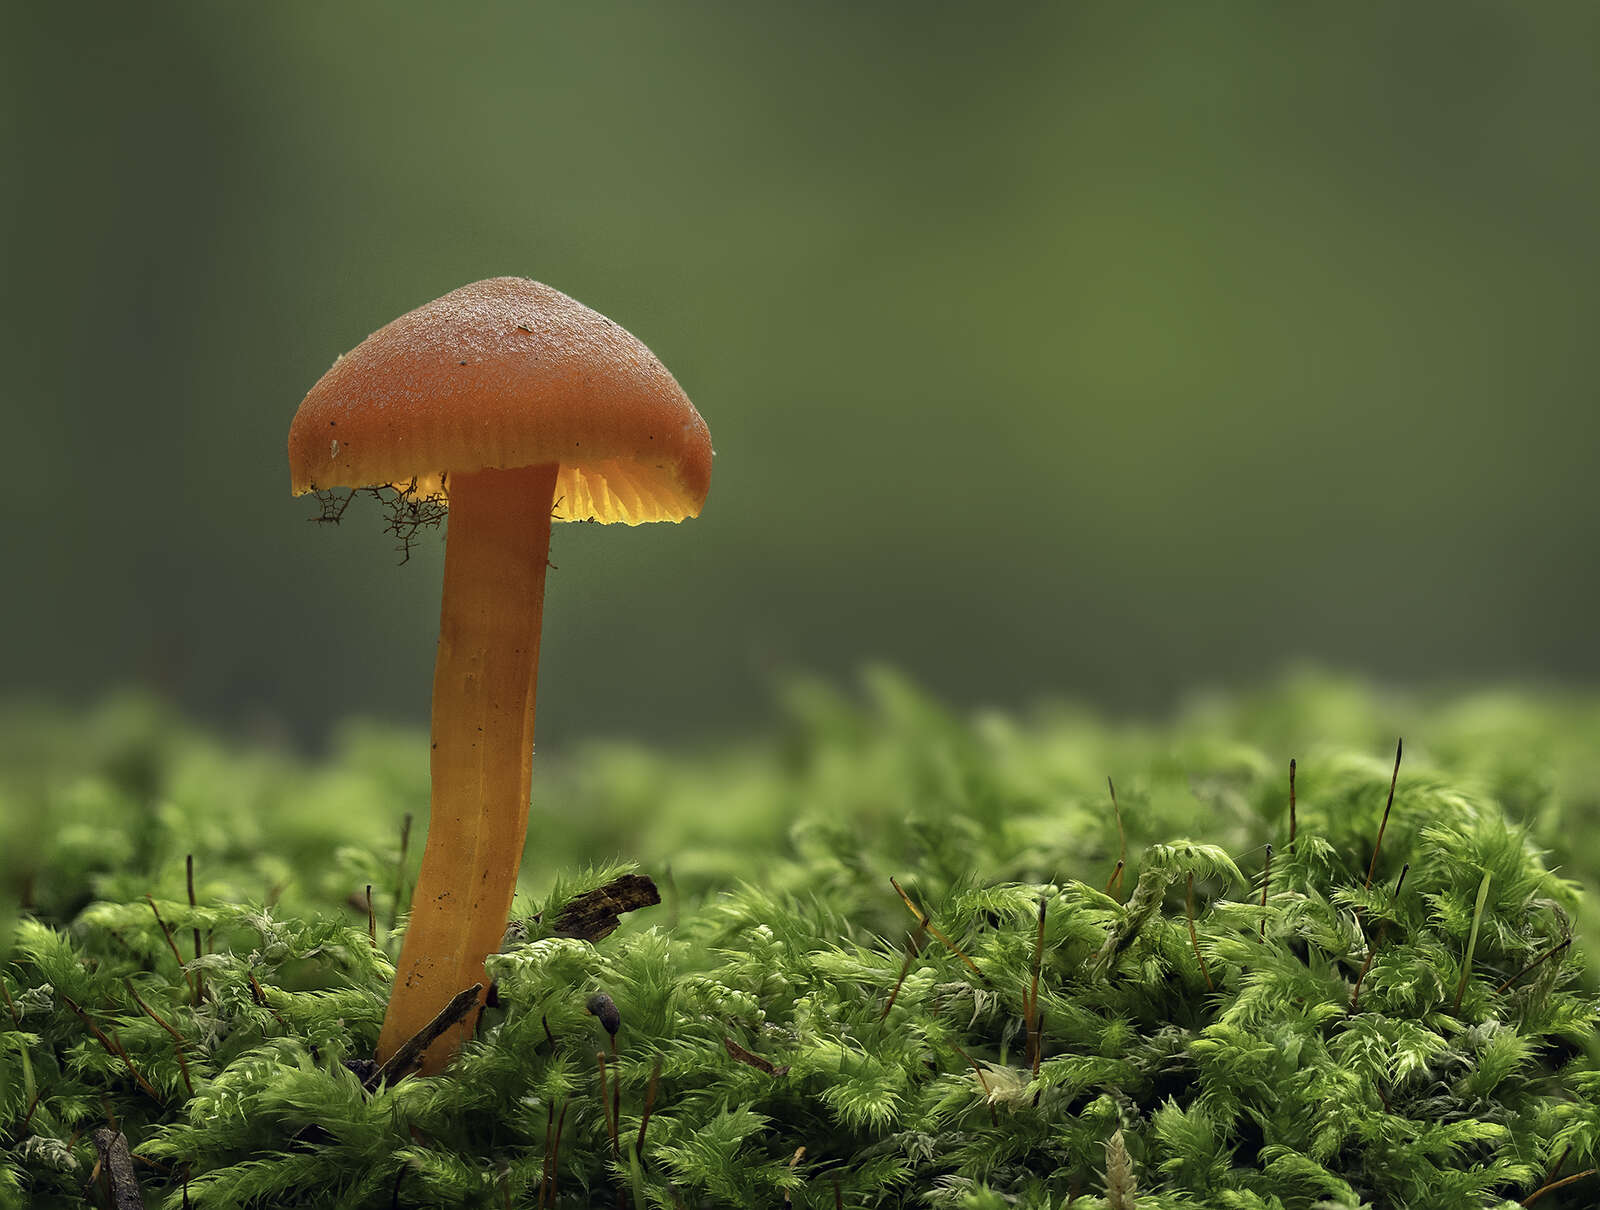
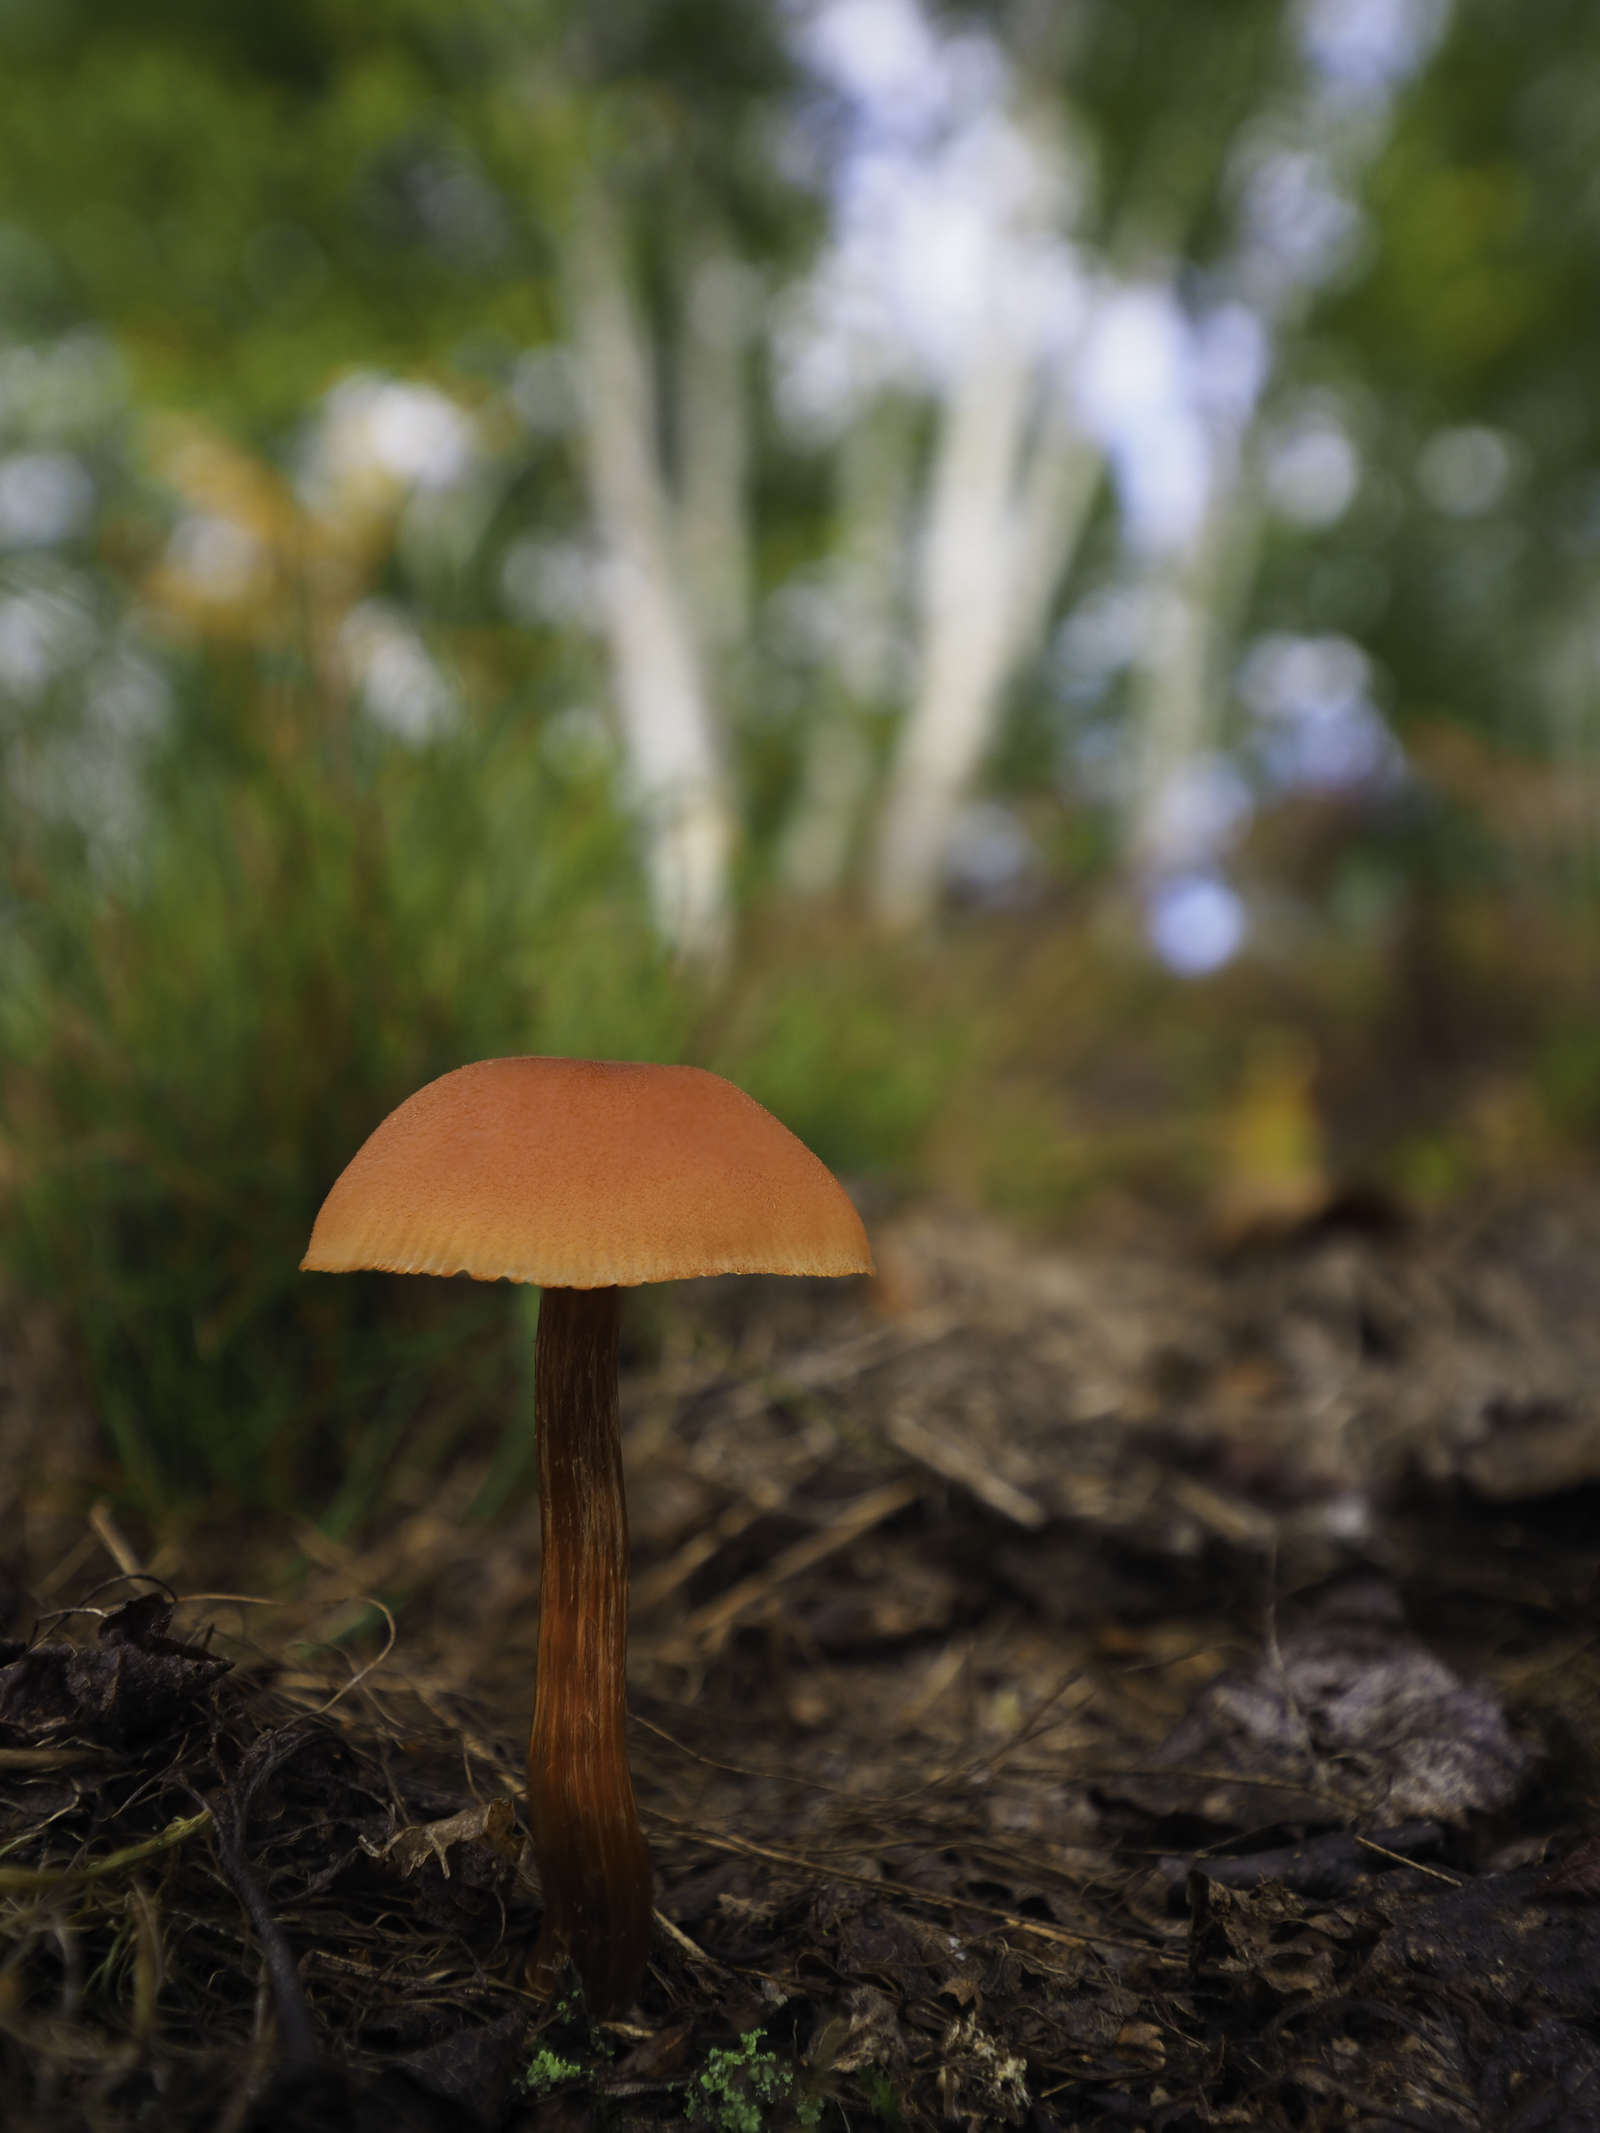
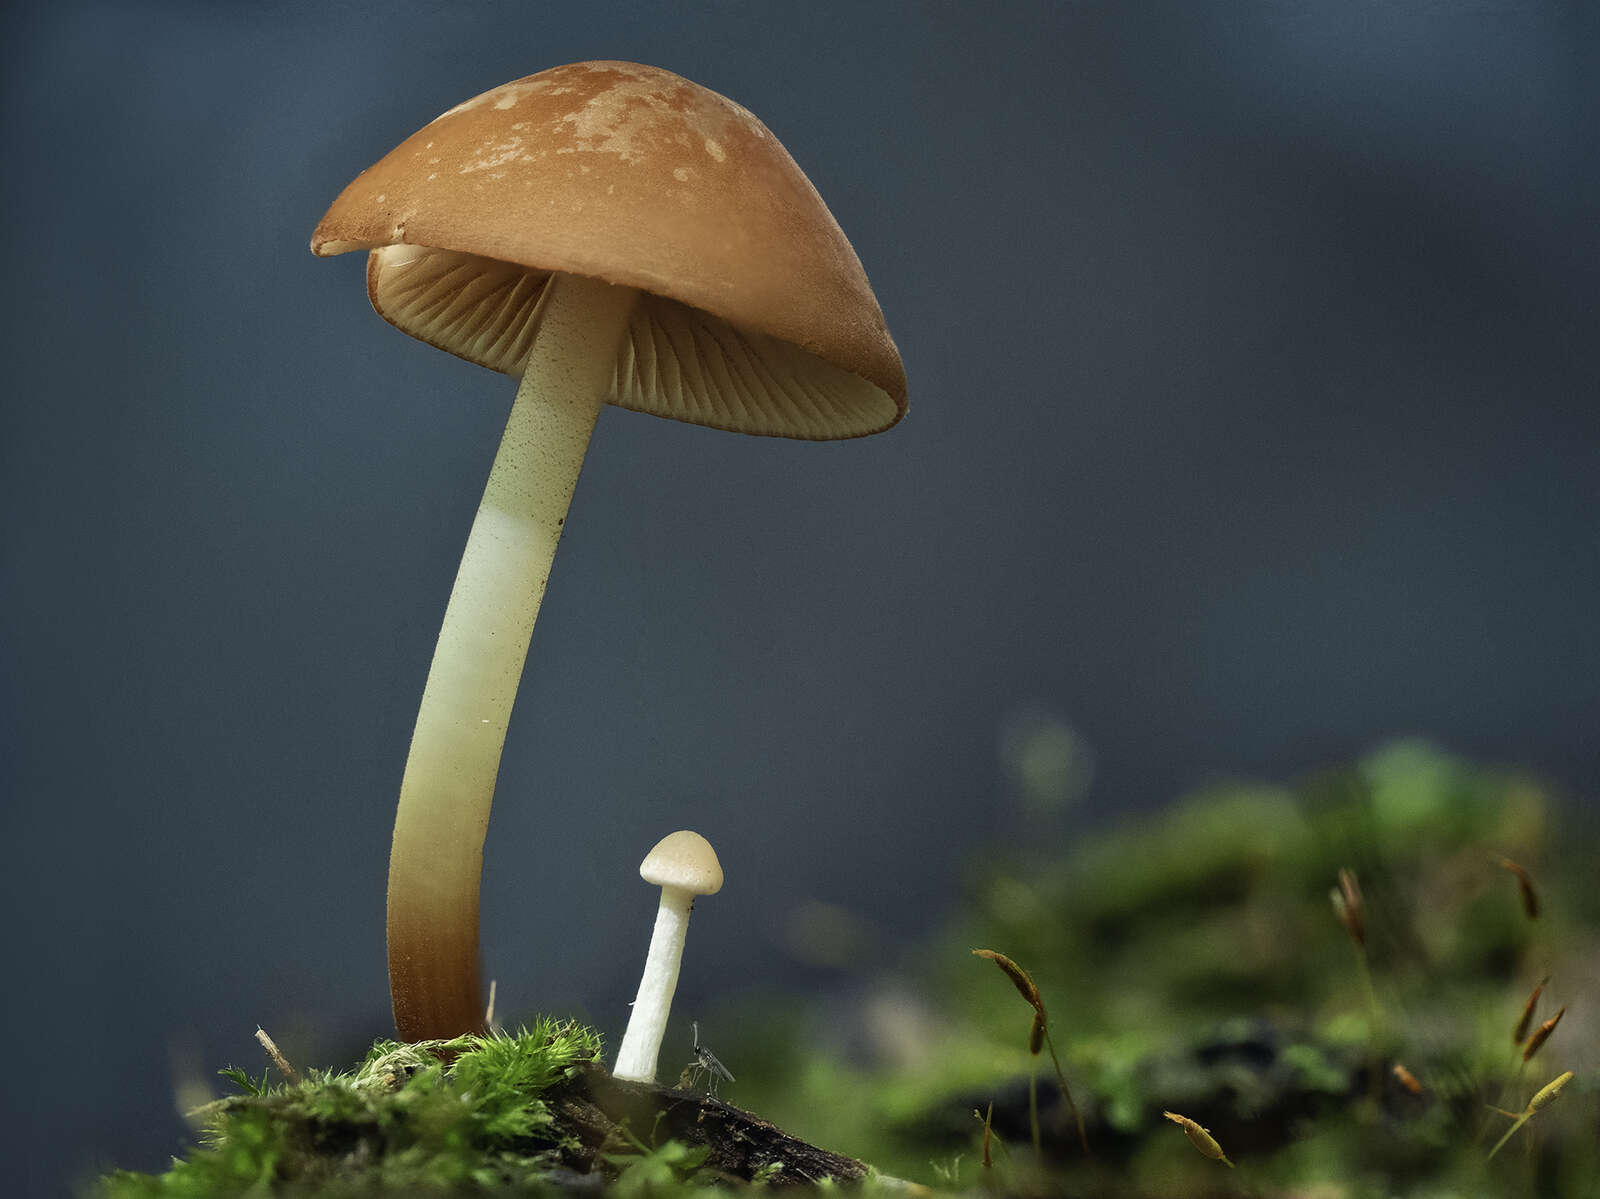
1/100s | F2.8 | ISO 400
Every autumn, in the forests near my home, a massive reproductive event takes place that I just can't ignore. It starts during the warm days of summer when long tendrils of mycelium digest their way through the rotting corpses of fallen forest detritus. When autumn arrives, an asexual explosion erupts from the earth, as the fruiting bodies strive to spread their genetically identical spores throughout the forest floor. We're talking mushrooms here, people! And I love to photograph them.
Mushrooms grow remarkably quickly and decay even quicker. But if you time it right they can be quite photogenic. Many species are so small that a macro lens is an absolute necessity. Anyone who has worked with a macro lens recognizes that it can be a real challenge to achieve a sharp subject from front to back and still maintain a nice, soft, defocused background. In fact, with most subjects it's an impossible task. Enter focus stacking or focus bracketing.
The concept is quite simple. Take a series of photos with each one being focused at a slightly different point on your subject. Then use software to stack and process them in order to capture a greater depth of field than is capable with just a single shot using a macro lens, all while maintaining nice bokeh in your final image. OM SYSTEM developed built-in focus stacking in their OM-D E-M1 with the release of the 4.0 firmware update. That feature has been included and improved in the E-M1 and E-M5 series of cameras. Although focus bracketing will be addressed, the main focus of this post is the focus stacking feature.
EQUIPMENT
The following OM SYSTEM cameras have built-in focus bracketing and/or focus stacking:
- OM-1
- OM-5
- OM-D E-M1 Mark III
- OM-D E-M5 Mark III
- OM-D E-M-5 Mark II
- OM-D E-M1X
- OM-D E-M1 Mark II
- OM-D E-M10 IV (Focus Bracketing only)
- E-M10 Mark III (Focus Bracketing only)
Not every lens is compatible with the focus bracketing/stacking feature. Many of the OM SYSTEM PRO lenses and Macro lenses support both the bracketing and stacking feature. View Focus Stacking lens compatibility list.
Other OM SYSTEM lenses allow for bracketing, but not the built-in focus stacking.
A tripod is definitely recommended. However, a few of the shots in this post were hand-held and for others I placed the camera on the ground.
Note: Current models in the TOUGH series (TG-5+) have a focus stacking feature. Many PEN series cameras have the focus bracketing feature. See your manual for additional information on how to access these features.
THE PROCESS
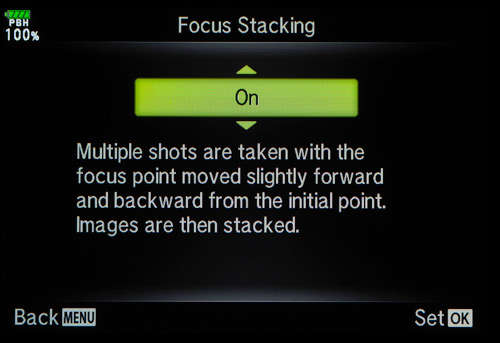
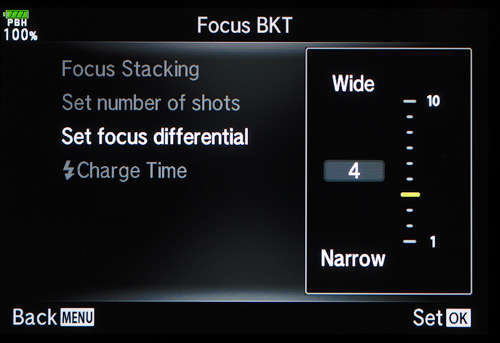
The following steps will set up the camera for focus stacking.
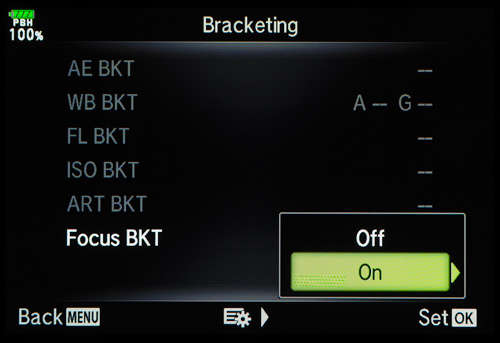
- From within the Menu, select the Camera2 options.
- Select Bracketing. You can bracket a variety of settings (Auto Exposure, White Balance, Flash, ISO, Art Filters, and Focus Bracketing). Select Focus BKT.
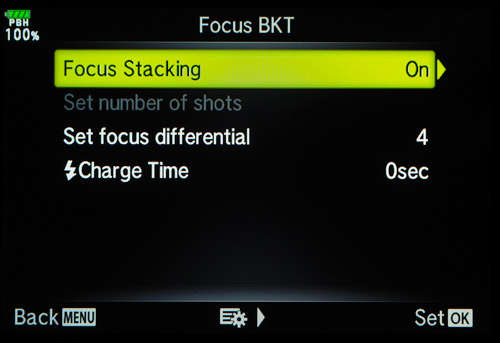
- Turn Focus Stacking On. For the E-M1X and the E-M1 Mark III you can adjust the number of stacked shots from 3 to 15. For other models the camera will stack 8 images.
- Select Set Focus Differential. Choose a focus differential from 1 to 10. This determines the difference in focus position between shots.
- Press OK repeatedly to engage the settings. You should see the letters BKT at the top ofthe LCD indicating that Focus Bracketing is set.
The focus stacking feature will shoot the set number of photos at the designated focus differential and then merge them into one jpeg file at full resolution. Achieving good results will take some experimenting since so many variables are at play - subject size, distance from subject, lens choice, aperture setting, and focus differential. Each photo in the stack is recorded plus the final stacked image.
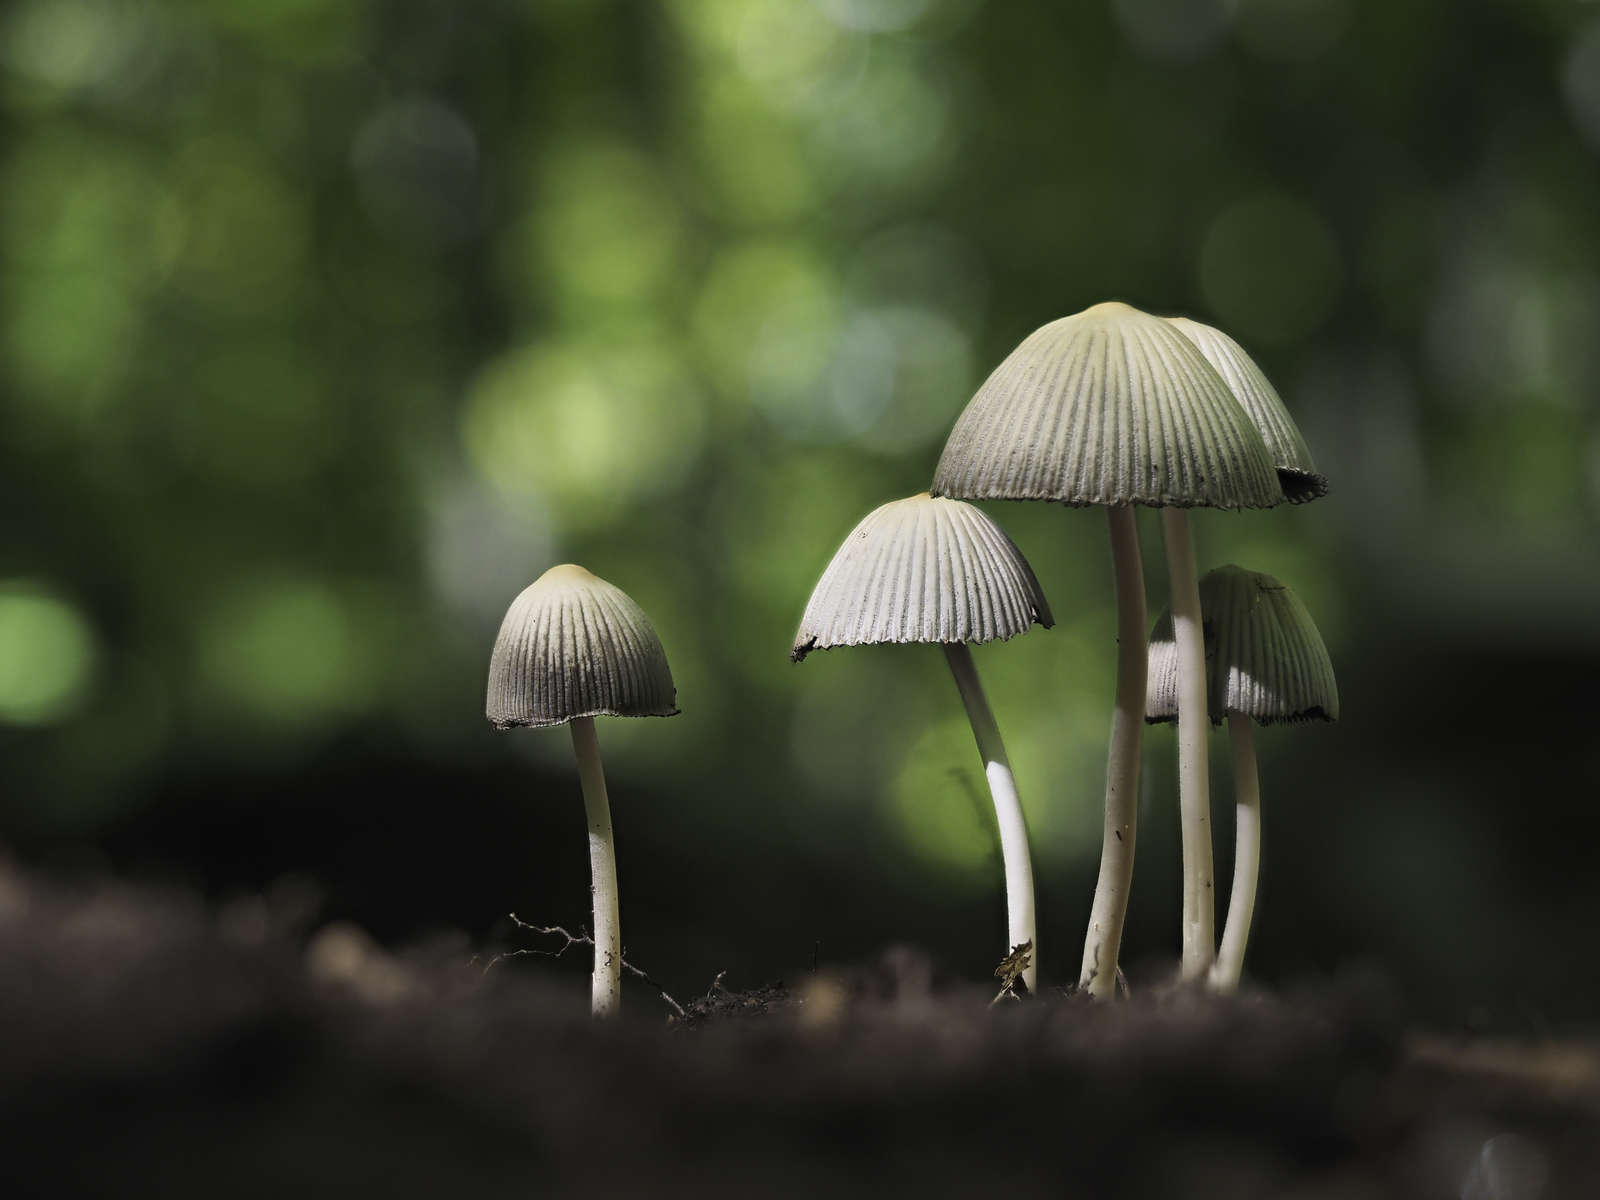
Generally I have found that a wider aperture and a narrow focus differential yields excellent results with the fungal subjects in this post. In all of the photos below I have included the lens, basic camera settings and focus differential. Although I have found the focus stacking feature to yield excellent results, it is not infallible. There are times where the camera cannot process the stacked image and a message pops up stating, "Focus stacking error. Image composite failed." This is usually due to camera or subject movement, however I have also had it occur when the lighting changes rapidly during the sequence.
1/50s | F4 | ISO 640
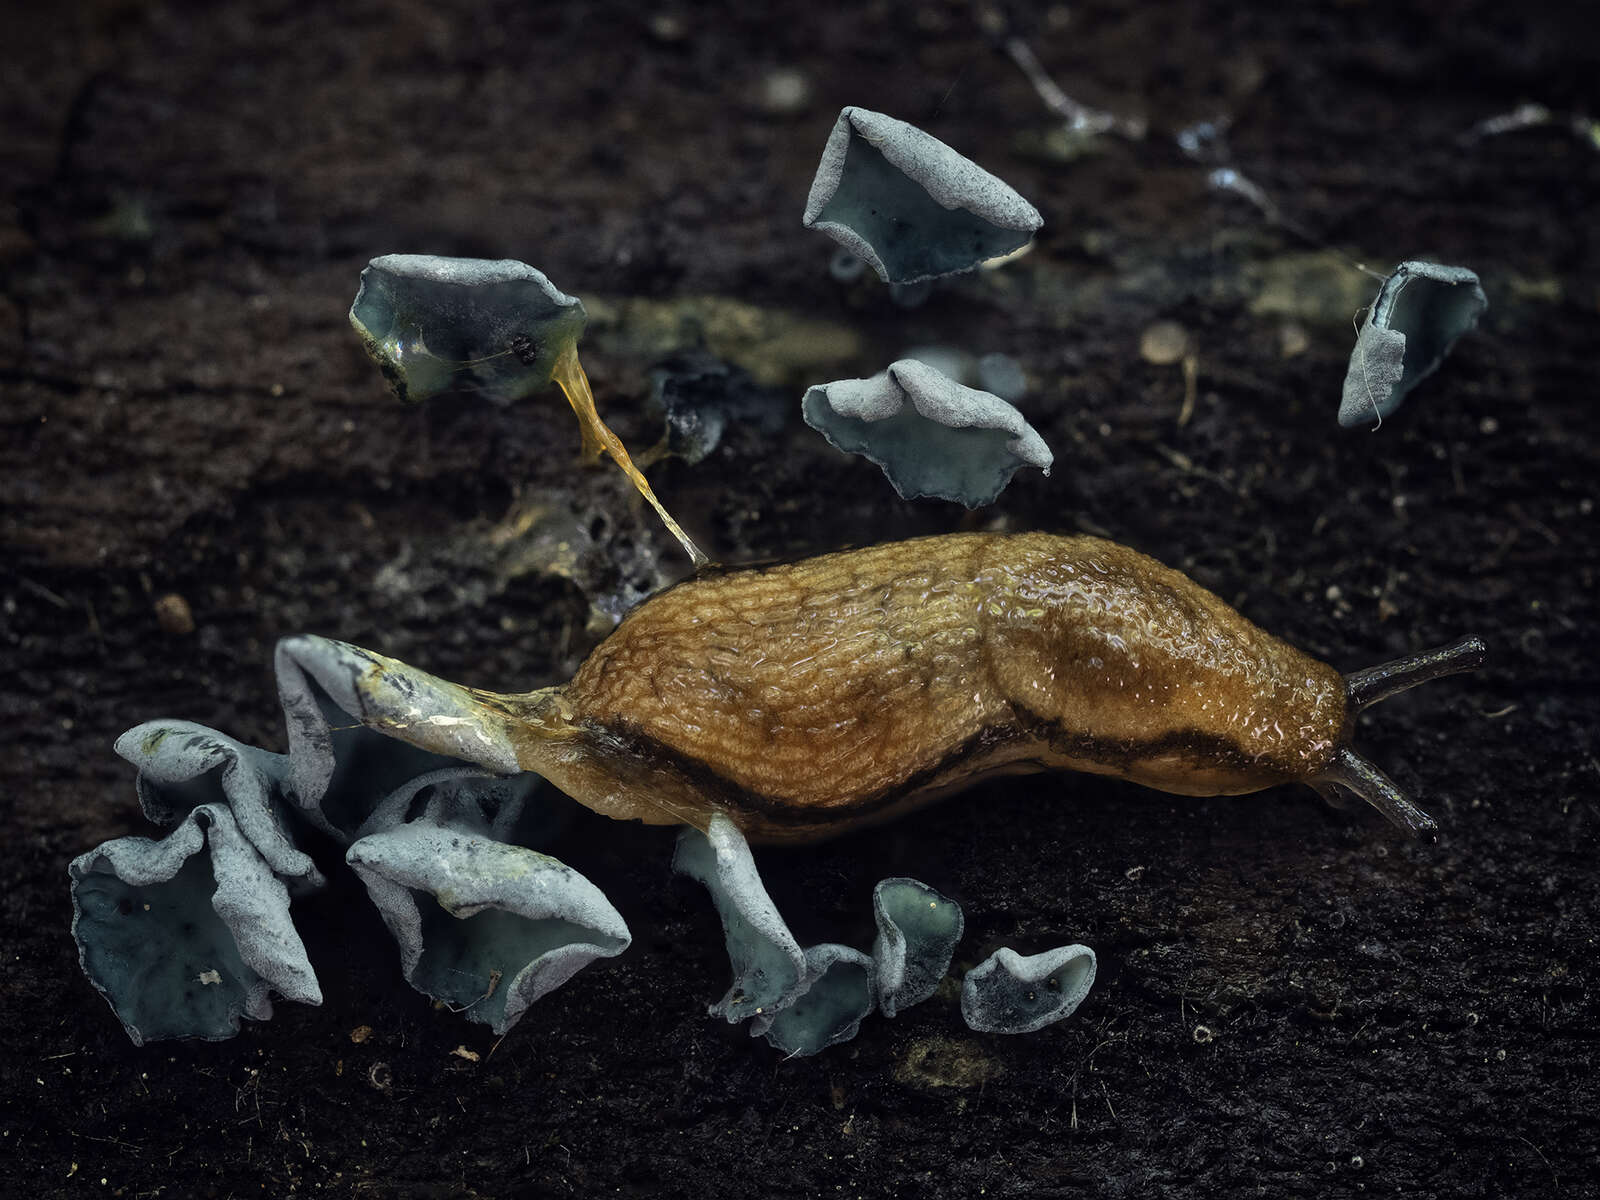
1/250s | F3.2 | ISO 400
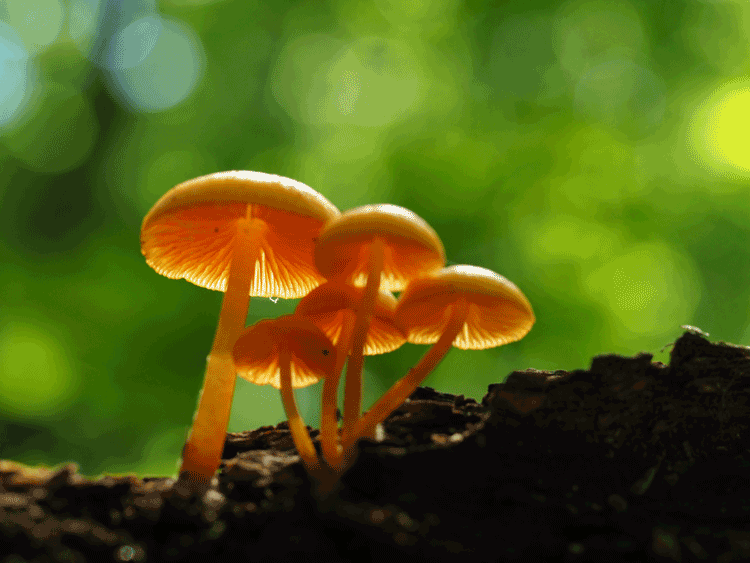
1/640s | F2.8 | ISO 200

1/60s | F3.2 | ISO 1000
1/25s | F3.2 | ISO 1000

1/20s | F5 | ISO 800
BRACKETING VS. STACKING
I have found the built-in focus stacking to be remarkably accurate. So why would you opt for bracketing vs. stacking? Here are a couple of reasons:
- The stacked image is trimmed. Regardless of subject, which lens you use, or whether you use a tripod or not, the final stacked image is trimmed along all four edges. During bracketing mode you will see a thin black rectangle in the viewfinder. Everything outside that rectangle will be trimmed. The final image remains the same size however (5184 x 3888px for the E-M1 Mark II), which means some interpolation must be going on. This must be taken into account when composing the shot.
- Details vs distance. The fungus below had countless stalactite-like fingers and was about 15 cm from front to back, a fair distance for a macro shot. I attempted to use the stacking feature, which only bracketed and stacked 8 photos when using the E-M1 Mark II. After some experimenting with the focus differential settings I had to compromise. I could capture the details of the front fingers but loose the details in the back, or I could capture the entire distance, but have too much interpolation that would blur out some of the fingers. Not willing to compromise I opted to use bracketing instead.

OM-D E-M1 Mark II | M.Zuiko ED 60mm F2.8 MACRO
1/100sec | F3.5 | ISO640 | +0.3 EV
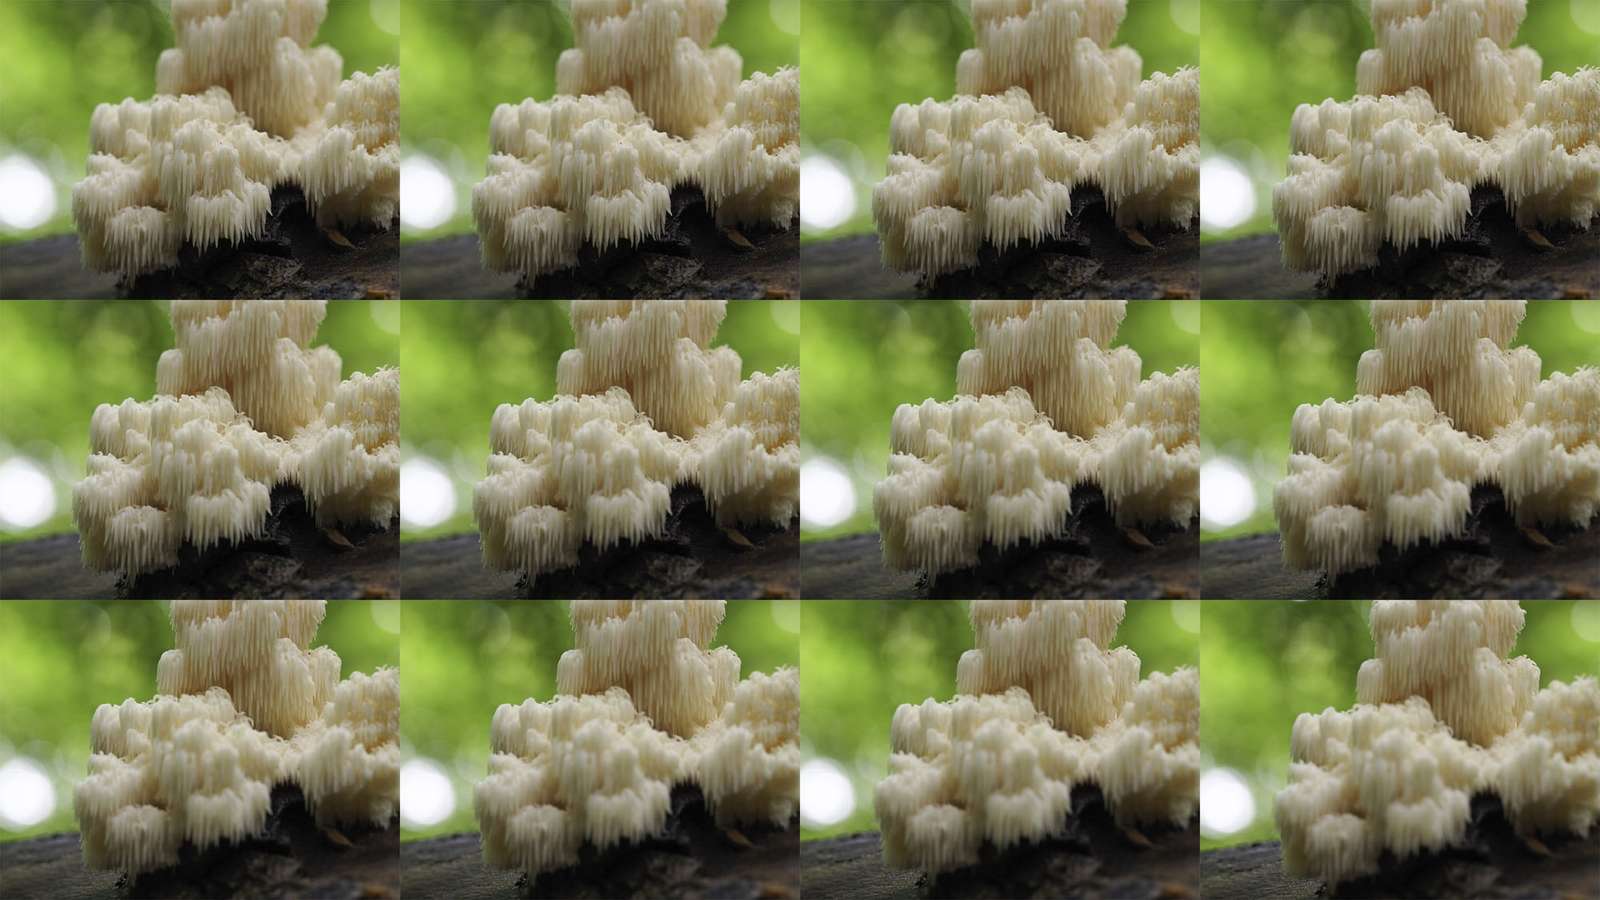
To access the bracketing options turn off focus stacking. This allows you to choose from 3 to 999 shots (or up to 9999 with the E-M1 Mark III) with a focus differential between 1 and 10. For the image above, I selected 20 shots with a focus differential of 2. After the sequence I had a look at each one using the LCD and determined that I had captured sufficient detail throughout the range.
Upon uploading the images I determined that I only needed 12 of those images to clearly capture the fungus from front to back. I then used Photoshop to stack them. This gave me greater control over the process (which I like), and there was no trimming of the final image. That being said, I really do like the convenience of the built-in focus stacking and how easy it is to use.
Tips for Composition
Focus bracketing and stacking can be used with all sorts of subjects, but if you are interested in photographing in the ‘fungal jungle’, here are a few tips that might help:
- Get down low. Really low! For many of my fungus shots I forego the tripod and put my camera right on the ground. I am looking for that ‘bug’s eye view’ and ideally, I want to see the gills of the mushroom. The articulating LCD makes it easy to compose your shot and the image stabilization in the OM SYSTEM camera bodies is so good that even for those shots where I’m not resting the camera on the ground I still rarely use my tripod.
- Keep it small. Generally, I find the smaller fungi are more photogenic than their larger counterparts and are actually easier to photograph. With the 60mm F2.8 macro lens I am usually aiming for mushrooms that are about an inch or less in height.
- The background matters. Once you’ve selected your fungal subject pay careful attention to your background. You want to avoid distractions that will pull focus away from your key subject. Move leaf litter, fallen branches and the like to ensure you have a ‘clean’ composition.
- Pay attention to the light. One of the reasons that I like to photograph fungi is that I can go out in the middle of day, even if the sun is directly overhead. Since I am shooting in a forest below a canopy of leaves I am getting some nice light on the forest floor. If my subject is bathed in direct sunlight I will use my hat to put it in shadow. This will enrich the colours and eliminate any harsh contrast.
1/40s | F4.5 | ISO 1250
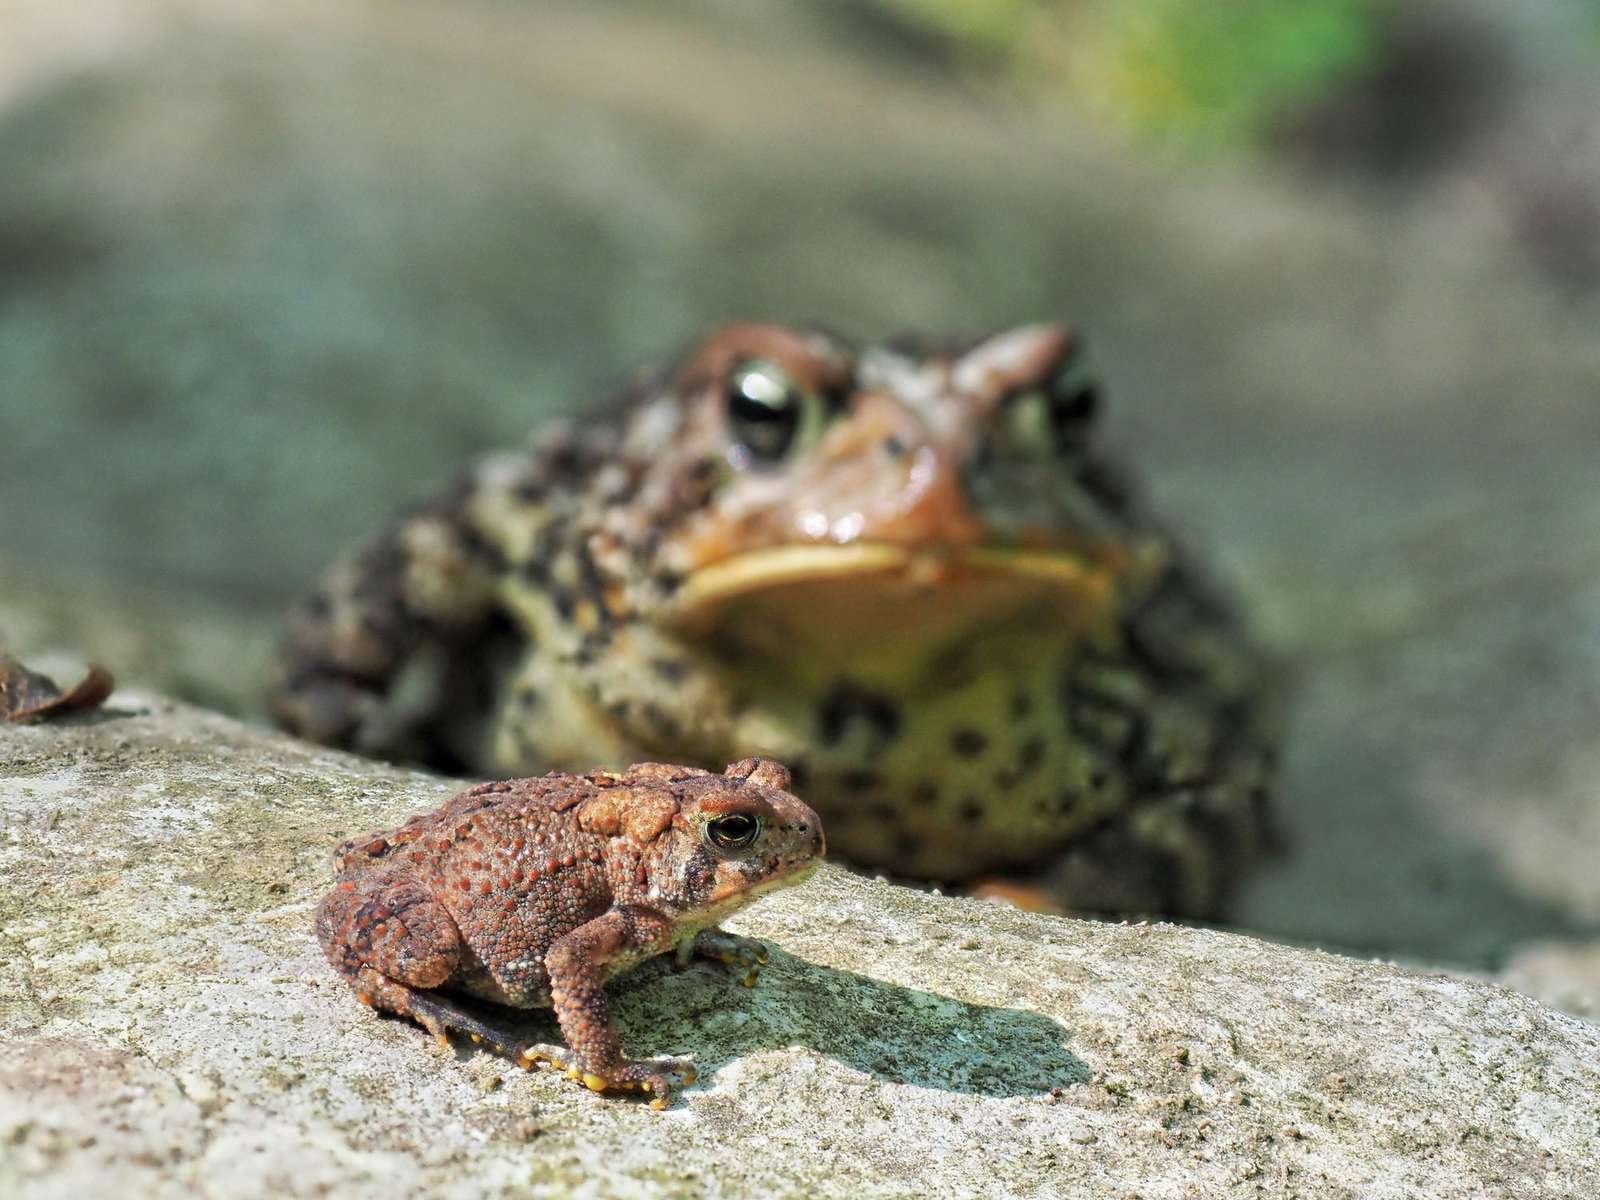
A FINAL PHOTO
It was my interest in the sheer number of mushrooms sprouting up in a local bush lot that inspired me to experiment a bit more with focus bracketing and to write this post. However, there are plenty of subjects out there where focus bracketing can be used. The photograph below is one example, but with full disclosure, it was a complete accident. Shortly after photographing a mushroom, I came across two toads on the trail. I bent down quickly, framed the shot, and pressed the shutter release only to realize I still had focus stacking enabled. Here's that shot:
If macro shooting isn’t your thing check out my article on using focus bracketing and stacking with your landscape images.
This article was re-posted with permission from Peter Baumgarten's "Creative Island Photo" blog. View more photos and tips or leave a comment at Peter's original post.
Featured Products:
ABOUT PETER BAUMGARTEN
Web:http://www.creativeislandphoto.com
Blog:http://www.creativeislandphoto.com/blog
Instagram: @creativeislandphoto
Peter has been a dedicated OM SYSTEM shooter for over 30 years, and he has found a way to combine his passion for photography with his love of teaching to develop photography and graphic design courses at the high school level.
Check out other tips from Peter:
Sunset Photography Tips
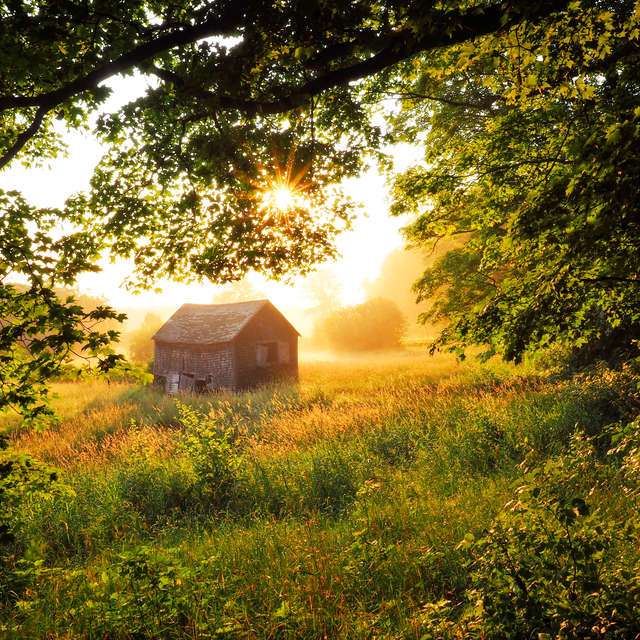
Astrophotography Tips
Time Lapse Photography
Using Focus Bracketing & Stacking for Landscapes
Learn how to use this technique to maximize depth of field in your landscape photography.
Using Natural Frames to Improve Your Composition
There are many cases where adding a frame improves the overall look of a photo. Get tips on using this simple technique.
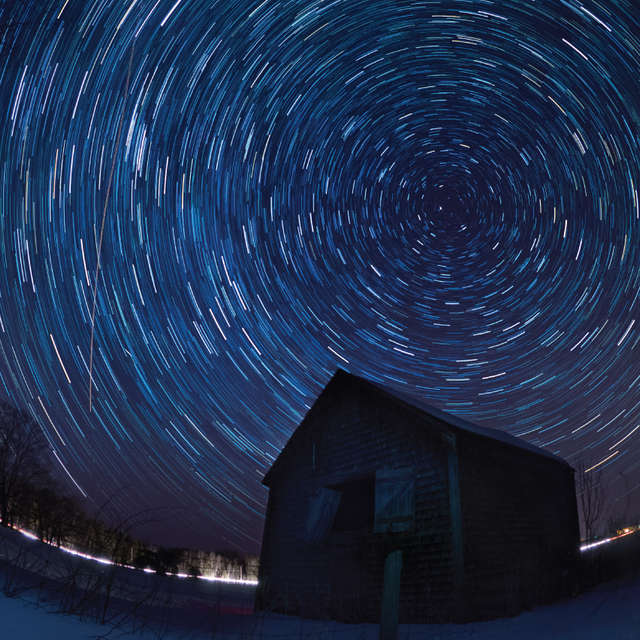
6 Tips for Better Astrophotography Images
Get six tips from Visionary Peter Baumgarten to help you with astrophotography.