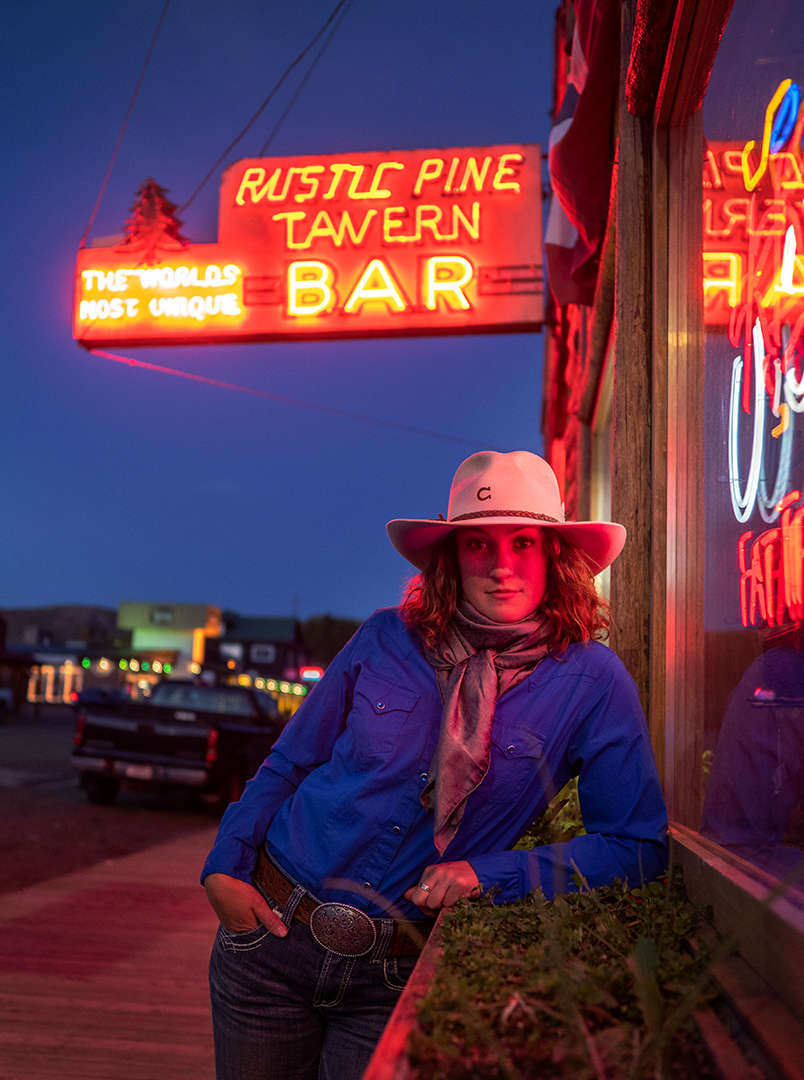
In my work, select images end up with National Geographic Image Collection. Their requirements are extremely high for those images selected. My Olympus equipment meets those requirements. I often print up to 50” on the long side, and the prints are spectacular.
Try pushing the envelope with your camera. Getting out of your comfort zone can often open new visual doors for you:
Here are some suggestions for getting the most out of your camera:
EXPOSURE IS CRITICAL
I often hear the expression, “I’ll fix it in post,” which is like hearing fingernails on a blackboard. You may be able to “fix” an image that suffers from extreme over or underexposure, but you pay a price. On your histogram, which displays important exposure details, the photo should be slightly towards the right or bright side, of the histogram.
Many think that under-exposed image will give them more exposure information. What you sacrifice with this can be accentuated noise. Photos are made of three channels: Red (R) Green (G) and Blue (B). When underexposing an image, the photographer actually exacerbates noise issues as noise comes from that B channel, and brightening a dramatically underexposed image really can enhance the “grain” of noise.

AUTO ISO
I use Auto ISO a lot. The trinity of exposure is shutter, aperture, and ISO. By going to Auto ISO, you allow the camera to do the “heavy lifting” of determining ISO. The Auto ISO setting will default to the lowest ISO for your preferred aperture or shutter speed, allowing you to shoot more successfully. This also eliminates the frustration of walking into a dark environment with the camera set on a low ISO, and you see a great moment, but the shutter speed is so low your file is unusable due to shake.
Plus, today’s Olympus camera handles noise really well, so why not let the camera deal with that component of exposure? I’d rather have a great moment of a scene with higher ISO than no photo at all. This craft of photography is all about moment.
RAW IS YOUR FRIEND
I’ll often see the aspiring photographer shoot jpeg as their file of choice. Your Olympus does a fantastic job of applying those elements of White Balance, sharpness, and contrast in the jpeg. But, I want all the data the camera can provide so when I work on final image, I have all that information to draw upon. A RAW file gives you almost two stops more dynamic range (that ability of the camera to capture the range from light to dark).
A lot of photographers early in their digital career also are a bit scared off of RAW as they’ve heard that the file takes an extensive amount of work. When one sees an image in Olympus Viewer, Photoshop, or Lightroom, they are usually amazed in seeing how user friendly those RAW converters are. Plus, if you “tweak” your jpegs regularly, come on over to the RAW side, as you’ll see very little difference in the interface.
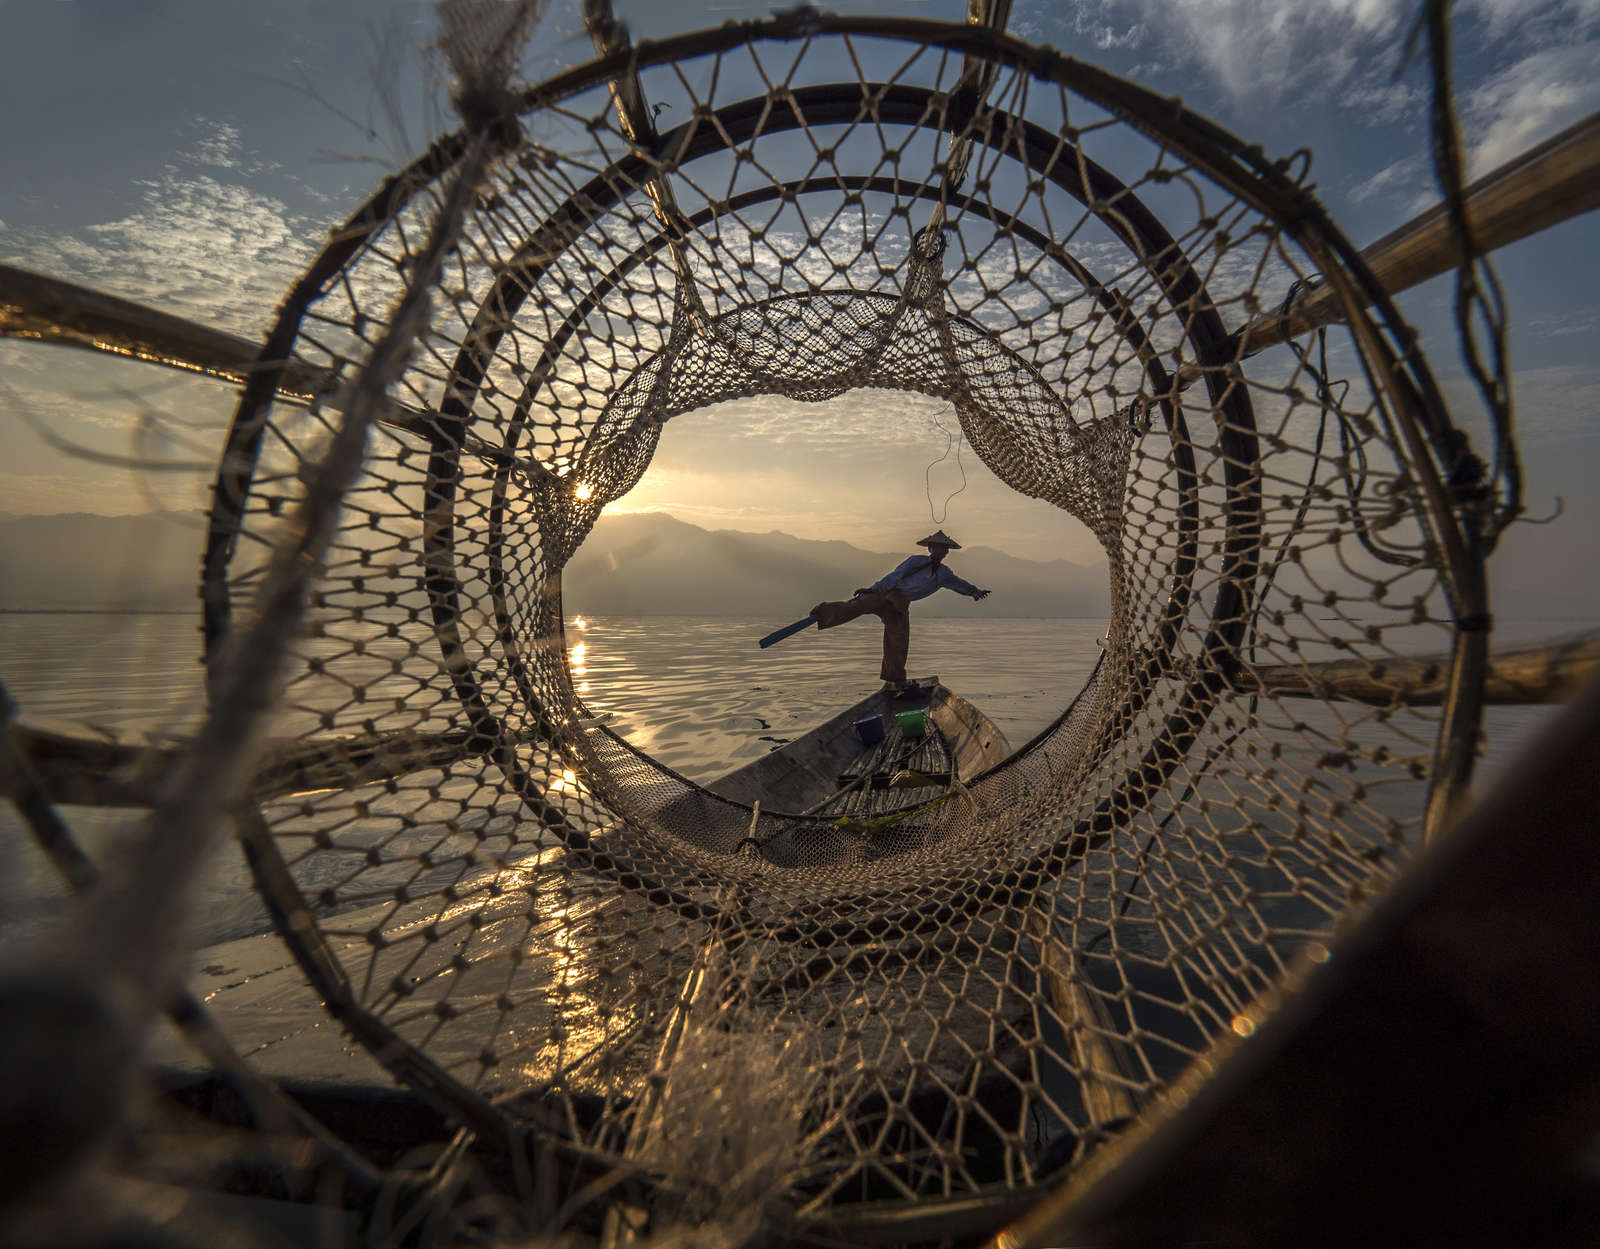
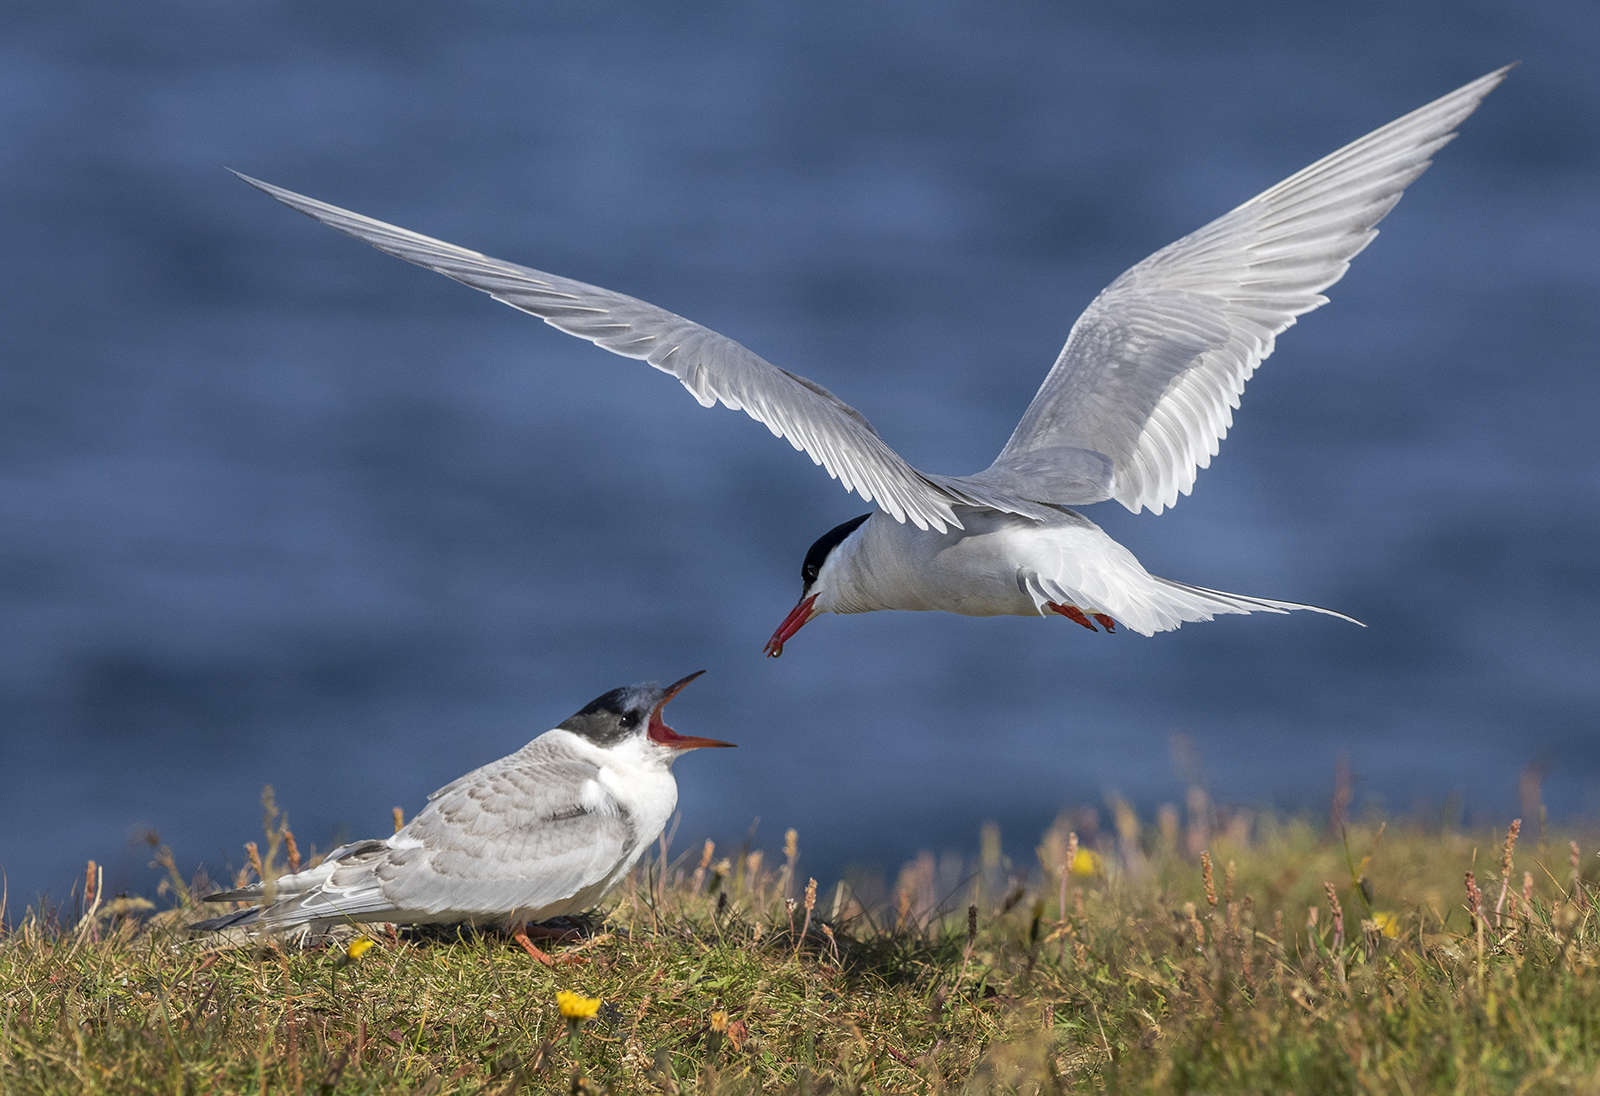
FREEZING MOTION
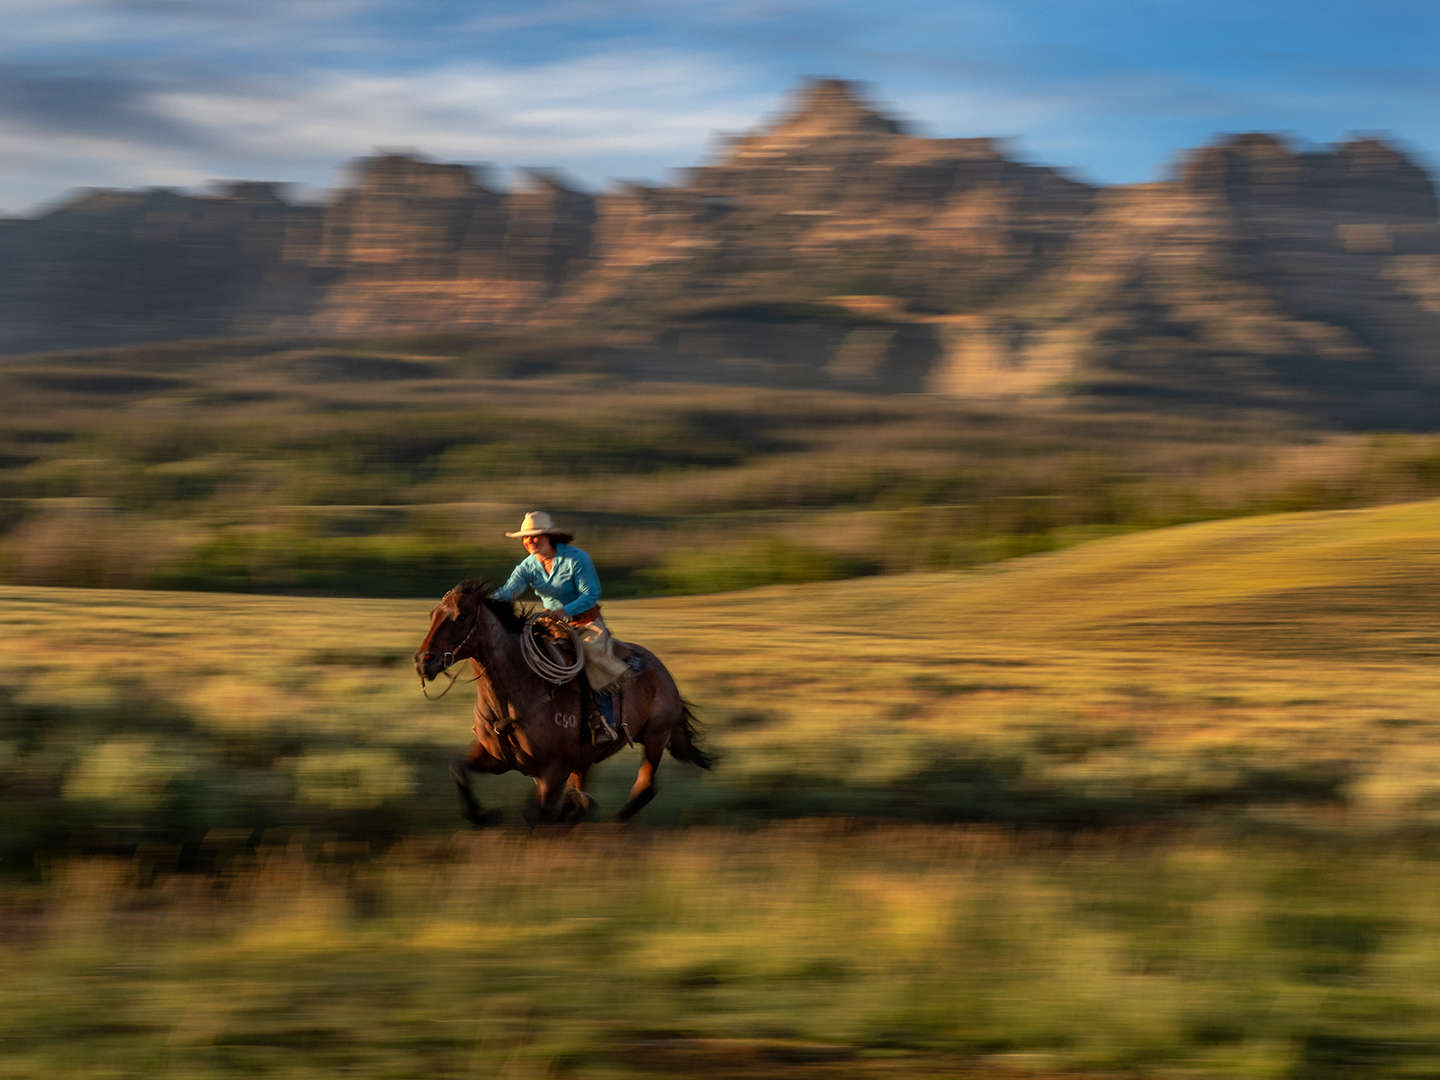
Shutter speed is a powerful creative tool for the photographer, allowing huge amounts of control to impact the final image. I shot NFL football for over 15 years in my newspaper days, and I learned an important rule in sports photography which translates to the world of wildlife photography and other areas where you are capturing a moving subject: when trying to “freeze” motion, it usually takes a shutter setting of 1/500th of a second to really start to stop motion. 1/500th of a second is great for photographing someone running.
If trying to stop the wings of a bird in flight, try ramping up that shutter speed 3 to 5 times higher - i.e.1/2500th of a second is a good shutter speed to stop the wings of an eagle. Conversely, you can use a slow shutter speed to enhance the feeling of motion.
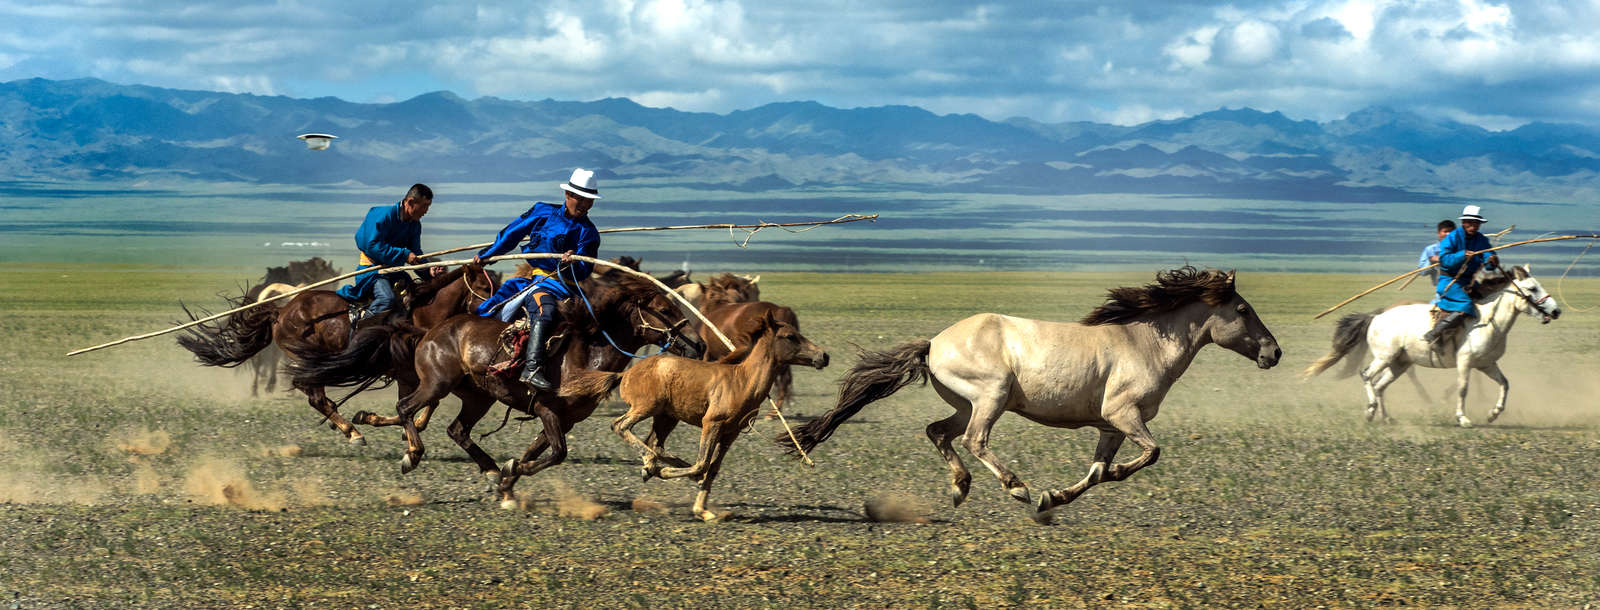
PANNING
If trying “panning” (shooting a slow shutter speed to impart the feeling of motion), start at 1/50th of a second, and if photographing people walking by, use a focus point in the viewfinder to “hold” on the subject that is moving. This enhances the chances of getting some sharpness on the subject, while the background blurs from that slow shutter speed.
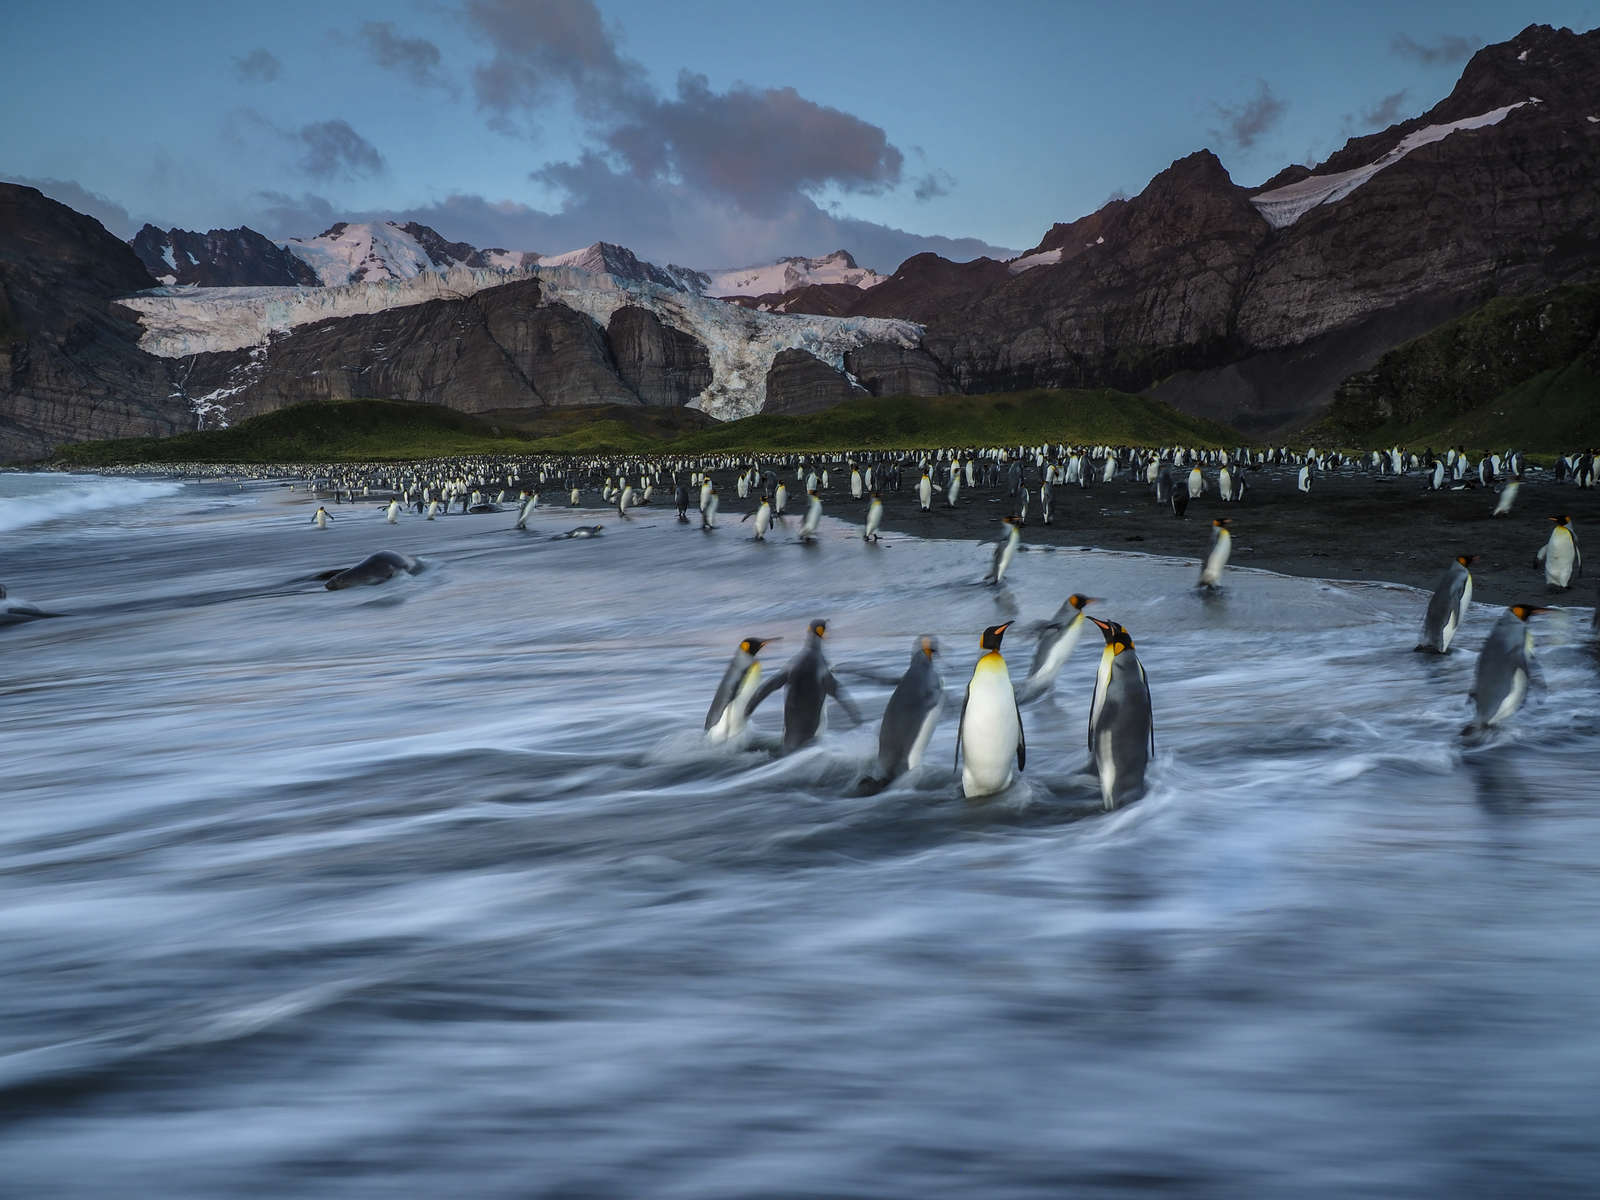
SLOW EXPOSURE
Try Slow Exposures in situations in which you thought it wouldn't be applicable. This can add an energy to your photographs, producing a photograph that can further engage your viewer.
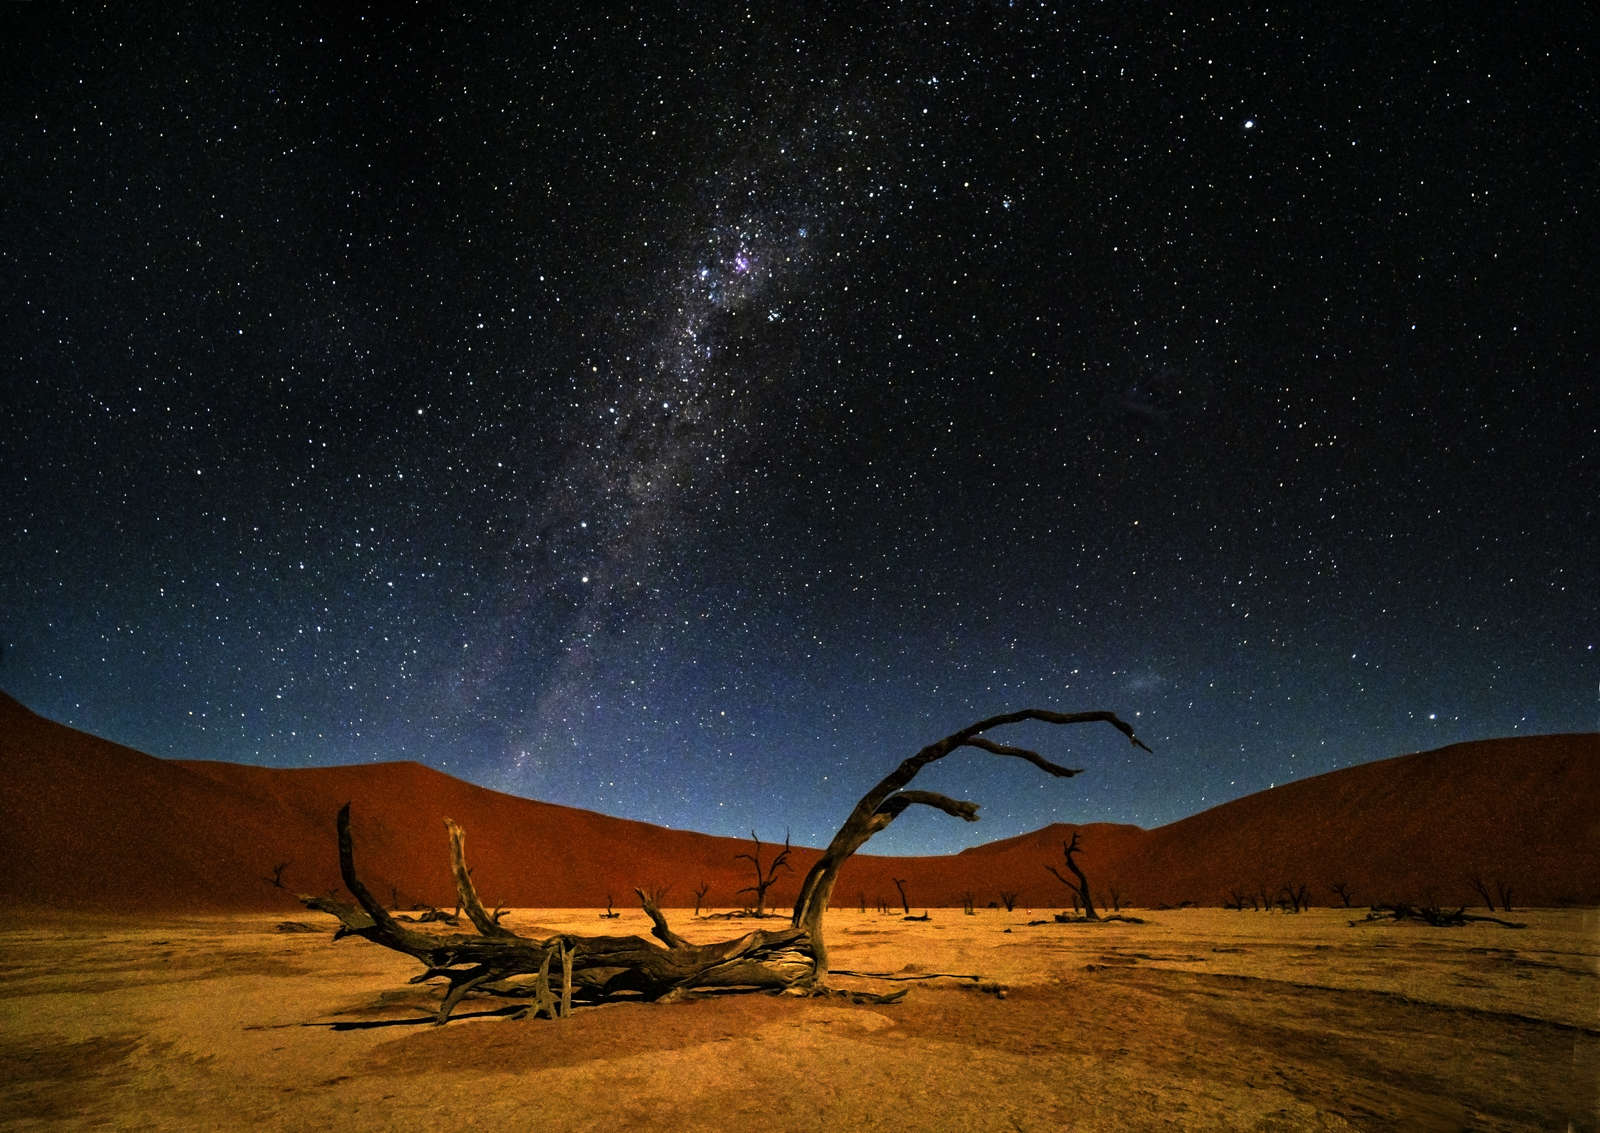
AVOIDING STAR TRAILS
A good rule-of-thumb: when photographing the night sky, the “500 rule” comes in handy. Take the length of your lens, divide it into 500, and the resulting number is the maximum number of seconds you can effectively use, with that lens, before you start noticing star trails.
If I want star trails, it’s usually a full sweep of them, not an abbreviated version. It’s kind of either or: a full circle or stars, or a sky full of points of light, with sharpness of the stars being a driving consideration. So, if using my M.Zuiko ED 8mm F1.8 FISHEYE PRO lens for a starscape, I’ll divide that 8 into 500, with the resulting 62+ seconds being the maximum exposure length, in seconds, I can use before I start to see a bit of star trail.
BONUS
Not really a tip, this is more of a statement of “wow,” in terms of Olympus’ images stabilization, especially in the M.Zuiko ED 12-100mm F4.0 IS PRO and M.Zuiko ED 300mm F4.0 IS PRO lenses. The Internal Body Image Stabilization (IBIS) works almost surrealistically. Enabling the IBIS by pressing half-way down on the shutter dampens movement so well on the camera, it almost looks fake!
Web: jaydickman.net
Blog: firstlightworkshop.com/wheres-jay/
Twitter: @jaydickman
As a Pulitzer Prize-winning photojournalist and National Geographic photographer, Jay Dickman is one of the most traveled, experienced and celebrated photographers in the program.