The Who, When, Where, What and How (I’ll Leave the Why Up to You)
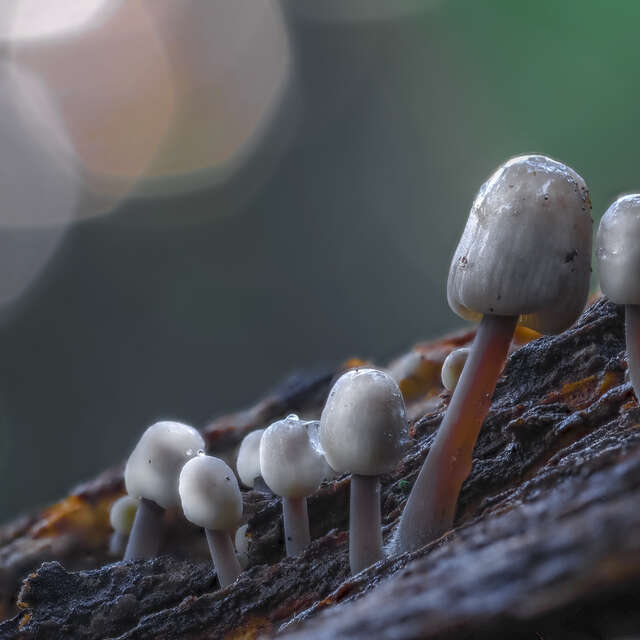
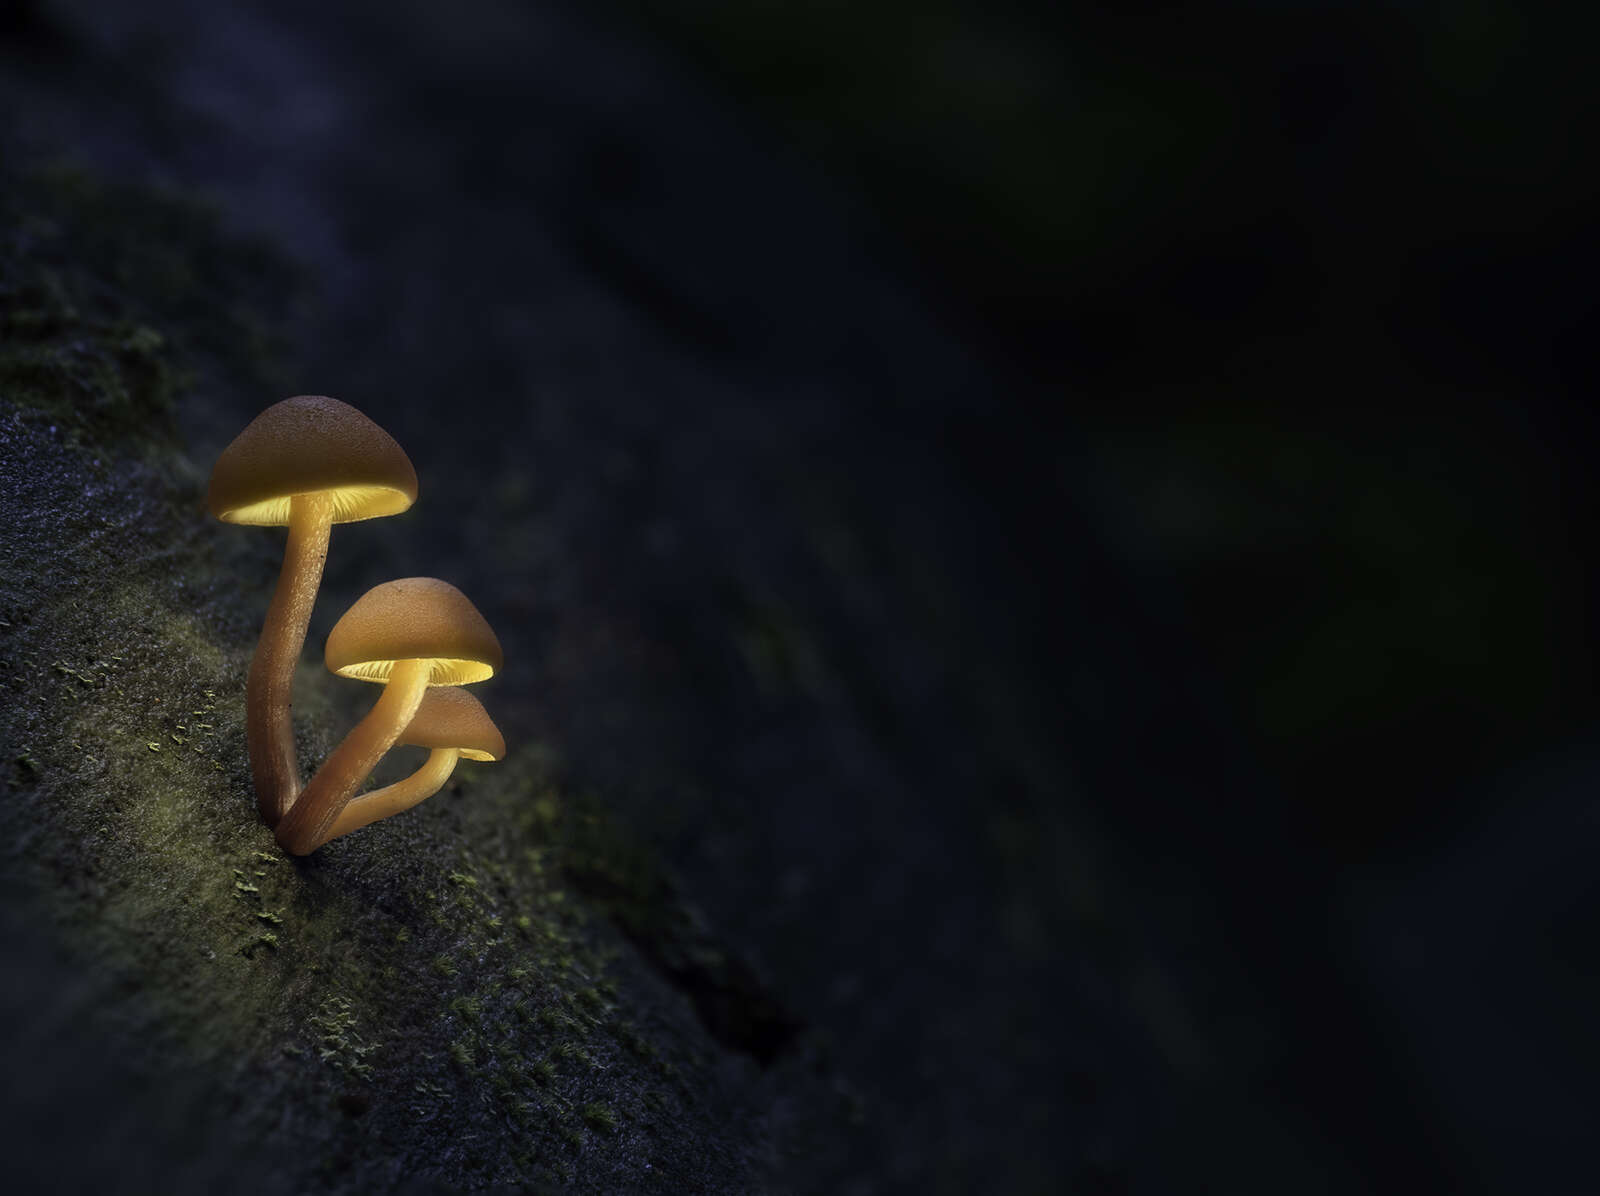
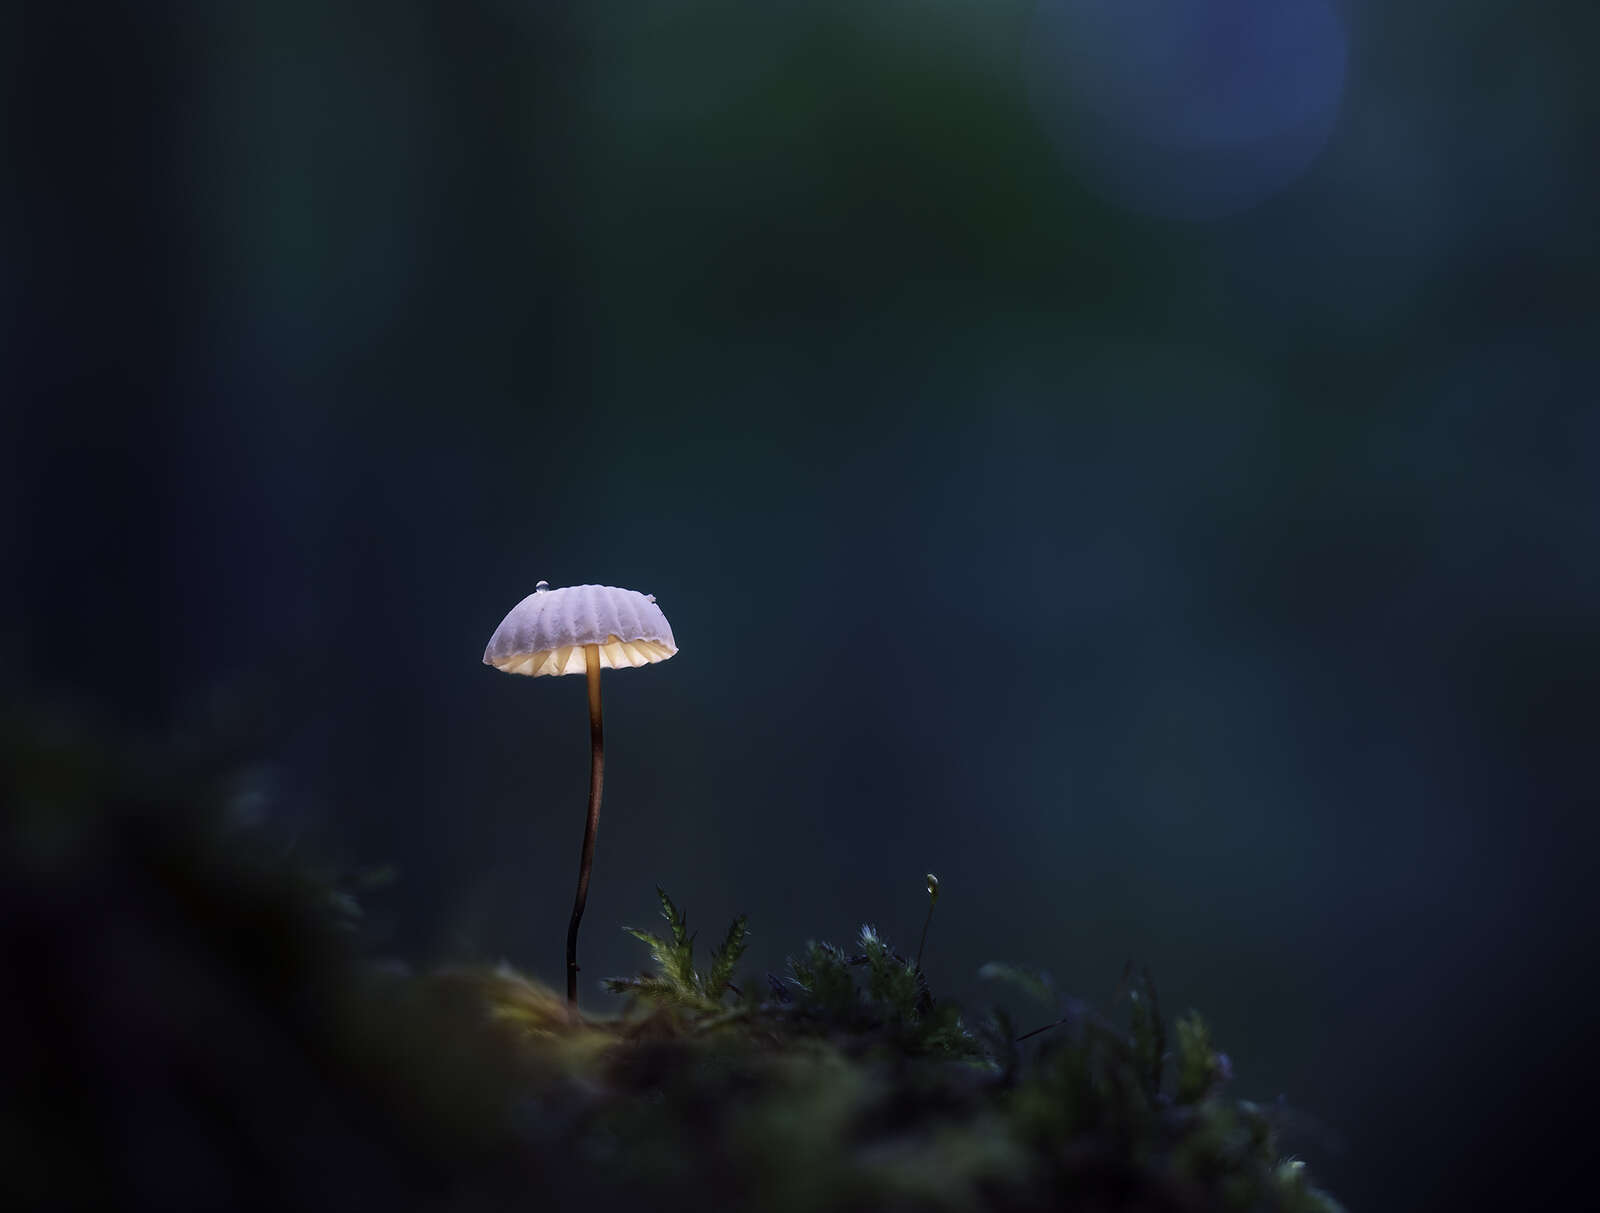
Who… or more specifically, which mushrooms? The best fungal subjects for this project will be those with a classic ‘lamp shade’ look to them. As the mushroom matures the cap will spread open wider and flatten out, so it is best to find ones that are fairly new. These are also less likely to have been munched on by a hungry slug or snail. As for the size, I prefer to work with mushrooms where the caps are between one and two centimetres in diameter. You also want to find a mushroom that is in a somewhat elevated position - on a rotten log, for example. The effect looks best (and is easier to accomplish) if you can clearly see the gills under the cap.
When – The main part of a mushroom, the mycelium, is underground and out of sight. The part that we see, the stem and cap, is the fruiting body, responsible for reproduction. It needs moist conditions in order to grow and therefore the best time to look for mushrooms is shortly after a rainfall. Autumn is typically a good time because of more unsettled weather, but mushrooms can easily be found in the summer after a good rain.
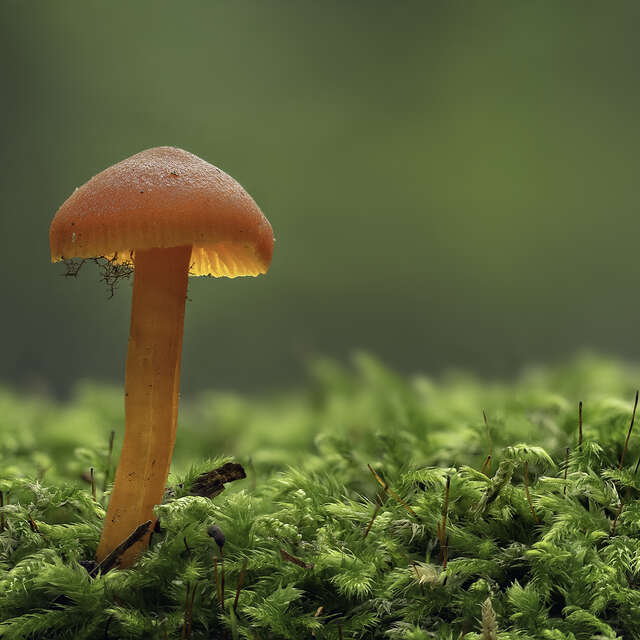
Where – Mushrooms can pop up anywhere that you have decaying matter, but typically the forest floor is the best spot. Rotting logs and leaf litter are perfect places to look. Since they require damp environments they often grow alongside mossy areas.
What… what gear, that is. You don’t need a lot of gear for this project but a few things are essential. Along with your camera body, a macro lens would be best. I used the M.Zuiko 60mm F2.8 Macro lens. Most of the OM System lenses have incredibly close focusing distances so if you don’t have a macro lens you can still get good results with whatever lens you have.
Since the final image is a composite it is important that the camera remain stationary between shots. A tripod or mounting system that allows you to get close to the ground is ideal. That said, for some shots like this I have propped the camera up directly on the ground and used a cable release or the OI Share app to prevent camera movement.
To illuminate the underside of the mushroom cap you will need a small light. A head lamp, flashlight, or any small LED light should work. For this image I used a small string of battery-operated LED lights. Finally, to put it all together you will need some post-processing software. The initial edits were done using Adobe Lightroom Classic and the compositing was completed in Photoshop.
How – Step by Step (Okay, here comes the fun part!)
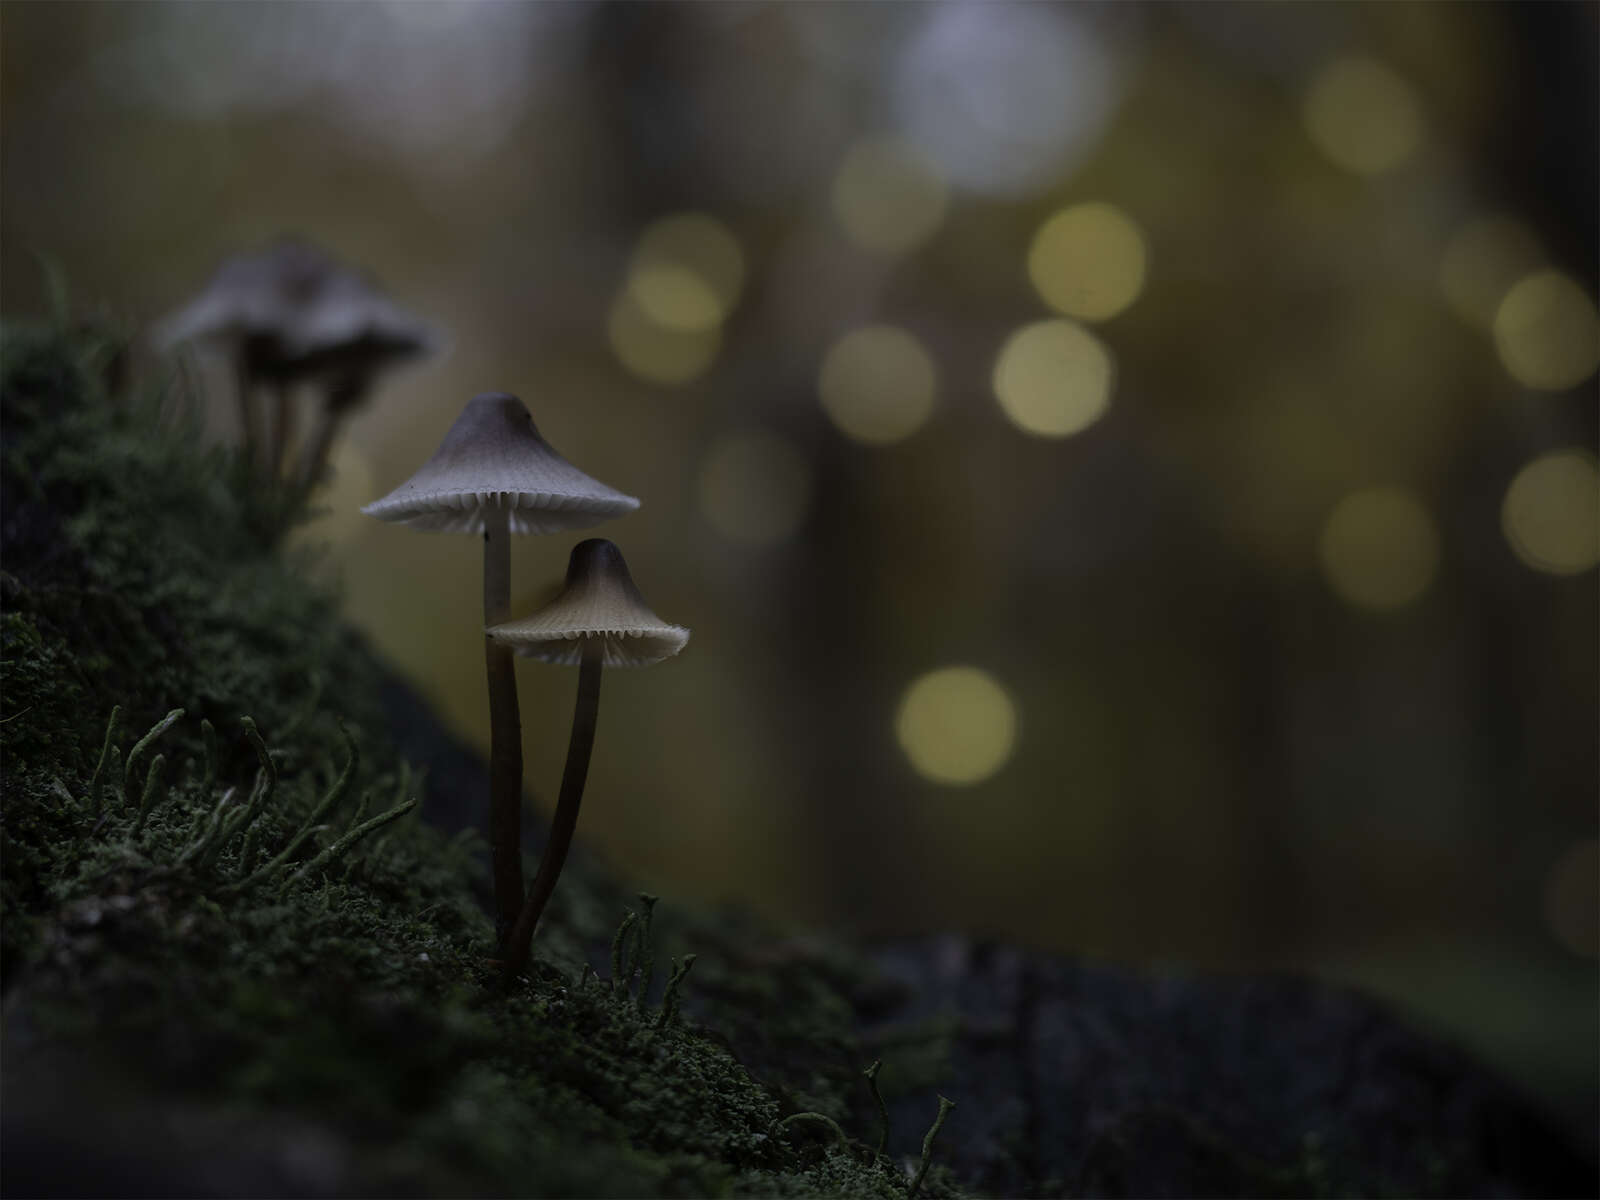
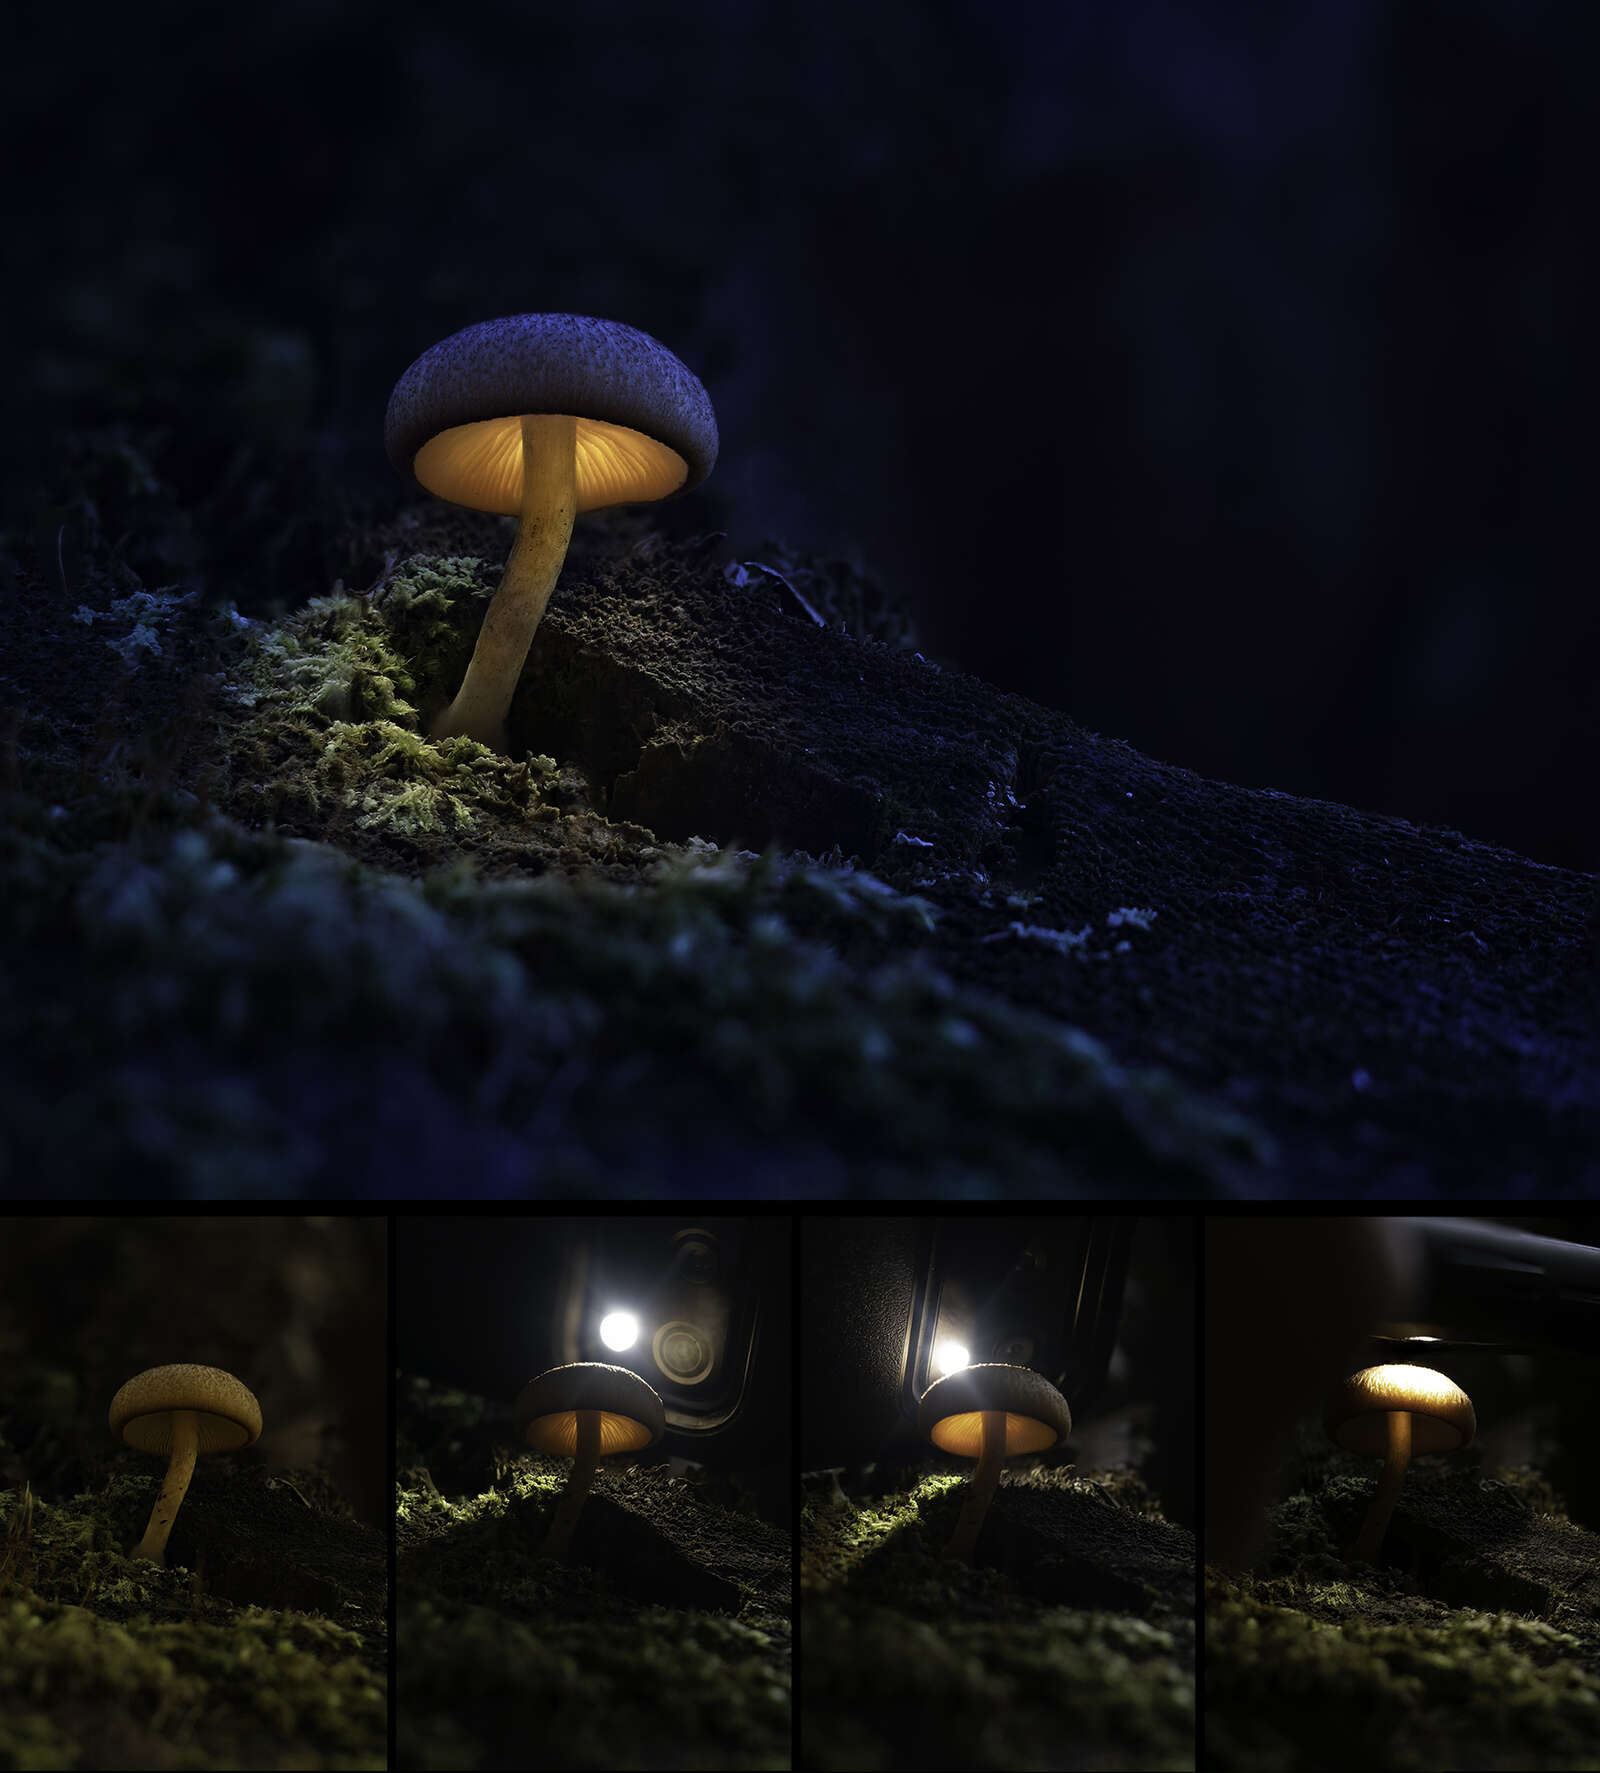
These forest night lights look as if they were photographed at night (makes sense, I guess). But that’s an illusion. I created that dusky look in post. I actually photographed the image at about 9 a.m. but chose a very dreary, overcast day. Some photographers do shoot these at dusk, but the light changes so quickly, particularly in a forest, that it is easier to work and control things during the day. Choose early morning or evening on an overcast day and you should get good results.
1. Setup – After you have found your perfect mushroom, set up the camera so that you can clearly see the underside of the cap. Good composition counts so check for distracting elements in your frame and work to remove them. Don’t destroy nature for the sake of a photograph!

2. Camera Settings – I typically shoot all of my landscape/nature photos in Aperture Priority and the same applies when I’m shooting macro images. Normally when I photograph mushrooms I focus bracket the shots, but since I am already working with multiple images to create the final composite I wanted to keep it fairly simple so I chose an aperture that would keep my main subject sharp. I also dialed down the exposure value to give it that dusky look. Each situation will be different, but for this initial shot my settings were as follows – ISO200, 1/125s, F6.3. I set the camera to F6.3, dialed the EV down to -1.3 and let the camera choose the shutter speed.
3. Lighting it Up – The success of the final image will depend on how well you light up the mushroom caps (mmm… mushroom caps! That makes me hungry). Although almost any small light can work, I prefer the tiny strings of LEDs that are popular at Christmas time. Take several shots lighting up both the front and back of the cap’s underside. You can also add some light to the area surrounding the mushroom to add some realistic glow from the mushroom lamp.
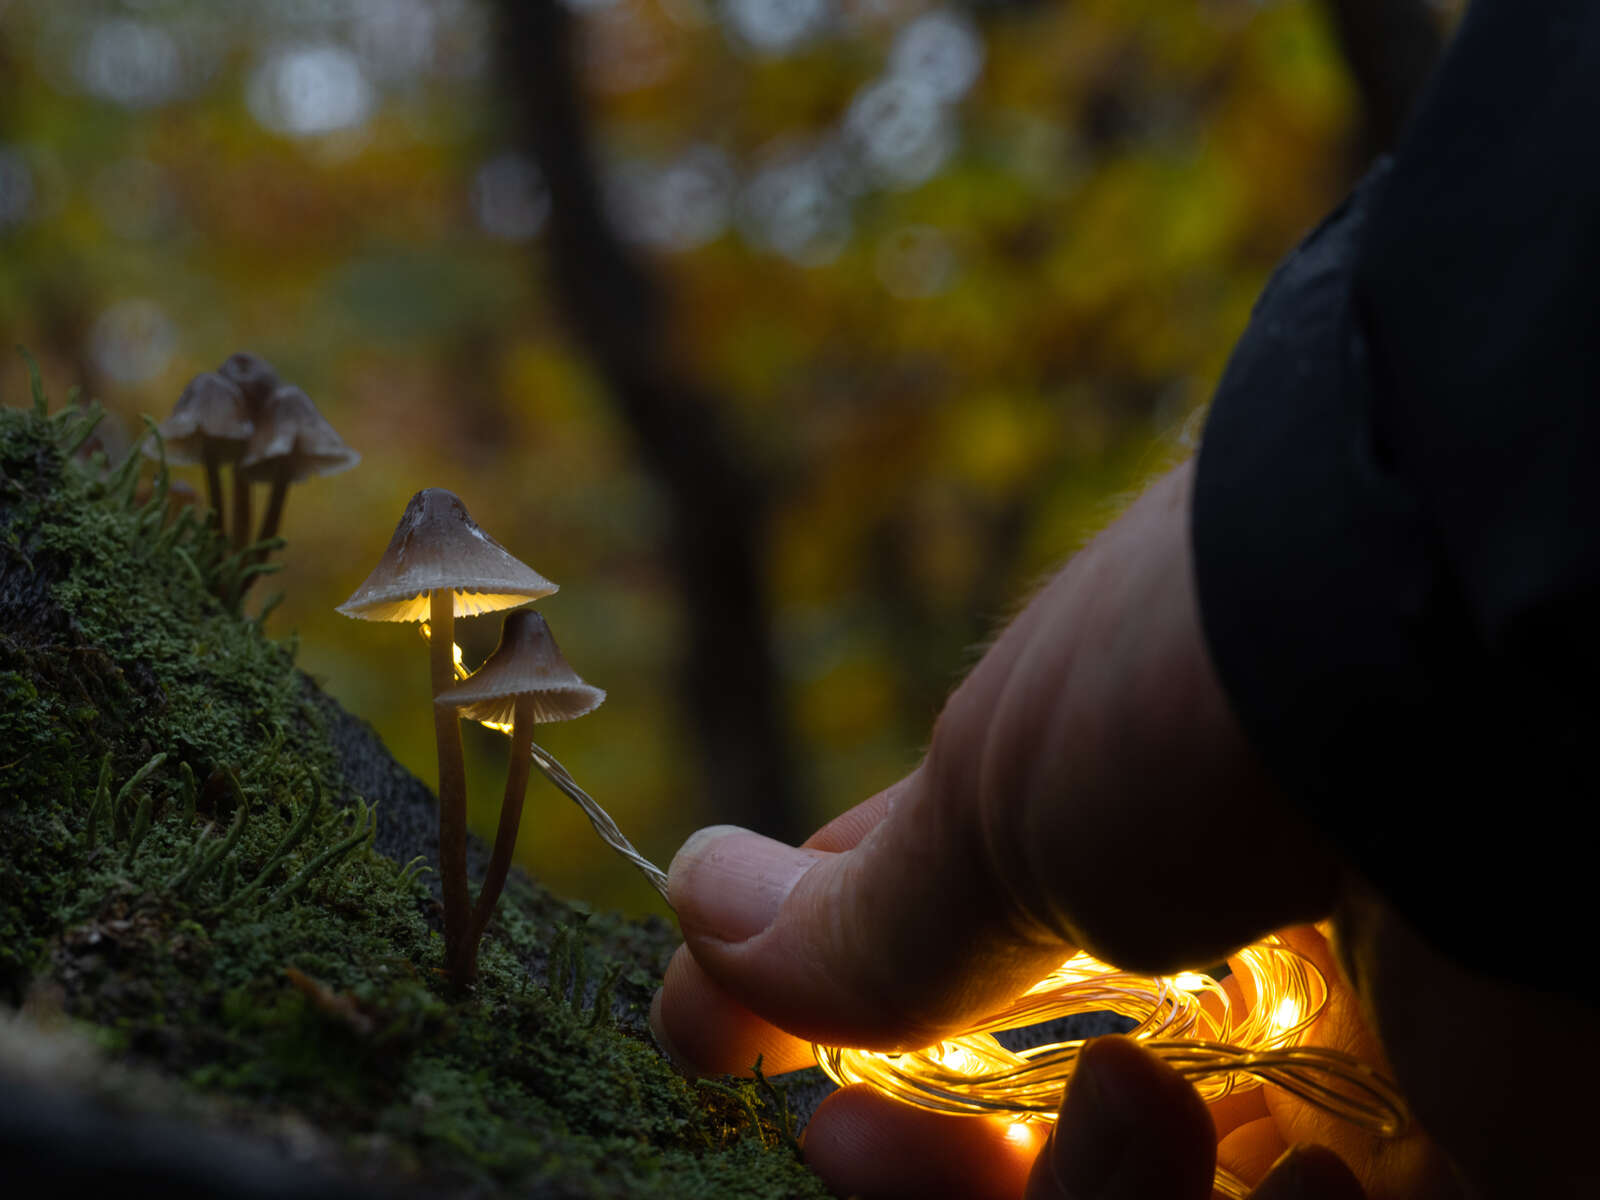
4. Optional Lighting – For this image I wanted to give the impression that forest sprites might be flitting about so I added some extra lighting in the background. I unraveled the string of lights and placed them about one meter beyond the mushrooms. At first, I kept the aperture set at F6.3 but quickly realized that I would get a nicer looking bokeh if I opened up the aperture to F2.8 for this shot.

5. Post Processing – Creating that Night Time Look
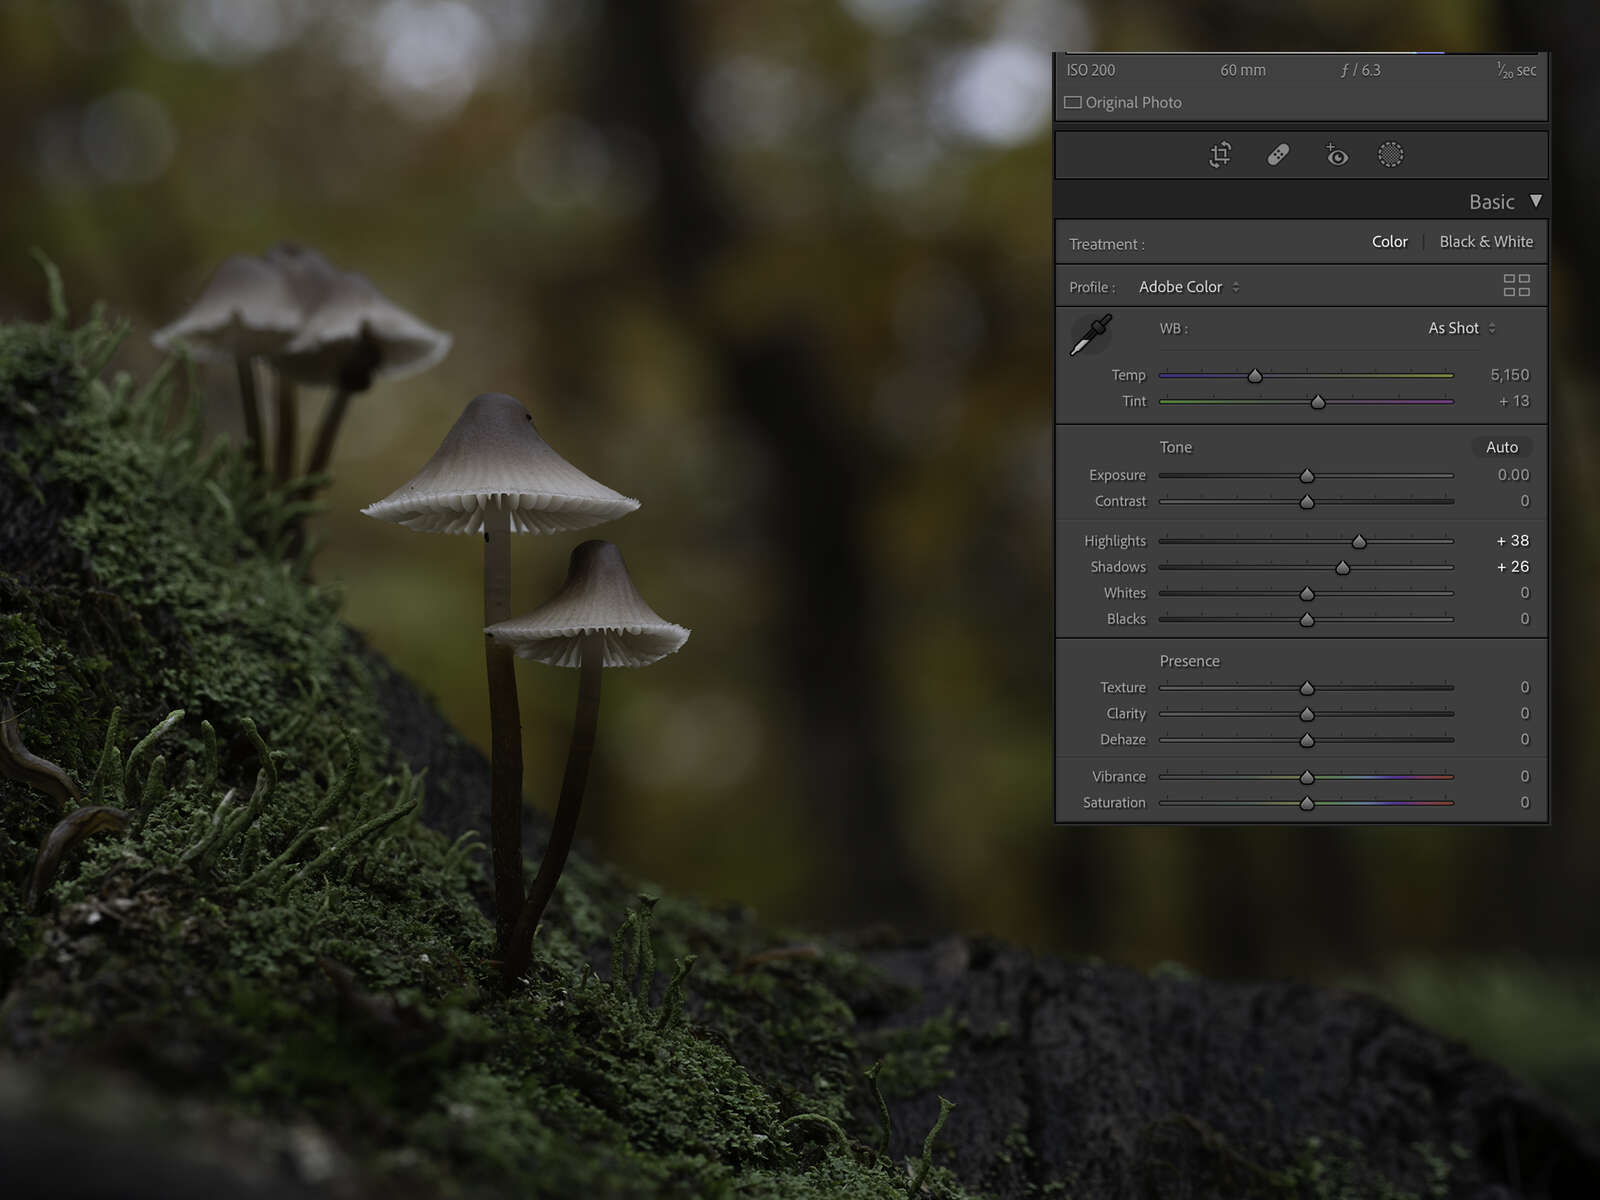
After importing the images into Lightroom, I made some minor adjustments to the shadows and highlights. In order to make it look more like night time I changed the colour temperature and overall exposure of the image. For each of the lighted photos play with the exposure and highlights sliders until you get a look that you are happy with. Don’t worry about how the rest of the image looks for these shots since the other areas will be masked out. A warm glow usually looks better so adjust the white balance if necessary.

6. Post Processing – Creating the Composite
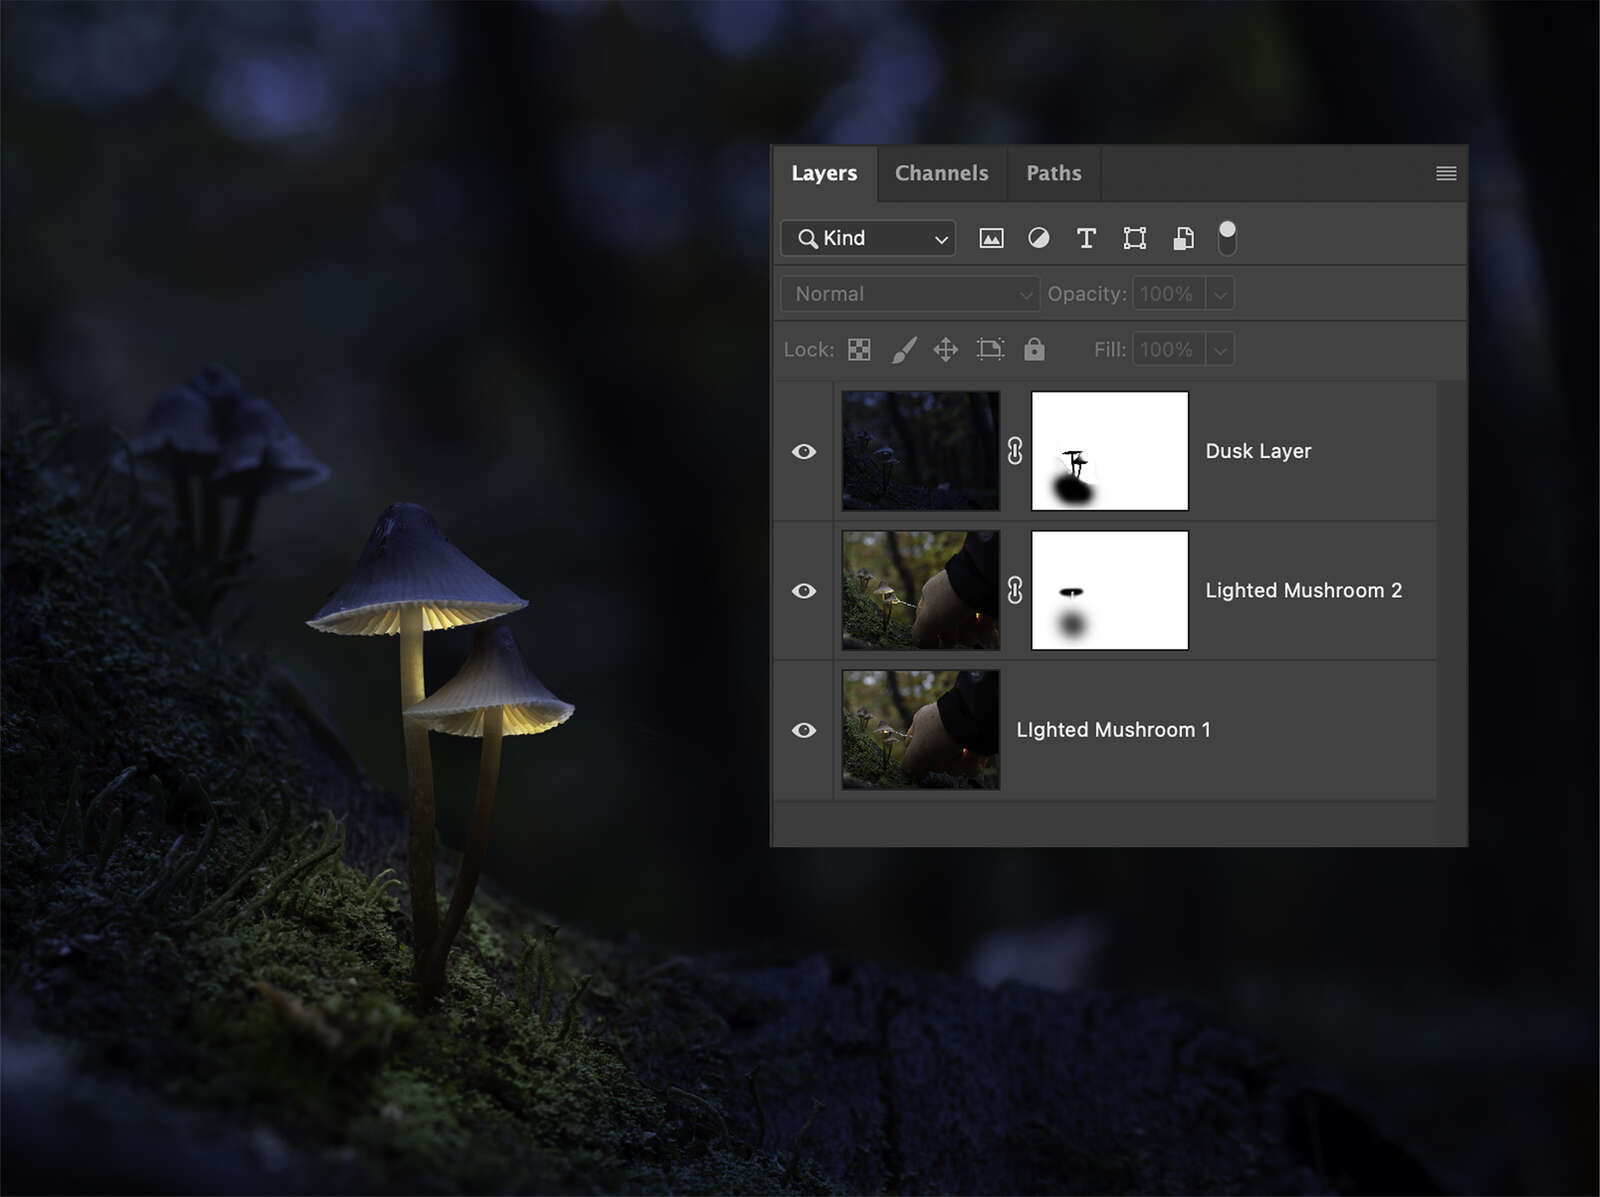
(This step assumes that you have some basic skills in Photoshop, especially working with layer masks.) Once the adjustments have been made to each of the component images, import them as layers into Photoshop. Organize them such that the ‘night time’ layer is at the top. Even if a tripod was used it is a good idea to ensure that each layer is perfectly aligned. Select all the layers and then from the Edit menu select Auto-align Layers.
Add a layer mask to each layer except for the bottom one. In the simplified example below, you will see three layers with the top two having layer masks (the white rectangle). By using a black brush on the mask, you reveal parts of the layer below. Make sure the layer mask is selected and brush away part of the top layer to reveal the lighted area of the mushroom below. You will need to repeat this with the second layer in order to reveal the other glowing parts of the mushrooms. You will notice that I also masked out some of the area at the base of the mushroom to make it appear as if the mushroom lamp was casting a glow on the ground. As you are masking, note that you can change the opacity of the brush so that you can mask out more gradually and therefore have more control over your end result. As well, if you have brushed away too much of a layer, switch from black to white and paint it back in.
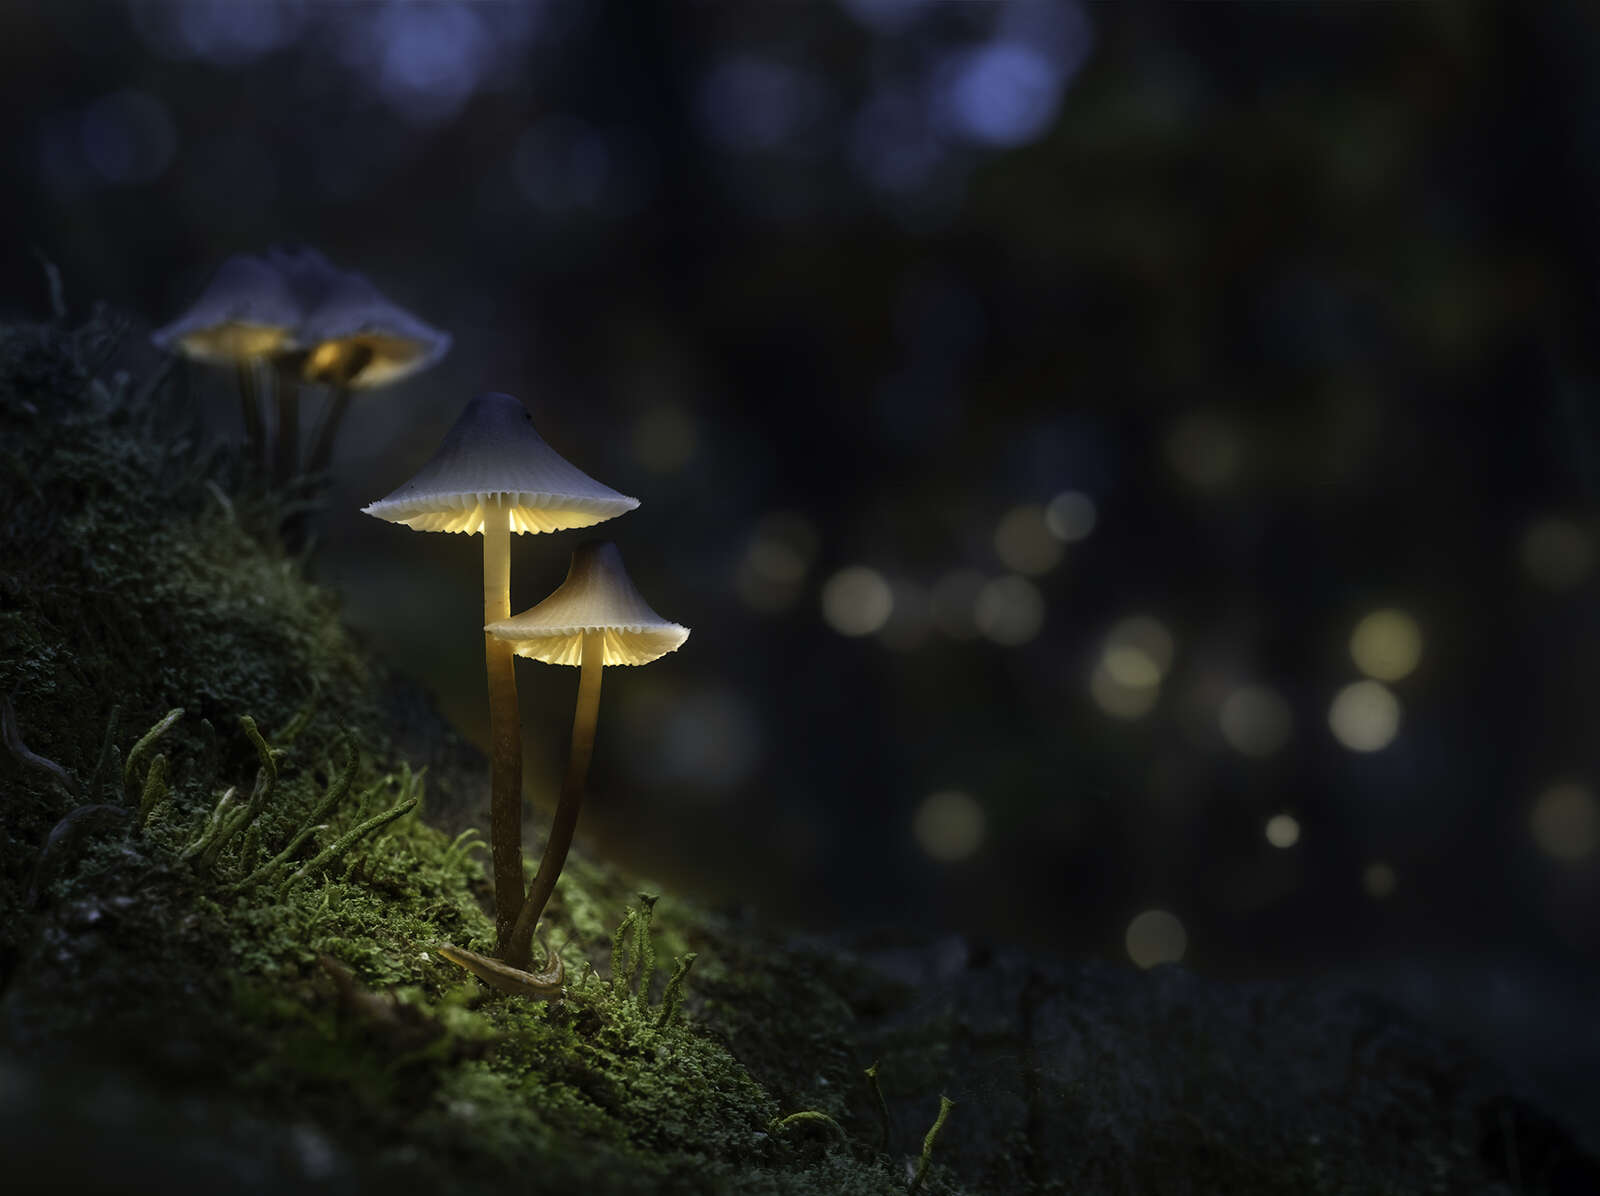
If you have numerous glowing mushrooms, and therefore more layers, you will need to continue masking to reveal the lighted areas below. In my final image I ended up with six layers – the night layer, four lighted mushrooms and the “glowing sprites” in the background. Once you are happy with the masking, feel free to add some adjustment layers in order to finesse the overall look. For example, a Curves adjustment layer works well. One technique I use to add some additional glow is to add a new layer and convert it to a Soft Light blending mode. Then I use a warm-coloured brush at about 5% opacity to gradually ‘paint’ on some overall glow.
Final Words and Images
Every good photo starts with a bit of your own imagination – how will you capture the scene in a unique and interesting way. Most of the time we are trying to preserve reality. What I love about this project is that it suspends reality and lets a bit more creativity shine through.
ABOUT PETER
Web: creativeislandphoto.com
Blog: creativeislandphoto.com/blog
Twitter: @creativeisland4
Peter has been a dedicated Olympus shooter for nearly 40 years, and has found a way to combine his passion for photography with his love of teaching to develop photography workshops with a focus on landscape, wildlife and astrophotography. Peter’s work has been published in a number of magazines including Canadian Geographic, Shutterbug and Outdoor Photographer. He maintains his own blog with an emphasis on tutorials that assist others in bringing their photography up to the next level.