HARK! THE FEATHERED ANGELS SING
Dawn Chorus Day’, that magnificently magical melodic awakening that is so worth experiencing even if it’s only the once. As many have found, spending time watching and listening to birds is a total joy and a tonic to your mental health; imagine them as your feathered psychotherapists but without the cost. Have you thought about recording them for future playback at your leisure or improving your video audio?
It’s not only one chorus day of course, our avian arias have been gradually building to a crescendo since the start of the year and carry on until the mating season has stopped in the summer.
The next few weeks are as vocal as our feathery friends become, singing away to either ward off would be rivals, either for territory or mating rights. It’s thought that some birds do sing for enjoyment and I think that’s a lovely thought.
There are many different reasons to record our feathered friends:
Like me, you may have endured an early morning alarm call to hear the magical dawn chorus or maybe watched a tiny but powerful lunged wren singing at the top of its voice, such wonderful things worthy of recording for posterity.
If you are a wildlife photographer, knowing your bird calls can alert you to subjects long before you have eyes on them and recording is a great way to improve your identification skills. No matter how many times I’ve played back a bird call on an app or media, it has very rarely stayed in the memory bank and it was only upon seeing the bird and its song re-united that it stuck. I don’t profess to be a bird call expert, in fact I’m rubbish but what little I know has certainly helped and also made walks so much more enjoyable.
It’s another reason to get out into nature especially if the light is not playing ball for photography and any addition to your knowledge base will only help.
You can also use recordings for ambience in videos or slightly off topic, you could use them for music production, just check out the Kate Bush’s Aerial album track, ‘Aerial Tal’ for feathery ambience and bird/human duetting.
You may just be a ‘dabbler’ (you can’t get arrested for dabbling) or something more serious, such as recording better quality audio for video, whatever your reason the Olympus/OM SYSTEM digital recorders, just like their cameras, are so small and lightweight that you can just pop them in your bag or pocket. Even though they are nifty little machines they record to the highest of standards.
ISO 800 1/800s f/8
So, let’s start with the basics
The basics of a good bird song recording is the same no matter what brand of equipment and the majority of this blog will be useful for all.
I could go into major detail but for the sake of brevity and because it’s all quite simple, I’m going to start with an easy one, the dawn chorus and then move onto a little more detail of a few specific things you can do. Then if you want to get into the nitty and indeed gritty, there’s a more detailed appendix that you can peruse at your leisure. If you are struggling to sleep at night and need something to read that will send you to the land of Nod, scroll down to the appendix (nothing to do with dreaming about the glam pop combo Slade by the way).
ISO 1600 1/500s f/8
Keeping it simple
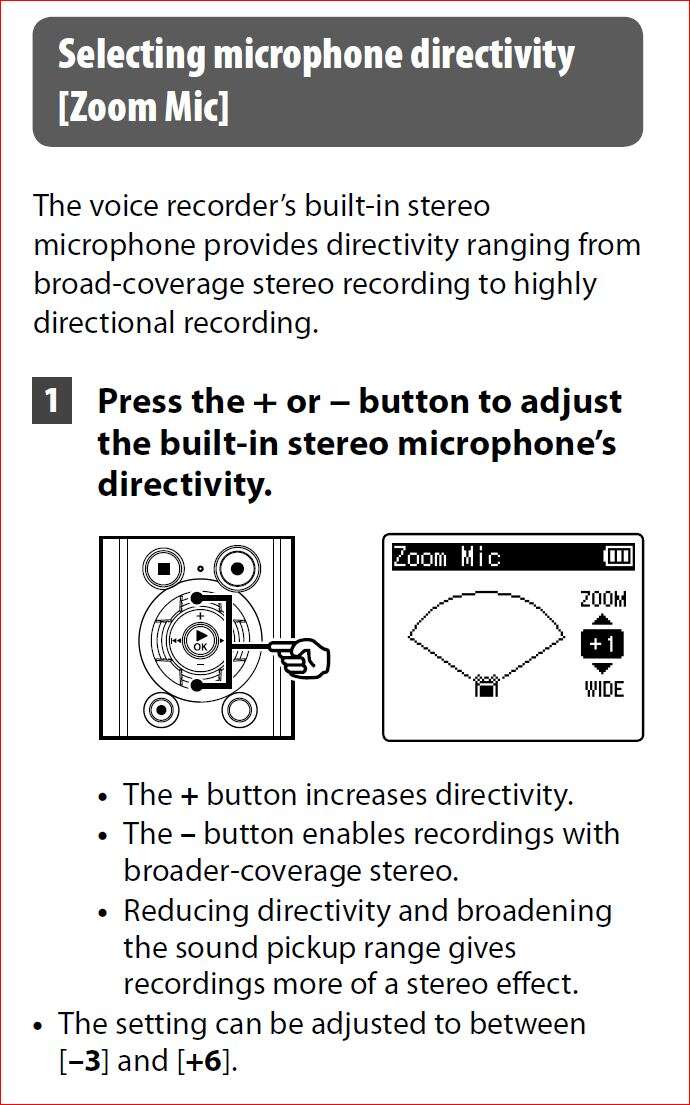
No matter if it’s photography or recording, I try to keep things as simple as possible and in that spirit the menu is set-up so that as best as possible everything is accessible from the recorder’s front panel (there is one setting you may need to change depending on circumstances, the zoom function but I’ll come onto that later).
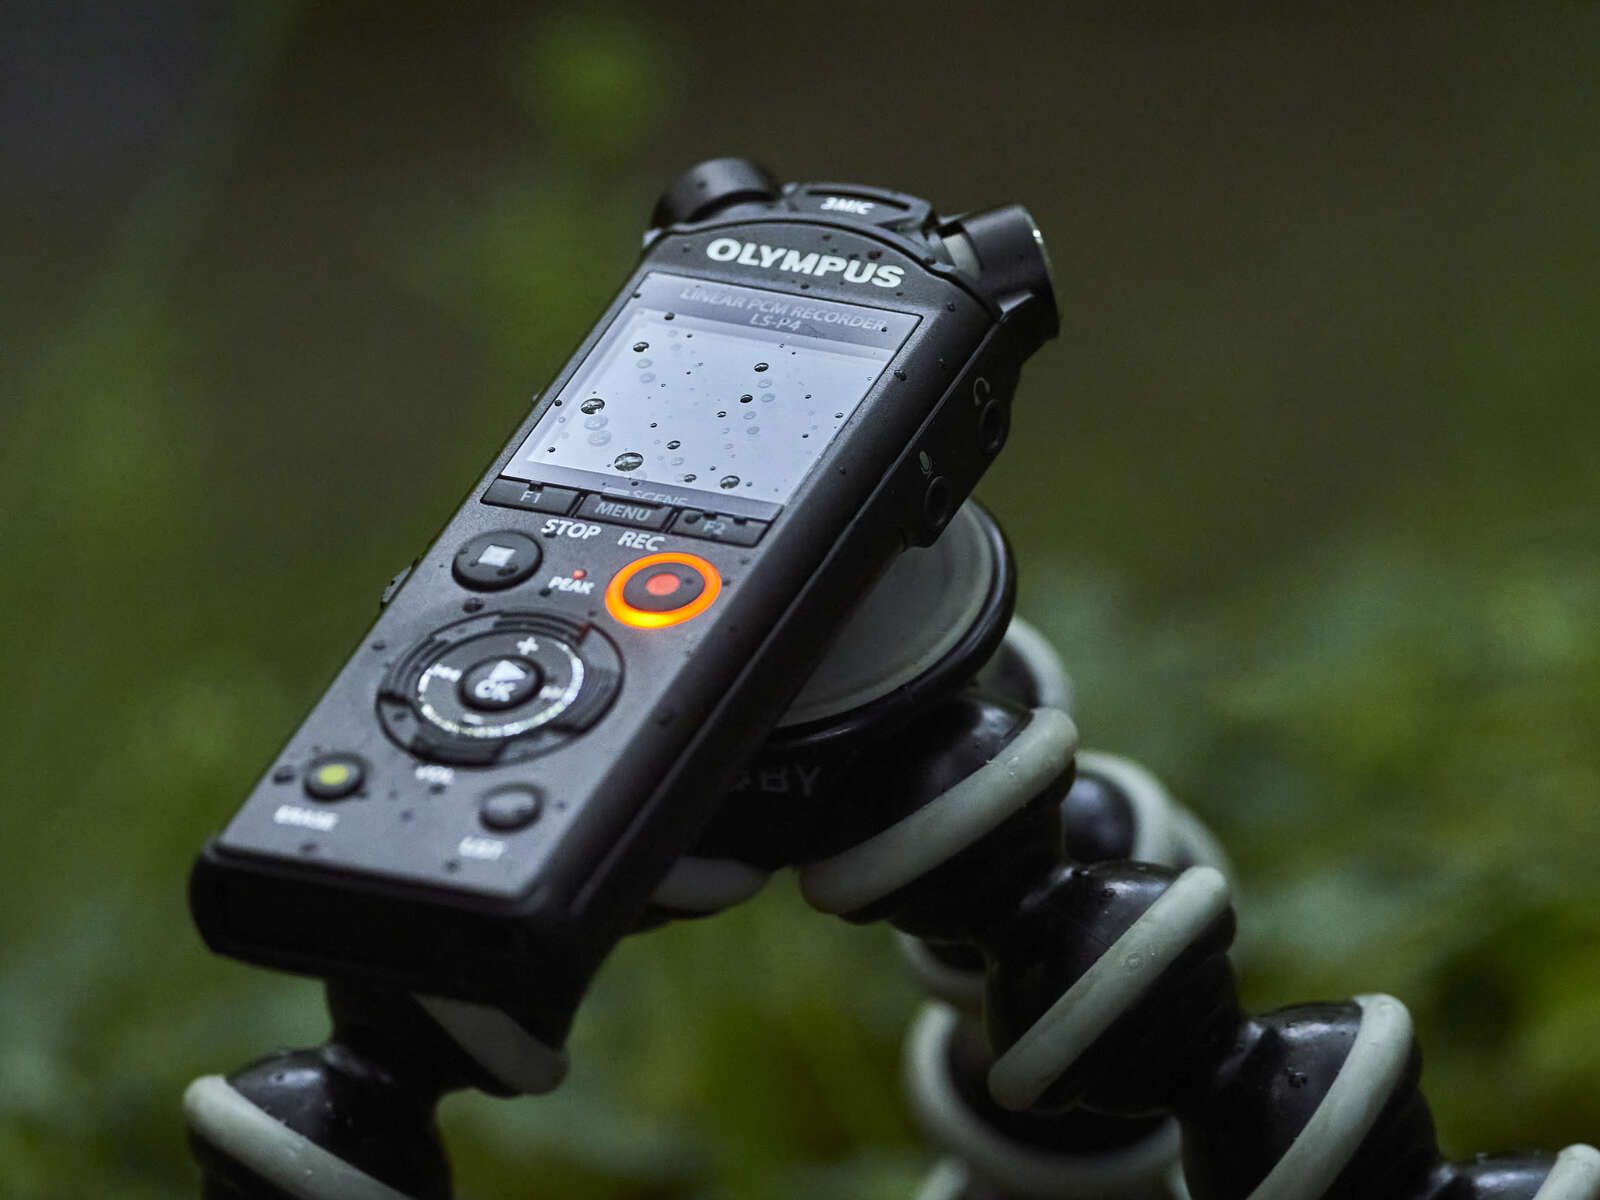
I know I’m being a mother hen here but don’t forget to charge the rechargeable battery. Unlike me, please remember to press ‘okay’ when you first pop the recorder on charge, otherwise, like me, it won’t charge. It’s worth carrying a spare long-life battery with you – possibly one that reminds you of a bunny – just in case something should go awry. It’s also worth making sure the date and time are set so you have the reference in the future.
Basic equipment
You could just carry an LS-P1 or 4 with you and you will achieve a lovely sound but just a few cheap additions will help improve the sound even further, some you may already have:
- Your recorder – For this I’m using the rather sexy LS-P4 however the principal is the same for all, including the LS-P5.
- A tripod - Helps to avoid handling noise from touching the recorder, doesn’t need to be anything special, even a table top one will do as you are recording a wide area.
- Microphone windshield - If your budget allows fit a windshield to stop extraneous wind noise, it’s surprising how even a gentle breeze can ruin a recording. I use the Olympus WSJ2 as it fits perfectly (I have tried the generic ones but they are a poor fit) but don’t expect miracles especially if it’s a strong wind.
- Headphones – It’s not totally necessary but it’s very difficult to tell how good a recording is if you are using the playback speaker on your equipment. There will be very little bass response and any problems will be difficult to hear. Besides if you are recording skittish birds, playing back your recordings through the speaker is going to make them skittisher (I might have just made that word up). The LS-P4 and P5 model allows you to use Bluetooth earphones/headphones which saves another cable getting in the way.
In place
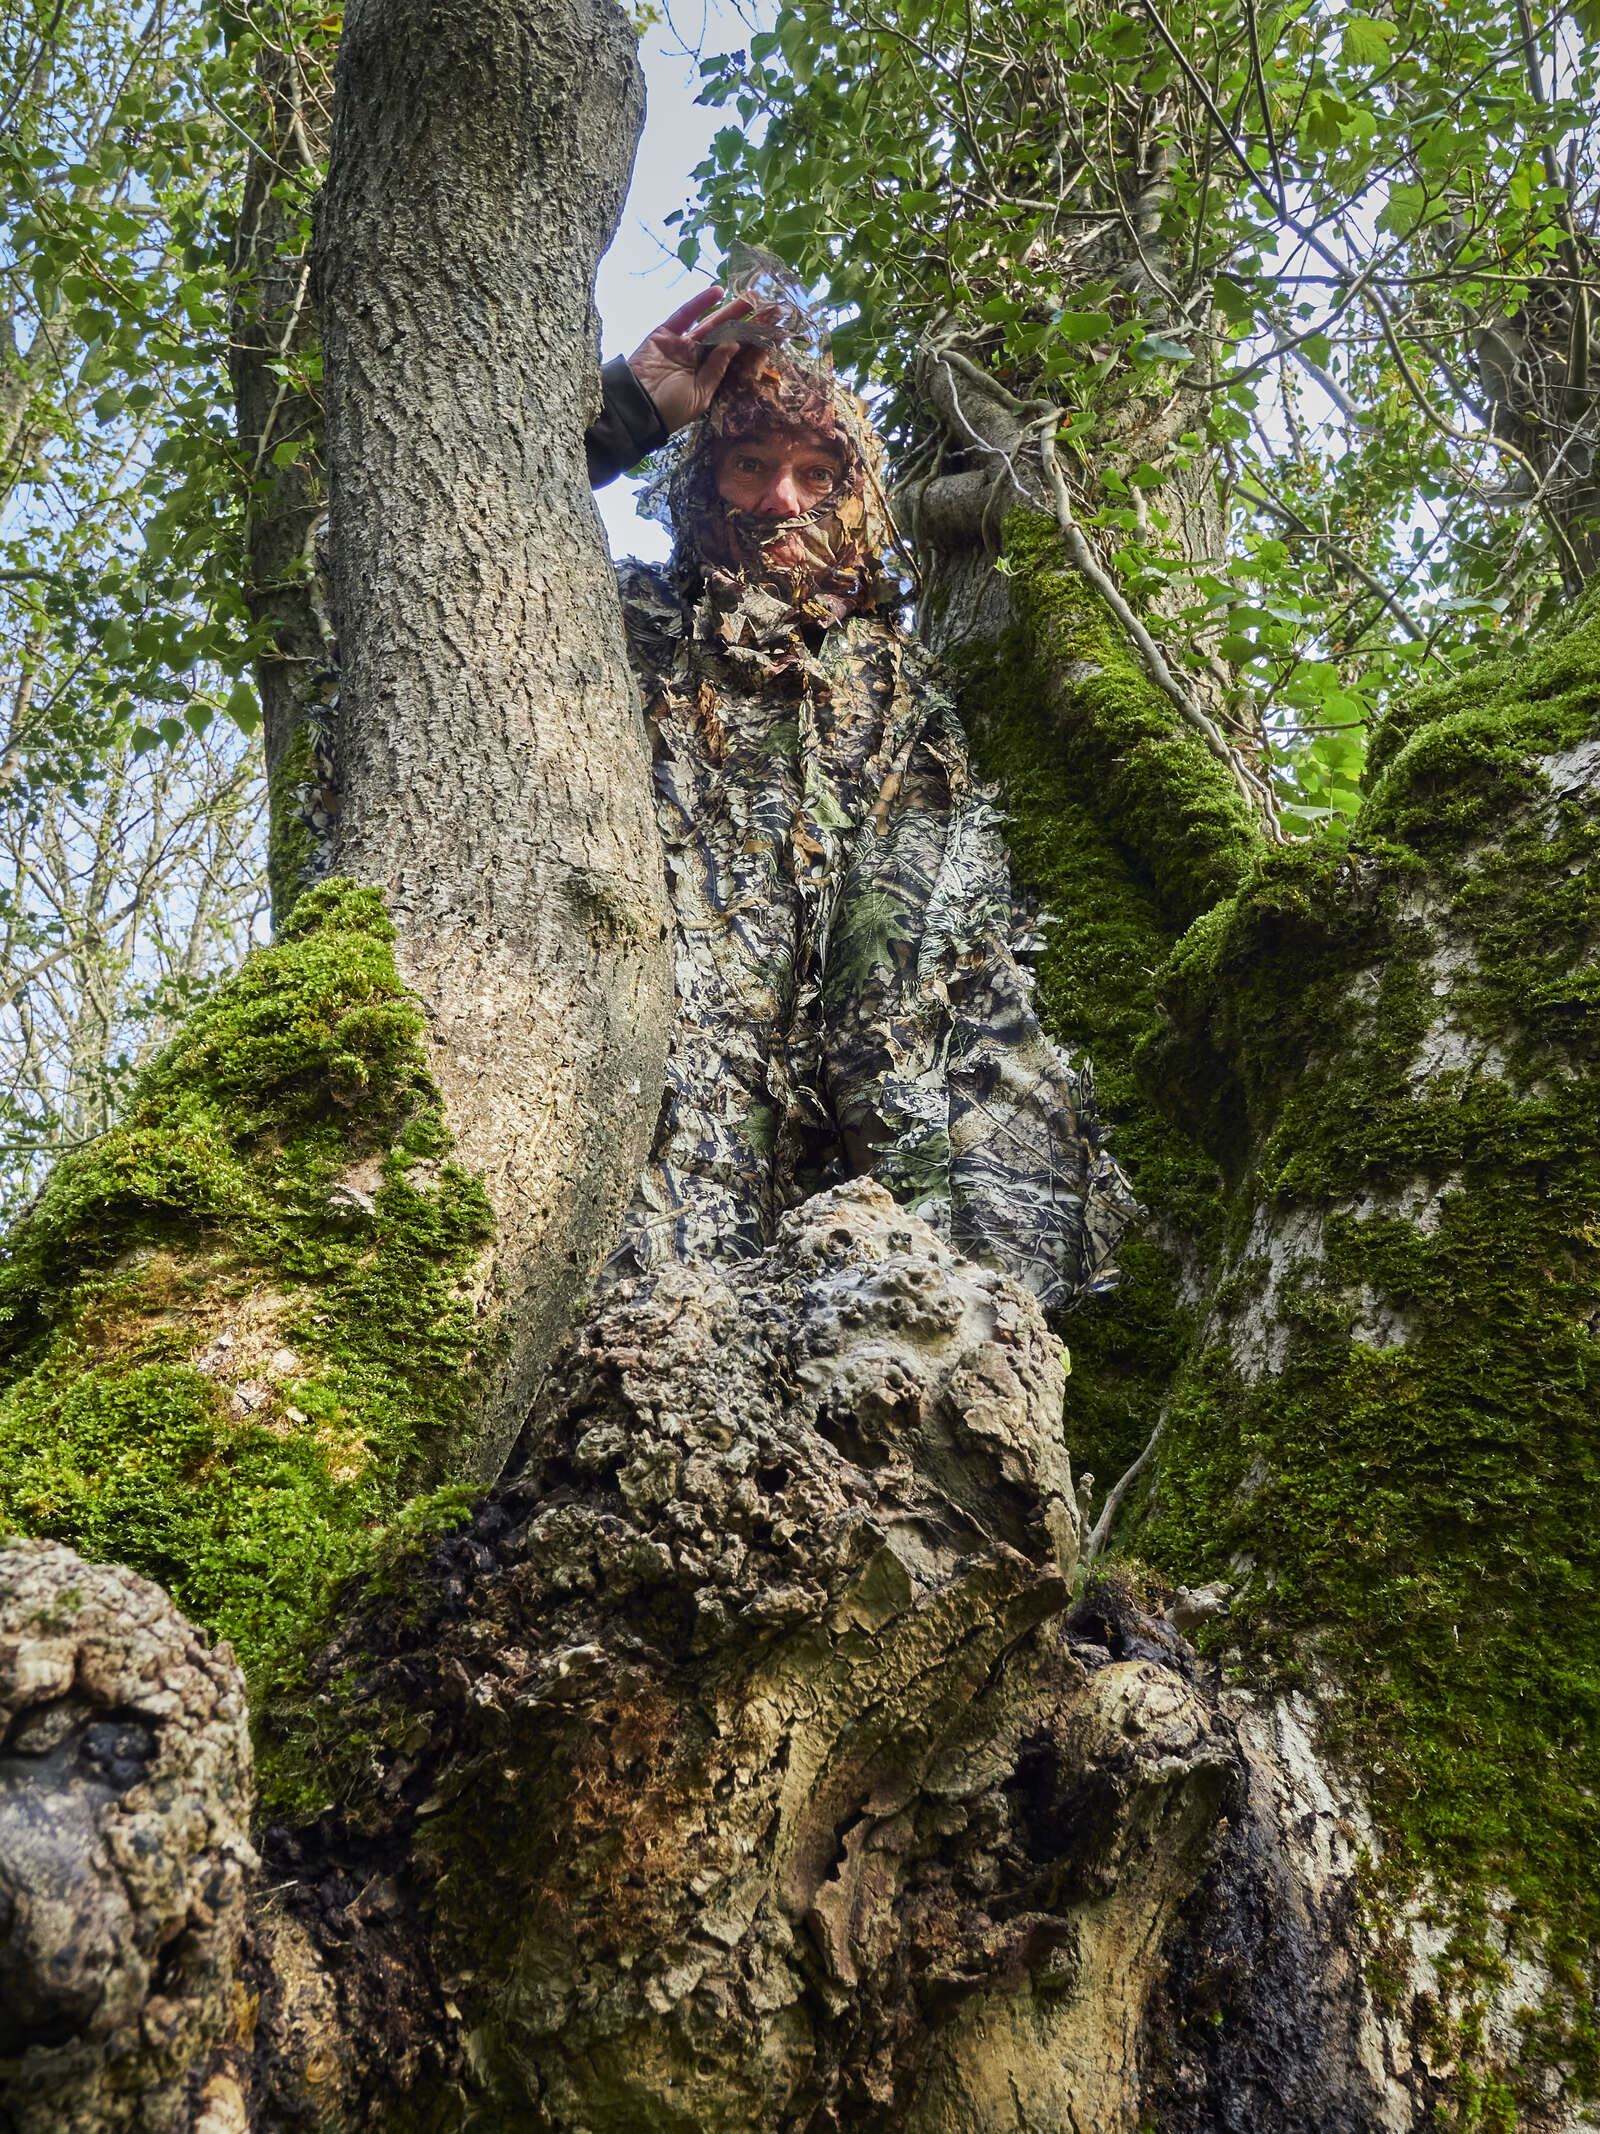
You can record the dawn chorus from right outside your window but if you are able, it’s worth trying to find a wood or park as bird’s larynxes are no match for cars and tractors etc so you want to remove as many man made noises as possible. If you are visiting a wood, it’s worth wearing muted colours or even camouflage to blend in a little. Just like wildlife photography, you want to be in place as early as possible, with all your equipment prepared and set-up. Birds are obviously quite flighty (pardon the pun), so tread carefully and once setup, just sit quietly and birds will gradually return to go about their business. Remember birds are busy trying to stay alive and if we are too much of a nuisance it could be costly.
The Dawn Chorus
With a little bit of careful setting up, the dawn chorus is actually one of the easiest to record because it’s just general stereo ambience. My set-up (it’s a good idea to set-up points 1 to 3 prior to leaving home):
- Manual record mode – Be in control, it’s really not difficult, a simple press of a button and observation is all that’s required.
- WAV format - Just like taking photographs in RAW format, recording in WAV format keeps all the information/sound. It is very easy to carry out basic audio processing/editing on your computer/tablet and there are many free music editors which have more than enough functions. Once you remove sound by equalizing or using a low-cut filter (which just means removing the bass frequencies) it is gone forever, so just use the software equivalents later.
- Turn off all automatic modes including automatic levels, voice sync, limiting and low-cut filter. All these functions are useful for recording lectures, dictation, music etc. but not for volume challenged birds that need a little bit more care.
- Once on location, fix the recorder onto a tripod, place the windshield over the microphone/s and plug in your headphones, keeping the volume on them relatively quiet to avoid making too much noise.
- Point your recorder where you think the maximum song will arise from, you’re ready to go.
Who’s First
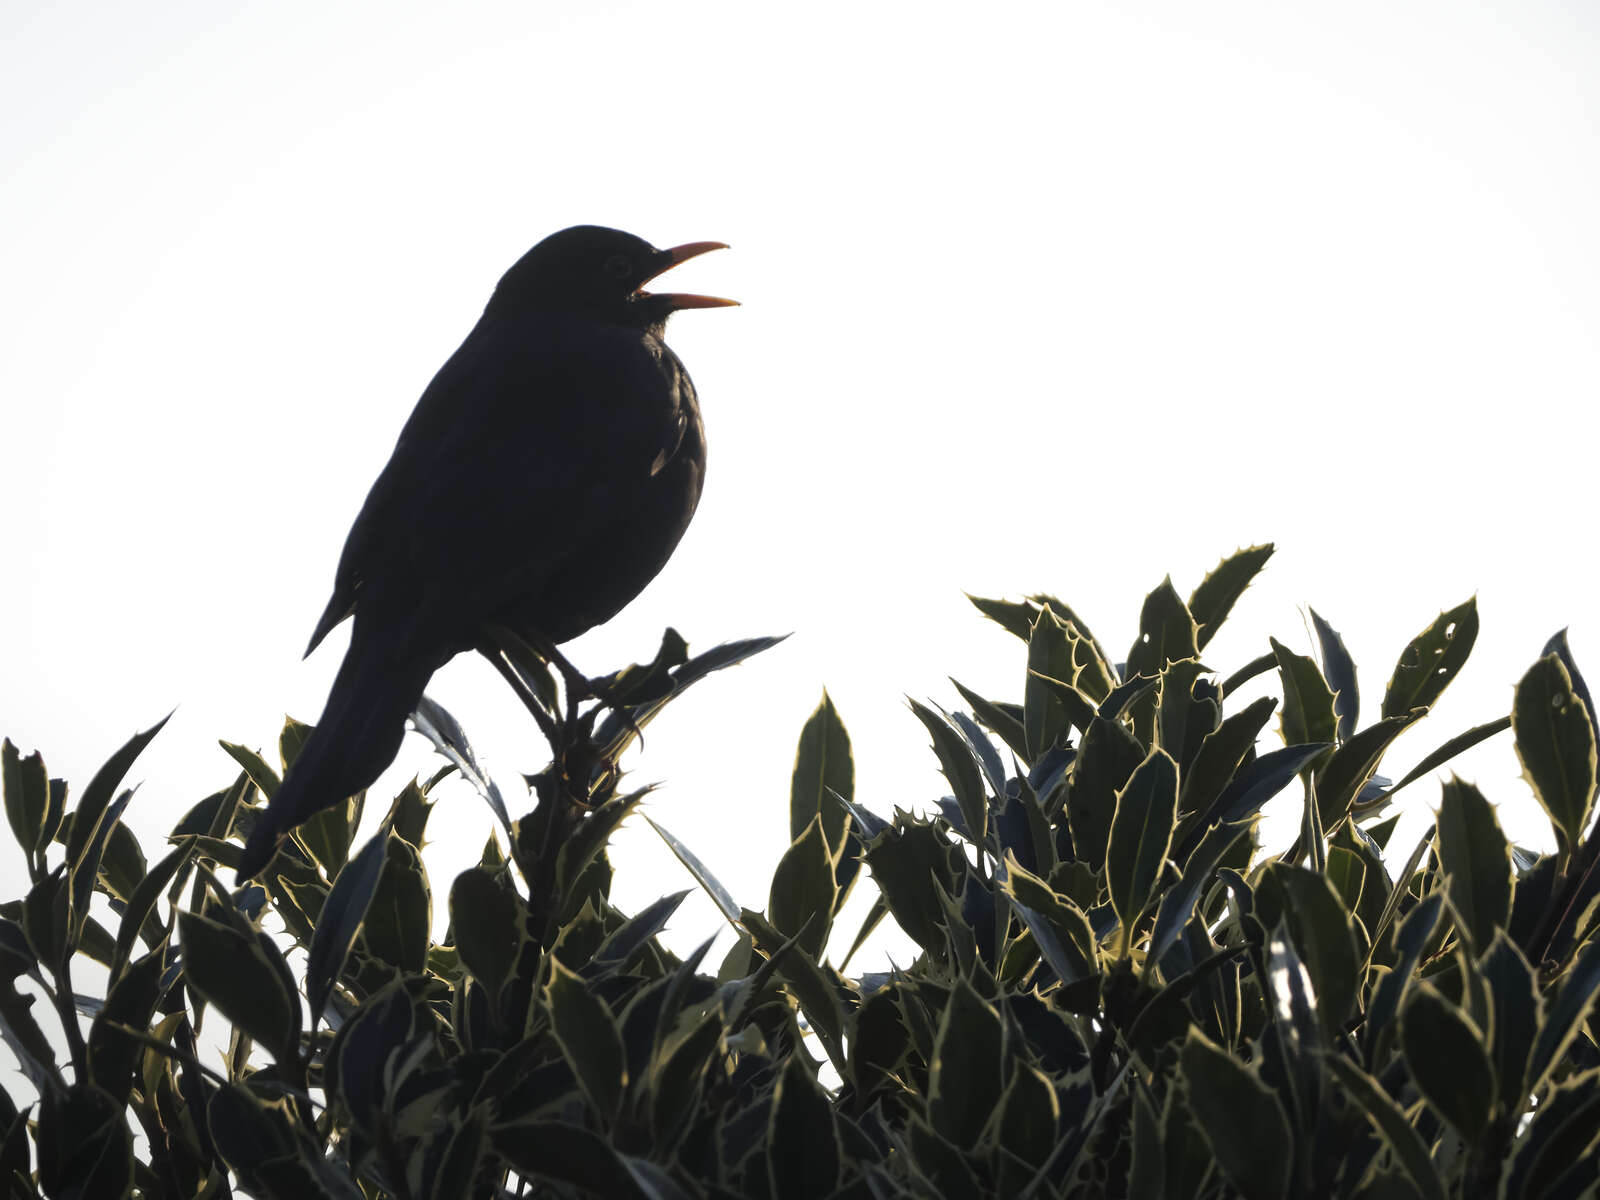
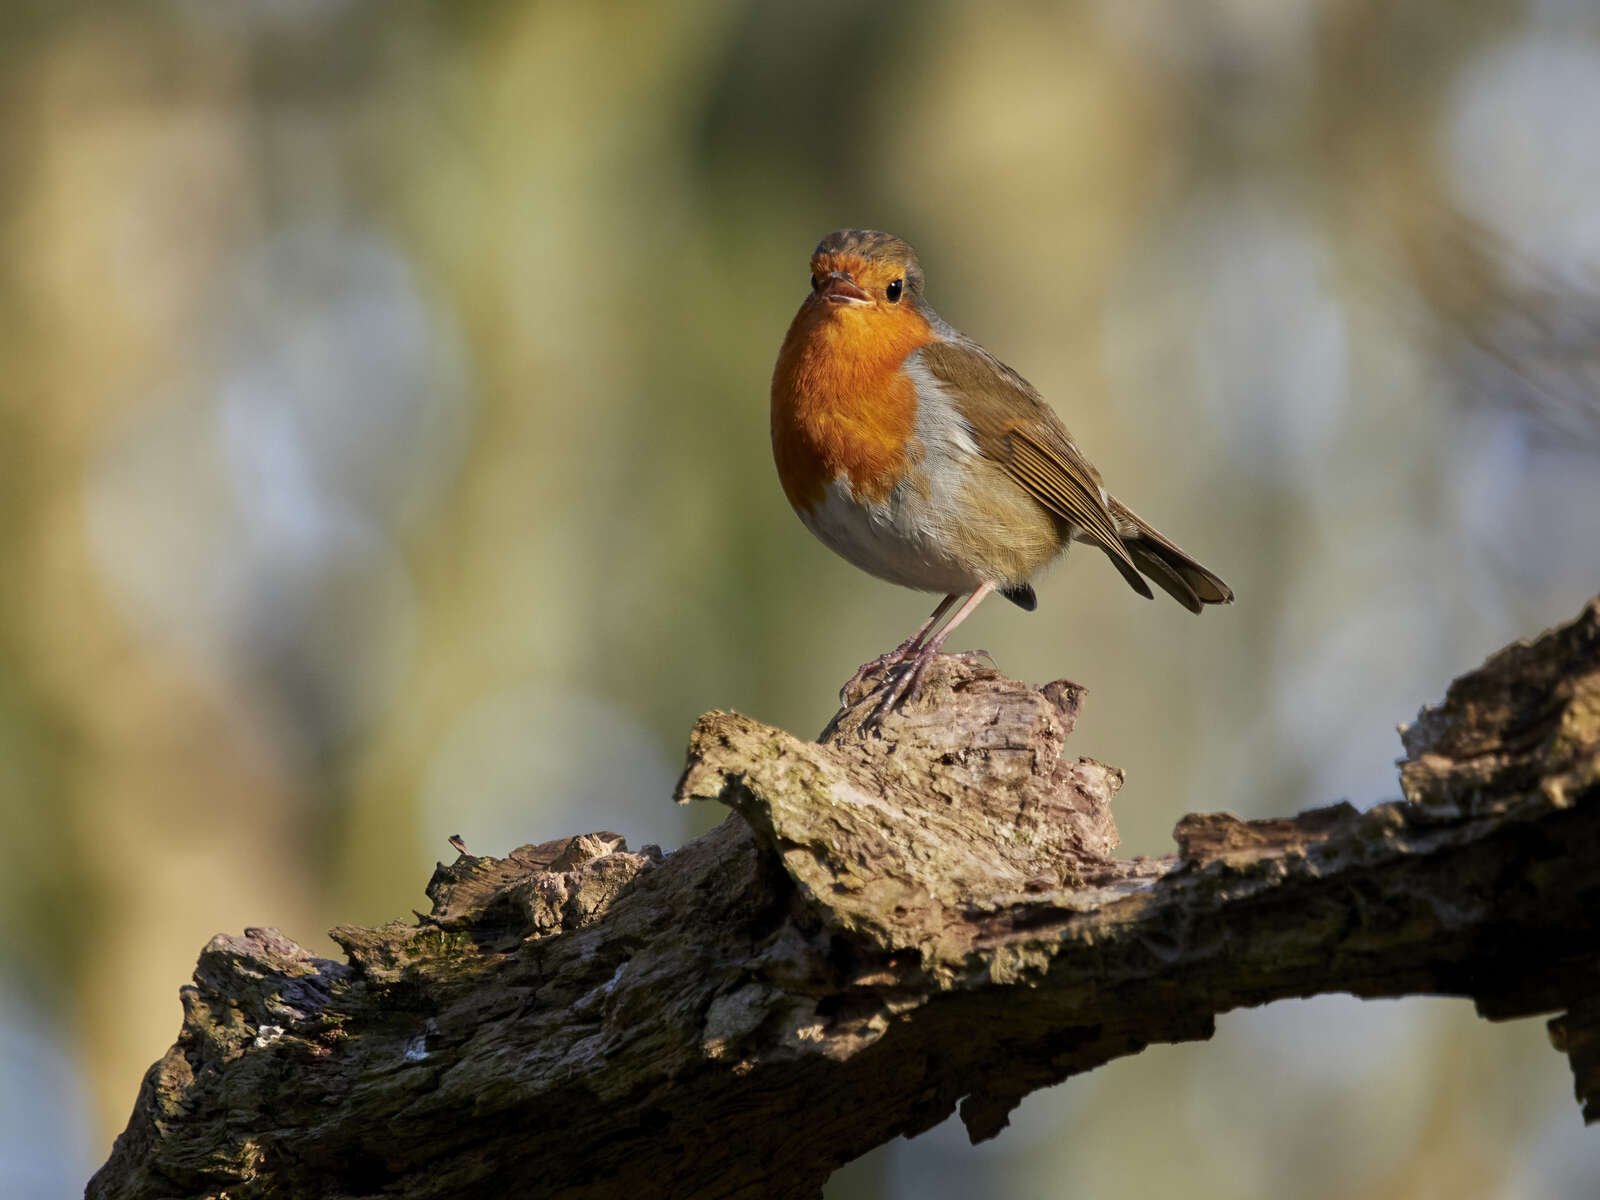
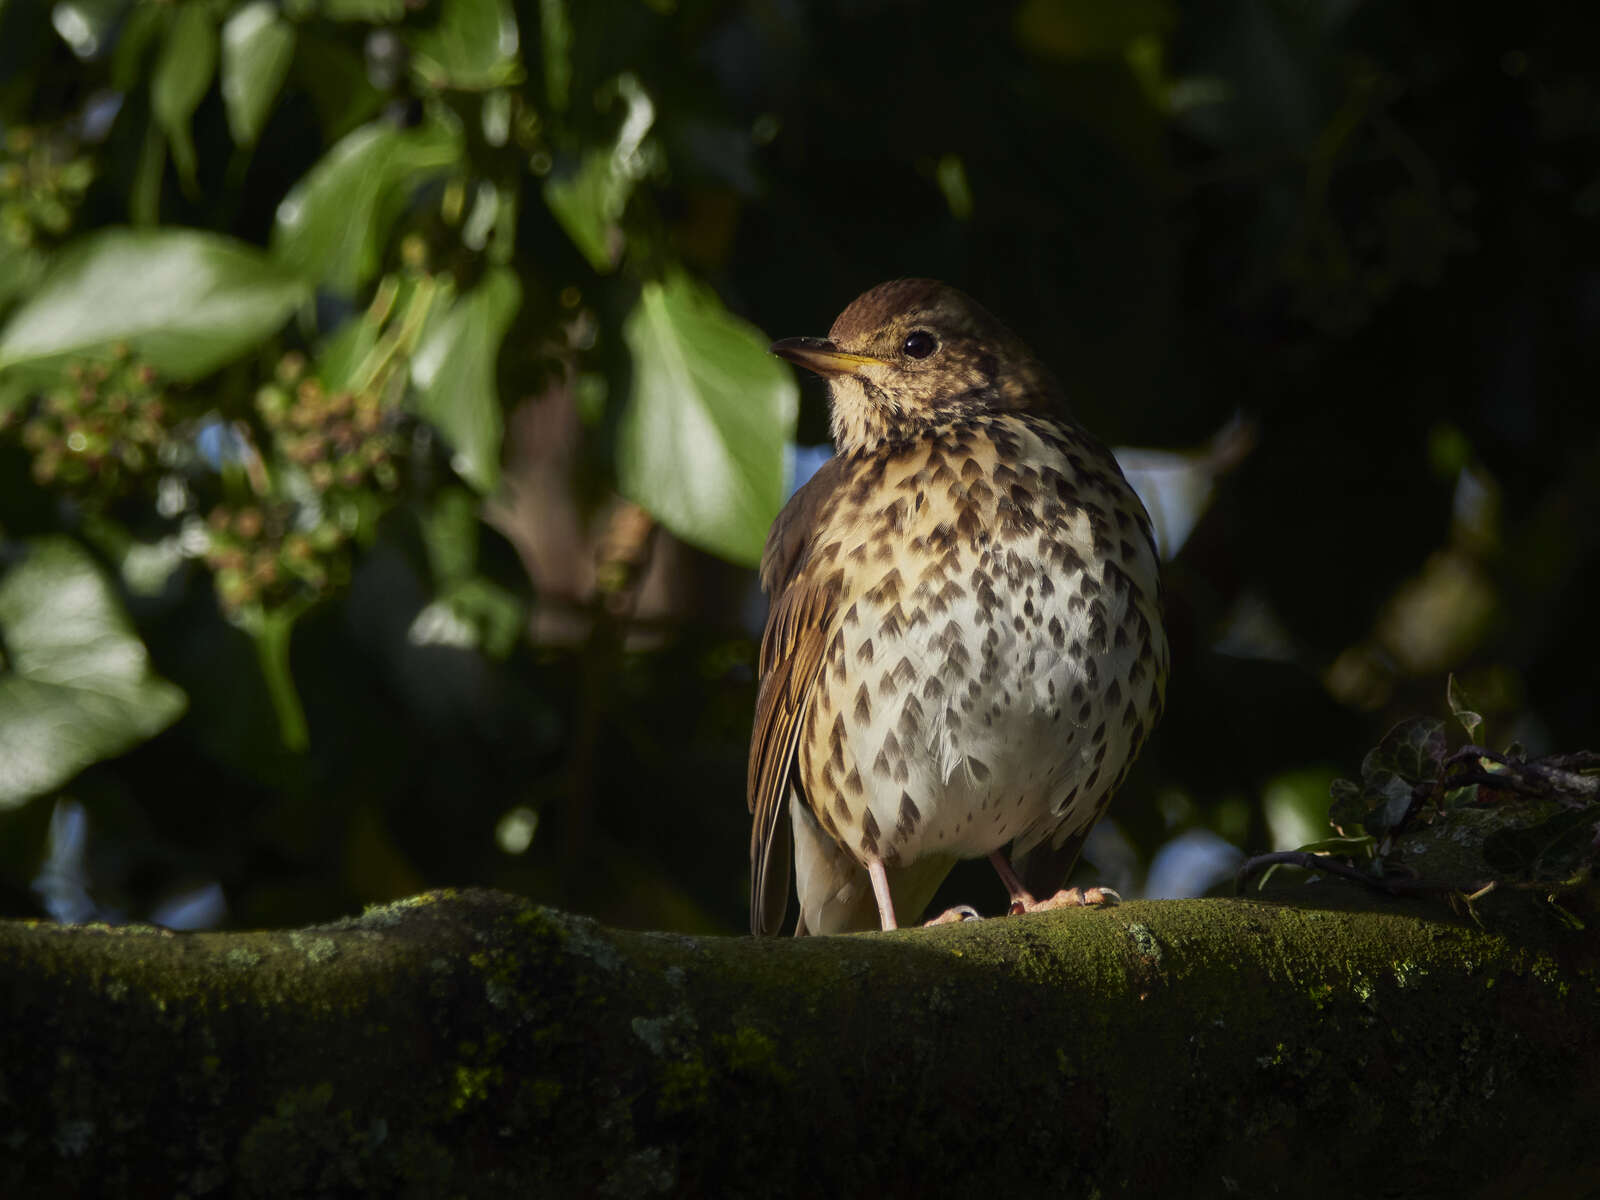
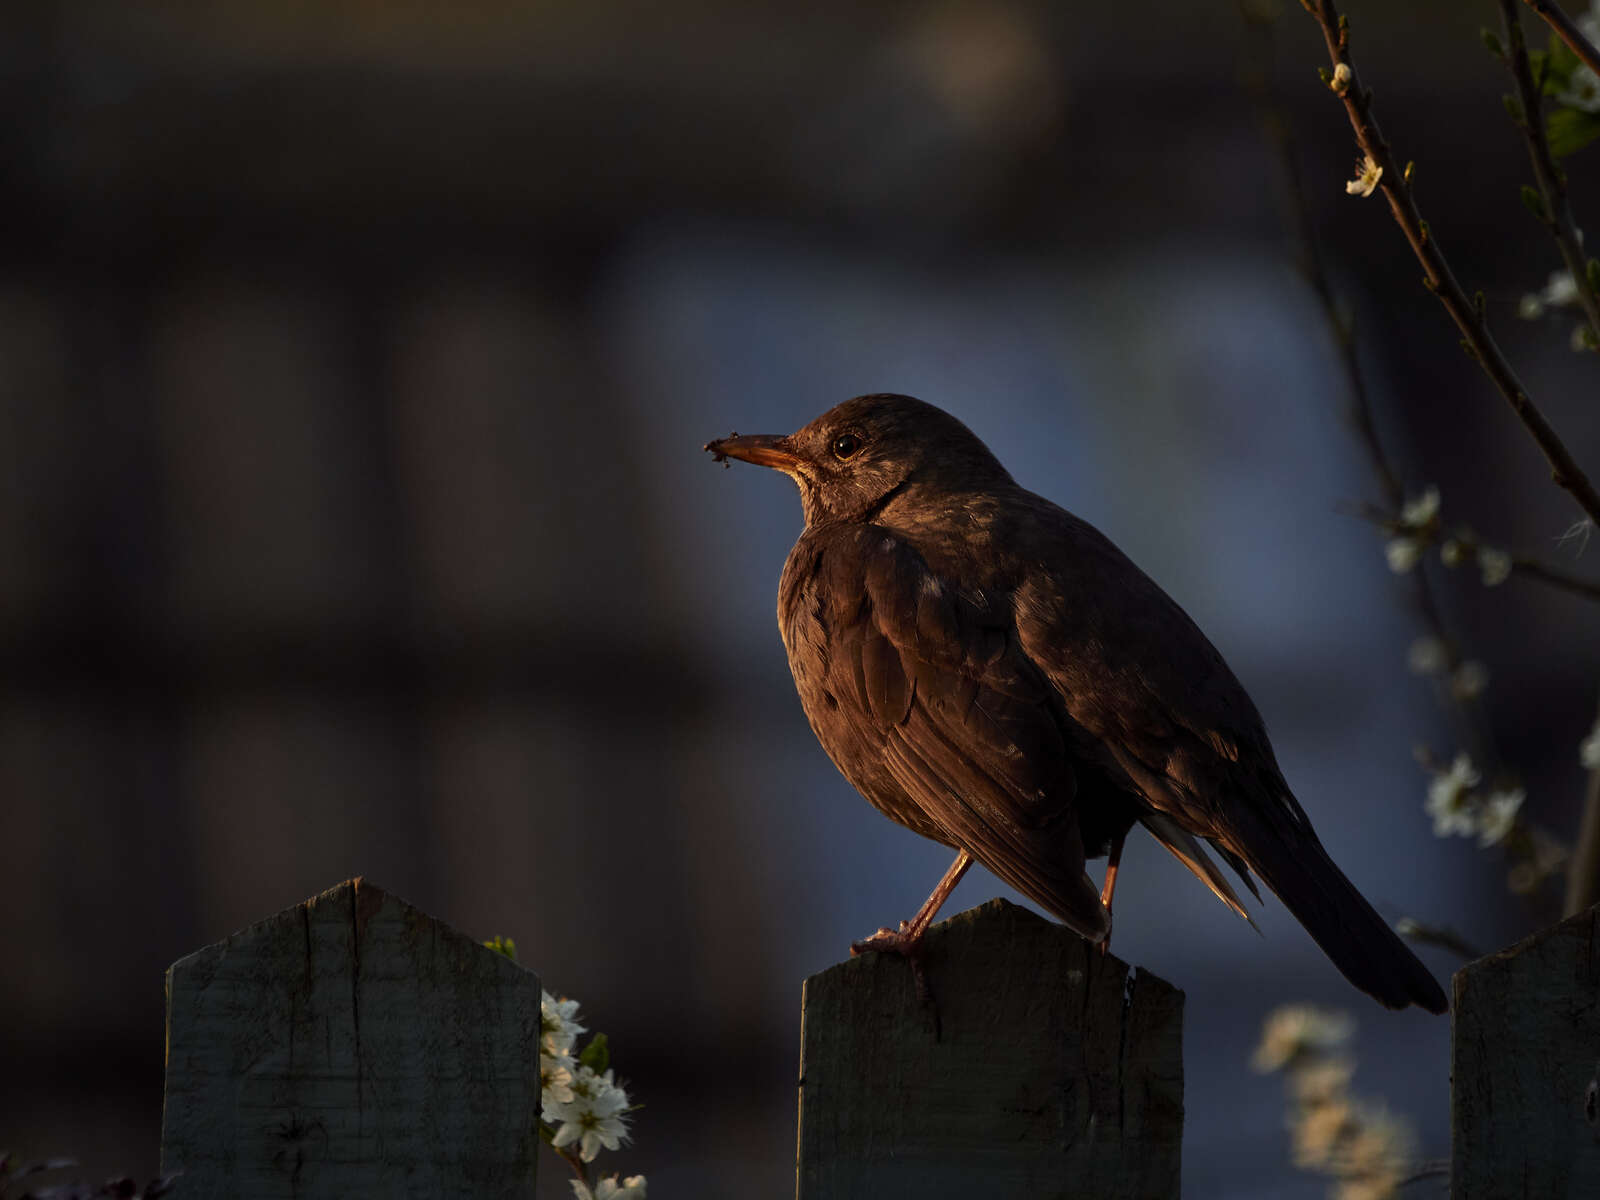
First the bad news dawn chorus fans, unfortunately you have to set your alarms rudely early. In the UK the chorus starts around an hour before sunrise and as you want to be in place long before for things to settle down, that means being in your spot for around 4.30am! If you are happily settled, haven’t fallen asleep and waiting patiently, you will hear the first avian melodies from blackbirds, robins and thrushes - interestingly all worm eaters, maybe the early bird does catch the poor squiqqly thing. Then as warmth and light gradually envelop the land, wrens, tits, pigeon and warblers etc pipe up and the dawn chorus reaches its magical zenith. It is excruciatingly early but I promise you it is well worth it, at least once. This year the Robin won out and was first to say hello.
ISO 800 | 1/320s | f/6.3

ISO 640 | 1/25s | f/11
ISO 800 | 1/640s | f/8.5
Recording
The dawn chorus is such a lovely atmospheric sound to capture and is recorded perfectly well using the on-board stereo microphones. By recording in stereo, not only can you can pick out individual birds but if something should fly past singing, it will have a lovely panning effect as sound emanates from one side to the other, especially wonderful listening on headphones. You can of course plug in external microphones if you have them (or indeed have the budget) but I’ll explain that in the ‘more you can do’ section.
Here’s the full dawn chorus recording that Rob made during his takeover on Instagram 2nd May 2021
I’ll level with you
Birds haven’t got the biggest pipes so you need record your level as high as possible without going over the maximum 0db (also known as digital clipping), so your bird call can be heard over any mechanical noise from the recorder. Keep your maximum recording peaks at around -12db which will hopefully catch any loud moments. In old money, when recording on tape you could push the levels quite high into overload but digital is not forgiving at all. If you want your wren to sound like a Norwegian death metal bands lead singer, go ahead, push it into the red!
Try to be as quiet as possible or move away from the equipment when recording as with bird calls being so faint and recording levels so high, everything else will be picked up including your sniffles or early morning teeth chattering. The LS-P5 can be used in conjunction with an app that allows remote recording and adjustments through Bluetooth connectivity. It’s also possible to wirelessly monitor the signal from up to 10m away.
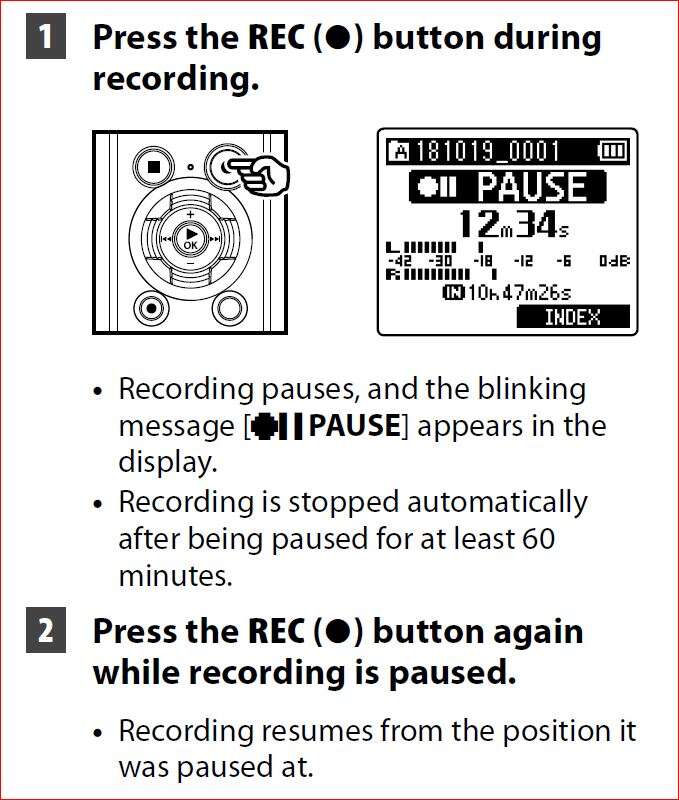
When you first press record it will pause record, ready to adjust your levels and it’s the second press that will actually start recording (and yes, many is the time I didn’t press it again). As you have more than enough memory for the dawn chorus, once you are in position, press to record and I would simply start recording straight away, adjusting the level if things aren’t quite right. Just keep an eye on the peaks and adjust the level using the rewind/forward buttons as necessary. There’s not a lot else you need to do but settle back and relax, drift off into nature’s rejuvenator. When you are done either press pause ready to record something else or press stop.
It's a good idea to record yourself speaking the time, date and any details so you remember where you were and what it was for, especially if it’s to tie in with a video.
PROCESSING AUDIO
First thing I must mention, you don’t have to process the files at all however with just a few simple edits you can improve the overall sound. Unless you are desperate, maybe on location or your computer has had a meltdown, I wouldn’t use the inbuilt editing functions, it’s so much easier to use visual software on your computer. Having said that the in-built functions are there if you need them. Once you’re ready, it’s a simple case of transferring the file on to your computer or tablet. The LS-P1, 4 and 5 can be plugged straight into a USB slot or cable, neat! Open your editor; for these purposes I’m going to edit using the free audio editor called Ocenaudio, there are many others such as Audacity.
ISO 800 | 1/500s | f/6.3
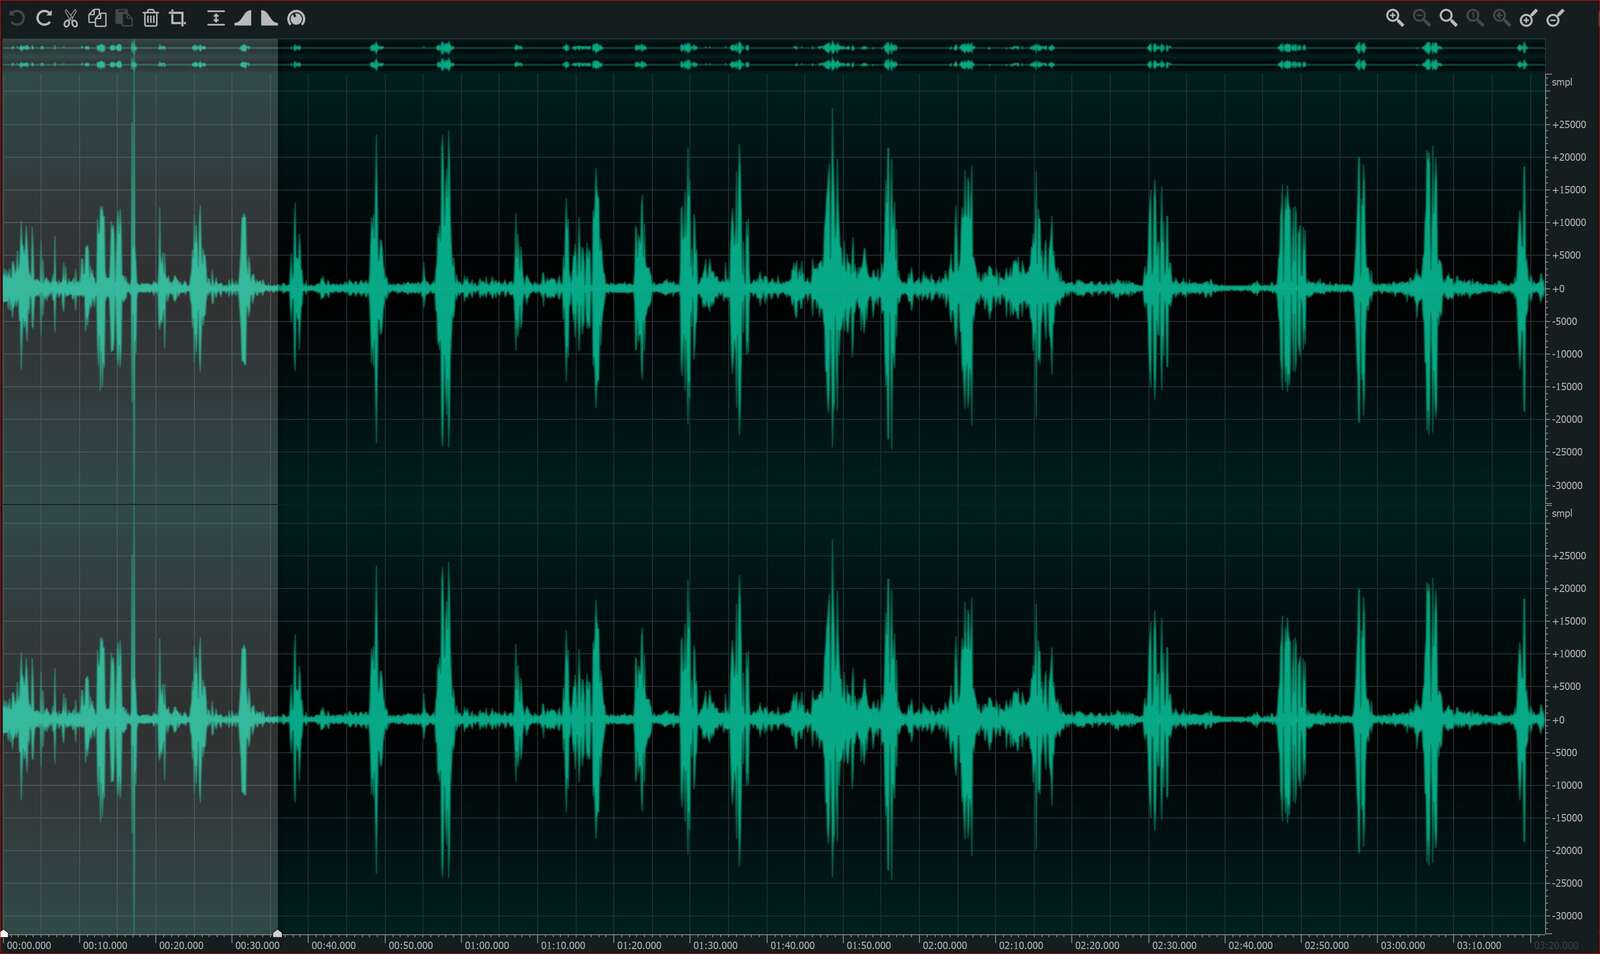
Snip - After opening the audio file in the editor you will see two waveforms and they are simply the left and right of a stereo file. There’s no point in editing anything that won’t be there once finished so the first thing I do is cut out anything that’s not necessary – such as beginning or ends, where nothing happens, coughs, noise, knocks, anything you would rather not listen to.
EQ - Now we get a little bit surgical and remove some of the bass frequencies as there is very little interest here and just gets in the way. Birds use little of the total frequency range and by removing or reducing the lower bass area where wind noise, traffic rumbles, industry, footsteps etc lay, your bird song will cut through much better. Be careful with some birds like the boom of a bittern, the rasp of a crow, the five coos of a wood pigeon etc as they are the Bryn Terfels of birds and stray into the lower frequencies and you don’t want to deprive them of their voice. It’s just a simple case of listening to hear if the lowering of a slider removes any of the call you want to keep.
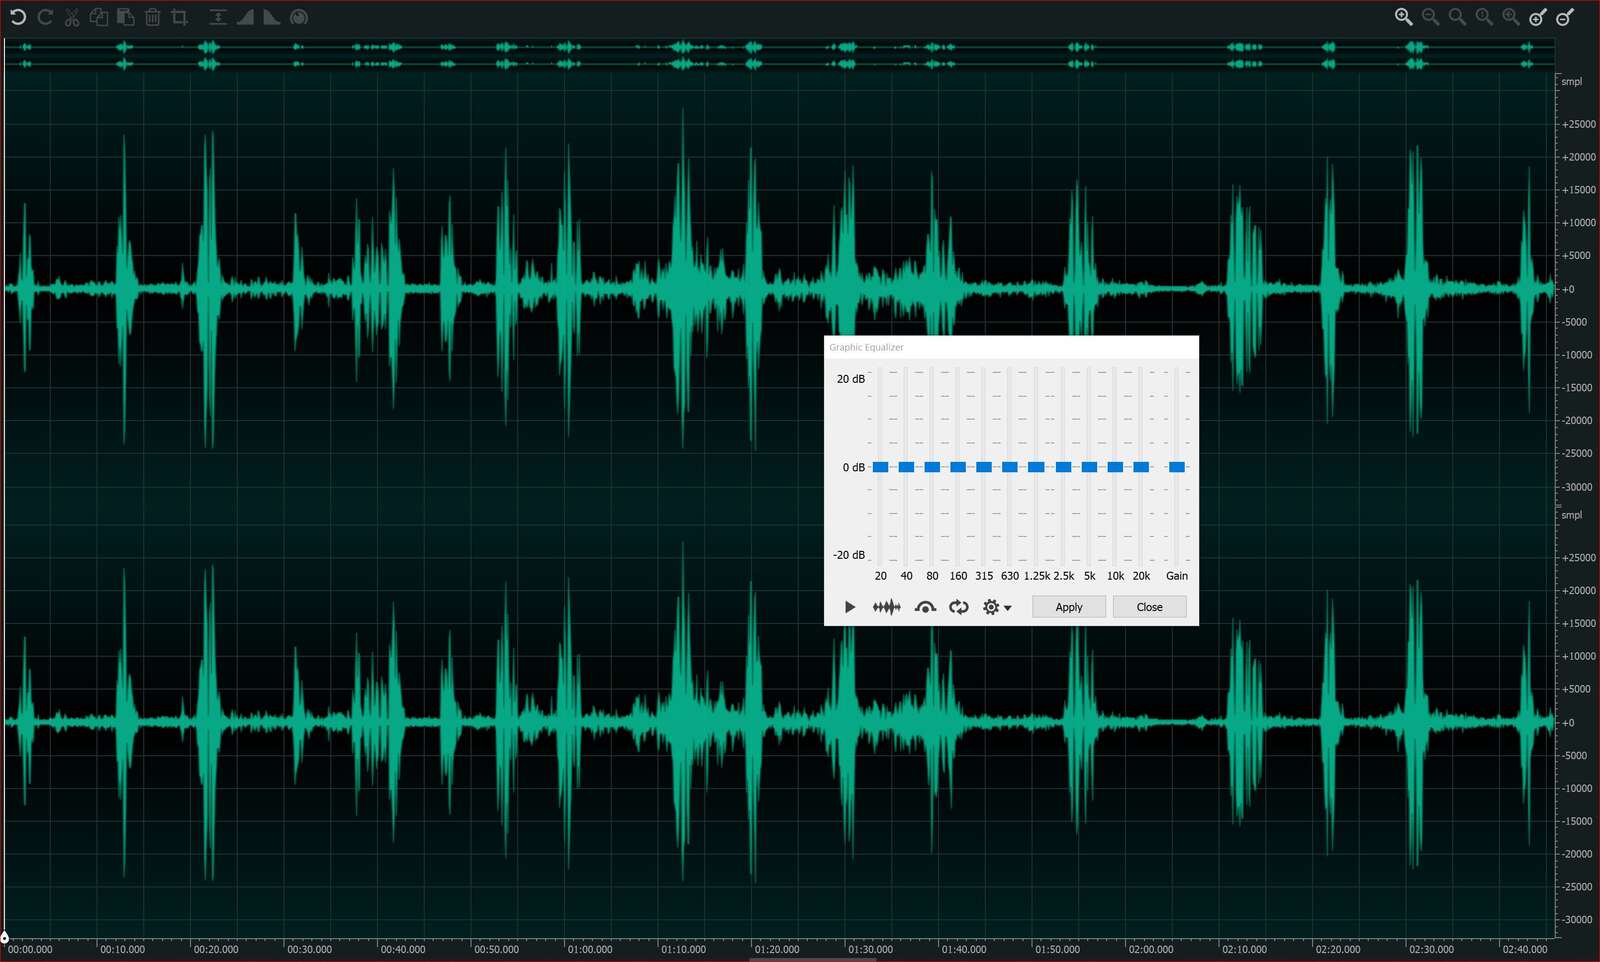
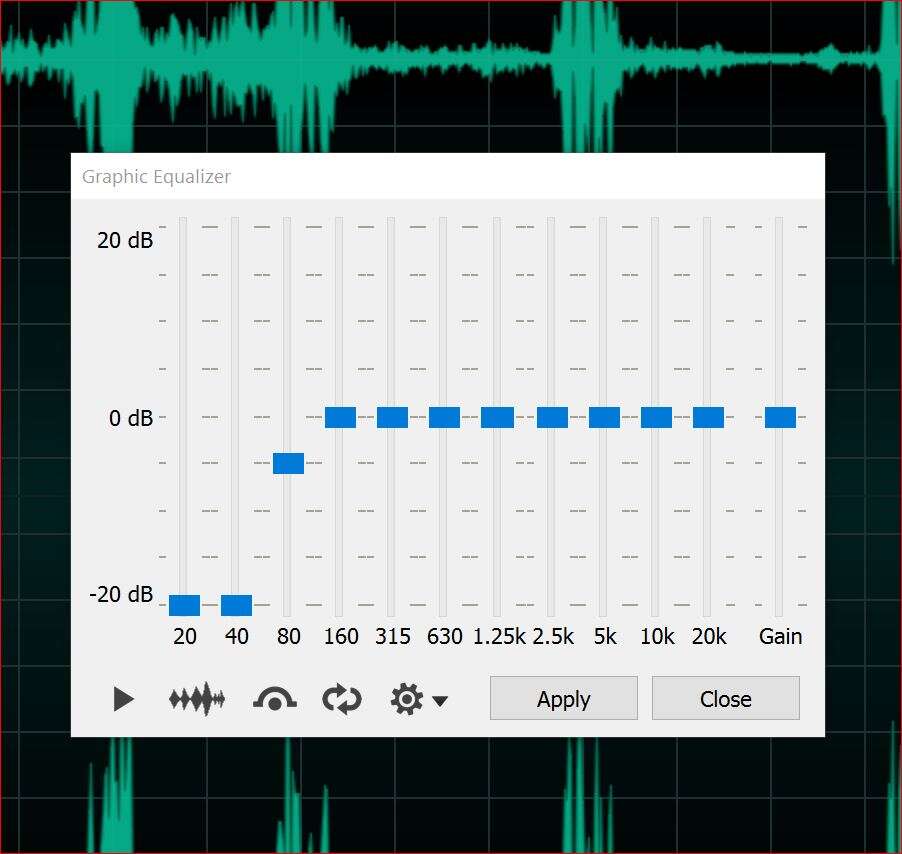
I tend to use the graphic equaliser, as it’s quite visually intuitive but you could also use a simple bass control (be careful though as you can take sound away that you may want with this) or a low filter. Go to the menu and choose the effects tab, scroll down to equalisation and choose the simple 11-band Graphical EQ. As you look at a graphical EQ, all those sliders are individual frequencies and they read from the lowest frequency (bass) on the left (so low that you would feel rather than hear) to the highest (treble) on the right. Moving the slider down reduces that frequency and of course the opposite, raises it. Concentrate on the lower bands where unnecessary noise lays and reduce the level of each to suit. In the diagram below you can see I have completely reduced the 2 lower bands at 20 and 40 Hz, as very little is lost and it removes some annoying rumble from traffic and wind. The third at 80Hz is just around half way and that’s so that things don’t sound too thin and weedy if you remove it completely. There’s no right and wrong and it’s just about adjusting a band to see if it changes anything and then just gauge it to suit. You can play around in the higher frequency ranges and raise areas that the bird song is in to highlight it more but be careful not to make things very shrill, just experiment.
Close up of graphical EQ – Note the 3 lower bands/sliders
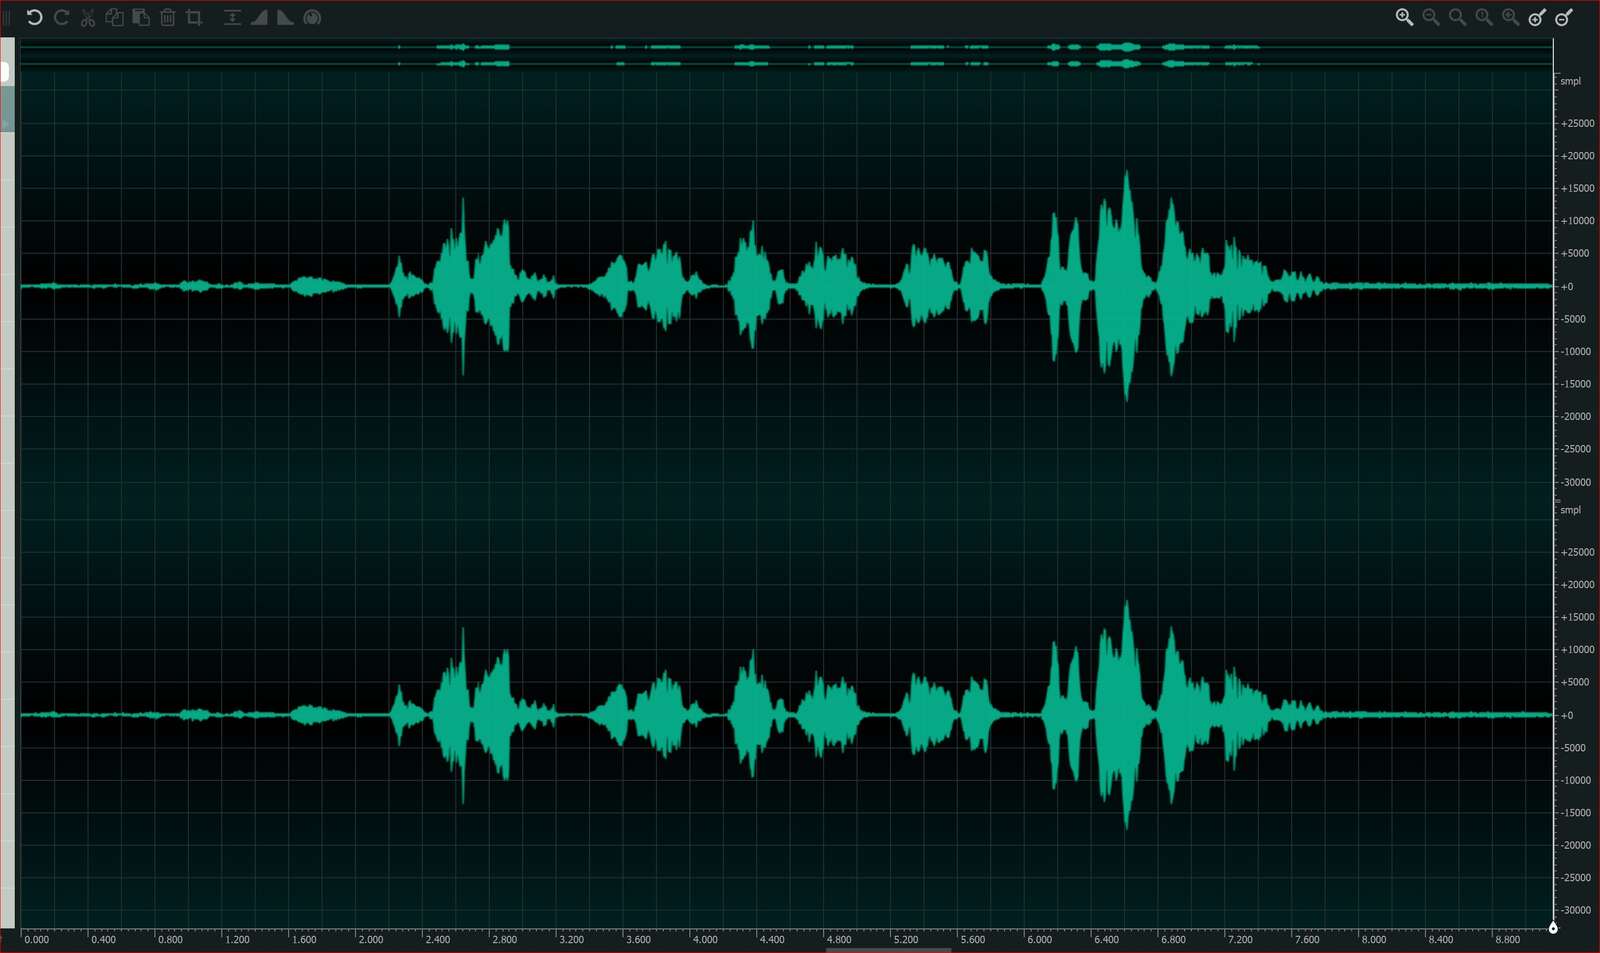
- Mp3 - Blackbird without any changes
- Mp3 - Blackbird with the lower bass reduced using the 11-band graphical EQ
Another example, this time of a Blackcap (and a sneaky Chiffchaff in the background). Listen to the traffic noise and rumbles on the original recording and then compare with the lower bass removed.
- Mp3 - Blackcap original
- Mp3 – Blackcap with bass removed using same settings.
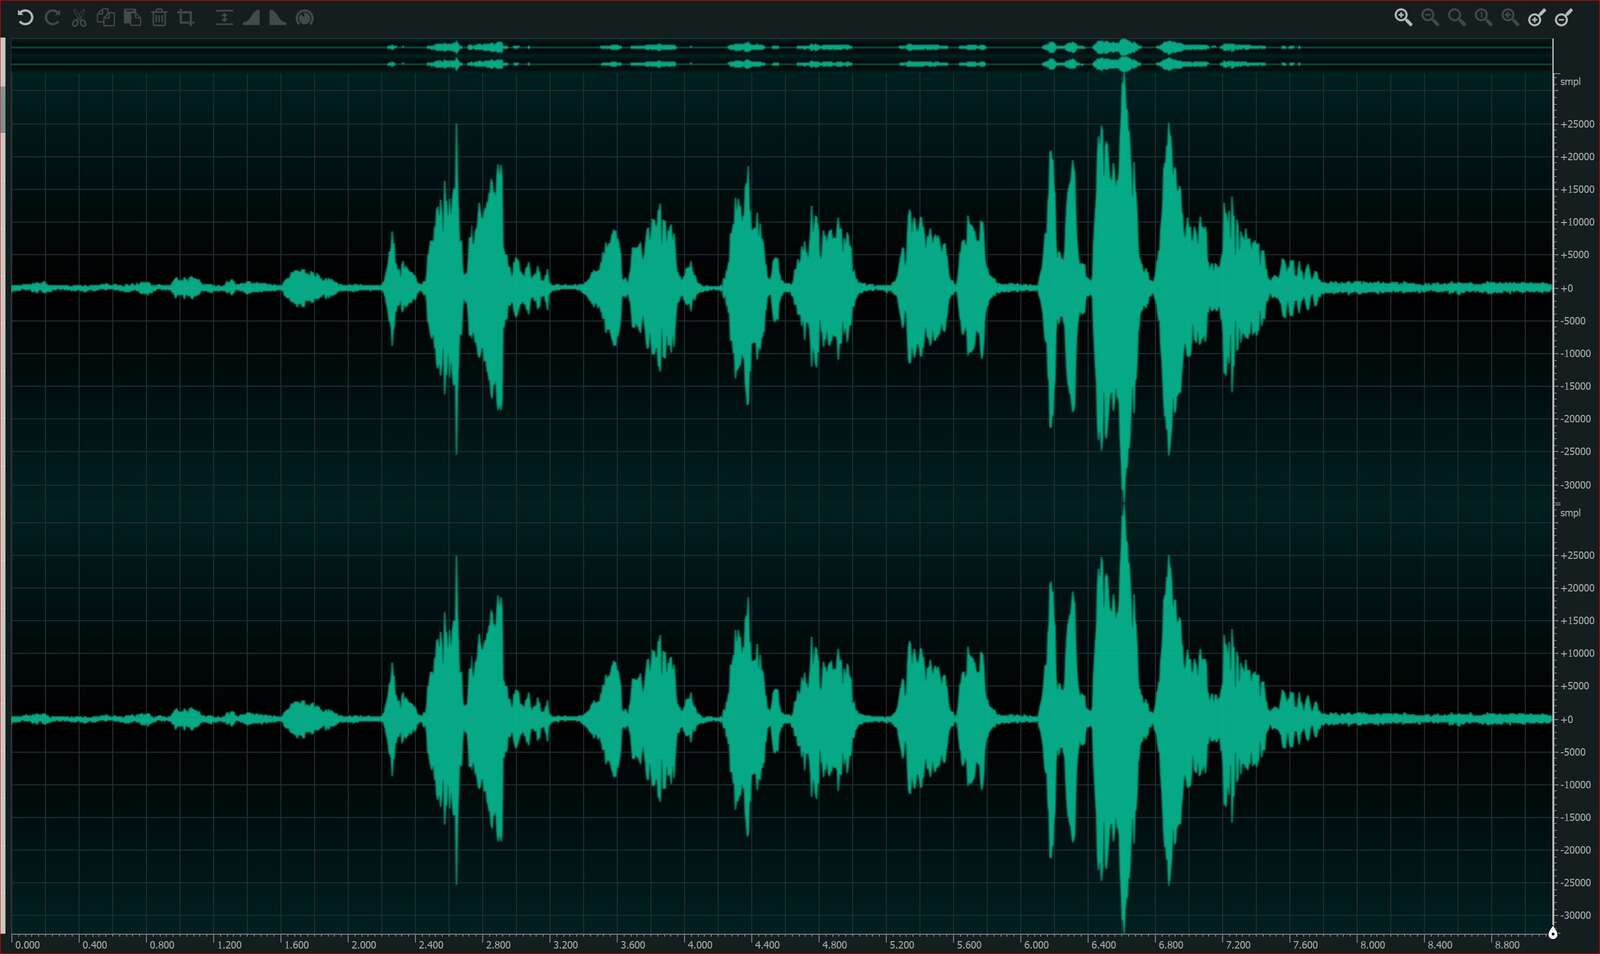
Next, it’s worth normalizing the track, this simply means letting the software increase the volume so that the highest sound is at the maximum volume without going over. Pop up to the menu, choose effects again, just click on normalize and it’s all done. You can see on image 1 the file before normalizing and then image 2 where the peaks are higher and at maximum volume. Do this after editing as levels will normally reduce when removing frequencies.
All that’s left is to save the file into the format you want. I would save in WAV format and then you can use that to convert to an mp3 later if necessary. If you are using an mp3 file just re-save to mp3 as you won’t improve on the original.
- Before Normalizing
- After Normalizing
ISO 800 | 1/1600s | f5.6
MORE YOU CAN DO
Recording individual birds
Again, recording individual birds is somewhat similar to wildlife photography, it’s about being patient, trying to get as close as you can get away with to maximize the level. Once you have a reasonable recording move in a little closer and record again, keep doing this until you think you have reached the birds circle of fear and leave it at that before it flies off. The perfect scenario is coming away with a lovely recording and the bird has happily gone about its day or even better, didn’t even know you were there.
Wide, zoom or external microphone/s.
On the LS recorders you can not only record in the standard way but also use a zoom function which is a bit like a virtual shotgun microphone, where the stereo width narrows and becomes directed more to your subject, discarding some of the peripheral and wider sounds. Think of the attached stereo mics of being like a wide-angle lens, whereas the zoom function is like using a digital zoom on a camera.
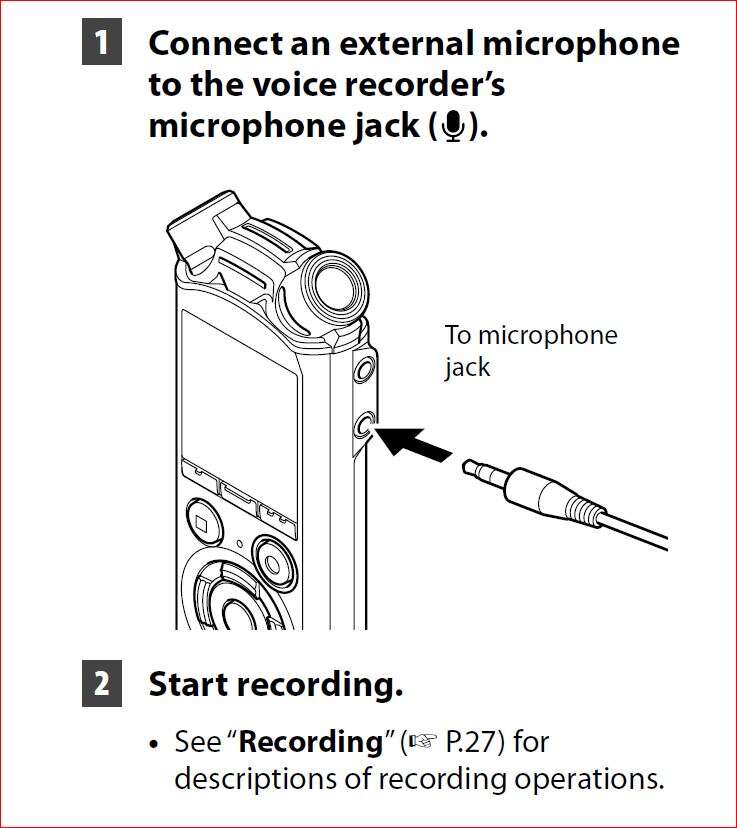
You have another option and that is to use an external microphone, preferably a shotgun mic (or a parabolic which is much more directional – think of a spy in a movie trying to over hear a conversation in the distance holding a small satellite dish - but then we are starting to get more serious as well as spending serious money) - I use the Olympus ME31 which is a bit like an audio telephoto lens and limits interference from wider sound sources, it’s much more directional.
Should you want to record individual birds and can’t be bothered to carry other paraphernalia, the in-built zoom function pointing at a bird at its narrowest setting is a good option, however, as handy as it is, if you can stretch to a shotgun mic it is the better bet, as you have more control and it rejects more of the unnecessary surrounding noise. External microphones can also help limit any noise caused by the onboard microphones being so close to the actual recorder. As bird calls are relatively faint and therefore less sound is being projected, the recorders pre-amps need to be turned up, bringing noise with them, so anything we can do to grab more sound is helpful. External directional microphones, patience and a bit of field craft will help with your recordings.
In the end, it all depends how serious you want to get. I’m just a casual recorder and the onboard stereo microphones are fine for me unless I want to record a specific bird. Then I just plug in the Olympus ME31, which even though it’s more to carry, it isn’t exactly weighing me down.
Different microphone examples of a blackbird.
(All the examples have been normalized so you can hear differences without being swayed by the recording level)
- Mp3 - Blackbird using on-board stereo mic and with windshield
- Mp3 - Blackbird using on board stereo mic with zoom function at its narrowest and windshield.
- Mp3 - Blackbird using ME31 shotgun mic and foam windshield.
As a bonus for making it this far, here’s 2020’s dawn chorus day!
APPENDIX
Why manual recording?
It is much better to record manually to take control as an automatic mode will constantly change recording levels by compressing any lulls as it thinks there’s nothing there. This compressing of the signal will not only raise any extraneous noise on your recordings it will also make the subject briefly too loud once it starts up again. This causes the volume to fluctuate and sound very unnatural.
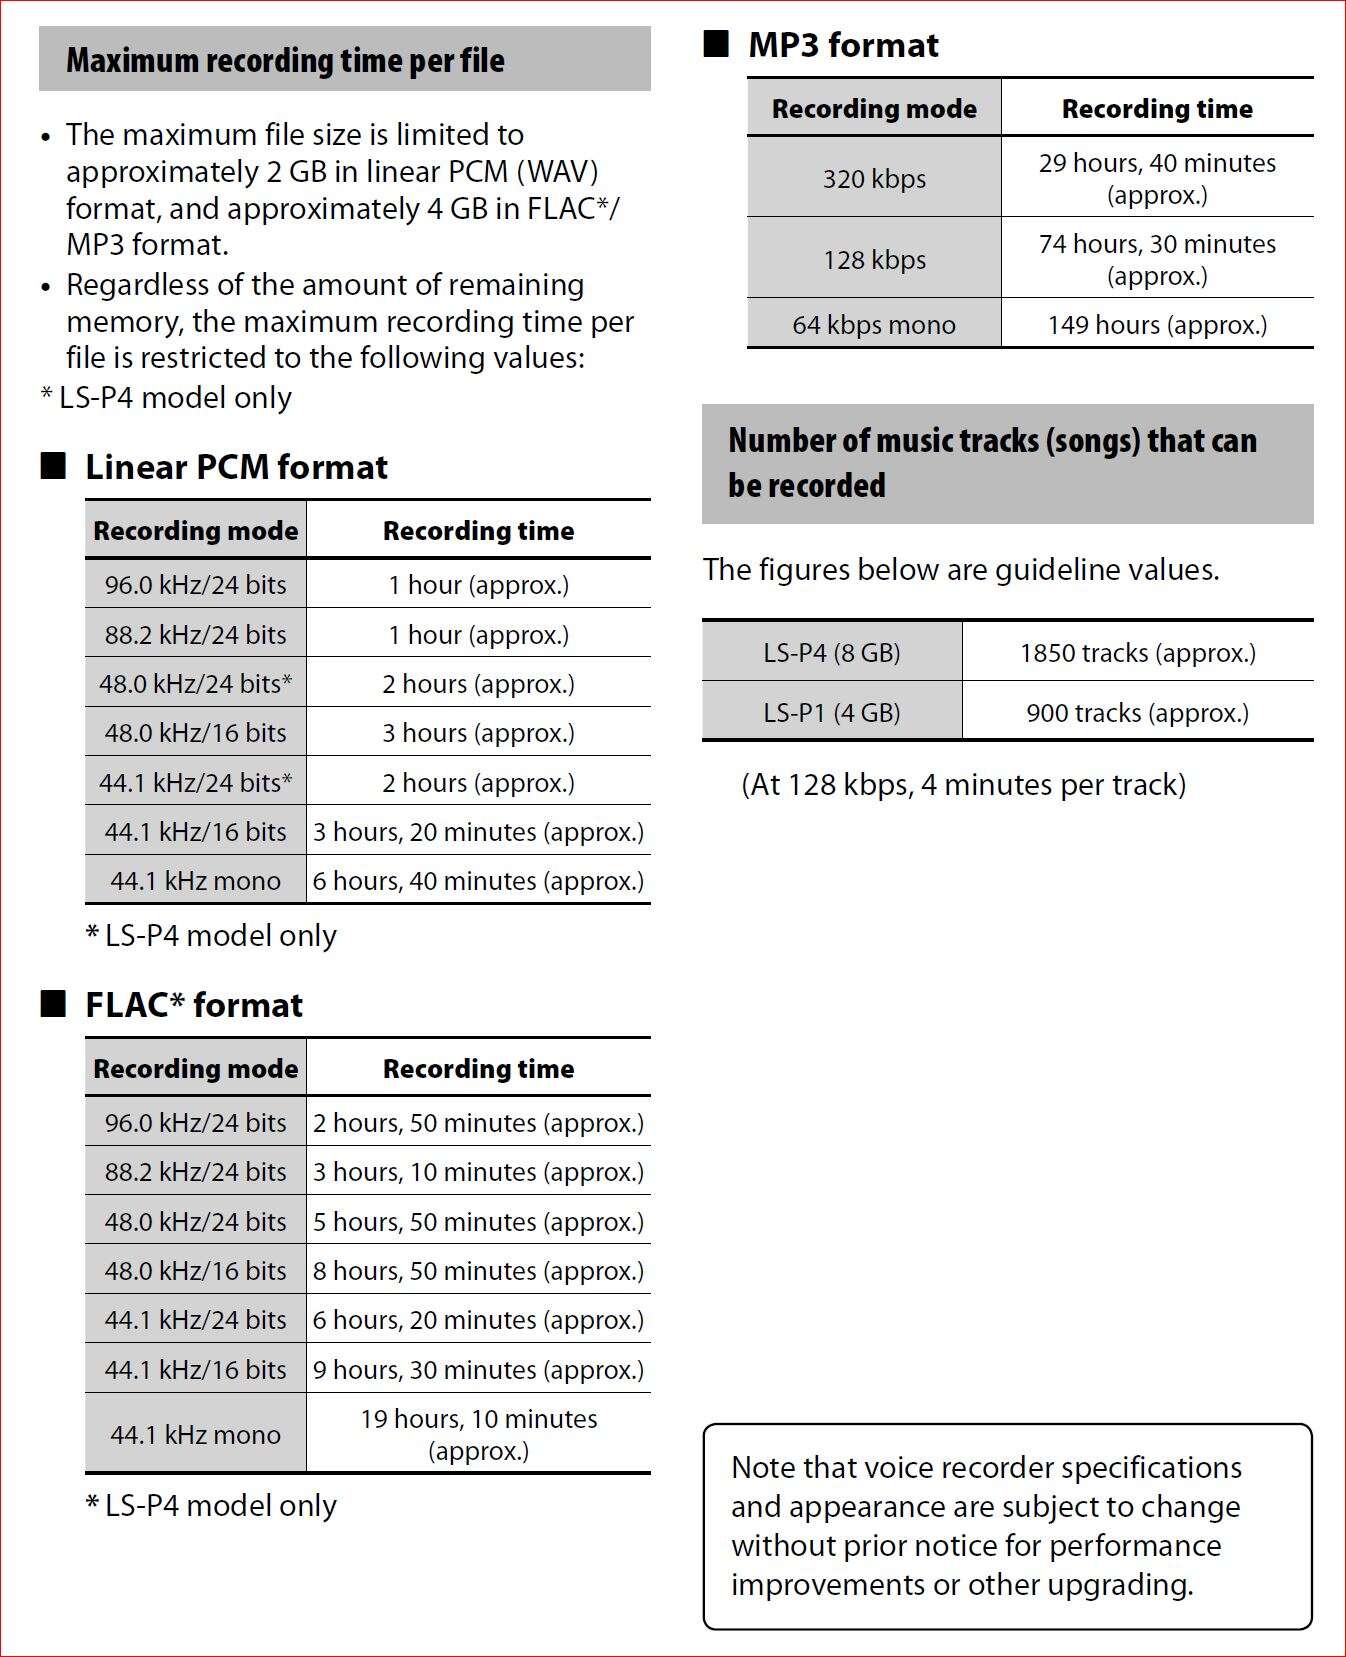
Memory, space and file formats
The LS-P1 has 4gb, the P4 8gb and the P5 16gb and for most of us that is more than enough but don’t forget to transfer the files to your computer once in a while, the last thing you want is to have to record over something else you wanted to keep. You can also use a micro-SD card and it’s worth popping one in your pocket or bag as back-up just in case you do forget.
4gb will allow you to record over 6 hours of stereo at CD quality (44.1khz/16 bit) or a massive 27 hours of best quality mp3 (320Kbps), unless you forget to download your previous recordings you have more than enough room.
File formats
Just like photography, there are several file formats and the LS-P1 has the possibility of recording to either MP3 or WAV with the LS-P4/P5 also adding FLAC to their repertoire.
MP3 is a compressed lossy format and it will discard any audio information it doesn’t think is necessary, a bit like an audio Jpeg. In this way, it will reduce file sizes, particularly handy when you have limited space but it won’t be to the best possible standard.
FLAC is also a compressed format but lossless and uses a similar technology to a zip file, allowing recordings to remain at the quality recorded but with a reduced file size. So even though you can record at the audio equivalent of 4k audio, the file size can be actually less than a WAV file. If you want to make the highest quality recordings and can keep them at this quality for listening, then this is for you however for most of us CD quality is more than enough.
WAV files have been around for a long time and are pretty much the standard in most systems. They are a true uncompressed lossless format and what you hear is what you get. A WAV or the Apple equivalent AIFF is the standard on CD. Previously, the large file sizes would fill up your drives quickly but now with the advent of cheap and large media there is no such problem.
Really, you could use any of the formats but I plump for the WAV format simply because it covers all bases and will run on just about anything straight from the recorder. MP3 is fine but even at the best quality you may lose valuable audio information that you may require at a later date. FLAC can actually record to a much higher quality than WAV but for the casual or for that matter even serious recordists, I don’t think it is necessary. Even though FLAC is often supported, some systems will not play it without conversion. Remember that even if you record at a high quality, if you want to transfer it to CD or MP3 it will need to be shrunk down to that standard, so nothing is gained. That’s why I just record at WAV and you can always convert to mp3 at a later date should you want to share.
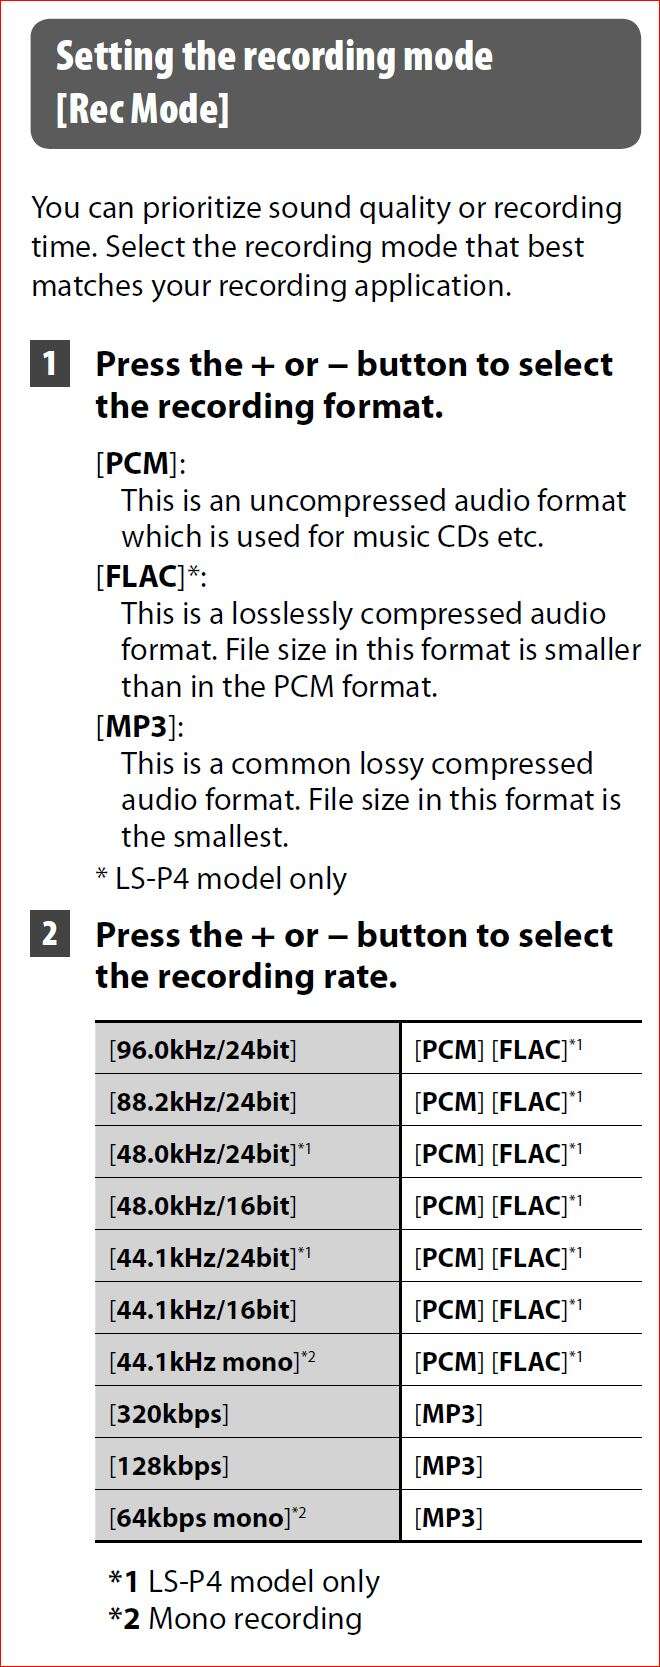
To change the recording format
Pop into the menu, scroll to the record menu, scroll down to rec mode and choose your preferred format. As I said, I stick with PCM (WAV files) of 44.1khz/16 bit which is standard CD quality as it’s more than enough for me and as it’s a standard, it is ready to go. If you are recording for video you may want to use PCM 48.0khz/16 bit as that is video audio standard (although often a video editor will compensate anyway).
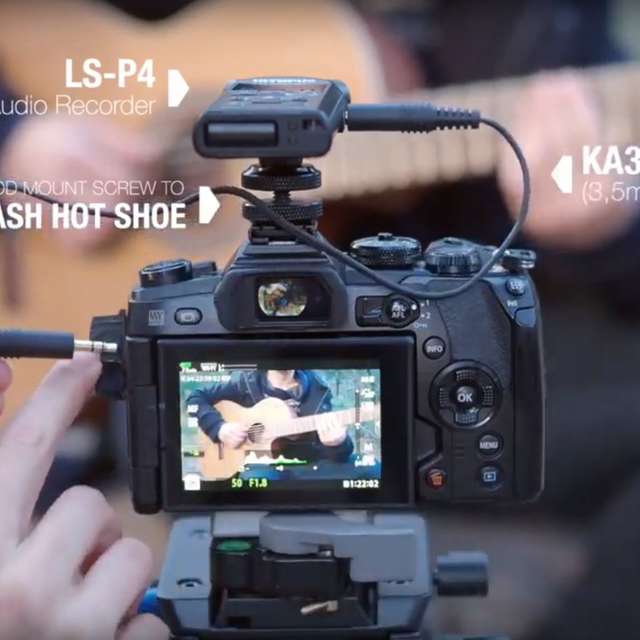
Shock mount
If you are using an audio recorder on your camera it’s well worth using a shock mount that fits onto the hot shoe mount. This is a way of isolating mechanically transmitted noise, such as a hand knocks, movement rumbles and floor vibrations etc. I use the Olympus SM2 as the generic ones have all been too flimsy. You can also use it to mount an external microphone as both have standard tripod threads. It will happily fit to a tripod too.
Featured Products:
ABOUT ROB
Camera wielding music making nature loving vegan
Rob is a Mother Nature lover, wildlife and feathered friend photographer. You may have come across some of his images or words in magazines, books and blogs. He talks a bit, scribbles a bit and runs workshops. He’s also a musician, writer, light fiend, rain hater, tea lover, biscuit consumer and a veganist.
Wildlife is the reason I pick up the camera but the camera makes me go out to see it more often.
Nature is far more important than the pressing of a shutter button and its wellbeing always comes first. Animals are not on this planet for our pleasure to do with it what we will but to live alongside and respect. All nature is worthy of our attention and not just the iconic or the cuddly. Please look after nature and it will look after you.
CONNECT
Instagram: @robcottleimages

LS-P5: All in One Hi-Res Audio
Read more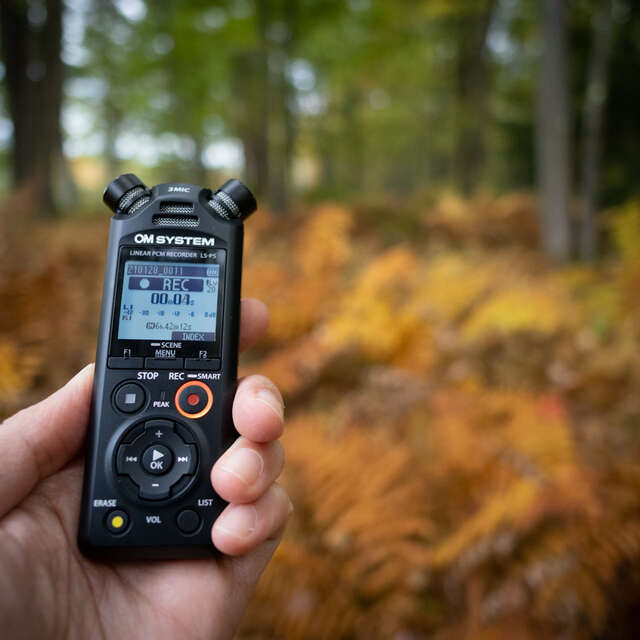
How I added the LS-P5 to my video workflow
Read more