It's that fantastic time of year again when we can set sail for Skomer Island in West Wales, UK – one of my favourite places, open once more for feathery, fun business. So I thought this an opportune time to give a little guidance on photographing puffins for anyone lucky enough to visit.
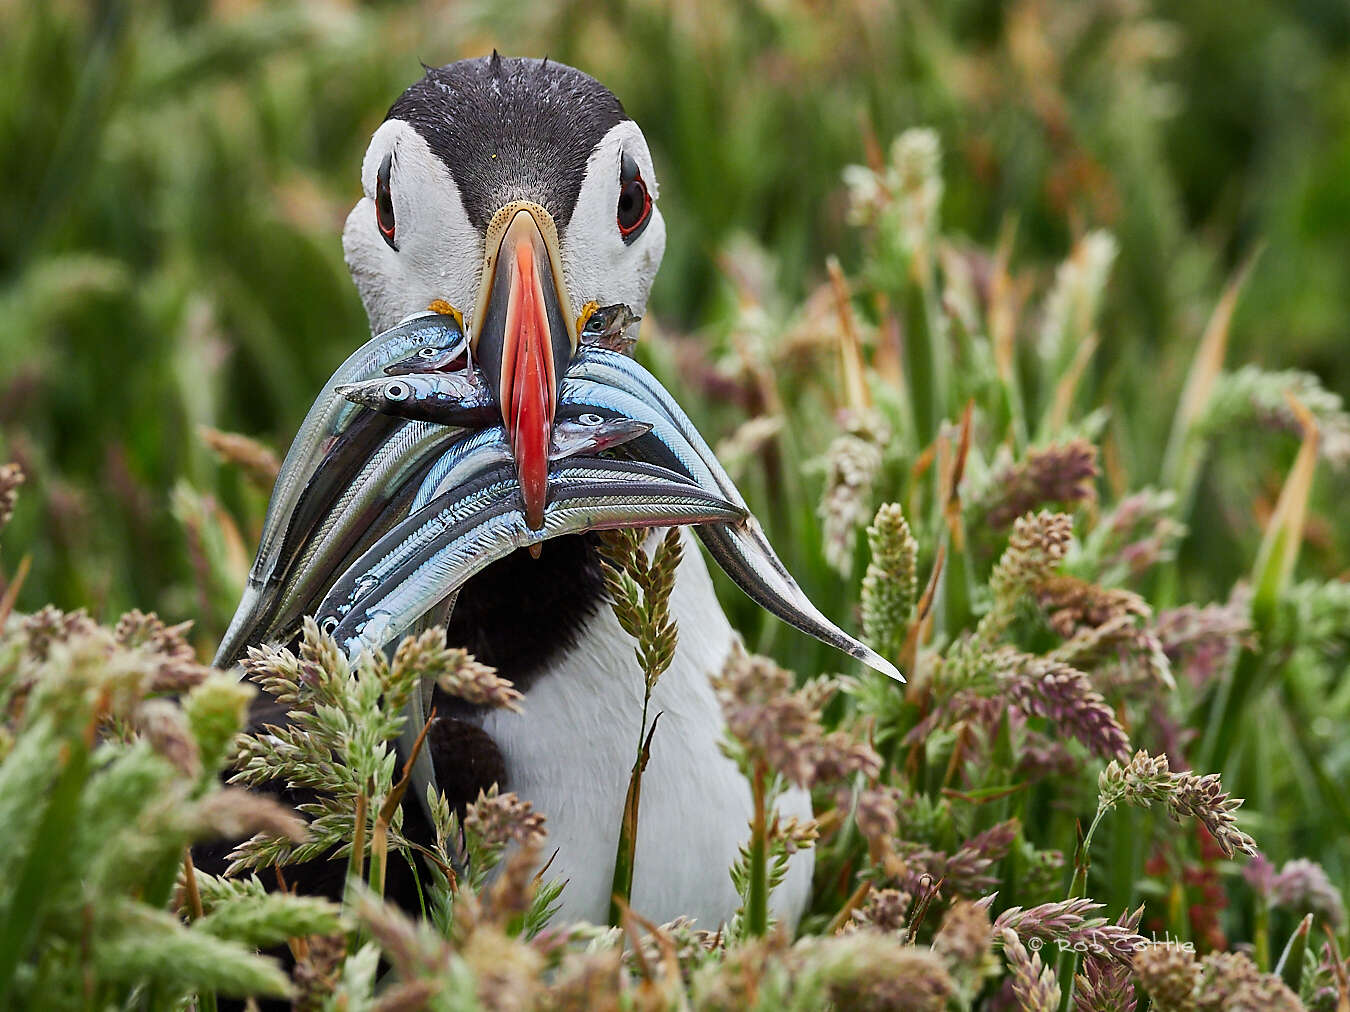
Puffins start landing in April but the height of avian action is June to July when the chicks have hatched and the parents are bringing their young sandeel takeaways.
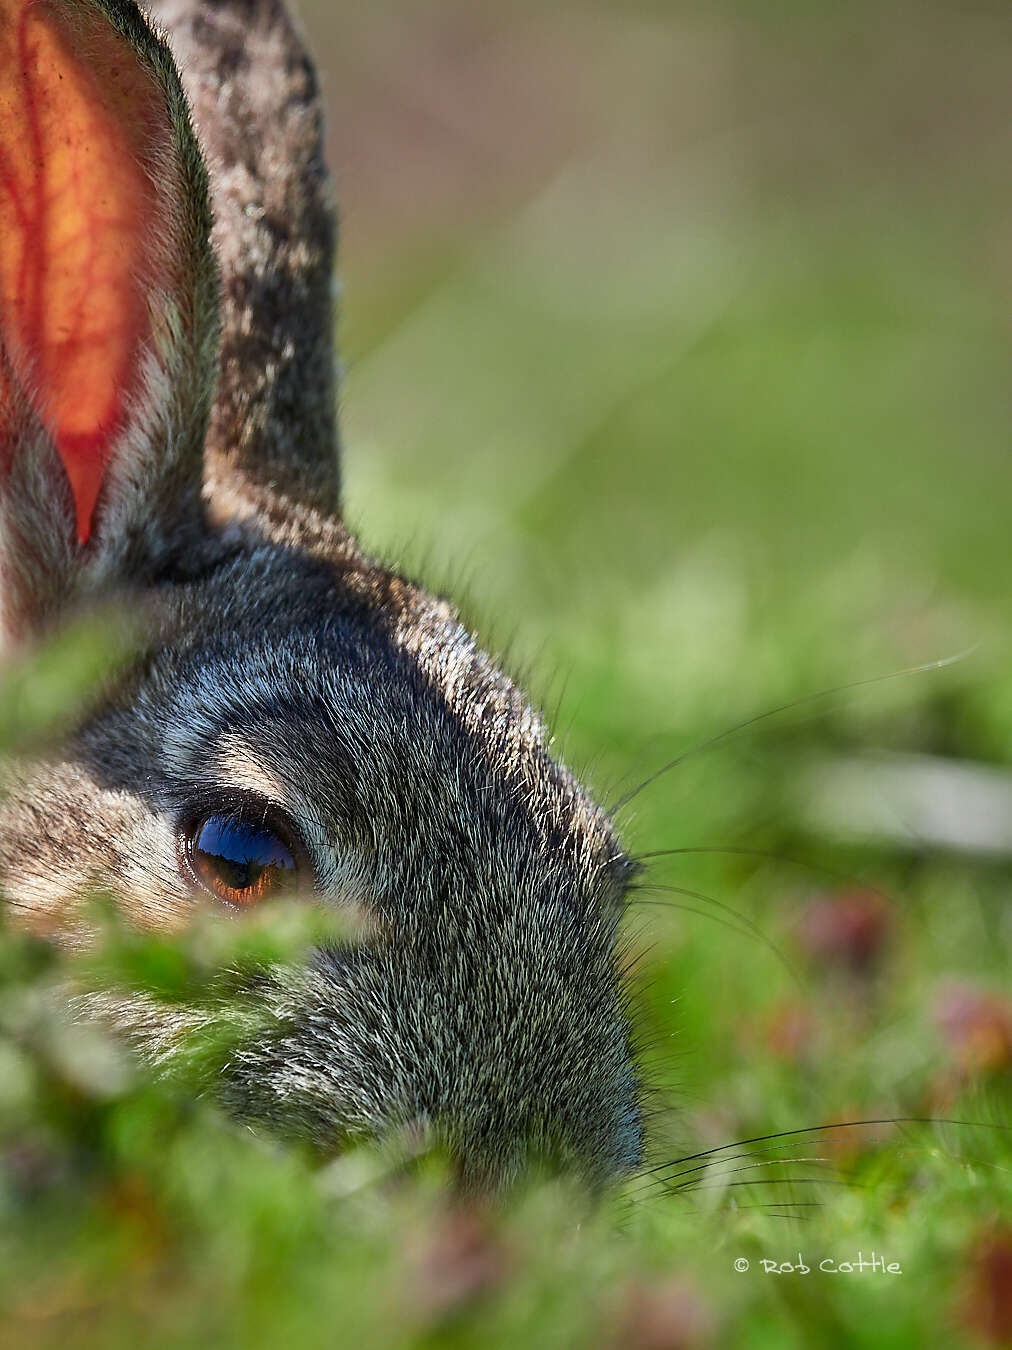
1/6400s | F4.0 | ISO 800
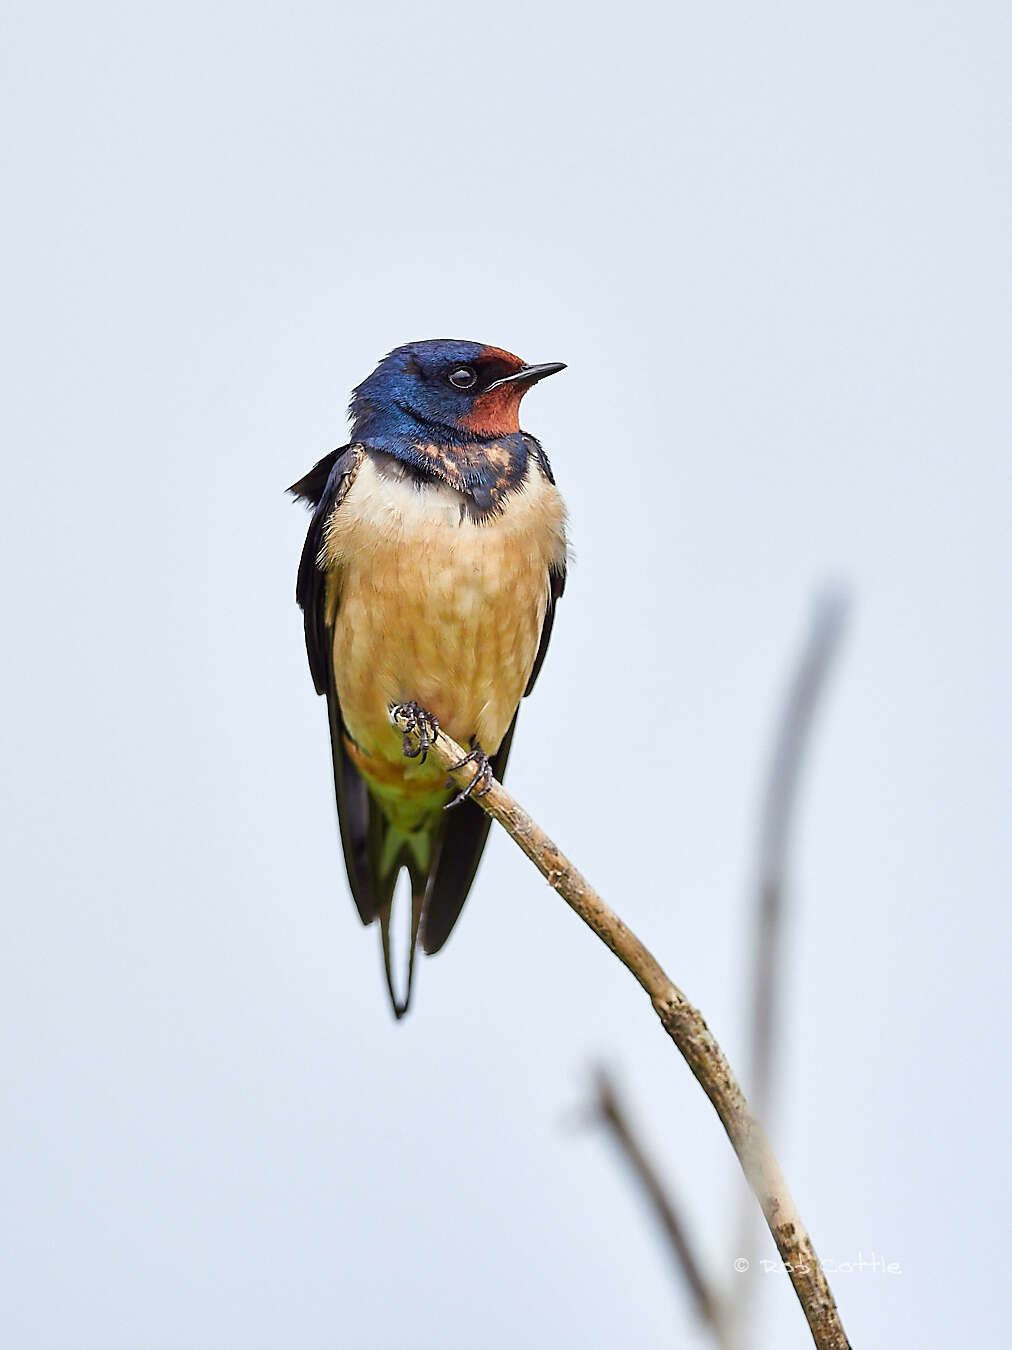
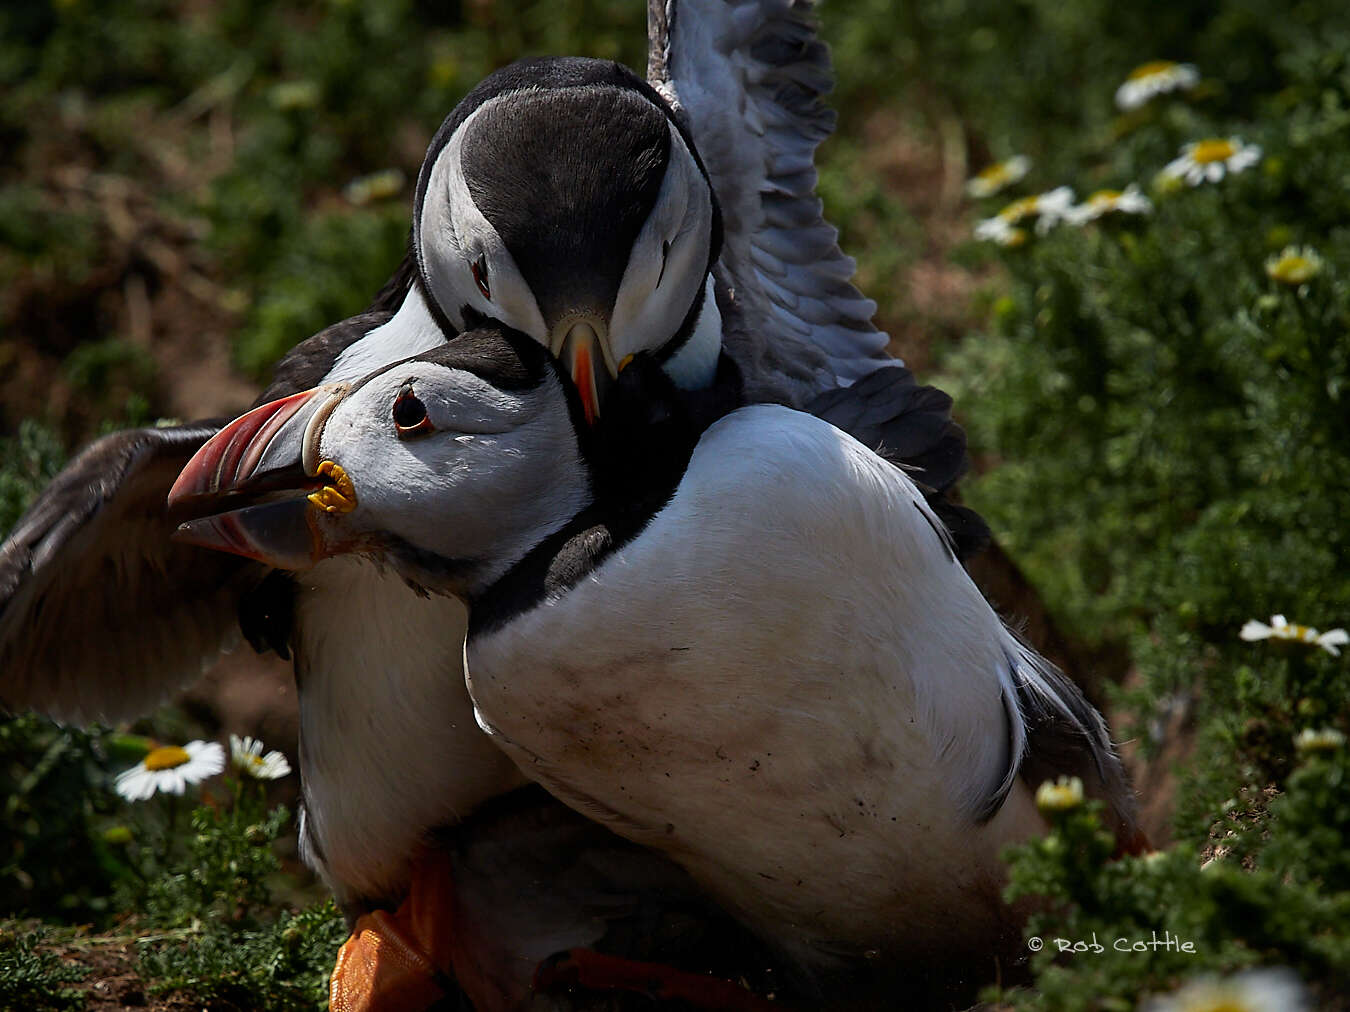
1/2000s | F6.3 | ISO 640
Located just a mile off the Pembrokeshire coast, Skomer has a large population of the wonderful ‘Sea Parrot’, the puffin, with around 30,000 birds that magically whizz above your head or waddle past your feet. It is also home to the largest population of Manx Shearwater in the world (although you won’t see them as they are nocturnal), other Auks too, razorbill, guillemot, as well as a myriad of other avian chums, such as short eared owl, curlew, gulls, kittiwake, fulmar and depending on the time of year Atlantic seals, dolphin etc.
All the pointers below can of course be used for any wildlife photography but I hope this helps you maximise your time, as a day visit is unfortunately short at only 5 hours and you will be surprised how time will fly (yes, pun intended).
OM-D E-M1 Mark II | M.Zuiko 300mm F4.0 IS PRO
1/6400s | F4.0 | ISO 800
OM-D E-M1 Mark II | M.Zuiko 300mm F4.0 IS PRO
1/3000s | F4.0 | ISO 400
ON THE ISLAND
If you haven’t visited before, please be aware that as you disembark the boat there are eighty plus steep steps to climb, it is also a trek of around 4 miles to wander fully around (although most stick to puffin central) and the only toilet is at the farm which is in the middle of the island, with the puffins being on the outside of the island! I won’t go into too much detail about locations but if like most you are visiting for the puffins, North Haven (where you land) and High Cliff are good places but most will end up at the Wick, which is excellent for portraits and close-ups.
Please be ever so mindful of the puffins, we are there for fun, whilst they are in a life and death struggle. Look to see if they want to pass you and step back (yes, they are that close) to let them cross. Please stick to the paths as the whole island is covered in burrows, potentially all filled with eggs or young and it’s easy to disturb or even ruin them.
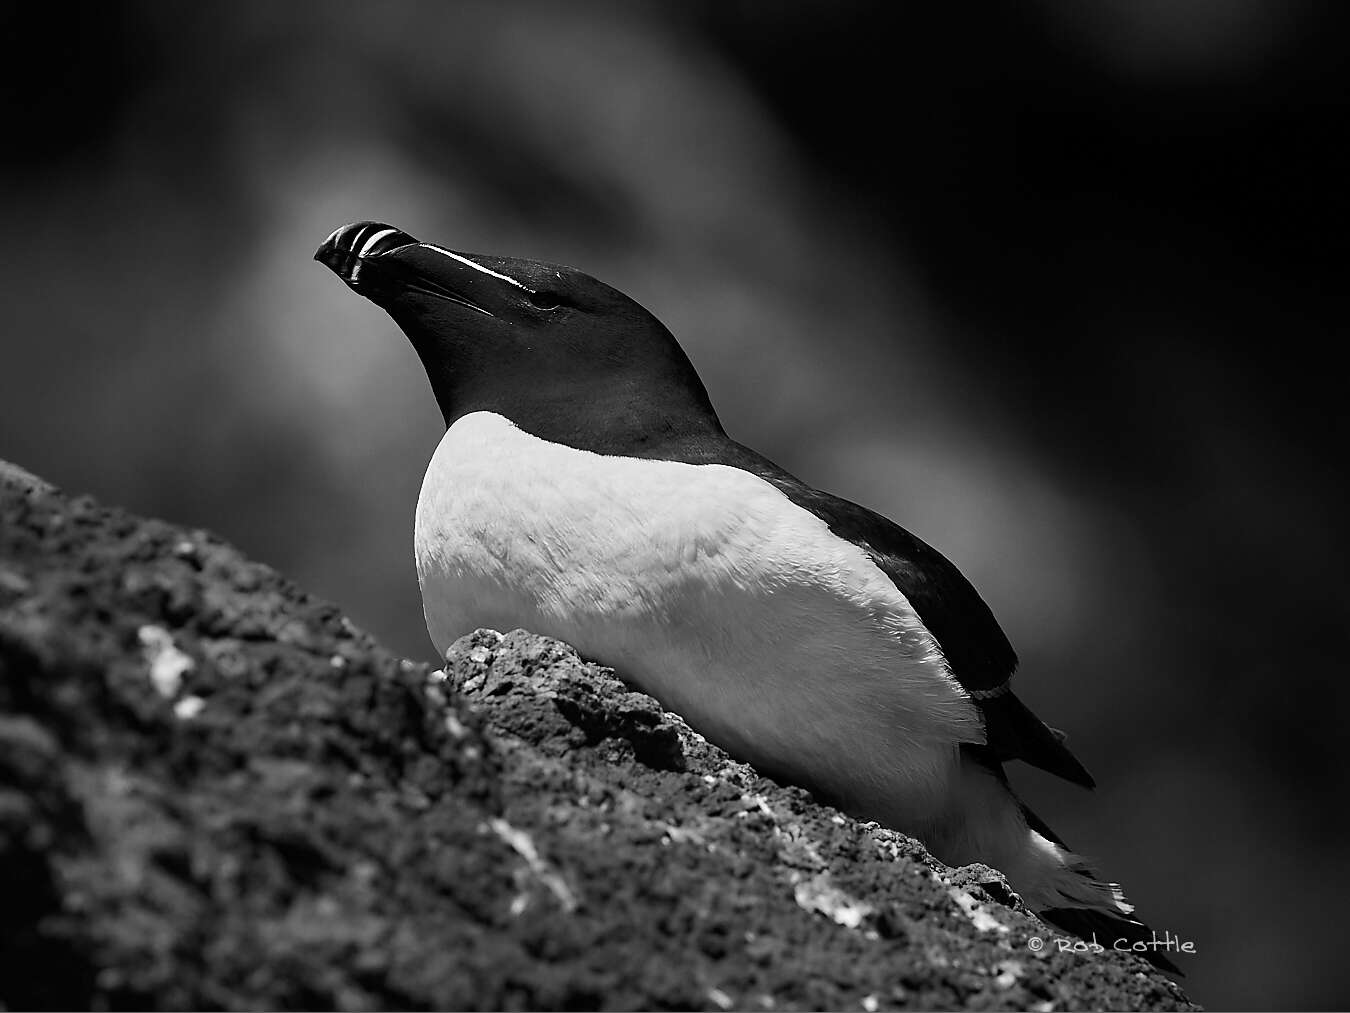
One other thing to mention, please, please, please take time out to look at the other stunning creatures on the island, if the puffins weren’t there, people would be visiting the island for those – and usually you can get much closer to them.
OM-D E-M1 Mark II | M.Zuiko 300mm F4.0 IS PRO
1/100s | F5.6 | ISO 400
OM-D E-M1 Mark II | M.Zuiko 300mm F4.0 IS PRO
1/3200s | F4.0 | ISO 800
A BRIEF SKOMER PUFFIN DIARY
April: Puffins start arriving to recolonise nests, maybe do a little courting, meet up with a few friends for drinks and nibbles or maybe even a ‘bit of the other’ to carry on the lineage. Their stunning beaks are only in its resplendent glory during this short breeding period, after that its back to ‘Dullsville’.
OM-D E-M1 Mark II | M.Zuiko 300mm F4.0 IS PRO
1/2000s | F4.5 | ISO 1000
OM-D E-M1 Mark II | M.Zuiko 300mm F4.0 IS PRO
1/2000s | F5.6 | ISO 400
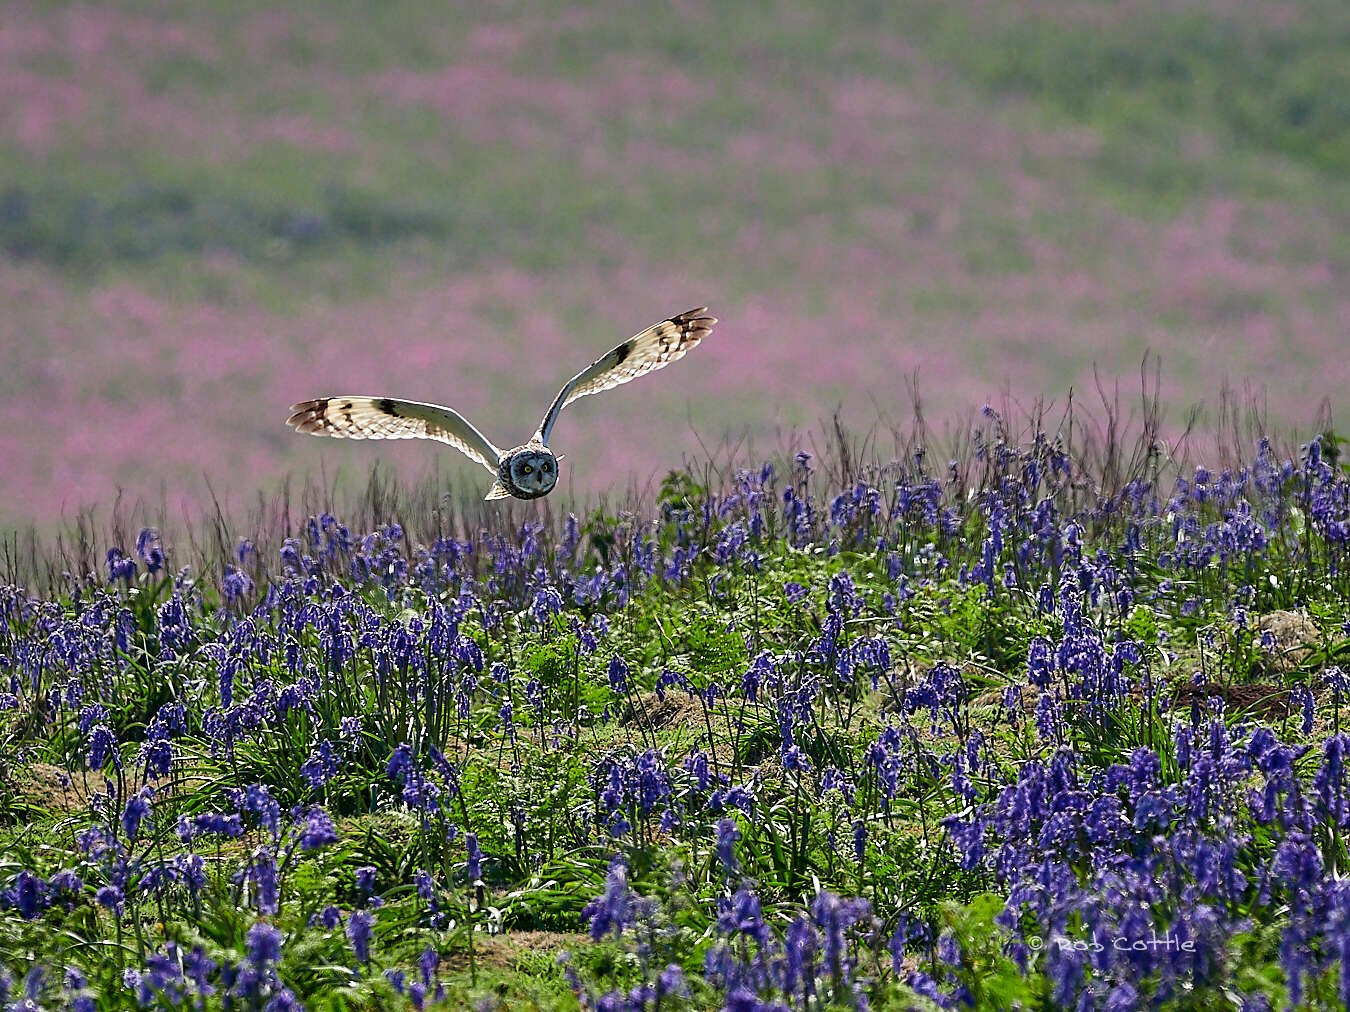
May: The female produces one egg in early May and the parents will take it in turns to sit on it. Look out for short-eared owls during this period hunting over the bluebells.
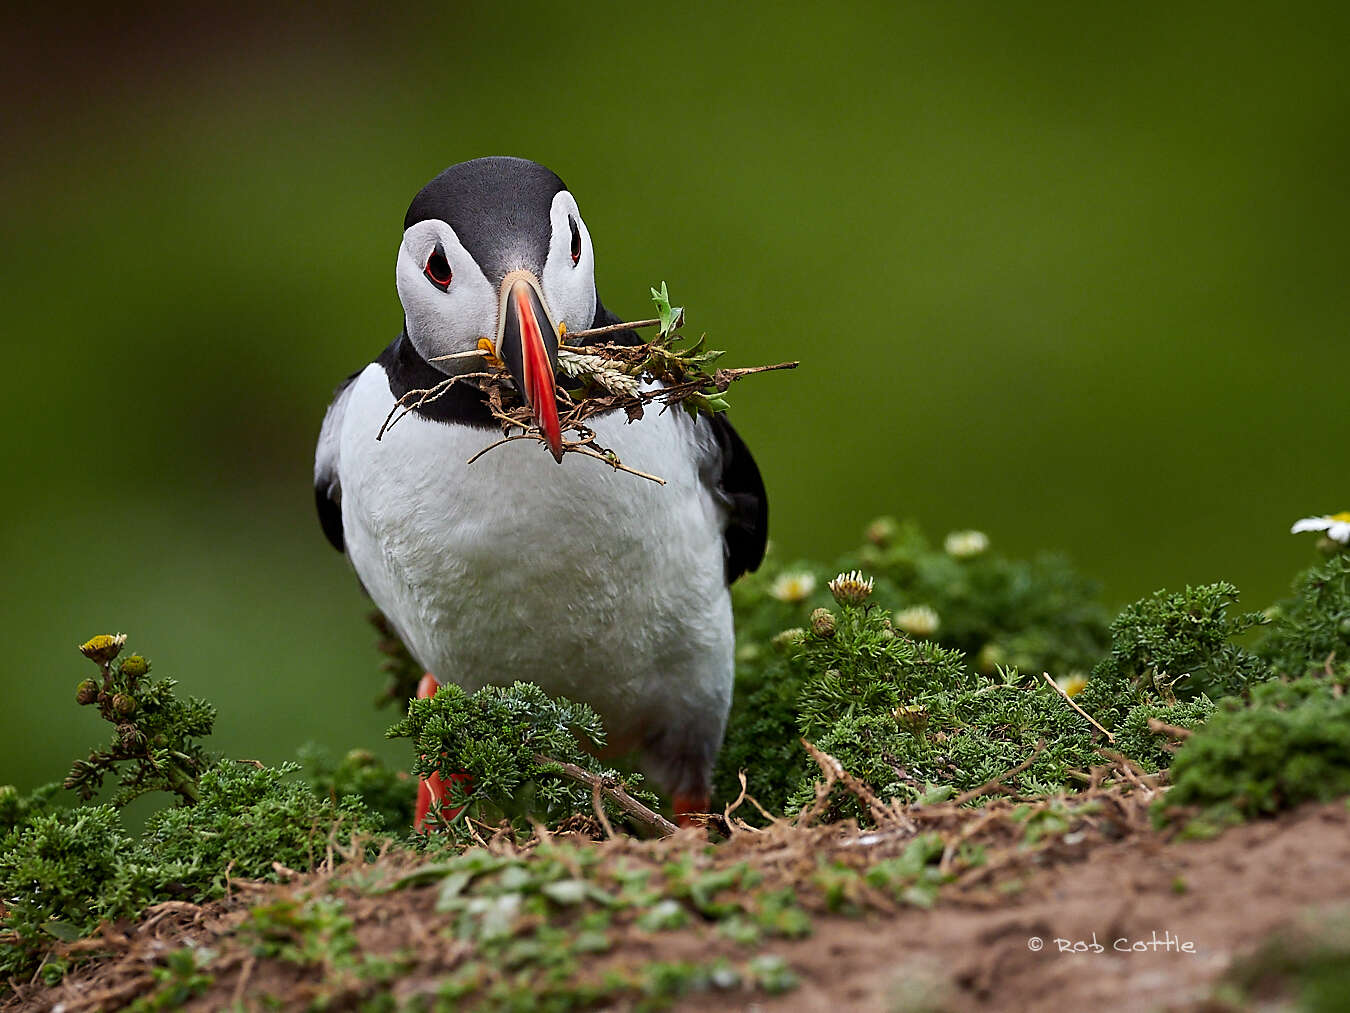
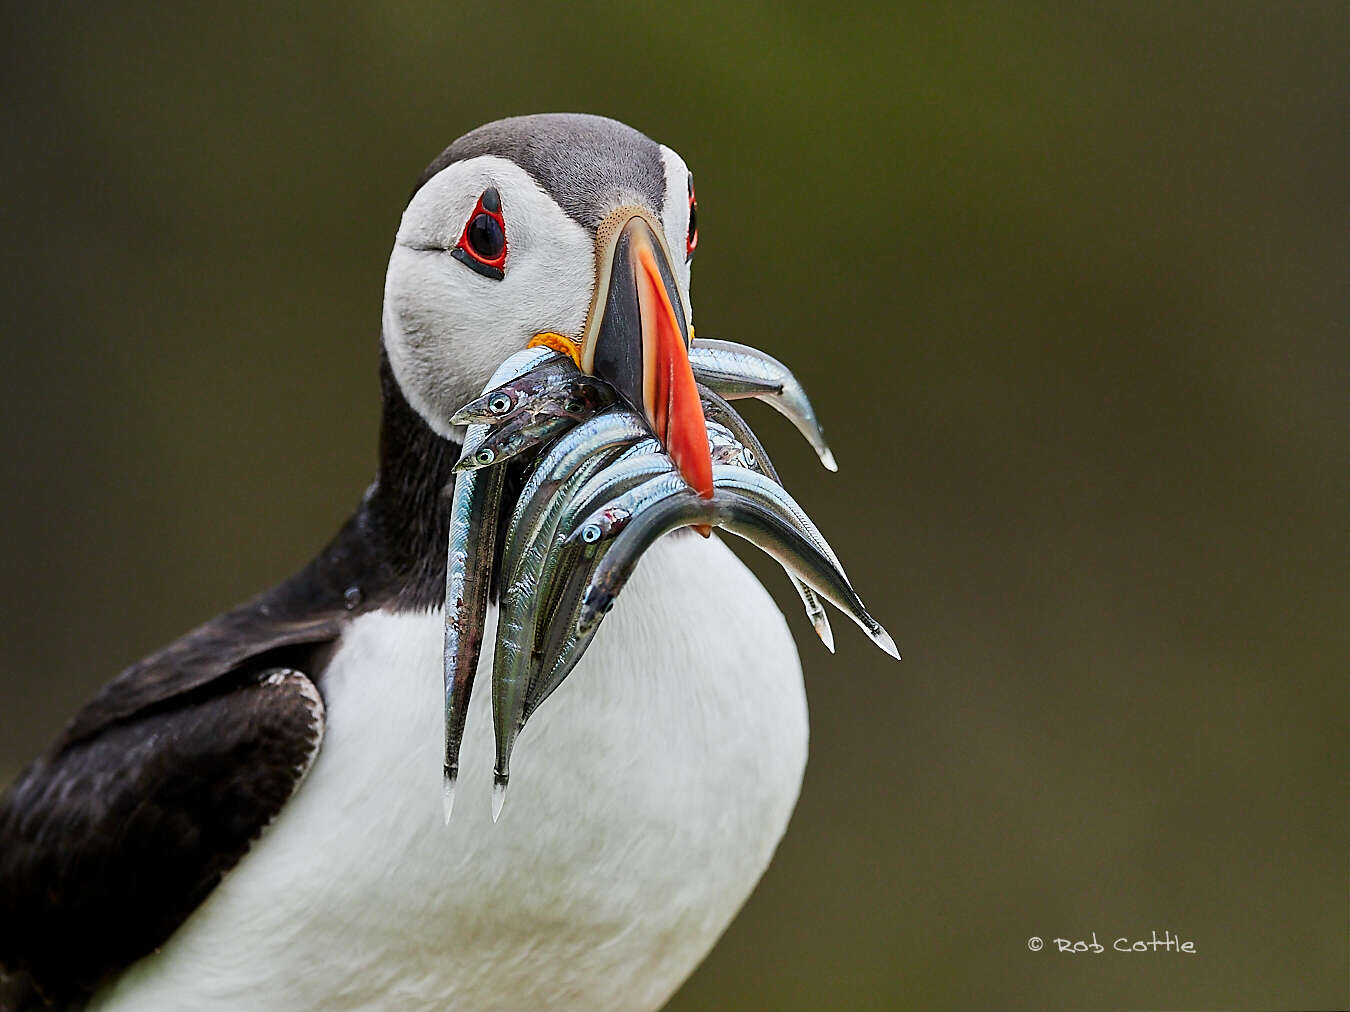
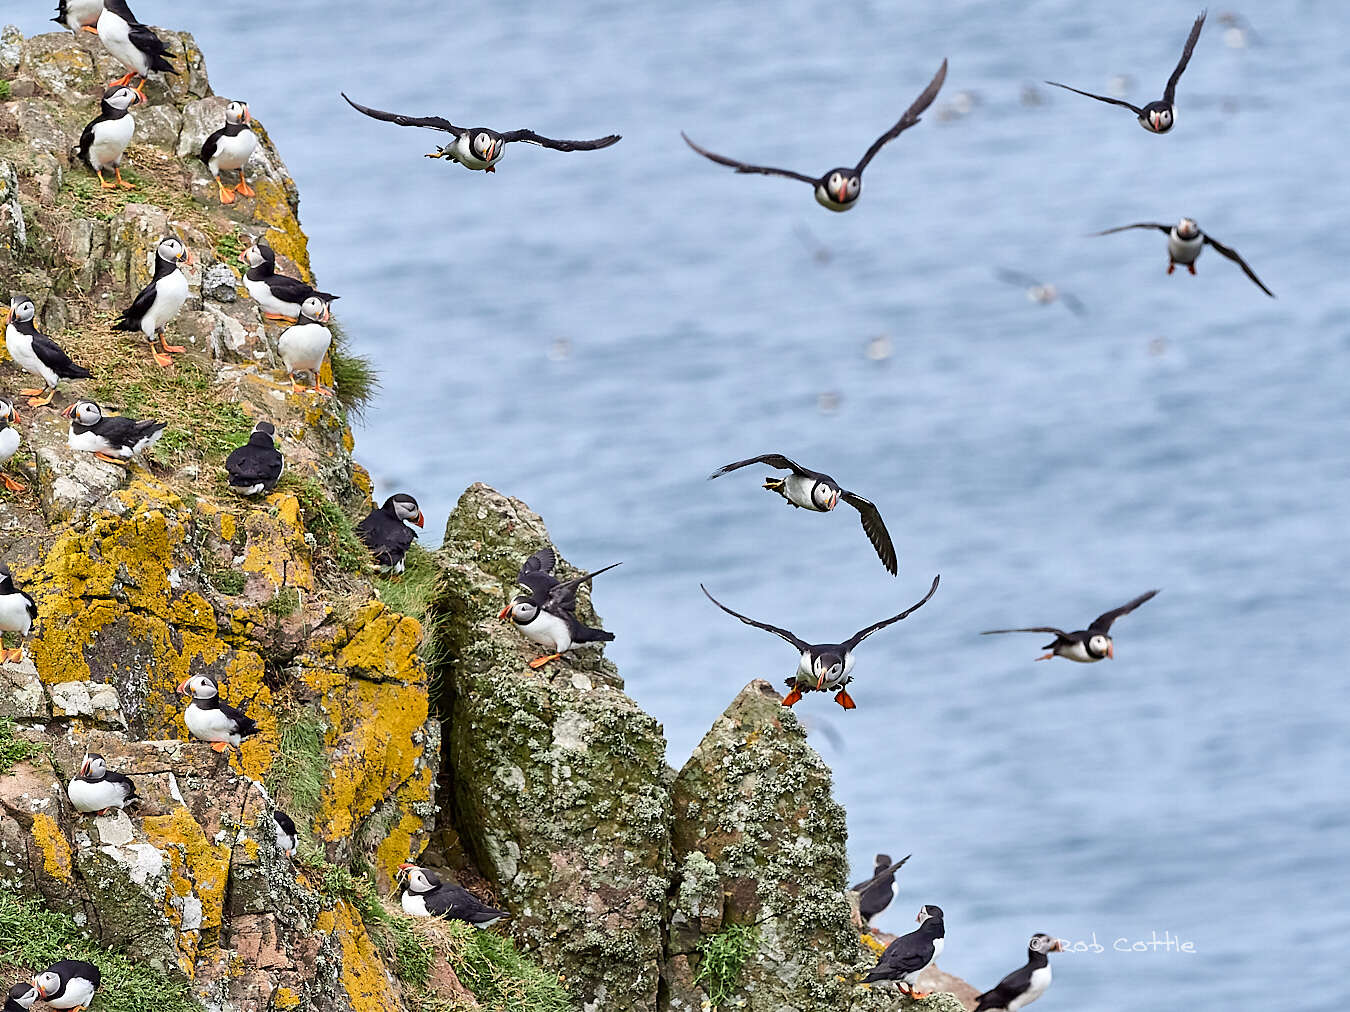
June: The young pufflings are born (that really is their name) but rarely seen and the parents take it in turns to find and feed them with sandeels. The sky turns into a spectacular feathery firework display, a constant flurry of activity that is a fantastic sight to behold.
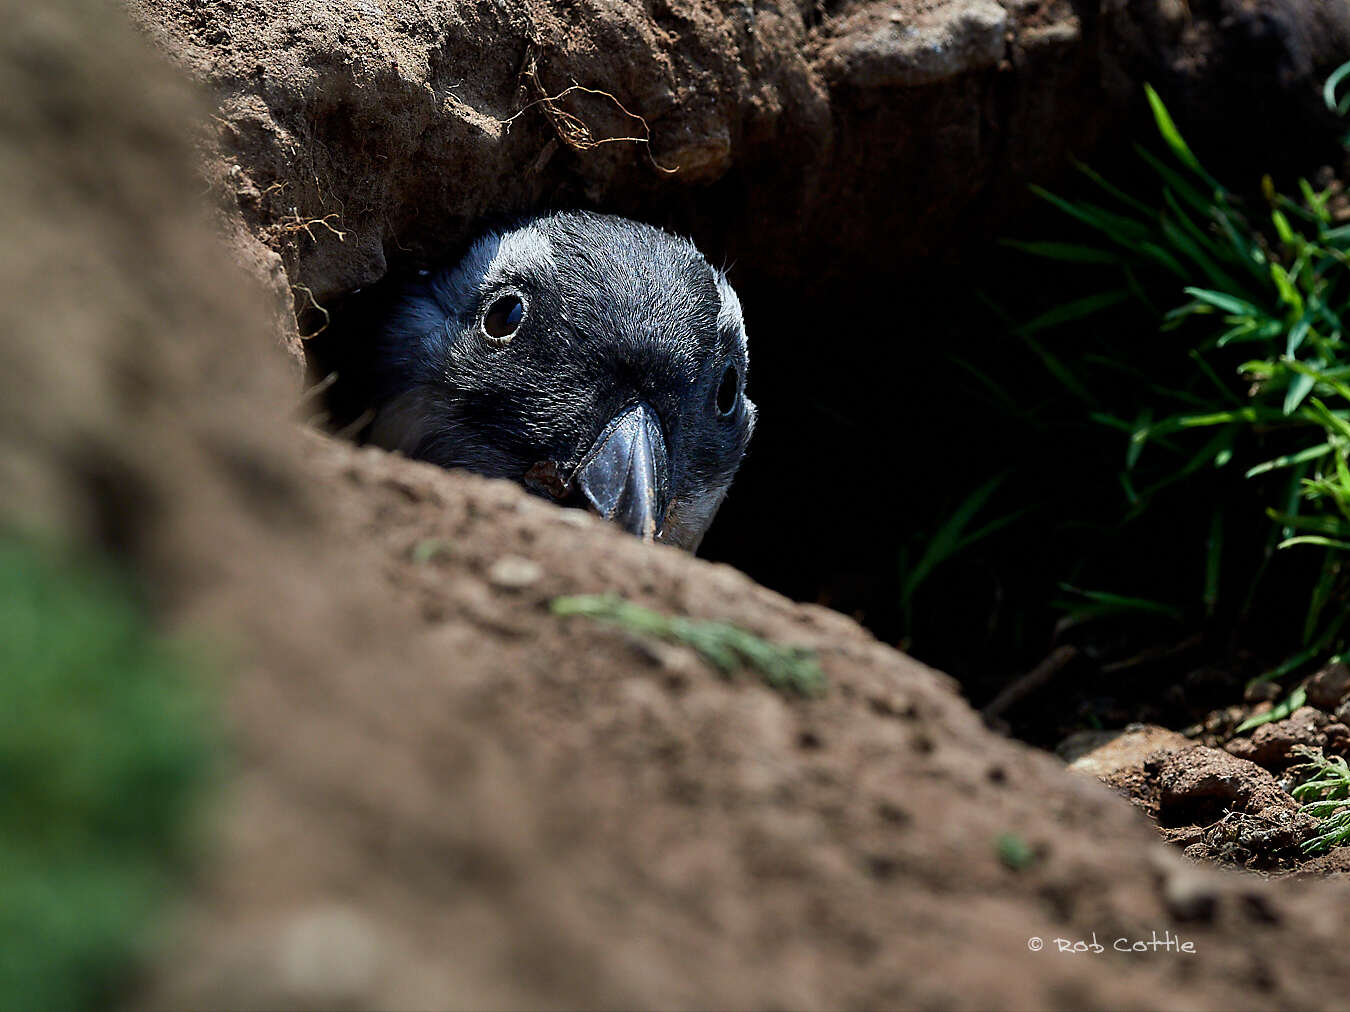
July: The pufflings are making their first wary appearances. They are dark grey and white puffin balls with big eyes. Keep looking at a nest and you may see one peering around.
August: They are almost gone and only a few stragglers remain, soon to disappear with the rest back to the Atlantic.
OM-D E-M1 Mark II | M.Zuiko 300mm F4.0 IS PRO
1/1600s | F5.6 | ISO 800
HOMEWORK
A little homework will save you masses of wasted time, so formalise your settings and try these techniques on easier targets like gulls, pigeons etc don’t leave it until you arrive on Skomer. It’s worth knowing and practicing these before setting foot onto ‘Puffinworld:’
- Move your AF point or points around the autofocus area available
- Change the number of focus arrays
- Change from single to continuous auto-focus
- Manual focus
- Change your aperture
- Set your ISO
- Use exposure compensation (not necessary if you use manual)
PUFFIN PORTRAIT POSSIBILITIES
I’ll get onto puffs in flight shortly but due to their fantastic expressions and stunning colours, portraits are a no less worthy way to capture our puff friends, especially when they aren’t flying at warp speed. In fact, you can waste an awful lot of time trying to capture them in flight that you can end up with little else, so be careful with your time. First thing to think about, are you photographing just the Puffin or the Puffin and its surroundings, what story are you trying to tell?
out
OM-D E-M1 Mark II | M.Zuiko 300mm F4.0 IS PRO
1/1250s | F4.5 | ISO 1000
THE CLASSIC
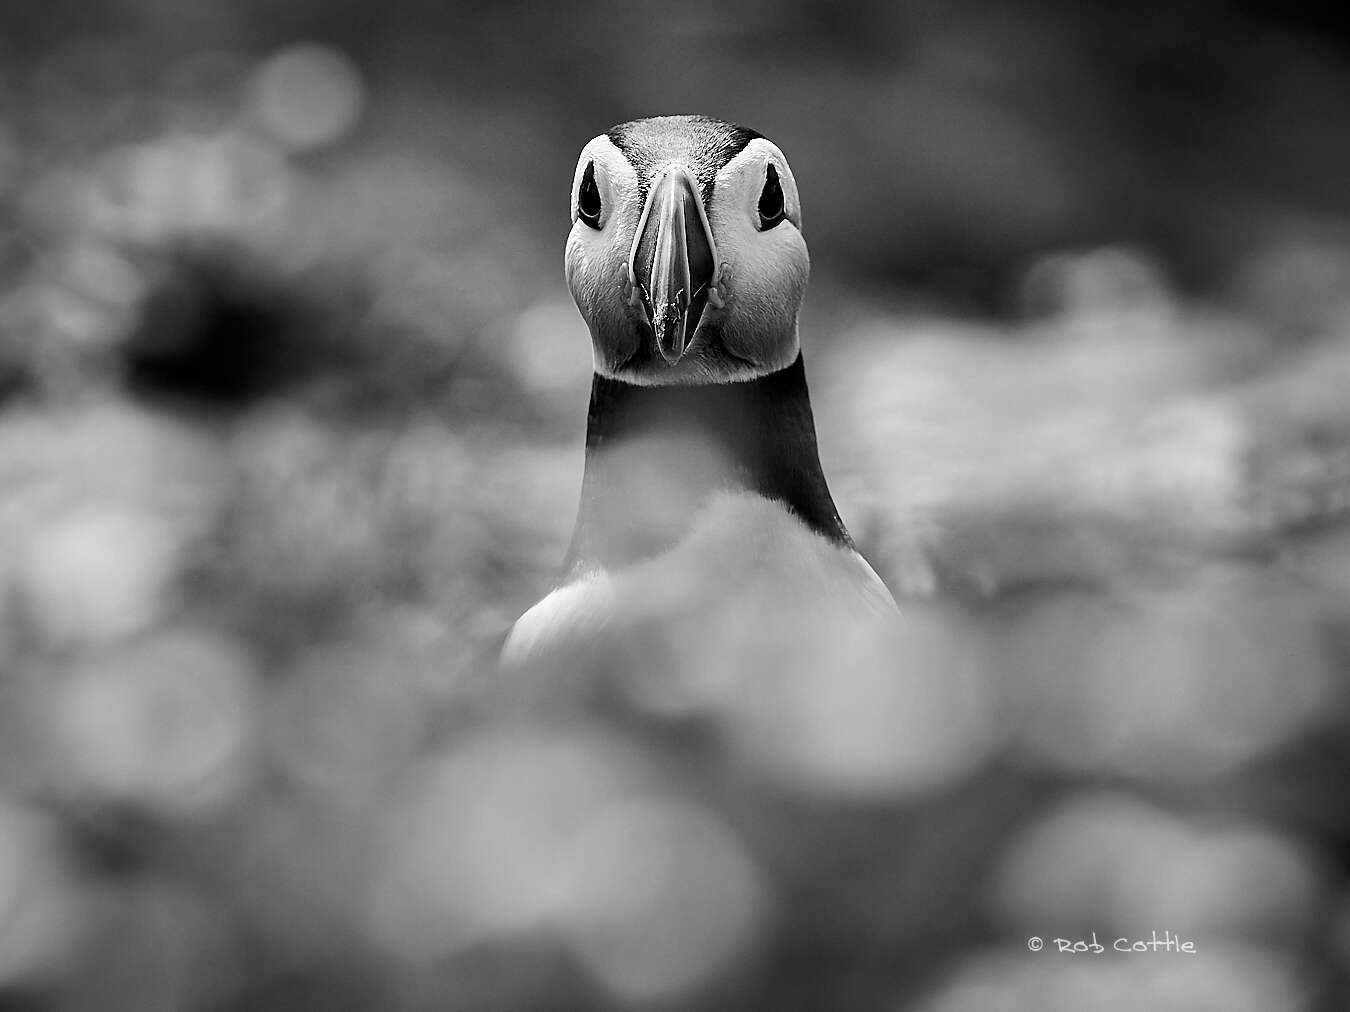
If it’s the puffin, you will want it to pop out of the image by rendering it sharp but with your foreground and background diffuse and creamy, the classic wildlife portrait.
- Look to use a long lens that will allow you to isolate the puffin. Any of the long lenses will work great but also think about using the 40-150mm with its f/2.8 aperture and should you have one, try using a tele converter.
- Scan for a suitable background that is as uncluttered as possible, preferably sympathetic to the image. It’s amazing how moving a few inches either way can change the look of a photo, so experiment, don’t stick to the first shot.
- Get as low as possible to the puffin so you are able to shoot at eye level and possibly with the foreground visible so you can render it diffuse (you don’t have to have any foreground).
- Set your aperture as wide open as necessary to blur any foreground but with enough depth of field to capture the puffin in as much detail as required whilst blurring the background. Try a few test shots to check and fine tune. Wide open apertures mean the smaller f/ numbers such as f/2.8, f/4 or the lowest available on your lens and closing down your lens means the other way with higher f numbers. Depth of field will depend on multiple variables, your lens length, depth of field, how close you are to the Puffin and how close you are to your background.
- Use the smallest single focus point on the head/eye and remember if the eye is not sharp a portrait is almost certainly not going to work. For those with Bird AI now’s the time to use it.
- Think about your composition, have the puffin to one side looking into the largest space or if it’s looking at you, more central. The rule of thirds can work well but it’s only a guide.
- Even though getting low works, keep an open mind and explore other options, heights, angles etc.
OM-D E-M1 Mark II | M.Zuiko 300mm F4.0 IS PRO
1/2500s | F5.6 | ISO 800
OM-D E-M1 Mark II | M.Zuiko 300mm F4.0 IS PRO
1/2500s | F6.3 | ISO 800
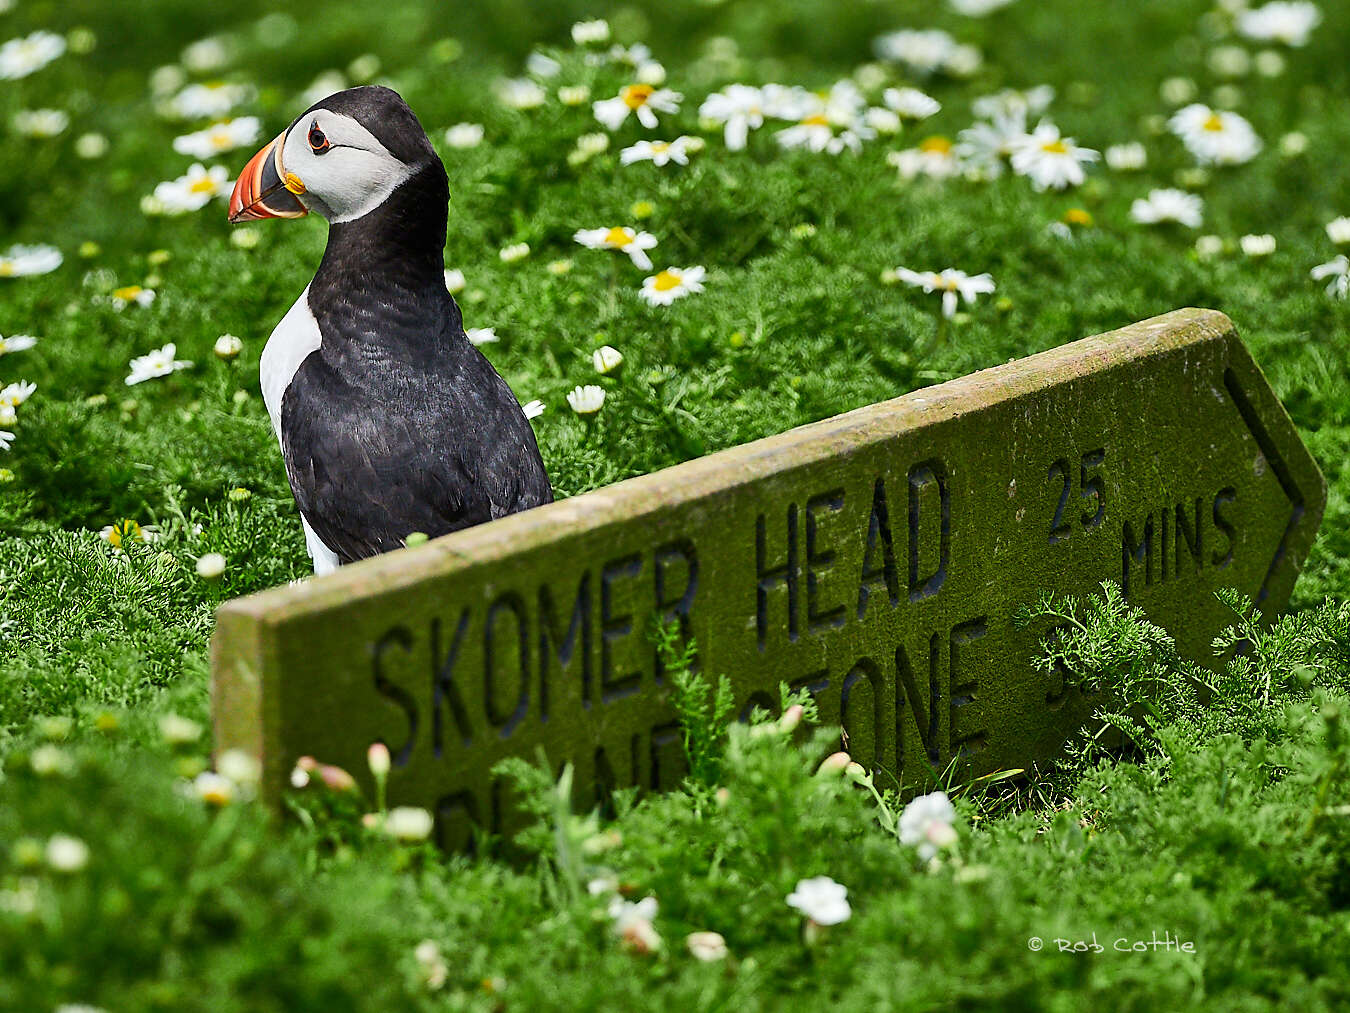
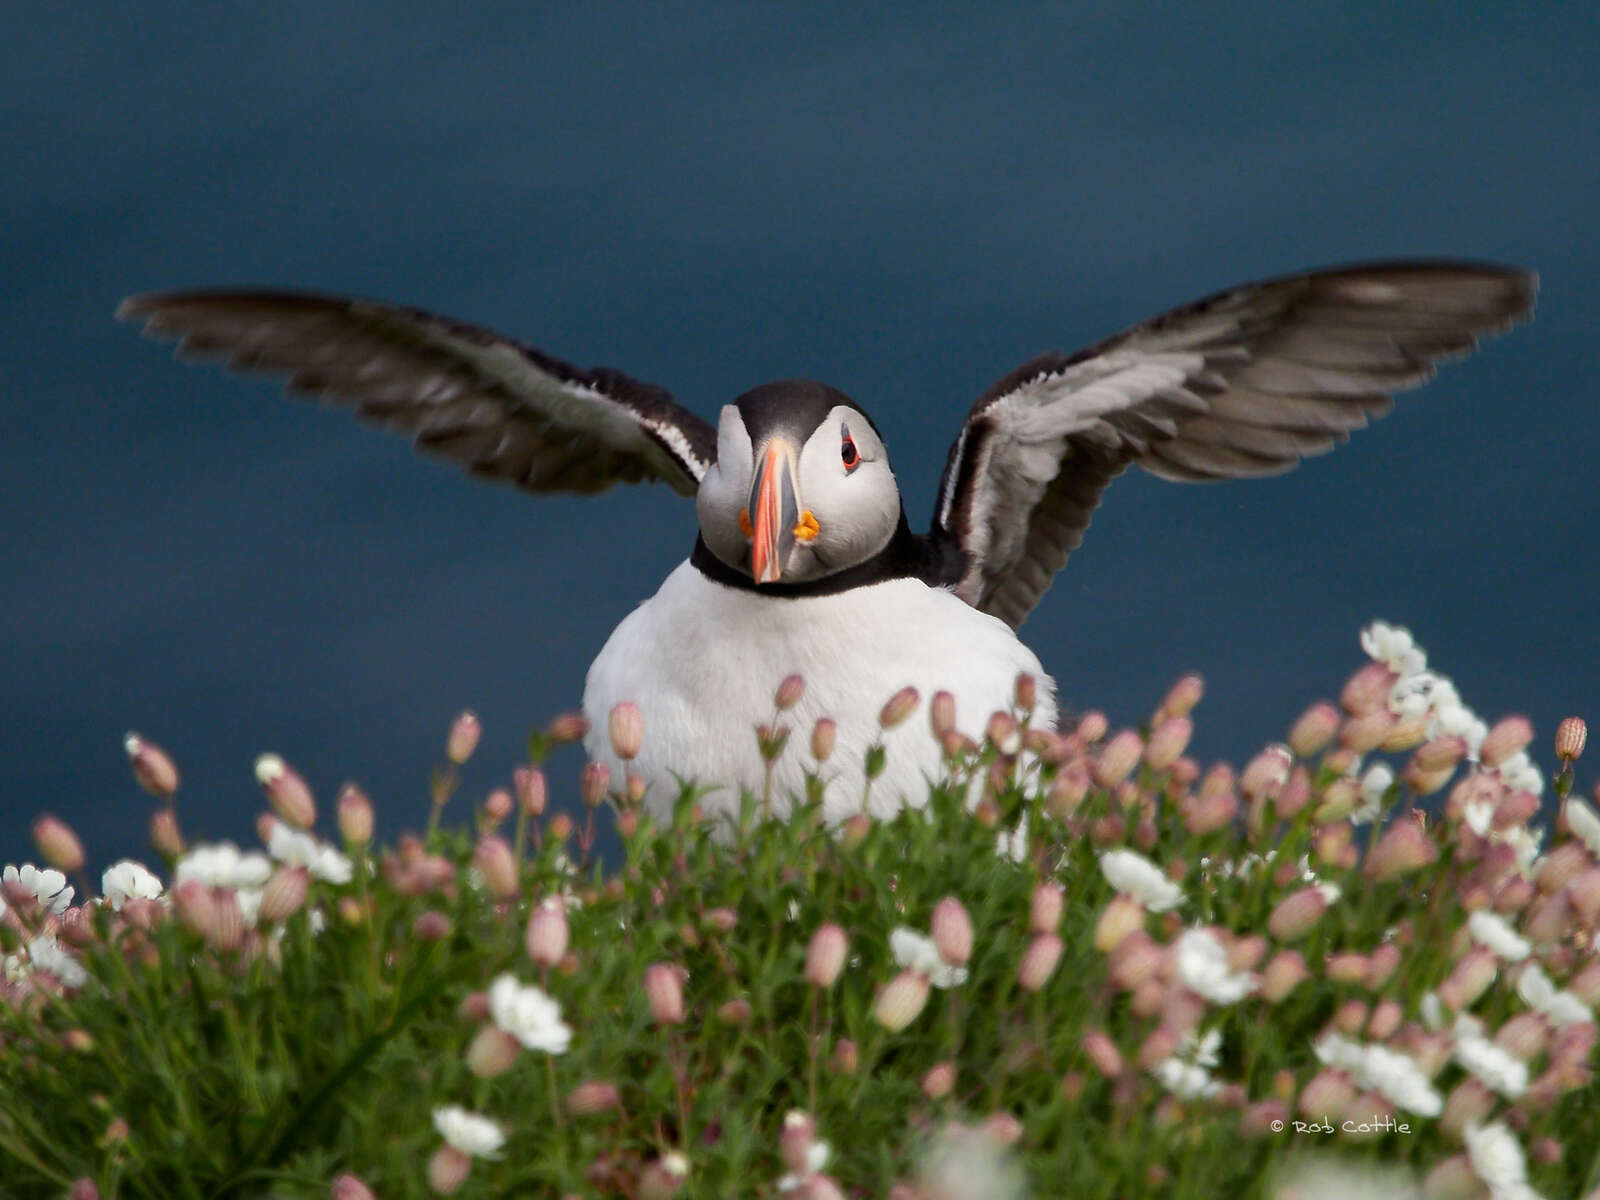
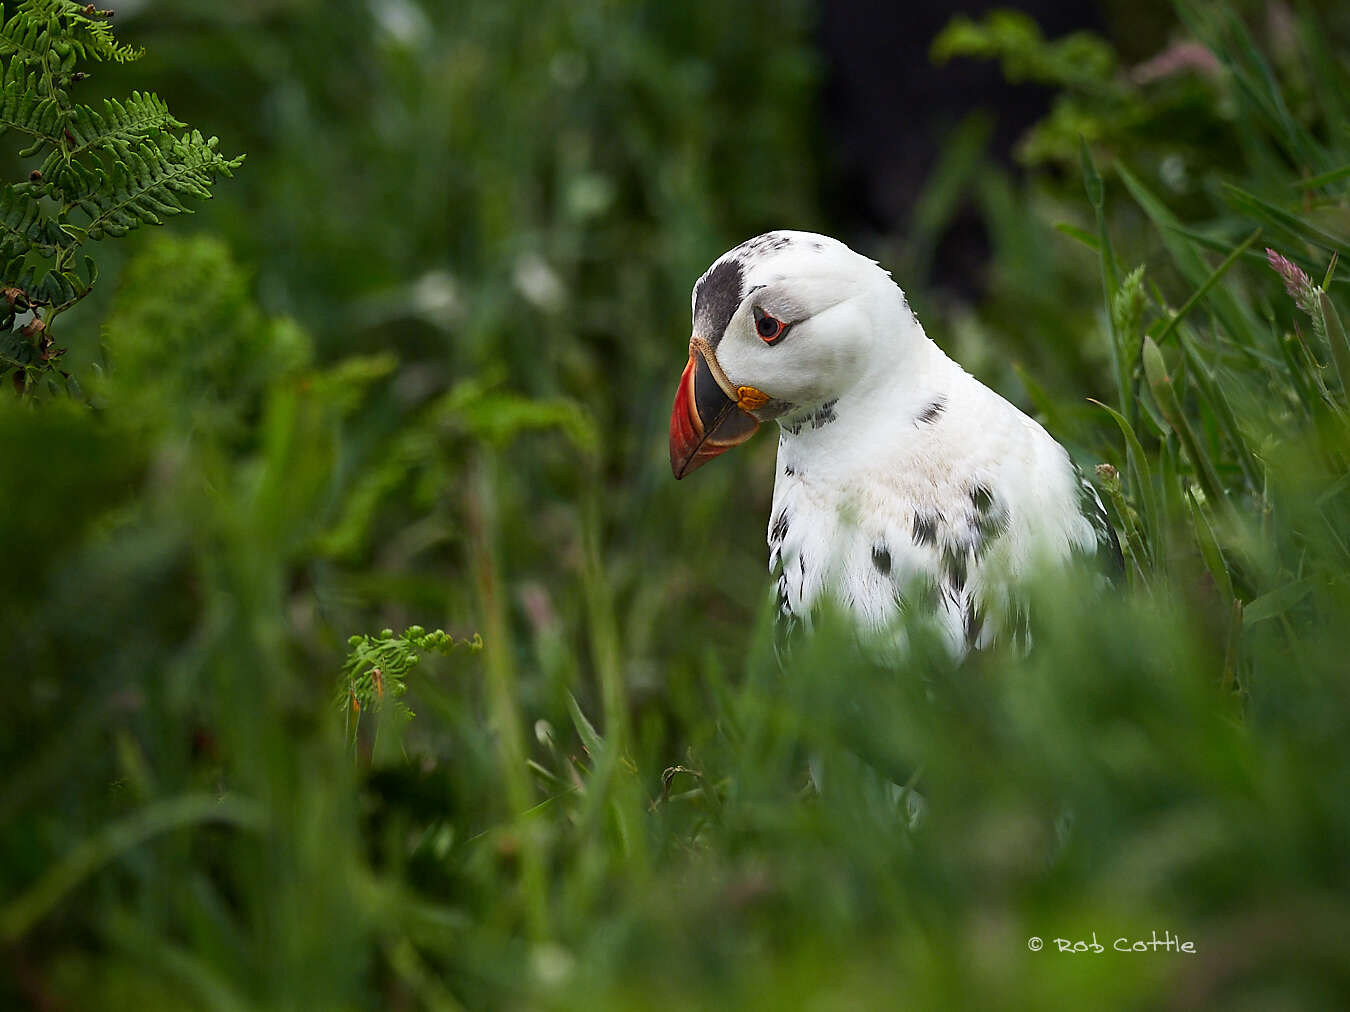
IN THE LANDSCAPE
If you are looking to include the habitat/landscape (and it’s well worth it) there are multiple options.
- Look for a background that will be worthy of capturing. It can be anything from flowers (especially thrift on Skomer) to the larger environment. • The basics of capture are the same but this time you will need to use larger apertures.
- You will need to stop down your long lenses heavily (larger numbers) to render everything sharp and even then, will probably fail.
- So you will be better off using wide-angle or shorter standard lenses that will allow more depth of field. If you are using a wide-angle you will need to be very close to a puffin to have it large in the frame, so be careful however it’s a great lens to capture the greater environment.
- Compositionally try to be selective with what you include in your frame, a dull or messy background will detract from your puffin, so scan the viewfinder.
OM-D E-M1 Mark II | M.Zuiko 300mm F4.0 IS PRO
1/2500s | F4.0 | ISO 1000
BEHAVIOUR SHOTS
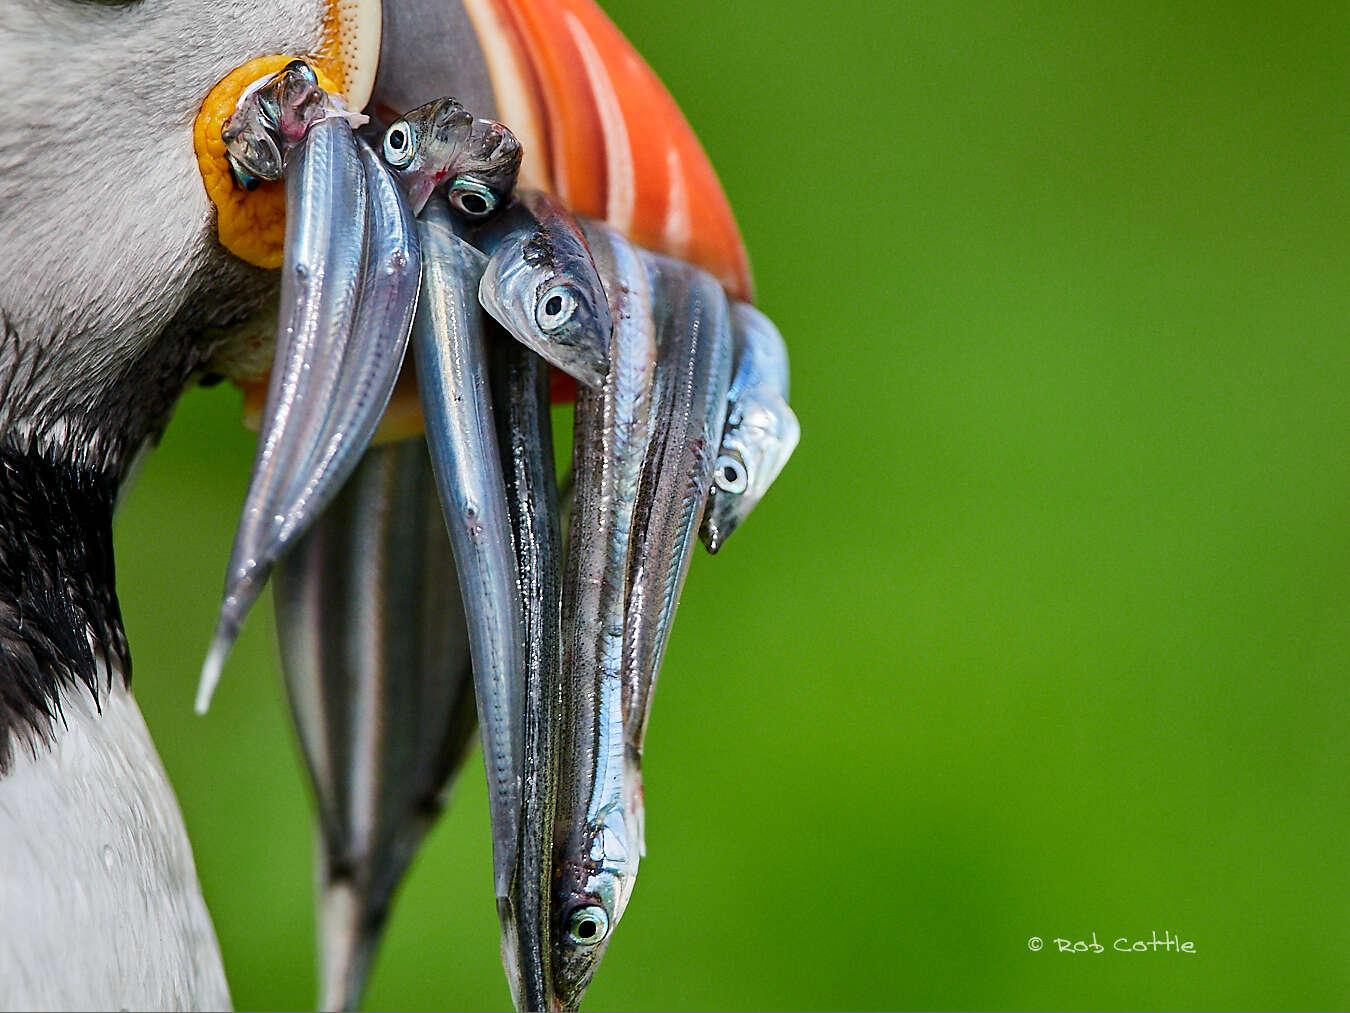
The puffin has such a great range of expressions and interactions that are crying out to be captured. Look for male and female bonding, puffin fights (they can be quite feisty), face contortions, feeding, mouths full of sand eels etc. Look out too for attacking gulls trying to nab their sandeel catch.
OM-D E-M1 Mark II | M.Zuiko 40-150mm F2.8 PRO + MC-14 Teleconverter
1/2000s | F8.0 | ISO 400
OM-D E-M1 Mark III | M.Zuiko 100-400mm F5-6.3 IS + MC-14 Teleconverter
1/1250s | F9.0 | ISO 800
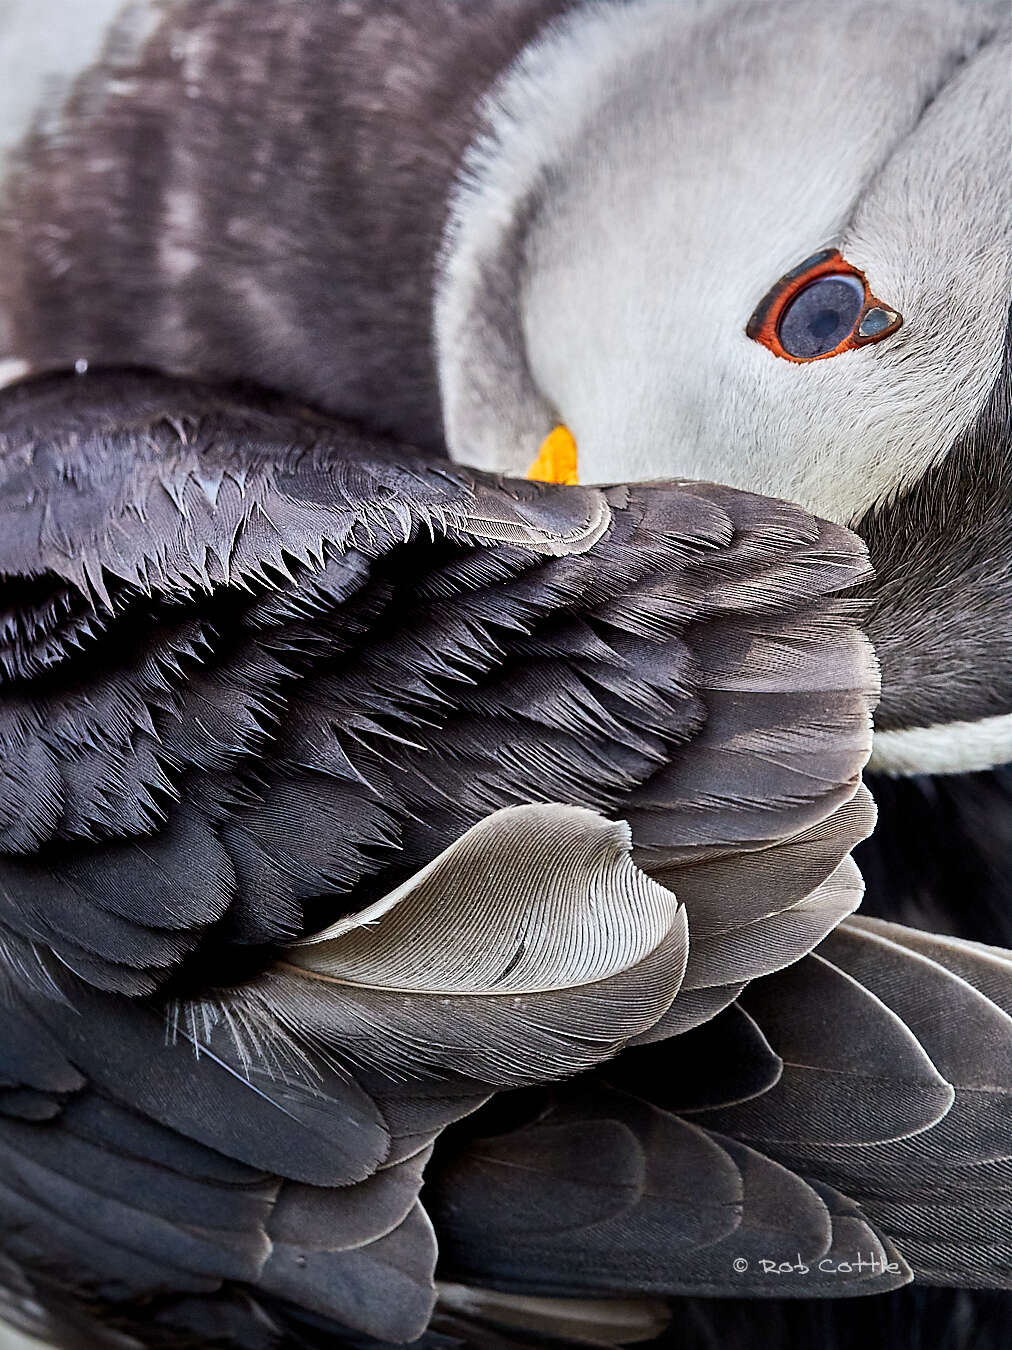
CLOSE-UPS AND DETAIL
With puffins being so close you have a great opportunity to nab some lovely textures and detail. You can use a wide-open aperture to pinpoint areas or the opposite and fill the frame with interesting compositions.
OM-D E-M1 Mark II | M.Zuiko 300mm F4.0 IS PRO
1/750s | F8.0 | ISO 320
OM-D E-M1 Mark II | M.Zuiko 300mm F4.0 IS PRO + MC-14 Teleconverter
1/1250s | F5.6 | ISO 800
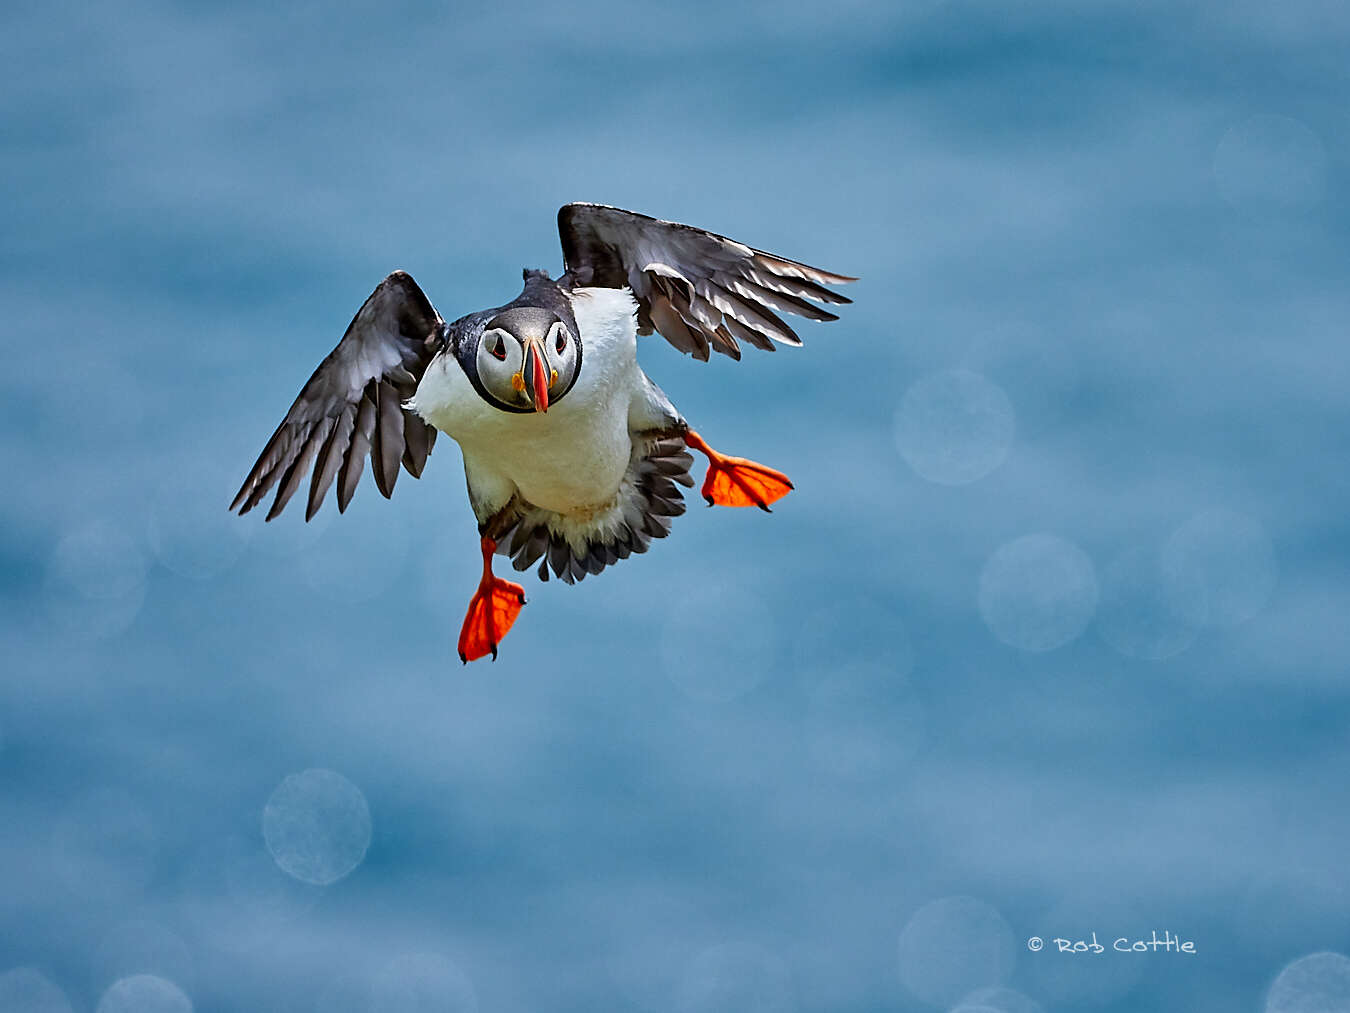
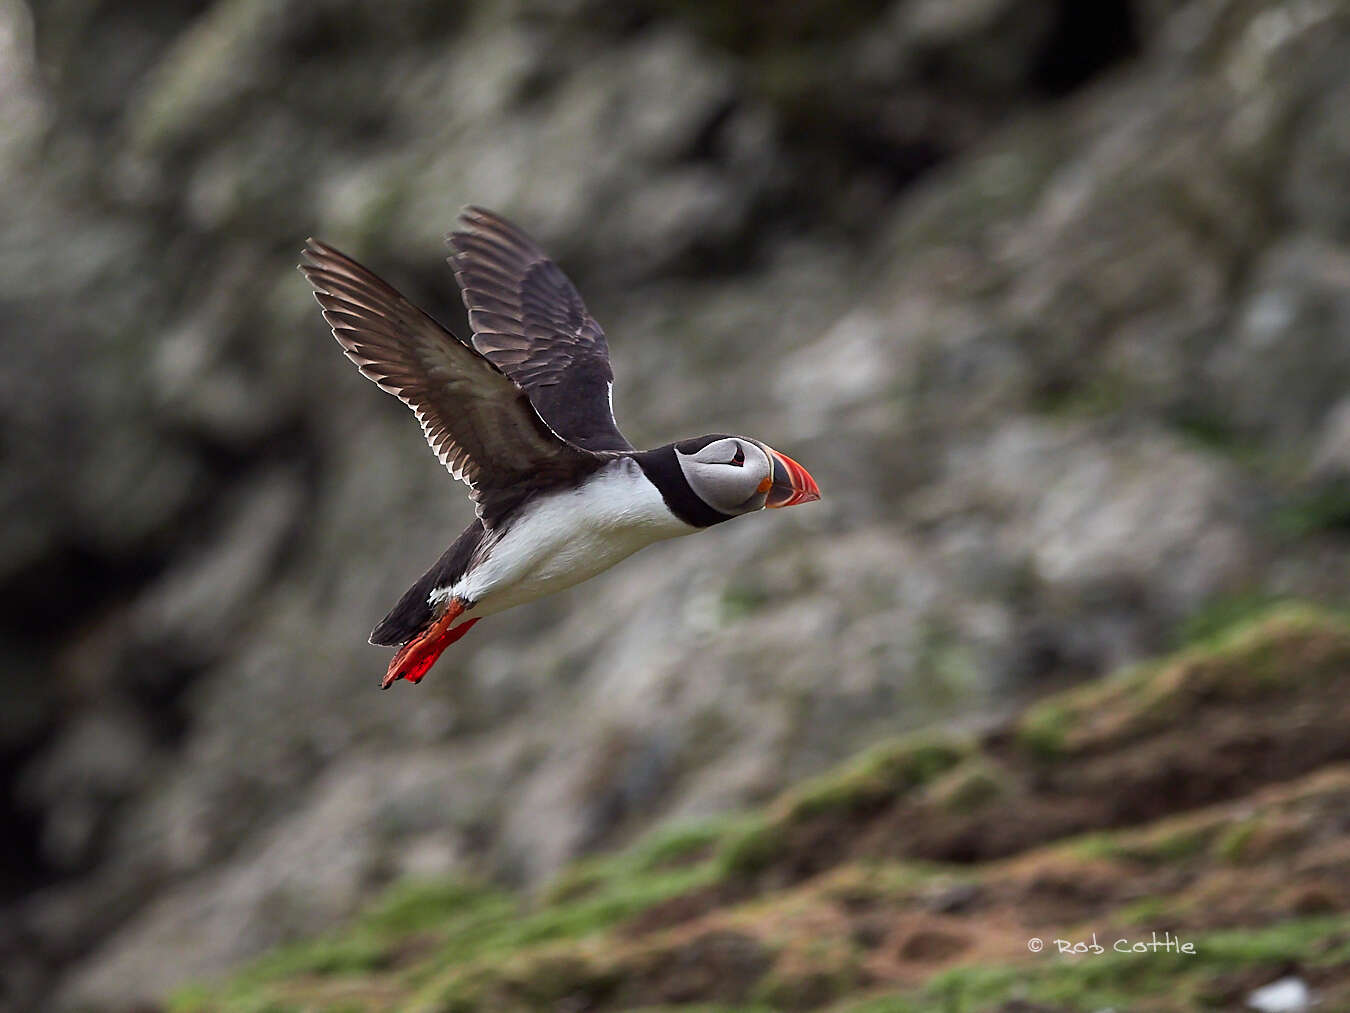
THE FEATHERY EXOCET – PIF (PUFFINS IN FLIGHT)
If anyone has tried to capture a puffin in flight before, you probably think a secret puffin surgeon has snuck into your house at night and performed a ‘puffinectomy’ on your images. Unfortunately, it may just be that the ‘Puff’ is a really tricky bird to capture in flight and sometimes there’s more chance of catching air in a string vest however there are a few things we can do to make the seemingly impossible, slightly more possible. First things first, puffins are about as hard as they come to capture in flight so don’t pressure yourself and enjoy giving it a go. If you actually capture a flying feathery Exocet missile, BIG BONUS!
LENSES
Understandably, there is a tendency to want to use your longest lens to get close, such as the 300mm f/4 but for BIF they have a very narrow field of view and the “puff” can disappear easily from your sight. There is nothing wrong with using these, aim a little further away and follow your target as it comes close but just be wary that it can make catching them a little more difficult. I am currently using the 100-400mm as it’s so versatile and saves me carrying anything else but I previously used the 40-150mm with the MC-14 1.4x TC which I found a really good combination and it works well with the MC-20 2x TC as well. Using a lens that has a wider field of view will allow you a little more wiggle room for correcting yourself. The lucky owners of the 150-400mm f/4.5, will find it a boon as not only can you use it to isolate your subject for portraits but you can also zoom out to achieve a wider field of view.
In processing I will happily crop to make up for the smaller subject in the frame but I’m only talking about knocking a couple of mb off the final jpg size (around 12mb or more), not cropping to a postage stamp.
EASIEST METHOD
The least difficult but by no means easy way, is to capture these feather blurs flying against as uncluttered a background as possible such as the sky, calm water or grass. Your auto-focus won’t be distracted as much and hopefully will get its mind in the game and concentrate on the puffin.
GENERAL SETTINGS
- Select all or a large number of focus points, let the camera do the work.
- Continuous auto-focus, continuous shooting, machine gun mode!
- Exposure compensation to suit conditions. If you are shooting into the blue sky/bright sea probably at least plus 1 to 2 stops to expose your bird properly. Remember you are exposing for the puffin and not the background.
- ISO and shutter speed. Use a high shutter speed of anything from 1/1000th but preferably more. The higher the shutter speed the more chance you have of capturing it sharp so use your ISO to bump up the shutter speed. Don’t worry about high ISO because if your photograph is blurred you are only going to delete it anyway so what have you got to lose. I am happy with wing blur and movement streaks so you don’t necessarily need high shutter speeds, it’s down to your preference and light available.
- Aperture. If you have the light to allow a fast shutter speed, a relatively high aperture of f/8 or higher will help as you have more leeway with the enlarged depth of field if the autofocus doesn’t quite catch the bird in the right place. Autofocus will pick an area with the highest contrast and sometimes that’s not the eye which should be sharp (if it’s not a panning shot and even then, it works better if it is). Remember the smaller the aperture (bigger numbers), the less shutter speed you will have, so you need to up the ISO to compensate.
- Aim. Try and aim for the head (eye even) and place the bird relatively centrally if it’s big in the frame.

OM-D E-M1 Mark II | M.Zuiko 300mm F4.0 IS PRO
1/6400s | F4.0 | ISO 800
MY SETTINGS FOR…PUFFINS FLYING ACROSS YOU WITH AN UNCLUTTERED BACKGROUND
- Aperture of f/5.6 to f/11 as long as I can achieve a high enough shutter speed and the background is not too distracting.
- A starting ISO of 800 (unless its amazingly light) but in the daytime, I am happy to go up to 3200, do not be afraid, an unintentional blurred image is only fit for the bin.
- A 25 array, a custom array or the fully automatic grouping.
- Continuous auto-focus (I don’t use tracking mode but try it for yourself especially if you have the bird AI).
- C-AF lock + 1 or 2. The plus settings are if the bird is erratic and the auto-focus will keep hunting. The minus settings are if the bird is still or constant and it stops the auto-focus from searching, remaining locked longer. Experiment, don’t just stick to one if it’s not working.
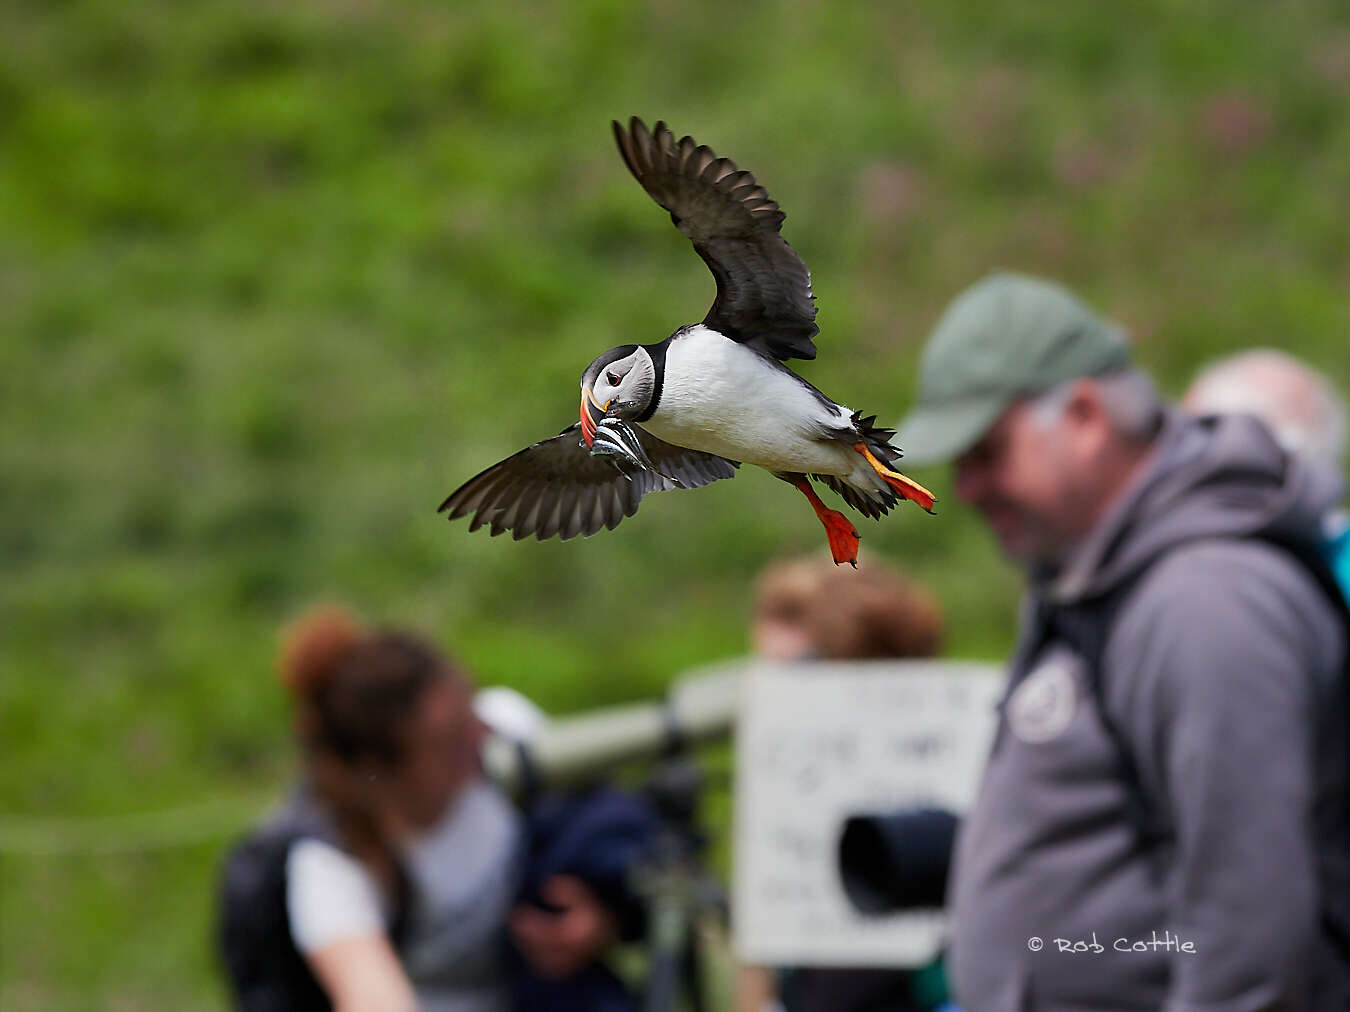
LET’S MAKE THINGS HARDER AND WRESTLE WITH A PUFFIN (NOT LITERALLY)
Okay hopefully you’ve managed to get a few shots in the bag but what if you want them coming towards you or if the background is busy. Well tough, just don’t bother! Oh okay, if you must. Some of the previous settings are obviously still relative, exposure compensation, continuous auto-focus and keeping an eye on the ISO usage relative to your shutter speed. So, what are the differences:
- If you use all focus points your camera being basically a dumb machine will probably choose anything but the puffin, so you need to choose a smaller focus group and that’s going to take some aim and steadiness. If you veer off the puffin, your focus point will grab a part of the background and your puffin will be smoother than a sand eel. Don’t keep your finger on the shutter button hoping it will catch up as more often than not it won’t, so try ‘pumping’ the shutter button which basically means instead of keeping your finger pressed in machine gun mode just lift your finger if it loses focus and place it back again so the camera can have another go at locking on.
- Think about where you want the puffin in the composition as you may need to crop later. If you are too tight or in the wrong position you may be unable to save the composition by cropping. I watch the birds for a little to choose a small group and then compose for those. I will then have my AF point or points slightly to one side or the other depending on the direction of flight observed and a little higher than central to give me a little leeway as it comes towards me.
- Aperture. In this instance your aperture will depend greatly on keeping the background as diffuse as possible so as not to detract from the puffin, unless of course you want an image of a puffin in its environment. Something like f/5.6 or f/8 would render some of the background out of focus depending how close the puffin is to it but you will need to judge that for yourselves.
- Shutter speed. As fast as you can muster. Raise your ISO up as high as you can get away with.
- Try altering the autofocus tracking ‘tunings’. Look in the menu and find CA-F sensitivity – I have this on one of my menu pages. This will tell the camera how fast the tracking should take to lock on and for it to refocus. Minus settings hold the focus longer once locked but takes longer to refocus if focus is lost. Plus settings look to focus quicker but can ‘fall’ off the subject if your aim is out and grab onto the background instead. This is where the ‘pumping’ shutter technique can help in re-acquiring focus. I have more luck with the plus region, just try it out, you won’t break anything (other than your heart!)
- The other thing to think about is using the limiter. This will stop auto-focus from trying to focus in an area that you are not concerned about. So if you are aiming at birds 6m away have the limiter set to 6m and infinity, it then won’t try to focus closer than 6m.
OM-D E-M1 Mark III | M.Zuiko 100-400mm F5-6.3 IS
1/1250s | F4.9 | ISO 800
need to be as high
OM-D E-M1 Mark II | M.Zuiko 40-150mm F2.8 PRO + MC-14 Teleconverter
1/1000s | F5.6 | ISO 500
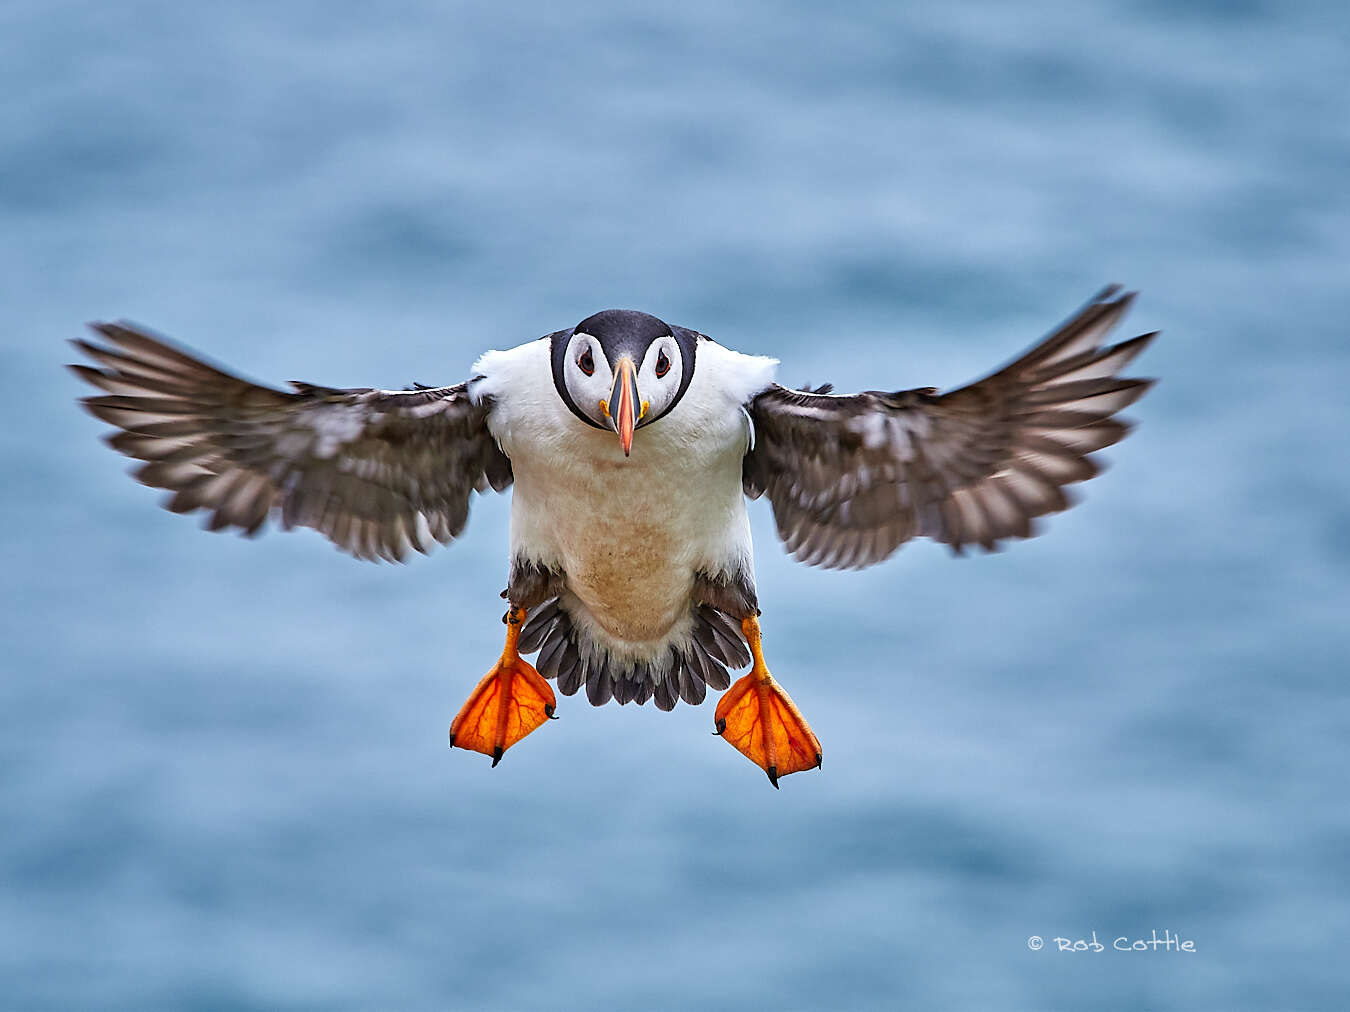
MY SETTINGS FOR…PUFFINS AT 12 O’CLOCK
- Aperture of f/4 to f/8. This will give you the fastest shutter speed, a more diffuse background but a harder job of keeping your Puffin in focus.
- ISO as high as necessary to achieve the highest shutter speed. Remember everything doesn’t need to be sharp.
- C-AF +2 as that “puff” is Mr or Mrs Erratic!
- Single point or 5/9-point grouping.
A FEW OTHER THINGS
- Puffins often fly towards their nest but abort at the last moment. They then make another pass or maybe several before actually landing. Use this to your advantage and watch the puffin all the way through your viewfinder. This will give your camera focus a helping hand to catch up rather than expecting it to lock on, unawares. I actually use back-button focusing but I think this is where the conventional method is better as you are able to move the focus point around whilst shooting. If you use back-button your thumb is being used for focusing.
- You can also use manual focusing (or back-button and disengage focusing) to pre-focus on a certain spot and wait for the puffin to fly into your focus path. Try using a fairly big aperture of f/11 to allow that wiggle room. This method is very hit and miss as you don’t know if the little darlings will fly exactly into your path and you are dependent on a small number of puffins using that area.
- Try as many combinations as you can to find something that works for you, as in all photography there is no real right and wrong, just find a way!
- Try panning to give your shot a sense of movement, doesn’t always work but it looks great when it does and this has the added bonus of not needing as quick a shutter speed. Lower the ISO right down and also use a small aperture of f/11 or more to slow the shutter speed down. This will also have the benefit of catching more of the puffin in shot.
- No ‘Carry On’ jokes please but wind can be your friend. Wind conditions can be helpful as birds will often use the wind to take off and fly into as it makes it easier for them, just like planes (where do you think humans got the idea from?). It’s often cited they can’t fly with the wind, that is not true. So, if you have a nice breeze check the direction, plonk yourself down and watch the direction the birds are flying in. If they are using the wind to land, point yourself in that direction.
- Keep on the lookout – You never know what you will see
OM-D E-M1 Mark II | M.Zuiko 300mm F4.0 IS PRO
1/6400s | F4.0 | ISO 1000
MY GENERAL BIF OM-D E-M1 SETTINGS ARE AS FOLLOWS:
-
I’m usually in manual mode most of the time (I know it’s a bit like the dark arts but I am used to it now)
- I only use continues electronic silent shutter mode – usually on 15fps
- AF mode C-AF
- AF scanner mode 3
- AF area pointer on 2
- C-AF lock +1 or 2
- IS on (can’t ever remember turning it off)
Please remember, only use my thoughts as a starting point, don’t take my word for it, experiment and try all manner of things. Most importantly, don’t put pressure on yourselves and enjoy, with or without capturing a shot, it really is a magical place.

Instagram: @robcottleimages
Rob Cottle is an “image maker, workshop taker, critter lover and veganist” with a love for wildlife.