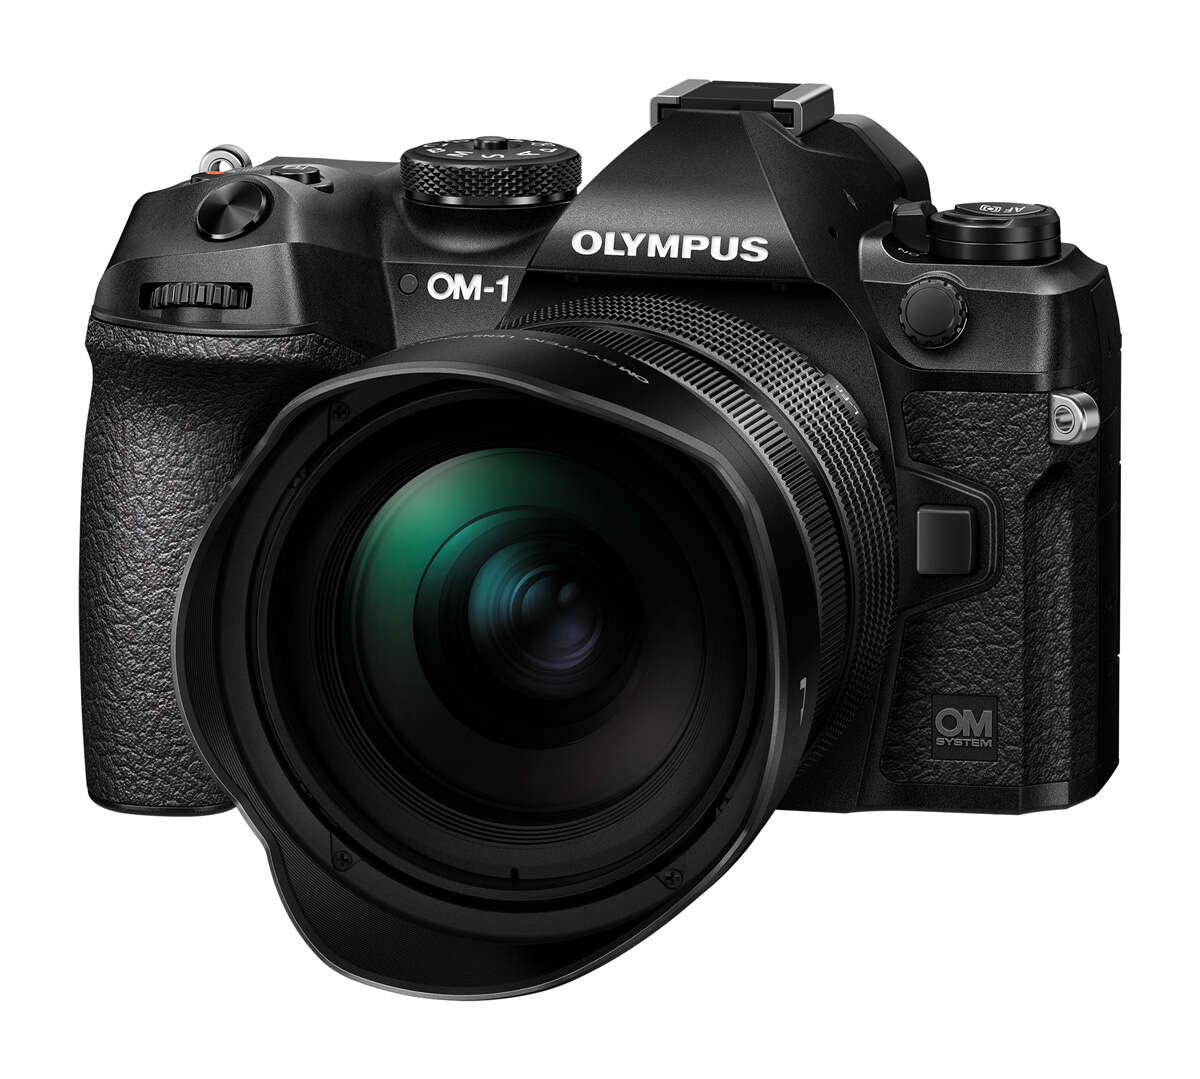
In 1972 Olympus released the OM-1. It earned high praise as the smallest and lightest SLR camera of its time and included numerous innovations in its build and design. Fifty years later the OM-1 is back. The name may be the same, but after that the differences are innumerable. It still bears the Olympus name, but the new OM-1 is also branded with the OM SYSTEM logo. It is the first camera released by OM Digital Solutions.
I had the opportunity to shoot with the OM SYSTEM OM-1 prior to its release date. In using the camera there have been some real “wow” moments. Keep in mind that this isn’t a formal review, but rather my impressions of how the OM-1 stacks up, especially when compared to previous models like the E-M1 Mark III and the E-M1X.
Design
Being a long time Olympus shooter there is a real comfort to the camera. It has the same feel and handling as its immediate predecessor, the OM-D E-M1 Mark III. Then I gave the camera a more thorough inspection and quickly discovered some subtle design changes.
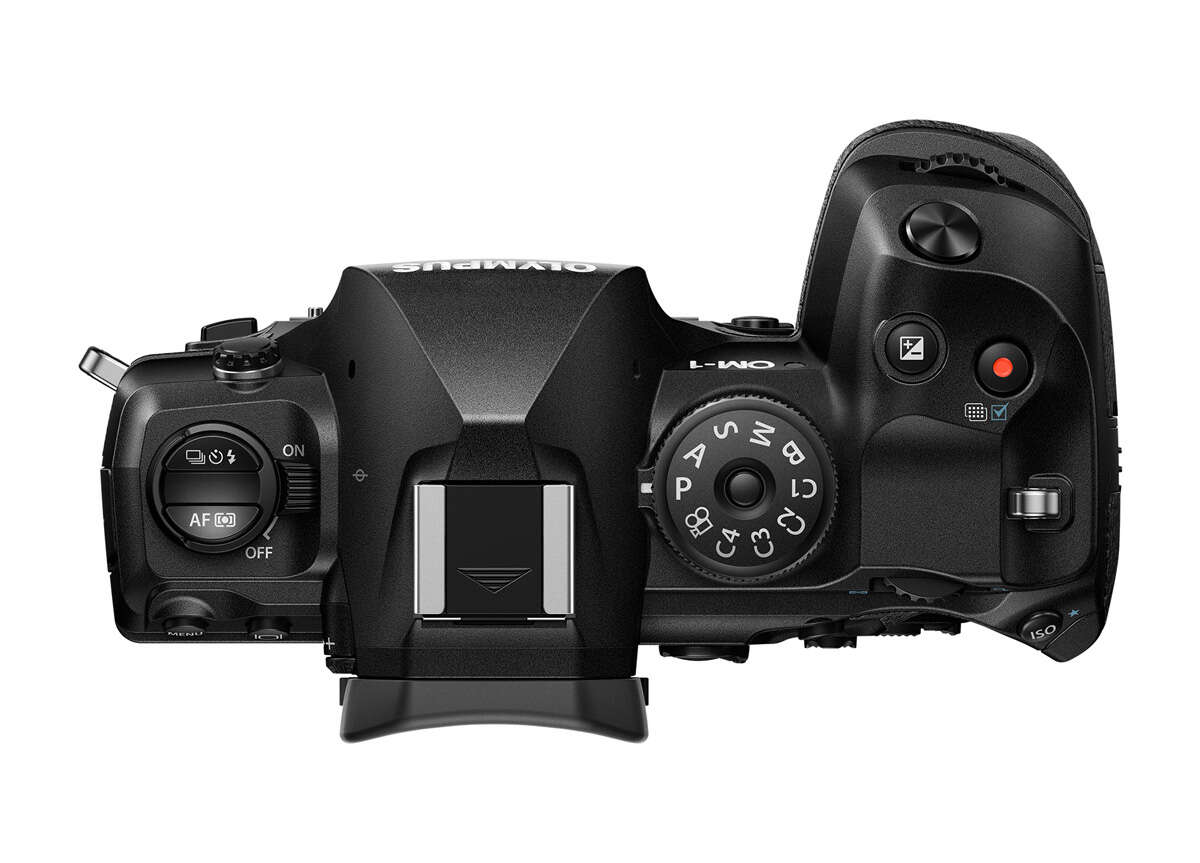
The OM-1 is just slightly larger and heavier than the E-M1 Mark III, and I mean slightly. The OM-1 is 19g heavier than its predecessor. That’s about the weight of 4 sheets of letter-sized paper. Not a significant difference at all. One of the more important changes is the design of the control dials and the shutter release. With the E-M1 Mark III, the front and rear control dials are seated at the top of the body with the shutter release being in the center of the front dial. On the OM-1 the dials are now seated within the housing with only a portion of each dial protruding. The shutter release is now on its own just above the front dial. This is the same design as the E-M1X. The mode dial and on/off switch are positioned in the same places as previous models with only slight changes to their appearance.
Buttons, switches and dials all feel rugged, which is exactly what I would expect. In using the OM-1 it actually feels even more solidly built than the E-M1 Mark III, and that was pretty tough camera.
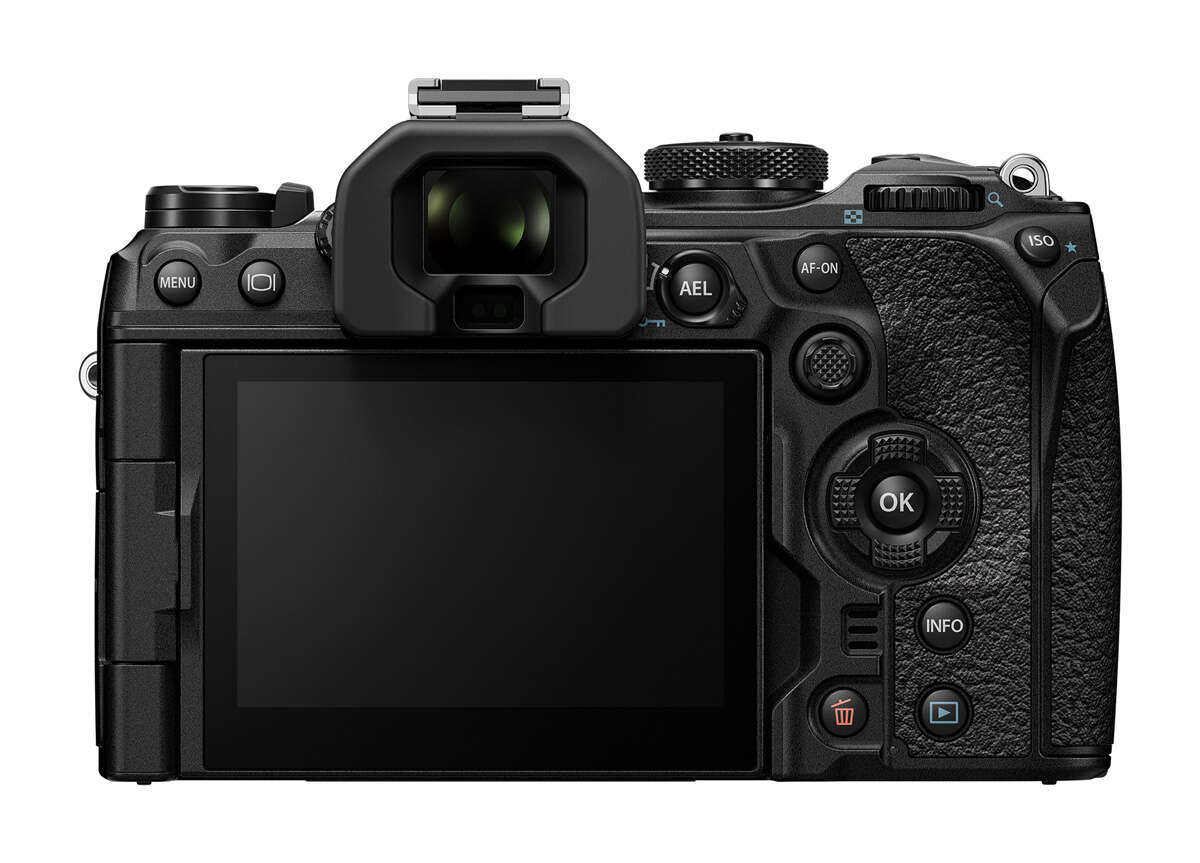
As for the buttons on the rear of the camera there is now a dedicated AF-ON button for those who use back-button focusing. All of the other buttons are in the same location as on the Mark III, but I did notice that they are slightly smaller. The joystick that I love on the E-M1 Mark III and the E-M1X is also on the new OM-1, but is also a bit smaller. Under normal usage these smaller buttons aren’t an issue at all, but when you spend about 5 months of the year wearing winter gloves like I do it can make the camera a bit more challenging to operate. That said, since I’ve never found photography gloves that can handle -30C I usually end up taking my thicker gloves off for a few seconds while I make setting changes. As such, the smaller buttons haven’t made a significant difference in my shooting situations.
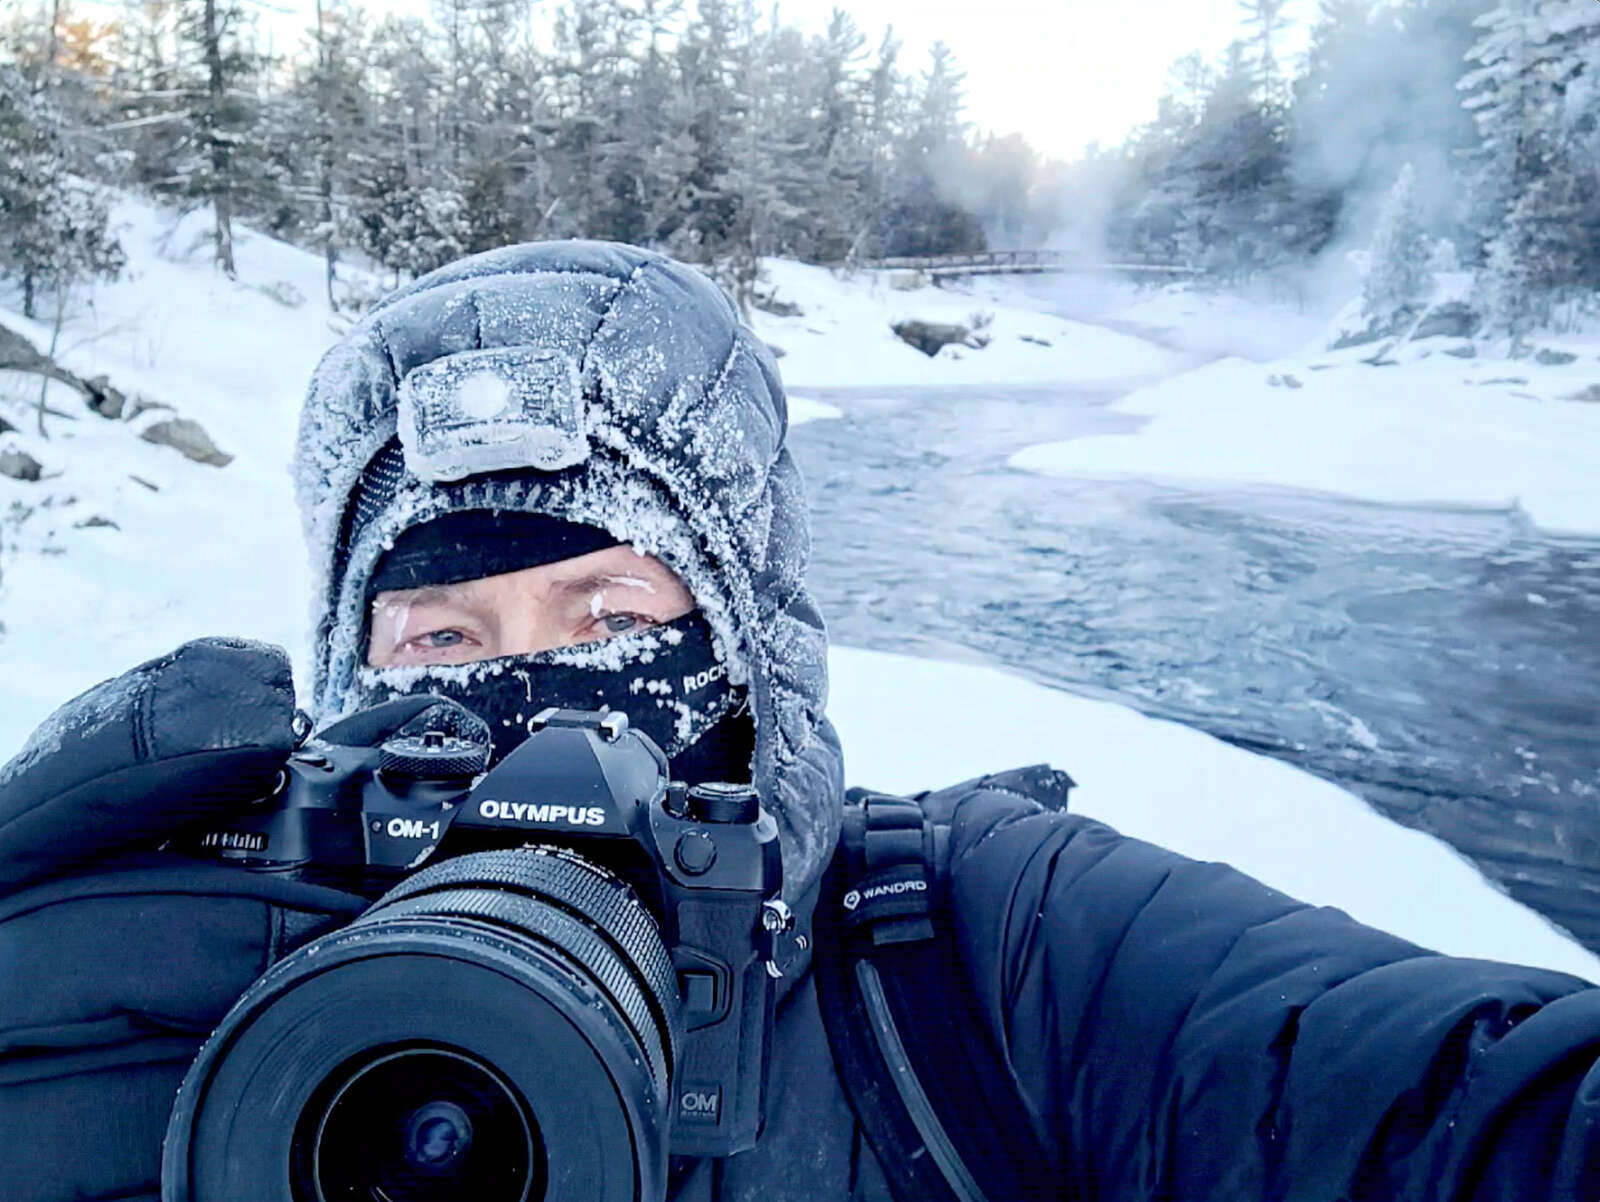
In speaking with an OM System rep, I was informed that having redesigned buttons allowed for even greater weather sealing. I didn’t think that they could improve on their weather-sealed body, but they did! The OM-1 is rated at IP53. This is a higher rating than the IPX1 of the Mark III. It is considered even more dust-proof and splash-proof. I can definitely attest to how freeze-proof it is. I’ve had it out for hours in extremely cold conditions and it doesn’t skip a beat. It lasted longer than I did!
A Change that anyone planning on upgrading to the OM-1 might notice is the fact that it uses a different battery. But, in using the new BLX-1 battery, which is slightly larger than the older batteries, I was impressed with how long it lasted. I only have one battery at present and I haven’t come close to draining it while out shooting in the cold. During one particularly frosty night at -28C, I was out for 3 hours of shooting and the battery was still at 72%.
The battery is rated at 520 shots, compared with 420 for the E-M1 Mark III. These might be the official ratings but I’ve already had a couple of shooting sessions where I’ve put over a thousand images on card and still had plenty of battery life left. The camera comes with a USB cable for charging, and is fully functional while charging. This is a welcome change since you can be powering up in the field and still have full use of the camera.
The OM-1 also has a new battery grip available. The HLD-10 will hold one extra battery and has the joystick, AF-ON, ISO and exposure compensation buttons, along with the control dials and shutter release. I find this particularly useful when photographing wildlife.
First Shots
Alright! The battery is charged, the memory cards are formatted. It’s time to start shooting. For my first test I decided to go to a small range light about 30 minutes from where I live. I was hoping for a colorful sunset, but instead I got clear skies. Well, so be it. I just wanted to see what this camera could do.
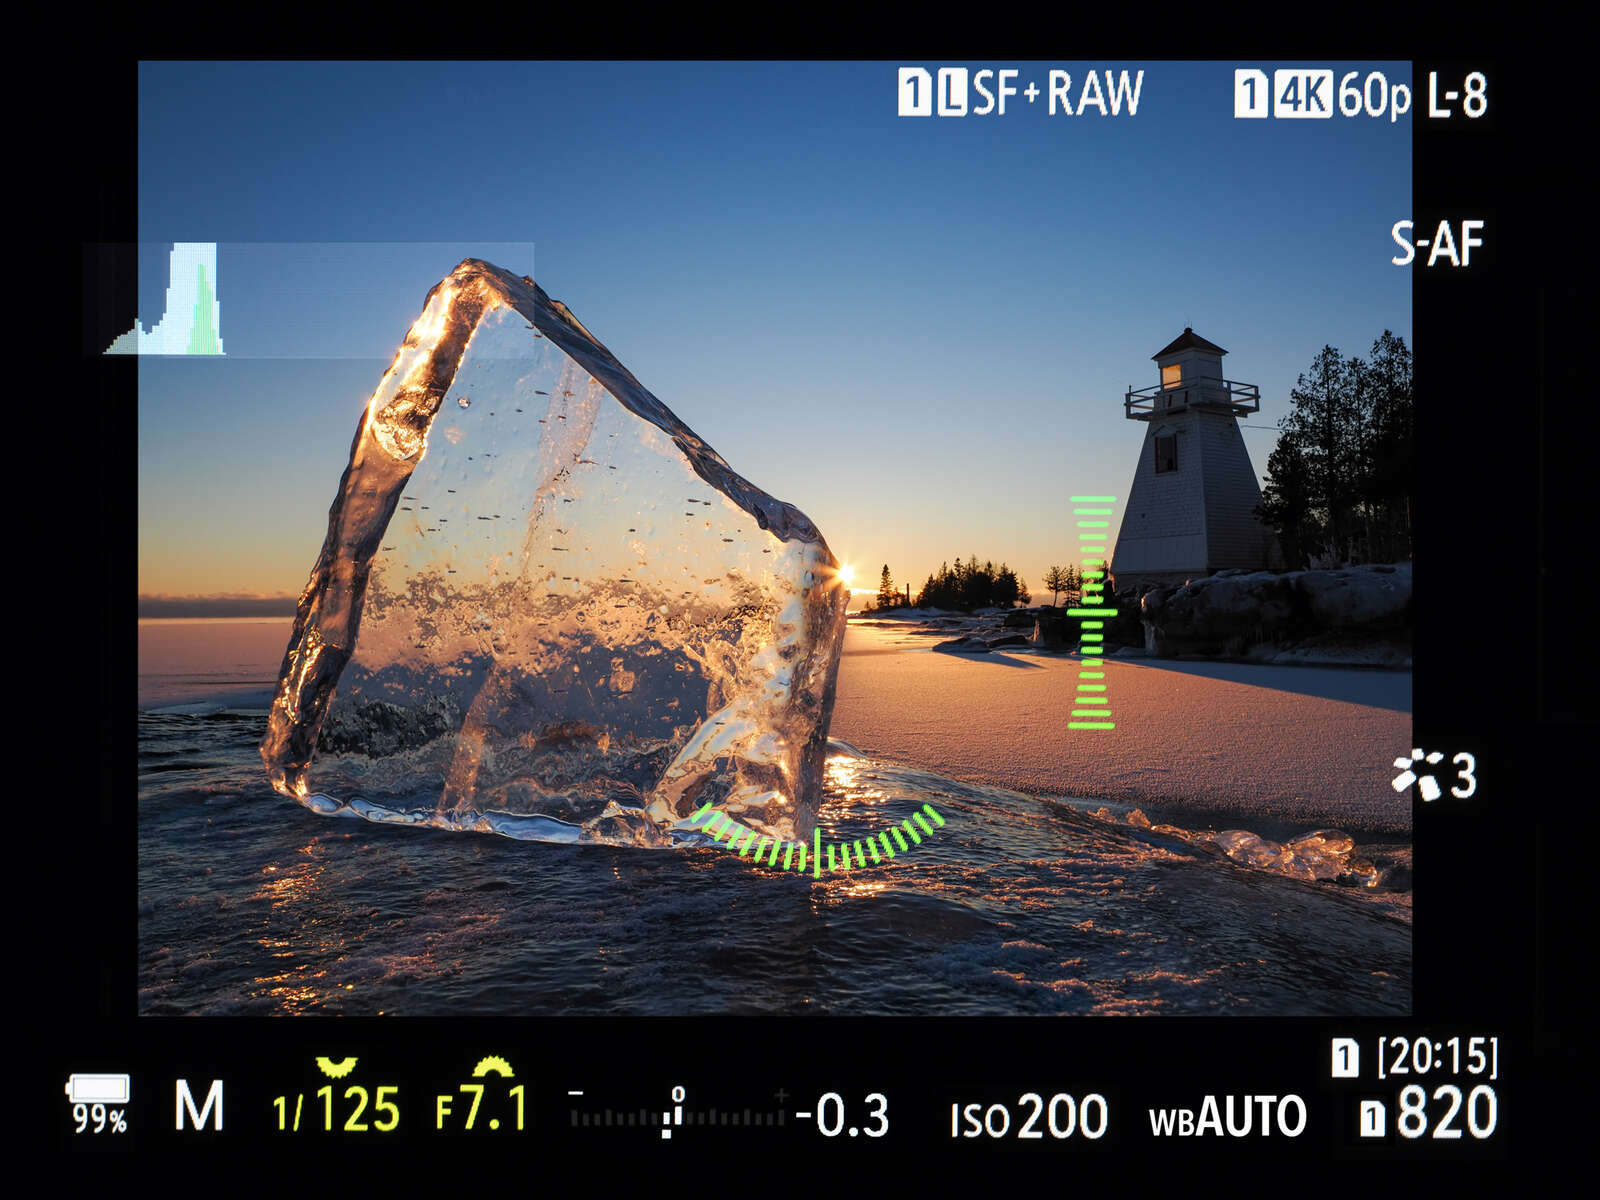
During this first outing I had absolutely no information on the inner workings of the camera, but being a former science teacher, I was happy to engage in some self-discovery. My first discovery was the new EVF. And it’s awesome! As much as possible I prefer to compose my images using the electronic viewfinder rather than relying on the LCD. The OM-1 is outfitted with a stunning new EVF – a 5.760K dot OLED. This is more than twice the resolution of the E-M1 Mark III and the E-M1X. It provides a noticeably cleaner and more realistic image while composing and reviewing your shots. The layout is also different than the E-M1 Mark III. The main settings are lined up underneath the image, rather than being superimposed on top of the scene you are shooting. The histogram is now in the top left of the viewfinder while the levels are centered in the image. As with previous models, the Info button allows you to cycle through 4 familiar viewing options; image only, main settings, settings + histogram, settings + levels.
The rear 3” LCD also provides greater resolution – 1.620K dots vs. 1.040K. The layout is slightly different than the EVF, but provides the same key information.

1/500 | F8 | ISO 200
For my first shot I tried a hand-held focus bracketed image of the range light with the sun shining through some ice. My next discovery was the processing speed. The focus stacking process was fast. Much faster than previous models.
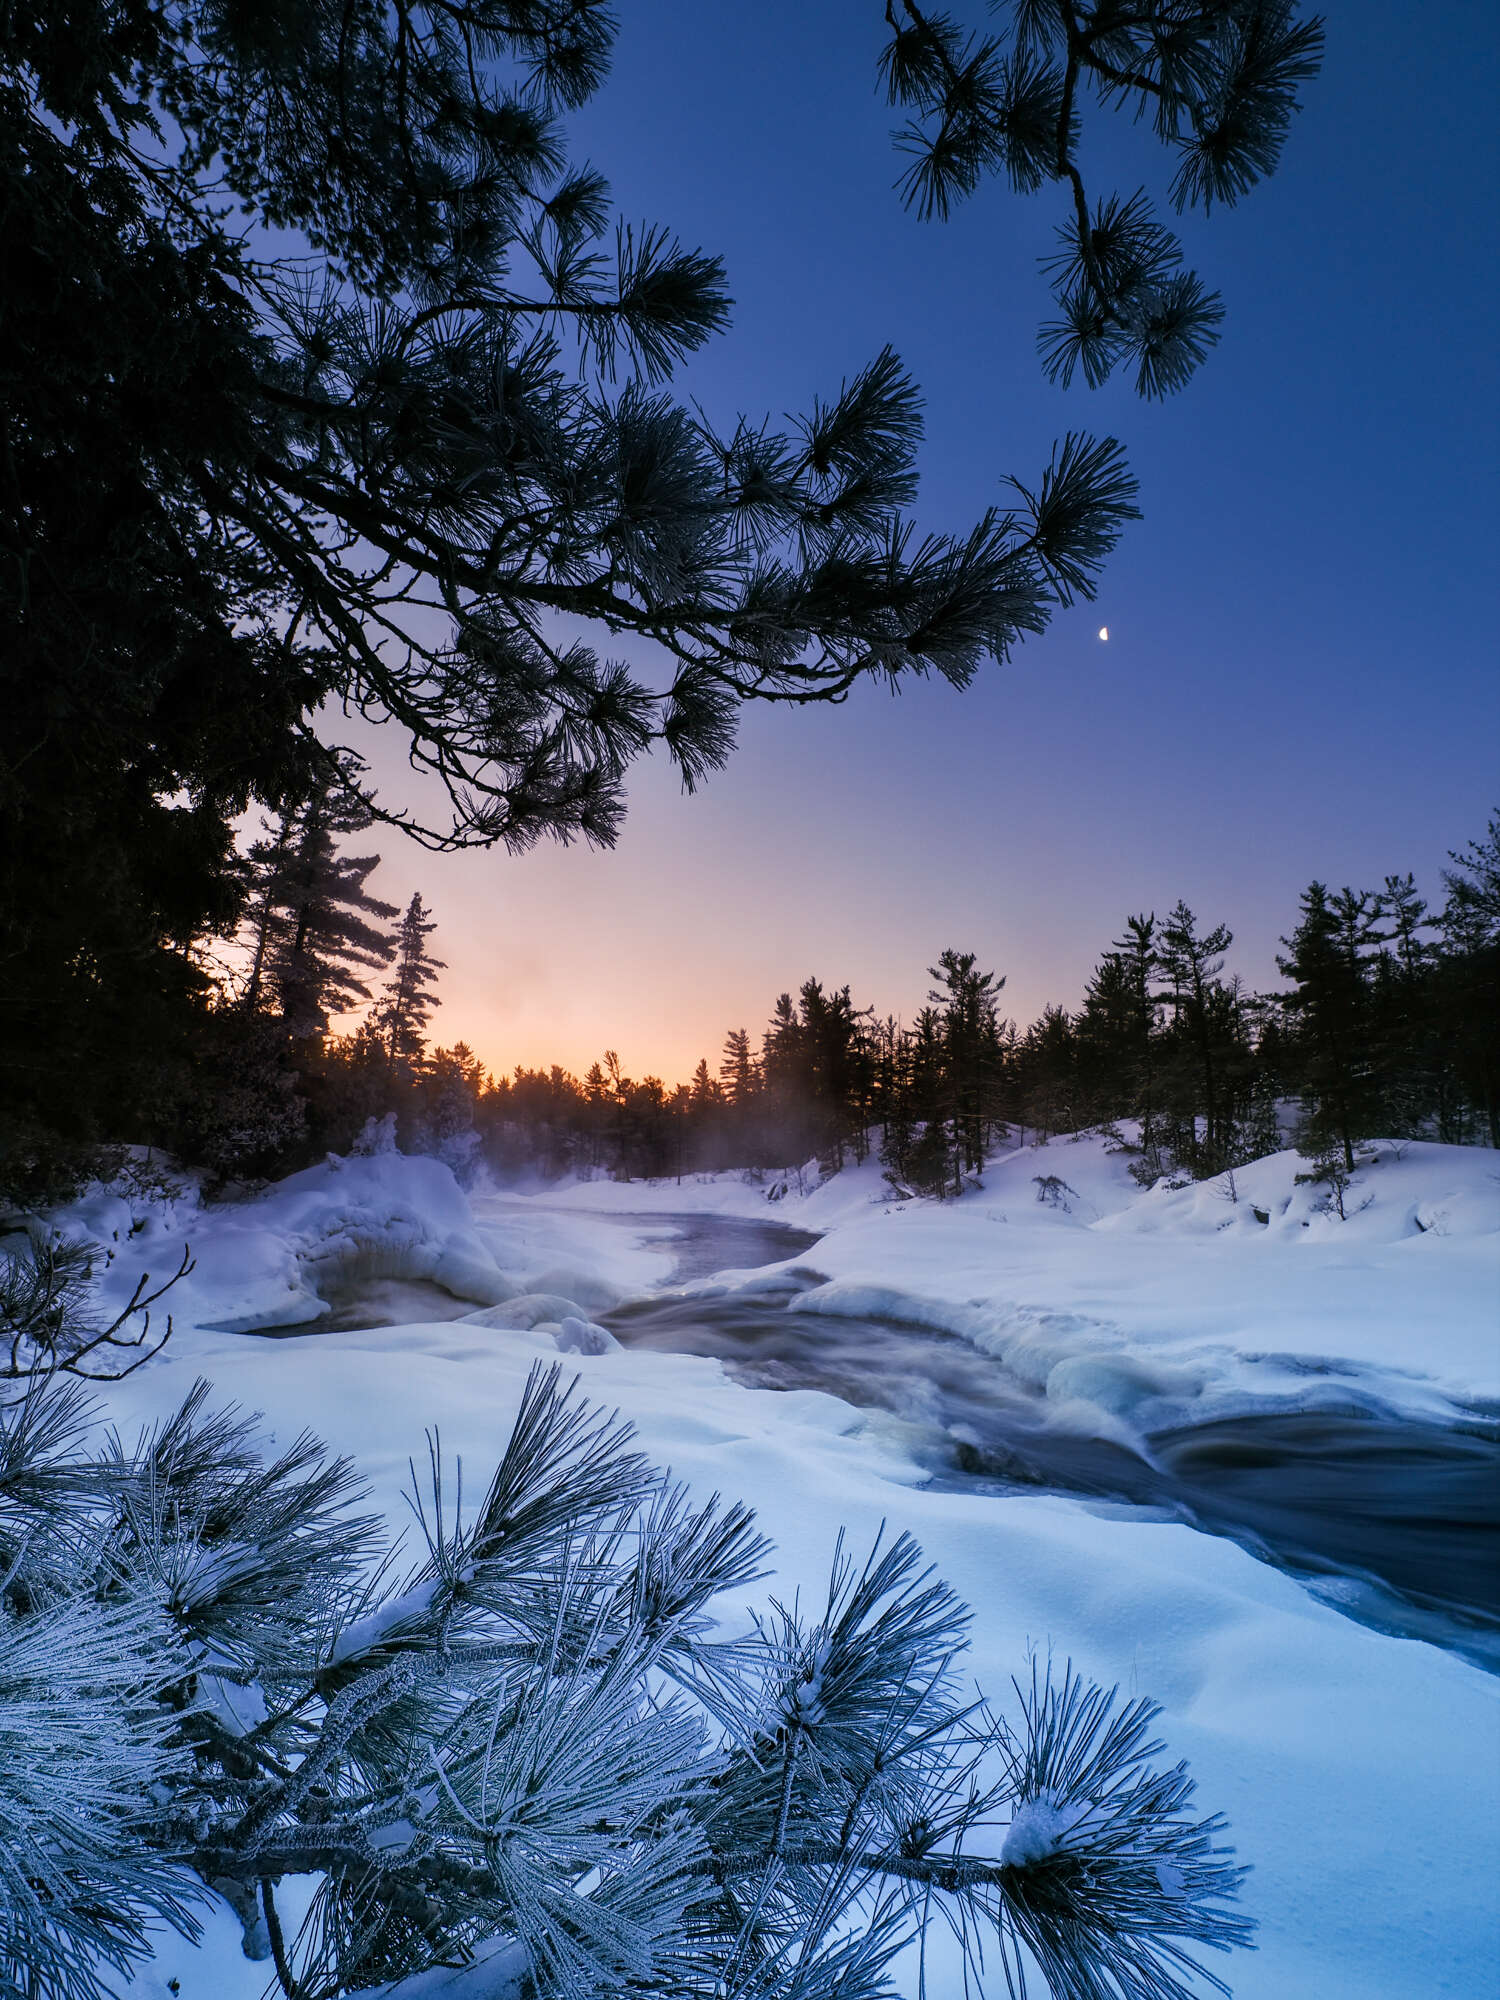
After my first set of images of the range light I decided to stick around and shoot well after sunset. I do a lot of low light photography so I was curious as to how those images would turn out. I usually review my images in the viewfinder rather the LCD and with a quick look I was impressed, but the real image quality test would have to wait until I got home.
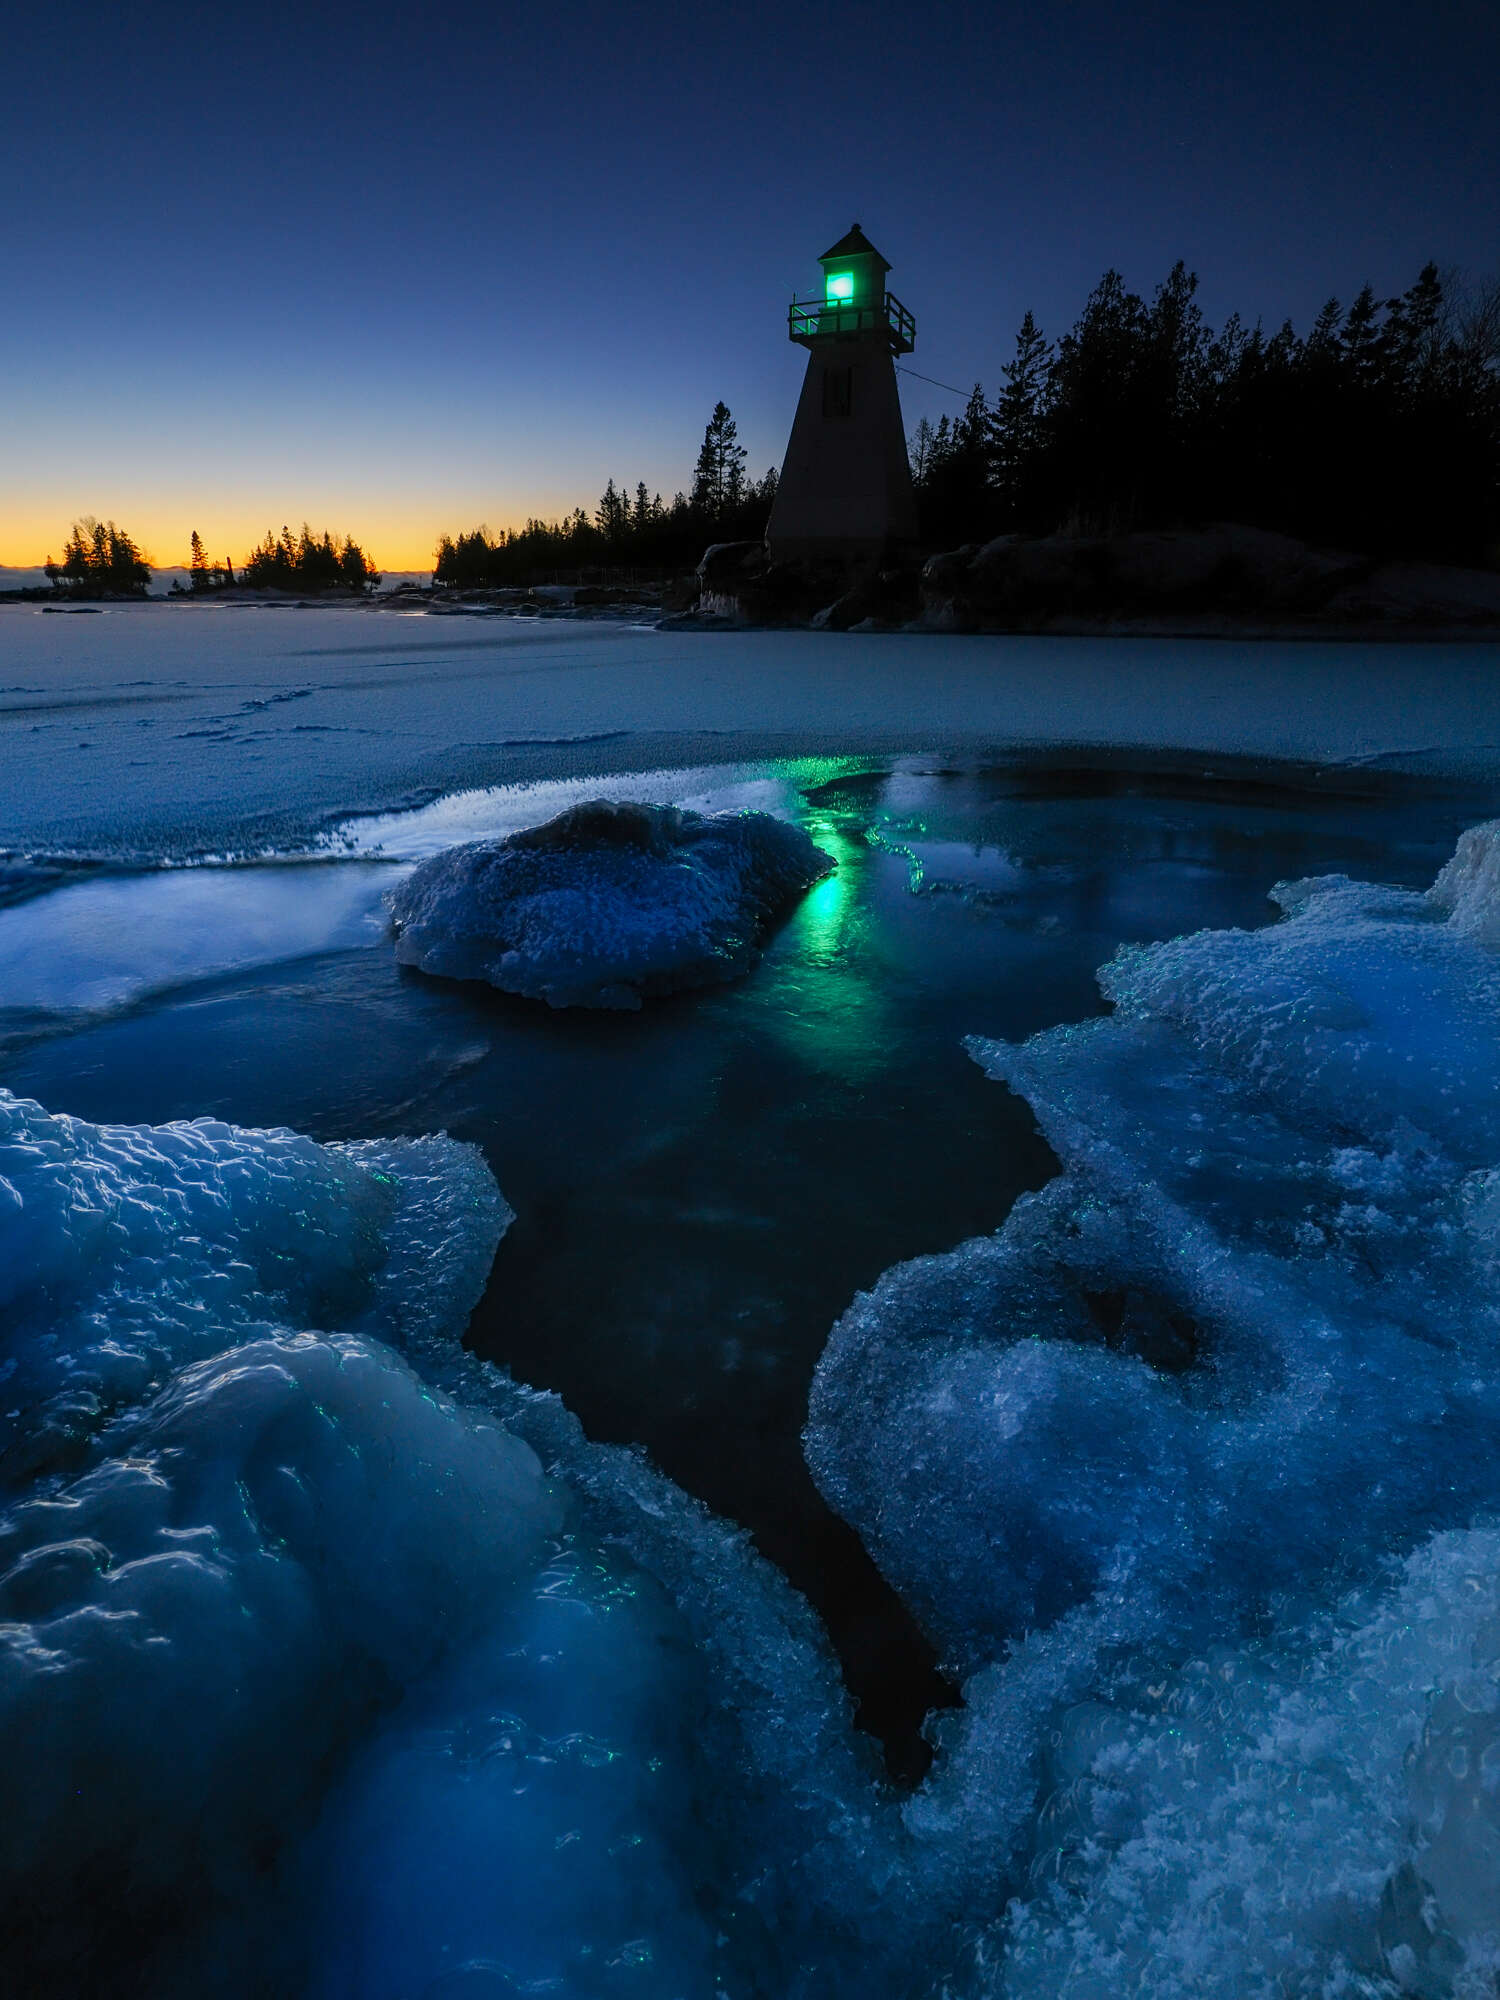
13s | F8 | ISO 400

15s | F5 | ISO 400
The Inner Workings
When I uploaded my first set of images and had a closer look I was truly impressed with the image quality. The photos were incredibly sharp, with excellent color tonality. There was practically no noise, even in those photos shot during the blue hour at moderate ISOs. Then I looked at the size of the image and realized that it was 20 MP. This is a completely new sensor with some incredible processing power behind it. I had to remind myself that I’ve been regularly printing images for clients up to 36” x 48” and even larger at times, with my E-M1 Series cameras. I had no doubt that I could easily print these first few photos with stunning results.
Let’s take a look at what’s inside the new OM-1.
- Sensor – The OM-1 has a new 20 MP Cross Quad Pixel AF Stacked BSI CMOS Sensor – now there’s a mouthful. As a back-side illuminated sensor it provides much better noise handling – 2 stops better noise performance than the E-M1 Mark III and 1 stop of improved dynamic range. As such, the OM-1 also has a greater ISO range – 200 to 25,600 with an extended range to 102,400.
- Processor – The OM-1 is equipped with the new TruePic X processor. The speed of the processor is quite impressive. Olympus has been a leader in computational photography, but that has always required processing the image after the shot was taken. In testing out focus stacking, LiveND and the high res feature the processing speed is considerably faster than the E-M1 Mark III. For example, in one side-by-side comparison the E-M1 Mark III took 20 seconds to process the high resolution image. The OM-1 had it processed in only 5 seconds – 4 times faster! There have been many times where I wouldn’t use high res during a sunset because of this wait time. The light was changing too quickly. That certainly isn’t going to be as big an issue with the OM-1.
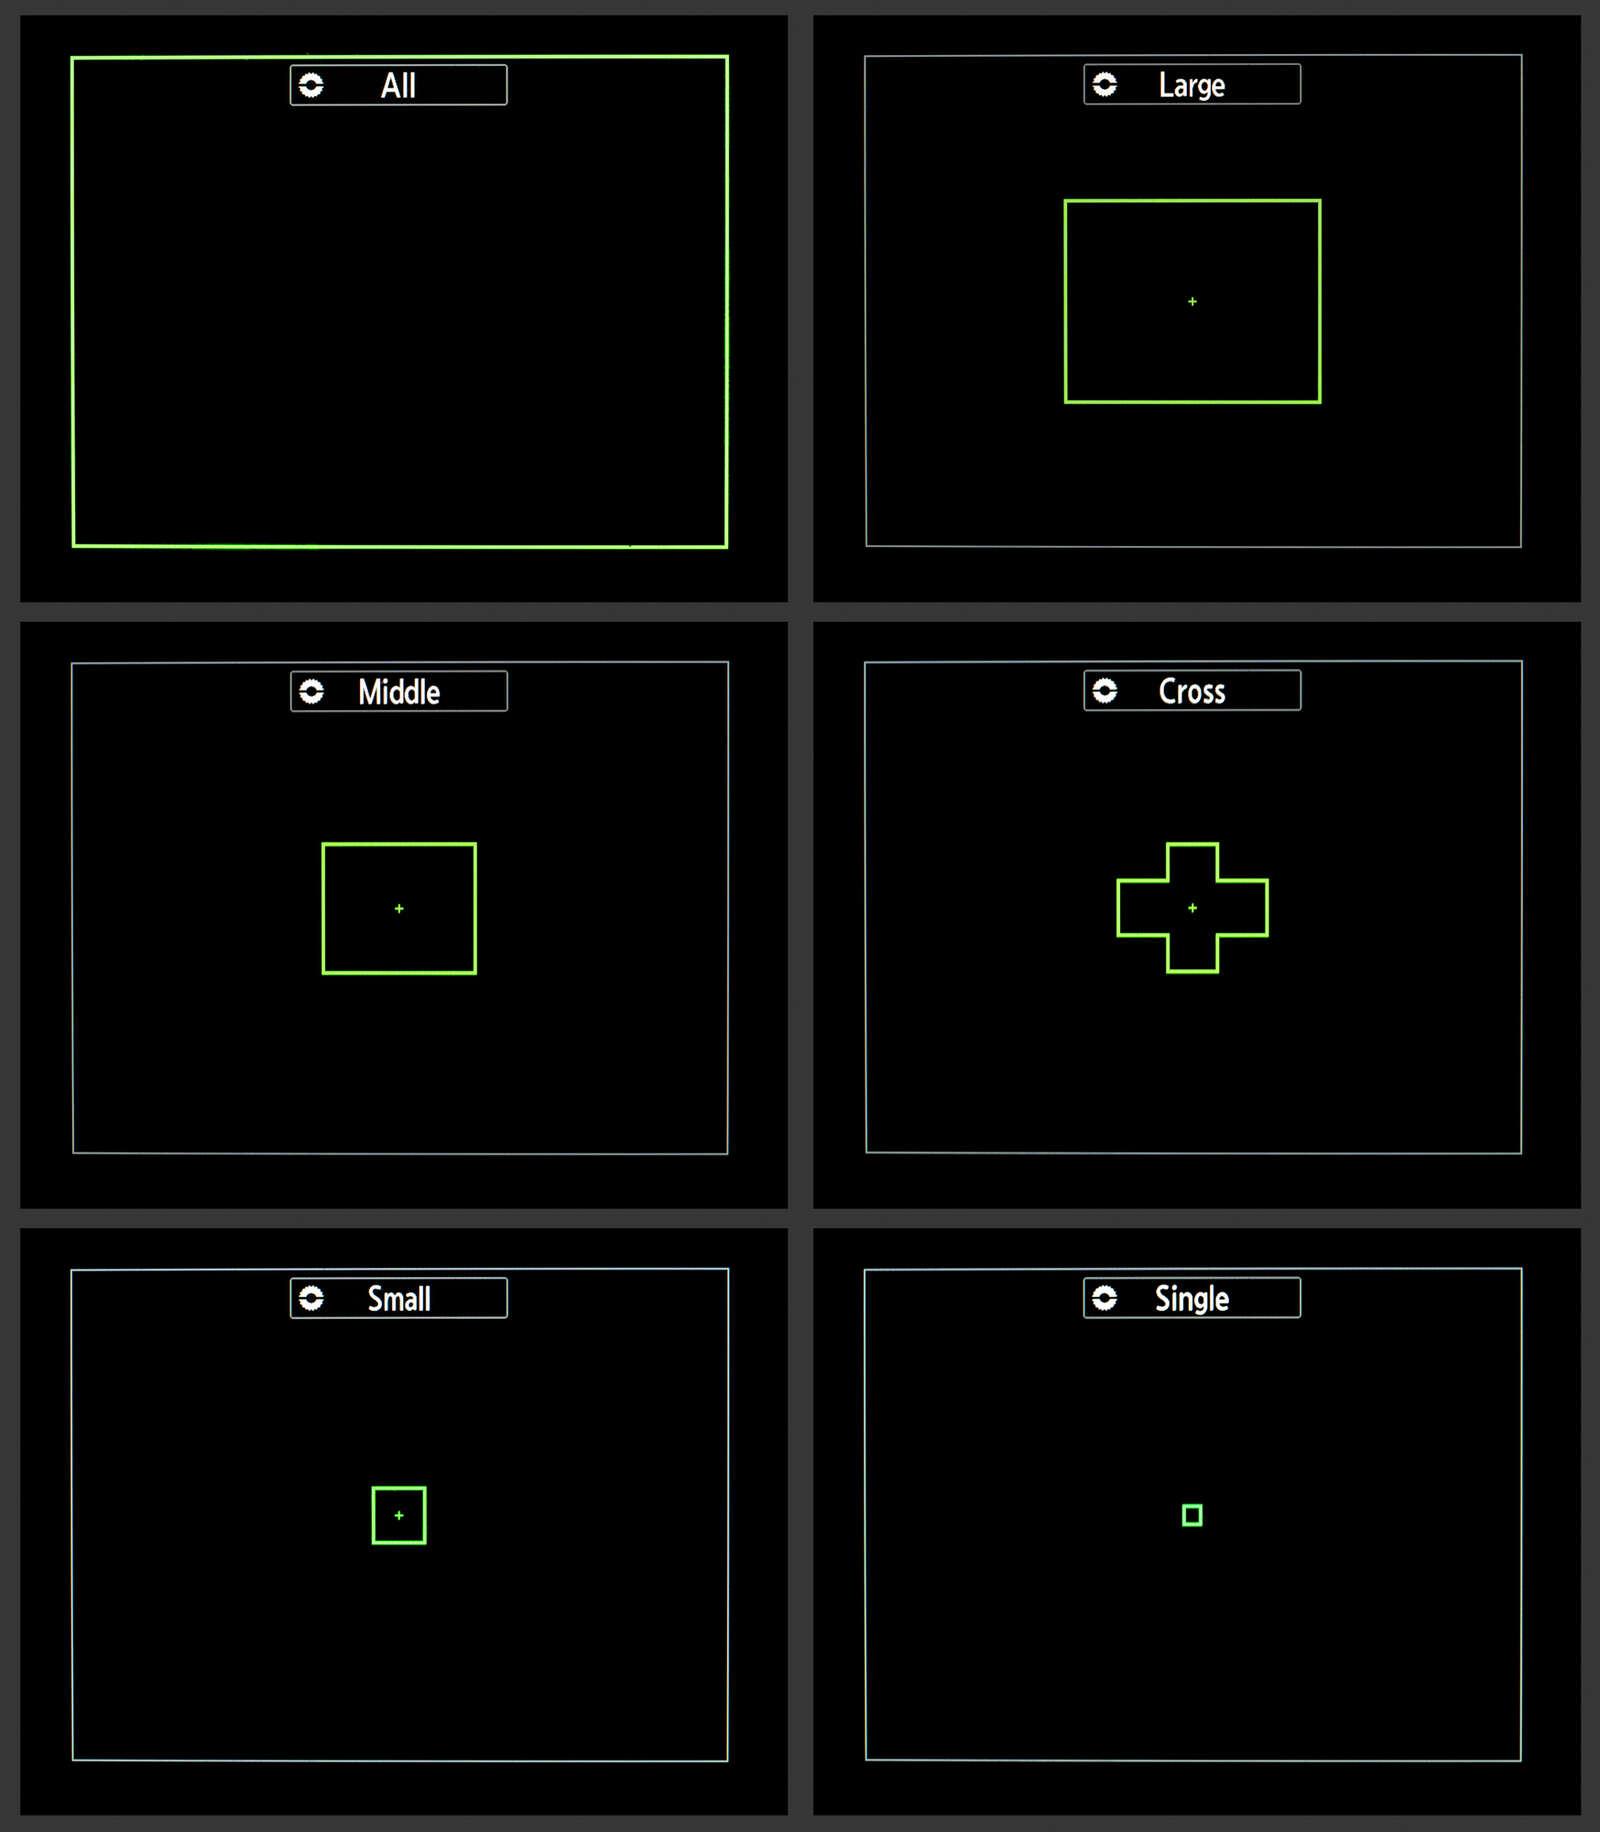
- Auto-focusing – The new sensor and processor also translates into much improved auto-focusing. The cross quad pixel AF now means there is 100% AF coverage in the frame with a total of 1053 phase detection cross AF points. Auto-focusing is faster and more accurate, but with so many focus points it is important to select the best option for the subject in question. The focus patterns are similar to what Olympus shooters will be used to except that now the single point is much smaller. But even that “single point” actually has 4 focus point within it. Users can also create several custom focus patterns.
- Sequential Shooting – The OM-1 will capture 50 fps in C-AF and 120 fps in S-AF using the electronic shutter. High speed shooting is blackout free through the new EVF. As well, there are now three Pro Capture options within the menu instead of just two, and you can capture up to 70 pre-shutter frames rather than just 35 with the E-M1 Mark III.
A Facelift
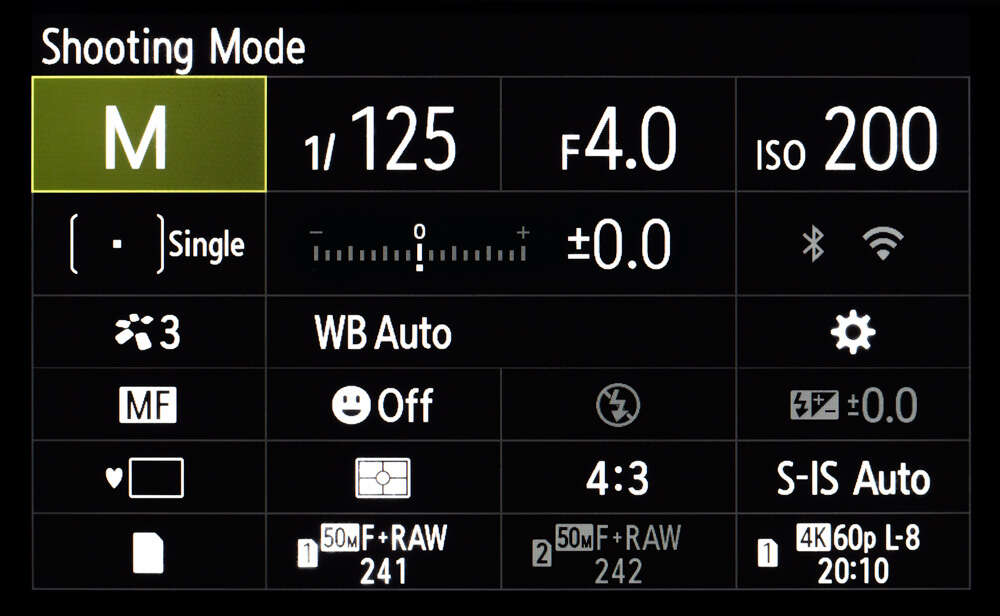
One of features that I’ve always loved in Olympus cameras is the Super Control Panel. It allows you to quickly see and change most settings without having to dive into the menu. The new SCP has a cleaner, less cluttered look yet still allows access to most of the important settings.
Waiter, Could I Have Another Menu Please!
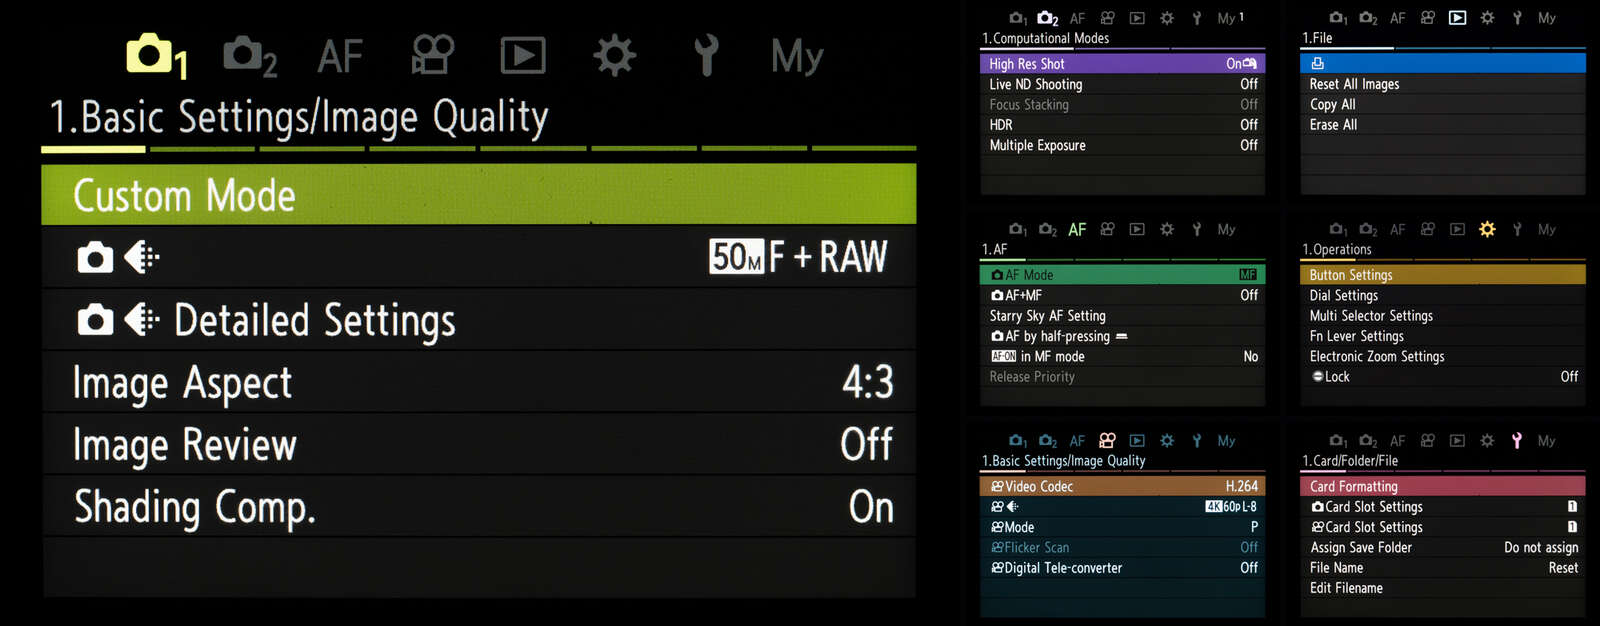
Speaking of facelifts, the OM-1 has a new menu system. Yay! The new menu is quite slick and far more intuitive. At first glance it may appear that the designers just switched from a vertical to a horizontal orientation of menu items and added a splash of color. But it definitely goes deeper than that. Many items have moved to areas of the menu that make far more sense. For example, Shooting Menu 2 is now dedicated solely to computational photography.
Navigating the menu has also changed. After pressing the Menu button, the front dial is used to move between menu headings while the rear dial is used to navigate from page to page within a heading. The arrow pad is used to move to individual menu items on a page and then, to activate that item, the OK button is pressed. Navigation is quite intuitive except for the fact that my muscle memory was getting in the way. In previous iterations the right arrow key was pressed to enter a menu item. Now it is just the OK button that is used to dive deeper, which makes perfect sense. It took a few days to get used to it, but I have to admit that it is far nicer layout.
Another nice feature in the OM-1 is that specific menu options can be directly accessed from various function buttons. For example, since I regularly use Focus Stacking I reprogrammed the AEL for that feature. Pressing that button will turn the feature on and off, but holding the button down for about 2 seconds gets you right into the Focus Stacking menu so you can quickly make changes. This is a great change.
Computational Photography
I recall when Live Composite was first introduced on the E-M1. I thought it was a gimmick and would have very little practical use. Boy, was I wrong. Olympus has been a pioneer of computational photography allowing us to see the world in ways that other cameras just can’t. Several improvements have been made to these features.
- Live ND – The Live ND feature has been extended to 6 stops (ND64) from the original 5 stops on the E-M1 Mark III.
- Live Composite – The Live Comp feature can now be used hand-held. I’m not about to try this for hour-long star trail shots, but capturing fireworks, lightning, or traffic trails should be quite possible without a tripod. More importantly for me is that the ISO range has been extended to 6400 compared to an upper limit of 1600 with previous models.
- Focus Stacking/Bracketing – No changes have been made to focus stacking or bracketing. The upper limit is still 15 and 999 shots respectively. Although not directly related to the feature, the fact that the AF points have 100% coverage will make this feature easier to use under many circumstances.
- High Resolution Shooting – Accessing the high res feature has been made a lot easier. When shooting stills the video record button has now been mapped to enable high res photography. As a landscape photographer I appreciate how quickly I can get in and out of this mode. Some additional controls have also been added. The hand-held high res shots can now be recorded at 25 or 50MP + RAW. Tripod high res shots remain at 80MP, but the option to shoot at 25 or 50MP is now available. One great addition is that a delay option has be added. In handheld shooting you can program a wait time of 1/8s, 1/4s, 1/2s or 1s. In tripod mode the delay can go all the up to 30s. As well, to quickly switch from hand-held to tripod mode press the record button and turn one of the control dials. The high res menu pops up and you can make quick changes to your settings. Regardless of the feature, the one improvement that applies to all of them is processing speed. For example, OM System states that the processing speed for high res shooting is 2x faster than the E-M1 Mark III, but based on my experience I’ve found it to be even faster than that.

OM-1 | M.Zuiko 12-100mm IS F4.0 PRO
1/50 | F7.1 | ISO 500
OM-1 | M.Zuiko 150-400 F4.5 TC 1.25x IS PRO
1/2500 | F6.3 | ISO 1000
AI Detection AF
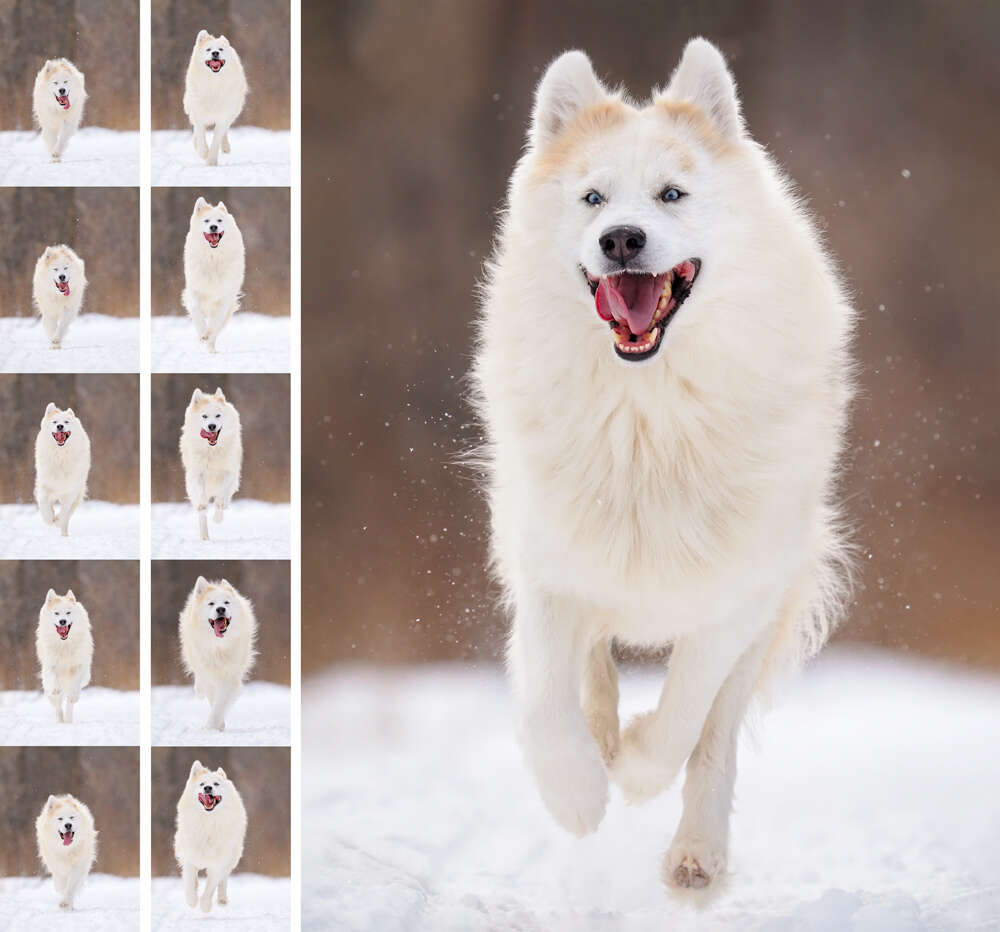
One of the features that I was most eagerly waiting for in the OM-1 would be to see if intelligent subject detection would be added. I’d come to rely on the bird AI detection AF and tracking on the E-M1X, so I was pleased to see that this feature has now been included in the OM-1. But wait, there’s more! Along with trains, planes and automobiles (man, I miss John Candy) and birds, there is now animal detection, specifically cats and dogs. As someone who occasionally photographs wildlife, I was hoping for animal detection that would include a wider range of critters, but I have it on good authority that it works incredibly well on foxes, wolves and even elk.
During my trial run with the new camera I’ve had very few opportunities to shoot wildlife. I was able to capture a few birds (it worked incredibly well – even better than the E-M1X), but what really impressed me was when I tested it out on my husky. His name is Squish, and man, can he run fast! I had him run from about 100m away and I just kept my finger on the shutter as he raced towards me. Without exaggeration almost 100% of the shots were tack sharp. I used both the mechanical and electronic shutter and got equally good results.
You may be thinking, “but, it’s only a dog”. Well, if any other animal comes charging towards me at that speed, I’m dropping the camera and running for safety! Now, I can’t wait to use it with fox kits in the spring.
Final Thoughts and Images
The OM-1 now takes its place as the flagship camera for the new company. My personal history with photography goes almost as far back as the original OM-1. In 1976, when I was just 12 years old, I purchased the OM-1n and have been shooting with Olympus ever since. At the time of this writing I’d been using the new OM-1 for about 3 weeks. It has truly rekindled my love for the craft. The camera does not make the photographer, but let’s face it, like with almost all creative pursuits, the better the tools, the better the results. And this camera has given me fantastic results. From the incredible image quality to the new EVF, from the lightning fast AF to the increased processing speed, the OM-1 has exceeded my expectations.
0.4s | F7.1 | ISO 200

1/13 | F2.8 | ISO 1600

0.4s | F7.1 | ISO 500
1/400 | F8 | ISO 200

1/8 | F7.1 | ISO 1000

20s | F2.8 | ISO 3200

1/40 | F7.1 | ISO 200
Web: creativeislandphoto.com
Blog: creativeislandphoto.com/blog
Instagram: @CreativeIslandPhoto
Peter has been a dedicated Olympus shooter for nearly 40 years, and has found a way to combine his passion for photography with his love of teaching to develop photography workshops with a focus on landscape, wildlife and astrophotography. Peter’s work has been published in a number of magazines including Canadian Geographic, Shutterbug and Outdoor Photographer. He maintains his own blog with an emphasis on tutorials that assist others in bringing their photography up to the next level.