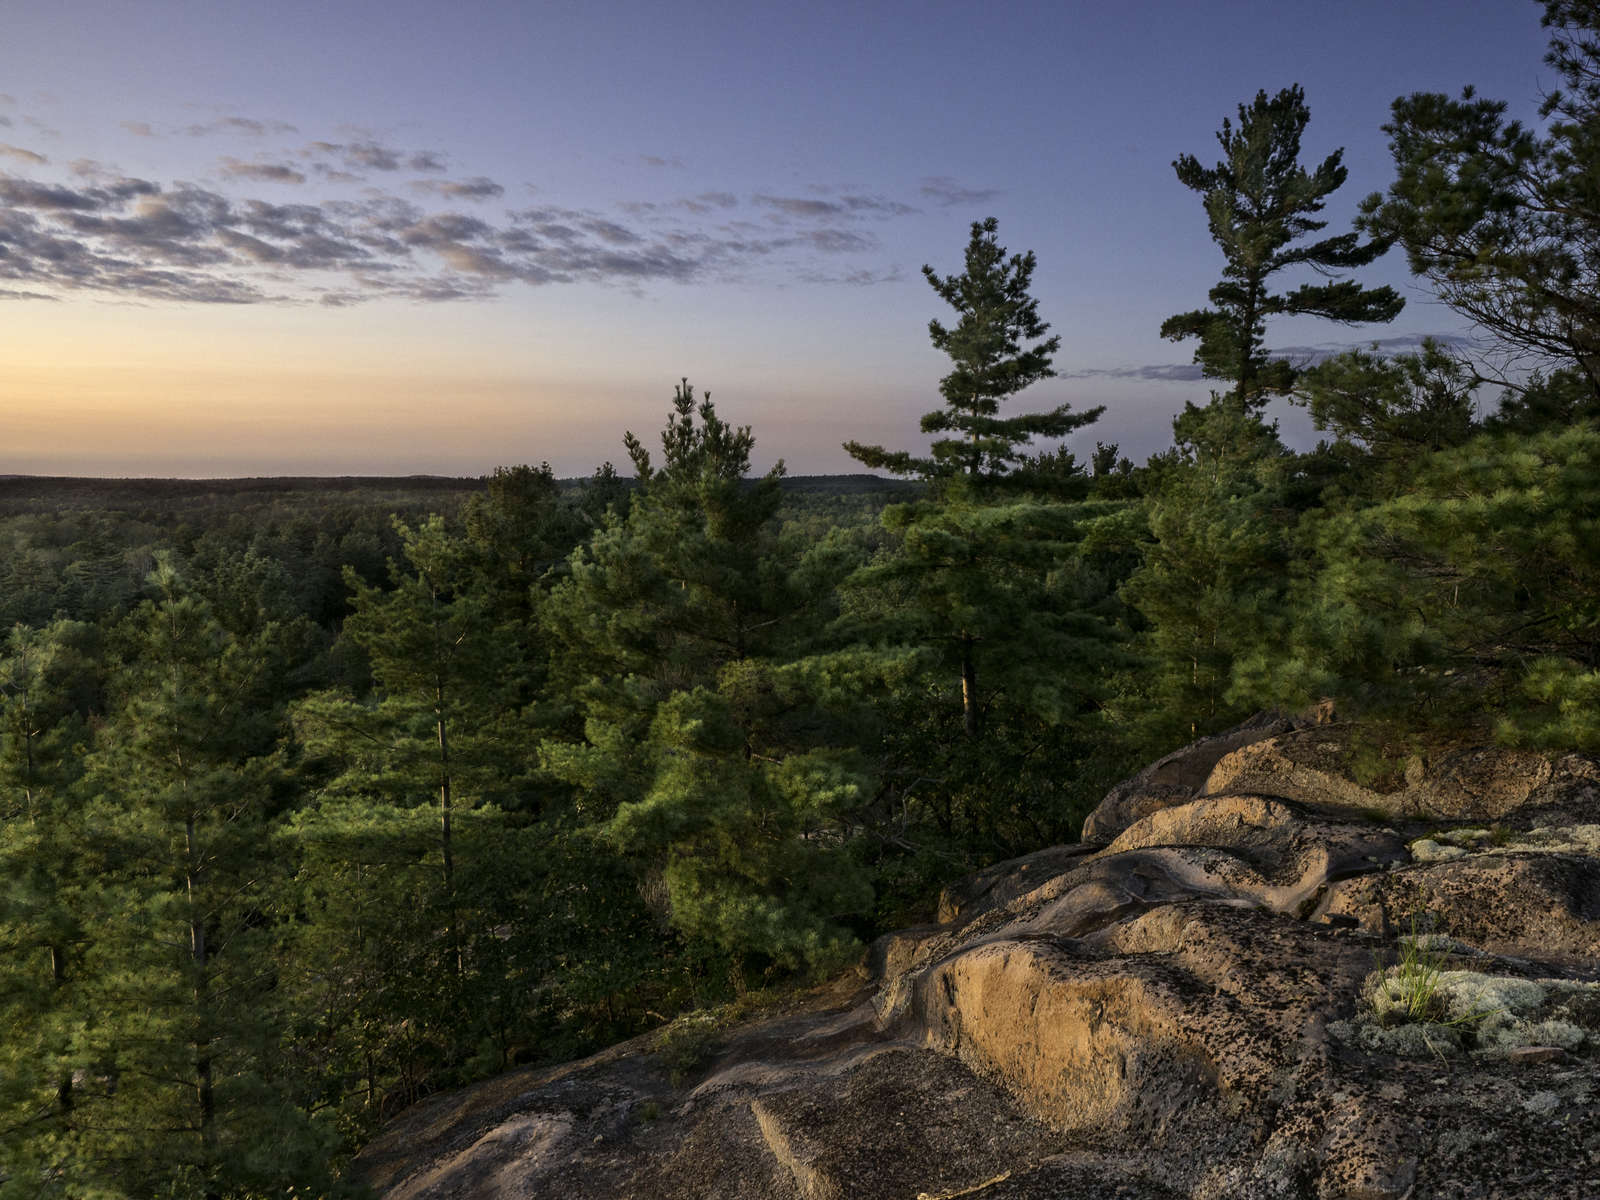
"Exposure bracketing is not something I use for most of my landscape images. In more challenging scenes I will first turn to using a filter to control the lighting or use Lightroom to improve the dynamic range of a photograph. Bracketing however, can be a useful tool to keep in your photographic toolbox."
Get tips from Visionary Peter Baumgarten on creating more accurate and dynamic images while using HDR.
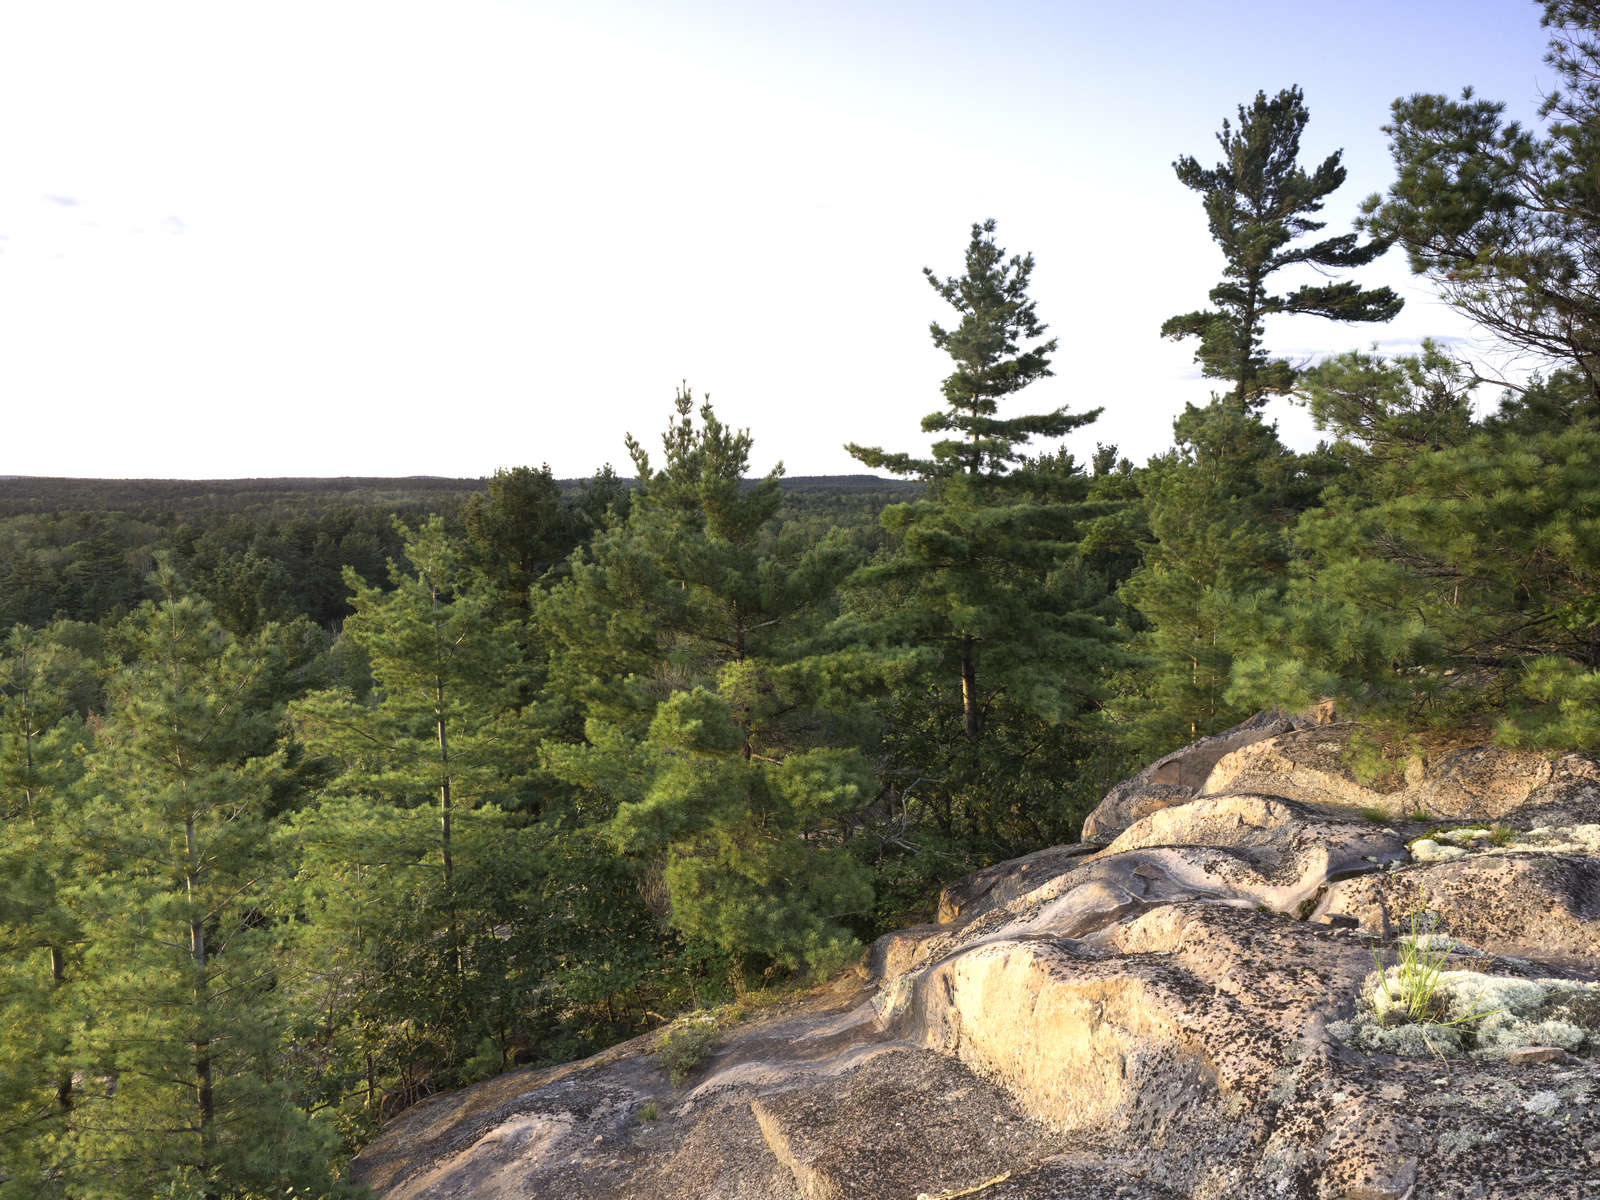
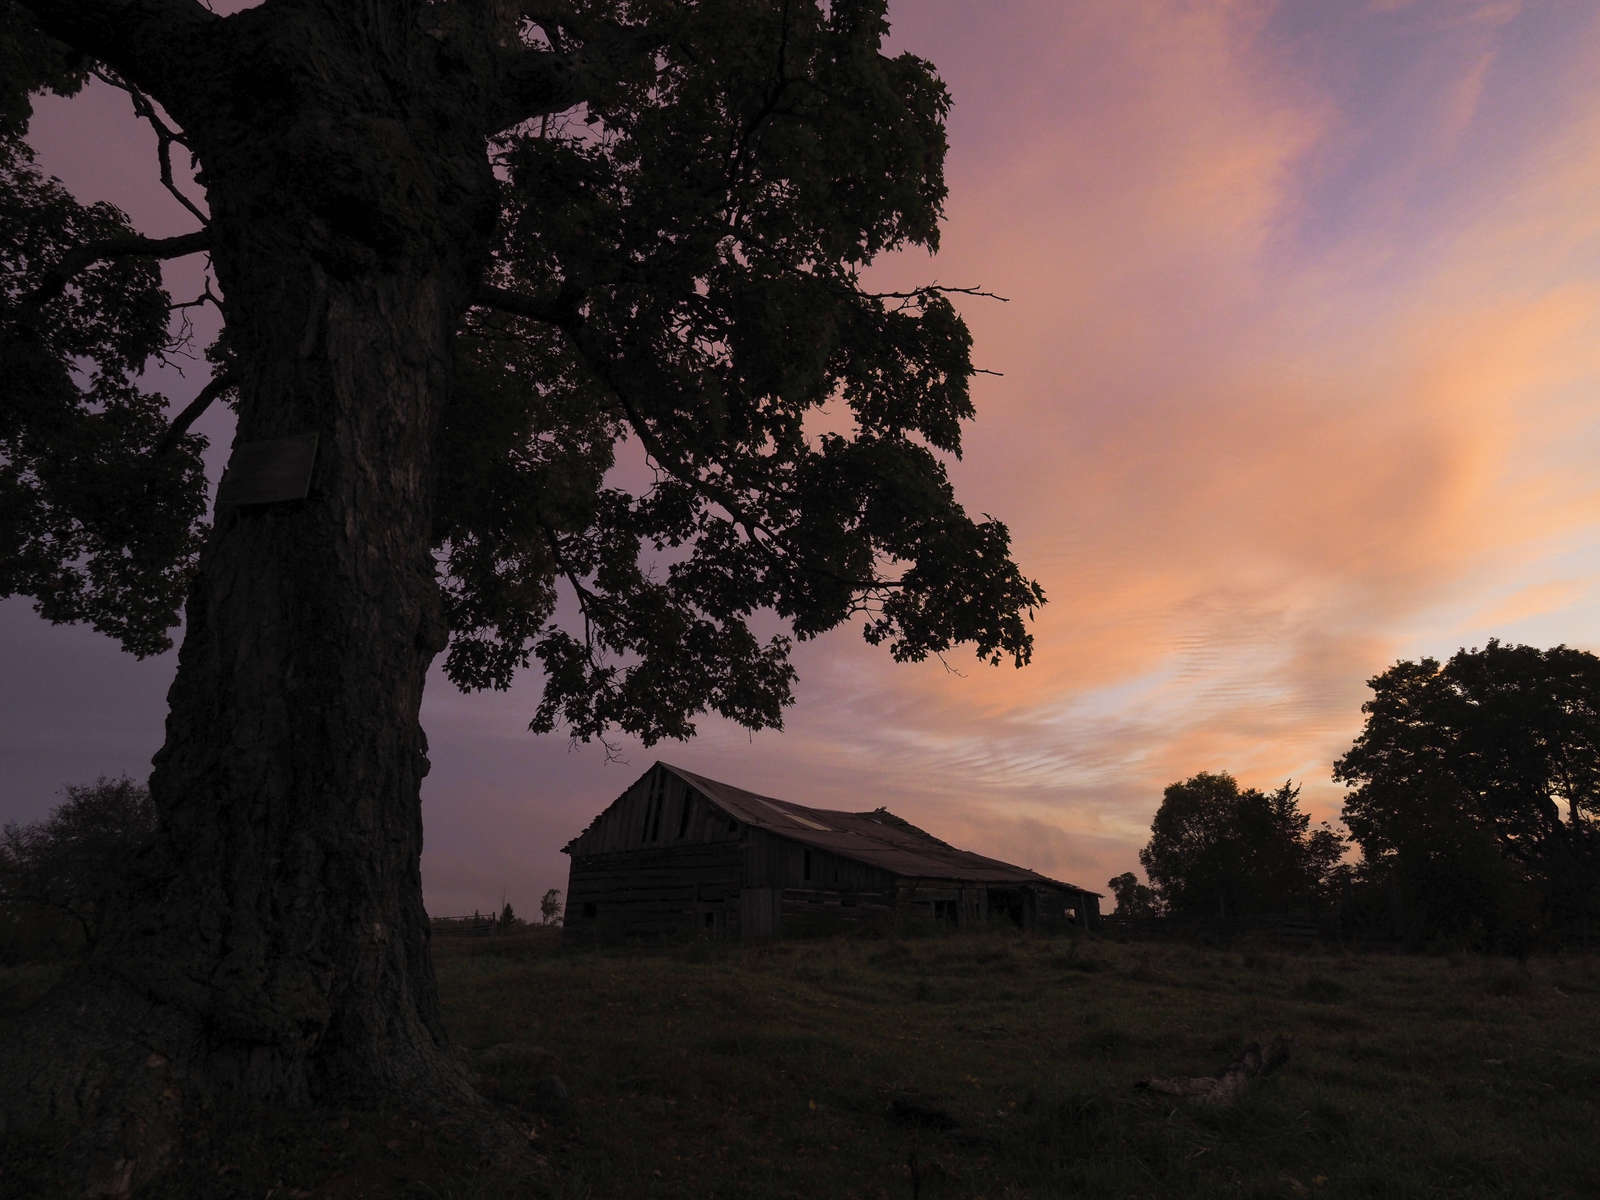
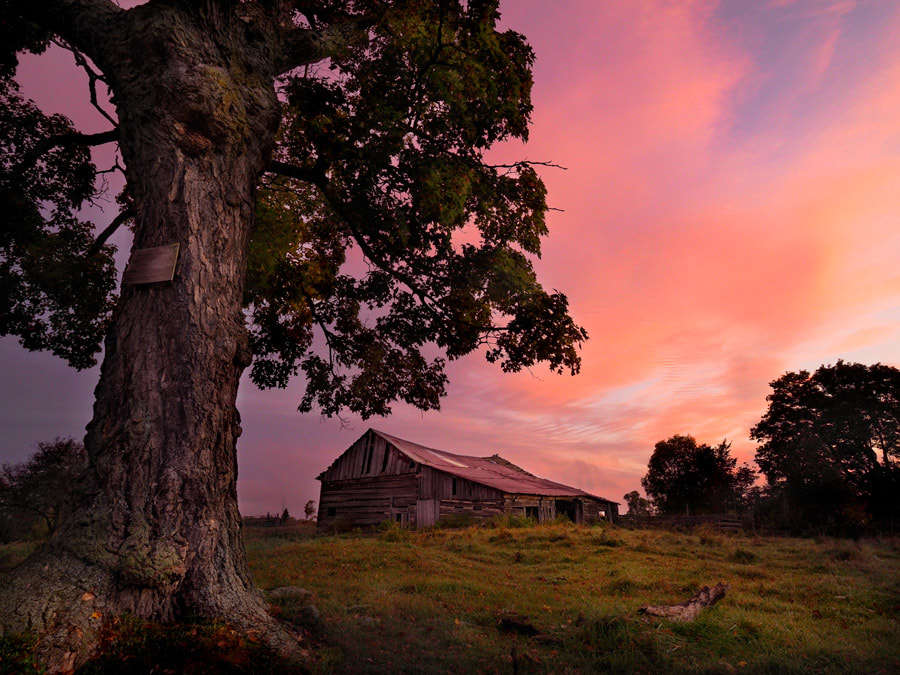
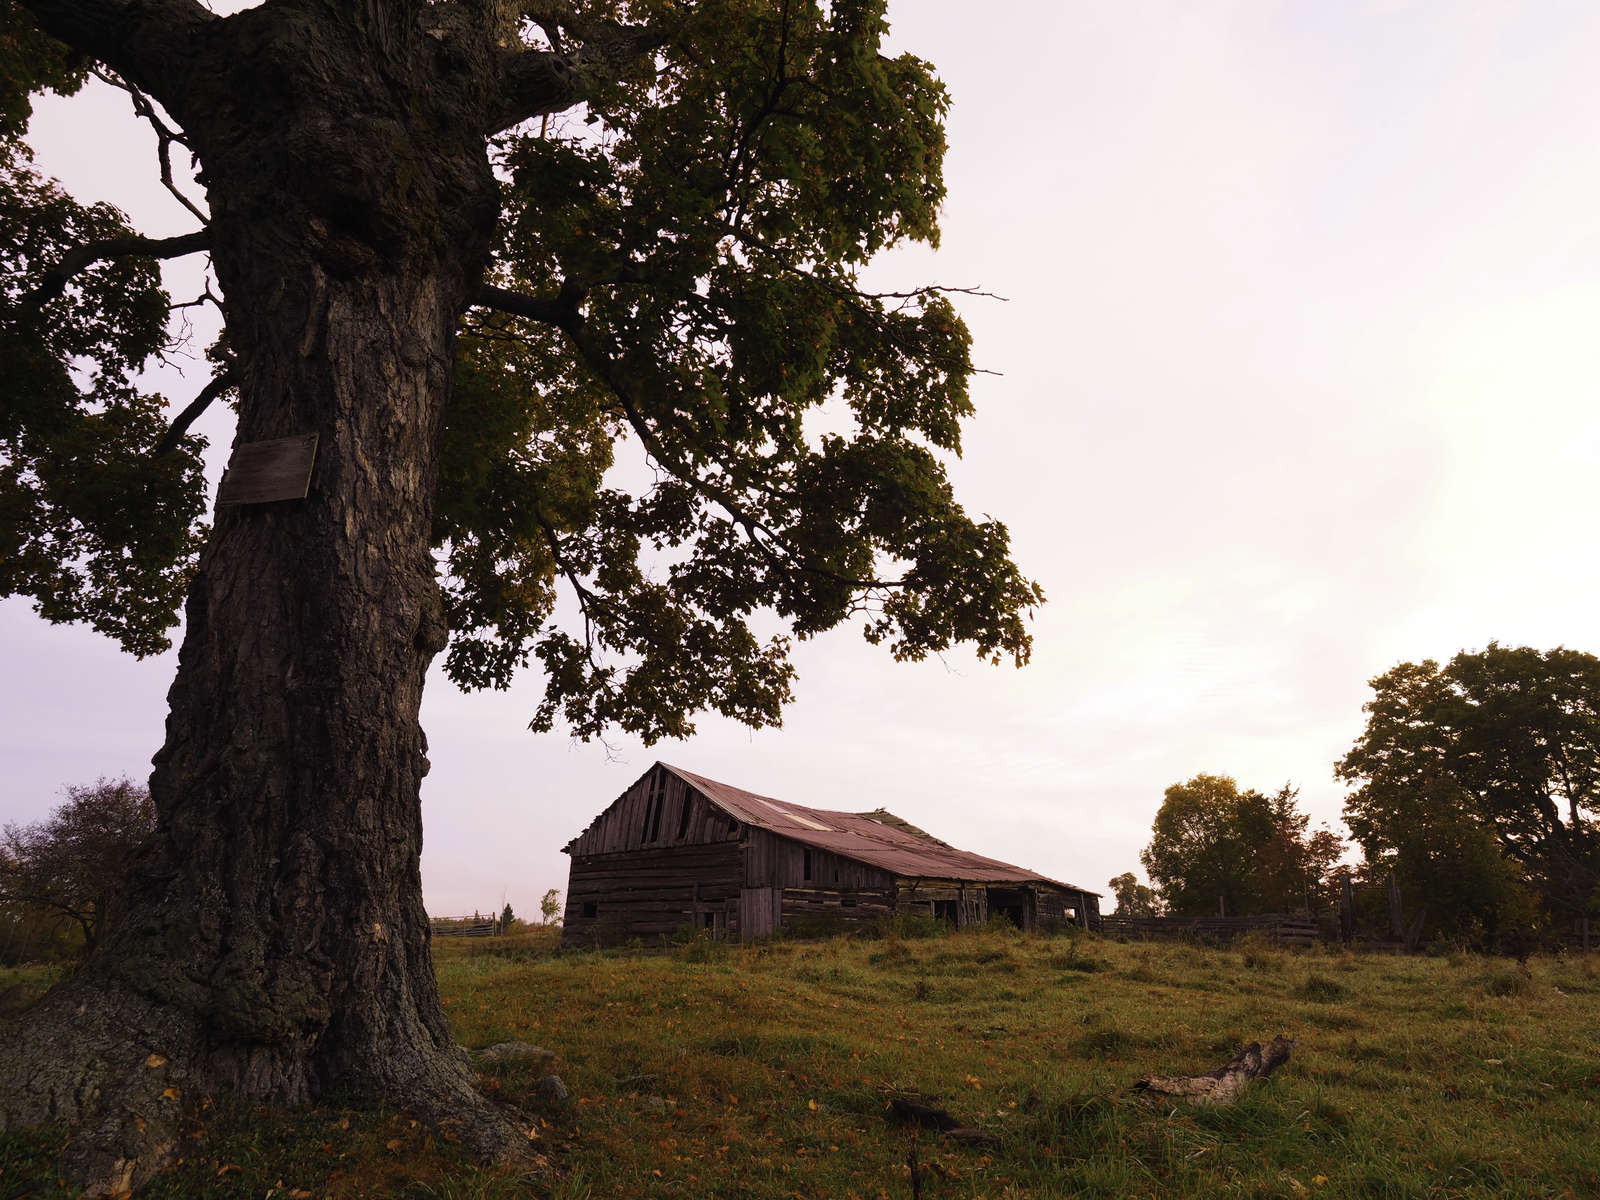
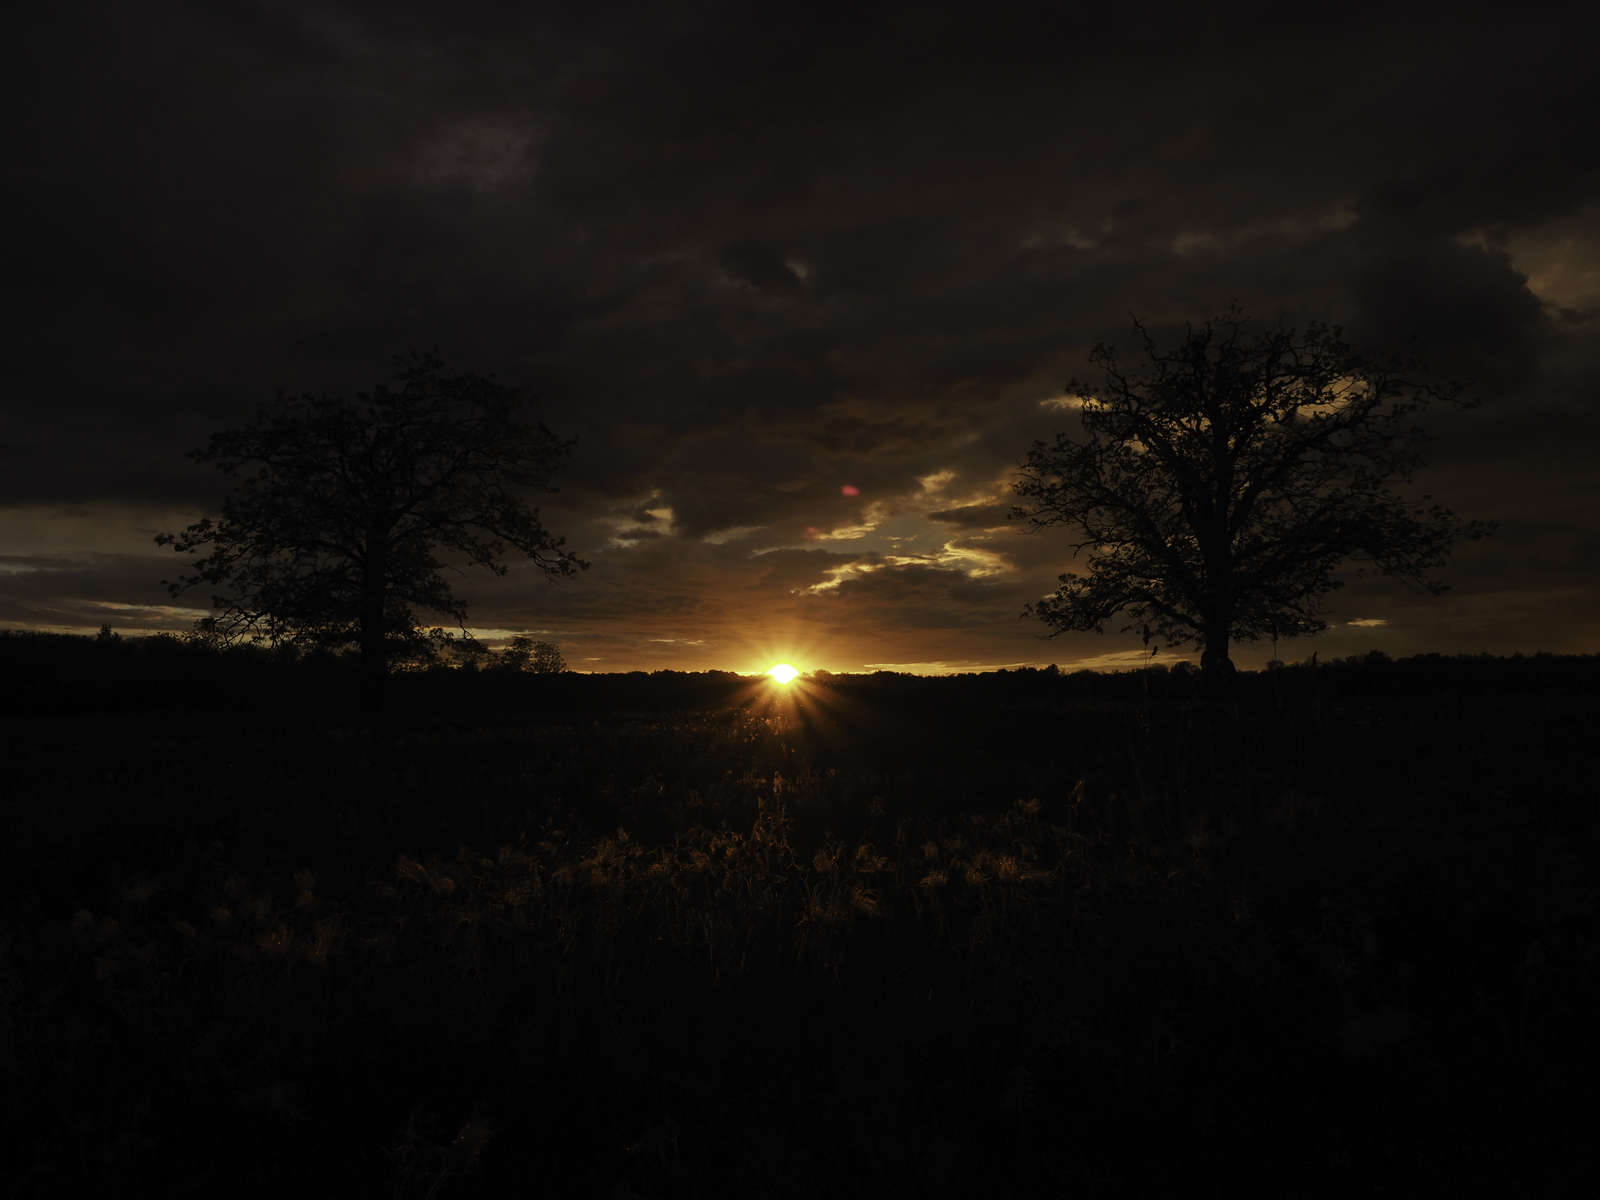
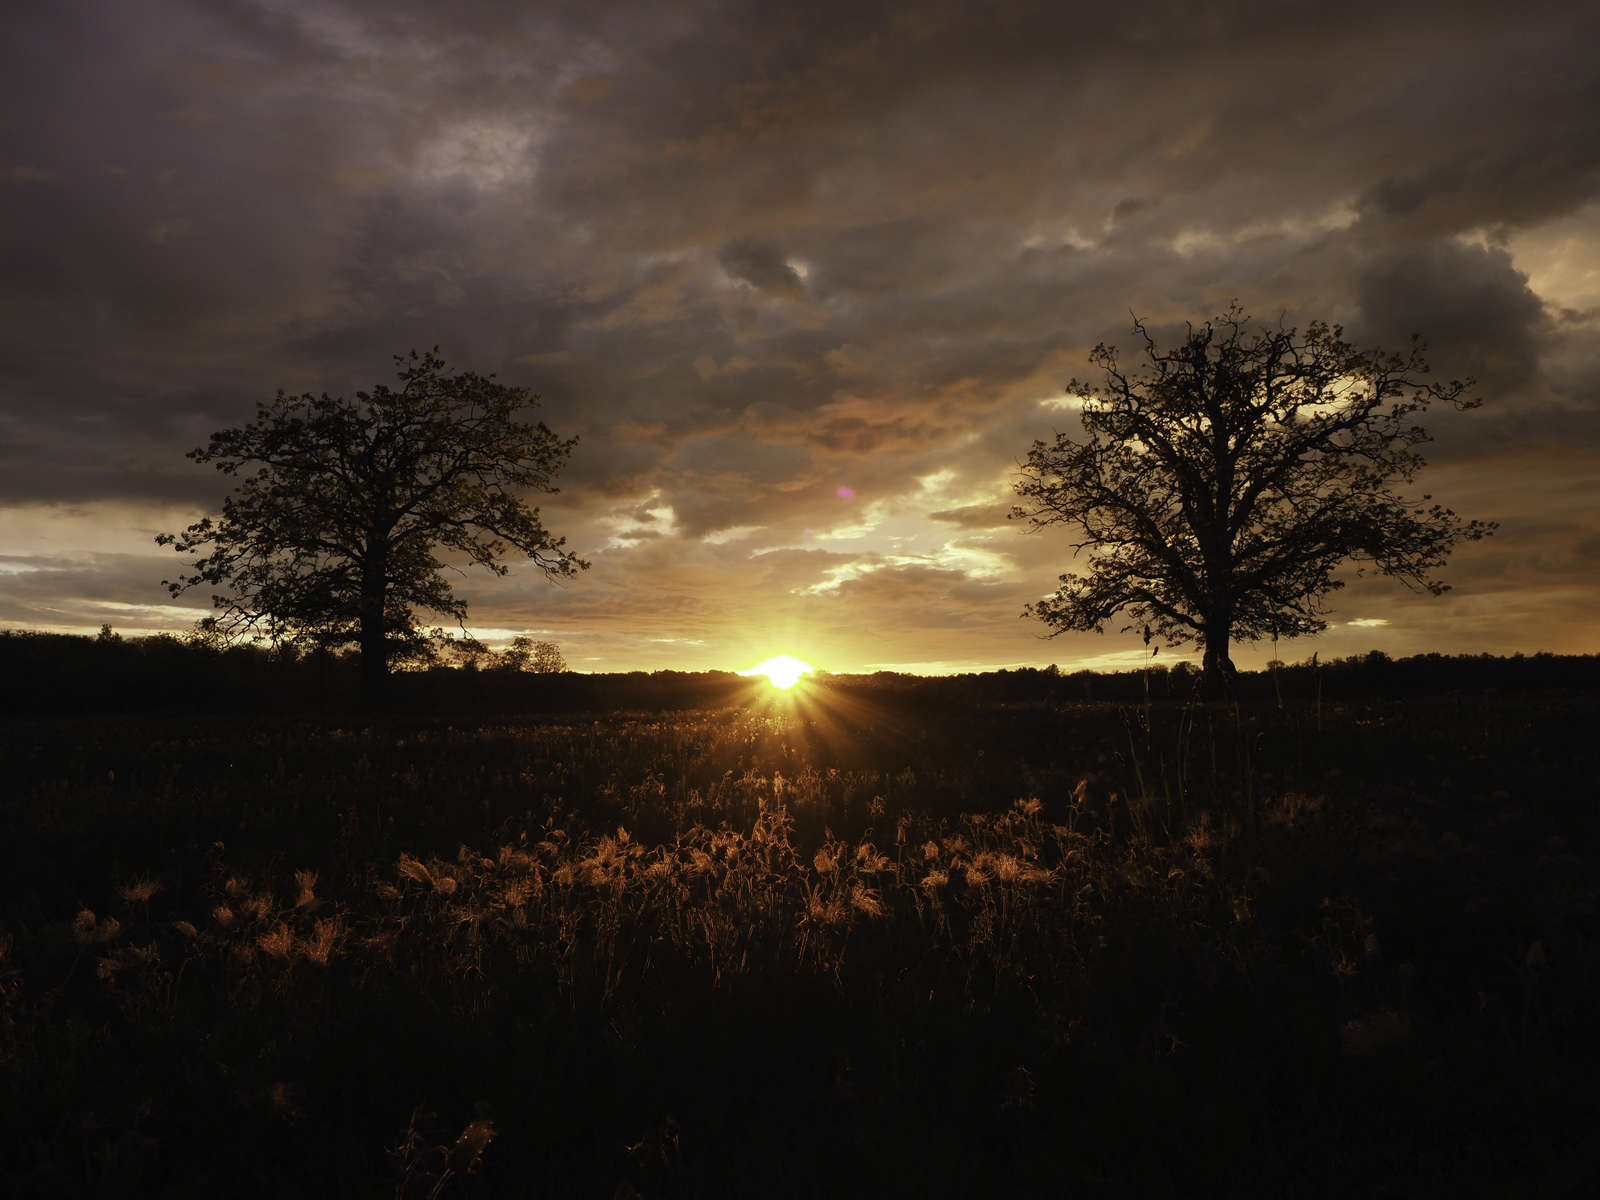
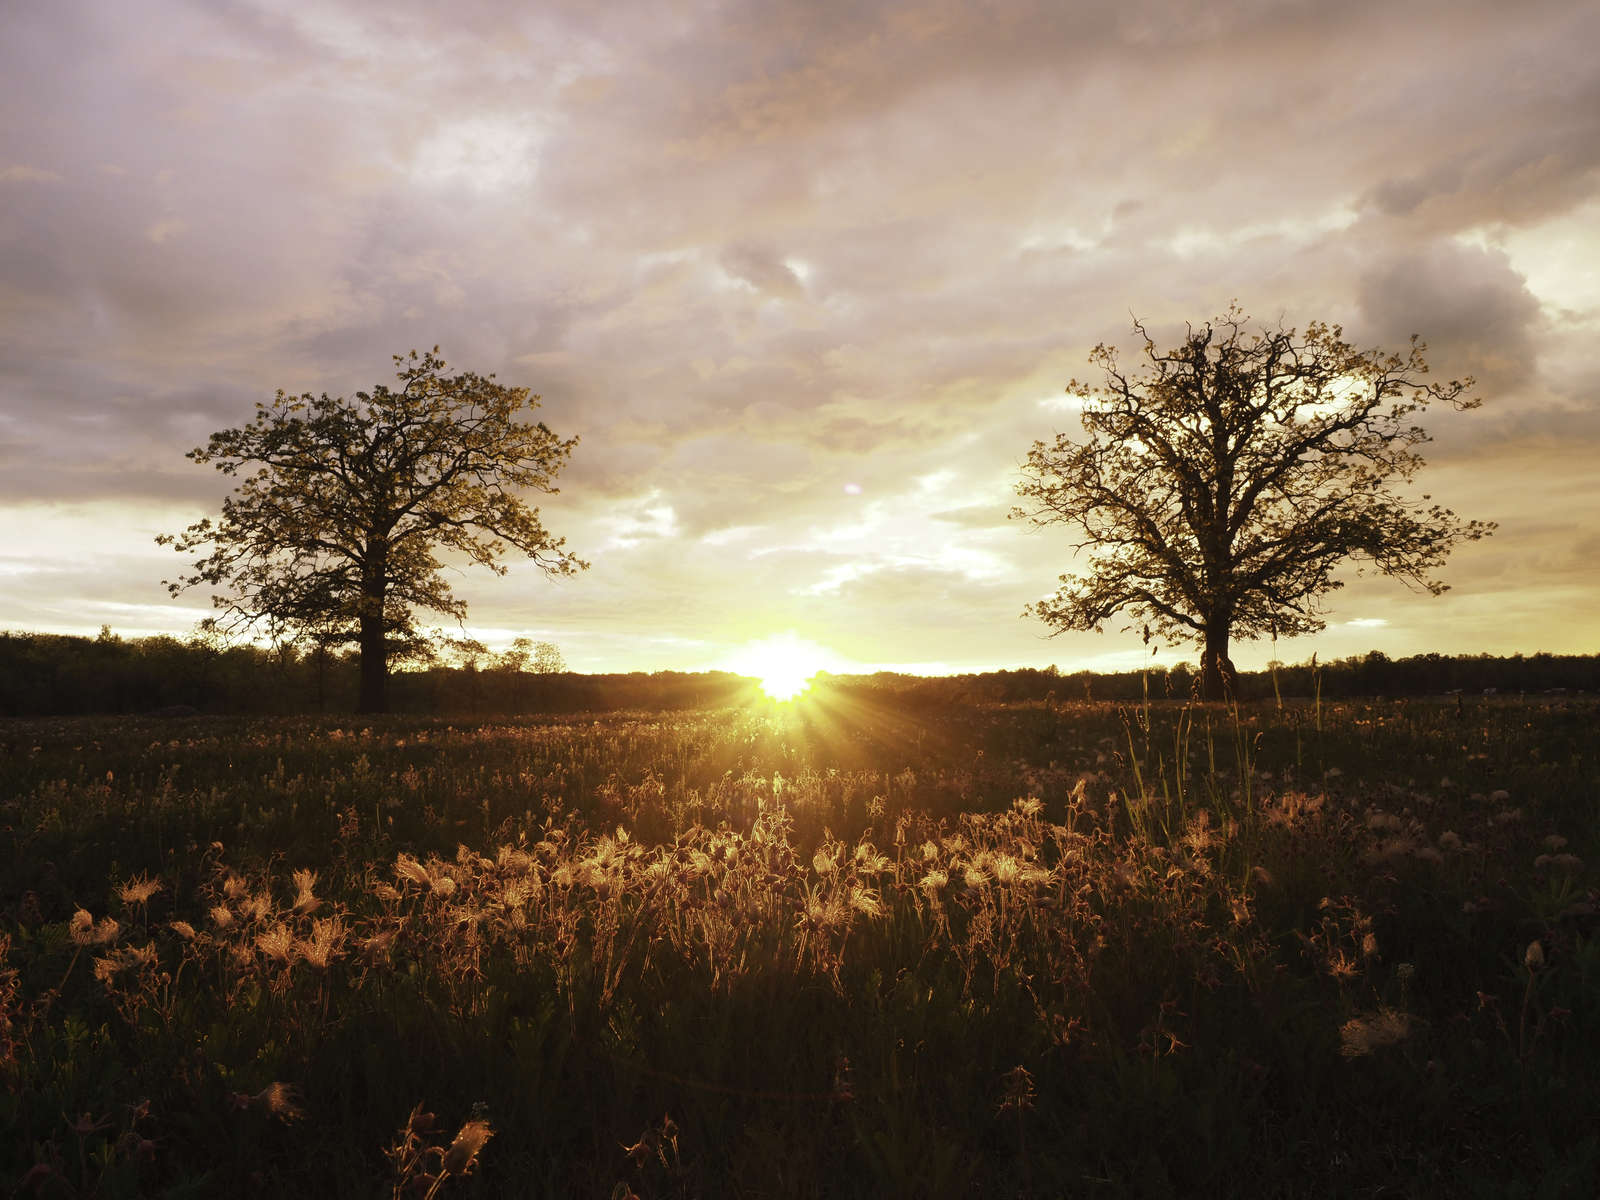
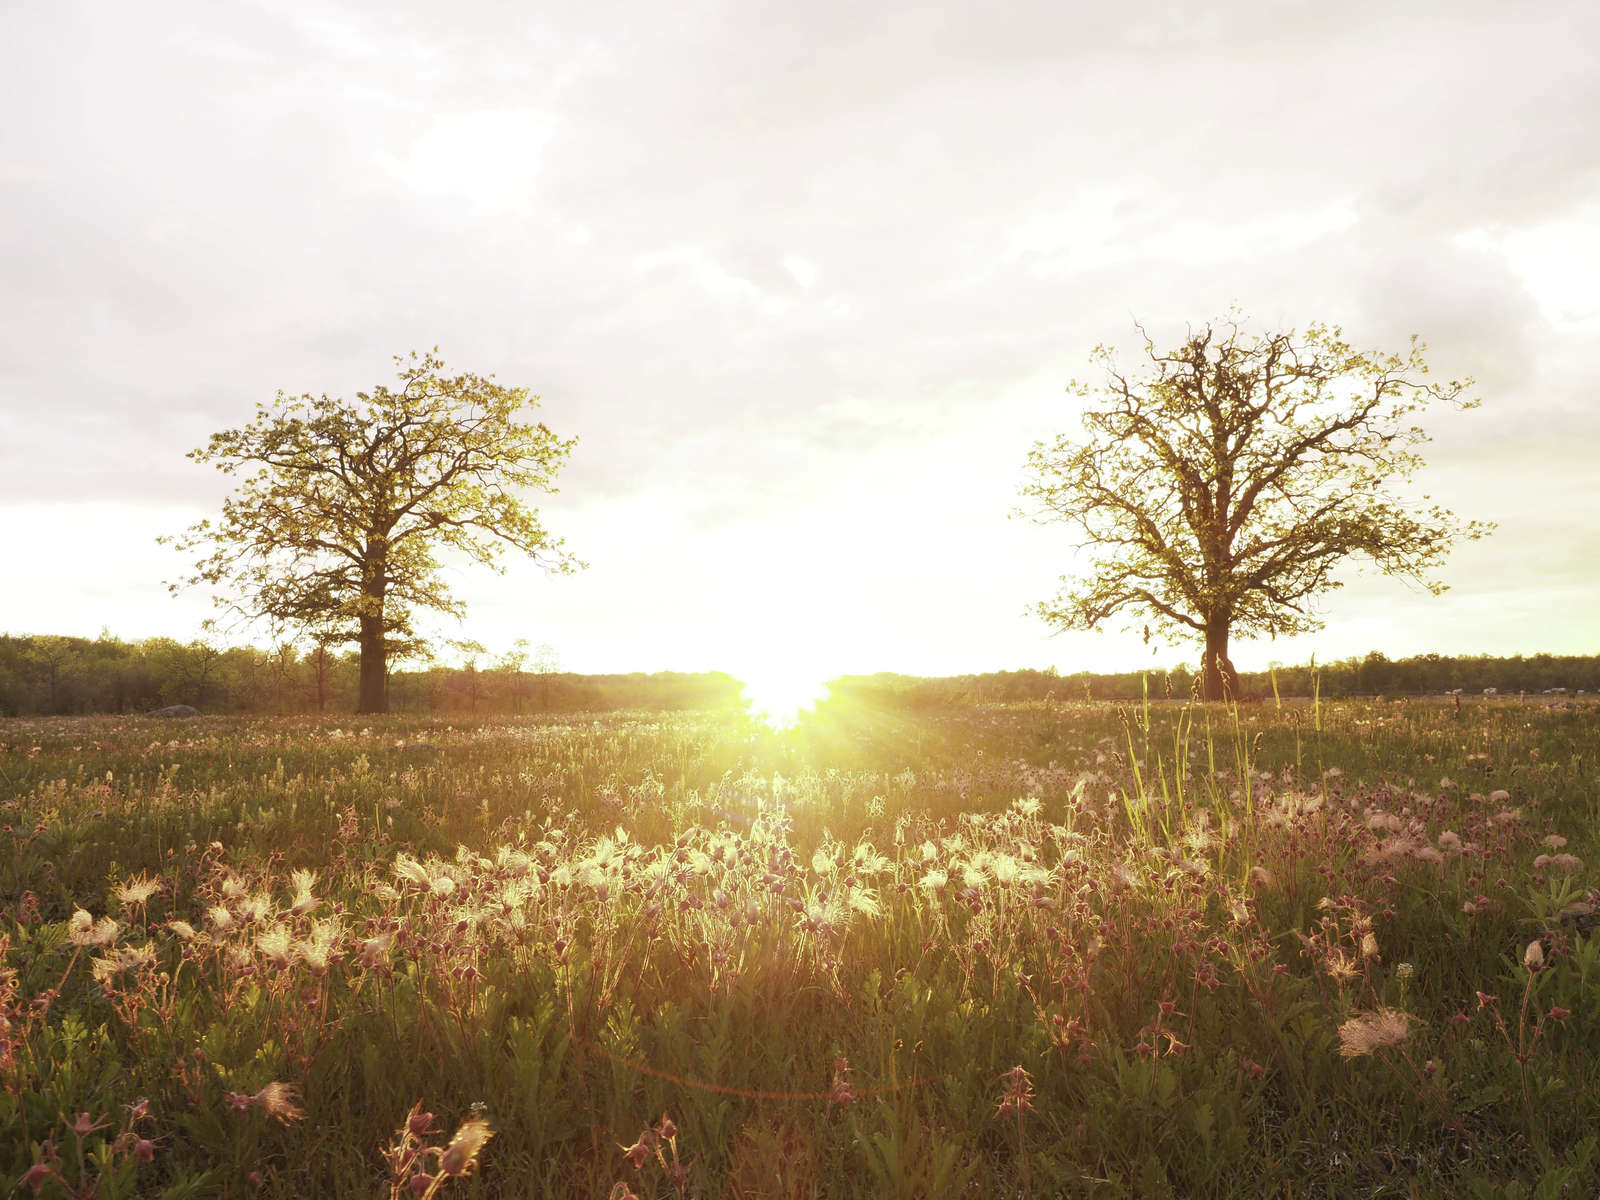
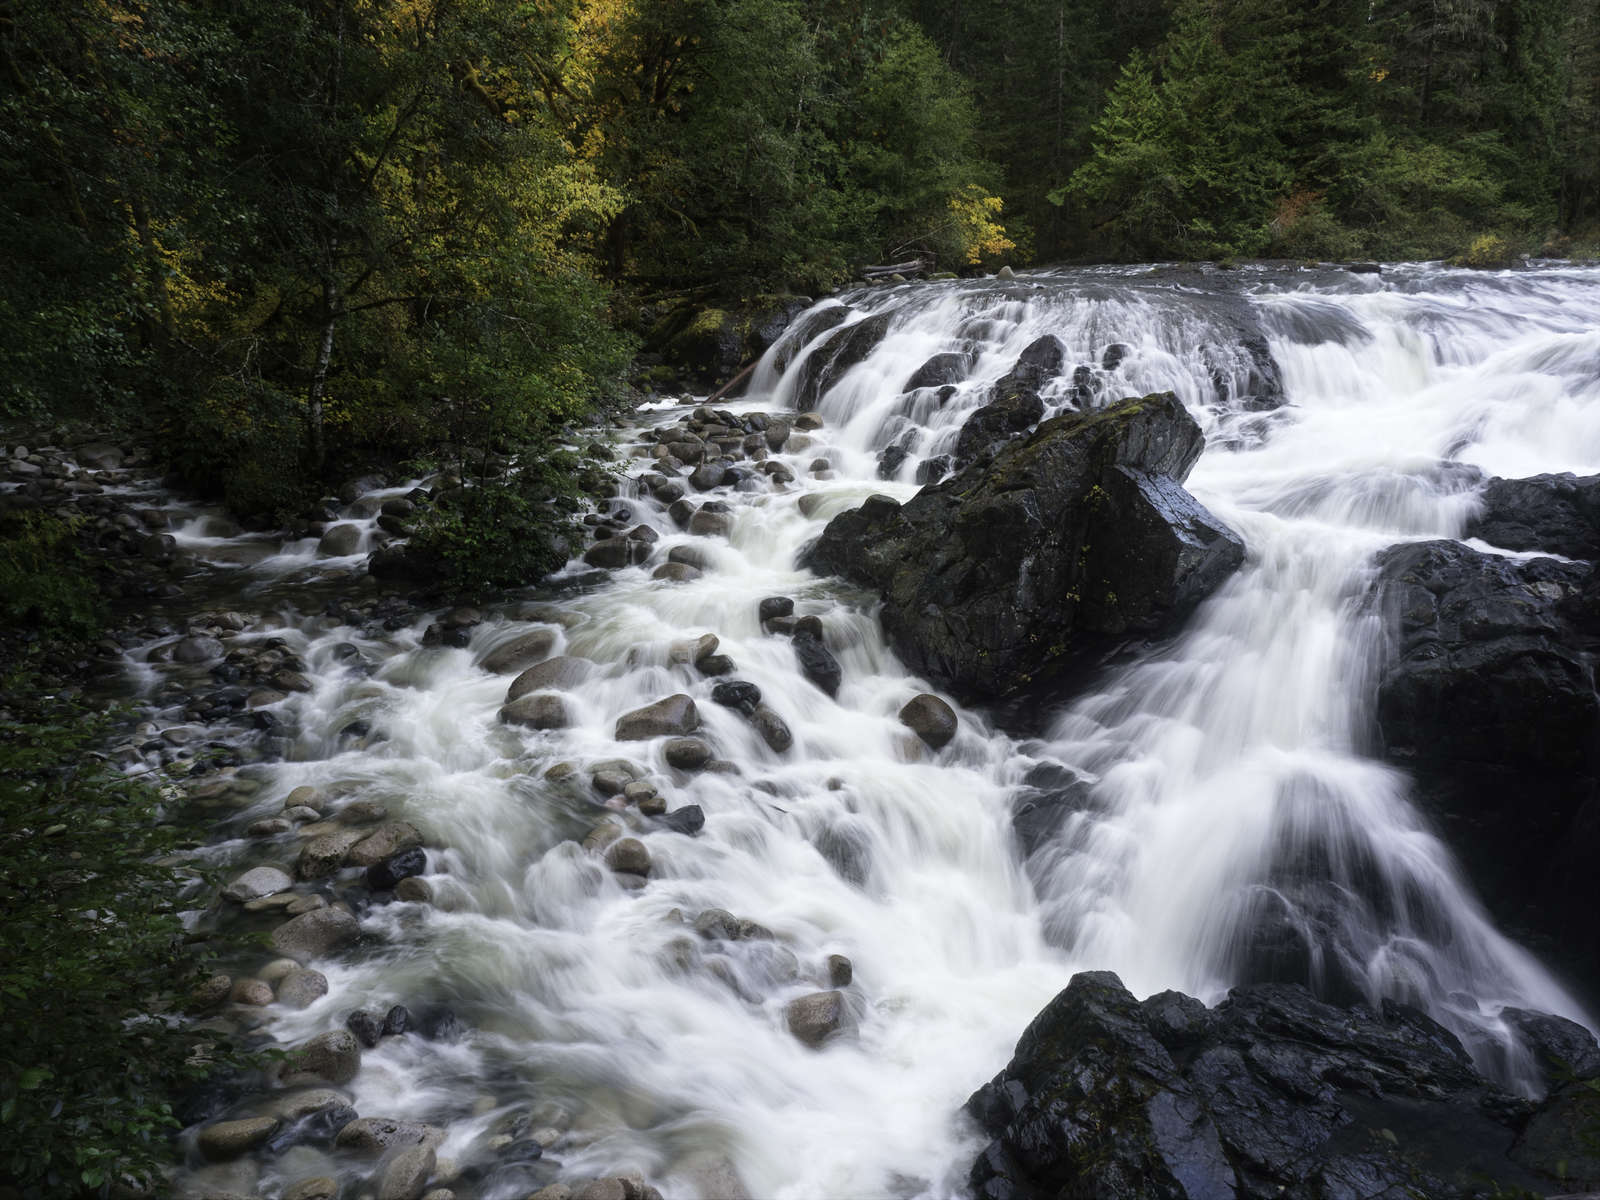
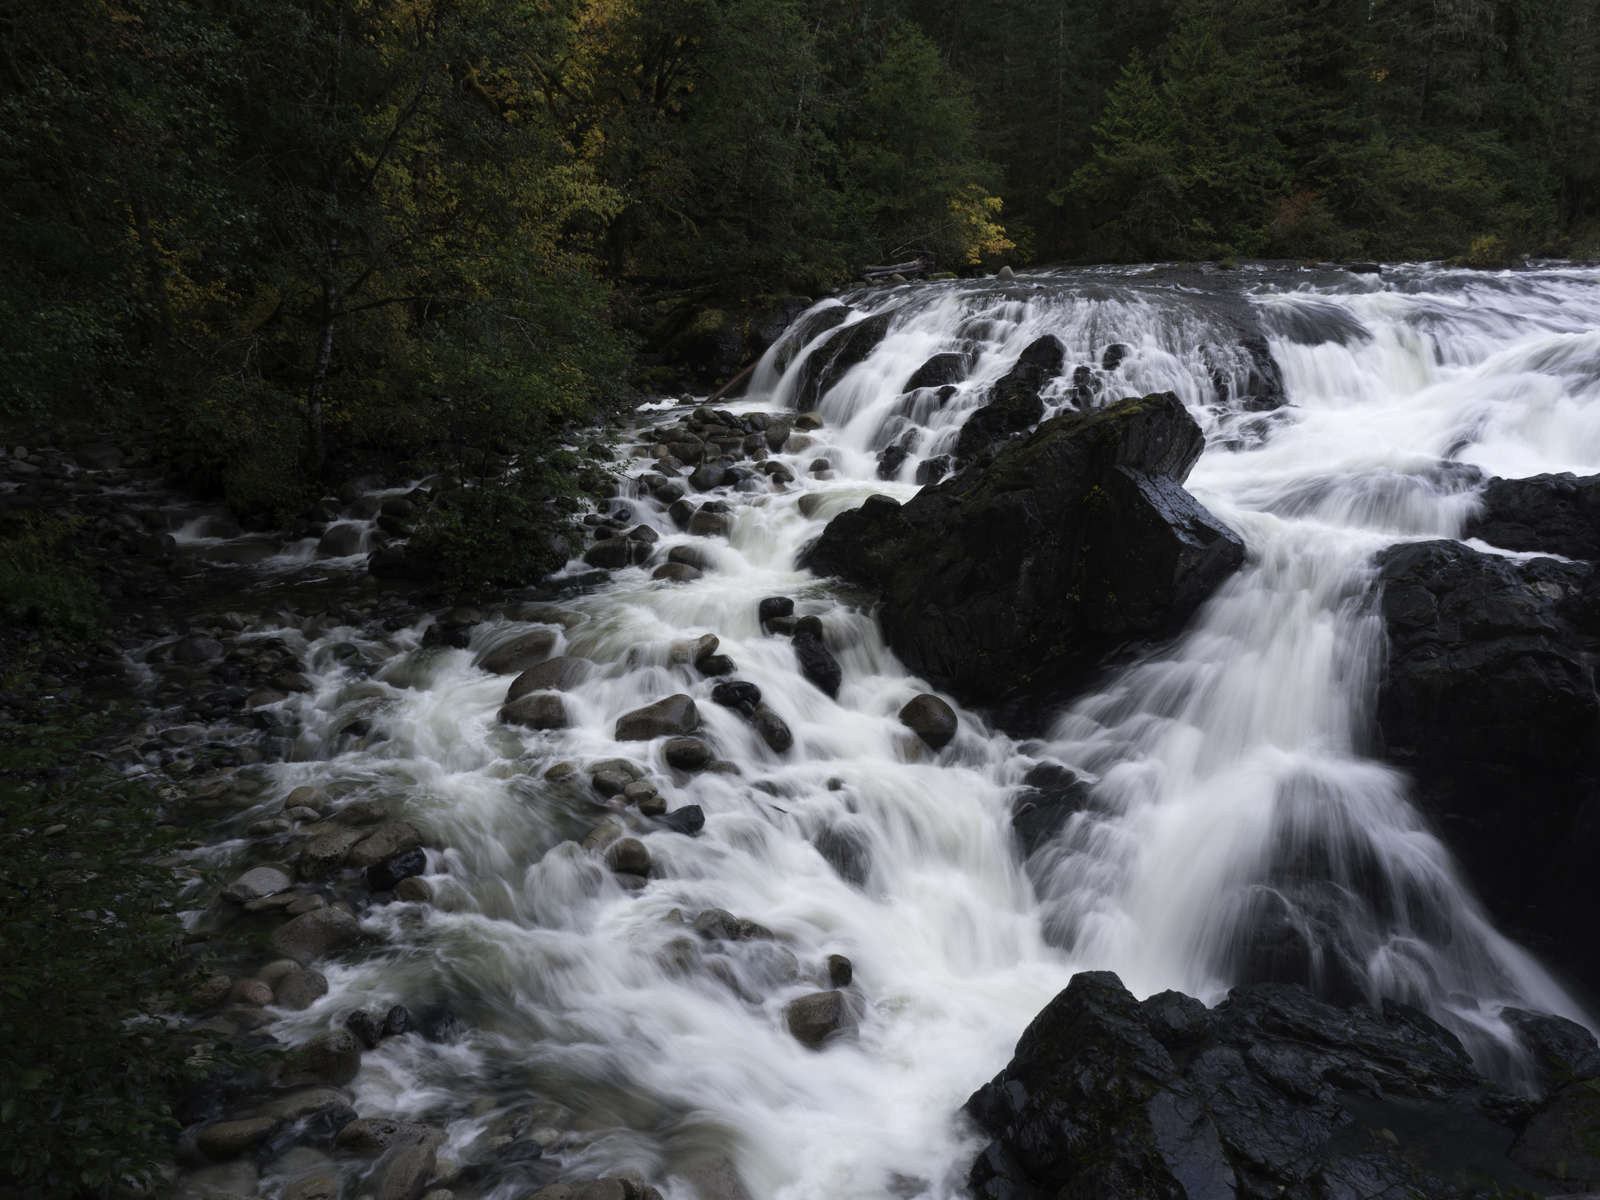
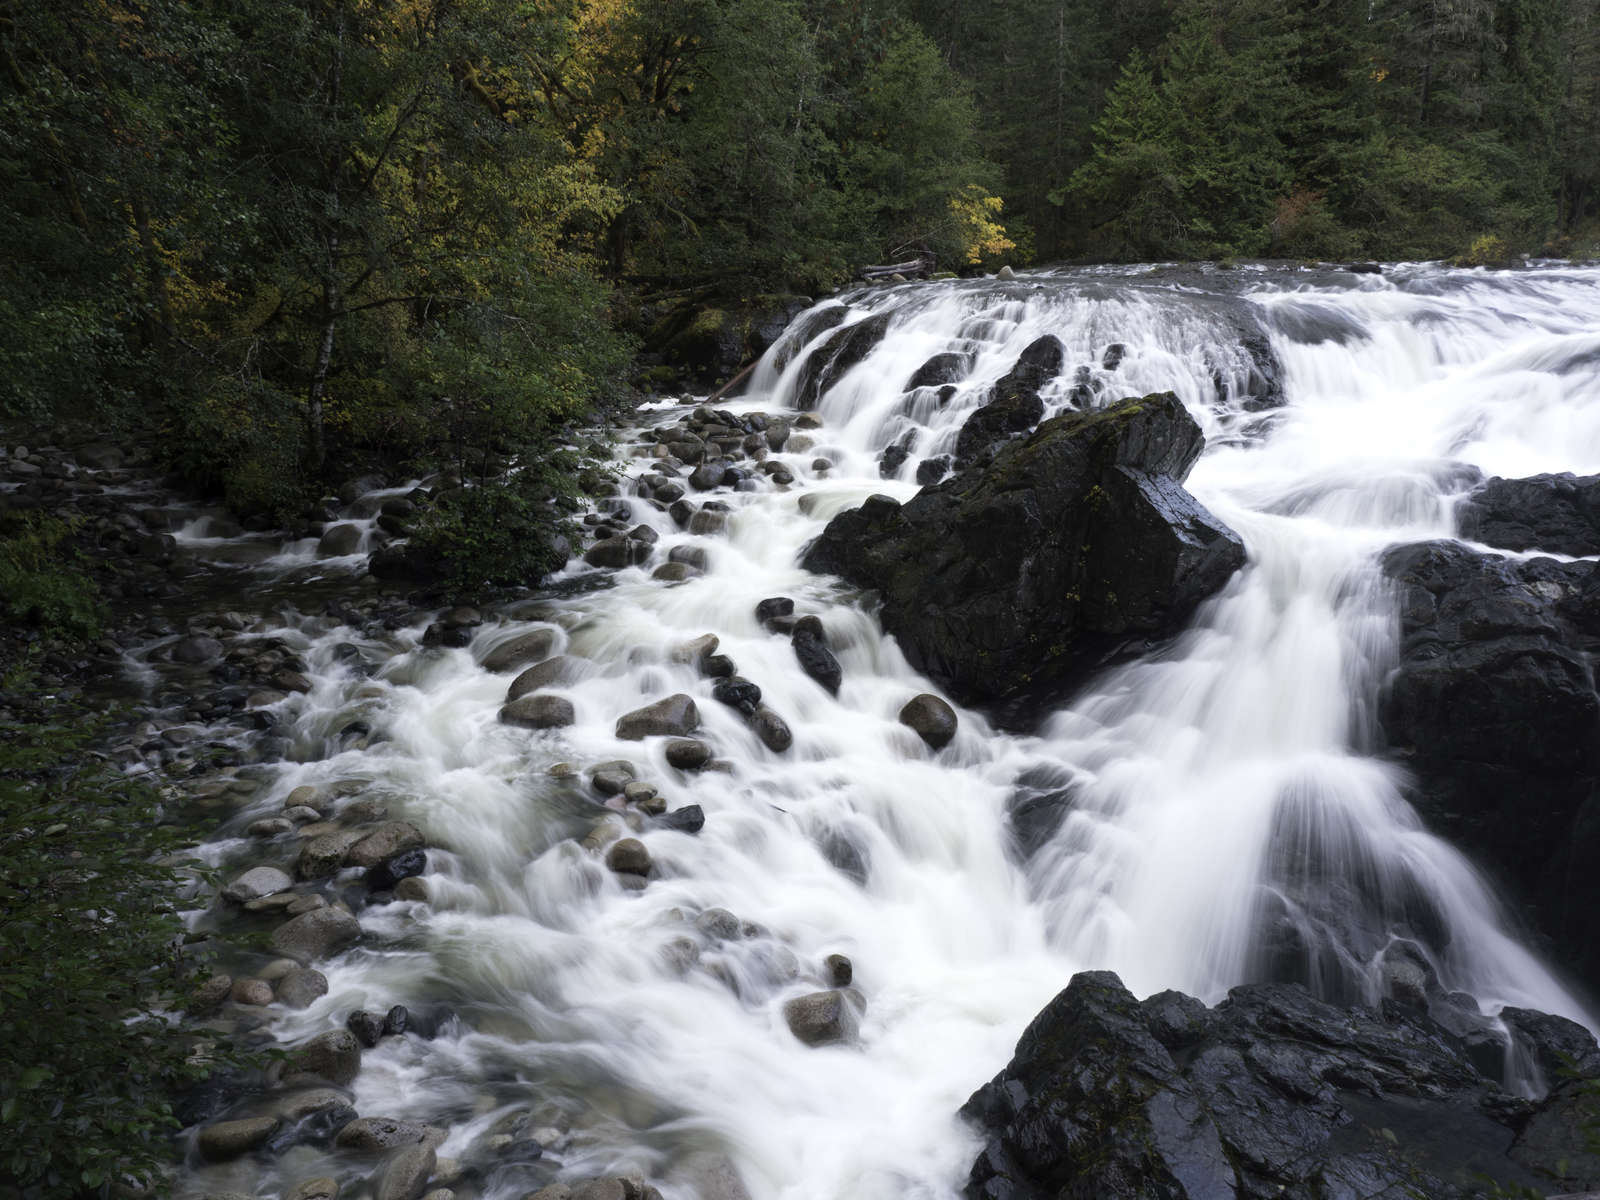
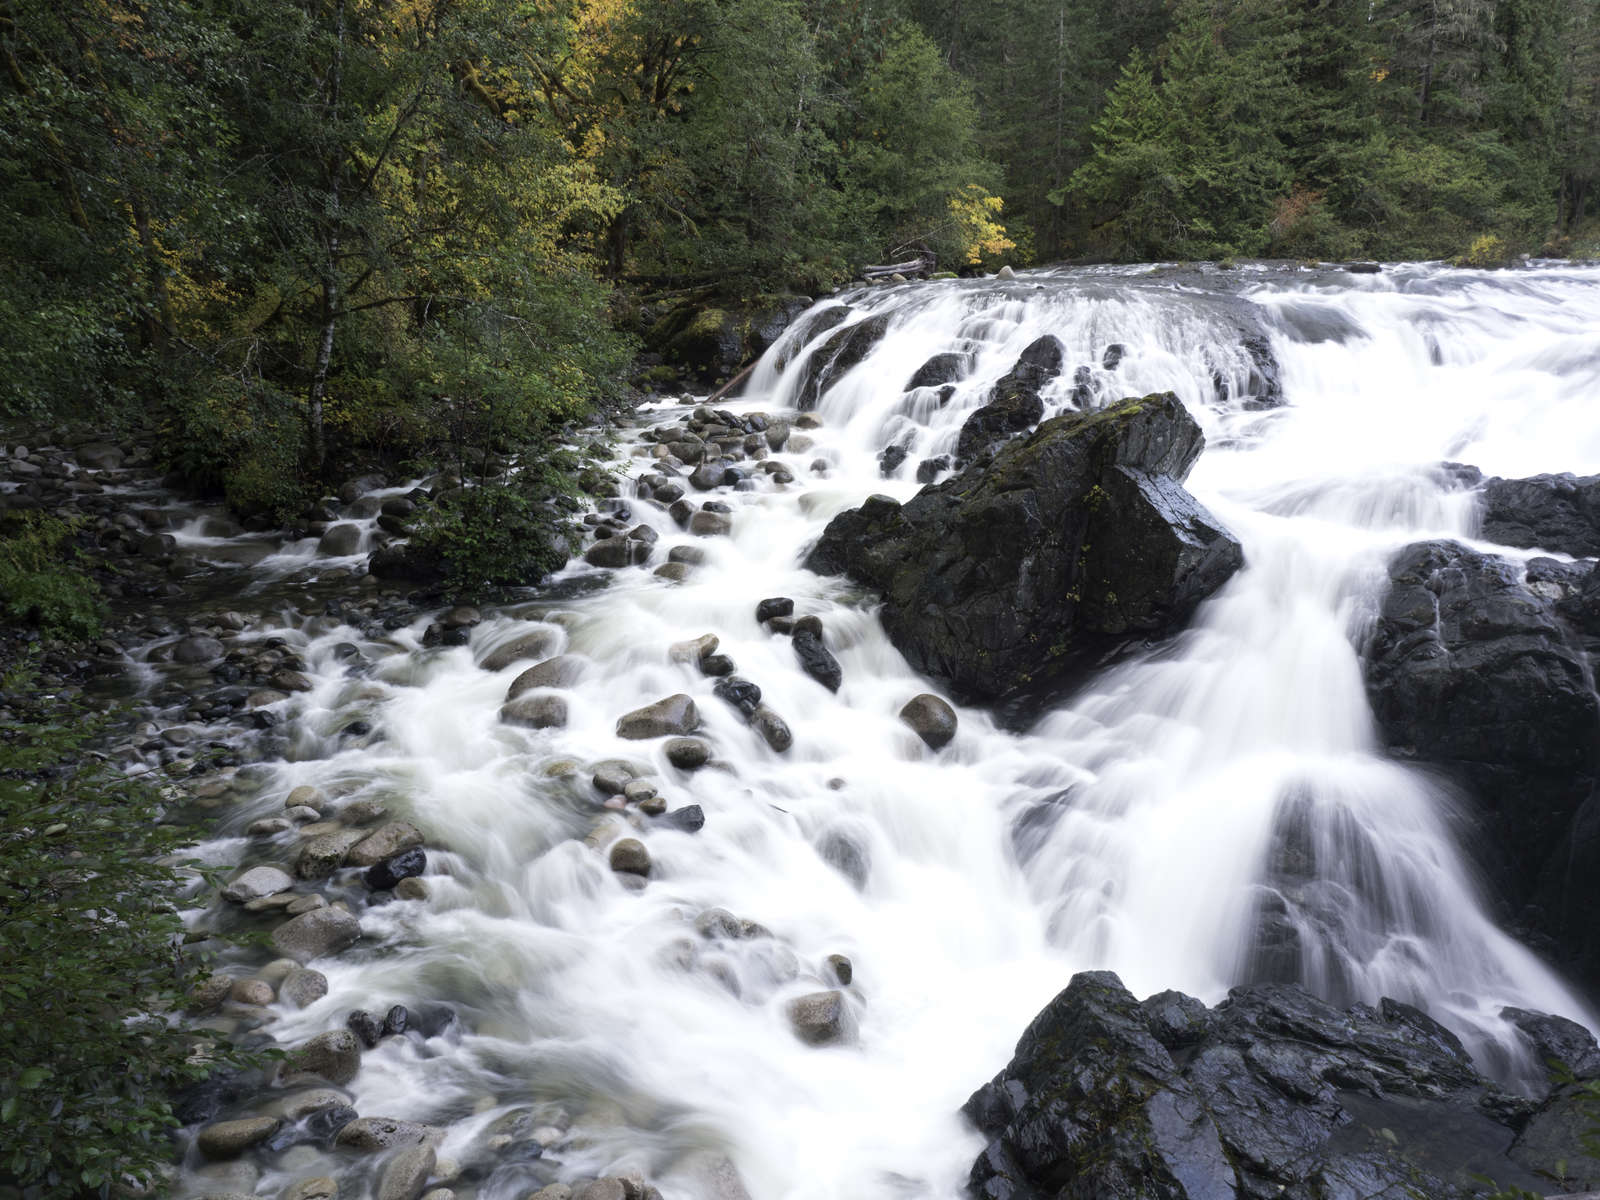
ISO400, F/7.1, 1/80s, -2 EV
Setting up the Camera
There are two ways of taking bracketed photos with OMD line-up of cameras. Let's look at both.
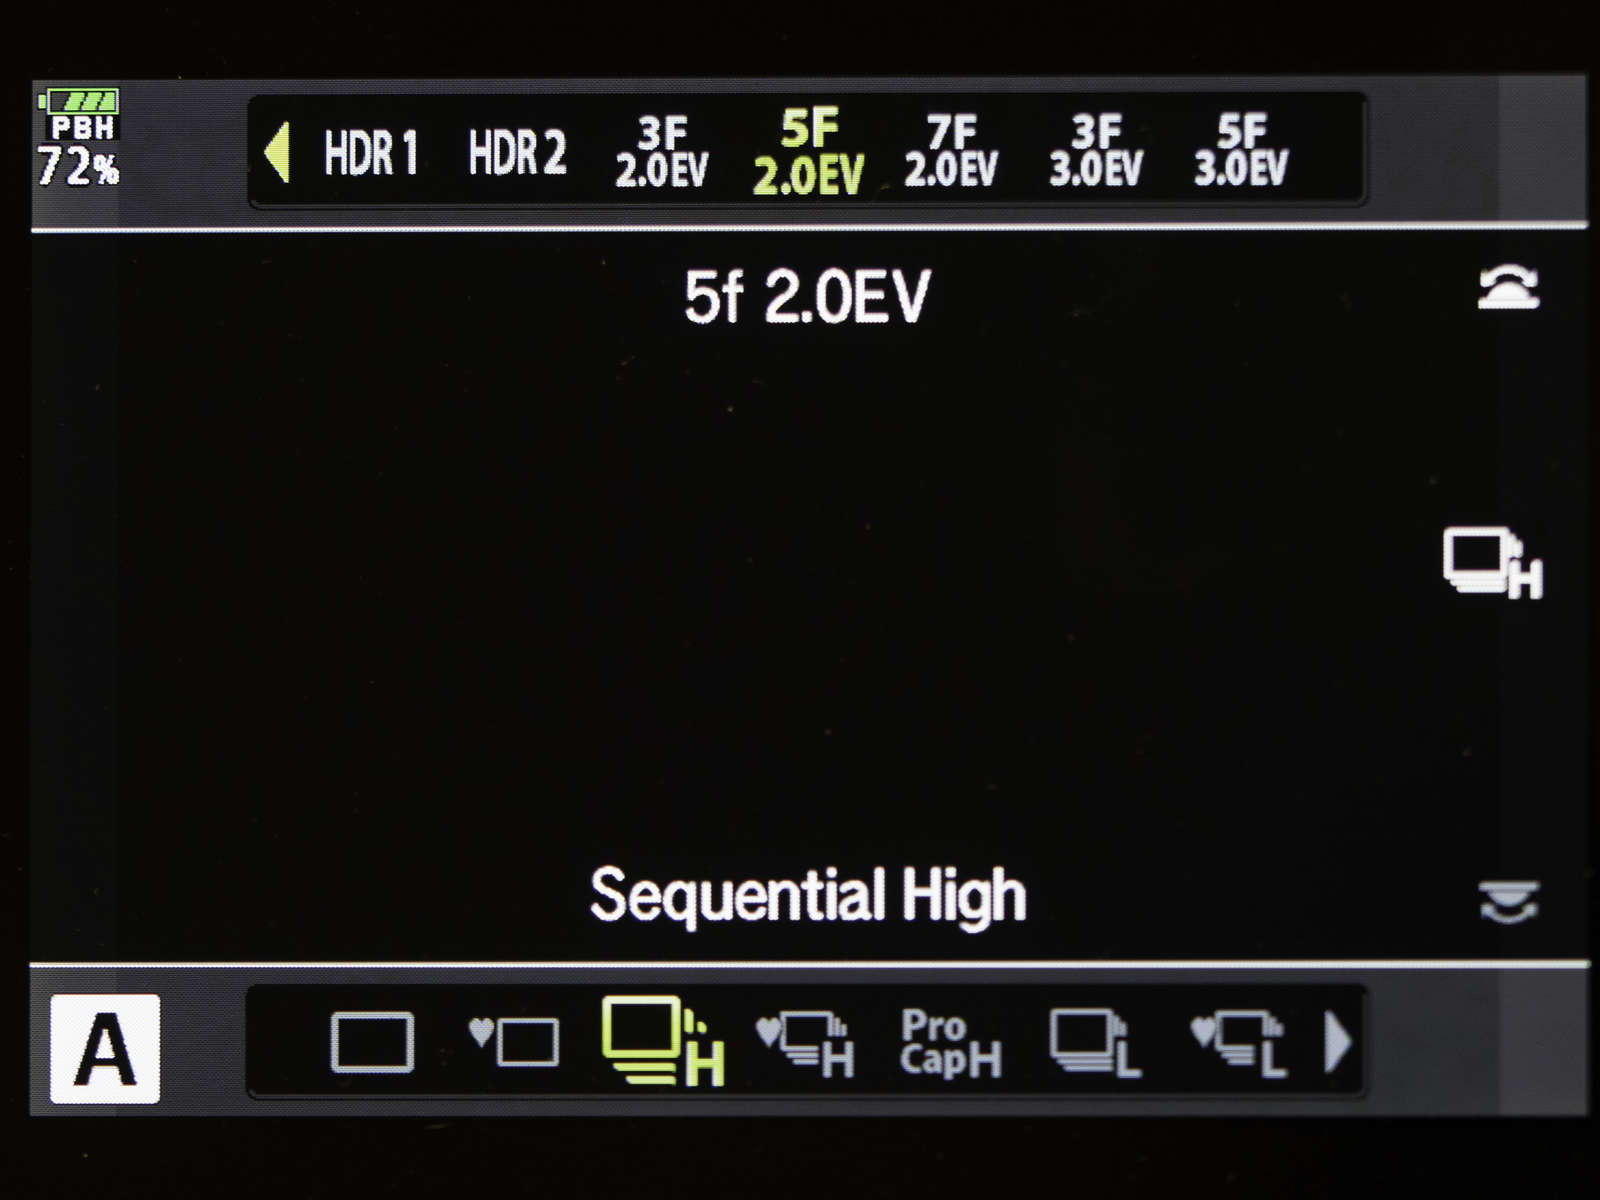
Method 1 - Using the HDR Button
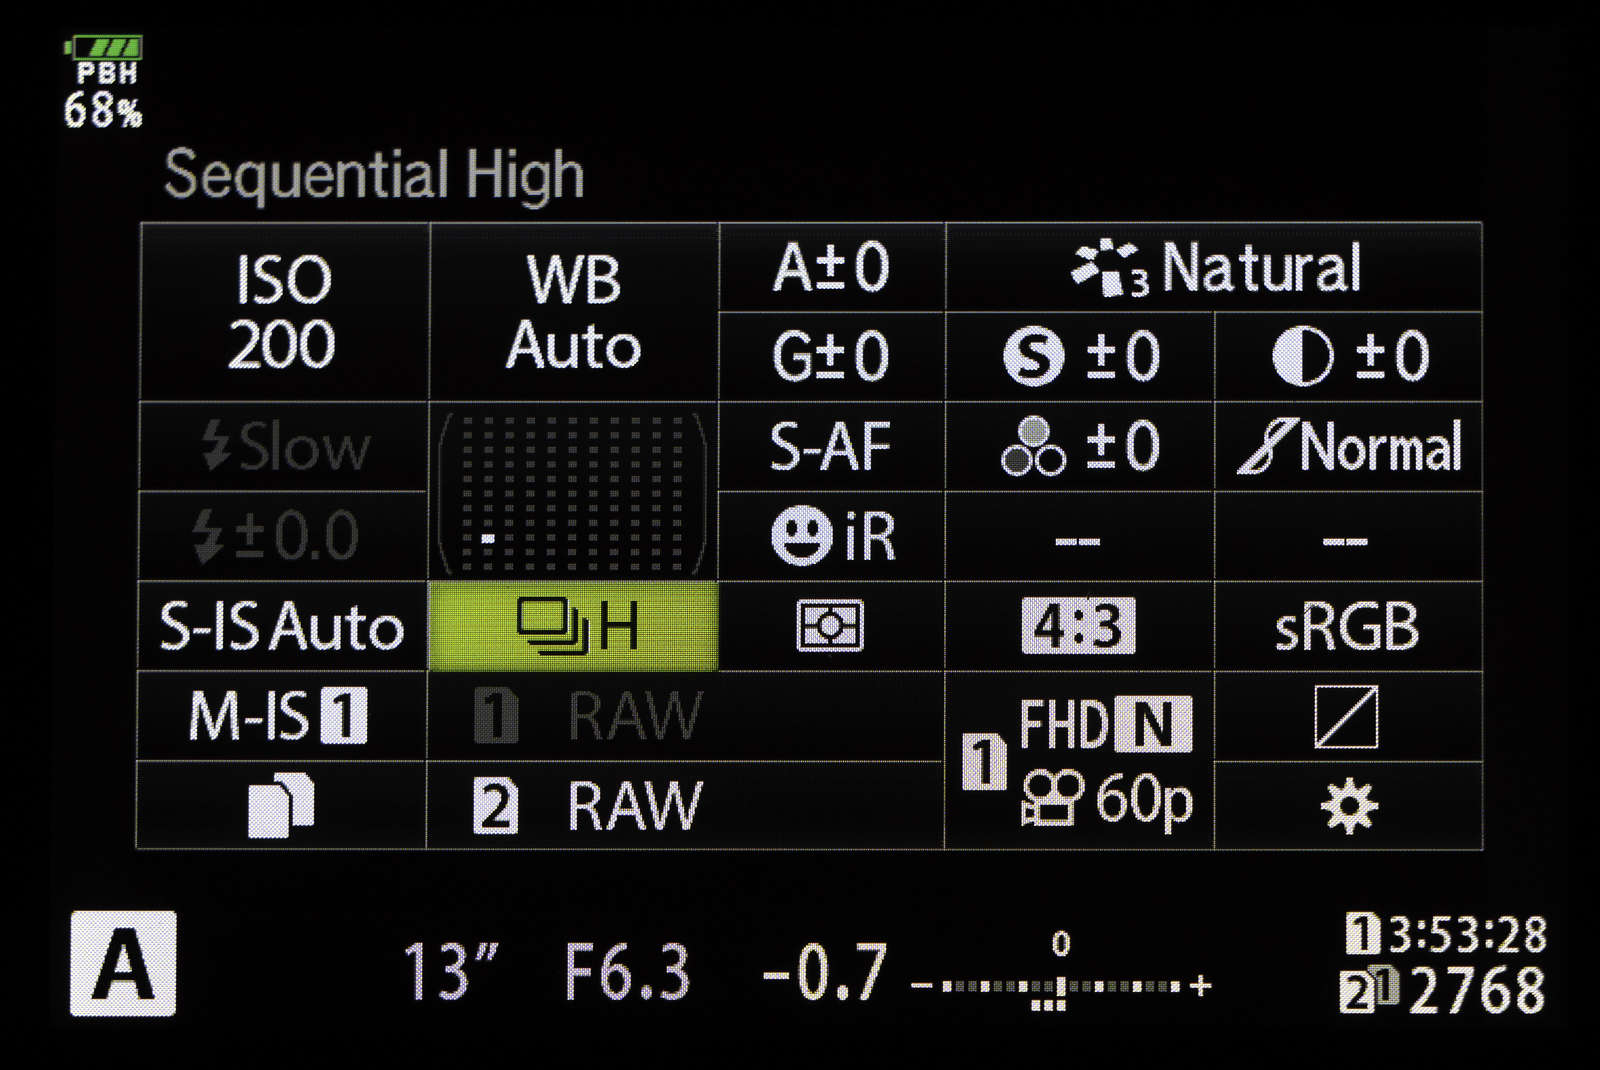
This is the method that I used for the sequence above. By selecting the HDR button you can select one of the built-in HDR modes, or a sequence of shots (3, 5, or 7 frames) at either 2 or 3EV difference between shots. In this case I used the "5F 2.0EV" option. It also engages the high sequential shooting mode so that with one single shutter release the camera will take all five frames, or whatever number you have selected. The advantage to this method is that it is very quick and easy to set-up. The disadvantage is that it offers less control over your exposure values compared to using true exposure bracketing (Method 2 below).
Before moving on, a natural question might be, "why not use the HDR1 or HDR2 modes?" and "what's the difference?". In both cases 4 separate images are taken at varying exposures and then processed in camera to create a single image. The HDR2 mode creates an image with noticeably more contrast than in HDR1. Both yield acceptable results depending on the lighting conditions, but don't give me the degree of control that I'm looking for.

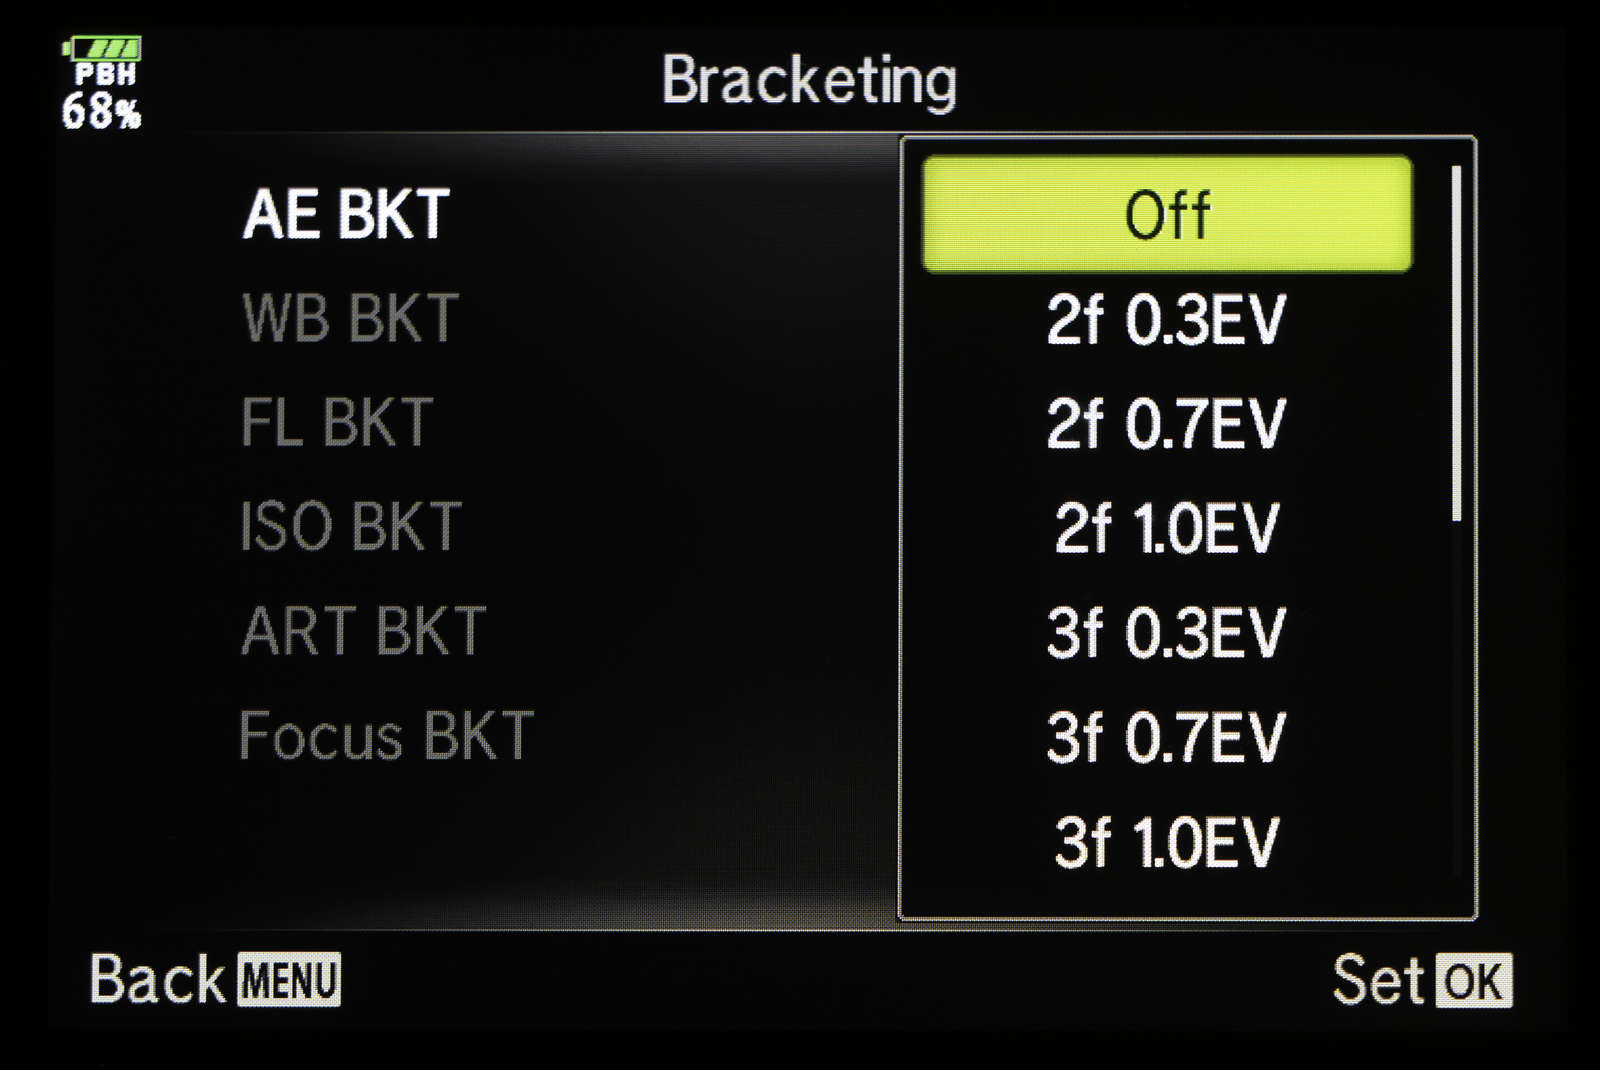
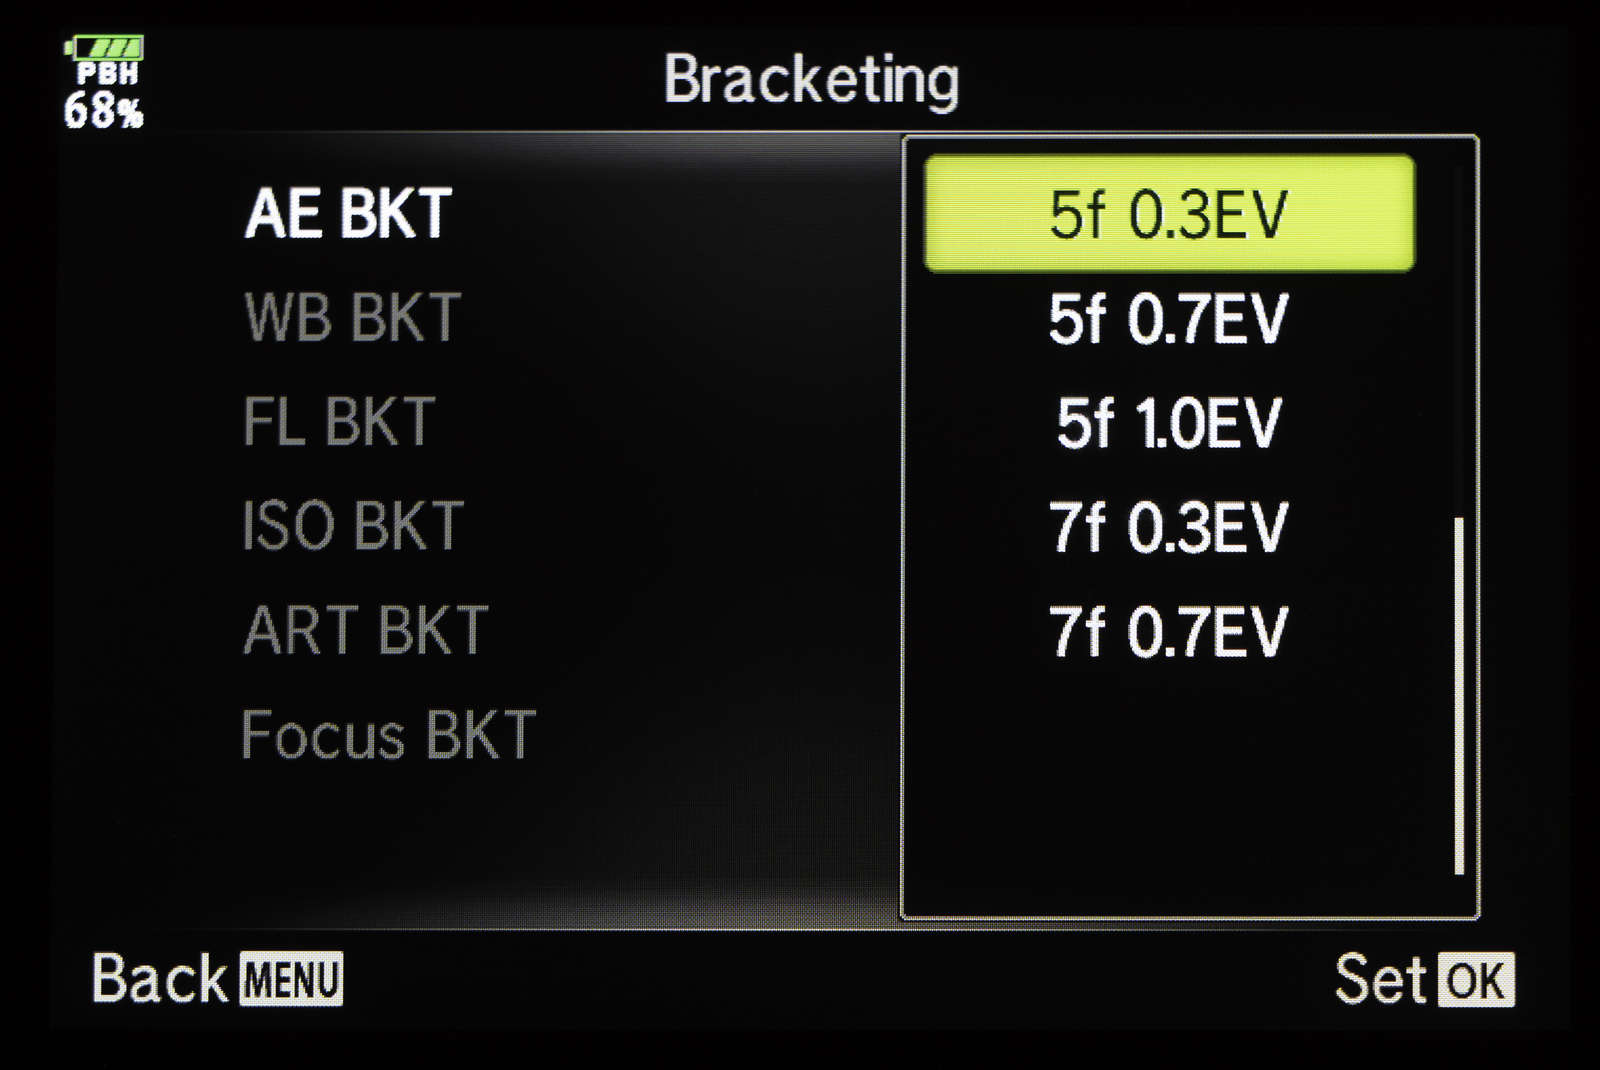
Method 2 – Using Exposure Bracketing
Exposure bracketing can be accessed through the camera’s menu system.
The AE Bracketing menu allows for far greater control over the number of frames being shot and the exposure value difference between each shot compared to the HDR options. The important thing to note is that the shutter release must be pressed for each frame in the series. For example, if you select 5f 0.3EV, you need to press the shutter release 5 times. Each time the exposure value is adjusted by 0.3 stops, with two of the shots having a lower exposure than your present setting, and two having a higher exposure. I prefer to press the shutter release only once and so I engage the high sequential shooting mode allowing me to rapidly cycle through the 5 shots.
There is another method of course. You could simply adjust the exposure compensation on your own, taking as many frames, and at whatever exposure value you'd like. Regardless of the method, a tripod is almost a necessity. I say "almost" because there have been times where I have used bracketing handheld with higher shutter speeds and have successfully held the camera steady.
Post-Processing
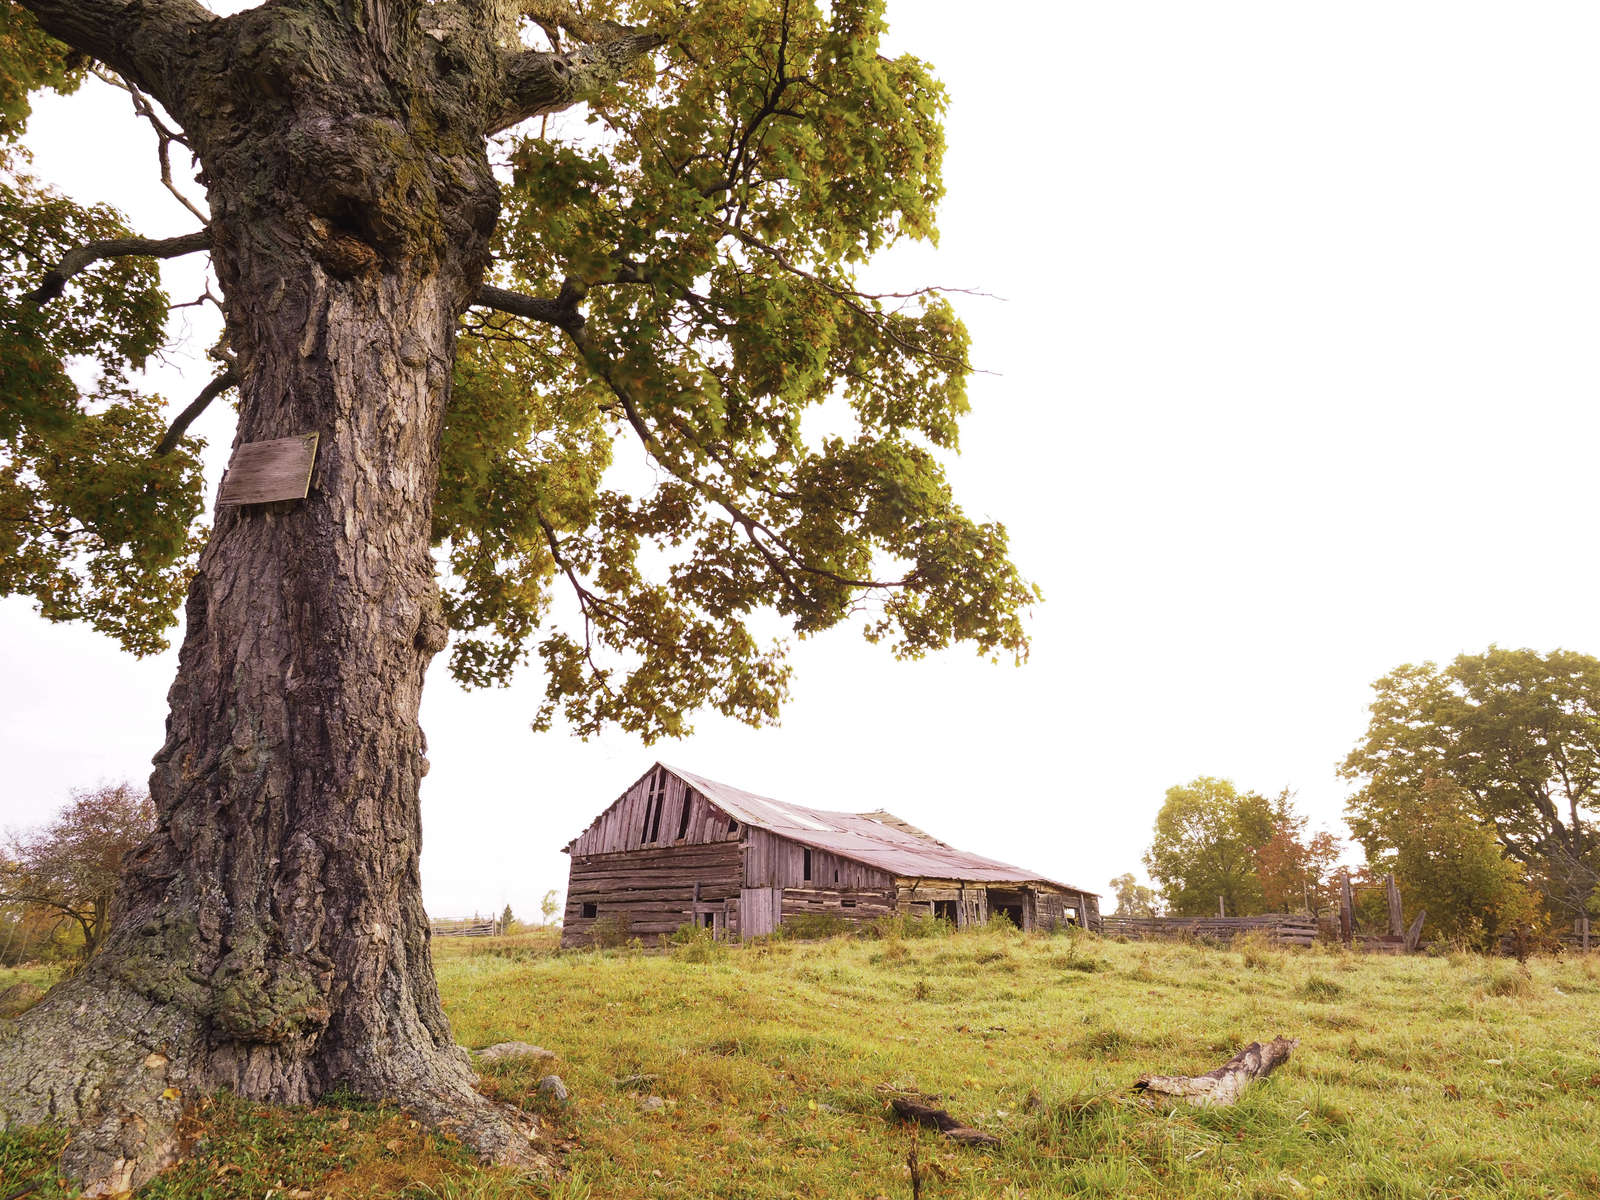
Bracketing shots using either method is pretty straight forward. Many photographers simply use exposure bracketing as a method to improve their chances of achieving a nicely exposed image. They choose the best image and delete the rest. I've done it myself. But that's not the point of this article. My goal is to make a photograph that more accurately represents what I see - either for real, or in my mind's eye. Enter Photoshop. And be warned, this assumes you have a good understanding of layers and layer masking.
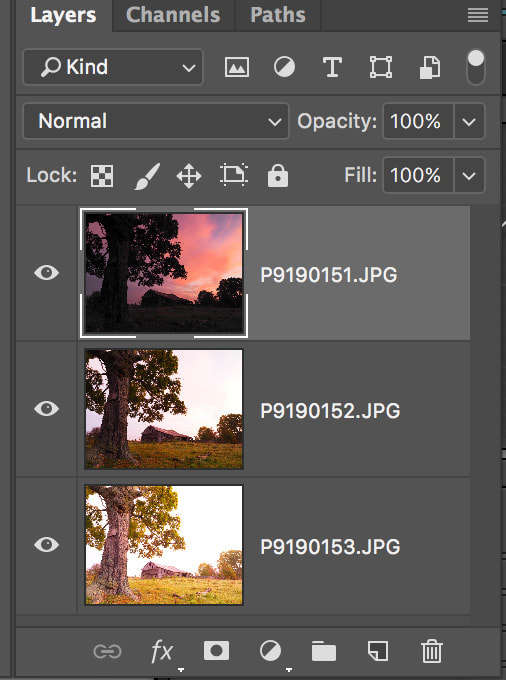
After importing the images into Lightroom, I will examine them carefully and select the photos that include the best setails in all tonal ranges. In the example above I had five photos to choose from but only selected three. I then selected "Open as Layers in Photoshop" from the Photo and Edit In menu. This imports the images into Photoshop and stacks them as three separate layers.
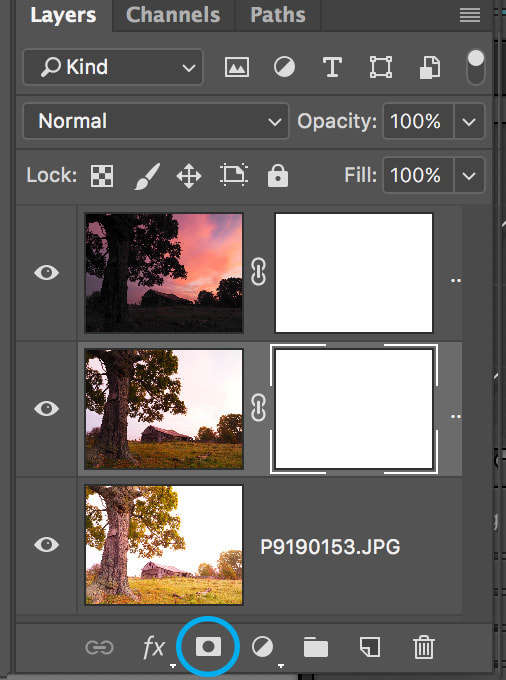
If you are not familiar with layer masking, here is the concept in a nutshell. Think of the white rectangle as a piece of masking tape the same size as your image preventing you from seeing the layer below. The "tape" is completely opaque when you first add the layer mask. You can remove sections of the mask by using the brush tool. The more you remove, the more of the underlying layer shows through.
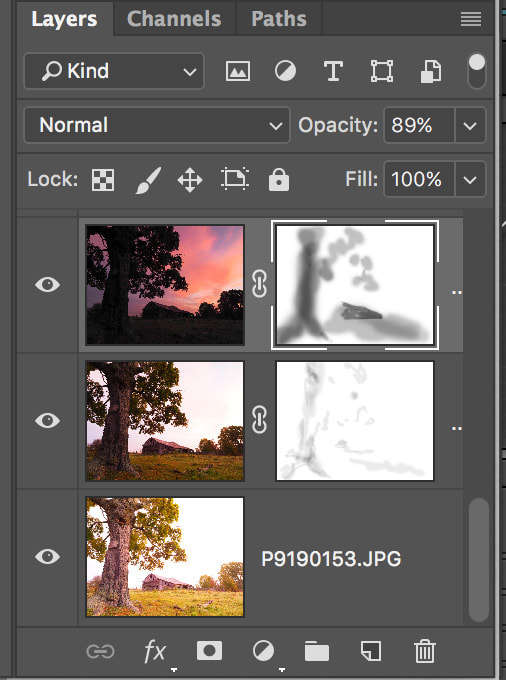
With the layer mask selected make sure that black is the active color. Then begin brushing away. You can also change the opacity of the brush giving you a great deal of control as to how much of each layer is being removed. If you switch back to white you can replace parts of the image that you removed. Now that's pretty cool masking tape!
You will also notice that I adjusted the opacity of the top layer down to 89%. There are certainly other methods of achieving similar results. I like this technique because of the control it gives me and the ability to easily reverse any step or brush stroke.
Other Examples
Exposure bracketing and layer masking is not a technique that I use often, but it has allowed me to create images that would be difficult or impossible with just a single shot. Here are a few other examples.
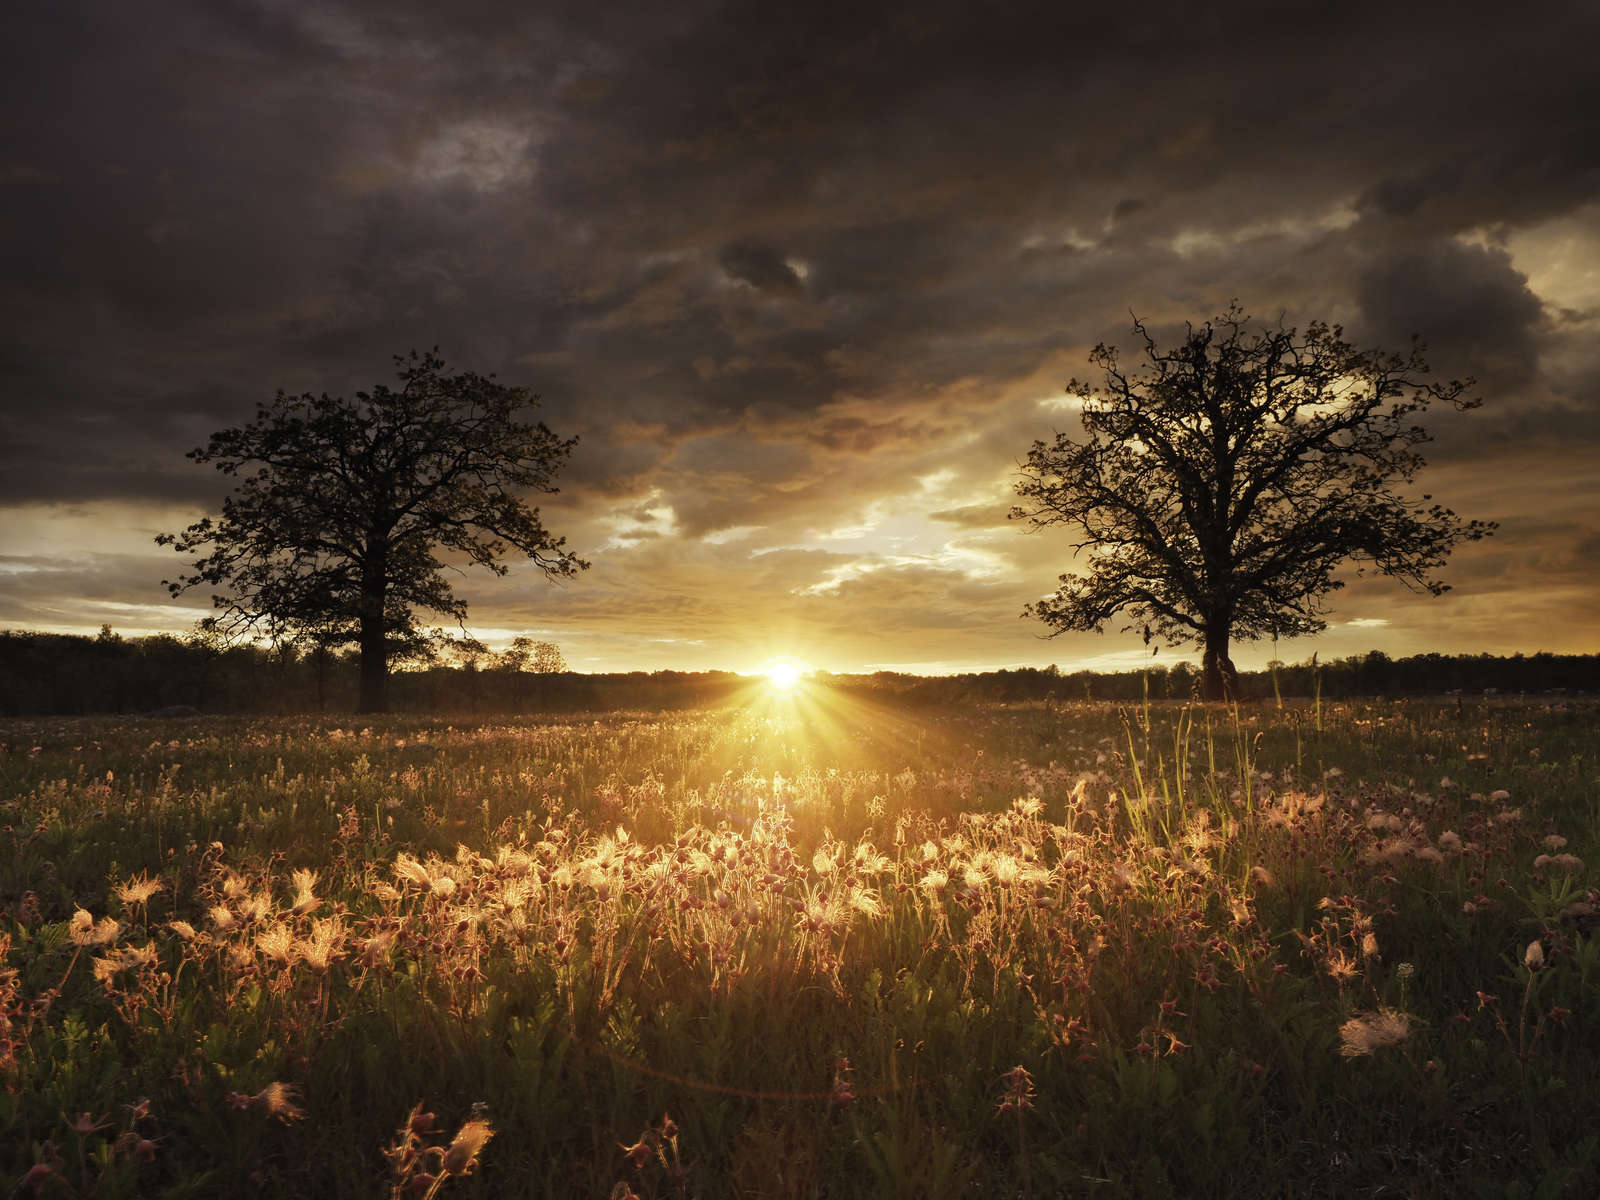
OM-D E-M1 Mark II | M.Zuiko Digital 12-40mm F2.8 PRO

Final Thoughts
As stated earlier, exposure bracketing is not something I use for most of my landscape images. In more challenging scenes I will first turn to using a filter to control the lighting or use Lightroom to improve the dynamic range of a photograph. Bracketing however, can be a useful tool to keep in your photographic toolbox.
Republished with permission. See and comment on the original article at Peter Baumgarten's Creative Island Photography blog.
ABOUT PETER BAUMGARTEN
Web:http://www.creativeislandphoto.com
Blog:http://www.creativeislandphoto.com/blog
Twitter:@creativeisland4
Peter has been a dedicated Olympus shooter for over 30 years, and he has found a way to combine his passion for photography with his love of teaching to develop photography and graphic design courses at the high school level.
Check out other tips from Peter:
Sunset Photography Tips
Astrophotography Tips
Time Lapse Photography