One of the things I am often approached about when teaching landscape photography workshops is how to compose a shot. Many people new to photography suffer from what I call the “AEL” syndrome. AEL being an acronym for “Always Eye Level”. What this simply means is that for many beginners the first instinct when shooting a scene is to raise the camera to their eye and shoot the scene. This isn’t wrong necessarily, and can work well in many situations, but it can often lead to images that are more snapshot images than composed photographs.
In this short piece I hope to introduce you to one simple method for getting away from that “AEL” syndrome, and creating more interesting compositions for your photos.
Today I want to introduce you to what I like to call simply, “The Low Shot”. There is very little that is complicated about this technique, and the name explains it quite well. The technique as you will see is one of the easiest to perform and get great results.
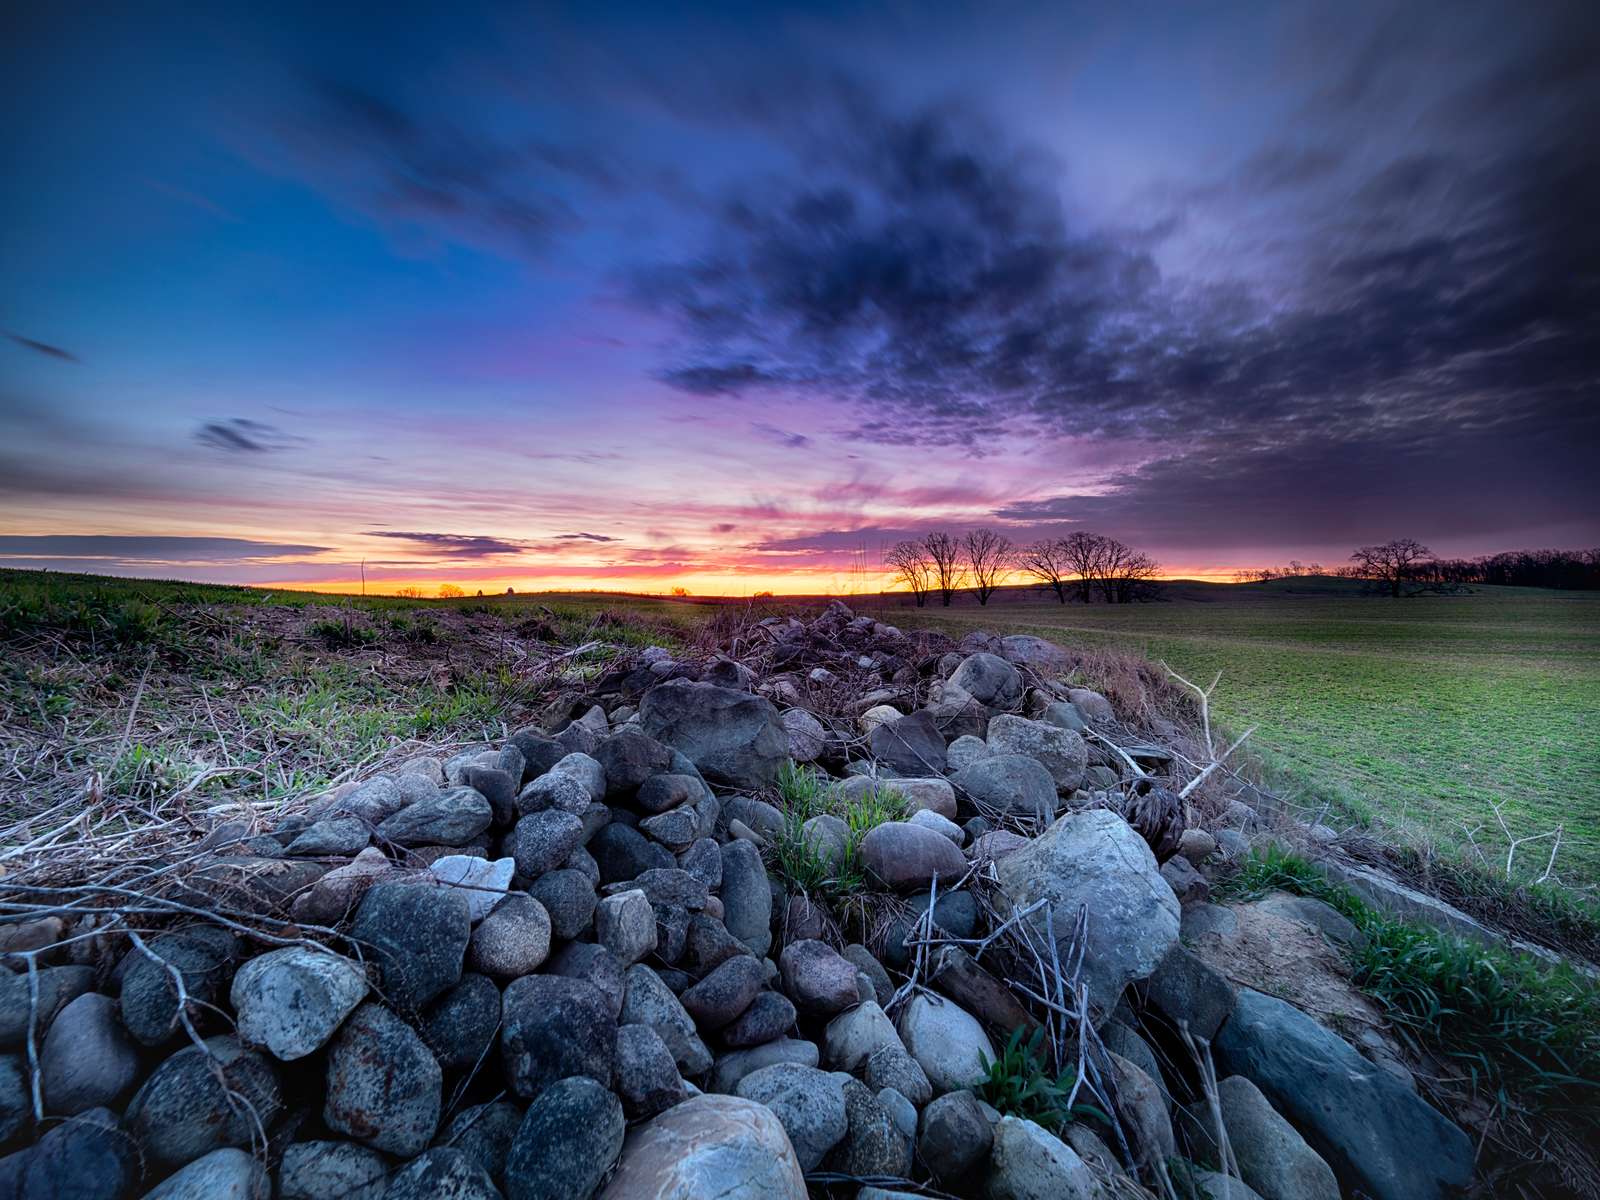
Scenes where a low shot work well are ones in which you have a very deep background. Beach and water scenes, long roads and wide open landscape, but even a city street can work!
To set up for a low shot we can either put our cameras on a tripod and have the legs spread far apart to lower the camera to the ground, rest your camera on the ground or an object low to the ground like your camera bag, or if you are really wanting to get the shot, you can lie down on the ground. Now controlling the camera when it is down low like that can be tricky. You can bend over or kneel down to press the shutter release, use an Olympus cable release, or if you have one of the models of Olympus camera which has built in WiFi you can use the OI share app to control the camera from a comfortable position.
Now that we have our camera down low, and either being controlled by hand, with a shutter release, or with the OI Share app we can focus on composing the shot from this unique position.
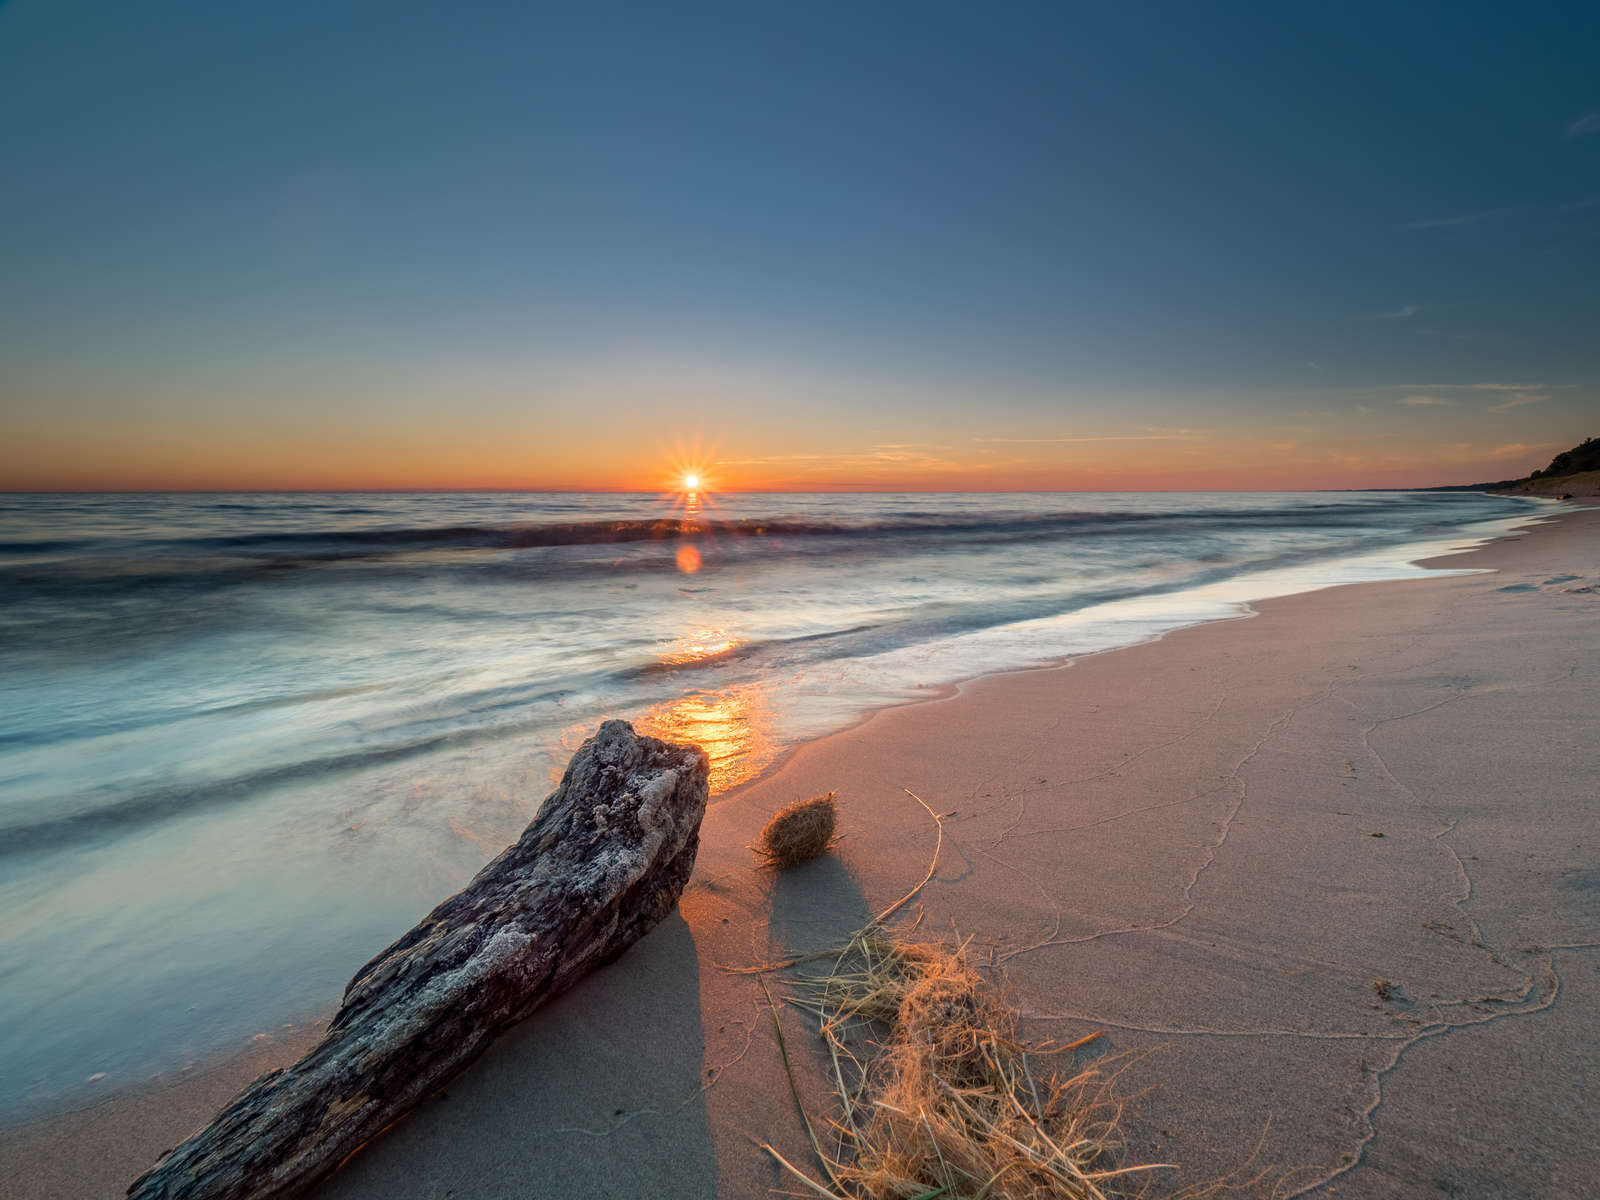
When shooting from a low perspective I try to take advantage of leading lines that start close to the camera and move the eye through the image as show in the driftwood image below, or by having some type of interesting object in the foreground to act as an anchor point, or starting place for the eye when viewing the image.
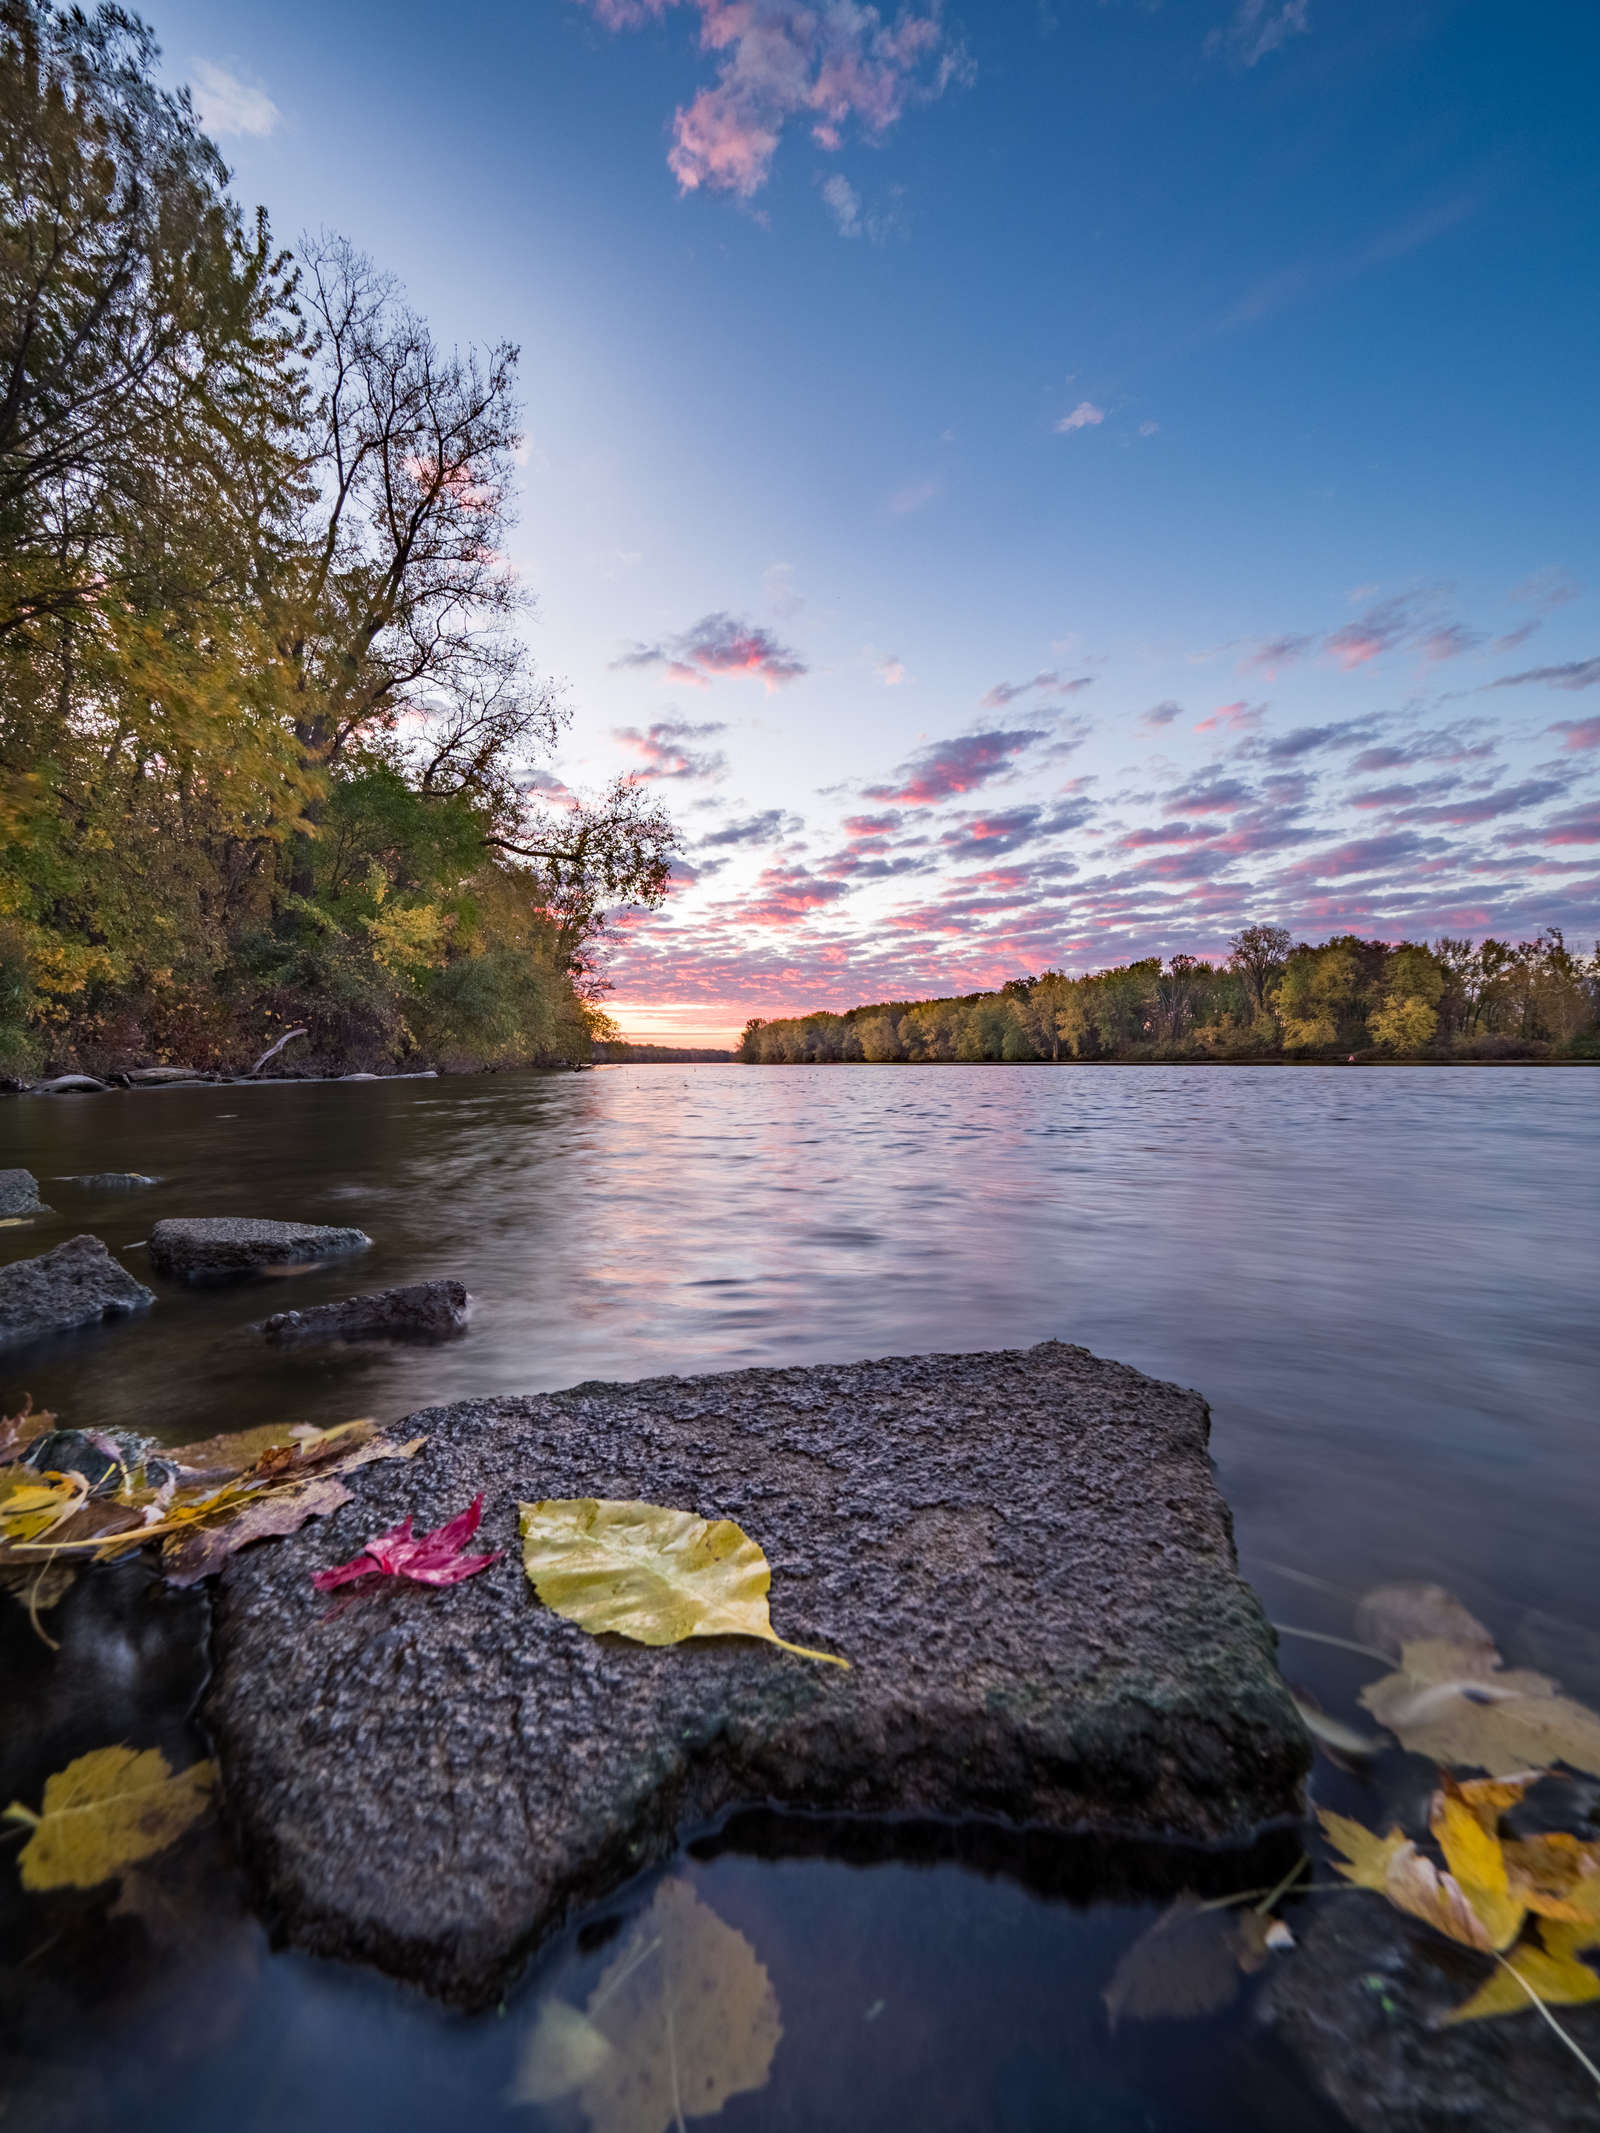
An example of Foreground interest that cannot be captured from eye level is this scene of leaves on stone in a river.
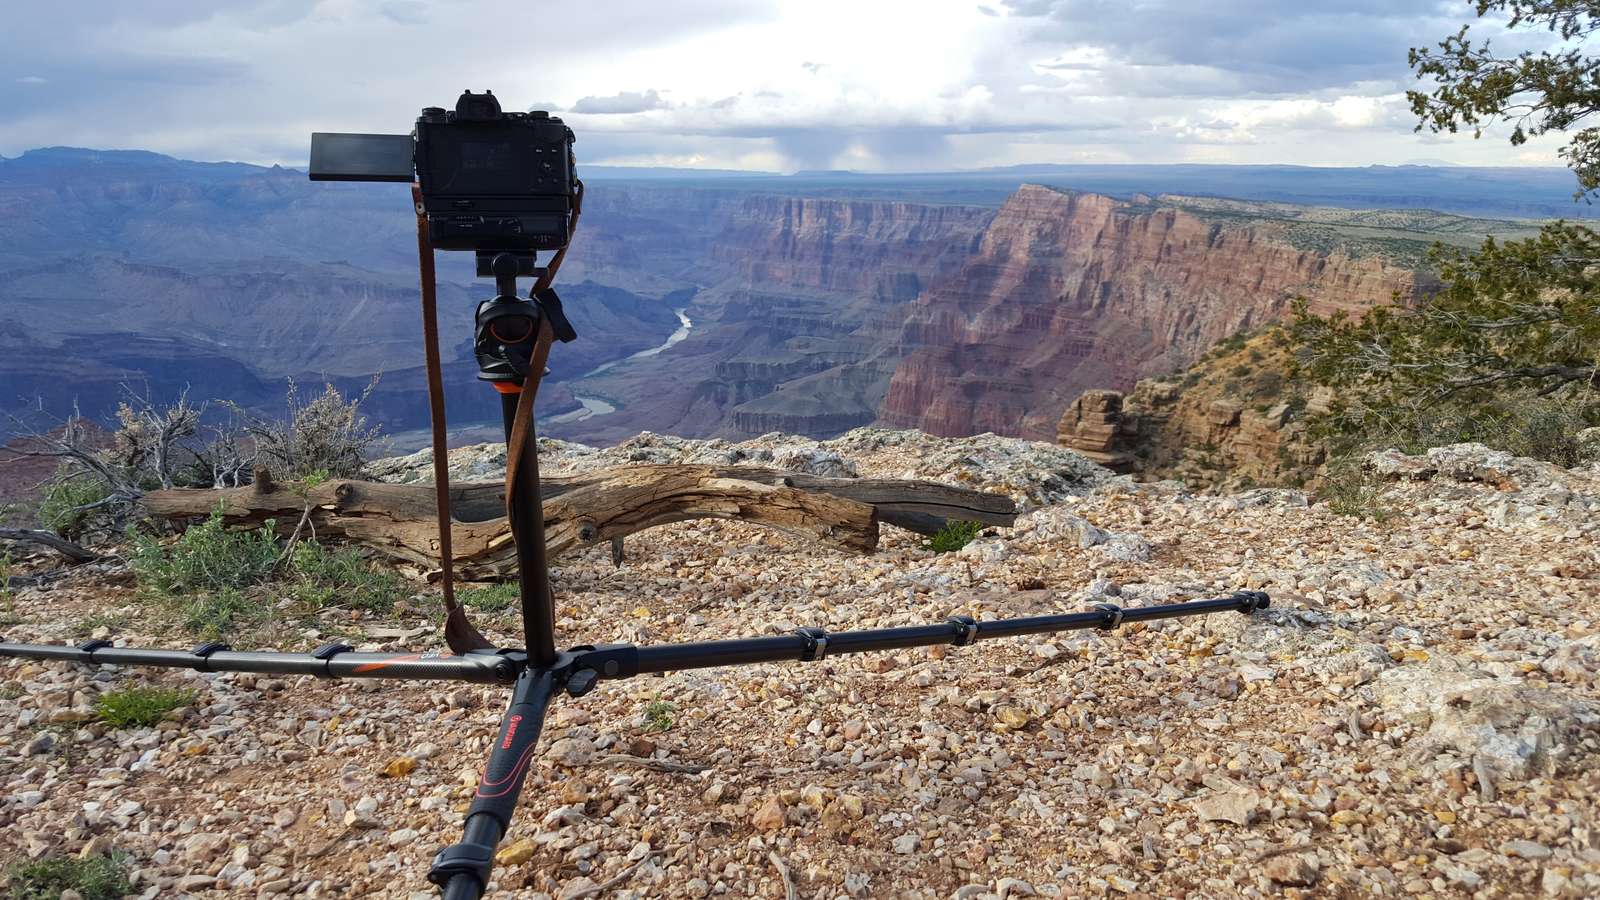
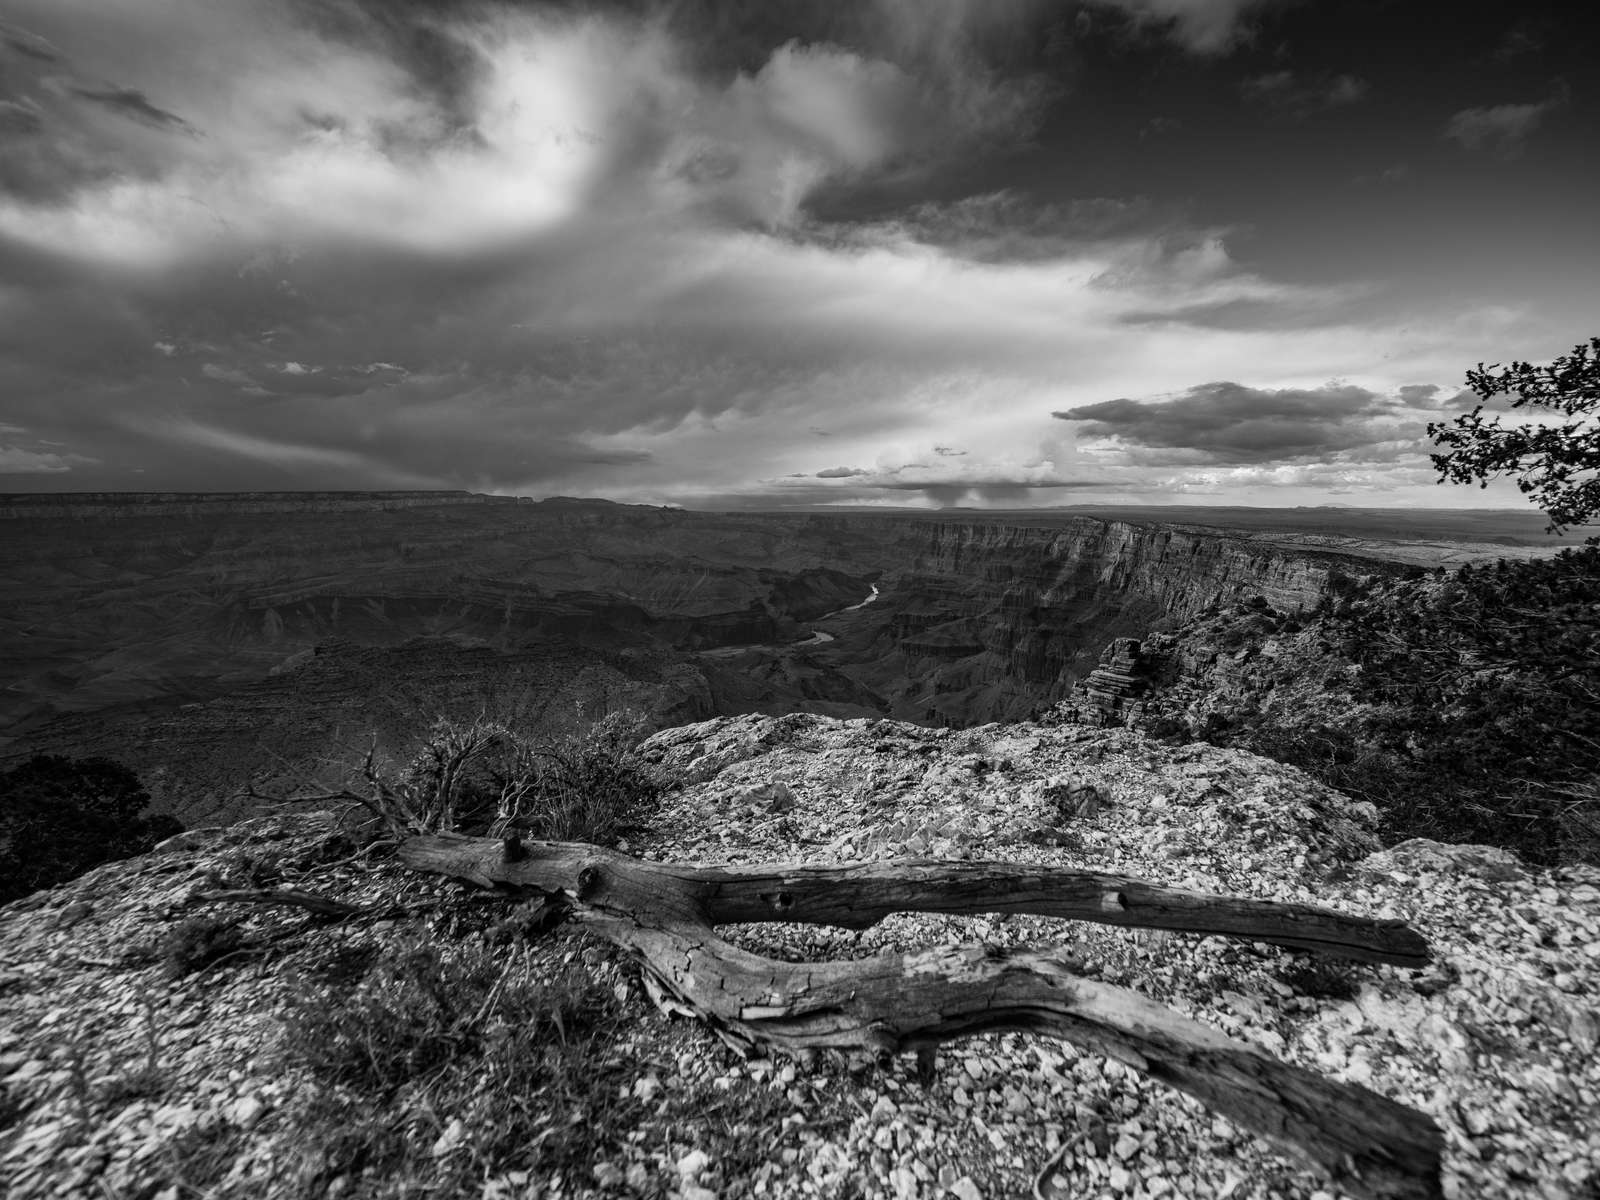
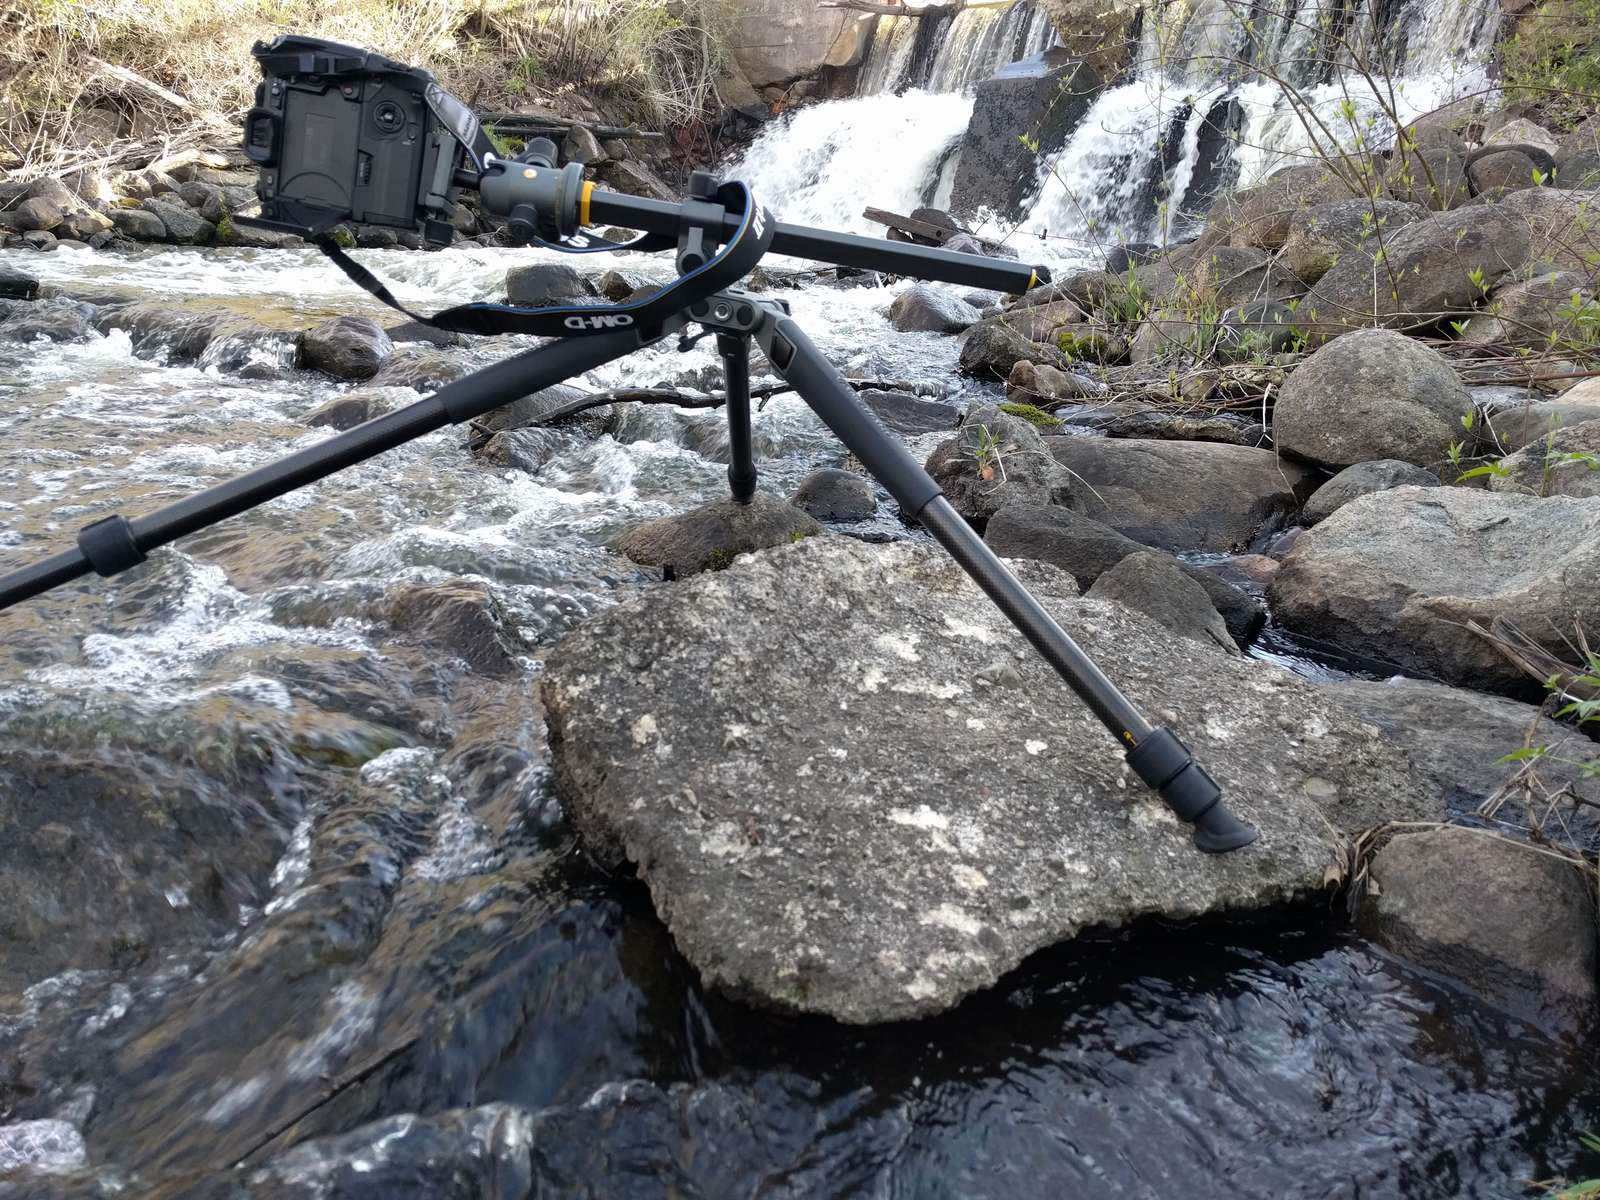
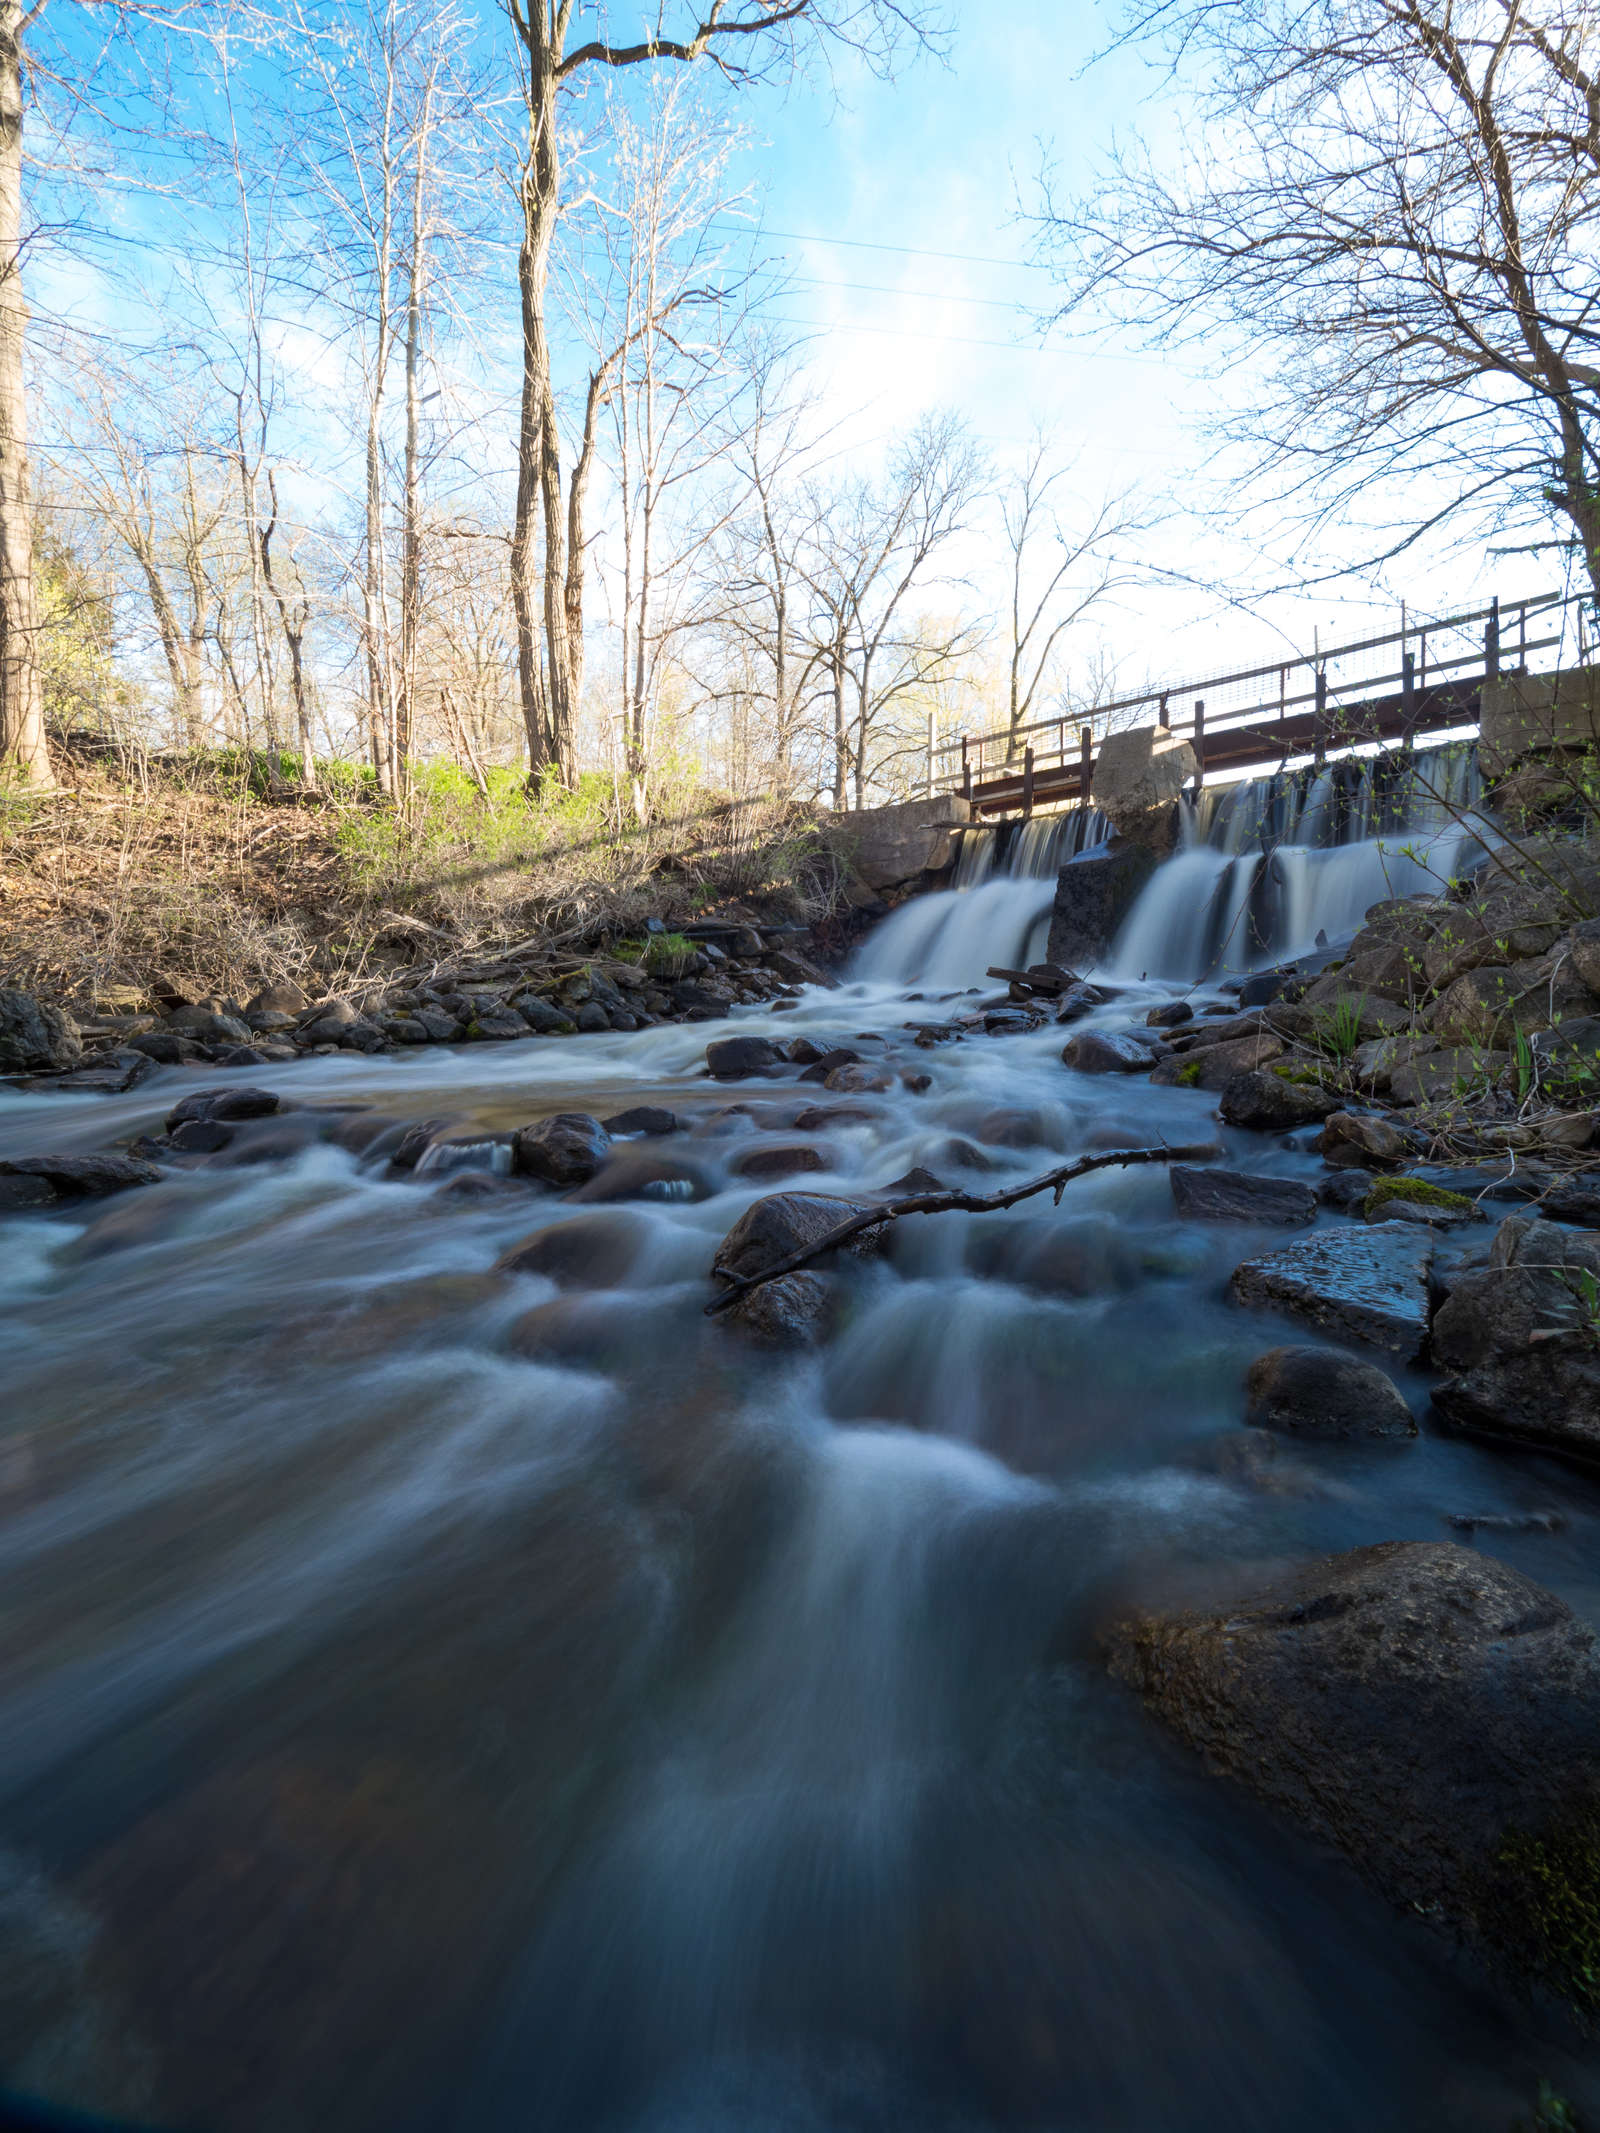
Another key component of these types of photos is the use of a wide angle lens. While you may be able to compose low angle shots that work well with a longer lens, the use of a wide angle lens makes these types of compositions not only easier for the beginner to set up, but can also lend themselves to a more dramatic feel. And it is this dramatic look that separates the “AEL syndrome” photos from the better composed and photographed scenes. And to show a great example of that, just look at the following “behind the scenes” image, and the resulting finished photo.
I hope this walkthrough has you seeing your photos from a new perspective, and reconsidering where you have your camera positioned when you take your next photo!

ABOUT JAMIE MACDONALD
Web: jmacdonaldphoto.com
Twitter: @MacDonald_Photo
Instagram: @MacDonald_Photo
Jamie MacDonald is a nature and stock photographer and social influencer living in Michigan’s Lower Peninsula. A husband and the father of two boys who are widely featured in his work, he describes his love of photography as one that is “rooted in the desire to move people to see the world around them in new ways.