Studio envy. You know the feeling–lust for one of those amazing spaces with soaring ceilings packed with the latest in powerful strobes, enormous soft boxes and giant reflectors. Well take heart. It’s possible to make amazing images with a small, portable lighting kit that will comfortably fit in a small shoulder bag.
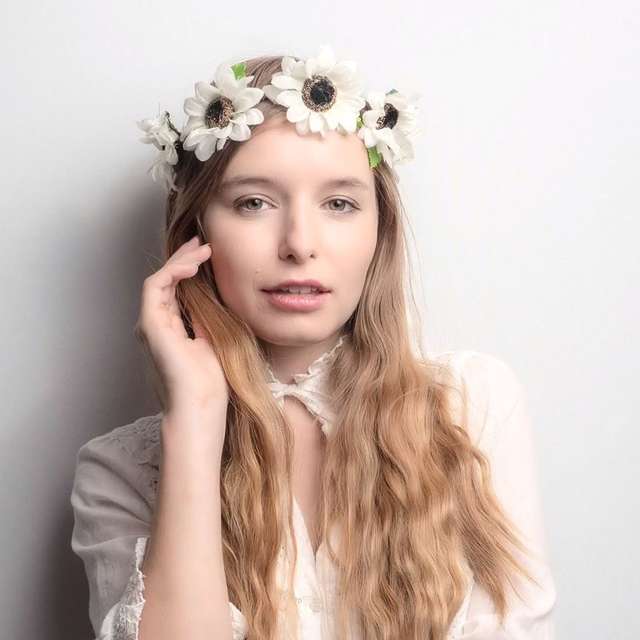
I recently went one step further and executed a series of still life flower macro images using only my small Olympus FL-900R handheld flash. My “studio” is modest. It is a tiny 7X10-foot room illuminated by a small north-facing window. While I can’t use the space for full-length portraits or group shots, my little space works well for head-and-shoulder shots and its cozy dimensions are perfect for table-top product and macro setups.
I’ve always embraced the K.I.S.S. theory when shooting in the studio. Generally, I like images that look natural and are not overly styled. “Keeping it simple” also translates to the gear I use. How much simpler can you get by using one strobe in the studio?
Here are nine tips to make the most of one light. So carve out a small corner of your home for your new “studio” and start small. Think carefully how to modify the light from your handheld strobe and you’ll be amazed at the creative possibilities.
GATHER YOUR MATERIALS
You don’t need a lot of expensive gear to work creatively in your little studio space. Your most important tools are your eyes. Concentrate on seeing the finished image in your mind’s eye, then figure out the lighting to best translate your vision. This said, you might want to assemble a small collection of craft-like materials to help you construct your sets. At a minimum, you’ll need a utility knife and extra blades, scissors, gaffer or duct tape, washi or blue painter’s tape, black and white panels of foam core board in various sizes, and a few spring clamps to hold your reflectors in place. Hint: purchase a Swiss Army Knife with scissors. It’s amazingly useful in the studio or in your camera bag. Just remember to leave it home or put it in your checked bag if you fly!
MODIFY YOUR LIGHT
The fundamental decision you’ll make to determine the overall look of your finished image is to decide whether you want to use an open, evenly lit lighting scheme or use a more contrast-y, directional lighting setup. You can easily soften the light of the FL-900R by using the included white flash diffuser or by bouncing the strobe into a light modifier like a small umbrella or soft box. Alternately, using direct flash will result in a harsher look but can also add a sense of drama to your image.
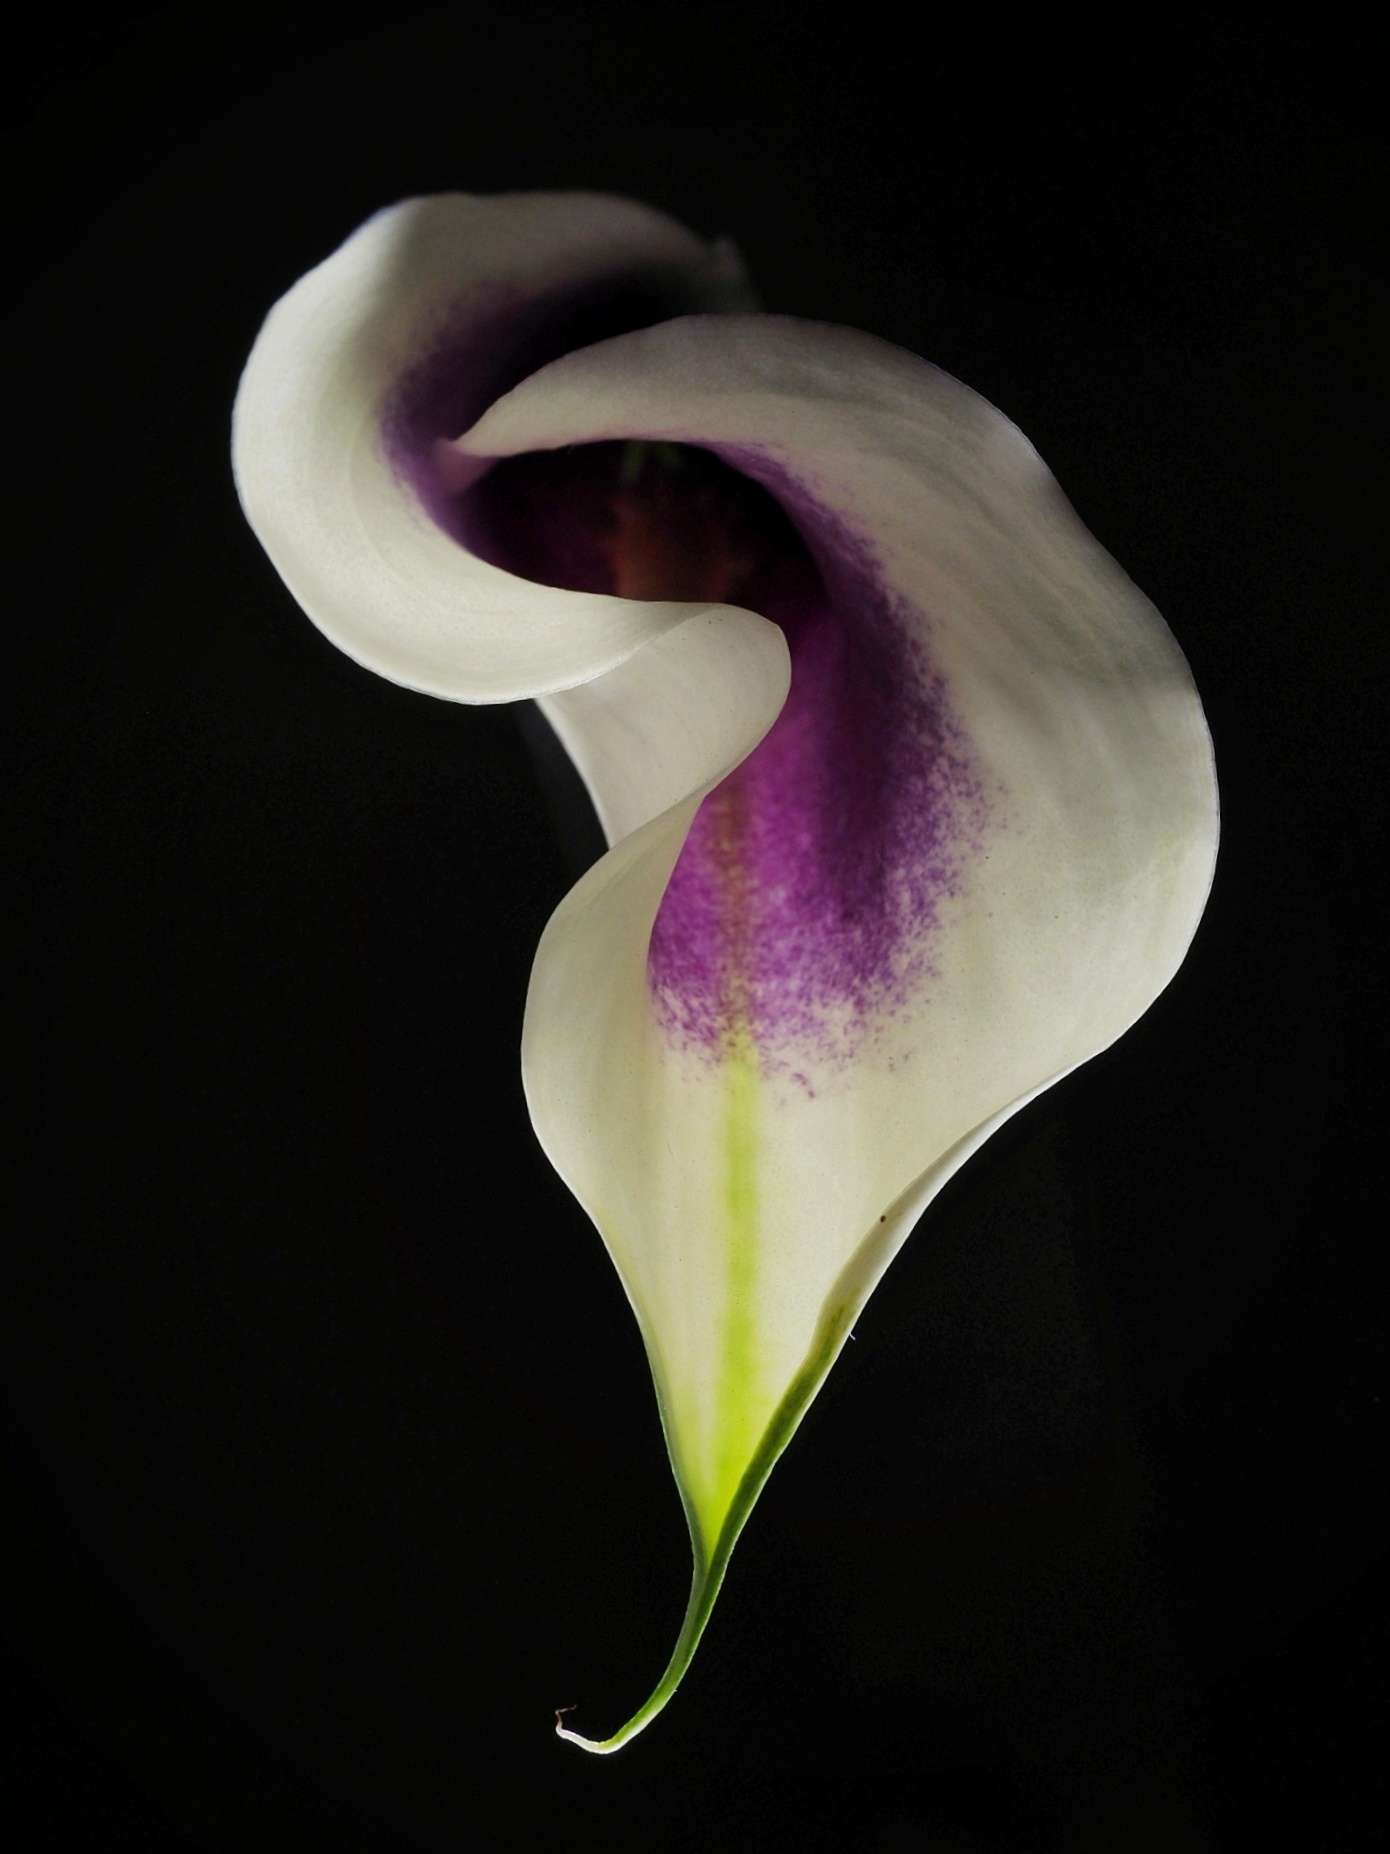
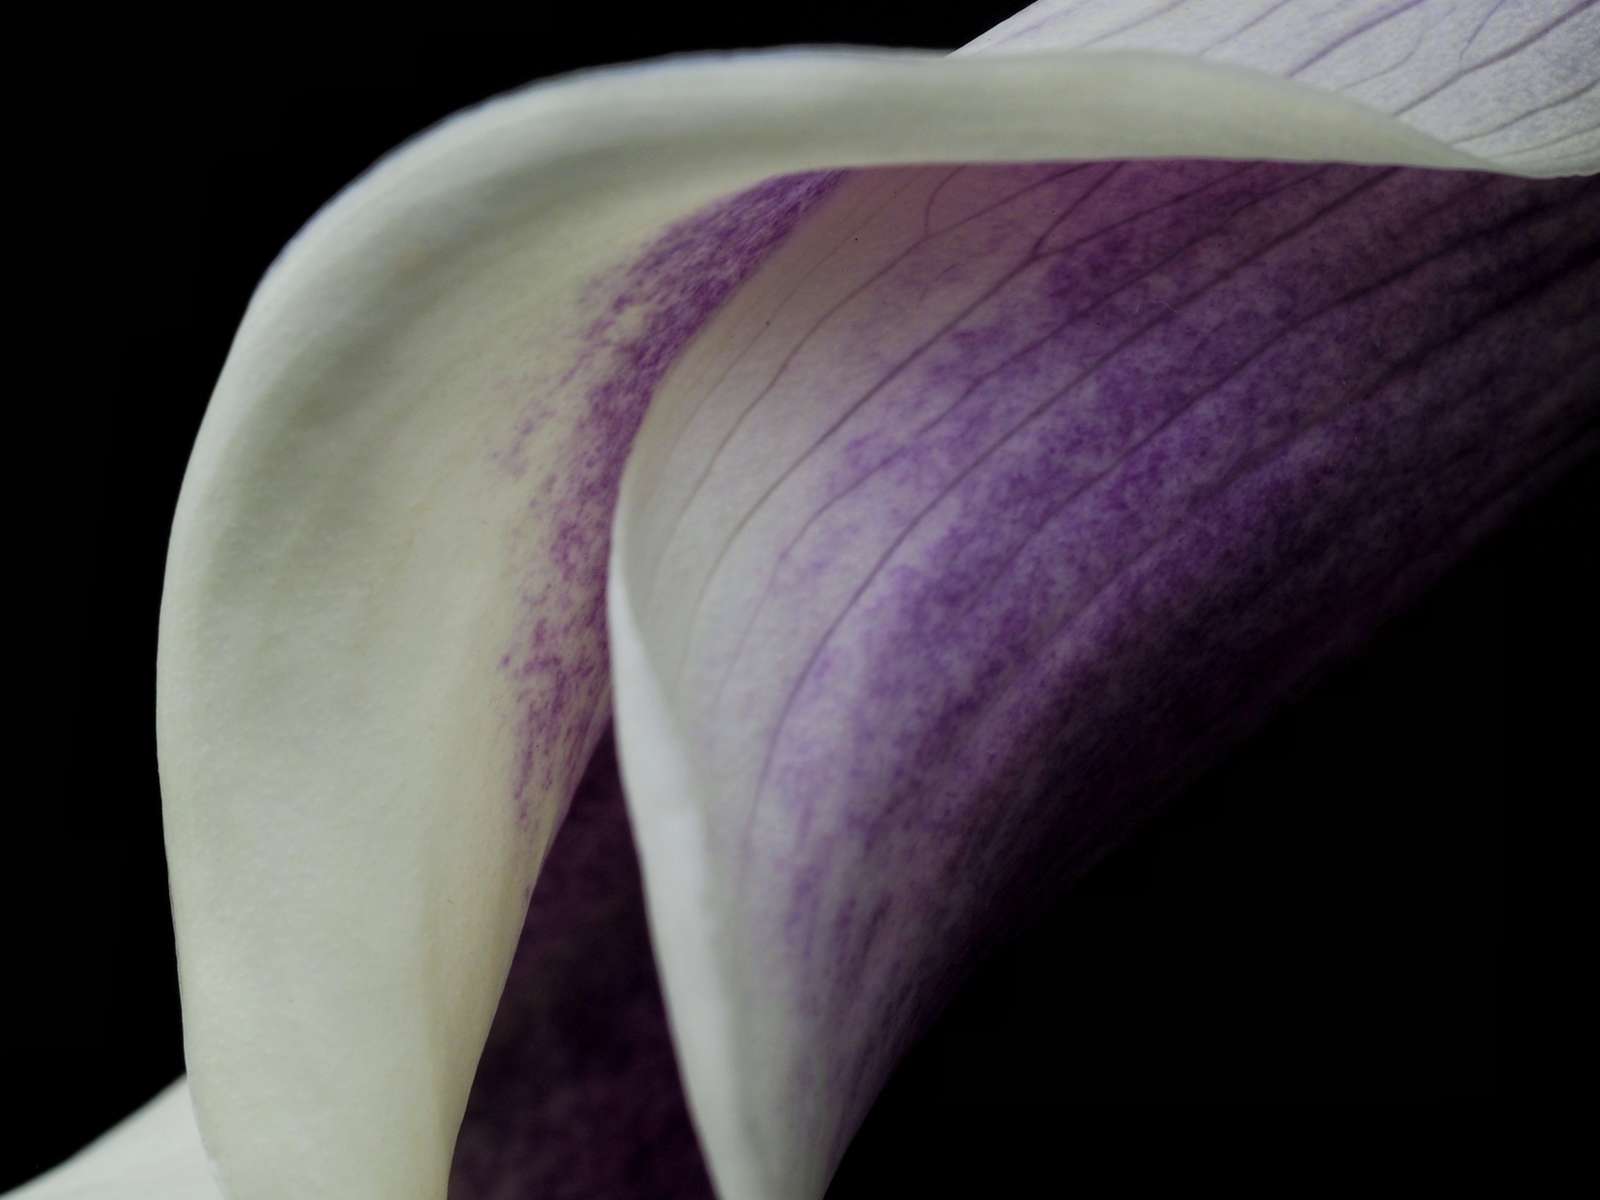
For this image, I decided to light the calla lily with direct, unmodified light. Since the flash was positioned only a few inches from the flower, I decided to mask off all but a tiny sliver of the flash head using a few spans of gaffer tape. In essence, I turned the flash head into a micro strip light by leaving a 1/8-inch gap for the light to escape the flash unit. I simply set the FL-900R on it’s flash stand and lit the arrangement from below. Voila! Instant drama.
USE REFLECTORS
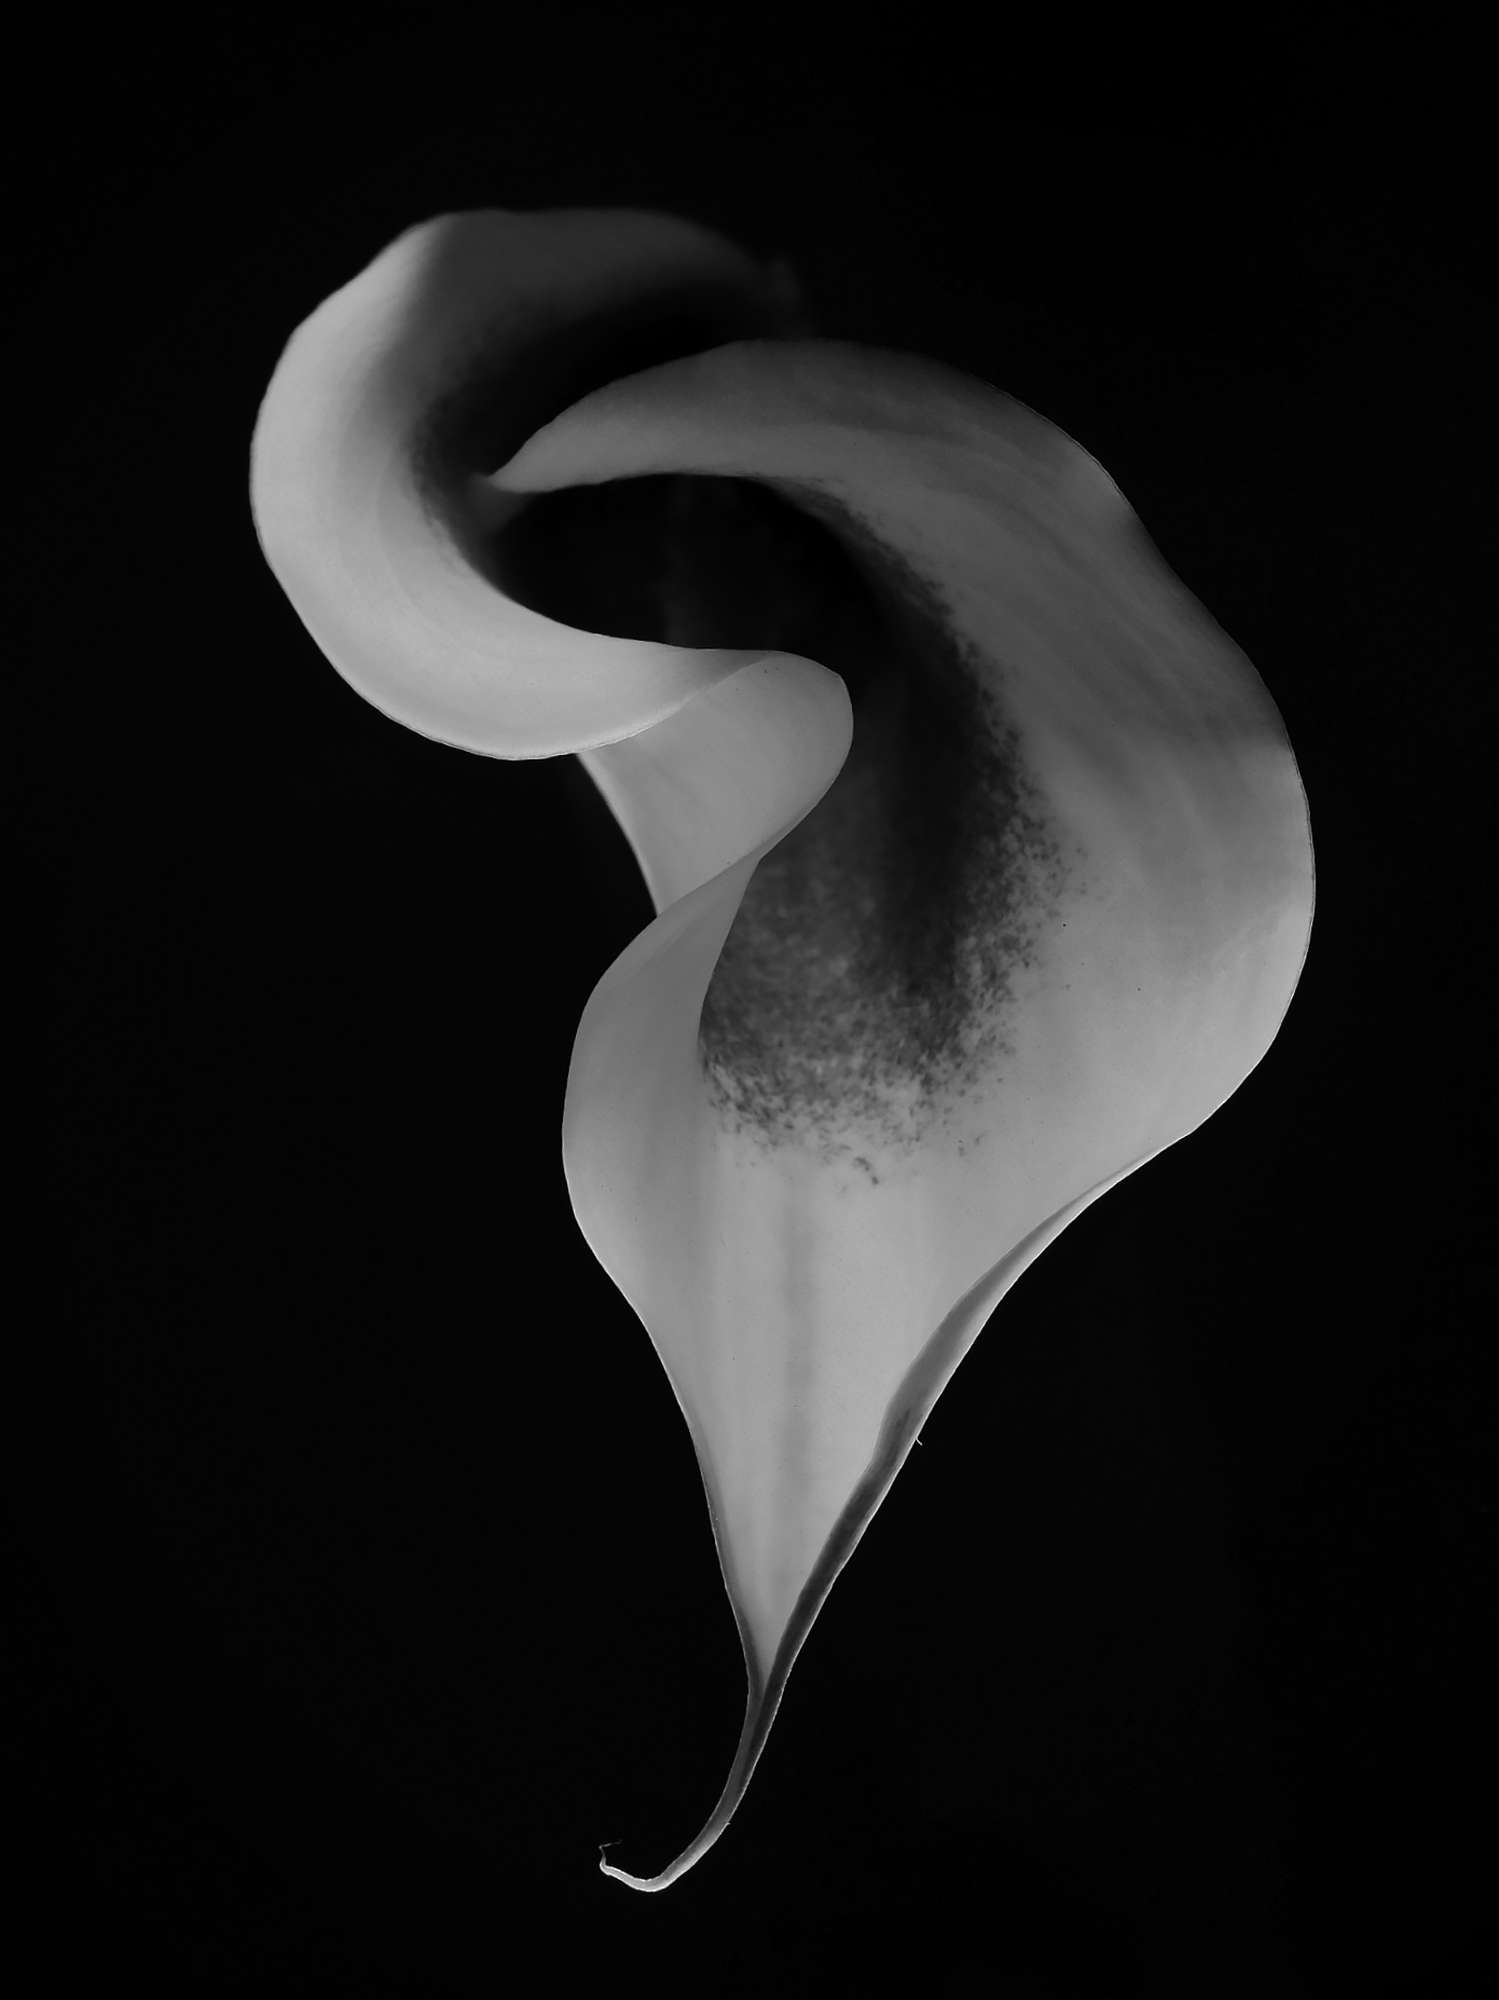
Taming the light leaving your flash unit is one thing, but remember, I’m only using one flash head. In order to keep some detail in the shadows, I used a small 8X10-inch foam core panel place a few inches above the flowers to soften the contrast and bounce some of the light leaving the FL-900R back onto the scene. This added the rounded drama and depth I was after. In essence, I’m using the reflector to bounce light around the setup by positioning it opposite the flash unit. Simple, but very effective. You can scale your reflectors size depending on your subject dimensions. Foam core is wonderful stuff and comes in lots of colors. Buy an assortment of sizes from your local craft or art-supply store. I stick to white for reflectors and black for backgrounds or scrims (scrims are used to BLOCK light and are usually positions to prevent flare or light spillage onto your background.)
GET A GRIP
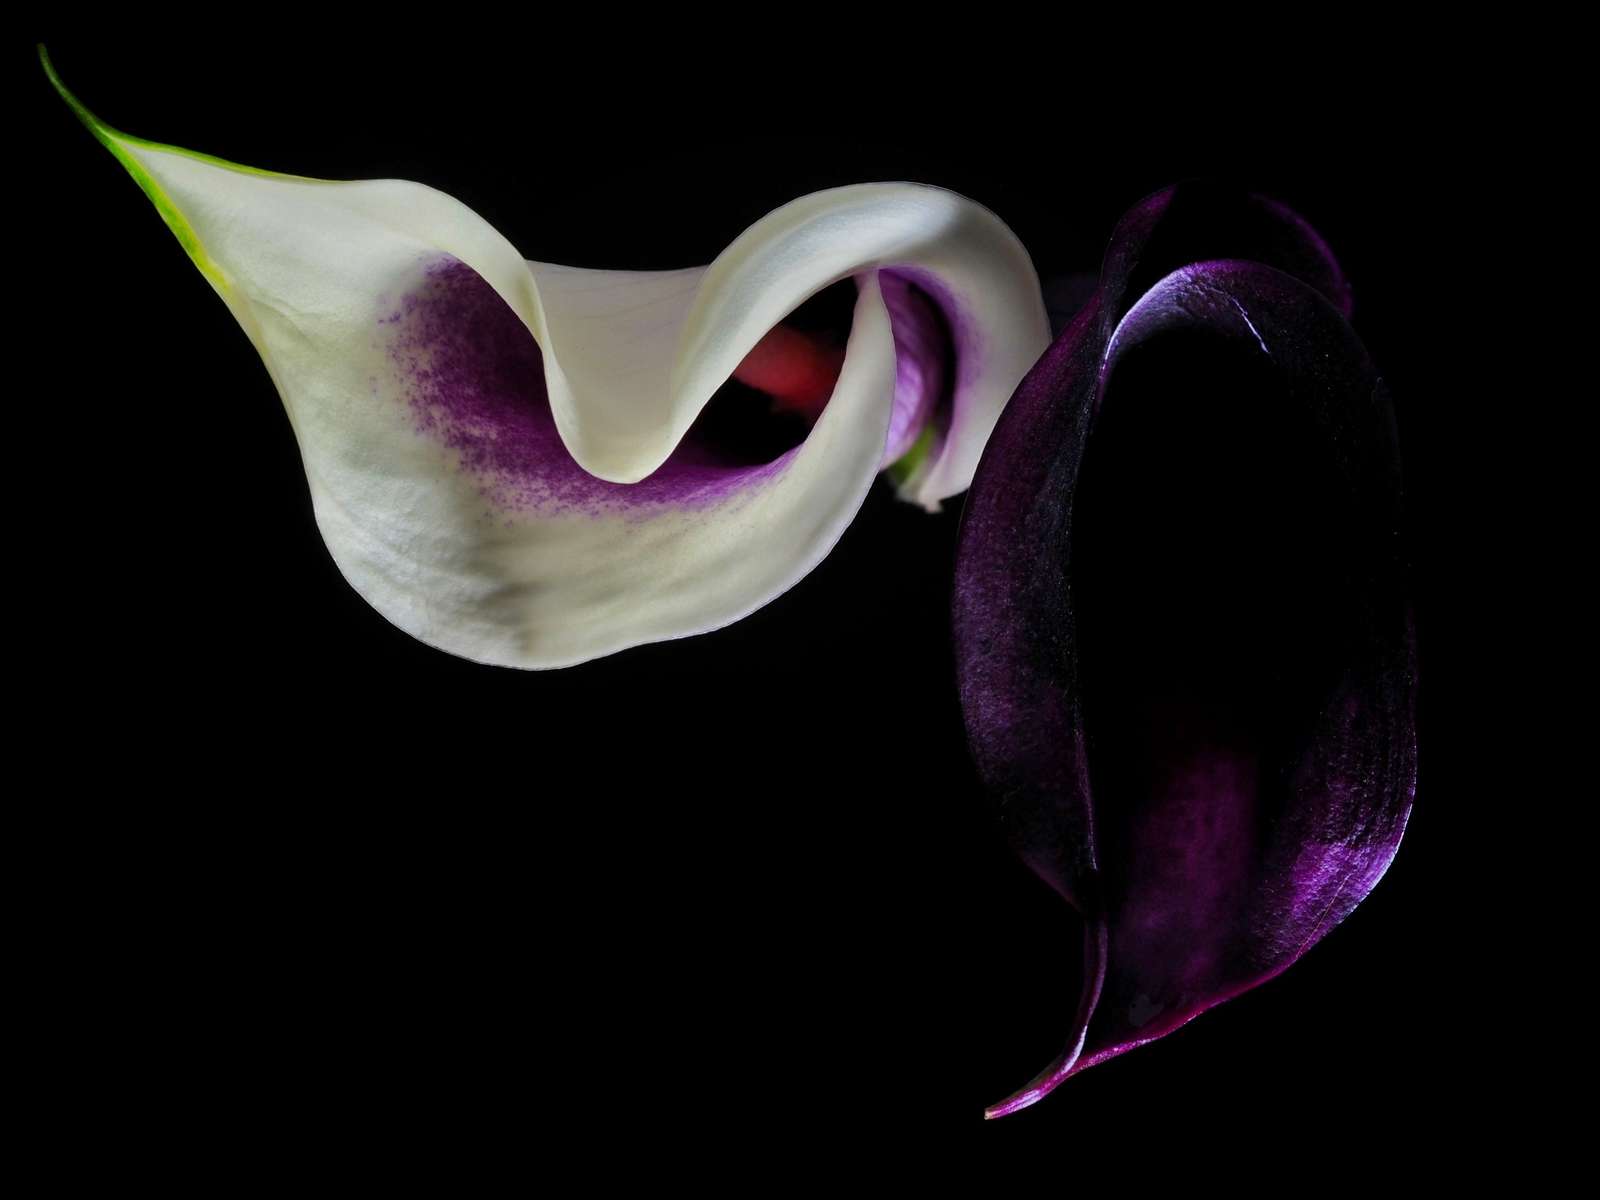
If you plan on doing a lot of work in the studio, you’ll need a few key accessories to support your lights and background. Plan on acquiring a light stand for each flash and a setup to hold your backgrounds in place. For tabletop work, support my background using one or two of the ubiquitous Manfortto Super Clamps with a small spring-loaded clamp attached. The Super Clamp can be positioned on one of my background supports or a spare light stand. The clamp will support a 20X24-inch piece of foam core with ease to serve as a background. For this image, I used this setup positioned about 10 inches behind the flowers. For portraits, you might think about a specialized set of stands and a crossbar to hold a roll of background paper. Supports are critical to help you position your lights, backgrounds and reflectors with precision.
CUT THE CORDS
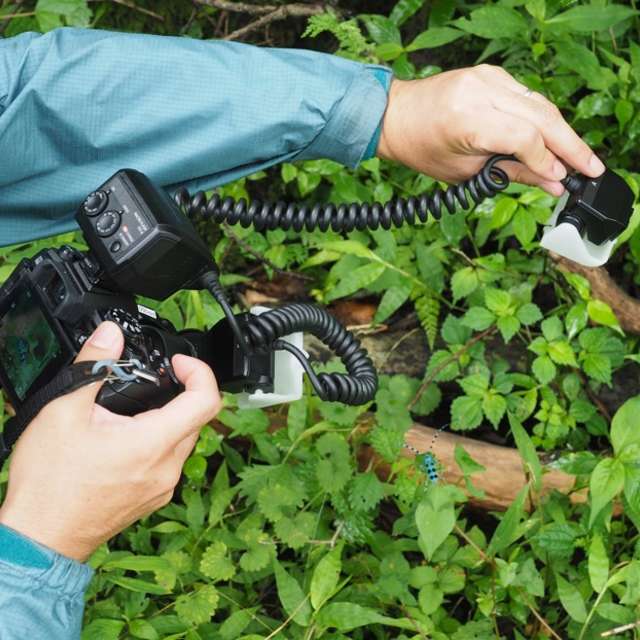
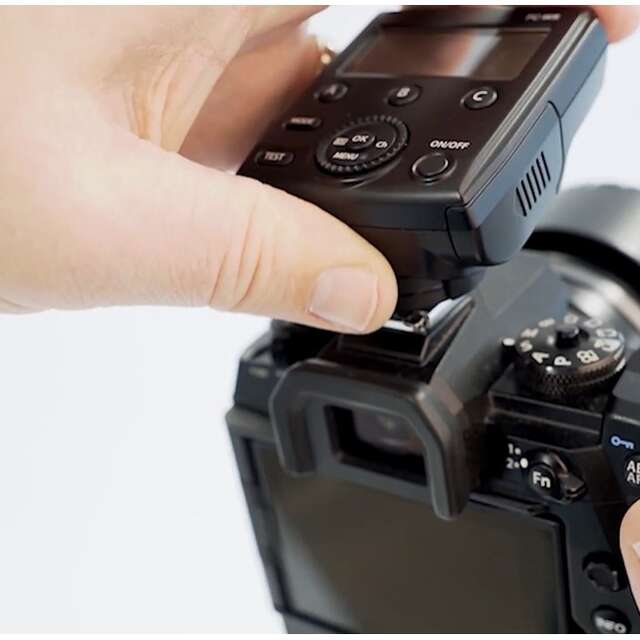
For effective lighting, you need the flexibility of positioning your main light off camera. Invest in a simple radio trigger to sync your camera and flash. I like the excellent Cactus brand of radio triggers. They’re inexpensive and each unit can be set for transmit or receive. You’ll need to purchase a minimum of two units to fire one flash head–one slides onto your camera’s hot shoe; the other slides onto the bottom of your flash. That it. Now you can move around your set unencumbered.
Position your flash 90 degrees or more from the lens axis. If you want to impart a sense of drama to your images, you need to get your main light far well away from your lens axis. Think back light. Use your flash to sculpt the light hitting your subject. In this case, I let the flower from below at a little more than a 90-degree angle from the lens axis. This increases the shadow and highlight effect and add three-dimensional impact to the image.
SHOOT FROM A LOWER ANGLE
Image composition is very subjective, but remember you’ll achieve more impact by shooting from a lower angle. Don’t be afraid to experiment but try to settle on the camera position before you start thinking about your final lighting scheme. Remember, the camera sees the composition differently from your eye. Don’t make the mistake of evaluating the lighting setup without taking camera position into consideration.
USE A LONGER FOCAL LENGTH LENS
Just as camera position plays a critical role in the overall look of your image, the lens you choose has a significant impact on your finished photograph. A wide angle lens is rarely appropriate for studio work as that tend to distort object closer to the camera. For realistic perspectives, use a slightly longer-than-normal focal length. Not only will the subject thank you, but you’ll be able to work a comfortable camera-to-subject distances. For the cala lily image, I used a 60mm macro lens which is slightly on the long side for a Micro Four Thirds camera. Even longer lenses are useful if you want to compress perspective.
BAG IT UP
Feel like going on location? Find a small tripod case that will accommodate one light stand, a couple of radio triggers and clamps. Drop in a small roll of gaffer tape and you’re ready to roll. All you need on location is a table for small setups or a smooth wall for a background. For macro shots on location, I cut a few pieces of foam core down to the size of my laptop and drop the three panels into the computer slot of my camera bag. Two are white and one is black. Generally, I’ll use these as reflectors but in pinch, one panel can serve as a background for small setups.
Take these simple tips into consideration the next time you decide to work indoors on a rainy day. You’ll be amazed at the images you can make with your FL-900R and a little creativity.

ABOUT LARRY C. PRICE
Blog: larrycprice.com/category/blog
Over his storied career, Larry has worked for some of North America’s largest newspapers, including The Philadelphia Inquirer, The Baltimore Sun, Fort Worth Star-Telegram and The Denver Post. He most recently served as a Director of Photography at the Cox Media Group in Ohio, publishers of the Dayton Daily News and owners of CBS affiliates WHIO TV and WHIO Radio.