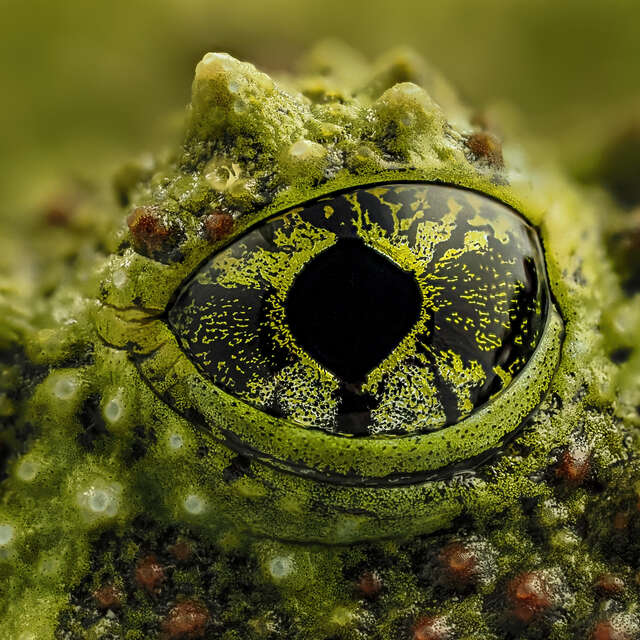
The M.Zuiko 90mm F/3.5 Macro IS PRO in unlike any macro lens I’ve used before. It’s a super sharp 2x magnification lens with substantial working distance, autofocus, image stabilization, weather sealing…the list goes on. When I received my first glimpse of the 90mm lens details I thought to myself, “This might change how I shoot macro.”
After using the lens for over a month, it did change how I shoot.
In this article I share some of my experiences with the M.Zuiko 90mm Macro and some tips on how to leverage the capabilities of the PRO lens.
Pop and Go
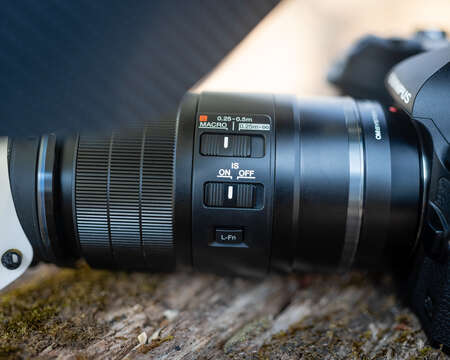
The 90mm is a PRO lens with a manual focus clutch and a focus range limiting switch. If you are a high magnification fanatic like me, you will likely find yourself switched on S-macro mode with the manual clutch pulled back to see precisely what magnification (displayed on the end of the lens barrel) you are at while shooting.
However, pulling the manual clutch back disables the lens’ autofocus functions, including focus stacking and bracketing. If you find yourself manually focusing with the clutch pulled back, but also want to focus stack/bracket, just adjust magnification/focus and then pop the clutch forward so you can start your focus stack or bracket.
If 2x magnification seems too close, the focus limiter is your friend, especially if autofocus is your jam. The middle option on the focus limiter switch will max magnification at 1x and keep the focus range within .25m-.5m. I found this extremely helpful when approaching larger macro subjects. I look forward to testing it out for in-flight macro shooting when I see more pollinators flying around in the spring.
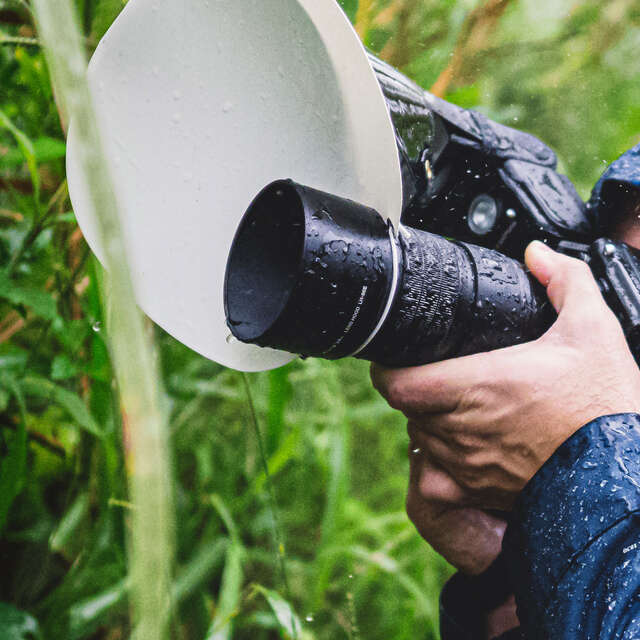
Tip 1: Raining outside? Pop and go with the lens’ IP53 weather sealing.
Tip 2: Are you can avid focus stacker/bracketer? Consider programming the function button on the lens to turn on/off focus stacking or bracketing.
Work the Working Distance
The working distance of the 90mm is incredible. Even after using it for over a month I still find myself approaching subjects too closely because I’m accustomed to being in tight at high magnifications.
The working distance of the 90mm at 2x is just a touch shorter than the 60mm at 1x. For those that have used the 60mm without a close-up lens or extension tubes attached, you know how substantial that working distance is. Take the 90mm down from 2x magnification and you get more and more room to work with.
Benefits of increased working distance:
- More room to approach skittish, living subjects
- More opportunities to shoot at eye-level or flatter angles
- More room to approach subjects from directly above when using a flash diffuser
- More room for various lighting options, including continuous light
Decreasing magnification will further increase the working distance and create possibilities to shoot from new positions/angles. I found myself being able to take a lot of eye-level shots with the 90mm that would have been infeasible with the 60mm.
Tip: Expect a bit of a learning curve when feeling out the new working distance, especially if you have been using the 60mm for a long time. If you can’t find your subject, try backing away because you are probably too close.
Magnification Matters
2x magnification is crazy close. It has benefits like being able to capture details not seen with the naked eye—but there are some things to consider when shooting at high magnification.
First, the closer you get, the shallower the depth of field will be. If you like how that looks, fantastic. If you want more in focus, consider shooting at a higher f-stop, focus stacking/bracketing, or decreasing magnification. If you want to shoot at a higher f-stop but don’t have enough light, consider introducing flash or continuous lighting.
Second, if you are going to focus stack or bracket, higher magnification means a higher shot requirement to cover the same distance. It is not as much of problem with a completely static subject, but if you are trying to do a quick stack/bracket of a subject in the field, decreasing magnification will make it more manageable.
Last, don’t forget about diffraction. Even though the 90mm is super sharp, physics comes into play. For optimal sharpness you should consider lowering your f-stop when increasing magnification. If you like the sharpness of f/11 when shooting at 1x, you may not find it as sharp when shooting 2x.
Tip 1: The increased focal length and magnification of the 90mm will render images differently than the M.Zuiko 60mm. Expect to approach photographing subjects in a new way and give yourself a chance to play around with the settings.
Tip 2: You can increase the magnification of the 90mm up to 4x with MC-14 or MC-20 teleconverters!
Sharp as a Tack
The 90mm is really sharp, especially if you like shooting with flash around f/8. I even found it to be super sharp at f/13 at certain magnifications. This meant I could play around with increasing the f-stop to capture more depth of field on each shot. The higher the f-stop, the less frames needed in a focus stack or bracket. I got getting really comfortable taking my average bracket frames needed down from 50(ish) to 25(ish) with this lens.
Tip: When focus stacking and bracketing, higher f-stops can help reduce the amount of ghosting when focal planes intersect during a stack (whether in-camera or in post). If you’re a consistent f/5.6 stacker or bracketer, give f/8 and higher a shot!
Accurate and Steady
I was impressed with how amazingly fast and accurate the autofocus is on the 90mm. Even at high magnification the autofocus was able to nail the eye of a moving springtail which was just a few millimeters across. The image stabilization compliments the focusing process and I was able to track things I could barely see with my own eyes. Do not think that autofocus does not mix with macro.
Tip 1: Even in manual focus, half-pressing the shutter button will engage image stabilization.
Tip 2: Don’t forget about the focus limiter switch! I usually kept it on S-Macro to keep the autofocus between 1-2x magnifications.
Managing Light
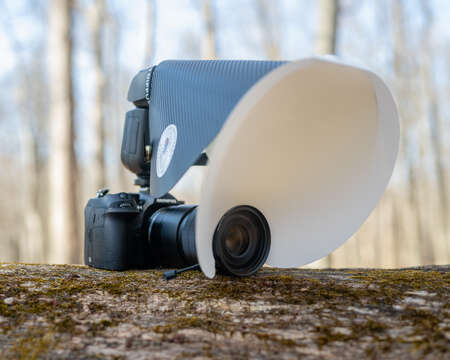
If you’re a flash user, flash diffusion is critical. The 90mm is not as compact as the M.Zuiko 60mm, and while a diffuser made for the 60mm can be worked onto the 90mm with some modifications, it will not be large enough to properly diffuse the light. If you’re into making your own diffuser, you will want to bring the diffusion panel further out to correspond with longer lens. In addition, you will want to increase the surface area of the diffusion panel to supplement the increased working distance. I gave up on making my own diffusers pretty early on in my macro career. I currently use a Cygnustech Diffuser (@Cygnustech on Instagram) engineered specifically for the 90mm.
Tip 1: A larger diffuser opens the door to consider bigger, more powerful flash units—which wasn’t really a feasible option when trying to use a flash/diffuser with the compact M.Zuiko 60mm.
Tip 2: The 90mm looks big next to the 60mm, but it’s really not that substantial. It only weighs a pound and I never thought twice about the size after initially using it.
Closing Thoughts
The M.Zuiko 90mm f/3.5 Macro IS PRO is my new “daily driver” for macro photography. It’s a wonder of a lens that continues to exceed my expectations.
The only real downside is the cost. But it’s a PRO lens with matching capabilities. If you’re looking to get the most out of your macro, this is the lens you want.
Bio - Ben Salb
ABOUT BEN SALB
Website: www.benssmallworld.com
Benjamin Salb is an OM SYSTEM Ambassador and international award winning macro photographer based in Gaithersburg, MD. Ben specializes in close-up portraits of living invertebrates and likes to test the environmental and technical limits of handheld focus bracketing in the field. Years ago, he collected 150 of the 151 original Pokémon before his saved game was deleted by a friend, and he’s been making up for it ever since.
