Working with expectant mothers can be fun and rewarding to do, but intimidating when you first start. Here are some tips to make maternity sessions easier for you, mom, and baby!
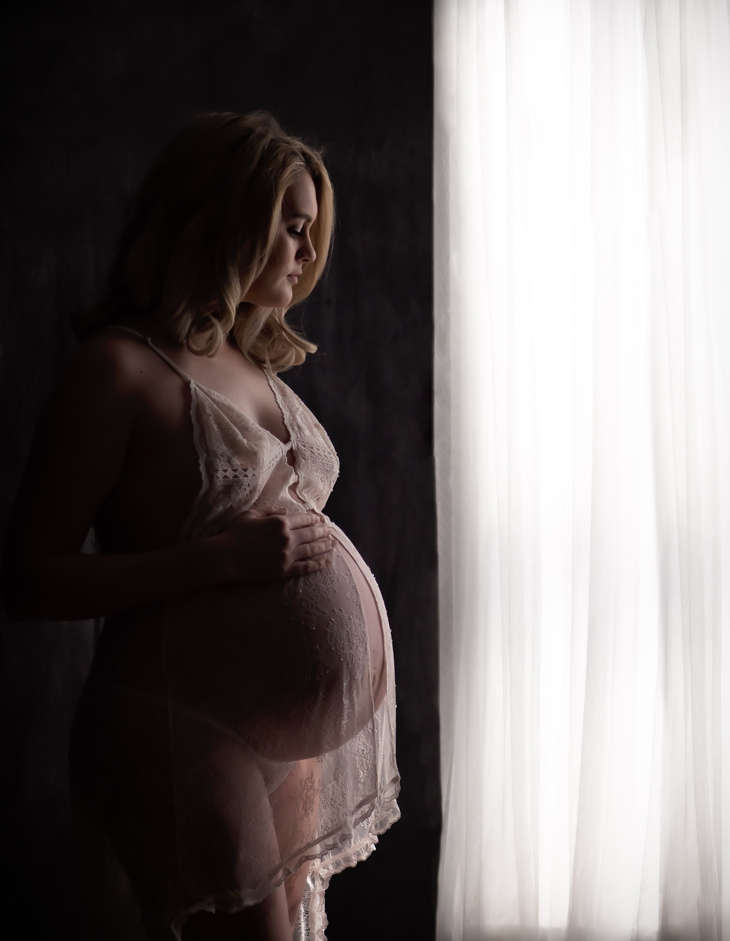
If you are dealing with any lighting situation, you want to be able to control all of your light sources. I like to shoot against a window in my studio. No matter where you are shooting – in your own studio space or at a client’s home - if you’re shooting indoors you will probably have access to at least one window.
If you’re doing a maternity session, there are rules that apply almost every time across the board. We’re going to go over a few of those tips and tricks today!
Women generally do not celebrate their bellies, other than when they are pregnant. In general, with portrait photography, posing is about making sure you do not pay attention to the stomach. If a woman is not pregnant, you do not want to pose her with her hands near her belly. Remember – wherever the hands go, is where the viewers’ eyes go.
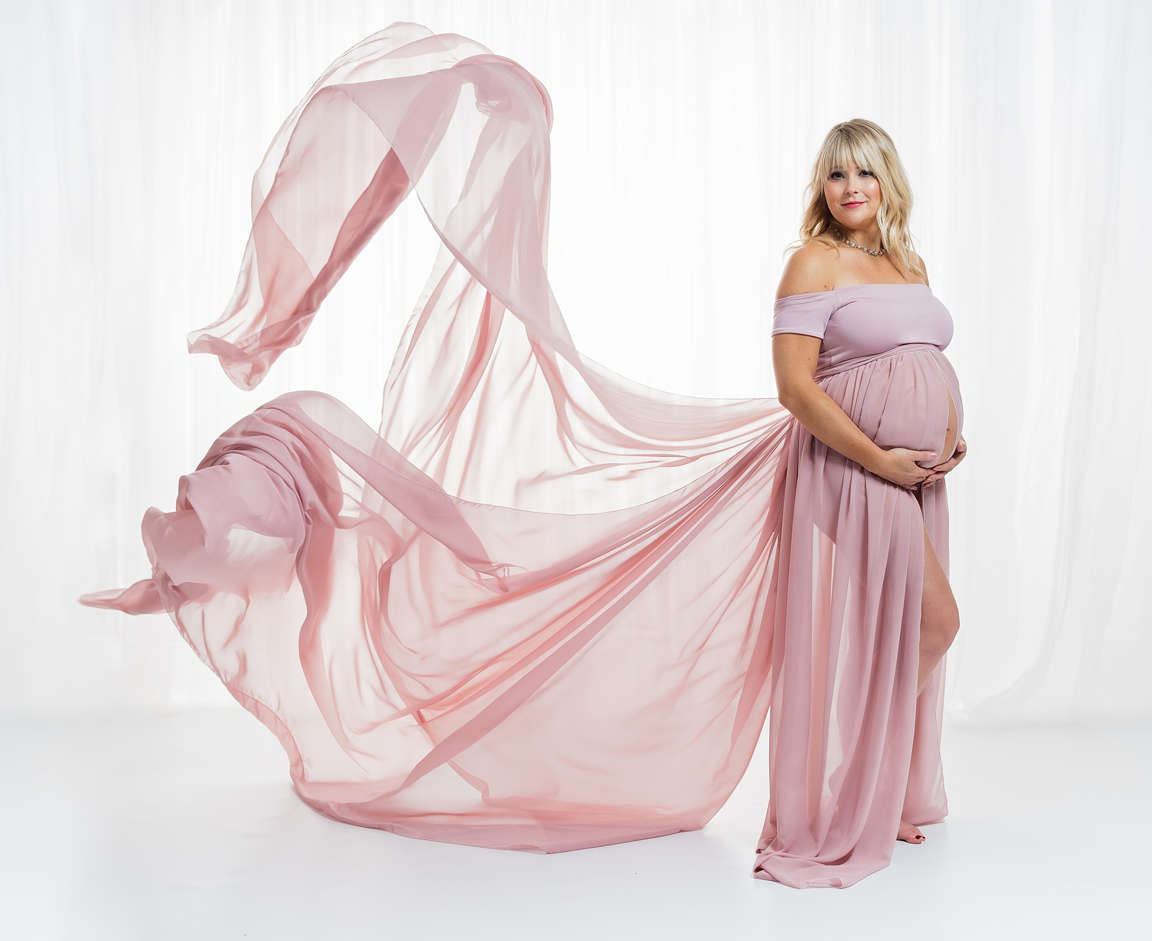
When we have a baby, we definitely want to bring mom’s hands into the picture, and surround the belly. Remember – the belly is baby, and baby is the star of the show.
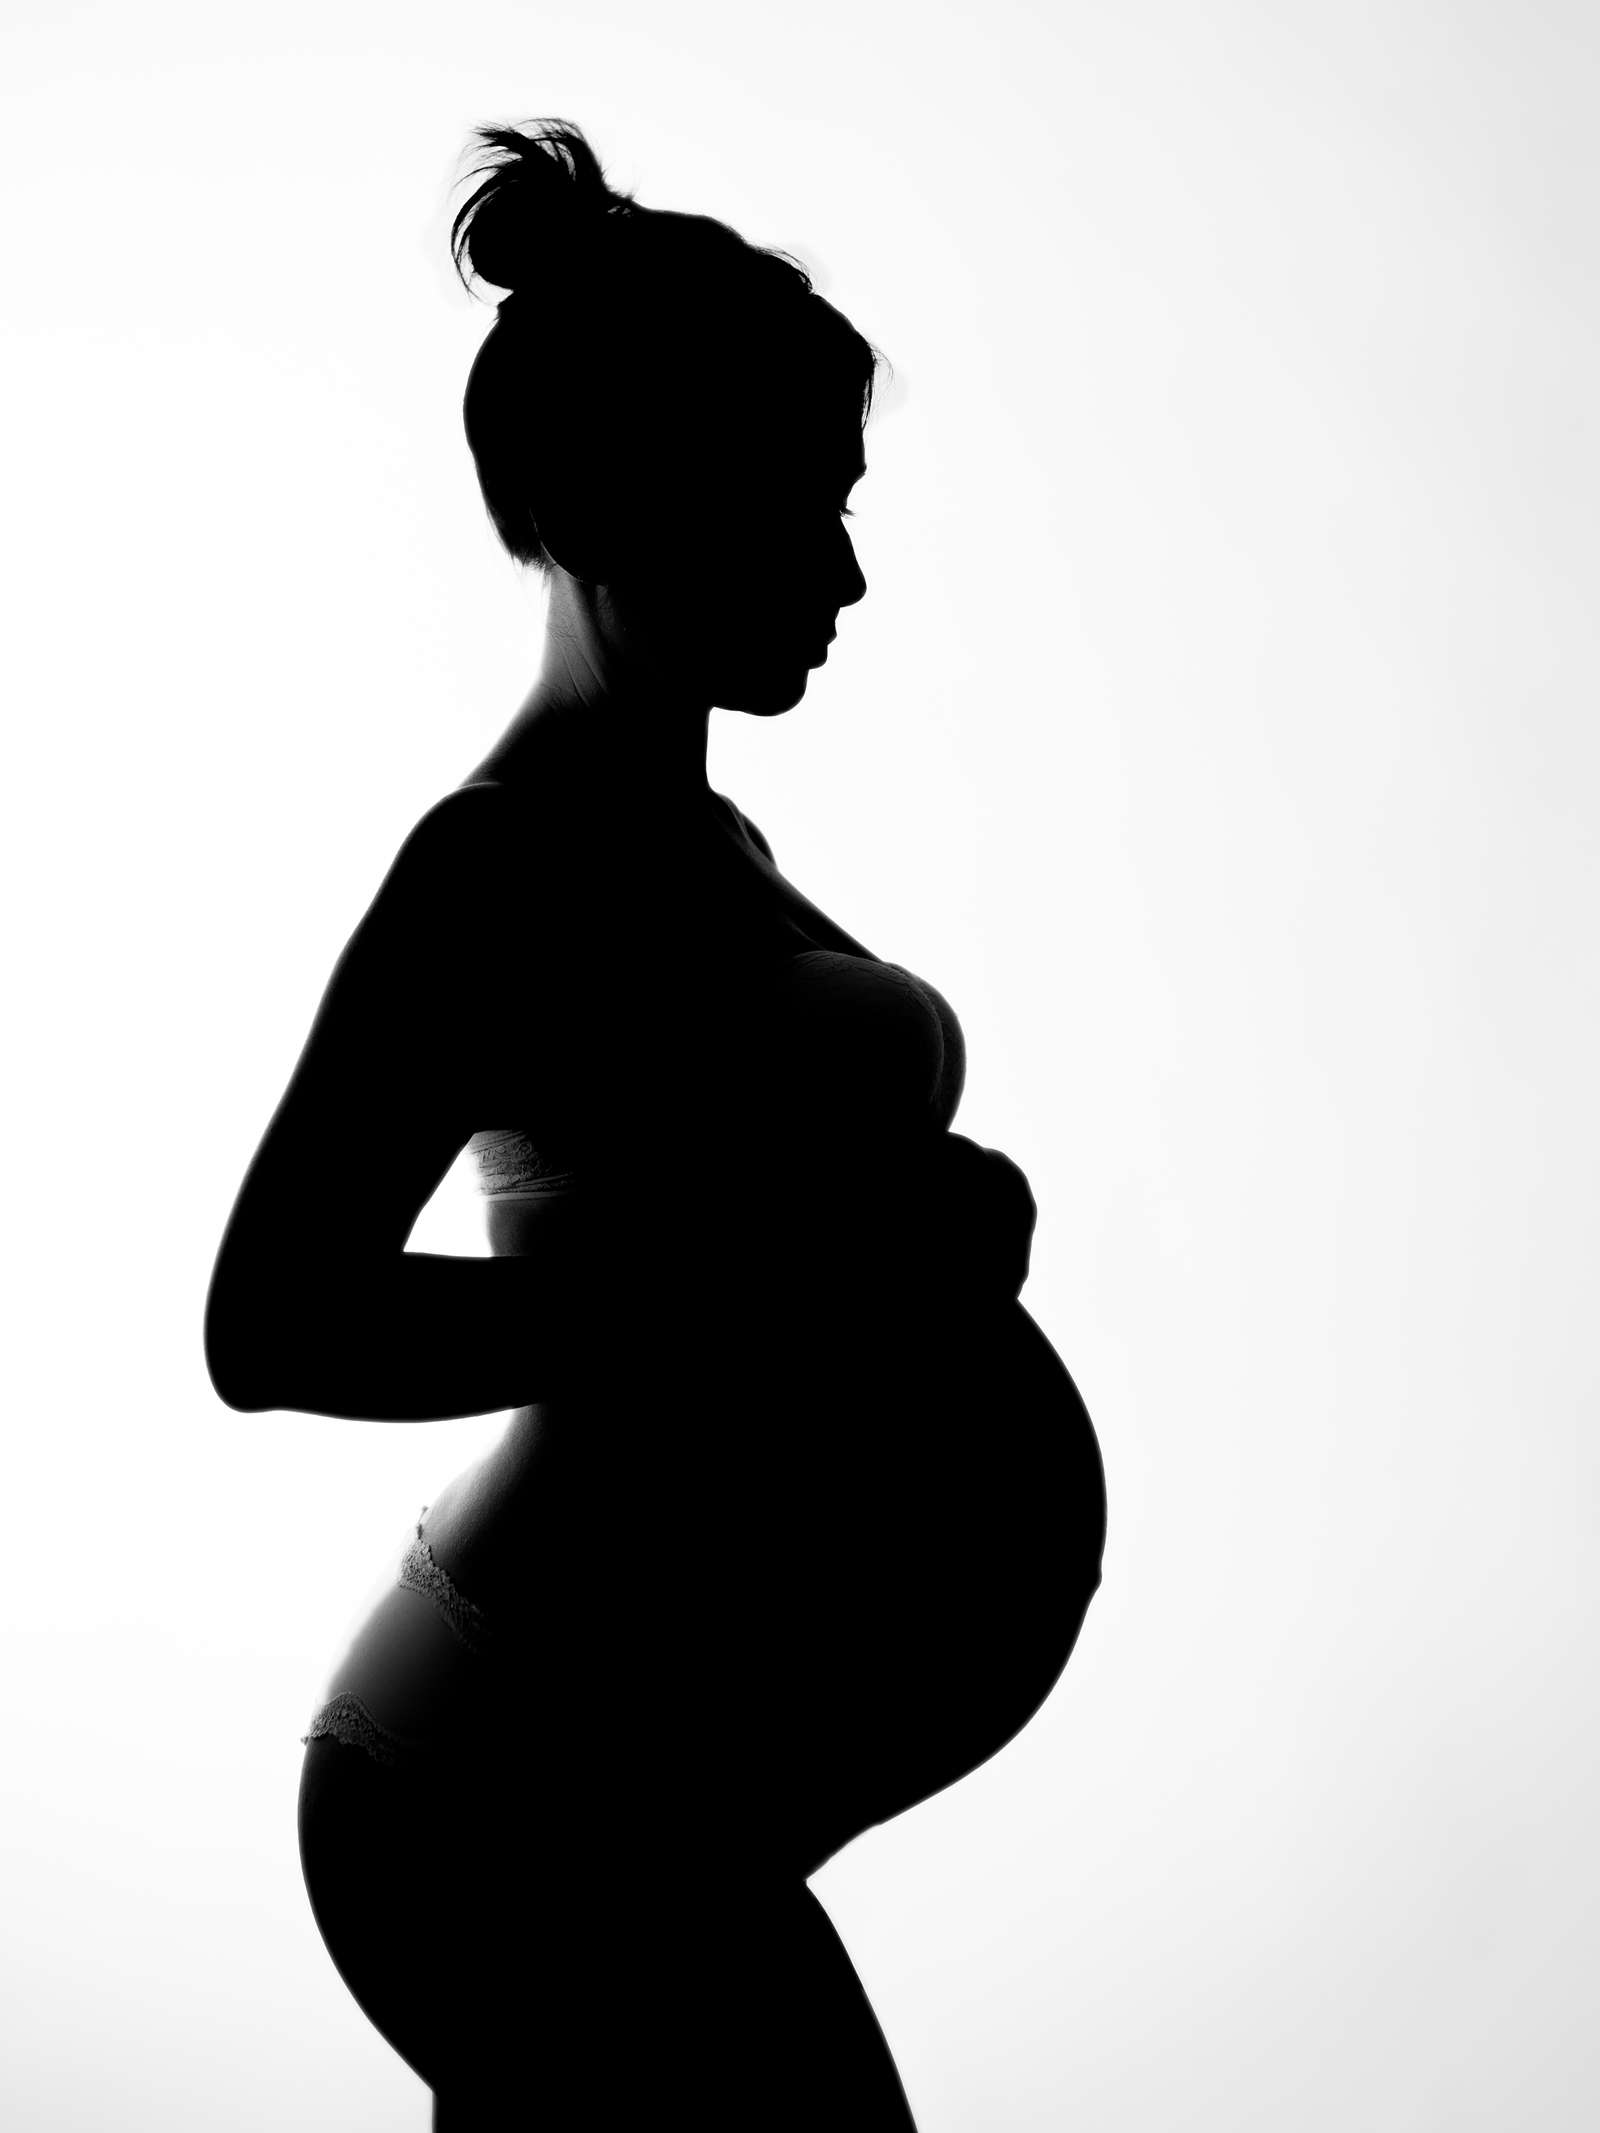
SILHOUETTES
I like to use the window in my studio to silhouette mom and baby. The frame will be only the natural light coming in, which allows us highlight her posing and belly with the shadows. If you need more light, you will move your subject closer to the window. Moving her further away will create more shadow.
Since your moms-to-be will most likely not be models, there some things to help them get the most dramatic effect from their poses. When they put their hand in front of them, have them place it on the top of their belly so that you can create angles and have light come through around their arms. If they put their arms to the side, you lose the ability to do that. Remember: it’s all about creating triangles with portraiture.
Another way to add an angle is to have your mom pop one of their legs. I think it works best with their front leg, because when you bend your front leg it draws more attention to your belly.
We also want mom’s chin to be fully extended, which will get rid of any double chins that might appear in the photo.
Another pose is to have mom put her thumbnails together and create a heart with her hands. We will push the heart forward, so that it is just above her belly.
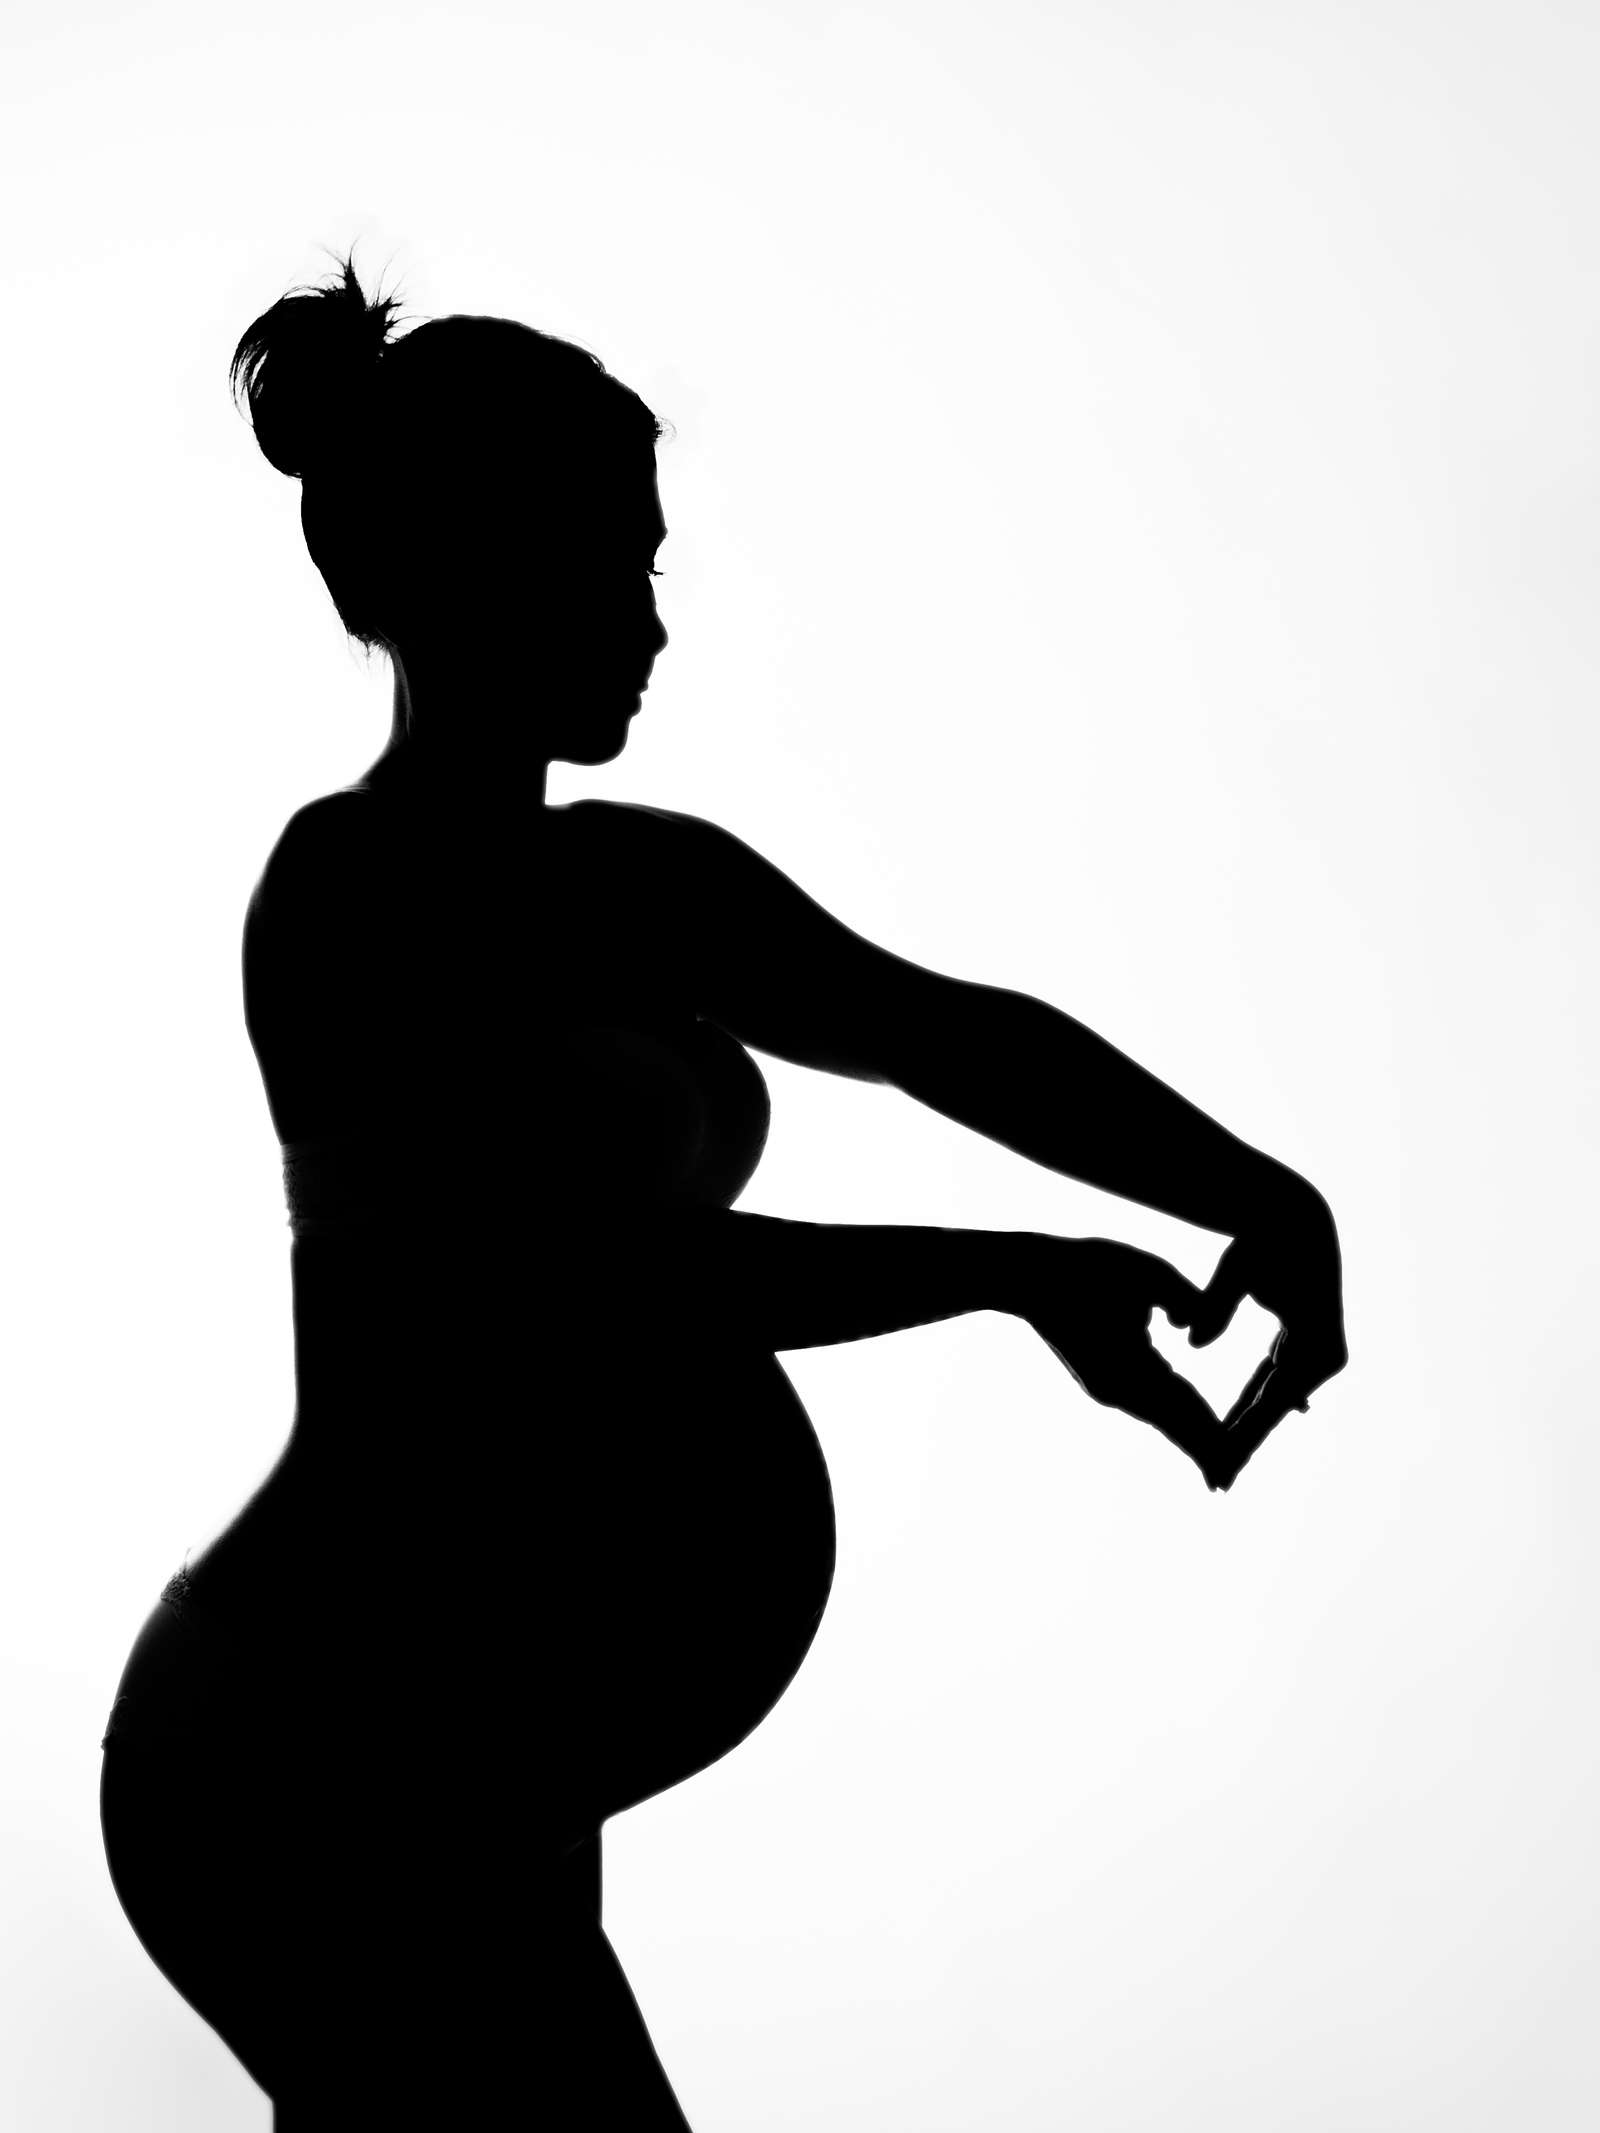
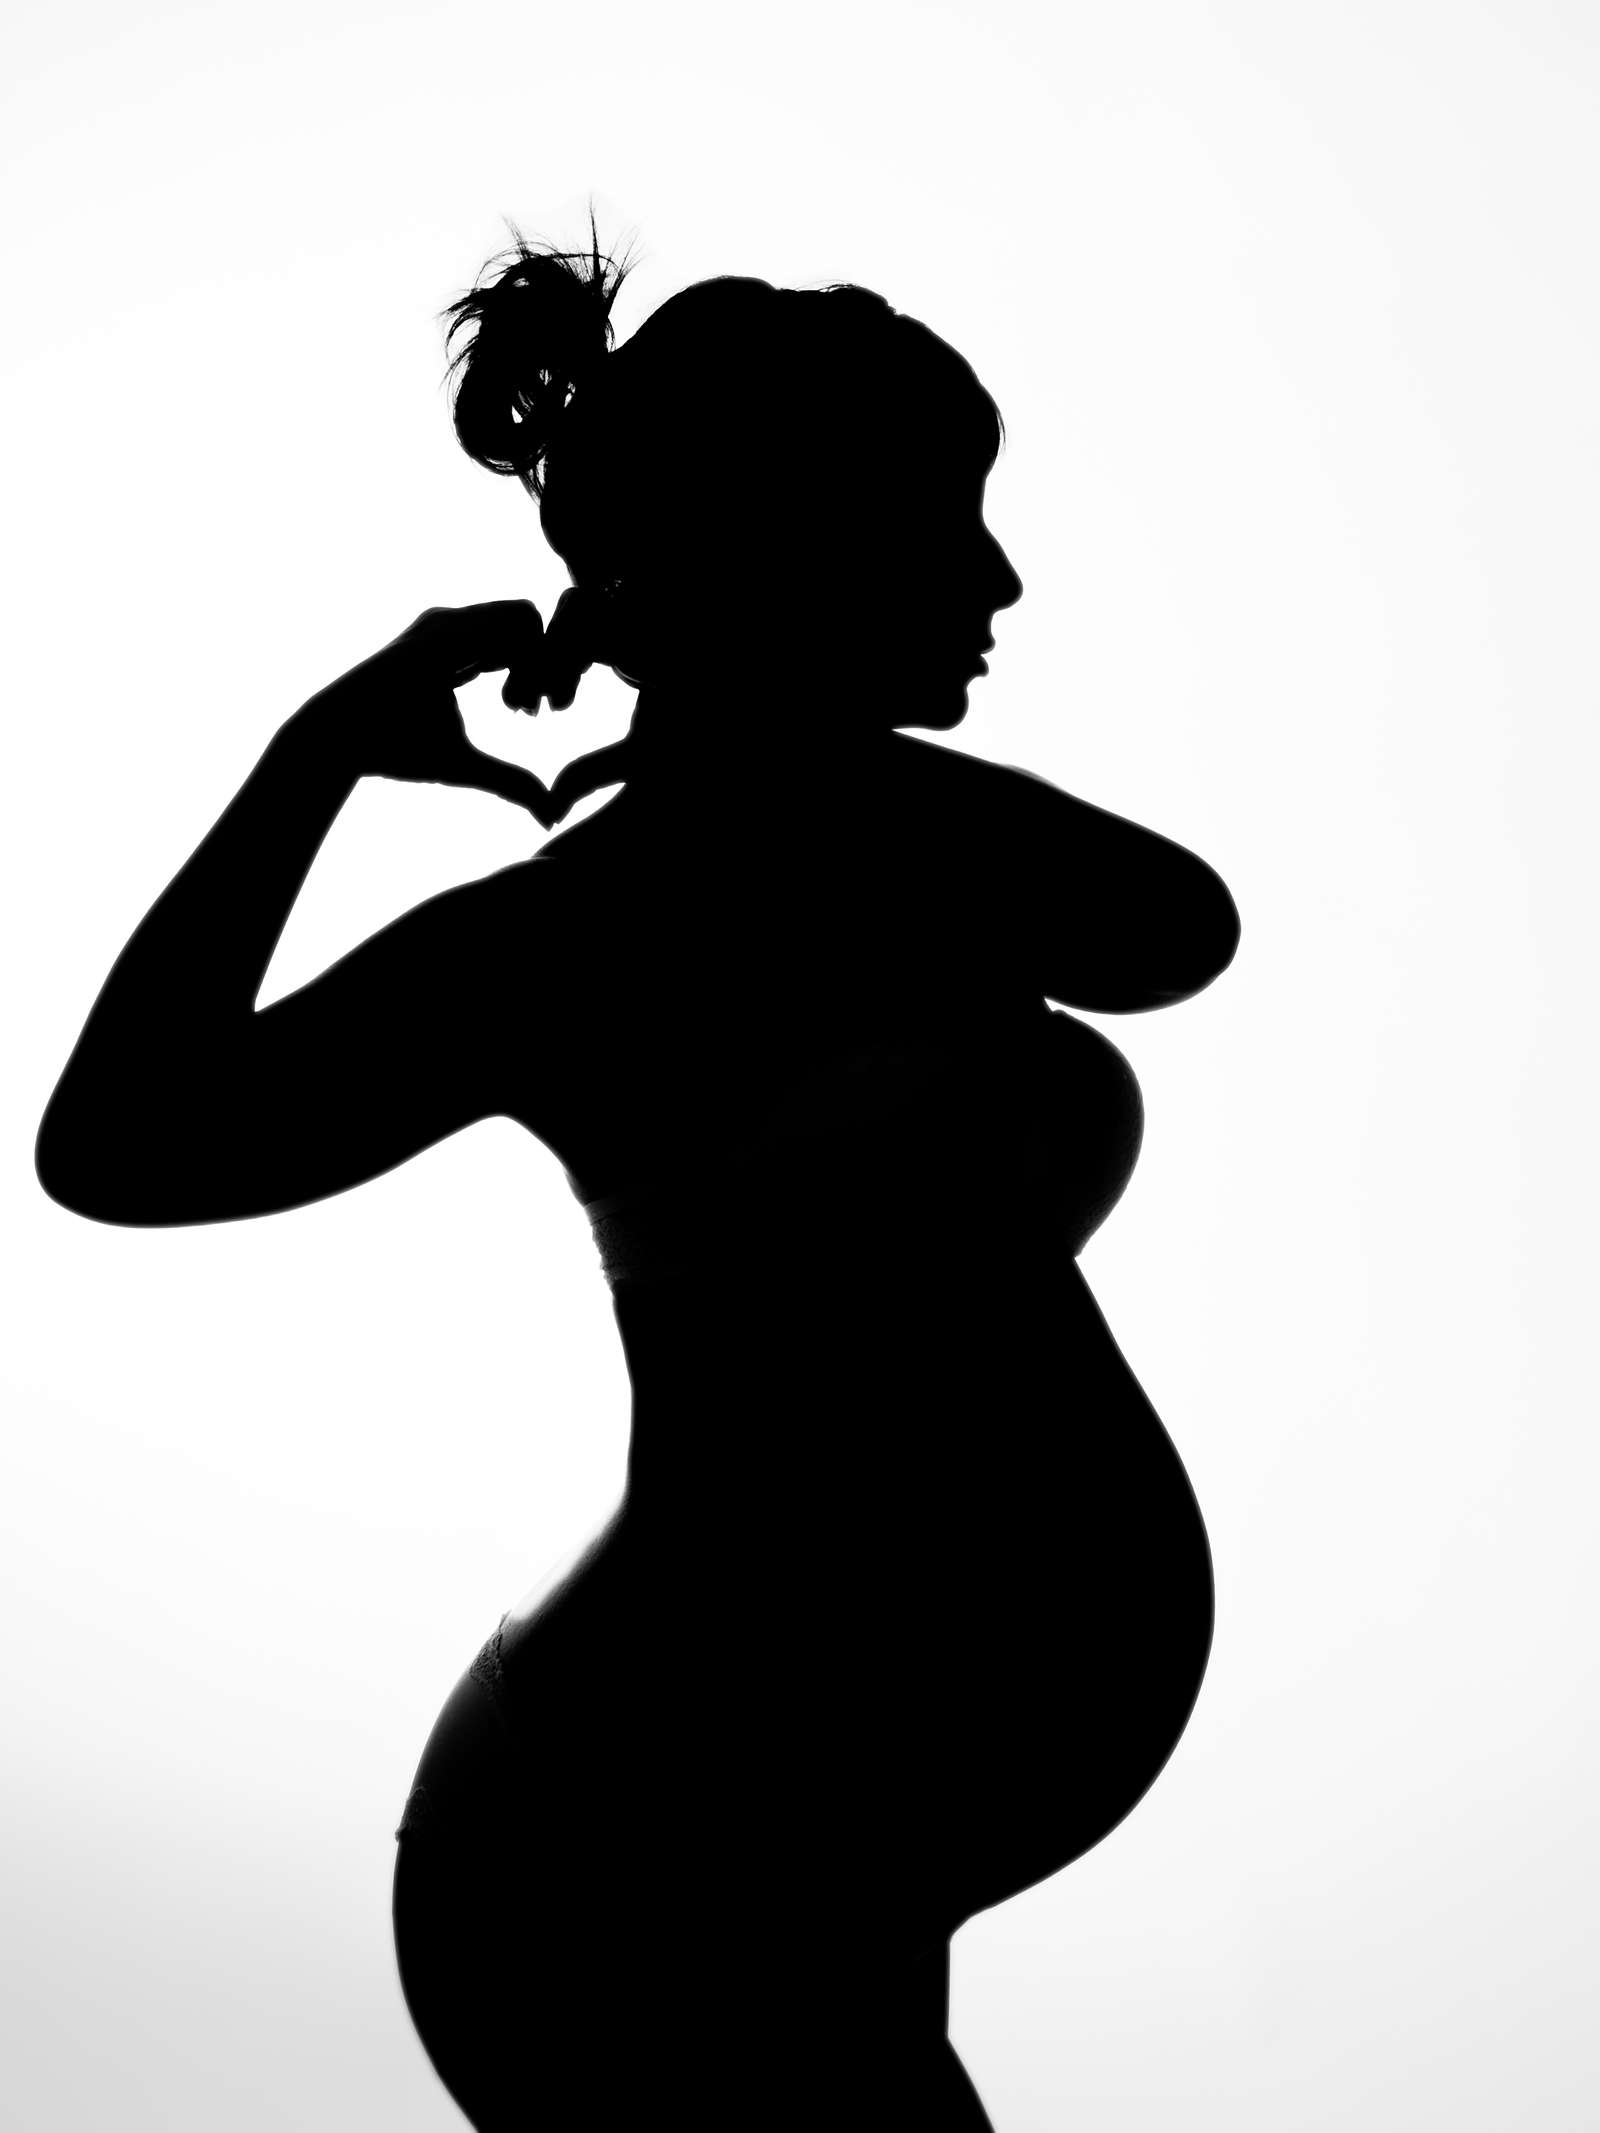
You can also create “heart hands” by making thumbs the bottom of the heart, and pointer fingers the top. Next, mom will move her hands over her shoulders and bring her chin to the other side of her body.
I like to create three piece silhouette photos for my maternity sessions, with three poses. They are very popular with moms, with a saying “No one else will ever know the strength of my love for you, because no one else knows what my heartbeat sounds like from the inside.”
You can do all of the poses without making them a silhouetted photo, and mom will love them! It’s good to do full length and three-quarter shots for each pose. I tend not to do close up shots for my maternity sessions, since the true subject of the shoot is the belly, and baby.
MORE POSES
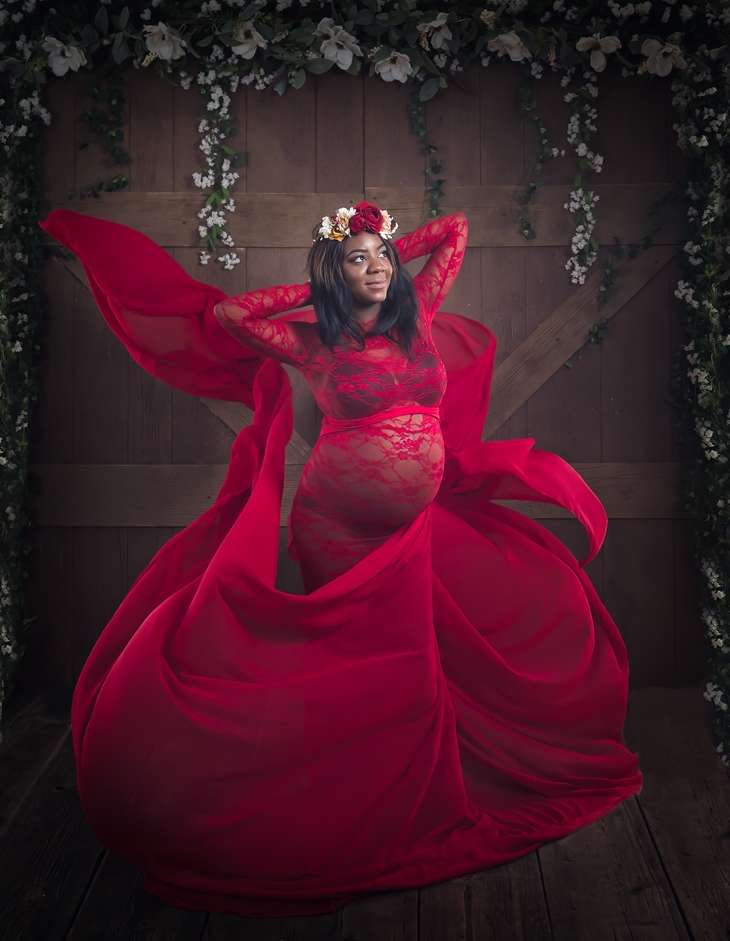
Another variation bring hands above the head, which may not work for every mom since it may not be flattering to all arm types. When you put the arms up and bend, you move the upper part of the body to open towards the camera, and have mom look up – what I call “eyes to God.”
When you have your mom face towards the camera, it can be harder to show off baby – but it is not impossible! Adjust your lighting to create a shadow to highlight the contour of the belly, and pop one leg to thin out the bottom part of the body. It helps to have mom gently lift her arms off of her body, to create space between baby and her arms.
I rarely shoot maternity in street clothes, since many of the moms I shoot with like to be a little glam in their maternity sessions. I like to do dress tosses, with about two feet of fabric being tossed on both side. It gives a very ethereal effect to the photos and everyone has a lot of fun doing it.
EYES
Regardless of how mom’s body is positioned, there are a few ways to direct her eyes:
- Eyes to God – where her eyes are looking up towards the sky
- Eyes to baby – where her eyes are down towards her belly
- Eyes down the arm – where her eyes follow her arm down to the path created by her elbow
- Eyes straight ahead – where she is making eye contact with the camera
When I direct “eyes down the arms,” many times moms move their head down – we’re all used to taking selfies that way. Be sure to still keep mom’s chin up when her eyes are looking down.
THREE KEY TAKEAWAYS
- Be sure to highlight baby – since they’re the star of the show!
- Choose poses flattering to mom, and make her happy and comfortable
- It is easy to create a variety of maternity poses, without a lot of movement
Web: http://www.traciejeanphoto.com
Instagram: https://www.instagram.com/traciejeanphoto
Tracie is an award-winning wedding and portrait photographer living in the greater Cincinnati, Ohio area.