What is OM Workspace used for, and how can it help you as a photographer?
This article will help you with:
- Importing images from camera / SD card to computer
- Viewing images
- Sorting and classifying images
- Making image adjustments / Developing Raw images
- Using creative edit functions: Panorama stitching / Focus Stacking / Stills from Movies
- Updating Firmware

Importing Photos Directly From Your Camera
-
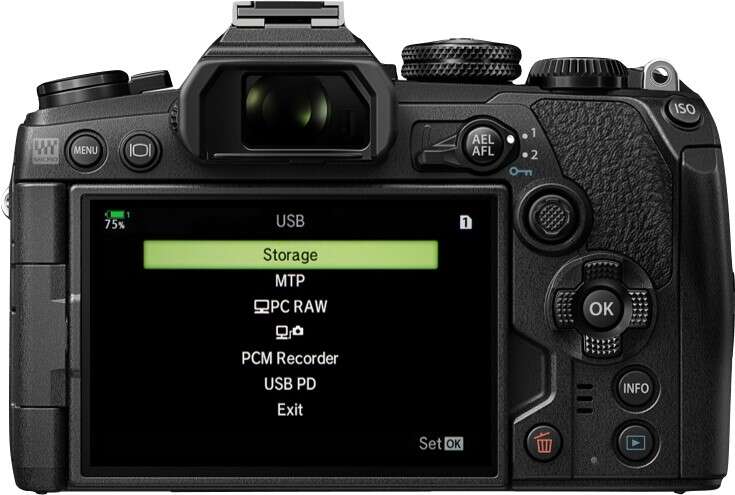
Connect the camera to the computer using the Olympus provided USB cable.
-
Select "Storage" and press OK.
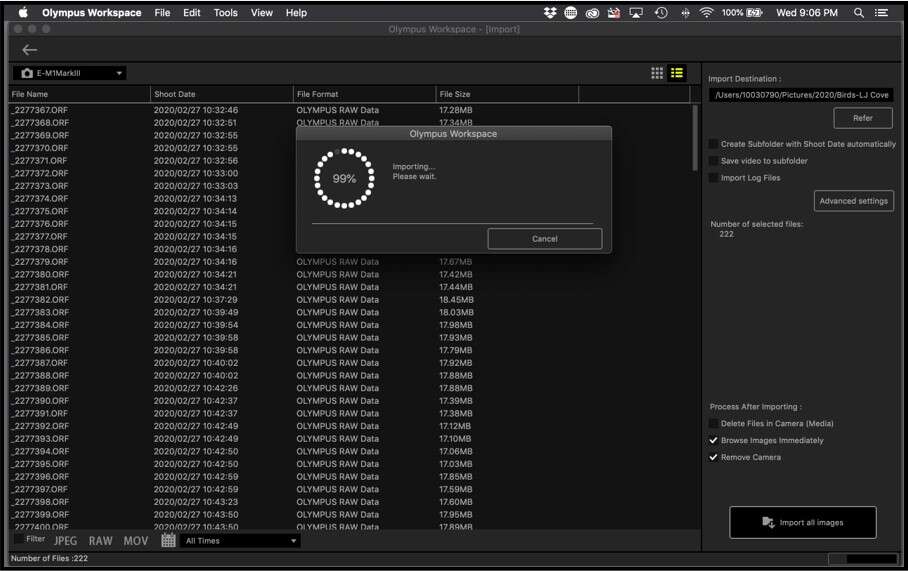
- Select “Import from Camera” using either the “File” dropdown menu or the circled icon.
- The software will search for the camera, then show a list or thumbnail view of the photos.

- Before importing, select an Import Destination by pressing the "Refer" button. If needed, a new folder can be created and named.
- If needed, check the available import options.
- Press the "Import all images" button at the bottom right to begin importing the photos.
Importing Photos Directly From Your Camera Using WiFi
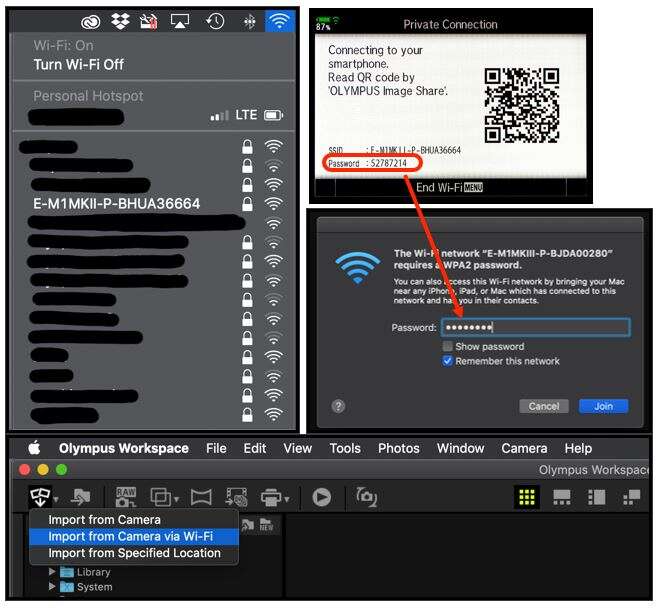
- Start "Connection to Smartphone"’ on the camera.
- Find and select the camera’s network name on your computer and enter the password found on the camera monitor.
- Select "Import from Camera via WiFi" and proceed as if importing from camera.
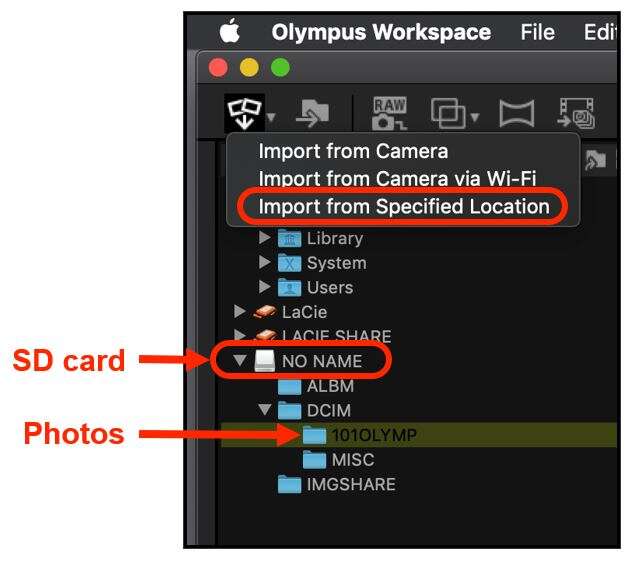
- Select when using an SD card reader or the computer’s built-in SD card slot.
- Select the 1xxOLYMP folder that resides within the DCIM folder of the SD card.
- Select "Import from Specified Location" from the Import list.
- Proceed with the same steps as importing from a camera without WiFi,
Viewing Photos Without Importing
Importing files isn’t required to view your photos. Simply select the folder on your computer, or, on the SD card, and the images will be shown.
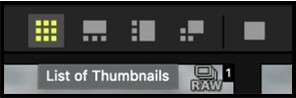
When you view your photos, there are a few different layouts you can choose from, which you can select from the middle row of icons.
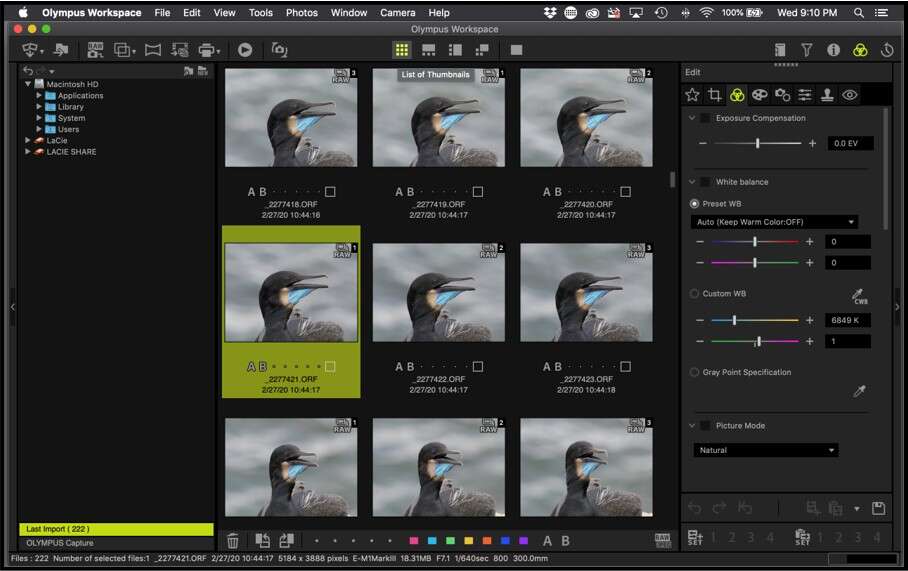
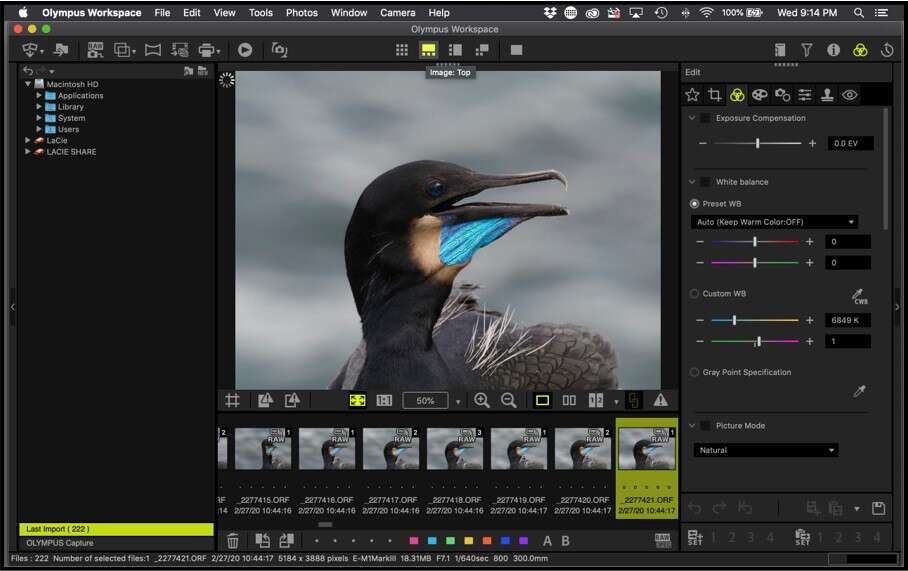
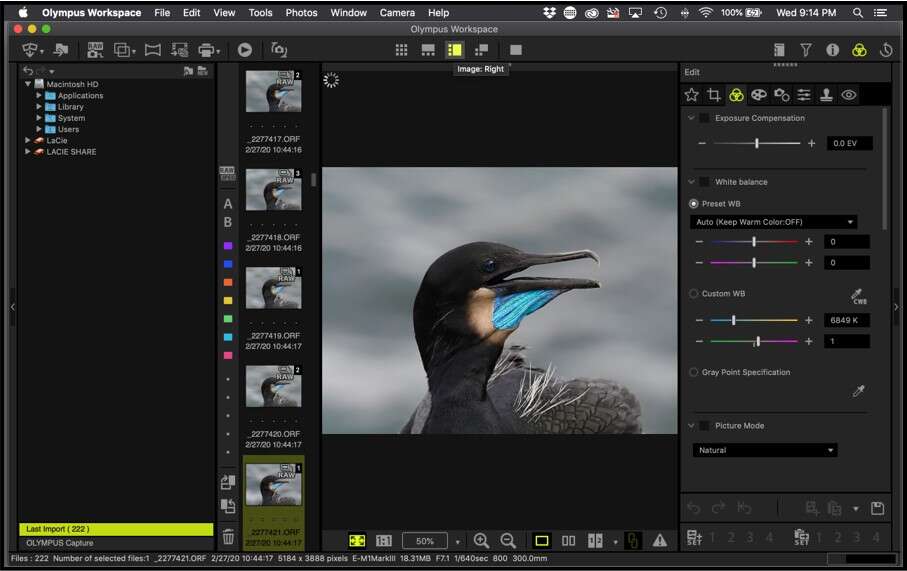
Hover over the thumbnail with the computer’s cursor to show the image’s top level EXIF data.
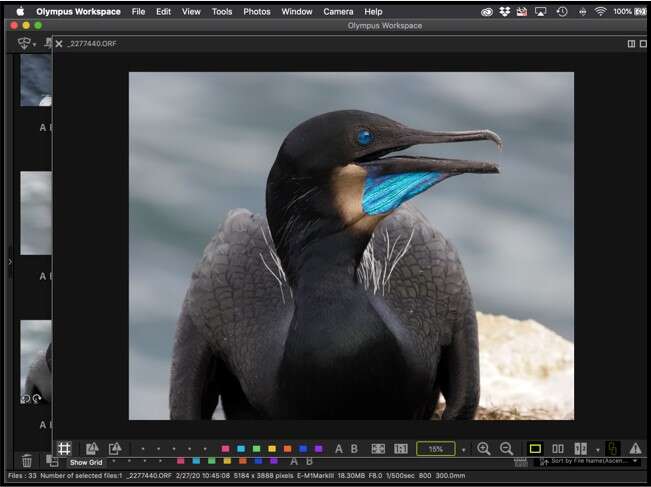
Multiple options are available to easily compare photos side-by-side.

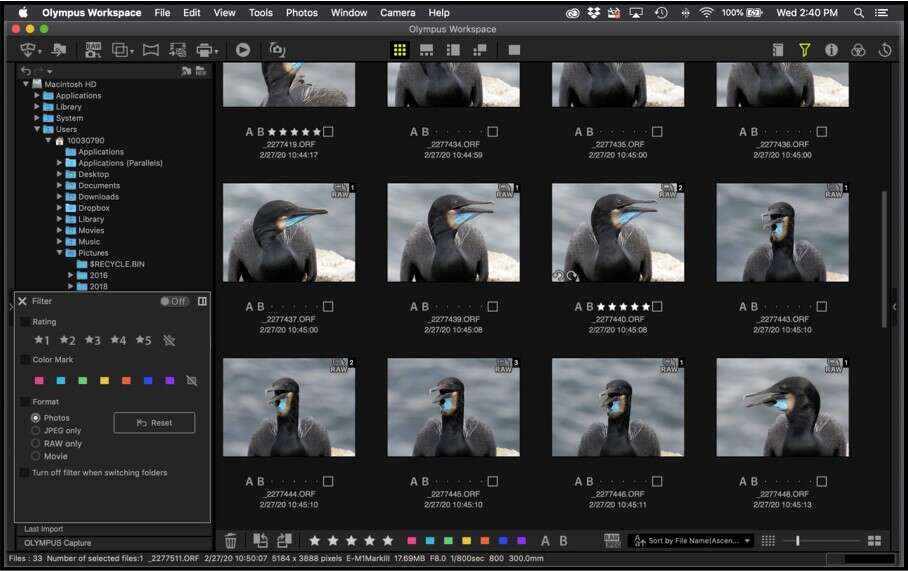
Classify Photos
To classify or rate, are terms used for the act of you narrowing down your photos to the final selects prior to editing. This can be done with Star ratings, Color Marks, or simply by file format.
- 5-star rated photos and the Filter screen showing the matching view selection.
- Color marks can be applied using the color boxes at the bottom of the page. Clicking the box below the individual photo opens another option.
- Check the desired color box in the Filter controls to show the group of selected photos.
- You can filter your files to view either photos (all photos, JPEG only, or RAW only), videos, or photos and videos.
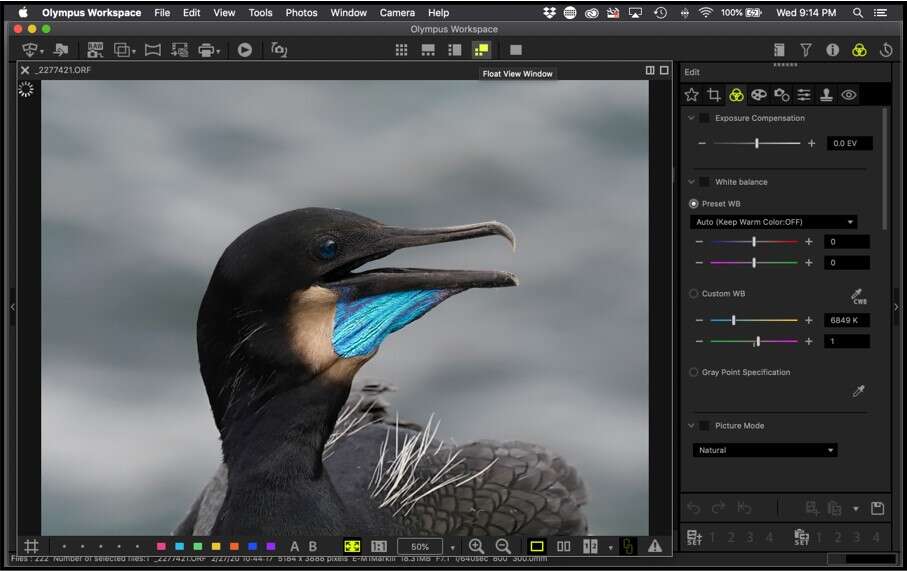
Editing Photos
The following tools are available for use when editing photos in Olympus Workspace:
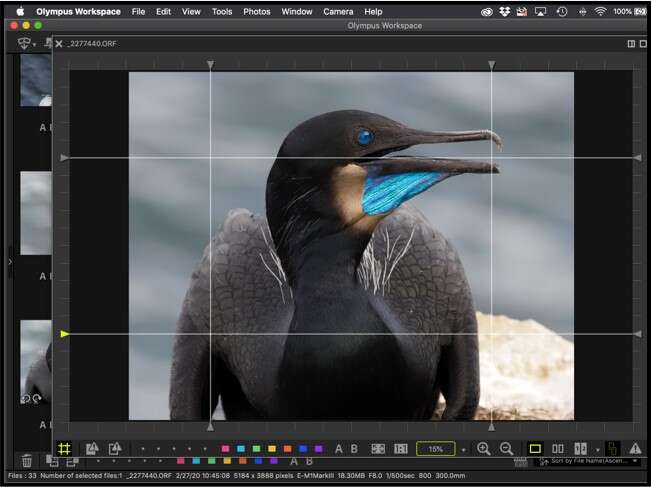
- Crop
- Exposure Compensation
- White Balance
- Picture Mode
- Adjust Color
- Clarity
- Dehaze
- Tone Curve
- Highlight & Shadow
- Contrast
- Saturation
- Gradation
- Color Space (Raw Images Only)
- Art Filter
- Color Filter
- Adjust Vignetting
- Shading Compensation
- Aberration Comp. (RAW Images Only)
- Distortion Correction
- Fisheye Correction
- Keystone Compensation
- Flip
- Sharpness
- Unsharp Mask
- Noise Filter (RAW Images Only)
- Noise Reduct. (RAW Images Only)
- Clone Stamp Tool
- Red-Eye Reduction
Creative Editing Features
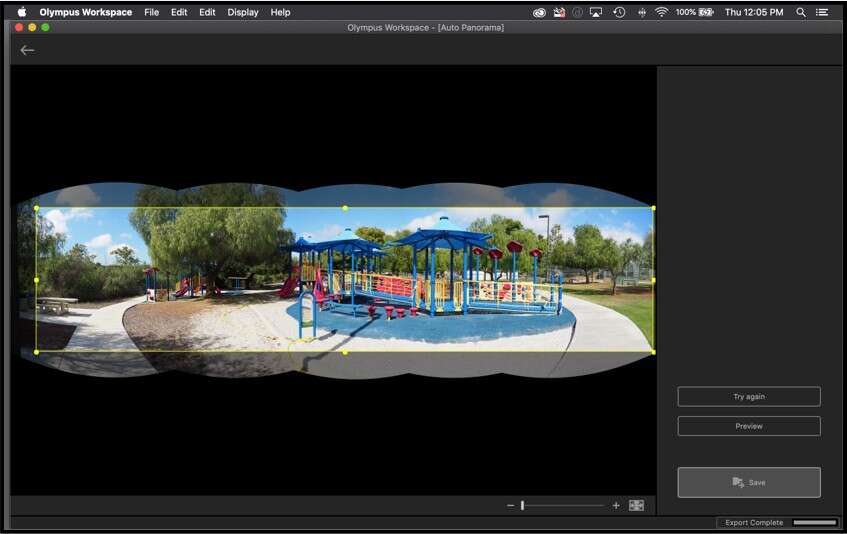
Panorama Stitching
This feature applies to image files shot using the Panorama mode found on many Olympus camera models. The camera feature requires multiple overlapping photos to be taken. Olympus Workspace will automatically stitch those individual photos into a panorama format.
To use this feature:
- Select all the panorama formatted photos.
- Select either Auto Panorama from the Tools menu or press the Panorama icon. The panorama formatted photos are identified by an icon and a number in the upper right of each thumbnail photo.
- Confirm the order of the photos and press the Stitch button. An auto crop will appear, but, it can be adjusted manually. Pressing Preview will enlarge the panorama and automatically scroll from left to right.
- Press Save to export the photo.
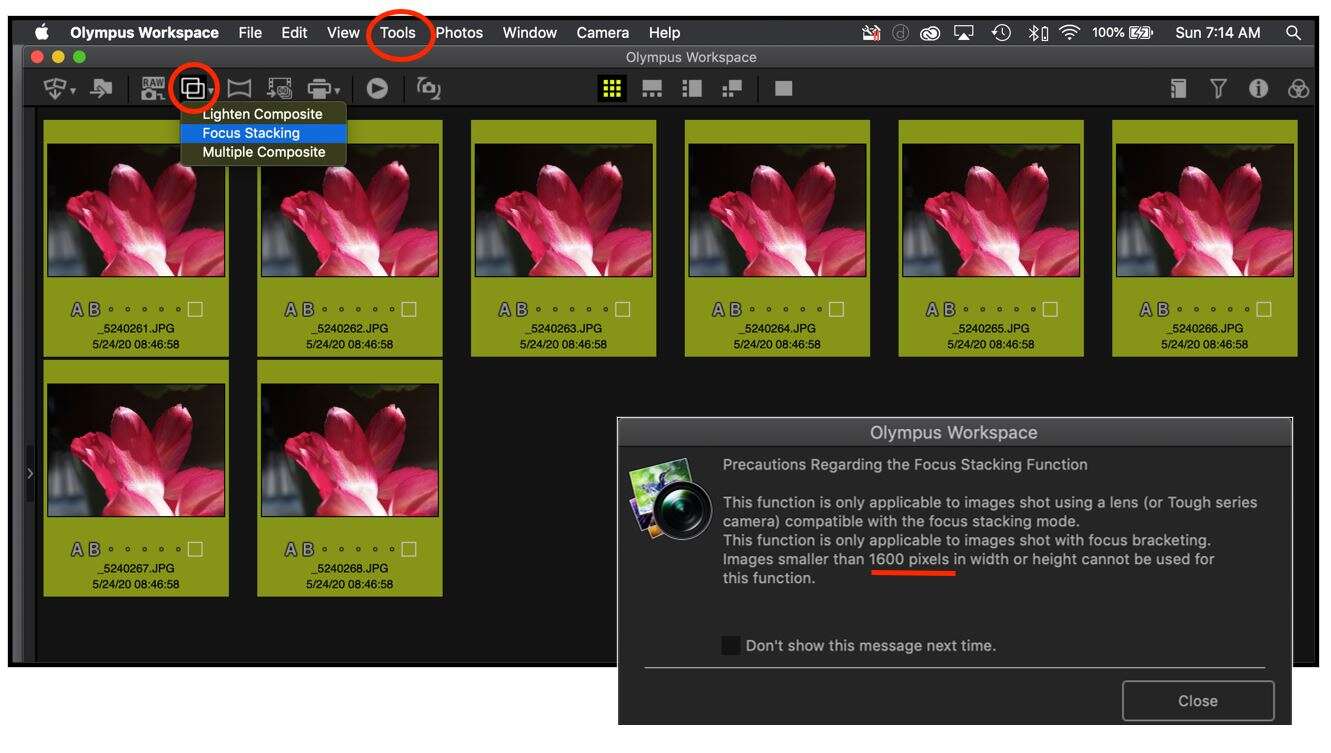
Focus Stacking
- Select all the images to be stacked.
- Select either Focus Stacking from the Tools menu or press the icon seen at right. Note the image size requirement warning.
- Select a reference photo for the software to use. This is often a middle point of the subject.
- If shot handheld, or in slight breezy conditions, select “Adjust Image Position” to automatically help align the photos.
- Press "Composite" button, then press "Export" button.
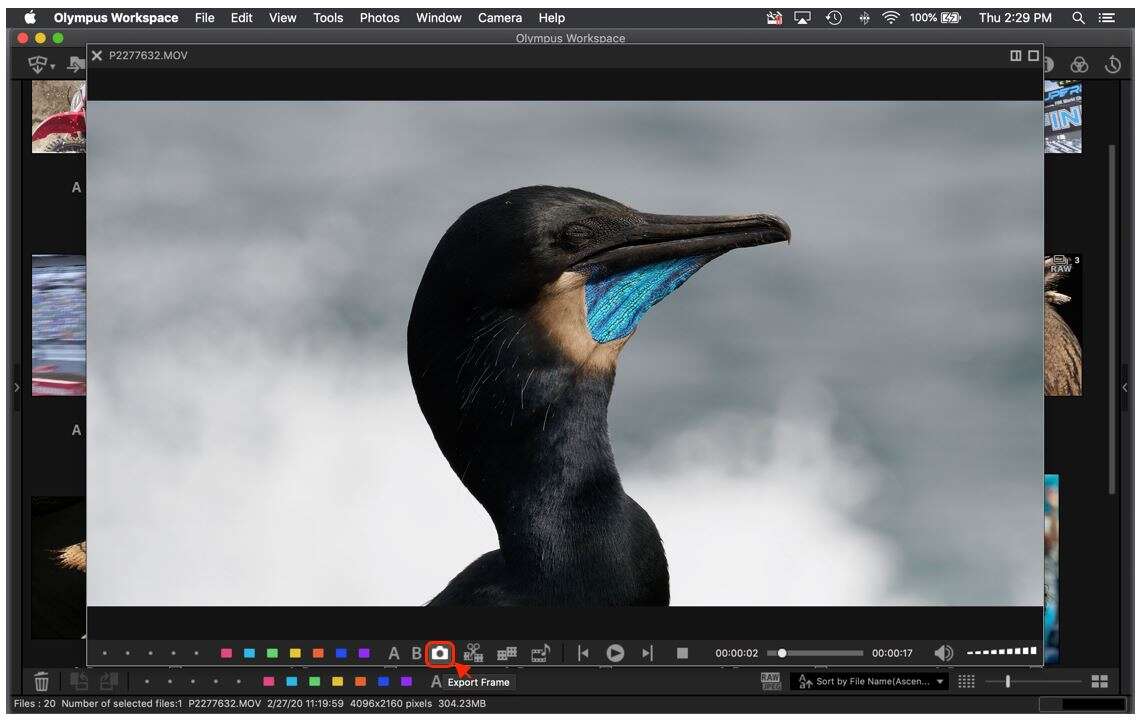
Creating a Still Image From a Movie
- Select and enlarge the movie file.
- Scroll to the desired frame.
- Press the "Export Frame" option (Camera Icon).
- The software will confirm that “Images Were Saved.” Your new jpeg photo will automatically appear next to the original movie file
Create a Time Lapse Movie
Individual photos shot in a traditional time lapse sequence or using Pro Capture at 60fps, can be combined in movie format.
- Select all frames.
- Preview the movie and then press the Export button to create the movie. Other options can be selected for longer traditional time-lapse movies.
- When exporting, select the location to place the file, name the file, and choose the size, frame rate, and bit rate.
Updating Firmware
Your camera and lens firmware can be updated within Workspace.
- Use your camera’s USB cable to connect to your internet connected computer. Make sure your battery is fully charged.
- Once camera is connected, press OK to confirm Storage.
- Confirm the connected camera and lens and the firmware to be loaded.
- If updating an E-M1 Mark II, E-M1 Mark III, E-M1X, or PEN-F, you’ll have the chance to save and reload your camera’s settings.
- A screen will be seen while the software is downloading the firmware from the OM server that shows you the download percentage and estimated time remaining in the update.
- Once the firmware has been downloaded into the camera, it is then installed into the camera (icons seen on LCD screen).
- Once it has been installed into the camera, "OK" is seen on the LCD screen.
- Follow the prompts to proceed.
- To update the lens, press "Continue Updating" and repeat the procedure.
- Press Close if finished.