The stars aligned this summer with the arrival of Comet NEOWISE.
Safe escape from my bubble in Charlotte, North Carolina, was already planned when I heard astronomers had discovered a new comet in our night sky. I paid no attention until I read that comet NEOWISE was going to be visible in mid- to late-July, and that wouldn’t be back in view from Earth for another 6800 years. I can’t wait that long. The chase was on! Comet NEOWISE presented the perfect opportunity to explore the dark skies of Utah. The comet also presented the perfect opportunity to the test Starry Sky Autofocus feature on the OM-D E-M1 Mark III, my newest camera.
In the midst of the ongoing pandemic, comet chasing across Utah was both a photographic and personal journey. This road trip quickly became an important time for me. So many memories, and so many photo locations that I’ve longed to re-visit in my old photographic stomping grounds from the film days in the early 1980s. For it was here – in the mountains, plateaus, and slickrock landscapes – that I was inspired as a young man to become both a photographer, and a geologist.
What I discovered during those early days of exploring Utah’s canyon country was that I enjoyed nature photography and spending time in wild places. The act of searching for the perfect composition and waiting patiently for the sweet light, intensifies the experience of being in nature, and being in the moment. For me, nature photography is not just an art – it’s also a way of being in and connecting with the natural world. It’s also a way of combing my passions for travel, photography, and exploring.
What follows are a selection of images with the E-M1 Mark III. All images were shot during the July road trip to the Canyon Country of Utah. From this experience I can say, without a doubt, that the Starry Sky Auto Focus feature has forever changed shooting the night sky.
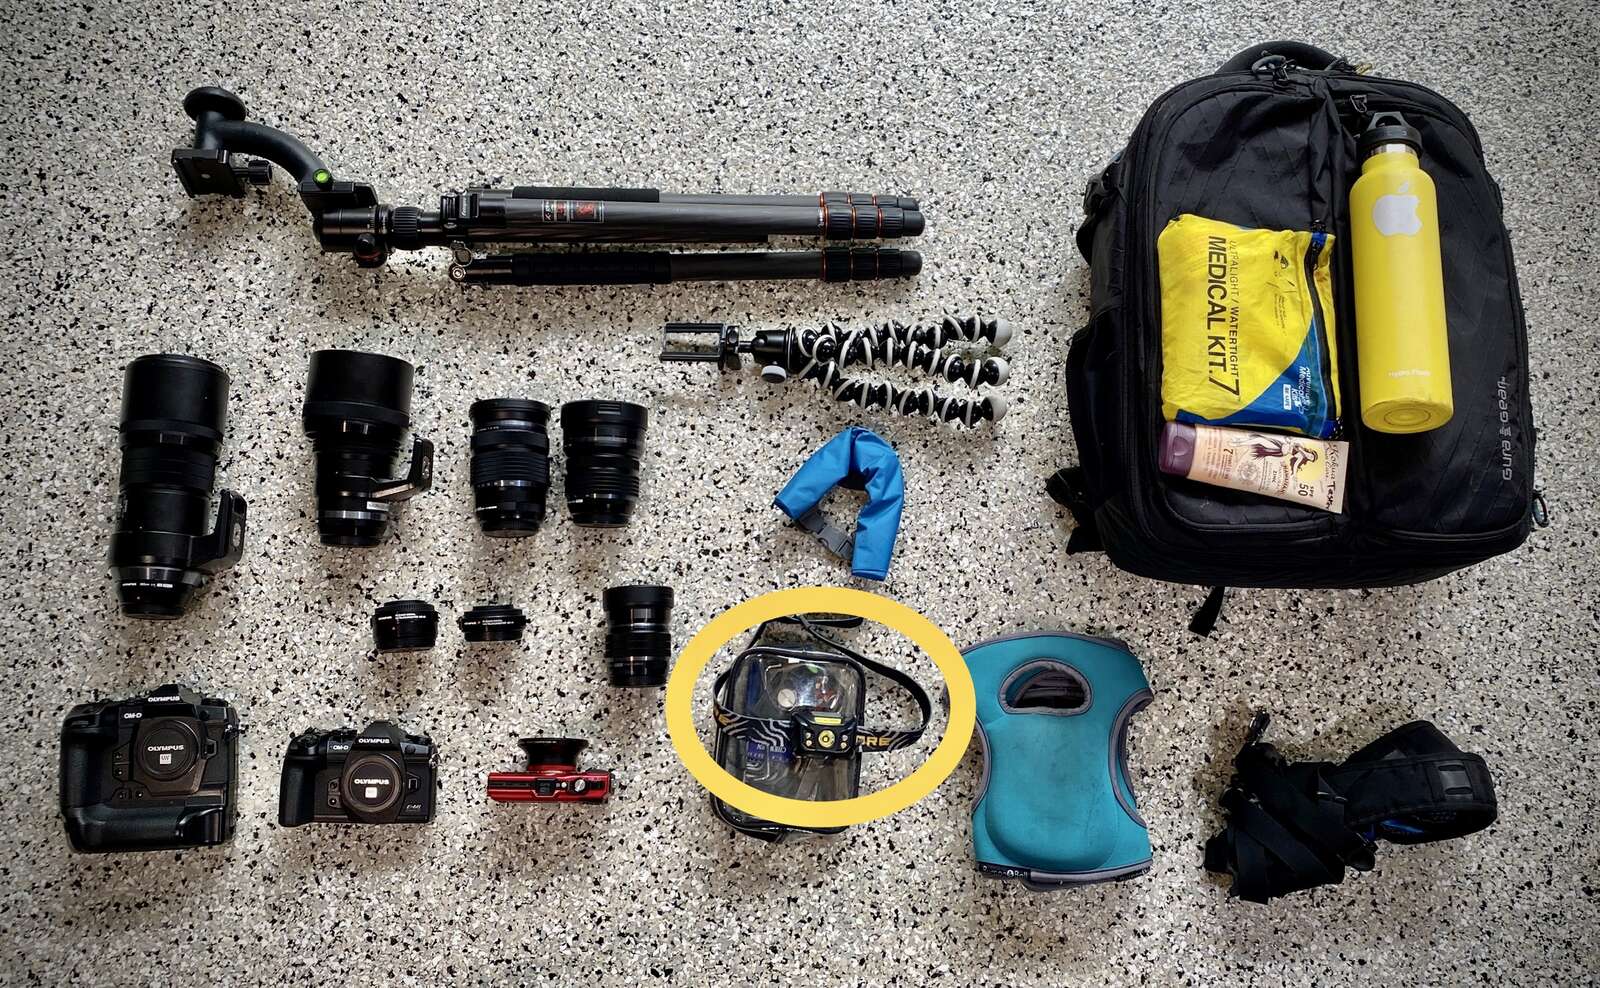
What’s in the Bag
My switch to the Olympus mirrorless system has given me a new sense of freedom with smaller cameras and cutting edge in-camera technology. The E-M1X and E-M1 Mark III help me capture images not possible before, with the help of 7-stops of image stabilization, Pro Capture and Live Composite Modes, and Starry Sky AF. All these features have helped me expand my horizons as a photographer. I love the Olympus adventure camera system for its compact size, sharp optics, in-camera technology, and weather sealed construction. For versatility I work with two camera bodies and an assortment of lenses. Don’t forget your headlamp (circled in the photo to the left) when shooting the night sky.
In addition to my cameras and lenses, I'll also bring along a Black Rapid Camera Harness, knee pads, first aid kit, sunscreen, drybag, and water bottle.
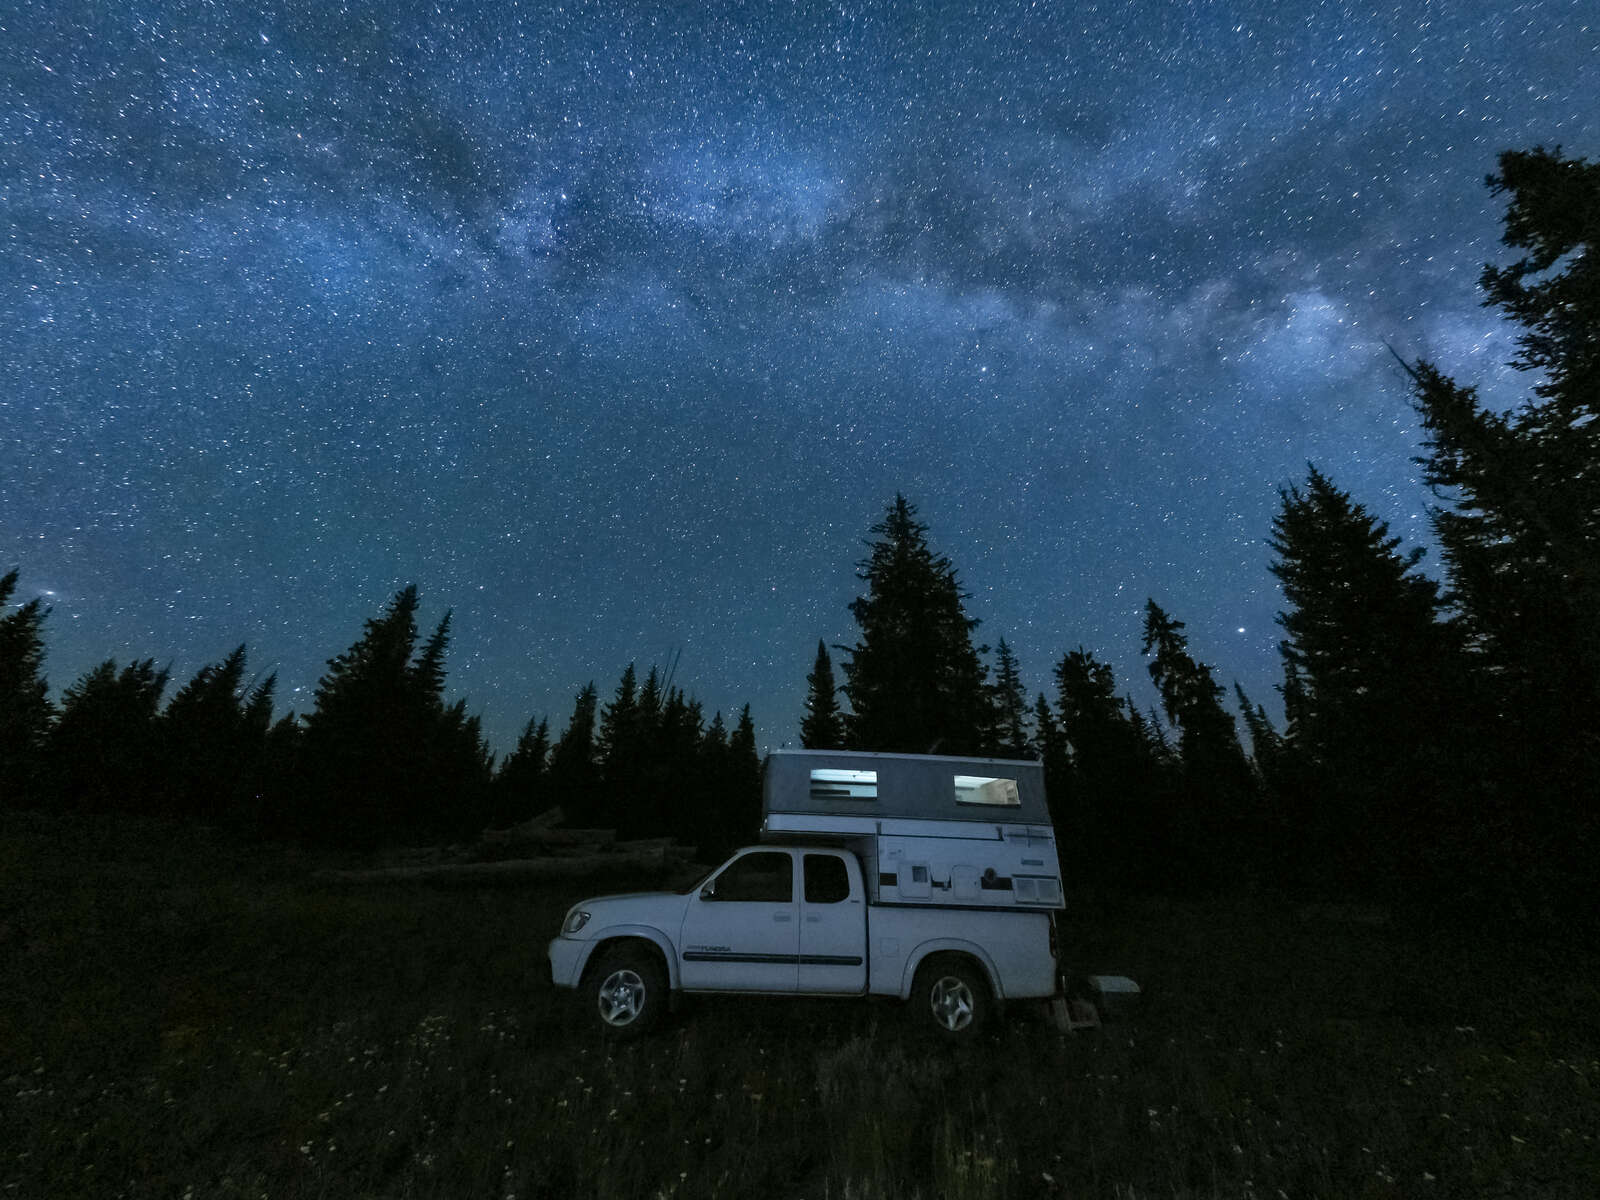
30s | F2.8 | ISO 3200
The Milky Way arches over my truck camper, which became affectionately known during the journey as "The Comet Chaser." Having a camper that can access remote locations is key to being in the right place at the right time.
DAY ONE - Denver to Dead Horse Point
It was almost midnight when I arrived at the Dead Horse Point State Park campground after a longer than usual drive from Denver. The sky was crystal clear, giving me the energy to immediately set up my tripod and begin test exposures with the E-M1 Mark III. You learn quickly how well you know your camera when you’re literally shooting in dark. The key is practicing and organizing your gear before you leave home. It also helps to have a red-light option on your headlamp, so that your eyes can stay adjusted working in the dark.
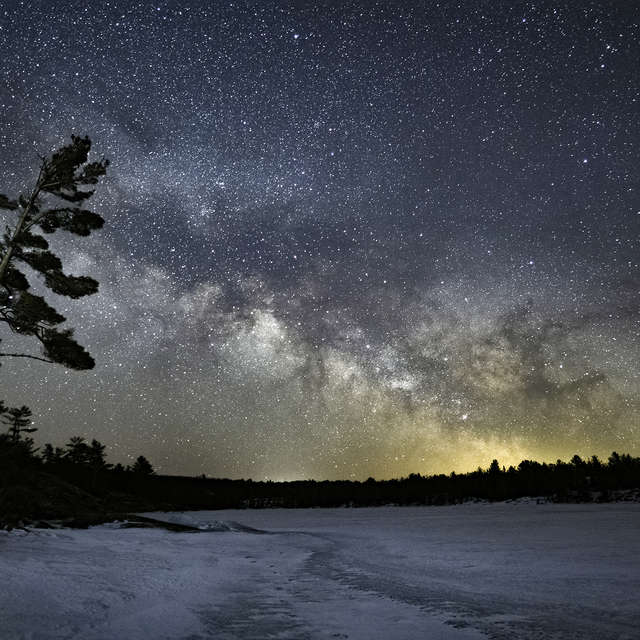
A well-positioned pinyon pine tree created foreground for a vertical composition with the North Star in view just above the top branches. The magic of astrophotography is the light gathering during time exposures. There is a sort of alchemy, letting the sensor capture as much light as possible before movement of the earth’s rotation causes the stars to streak. Longer exposures will turn those streaks into start trails rotating around Polaris, the North Star, capturing the star light in a way that our eyes can’t see.
To avoid visible motion or streaks in the stars from the earth’s rotation, first I shot a series of exposures employing the 500-rule of thumb (500 divided by focal length) to calculate the minimum shutter speed. Using an 8mm Fisheye lens, this translates to 31 seconds or faster. Once focus was attained with the revolutionary Starry Sky AF mode, I clicked the shutter. Eureka! The stars were tack sharp as the Milky Way arched over the tree.
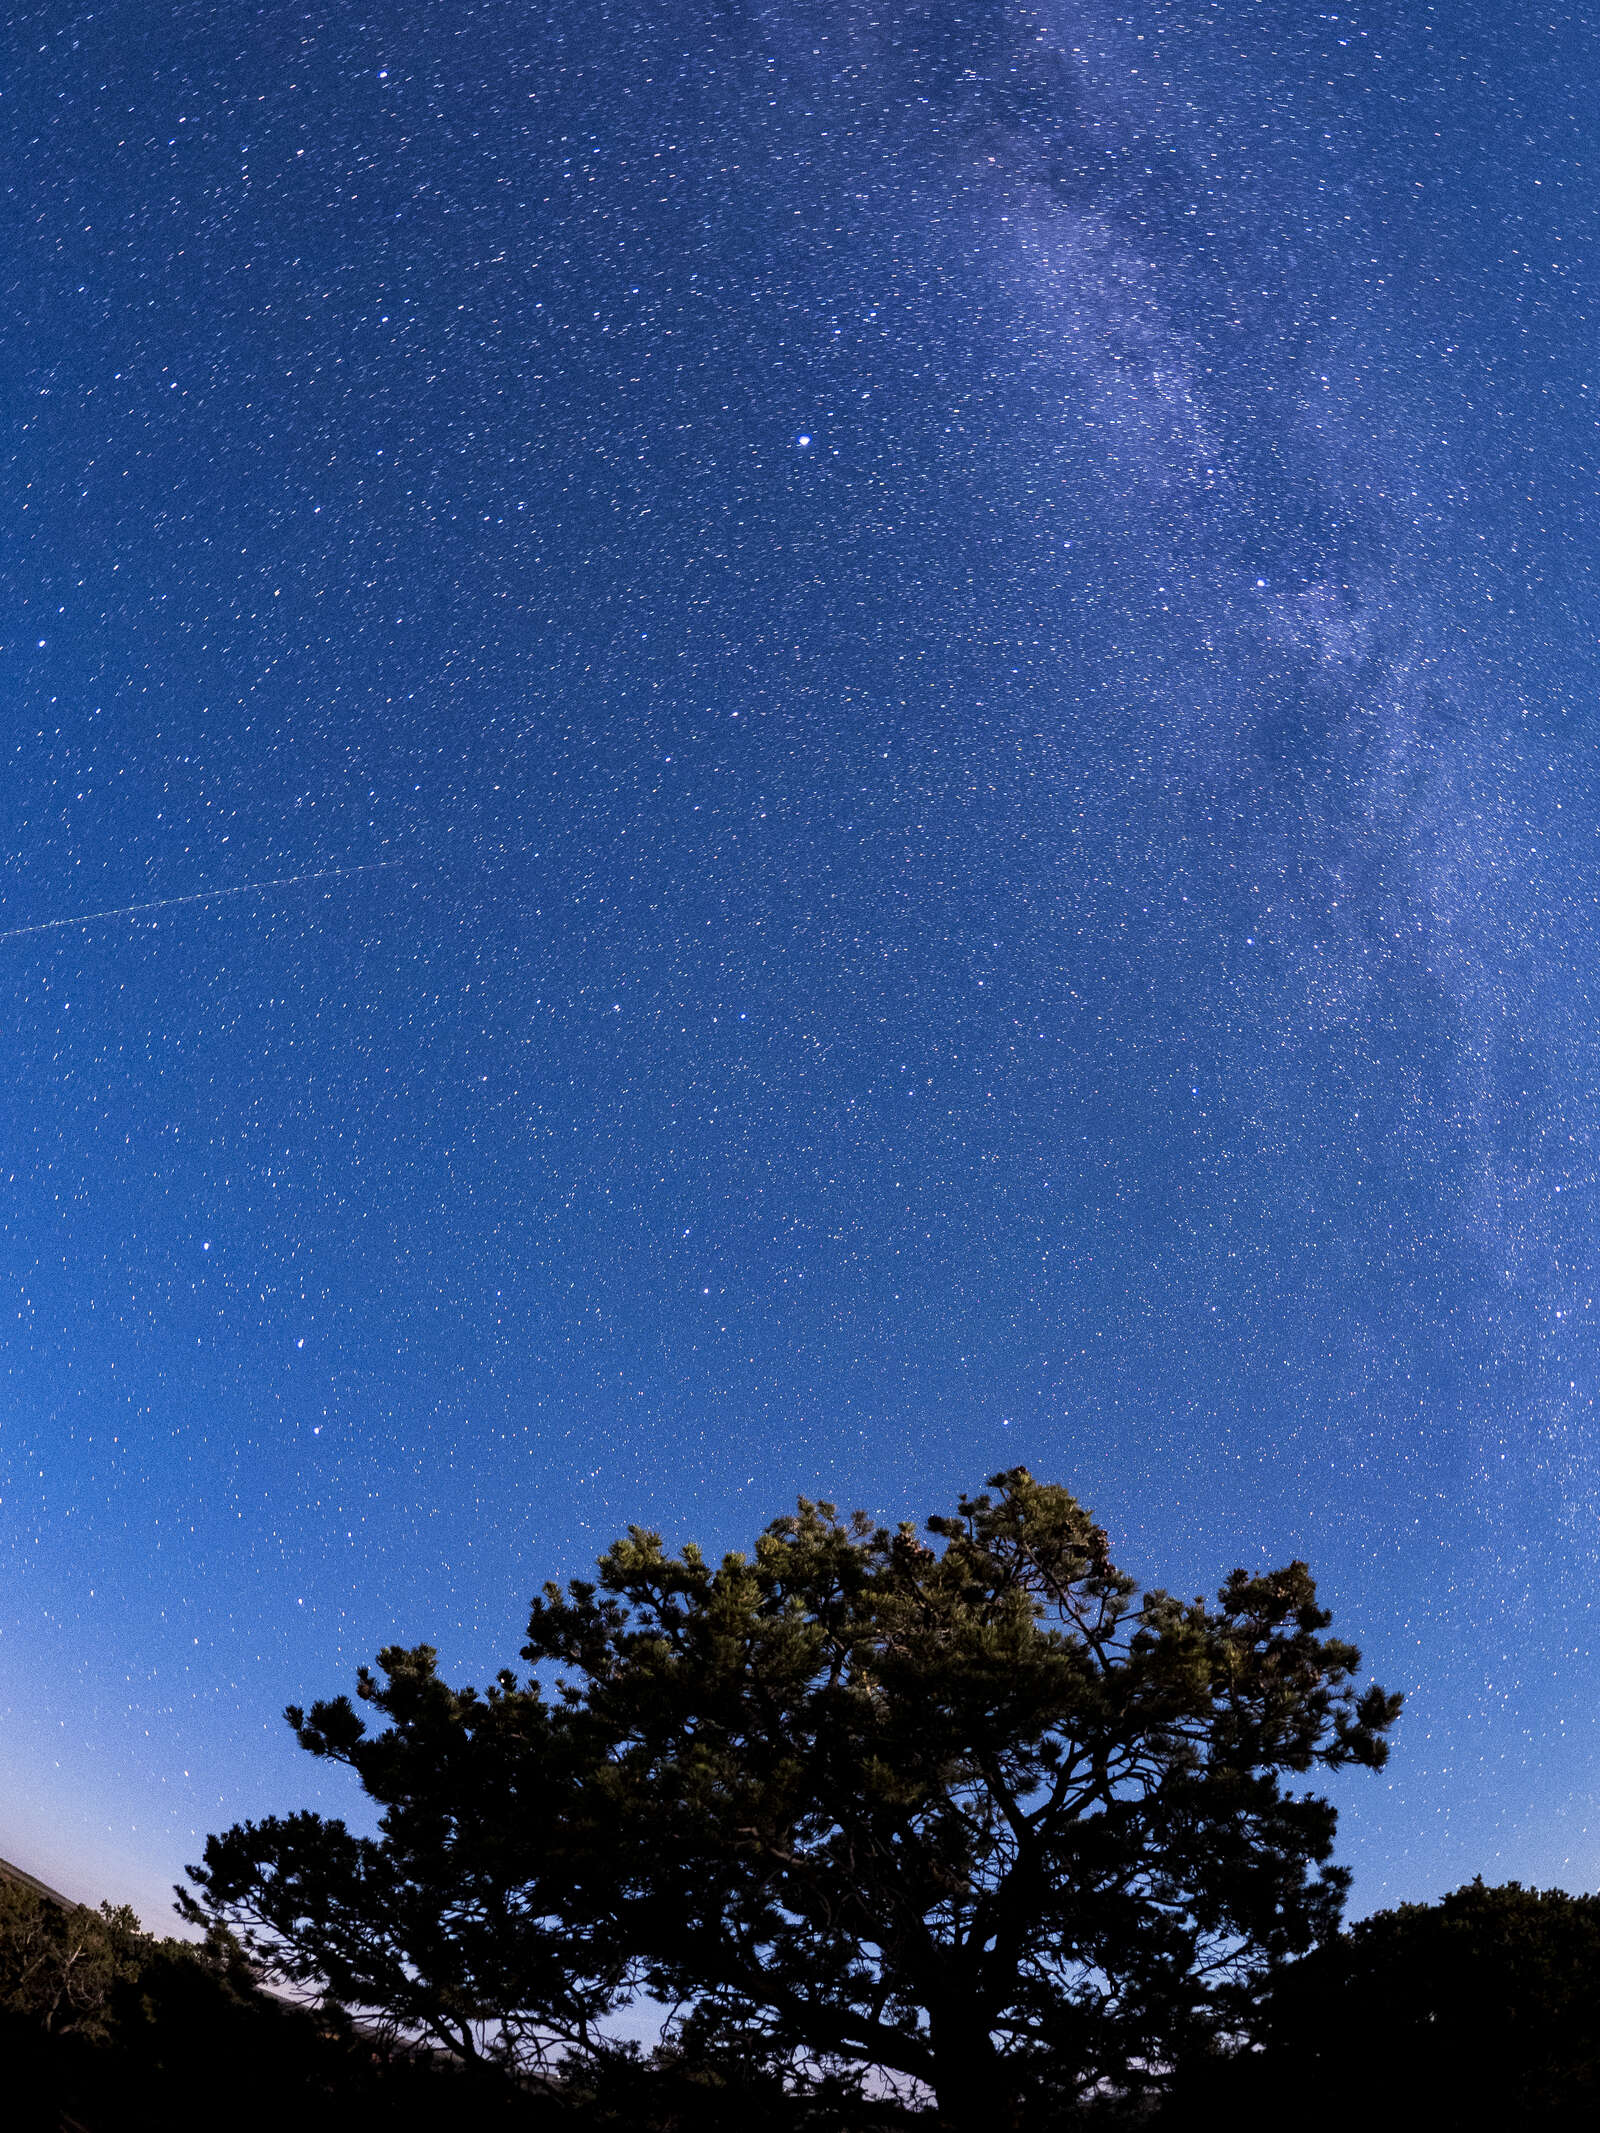
30s | F1.8 | ISO 3200
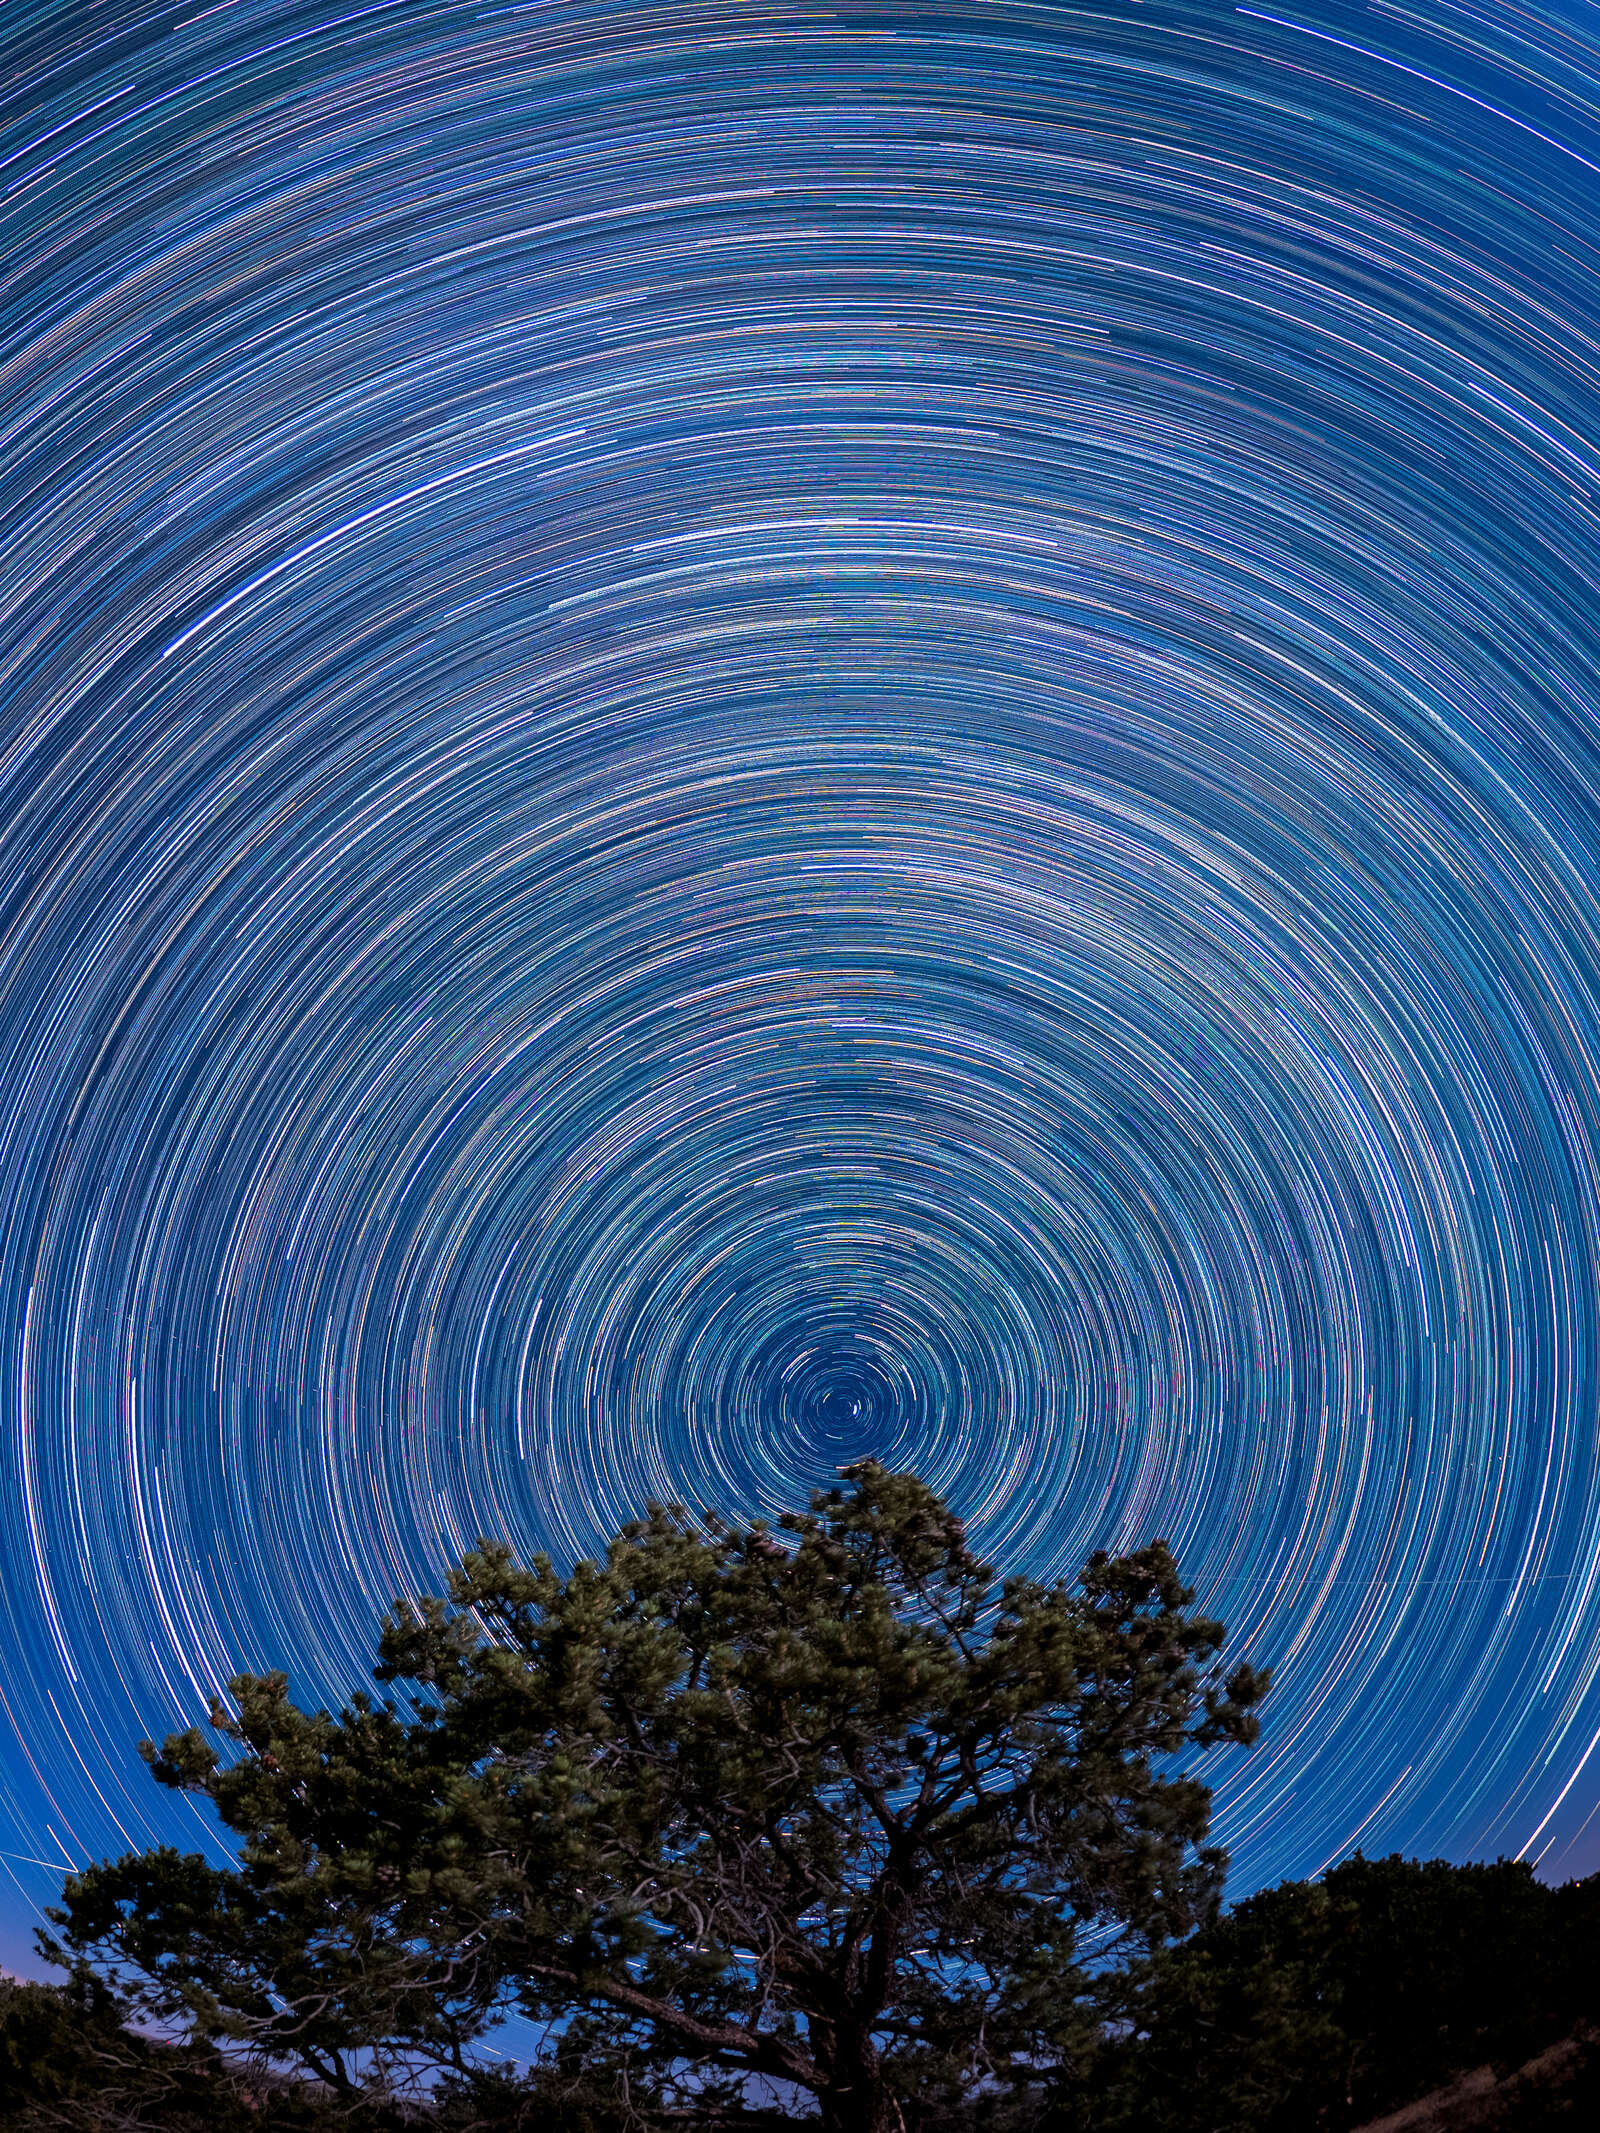
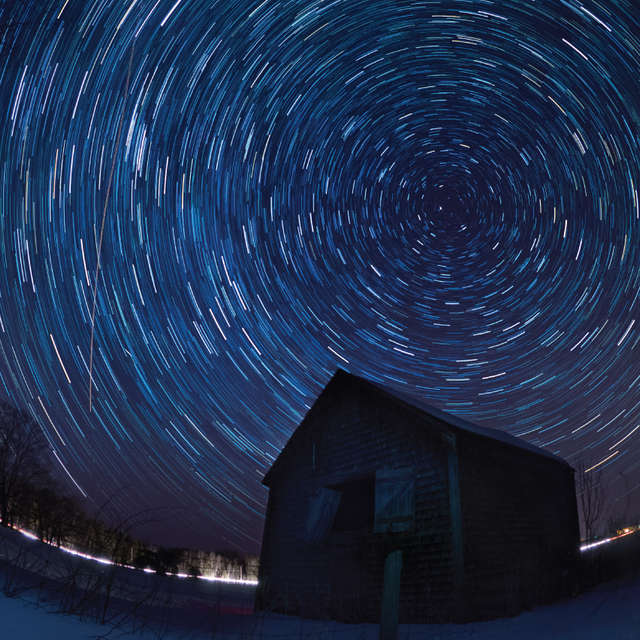
60s | F1.8 | ISO 1600
With star trails in mind, I switched to Live Composite Mode for a 90-minute time exposure at 60 second intervals. In-camera software blends the images creating streaks orbiting around the North Star. The cool thing about Live Composite you can watch the start trails develop in real-time on the LCD screen. As luck would have it, a crescent moon rose near the end of the 90-minutes and light-painted the tree adding detail the foreground.
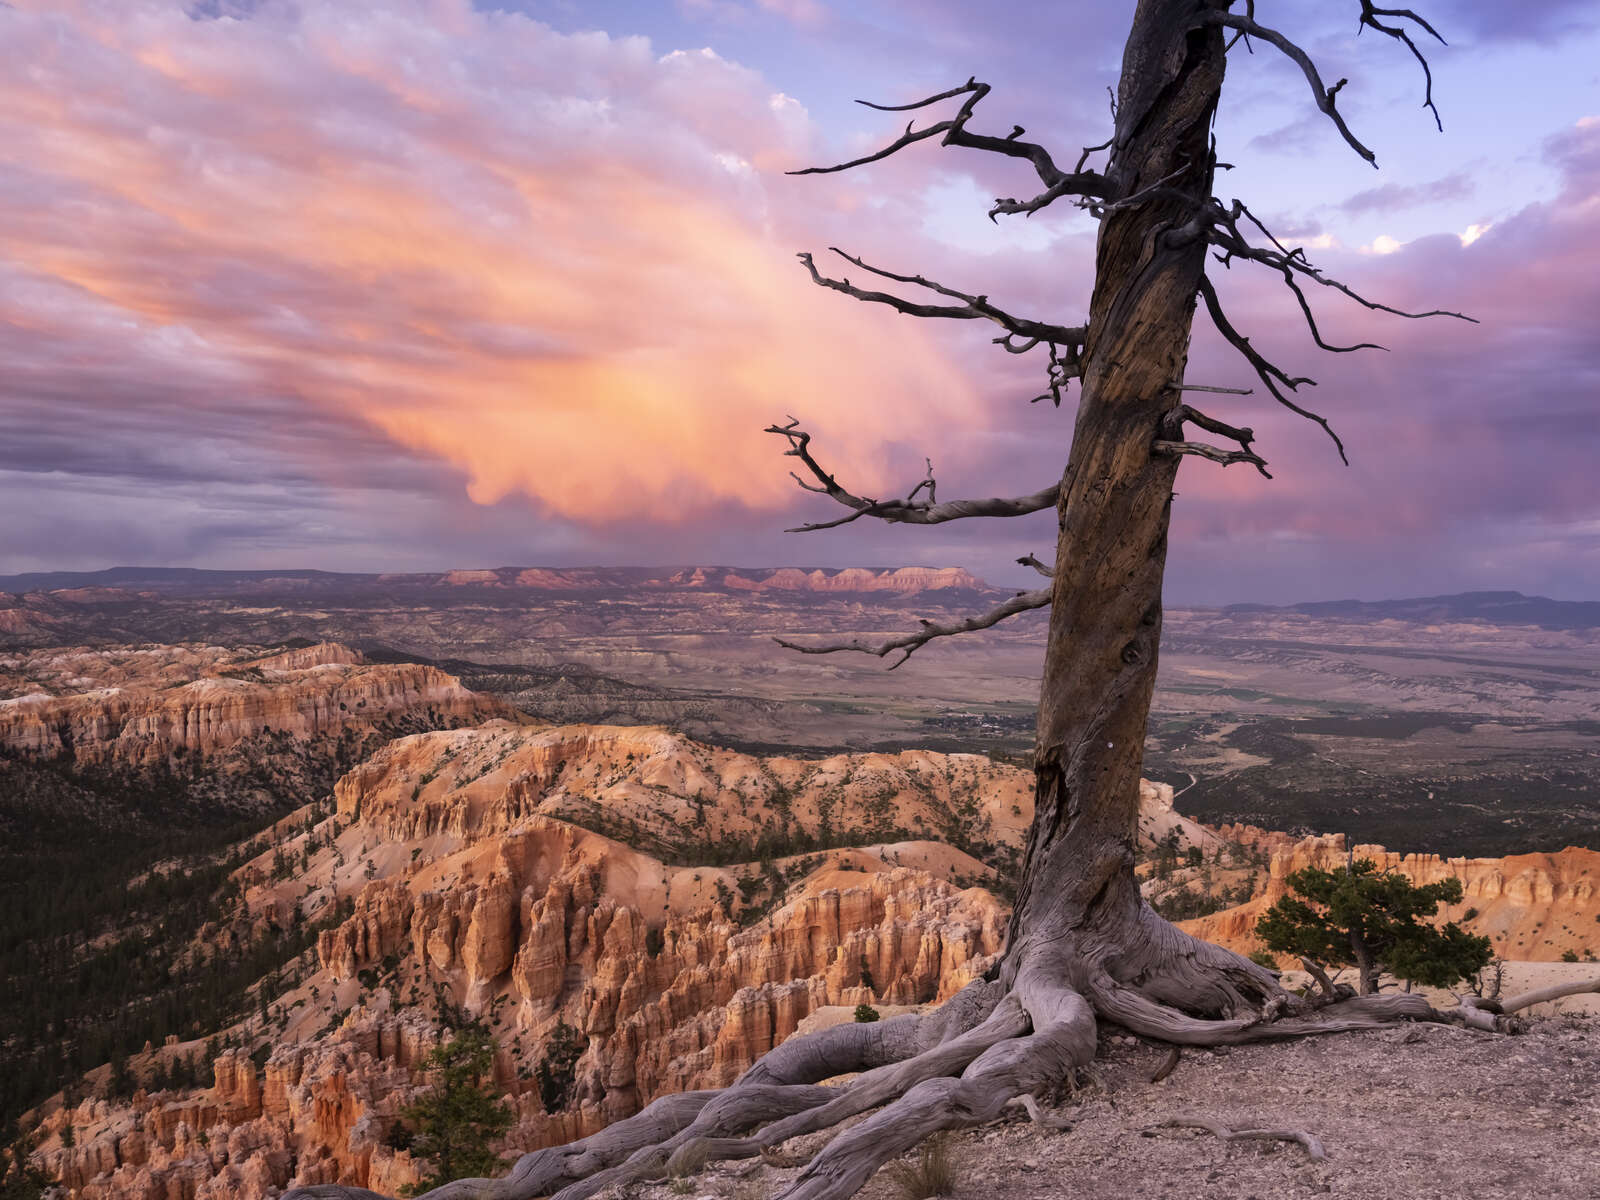
Early the next morning the sky was still clear. I got up before sunrise to explore along the rim at Dead Horse Point. It was critical to find a viewpoint facing the correct direction, hopefully with foreground for a sense of place. A crescent moon provided just enough light that I didn’t need my help lamp. I set up with an artistic tree skeleton in the foreground and waited.
It took time to locate the comet in the dawn sky. Finally, eureka! Although exciting to get my first glimpse of this celestial event, it was visible only long enough for one frame (in center of image) before clouds obscured the comet. The chase continues…
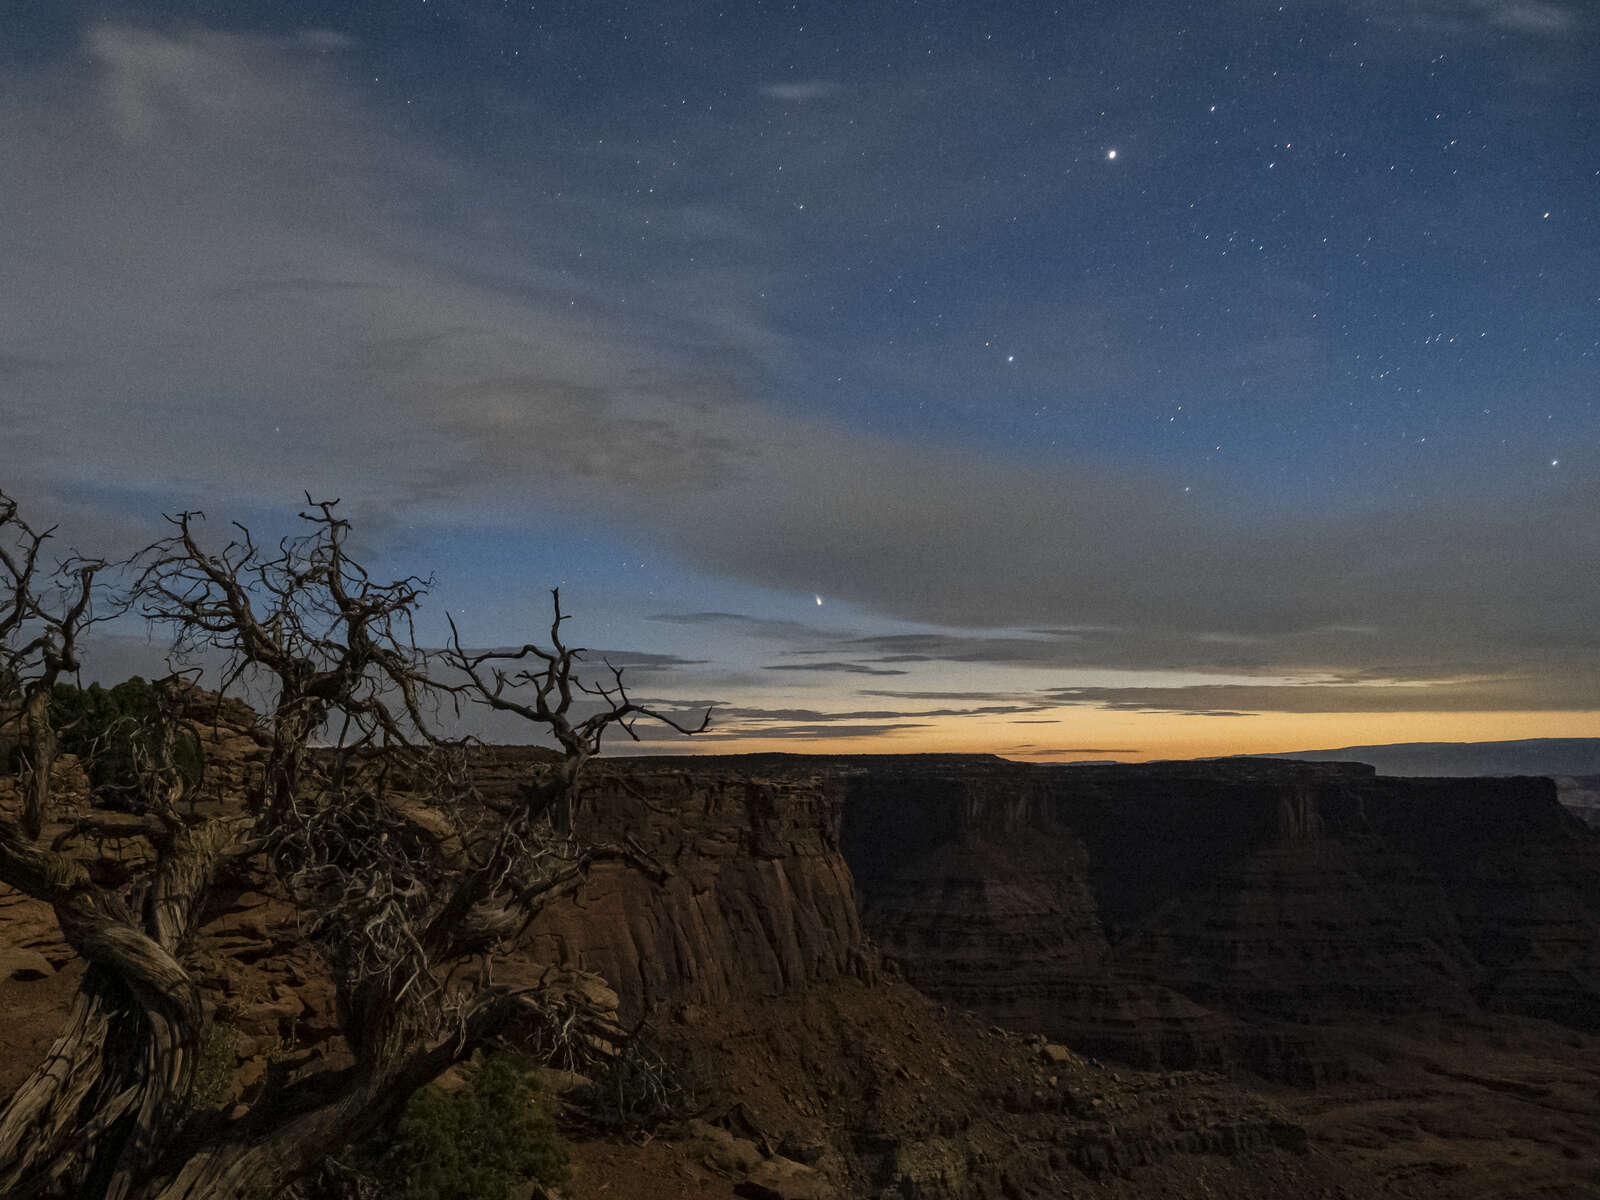
25s | F4 | ISO 3200
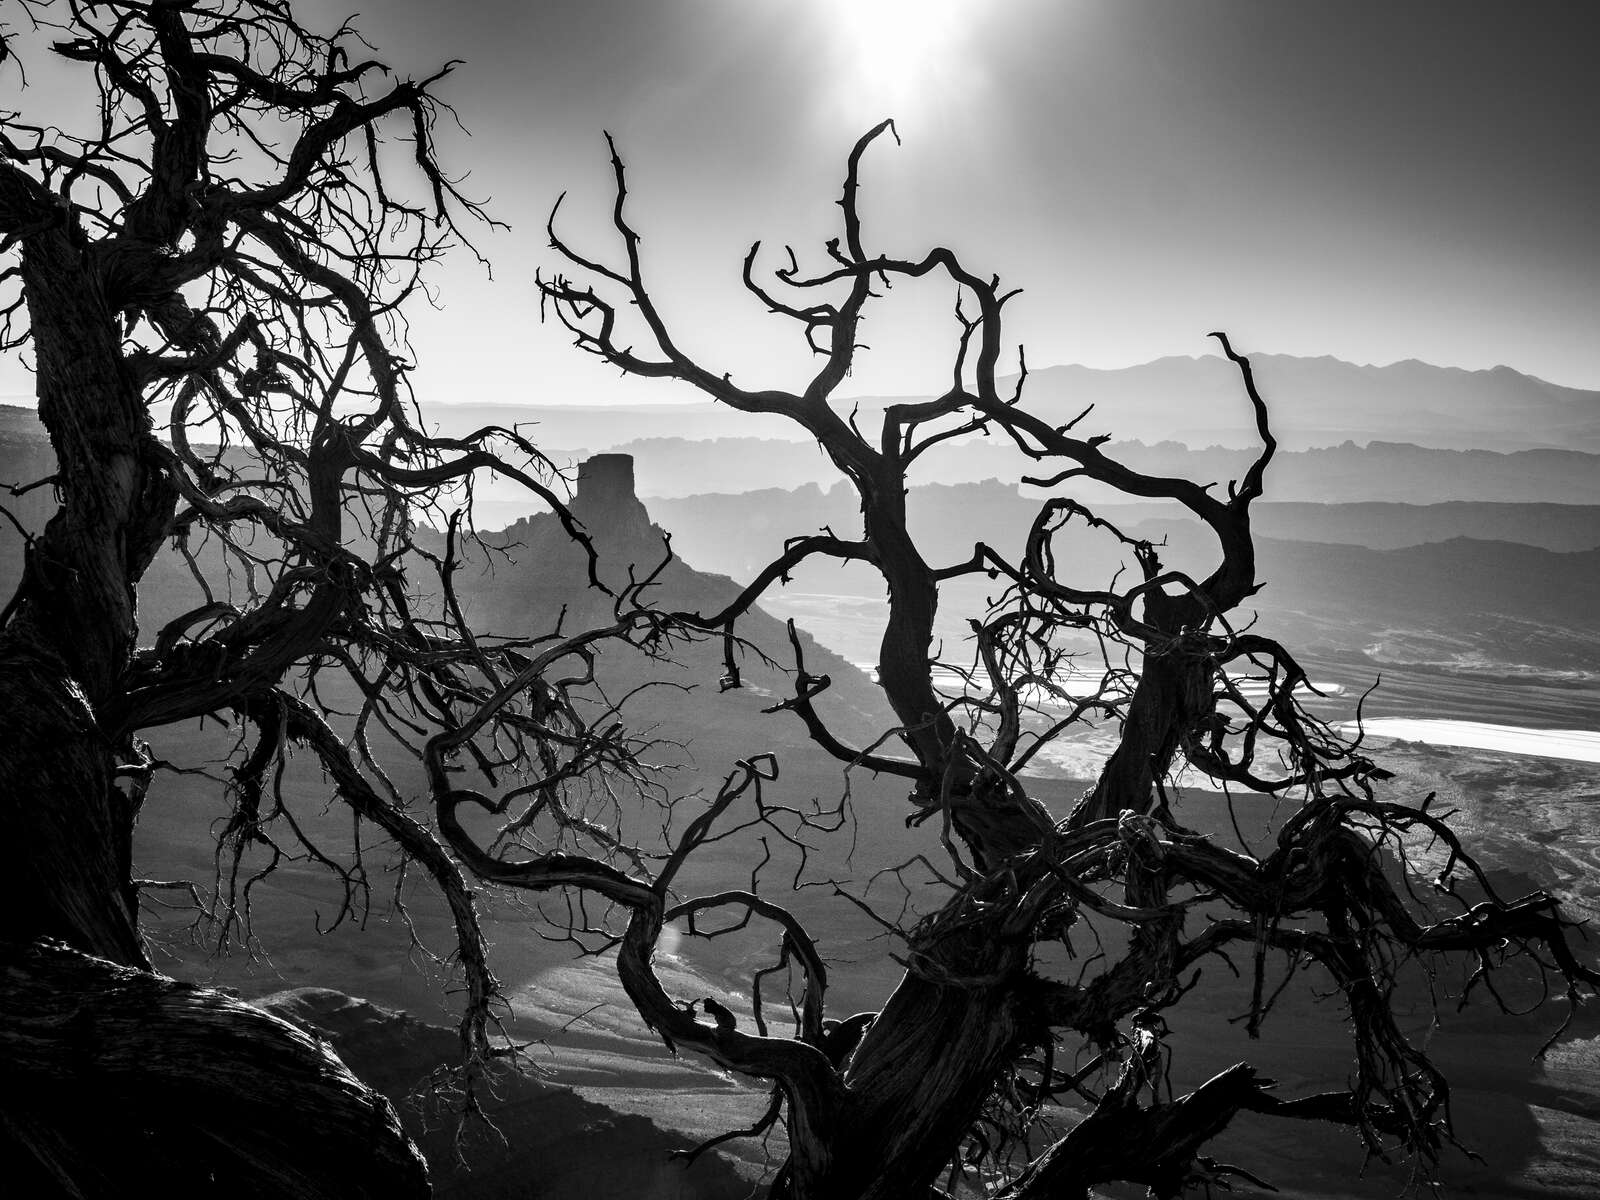
1/400s | F11 | ISO 250
When out exploring you must always remain open to serendipity. To my surprise, on my way back to camp I stumbled across a viewpoint I’ve wanted to return to ever since my first visit here in 1981. This composition was burned into my memory – a juniper tree skeleton set against repeating sandstone cliffs with the La Sal Mountains on the skyline.
Using the M.Zuiko 12-100mm zoom, I shot this image in color knowing I would convert the image to black & white in Lightroom (or in “post,” as we say in the business). Some images just scream to be in black & white, especially if there’s high contrast and potential for a silhouette.
DAY 2 – Dead Horse Point to Mount Terrill
Next I headed for the high plateaus to the west of Capitol Reef National Park. NASA published a viewing guide that indicated the comet would switch from being visible before sunrise to just after sunset. My goal now was to find a location with an open view of the northwestern sky.
I found the perfect spot above glacial lake Fishlake along the flanks of Mount Terrill at 10,000 feet above sea level. The clearing sky looked promising with spruce trees in the foreground. After making camp, I set up my tripod and went through the workflow for shooting the night sky. Satisfied that I was ready for prime time, I cracked open a cold beverage, set up my lawn chair, and waited for twilight when the comet would appear.
Twilight came soon enough and could not believe my eyes when the comet appeared between the spruce trees, framed in the twilight sky just as I had hoped. Love when a plan comes together. I fine-tuned my composition and began shooting varying both the shutter speed (15-60 seconds) and the ISO (1600-3200). The results on the LCD screen were blowing me away. I shot until the comet disappeared sometime before midnight.
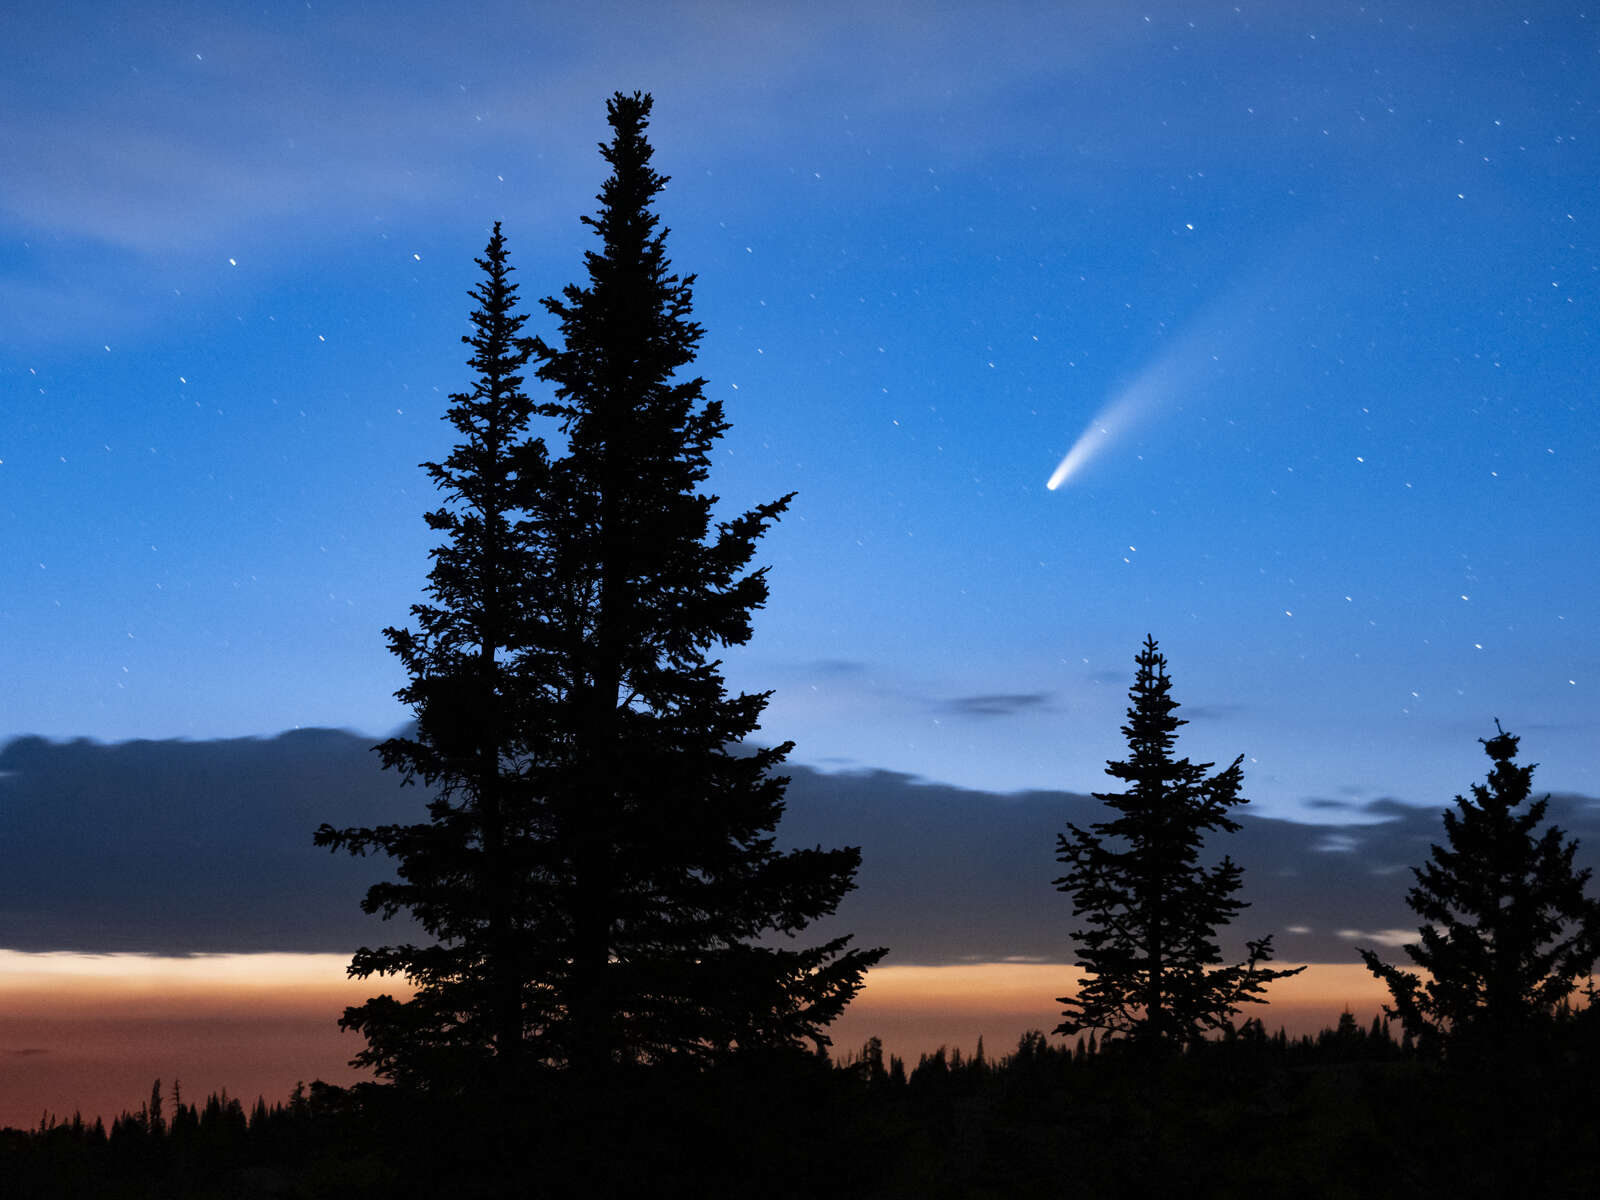
25s | F2.8 | ISO 1600
You get to know your camera well when you spend time shooting in the dark. The Olympus menu is quite logical, once you are familiar with where things are and muscle memory kicks in. One of the best things about Olympus cameras is that all the buttons and dials are programmable should you choose. In particular, the Custom Modes (1-3) enable shortcuts for frequently used modes and setting.
10-step Starry Sky AF Checklist:
- Camera on stable tripod (ball-head with quick-release plate)
- Wide-angle lens (preferably F2.8 or lower)
- Set camera to Manual Mode (30 seconds at F2.8 or lower, ISO 3200)
- Set White Balance to 3200˚Kelvin (tungsten) to help see the stars (fine tune in post)
- Set camera to Starry Sky AF Mode (<accuracy>) and focus area to small square
- Compose scene with foreground elements (if possible) and focus area on sky
- Run Starry Sky AF by pressing AEL/AFL button (takes a few seconds)
- Shoot test shot wide open at 30 seconds (ISO 3200) 2 second timer or wireless remote
- Check test for exposure and sharpness (zoom in on stars); adjust if necessary
- Shoot sequences adjusting shutter speed (15-60 seconds) and vary ISO (1600-3200)

1/5s | F8.0 | ISO 64
DAY 3 – Mount Terrill to Cedar Breaks
Next on my list for chasing the comet was Cedar Breaks National Monument. The colorful cliffs and fanciful rock formations (rock spires called hoodoos) of Cedar Breaks mark the western edge of the Colorado Plateau geographic province. This is where the high plateaus step down along the Hurricane fault into the Basin and Range of western Utah, Nevada, and California.
Arriving in the late afternoon, I scouted overlooks and trails along the rim looking for foreground to set against the twilight sky. I found a great spot for shooting the magic light on the cliffs at sunset. Although did not find a suitable location with foreground that I had in my mind’s eye for shooting the comet after sunset, I lingered along the rim waiting for the sweet light to appear between the clouds. Testing my patience, shafts of light did finally paint the hoodoos but didn’t last long.
After sunset I relocated to an overlook with a view to the northwest. With no workable foreground, I focused on a clean shot of the comet. Clouds threatened but dissipated enough to add another element to the composition. To my naked eye I couldn’t tell if the Big Dipper would show through the clouds in the resulting image. Luckily, with 30 second exposure the star light from the dipper burned through the clouds, with the comet in clear sky below the clouds.
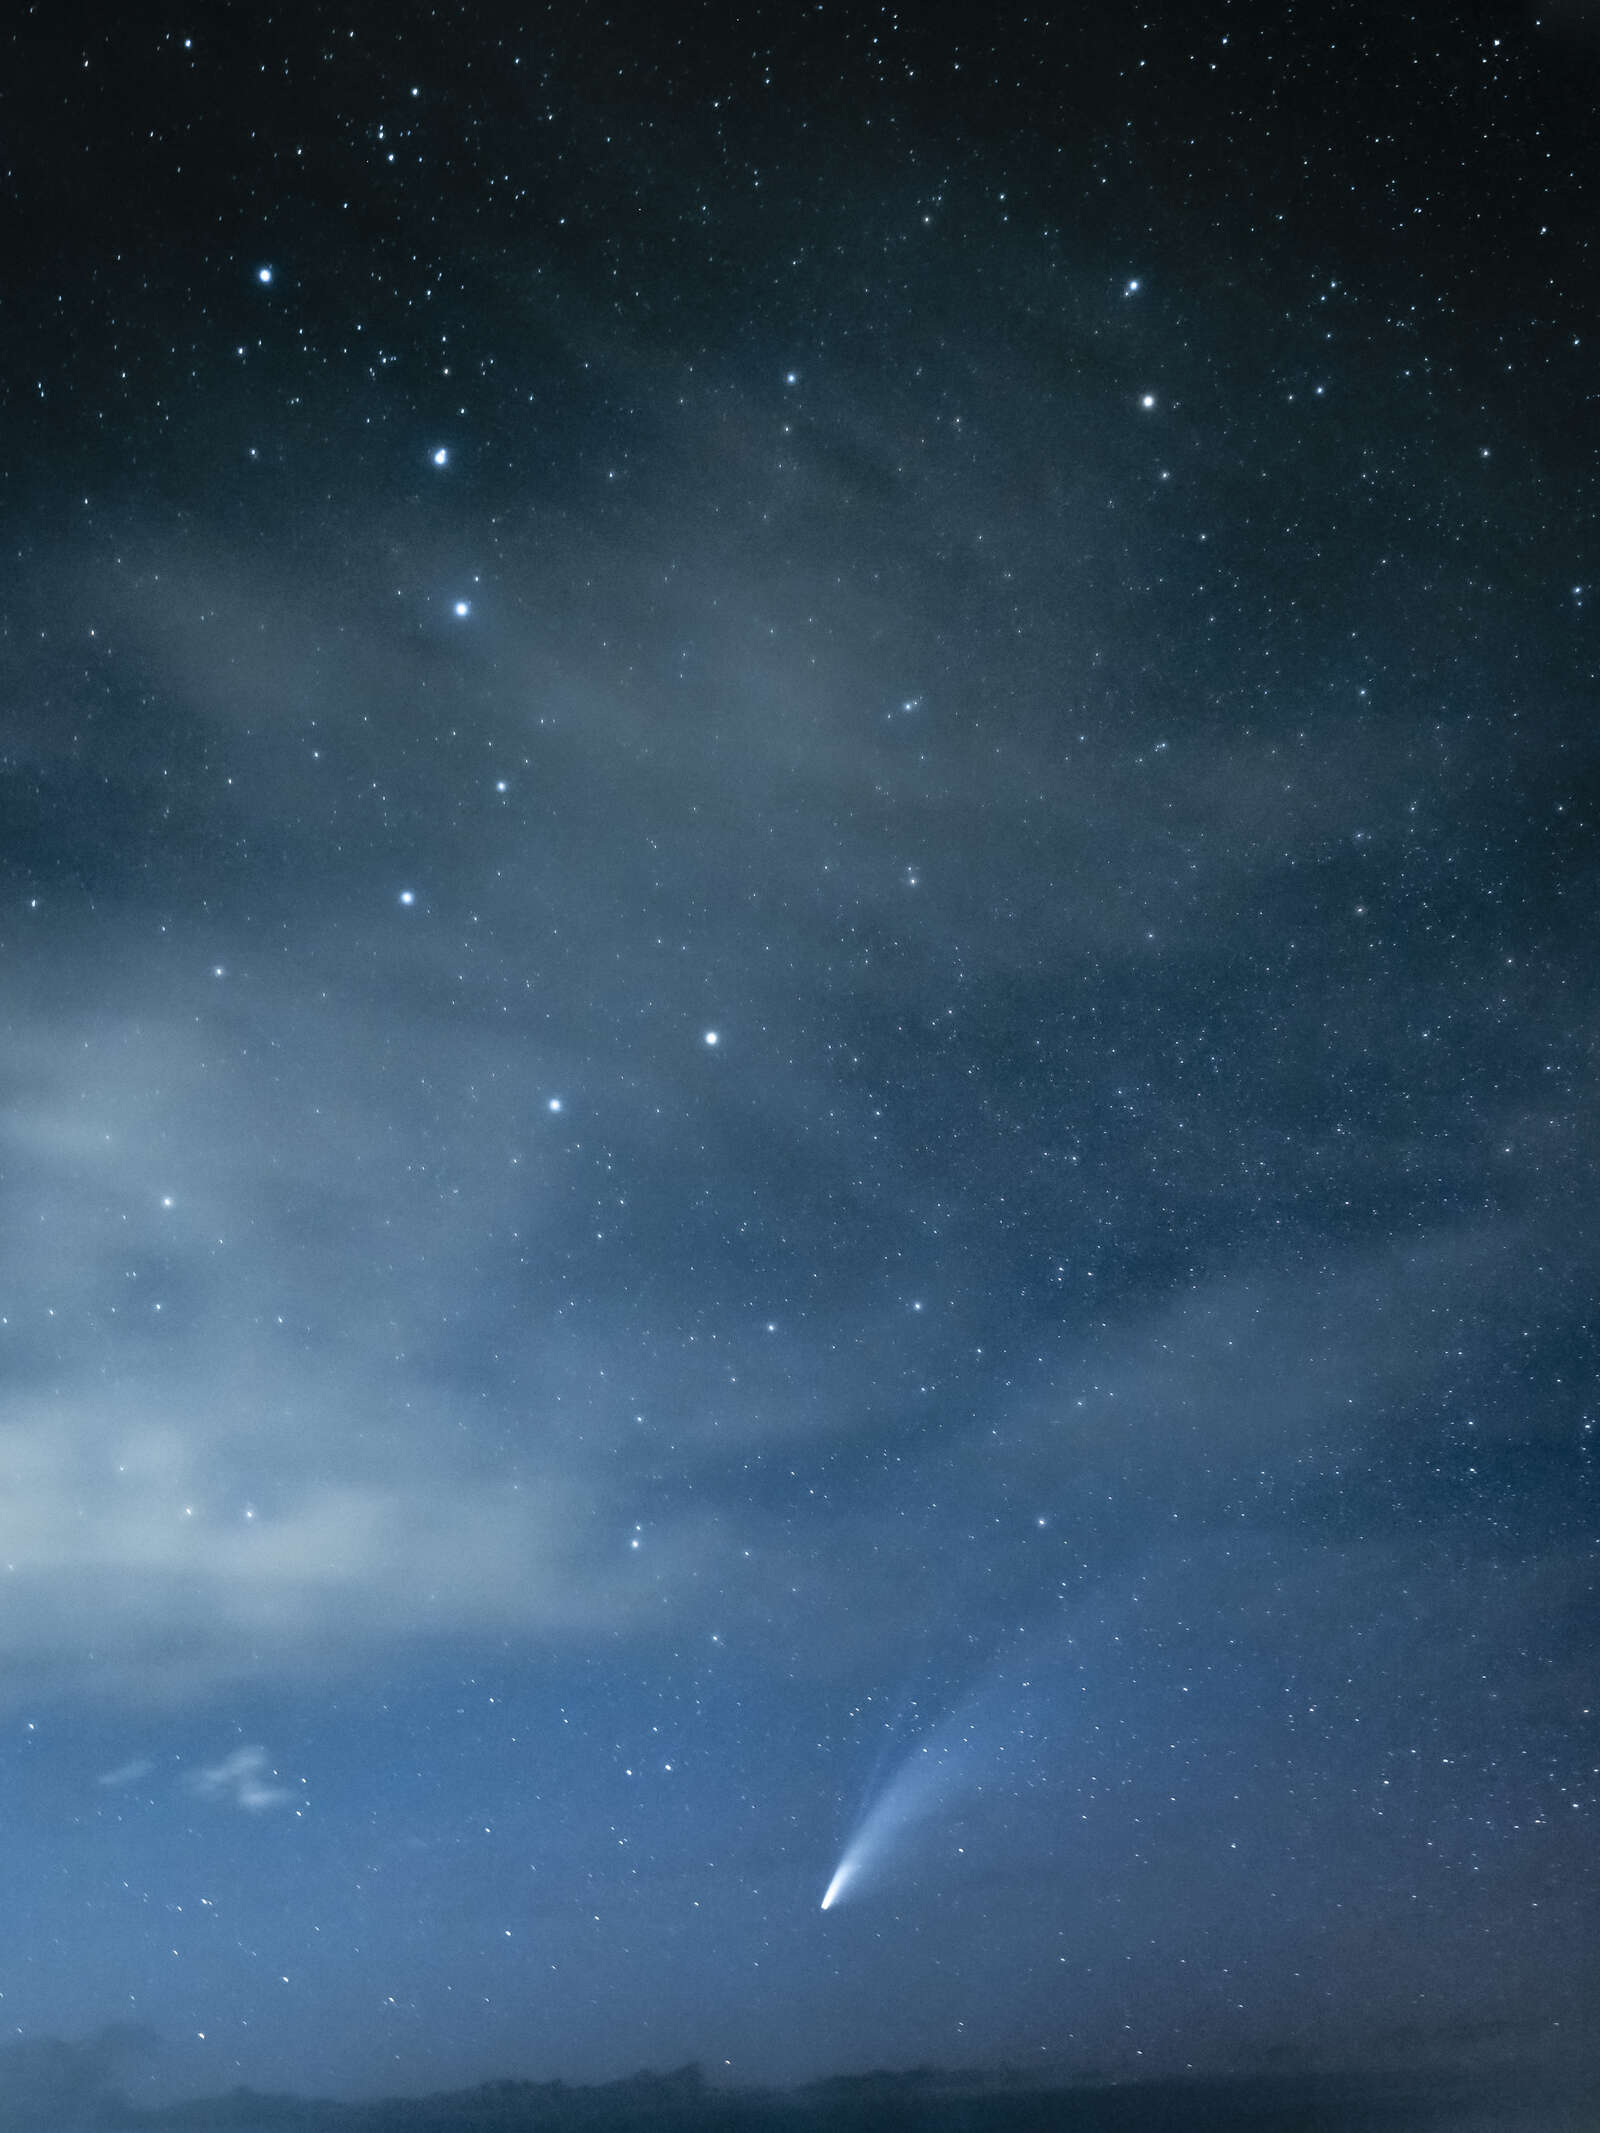
30s | F2.8 | ISO 3200
1/30s | F5.6 | ISO 640
DAY 4 – Cedar Breaks to Bryce Canyon
Thunder was echoing off the pink cliffs when I arrived at Bryce Canyon National Park. Afternoon thunderstorms are common across Utah’s high plateaus this time of year, potential for great skies at sunset. Similar to Cedar Breaks, Bryce Canyon is a cliff edge of colorful rock formations that formed in a shallow lake millions of years ago. In contrast, the topography at Bryce is not as steep, allowing for a network of trails below the rim.
I scouted different overlooks before settling on Bryce Point, a promontory oriented with a clear of the western skyline, and also the trailhead for the Peekaboo Trail. My plan was to have dinner then head down the trail to find a composition with hoodoos in the foreground. I hurried to finish eating as the magic light started to reveal itself.
I’m often accused of being a perfectionist and always being in the right spot. Truth is, you have to be ready when the light is good, and also be willing to work the scene with different compositions and exposure settings. The setting sun painted the landscape for 15 minutes, plenty of time for working it. I shot this every which way as the light changed, but it wasn’t until the sun had set that the sky turned pink and gold. To my eye, the horizontal composition best captured the light and drama of the wispy glowing clouds over the Aquarius Plateau in the distance.
After hiking about a mile down the trail below the rim, a tunnel over the trail created a frame for the M.Zuiko 7-14mm wide-angle lens. I set up my tripod and worked the composition. The star gazing app on my iPhone gave me confidence the comet would be in the frame. In this view, the twin tail of the comet is starting to be visible. Like shooting stars, two aircraft create fortuitous streaks of light during the 30 second exposure.
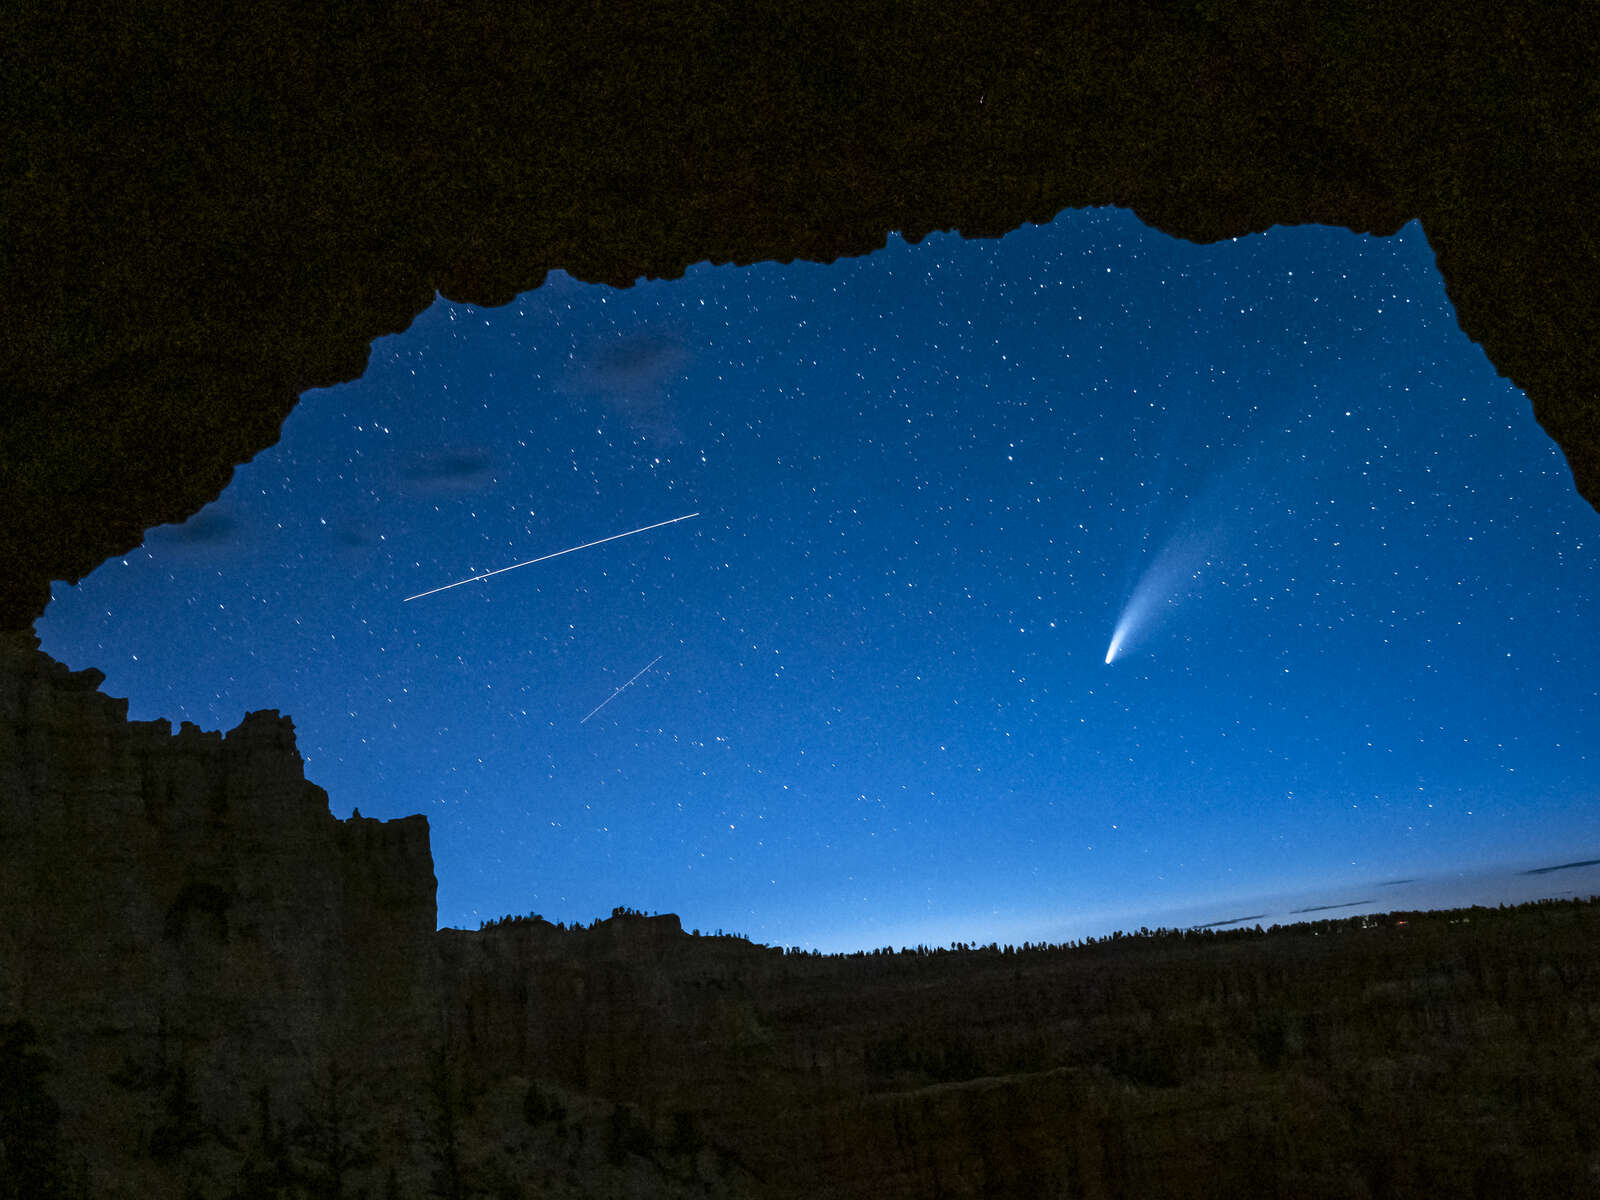
30s | F2.8 | ISO 3200
30s | F2.8 | ISO 3200
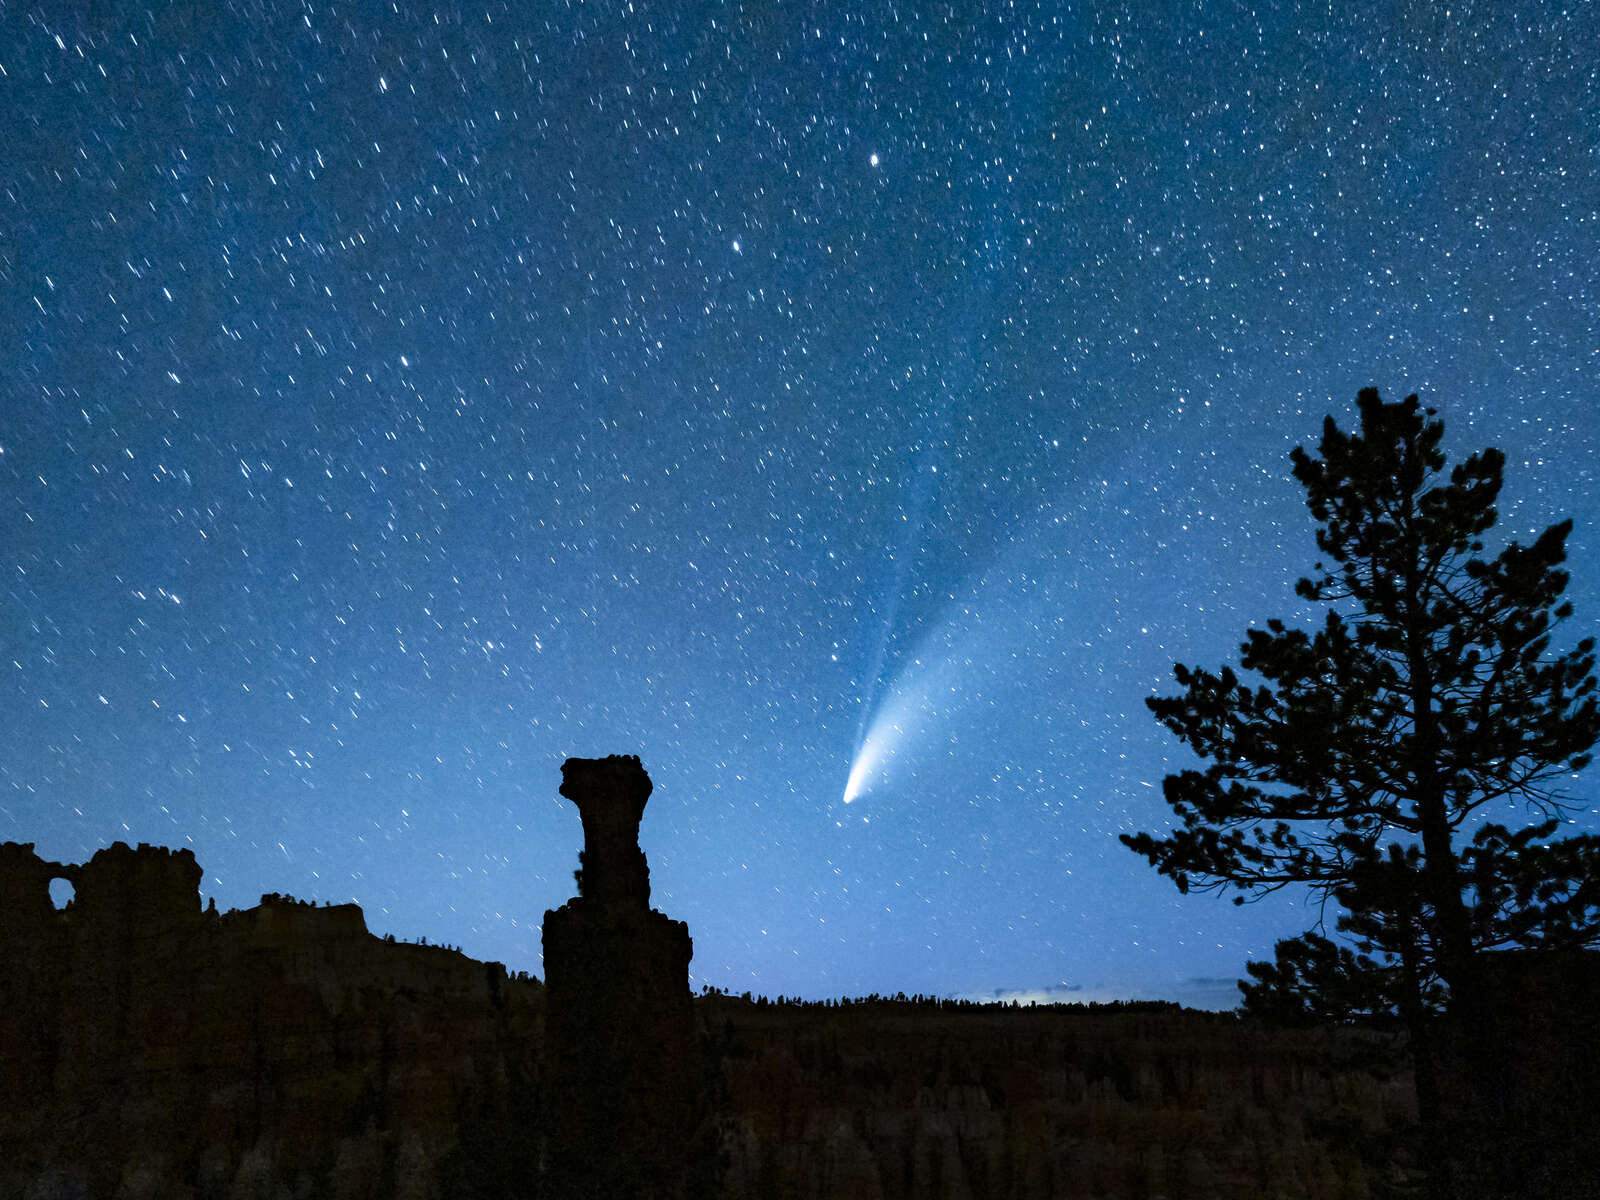
Farther down the trail I discovered what I was hoping for – hoodoos creating silhouettes against the night sky. The sky was amazing clear and the blue split to the tail was visible in a 60 second exposure. While some stars begin to streak noticeably at 60 seconds, I like the effect because it also makes the comet appear slightly bigger and also accentuates the split tail.
DAY 5 – Bryce Canyon to Cathedral Valley
The upturned rock layers along Waterpocket Fold in Capitol Reef National Park create a spectacular landscape of standing stones and slot canyons. A long dusty road into Cathedral Valley explores some of the most remote areas. This is another location that I first explored 40 years ago and have longed to return with modern-day digital equipment.
After fording the Fremont River, the road wound through the colorful Bentonite Hills framing the Henry Mountains in the distance. Driving west the rocks dramatically change with light and shadow dancing among the rock spires on the skyline. The road climbs with turnouts that lead to one spectacular viewpoints. After the campground, the road switchbacks down off the mesa into Upper Cathedral Valley with jaw-dropping views at every hairpin turn.
Once in the valley I drove a little faster than I should have as the sun was about to come out from under the clouds. Stopping where the sun would be framed by two rock spires, I grabbed my camera. I didn’t have much time to set up so I hand-held the first couple of shots as the sun broke through. These turned out the best shots with dramatic sun rays and a starburst created by the small aperture (F22) and positioning myself where the sun peaks over the spires. The moment with the magic light didn’t last long but was well worth the effort.
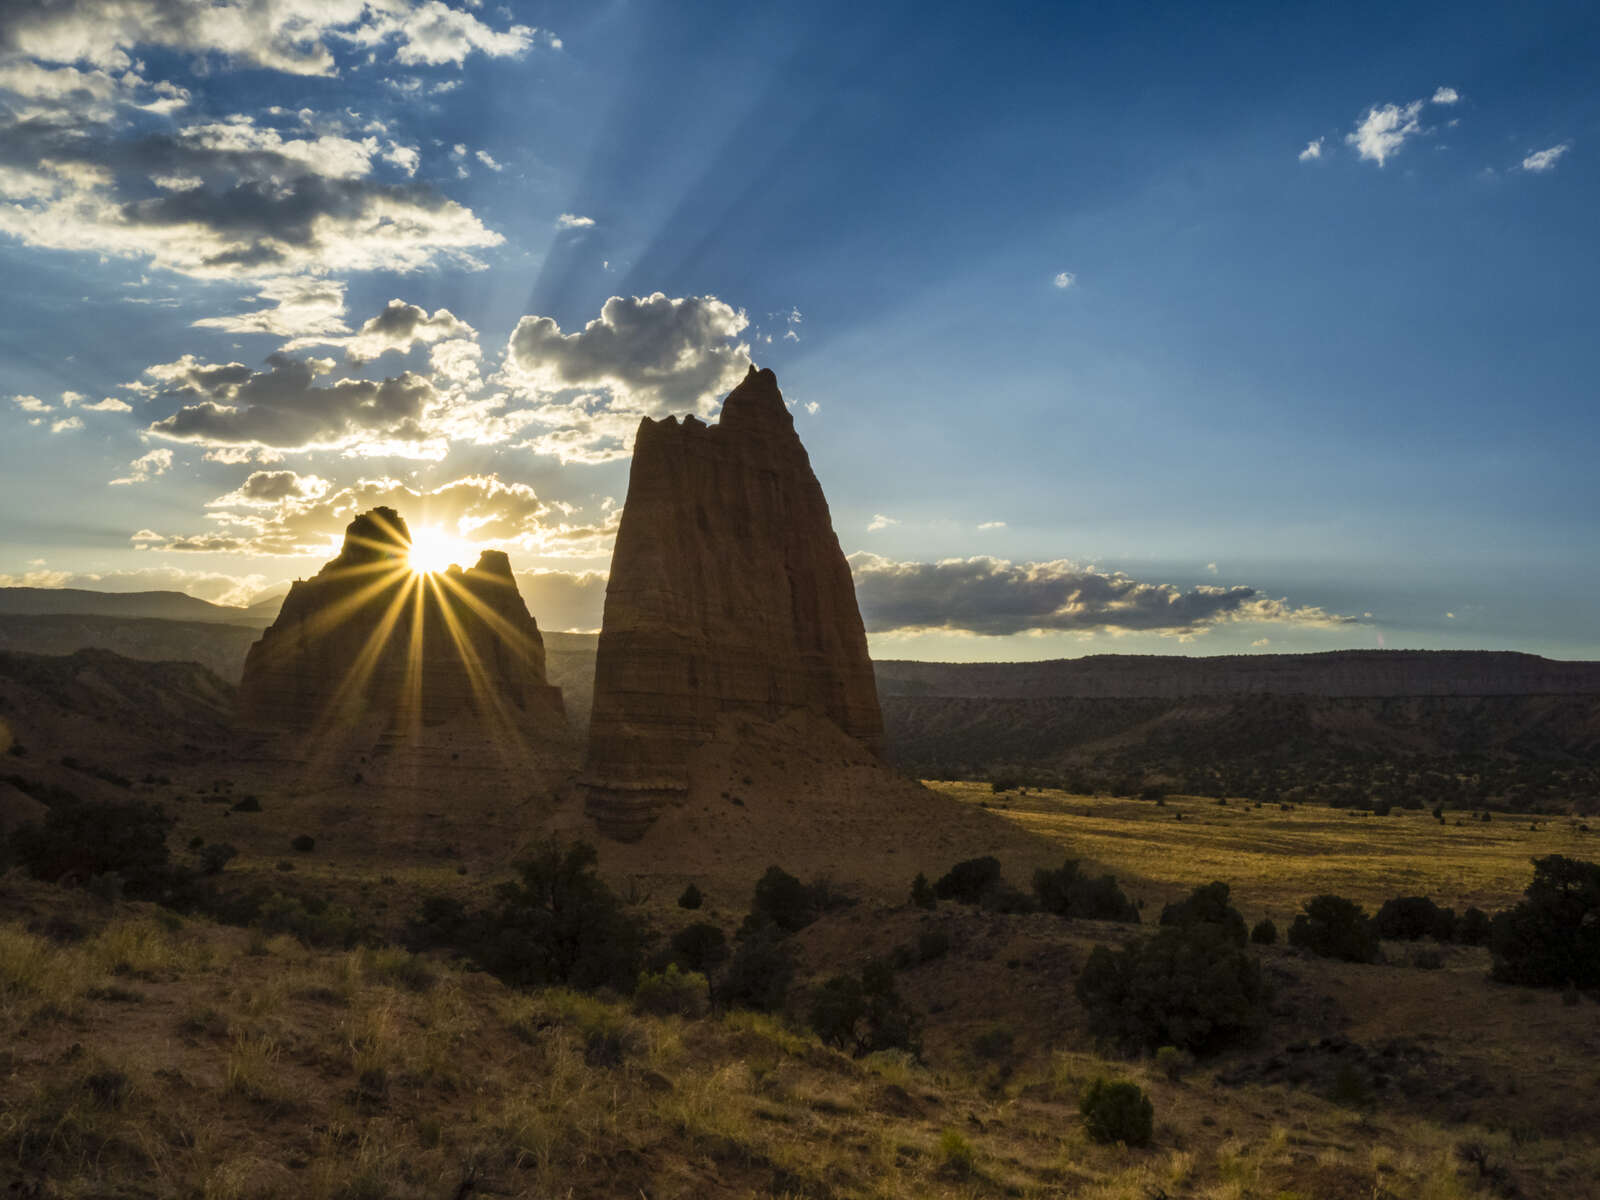
1/320s | F/22 | ISO 640
60s | F2.8 | ISO 3200
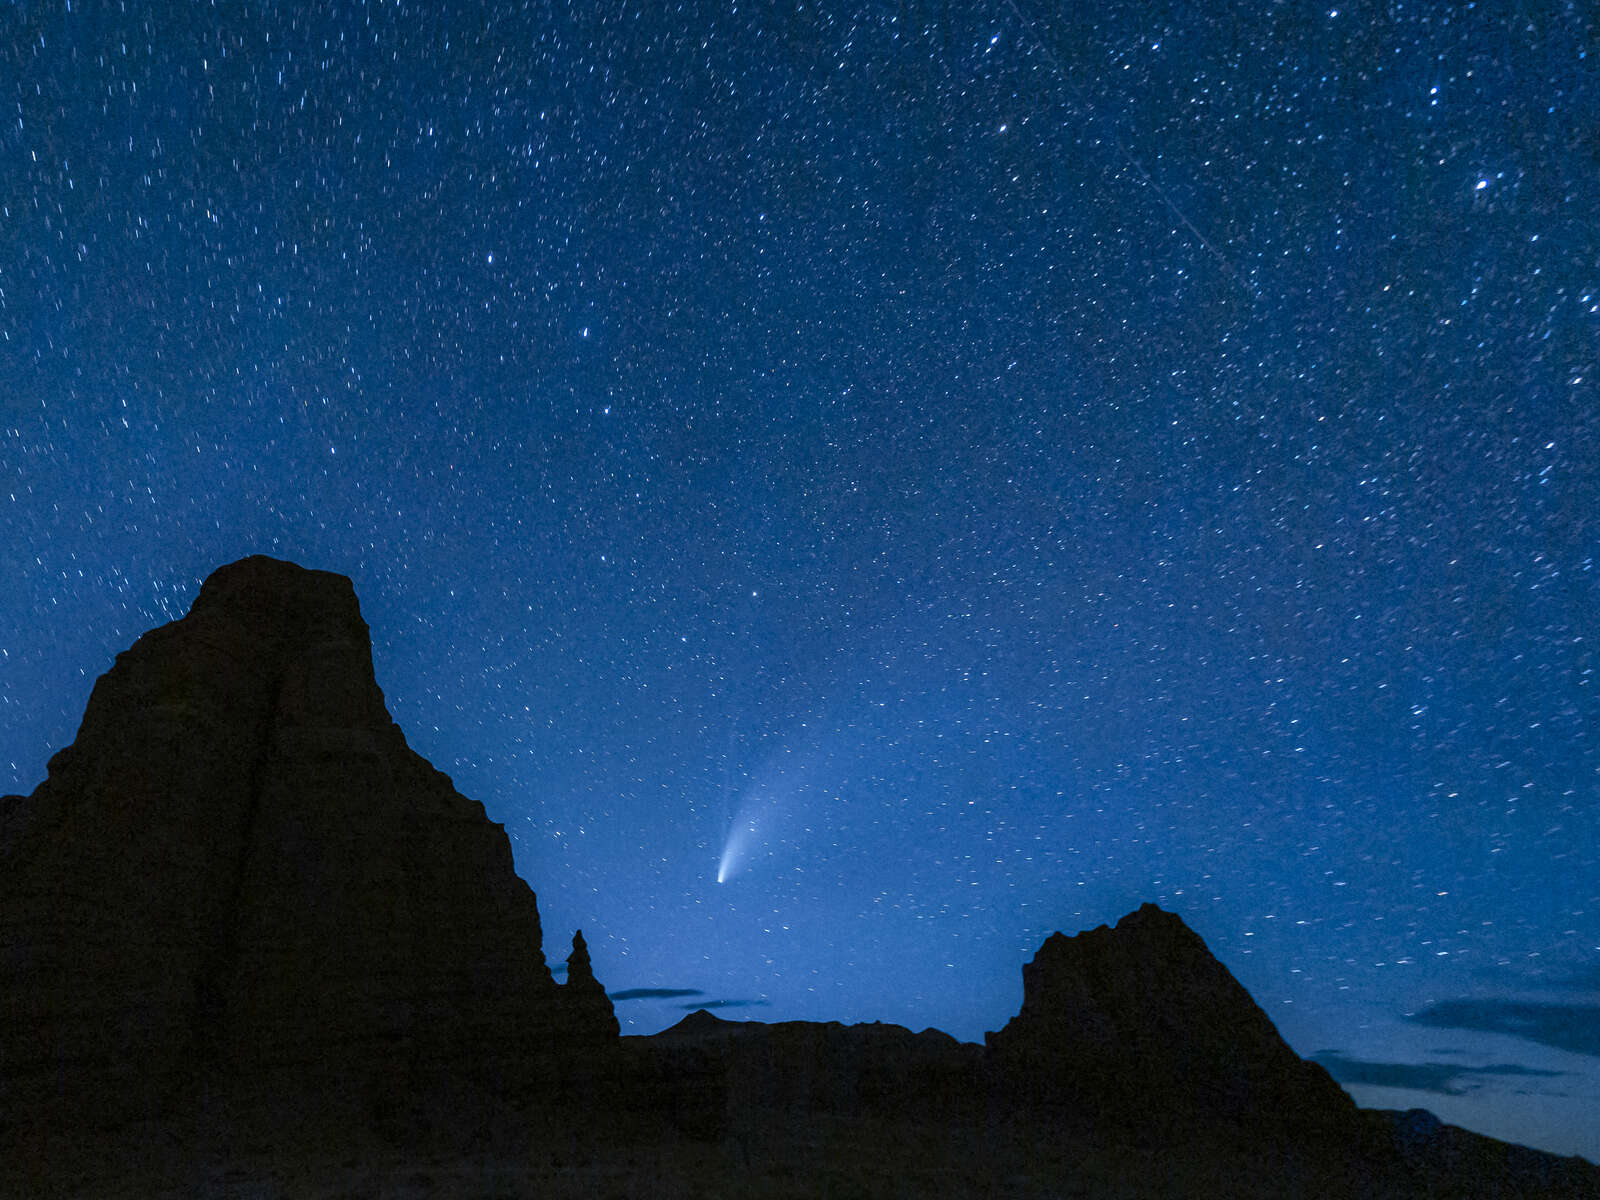
Setting my sights on the comet, my goal was to camp near Temple of the Sun and Moon and hope the sky would clear to shoot the night sky. I arrived just in time to shoot sunset, but it was the comet I was chasing. After dinner I set up where I anticipated the comet to be visible between the Temples.
Right on cue, comet NEOWISE appeared below the Big Dipper in another dark, crisp Utah sky. As with the previous nights, I ran through a series of exposures varying both the shutter speed (15-60 seconds) and the ISO (1600-3200). Here again the final result is a 60 second exposure to accentuate the comet.
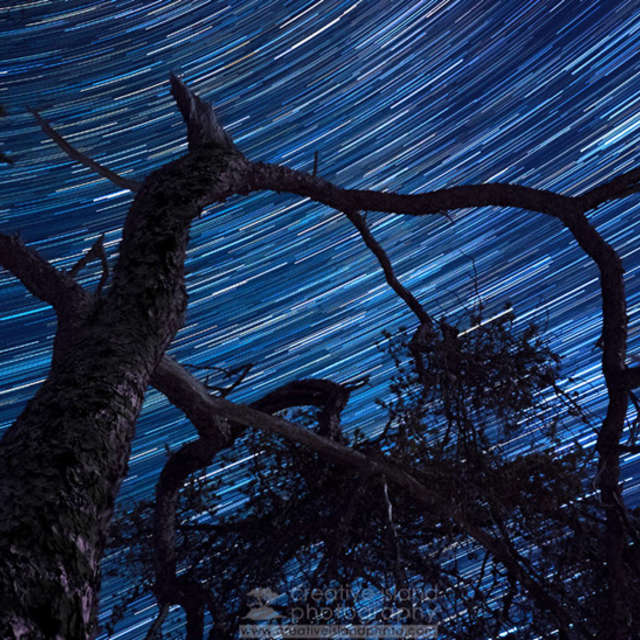
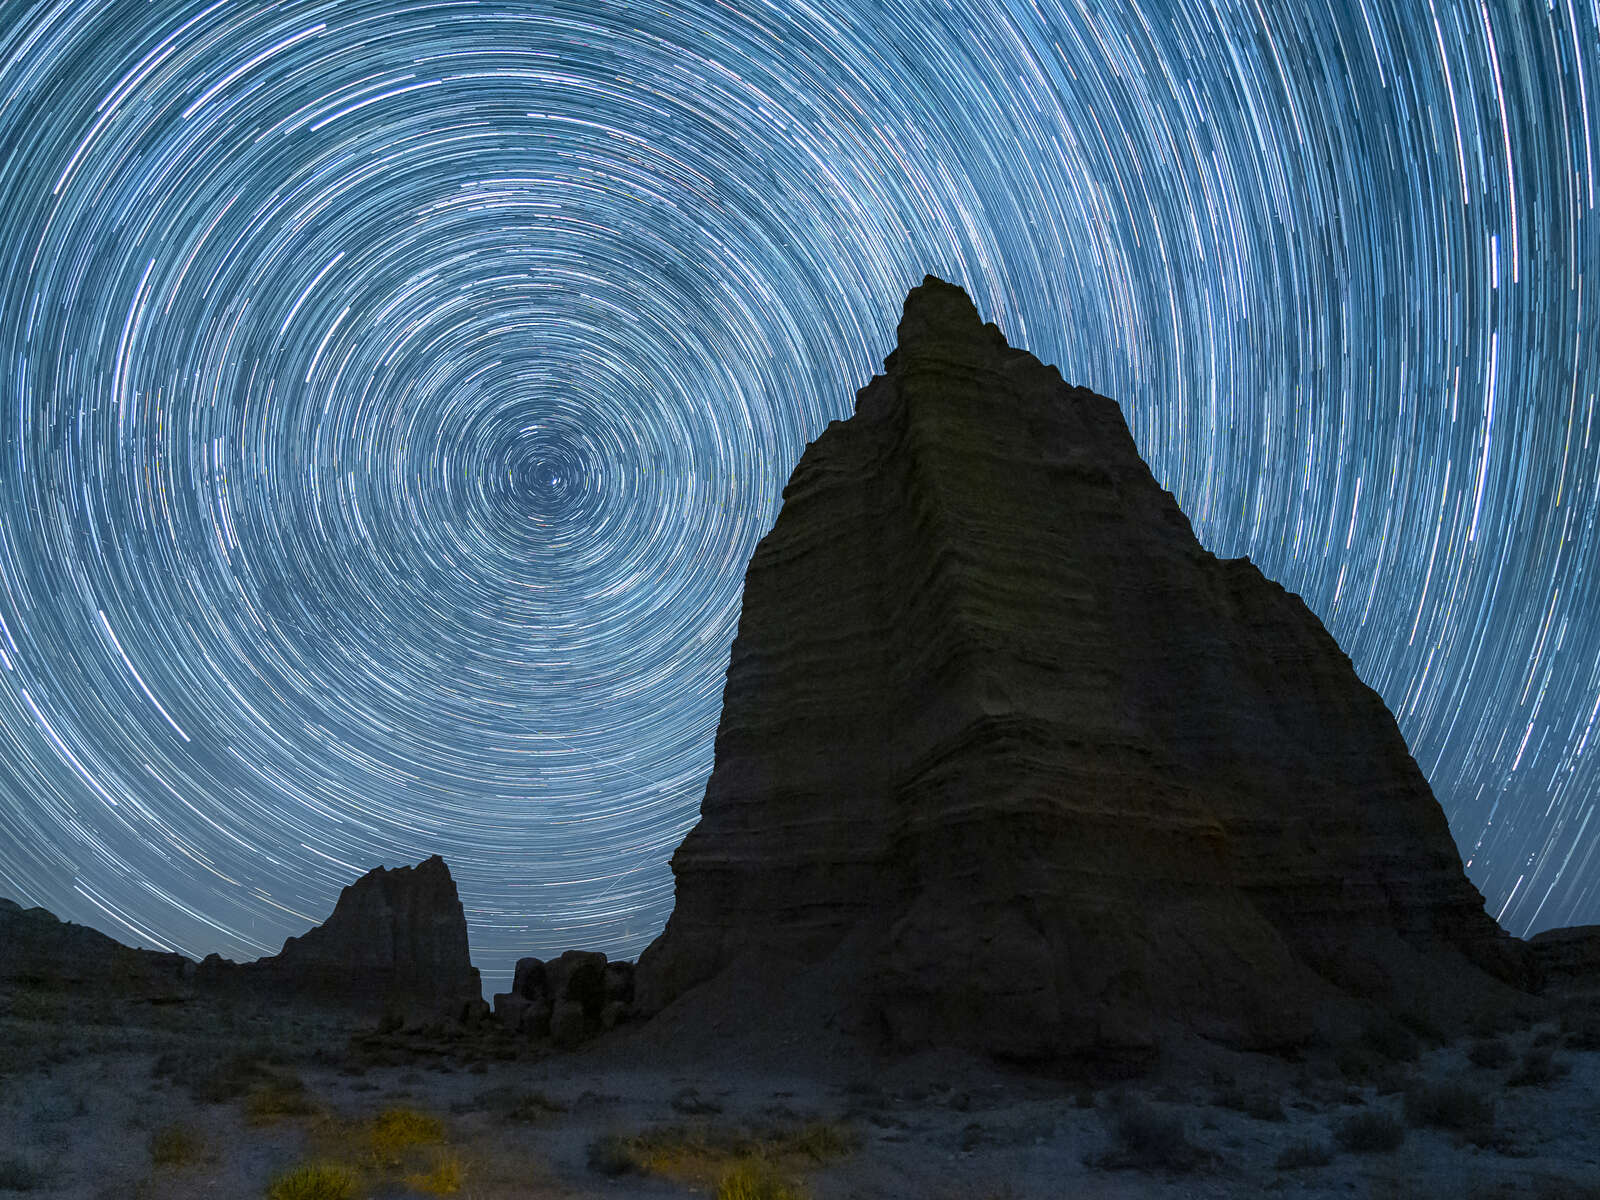
Before turning in for the night, I looked for another composition to make star trails centered around the North Star. Using the 8mm Fisheye lens I set up with the North Star to the left below the peak of Temple of the Moon. This perspective made the Temple appear huge in the frame.
Switching from manual to Live Composite Mode, I programmed the camera to shoot a series of 60 second time exposures for the next 3 hours. After focusing on the Big Dipper using Starry Sky AF, I tripped the shutter and stepped away to watch digital magic happen. In Live Composite Mode in-camera software blends or layers the highlights (stars) that build in real time on the LCD screen.
I watched the monitor for the first 15 minutes making sure all was as it should be. Confident that my settings were correct, I took a 3-hour nap setting an alarm to jump up and end the shoot. The start trials in the resulting image blew me away. I slept with a smile on my face until an early alarm woke me before sunrise.
60s | F1.8 | ISO 1600
1/80s | F8.0 | ISO 160
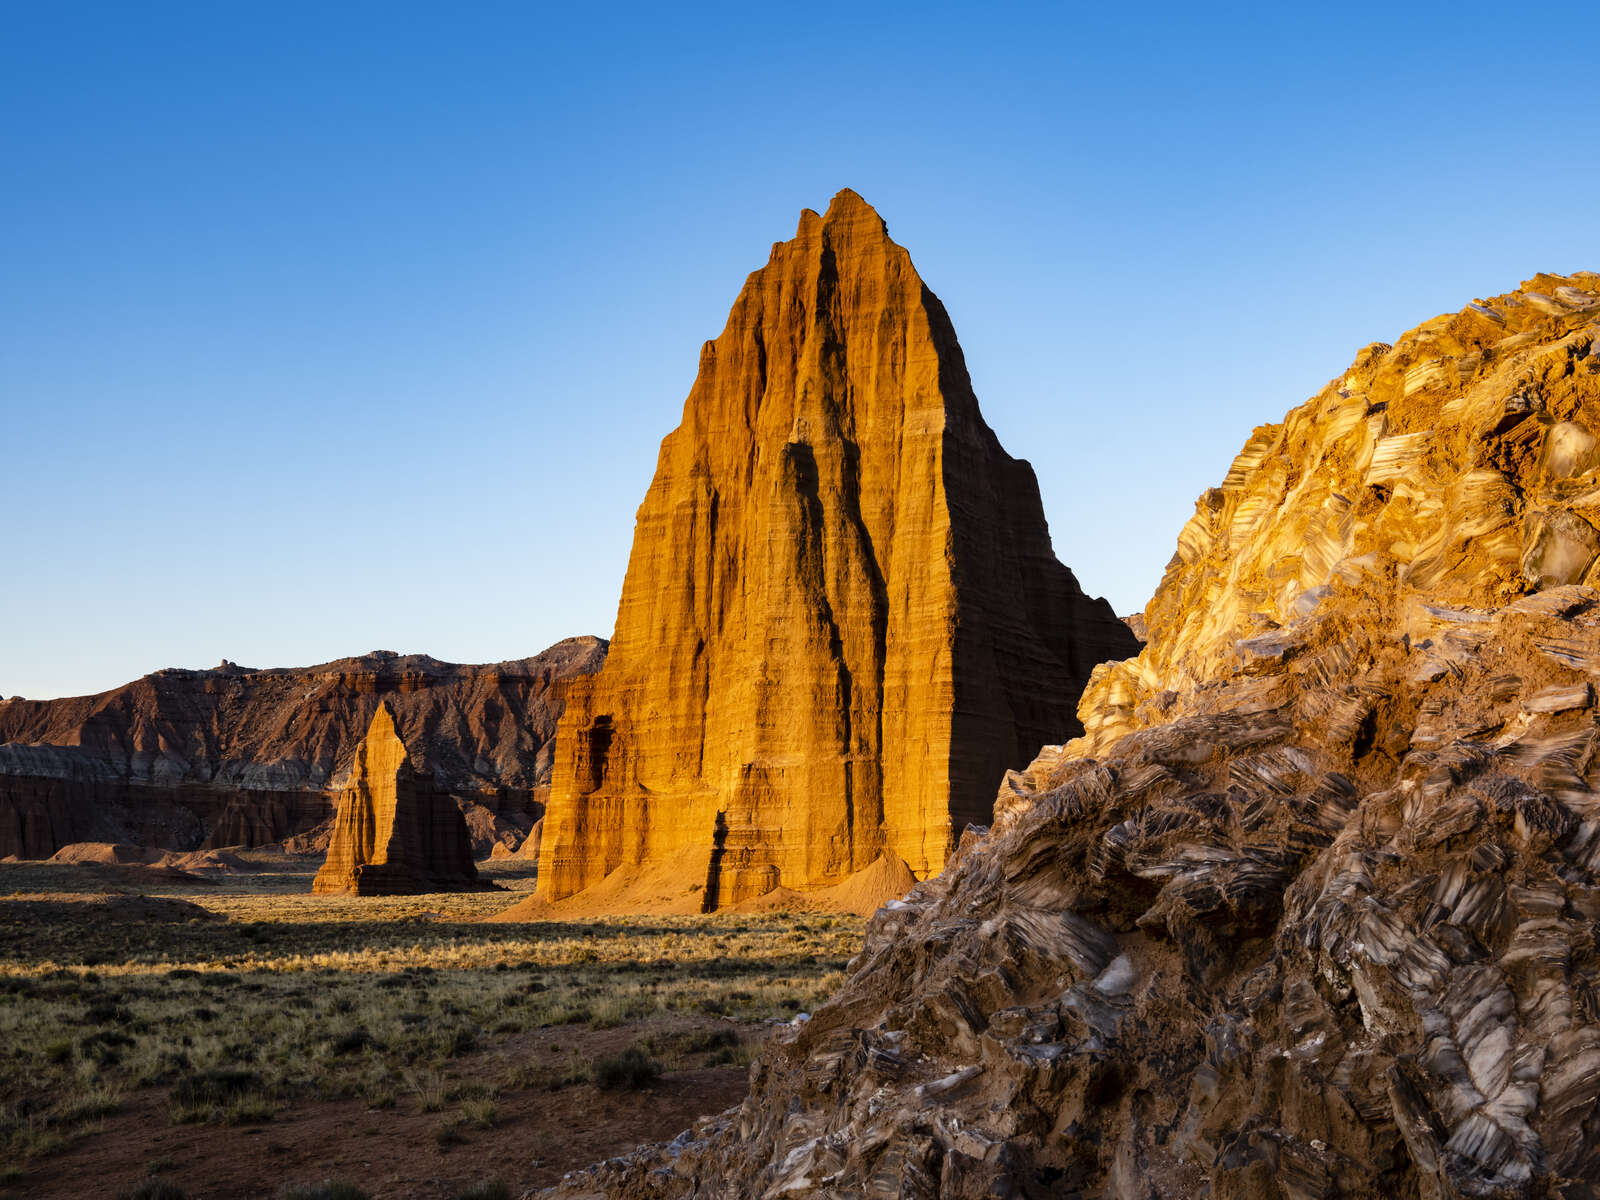
Breaking camp in the dark, I drove to a location at Glass Mountain nearby to catch first light on the Temples. Sunrise did not disappoint. Glass Mountain contains large selenite gypsum crystals that make for an interesting foreground, especially with the warm light at sunrise painting the Temples gold in the distance.
Day 6 & 7 – Cathedral Valley to Goblin Valley
From Cathedral Valley, it was a much more relaxed drive back the sandy track to the paved highway and stopped to buy more ice for the cooler in Hanksville. Next stop, Goblin Valley State Park.
Seemingly in the middle of nowhere, Goblin Valley State Park is a spooky place, especially after dark. Part of the adventure of photography is scouting locations during the day. It’s especially fun in Goblin Valley with all the strange and wonderful eroding shapes and rock pinnacles called hoodoos. It’s a treasure hunt and, in photography, there’s a masterpiece out there somewhere!
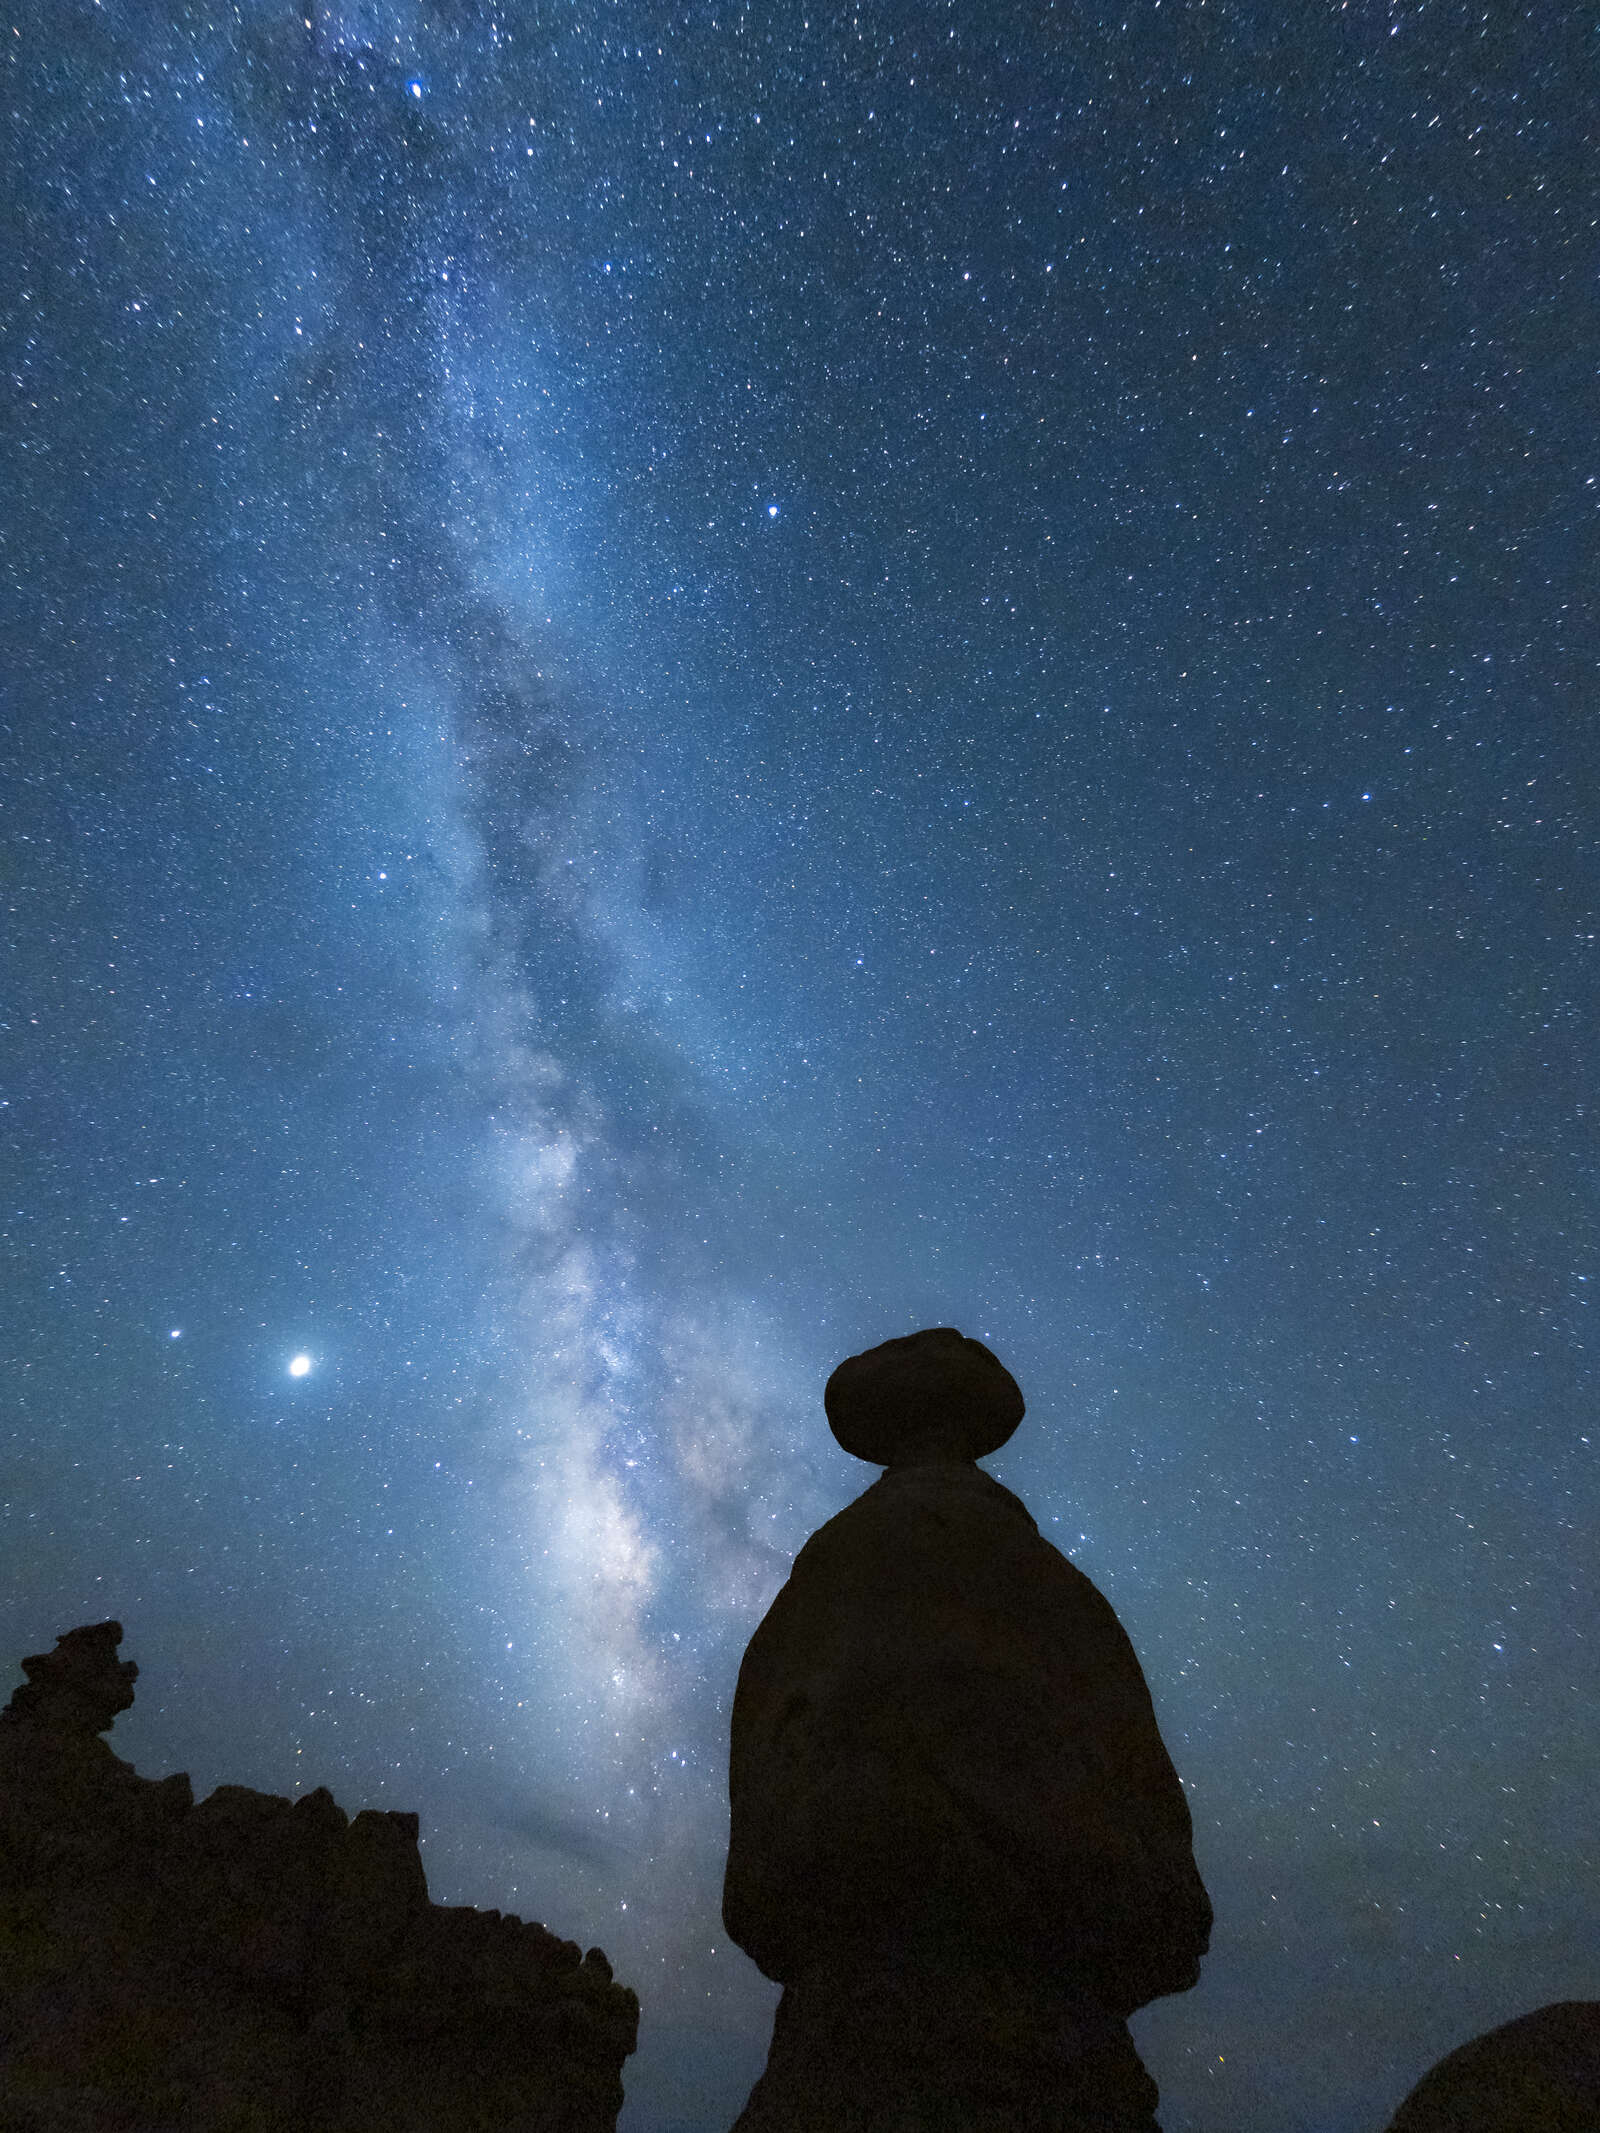
Clouds obscured the comet in the northwest sky on the first night, so I concentrated on the Milky Way in the direction where the sky was clear. Using the 8mm Fisheye, I got up close and down low setting up compositions with silhouettes of the hoodoos in the foreground and with as much sky as possible.
30s | F1.8 | ISO 2000
30s | F1.8 | ISO 3200
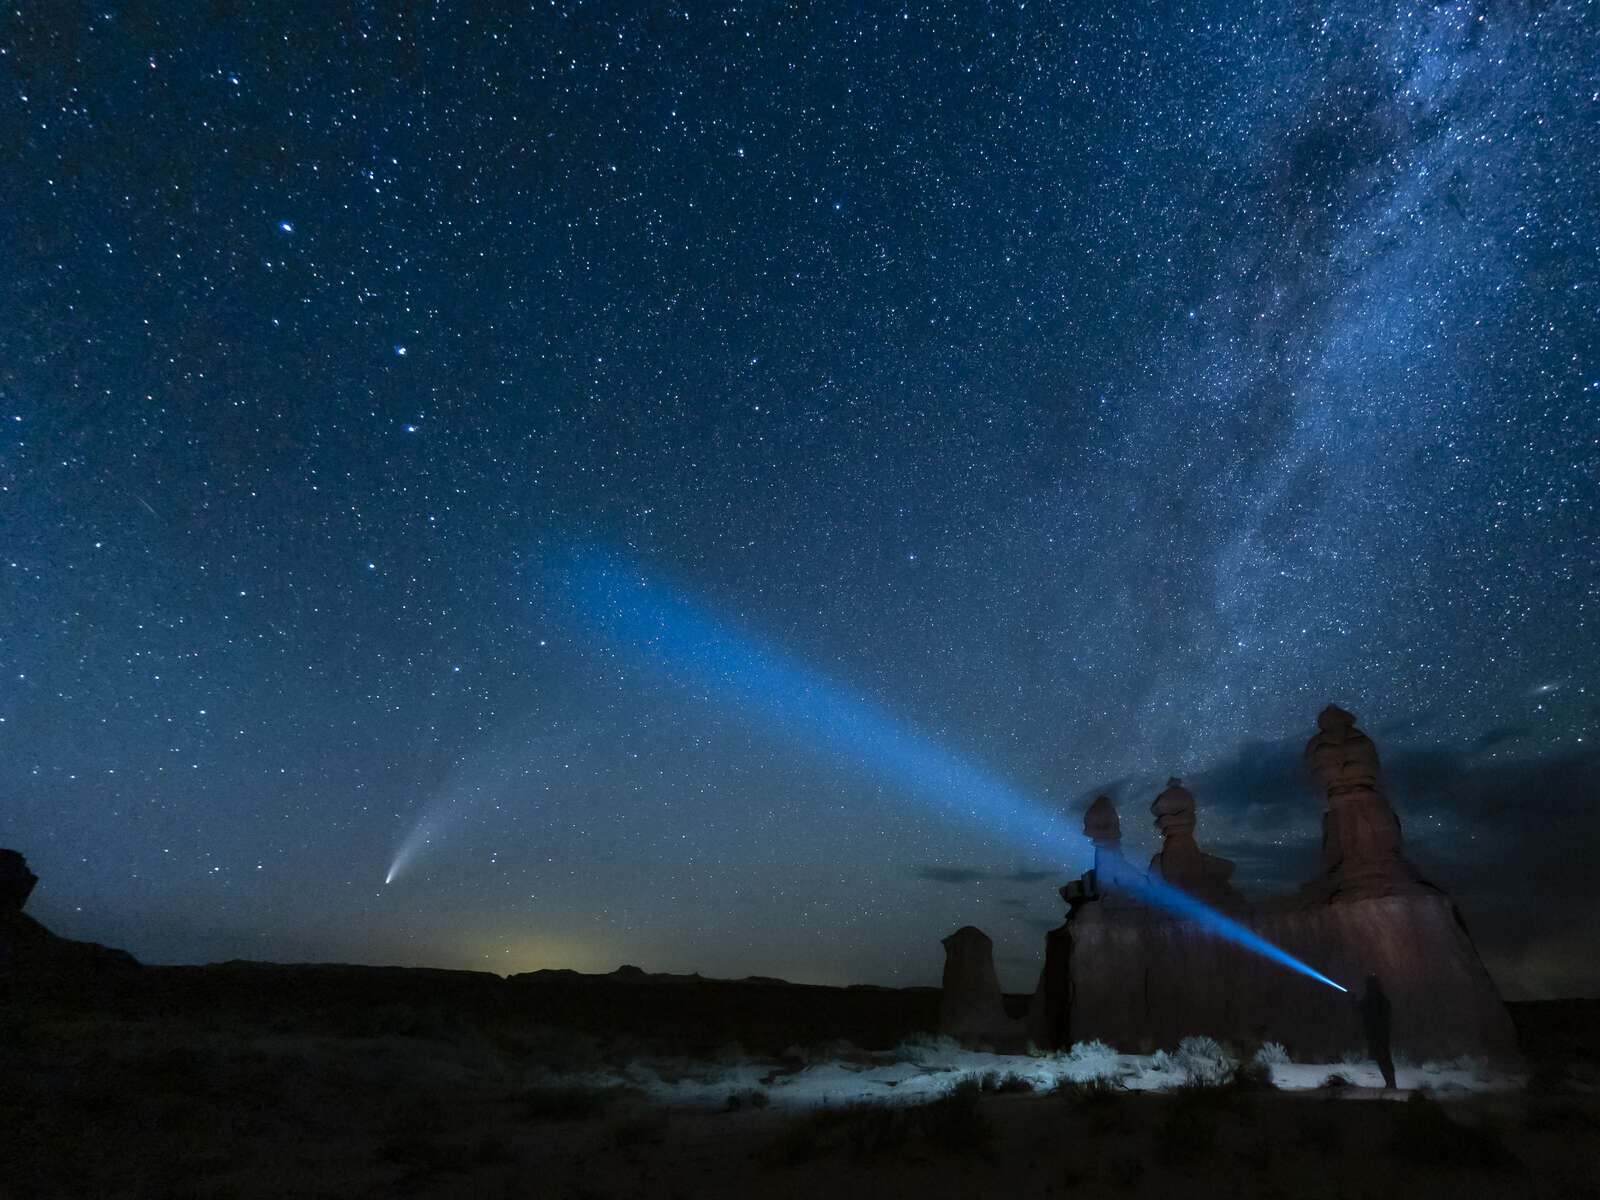
The next night was crystal clear. The Three Sisters hoodoos stand alone, apart from the main goblins in the valley. I shot this scene every which way, including using a torch beam for an added element with me in the frame. This was the best result with both comet and Milky Way in the frame.
Day 8 – Goblin Valley to Arches
Arches National Park near Moab has perhaps the highest concentrations of natural rock arches anywhere in the world. You would think one would be oriented for shooting the comet. Try as I might, I could not locate an arch that would frame Comet Neowise, so I went for the next best thing – Balanced Rock.
Ending the Comet Chase in Arches was planned for the night when the comet was predicted to be the brightest in the night sky. While I had other locations essentially to myself, Arches is very popular and close to Moab for day-trippers, so tonight there were other photographers roaming about making it more challenging. Thankfully, by the time comet came into view the impatient photographers had moved on.
I positioned myself where the comet was positioned between Balanced Rock and a nearby pinnacle. At first I tried capturing a silhouette of the rock formations. Many attempts were spoiled by headlights casting light and shadow across my foreground. Finally, I got the shot I was hoping for.
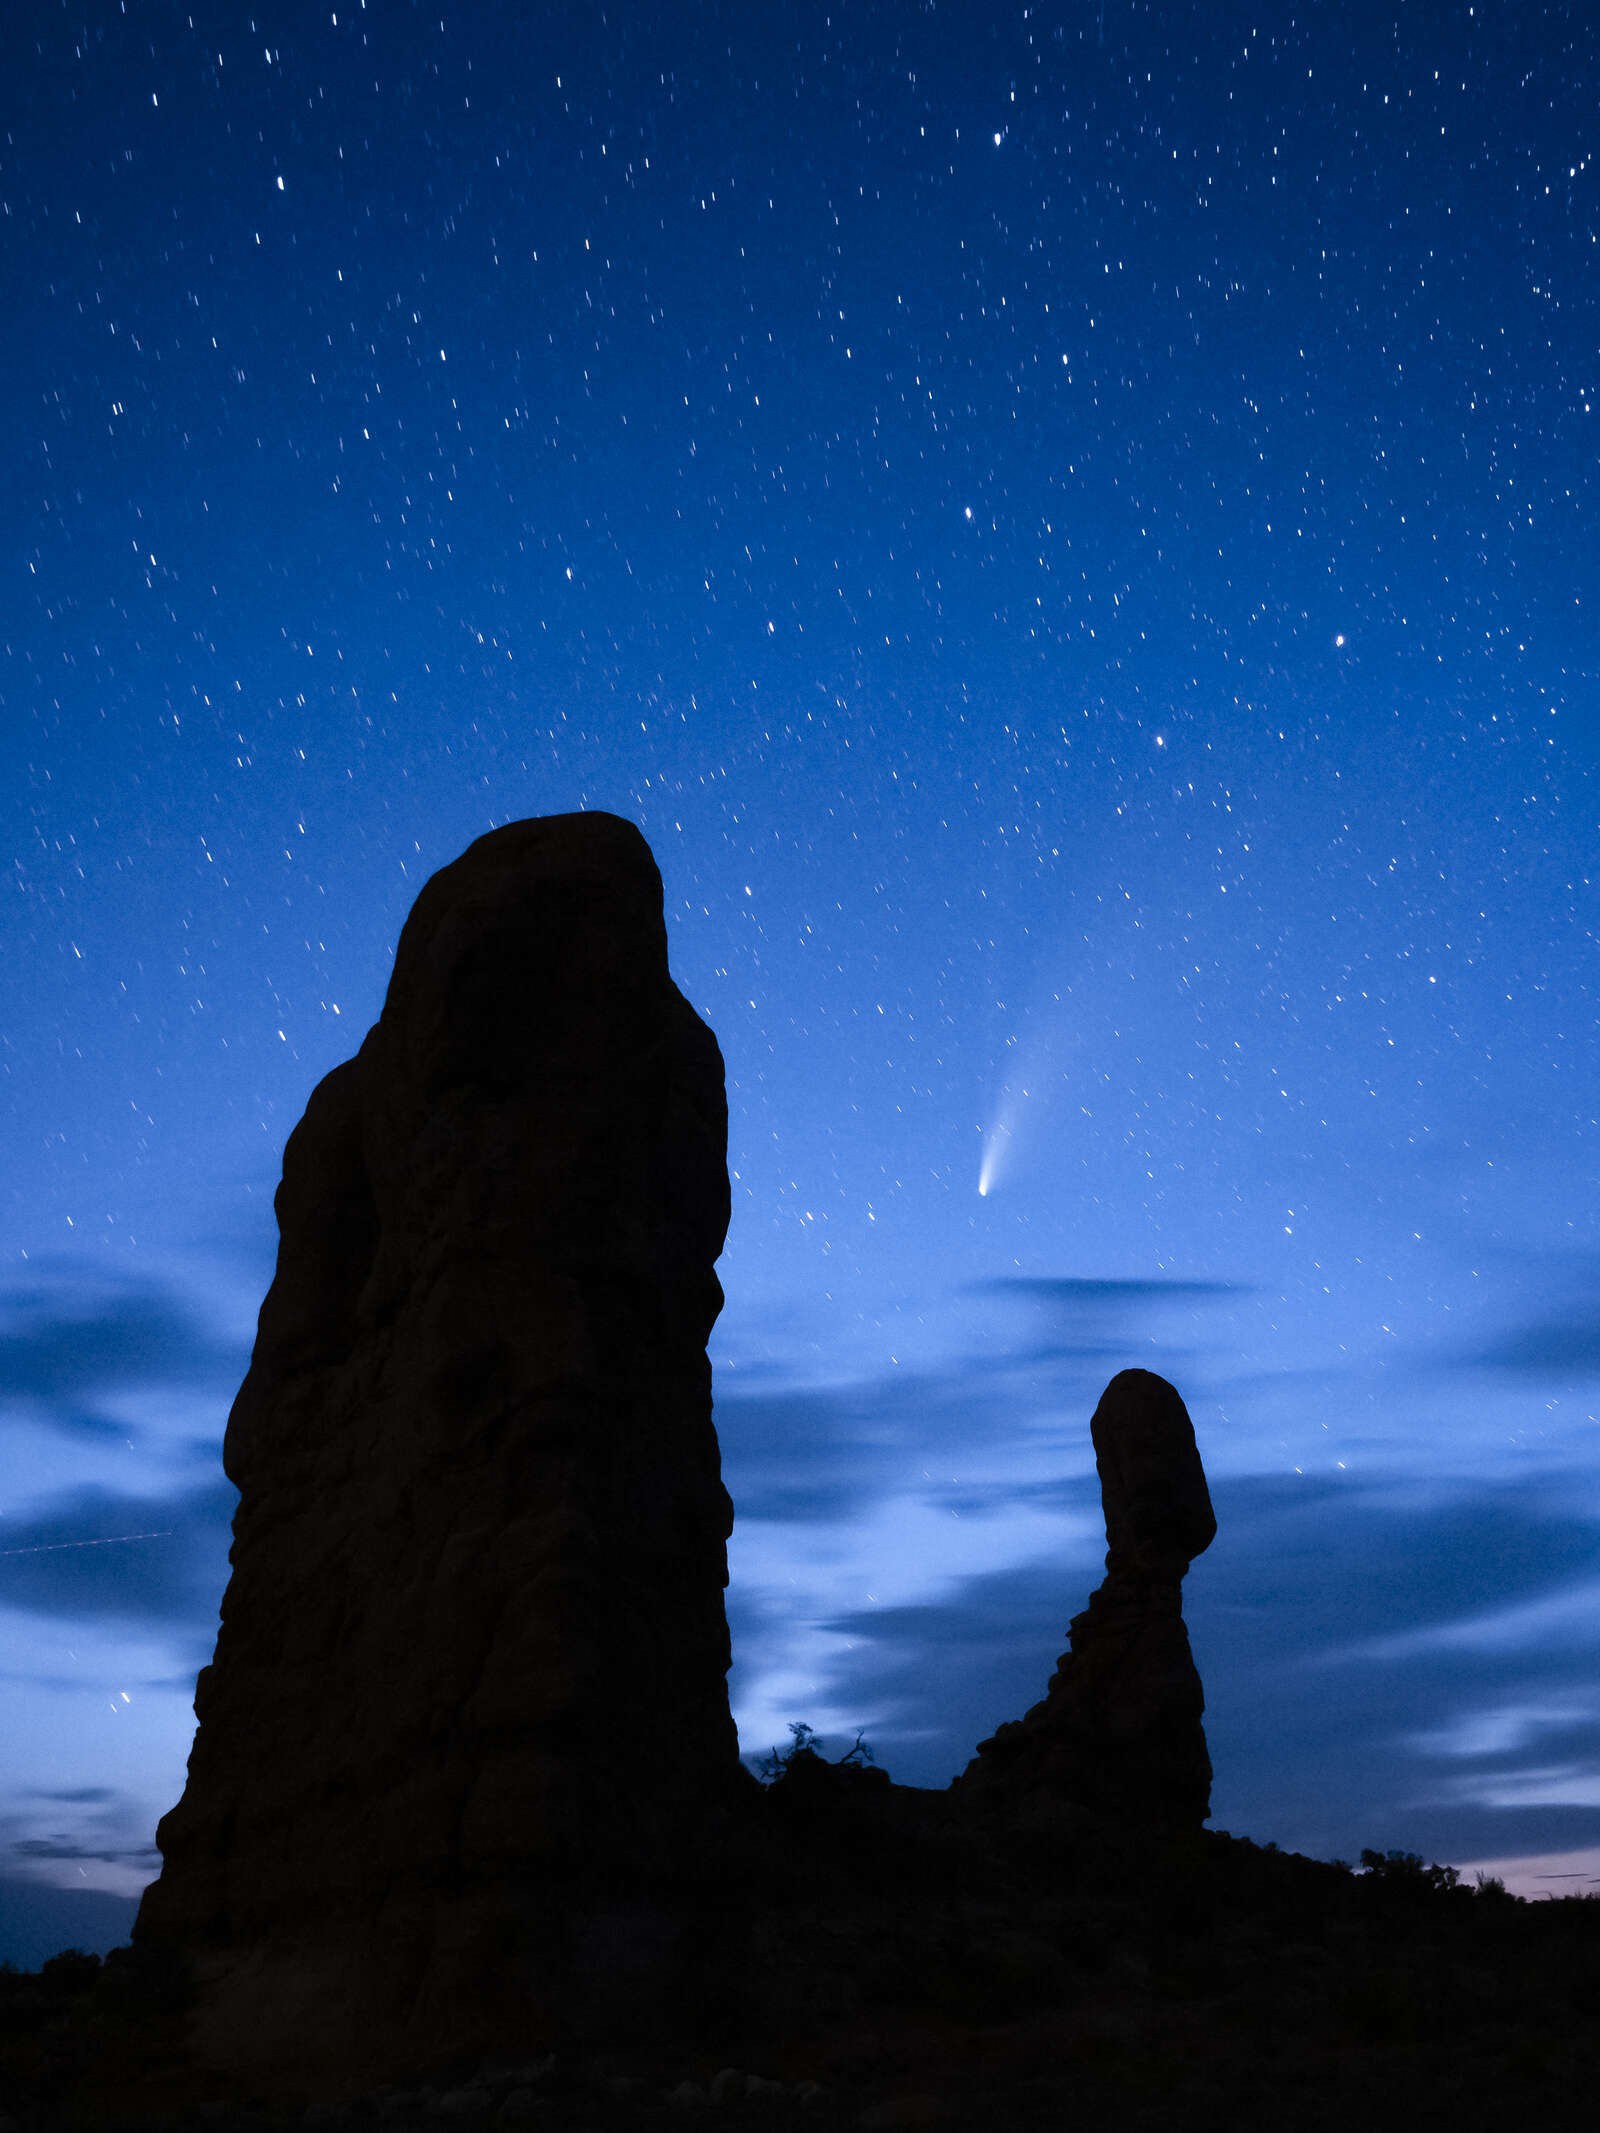
60s | F2.8 | ISO 1600
Arches National Park, Utah
OM-D E-M1 Mark III | M.Zuiko Digital 7-14mm F2.8 PRO
25s | F2.8 | ISO 1600
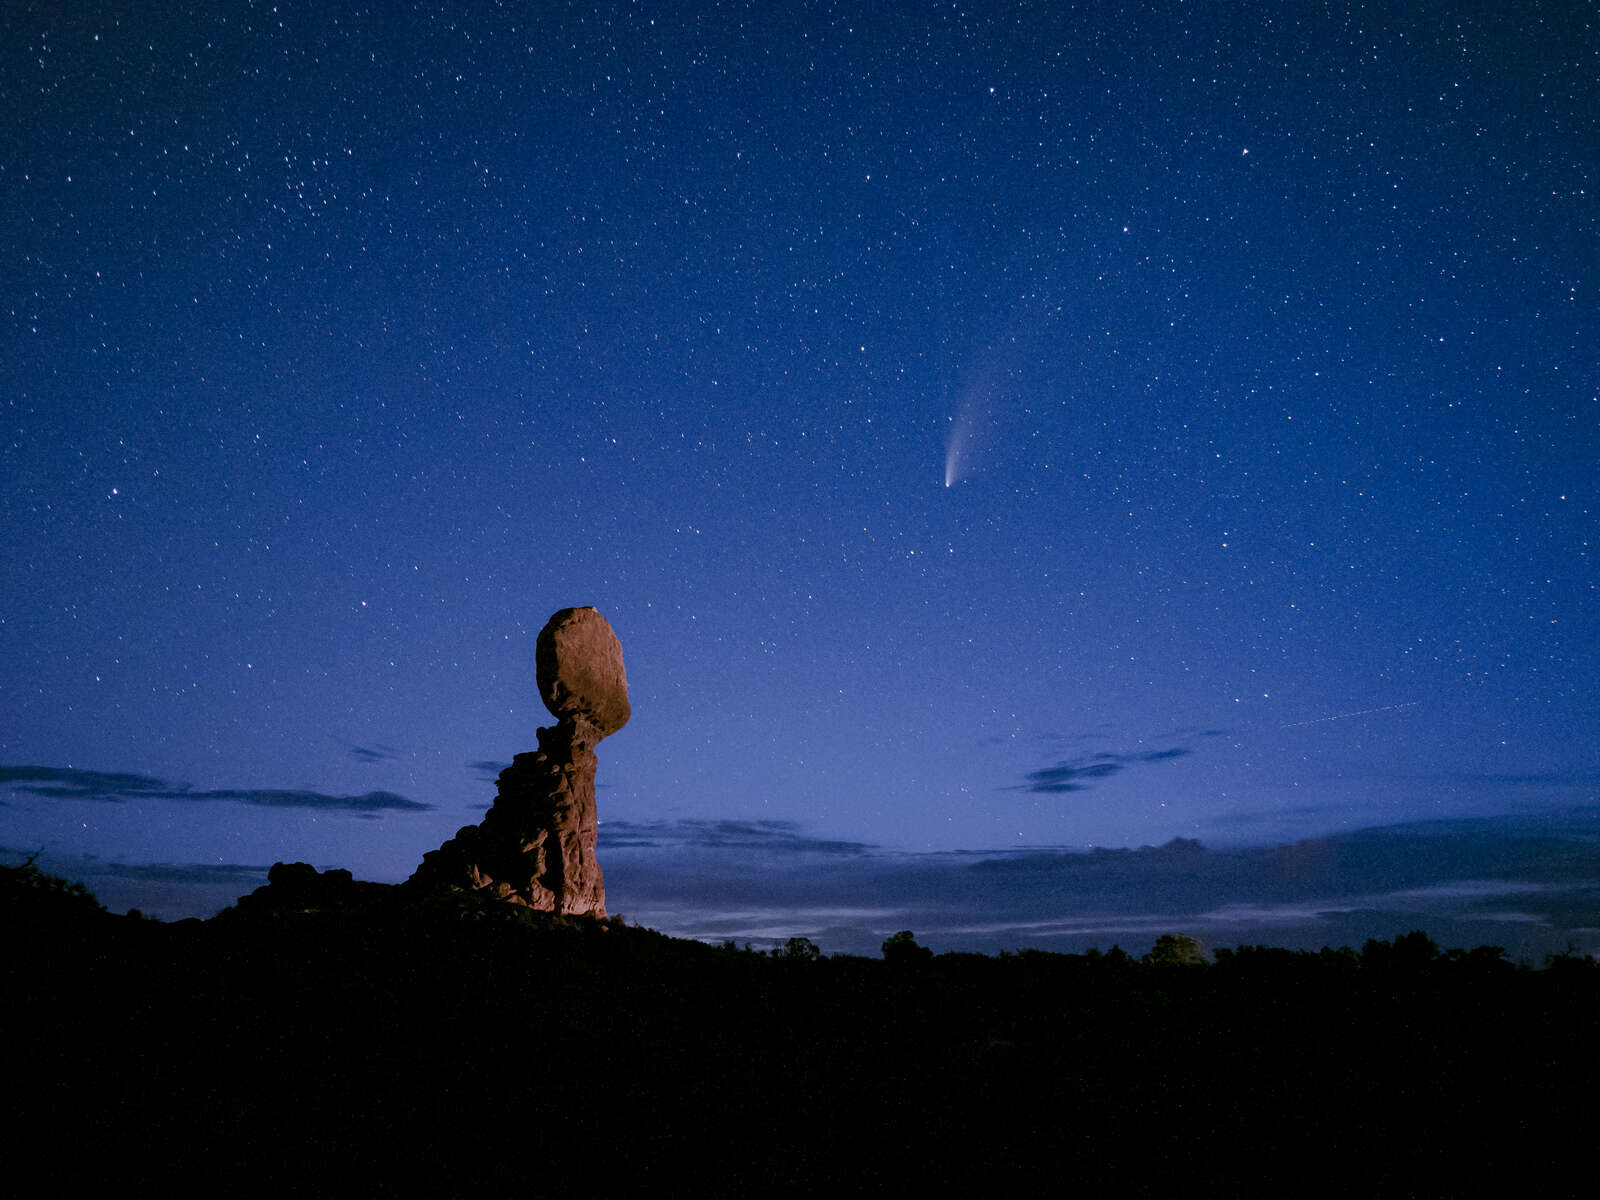
After a few successful silhouette shots, I decided to purposely use the car headlights as if they were painting the rock. I spent the better part of an hour shooting the same sequence multiple times with the idea of blending the images together using specialized software for the final image. In contrast to the in-camera Live Composite mode that creates star trails, this technique keeps the stars sharp by assembling using Starry Sky Stacker software.
Although the comet isn’t as bright as with 60 second exposures, the stacked image appears as if the rock was painted with colored-corrected torches. My work is done.

Instagram: @ralphleehopkins
Ralph Lee Hopkins travels to the world’s wild places with Lindblad Expeditions and National Geographic. As Director of Expedition Photography for the National Geographic fleet he has photographed expeditions from the Arctic to the Antarctic and points in between over the last 30 years.
SHOOT FOR THE STARS
SAVE BIG
Capture the beauty of the heavens with astronomical savings on cameras equipped with Starry Sky AF, as well great deals on super telephoto and wide-aperture lenses.