For nature photographers, each season brings its gifts. In the northern hemisphere winter brings shorter days and longer, often colder, nights. If you live far enough to the north, winter brings the potential of one of the more spellbinding of winter’s phenomena: the Aurora Borealis, or Northern Lights. Modern digital cameras and lenses like the OM-D system are great for capturing the auroral glow emanating from the earth's atmosphere.
If you have ever had the pleasure of seeing or photographing the Northern Lights then you will know how special these displays can be. With the recent and official beginning of the 25th Solar cycle, the promise of increased auroral activity at more southerly latitudes should have you excited about a chance to get in place should the conditions arise for the Northern Lights to be observed in your area.
It seems that this year’s aurora activity has started out pretty strong and if you live under the Auroral Oval, (the active region of the earth where the Northern Lights most often make their appearance) then you have probably already observed some excellent displays. If you live just south of this region, there have be some great aurora viewable already this season. If by chance you live well south and outside this active aurora region, this is a good time to begin planning a trip to a more northerly destination for the chance to see and photograph the magic of the Northern Lights.
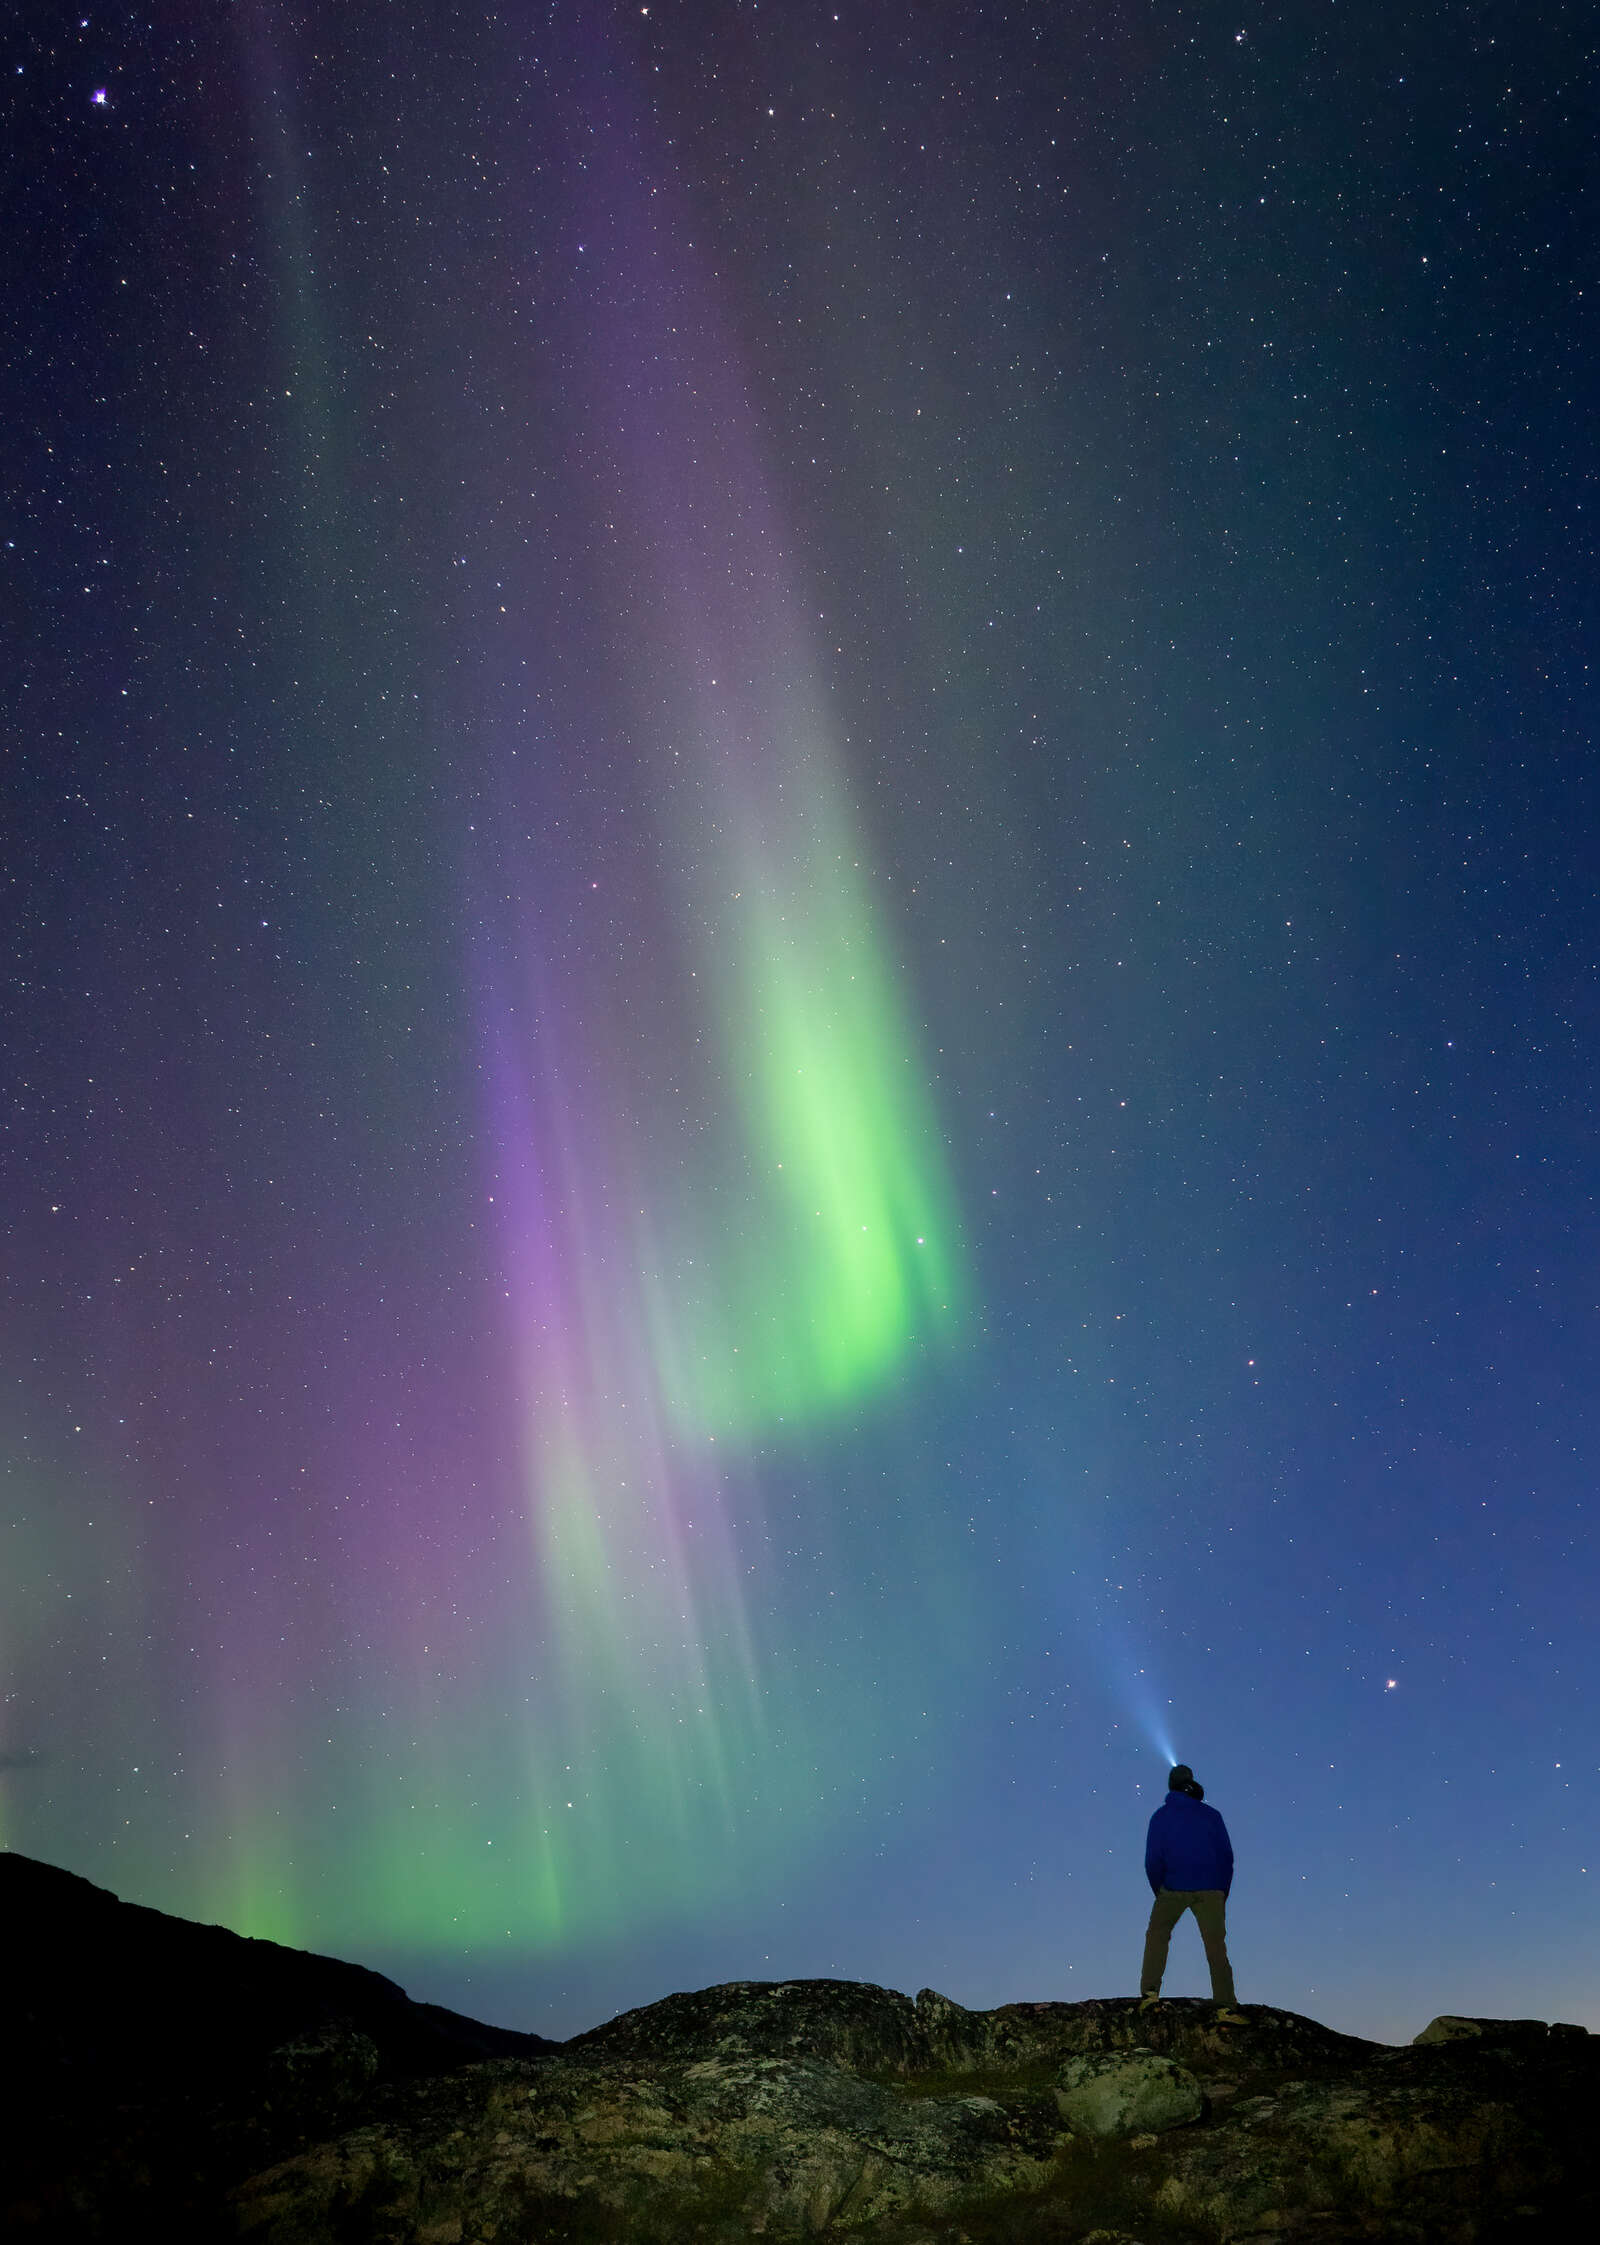
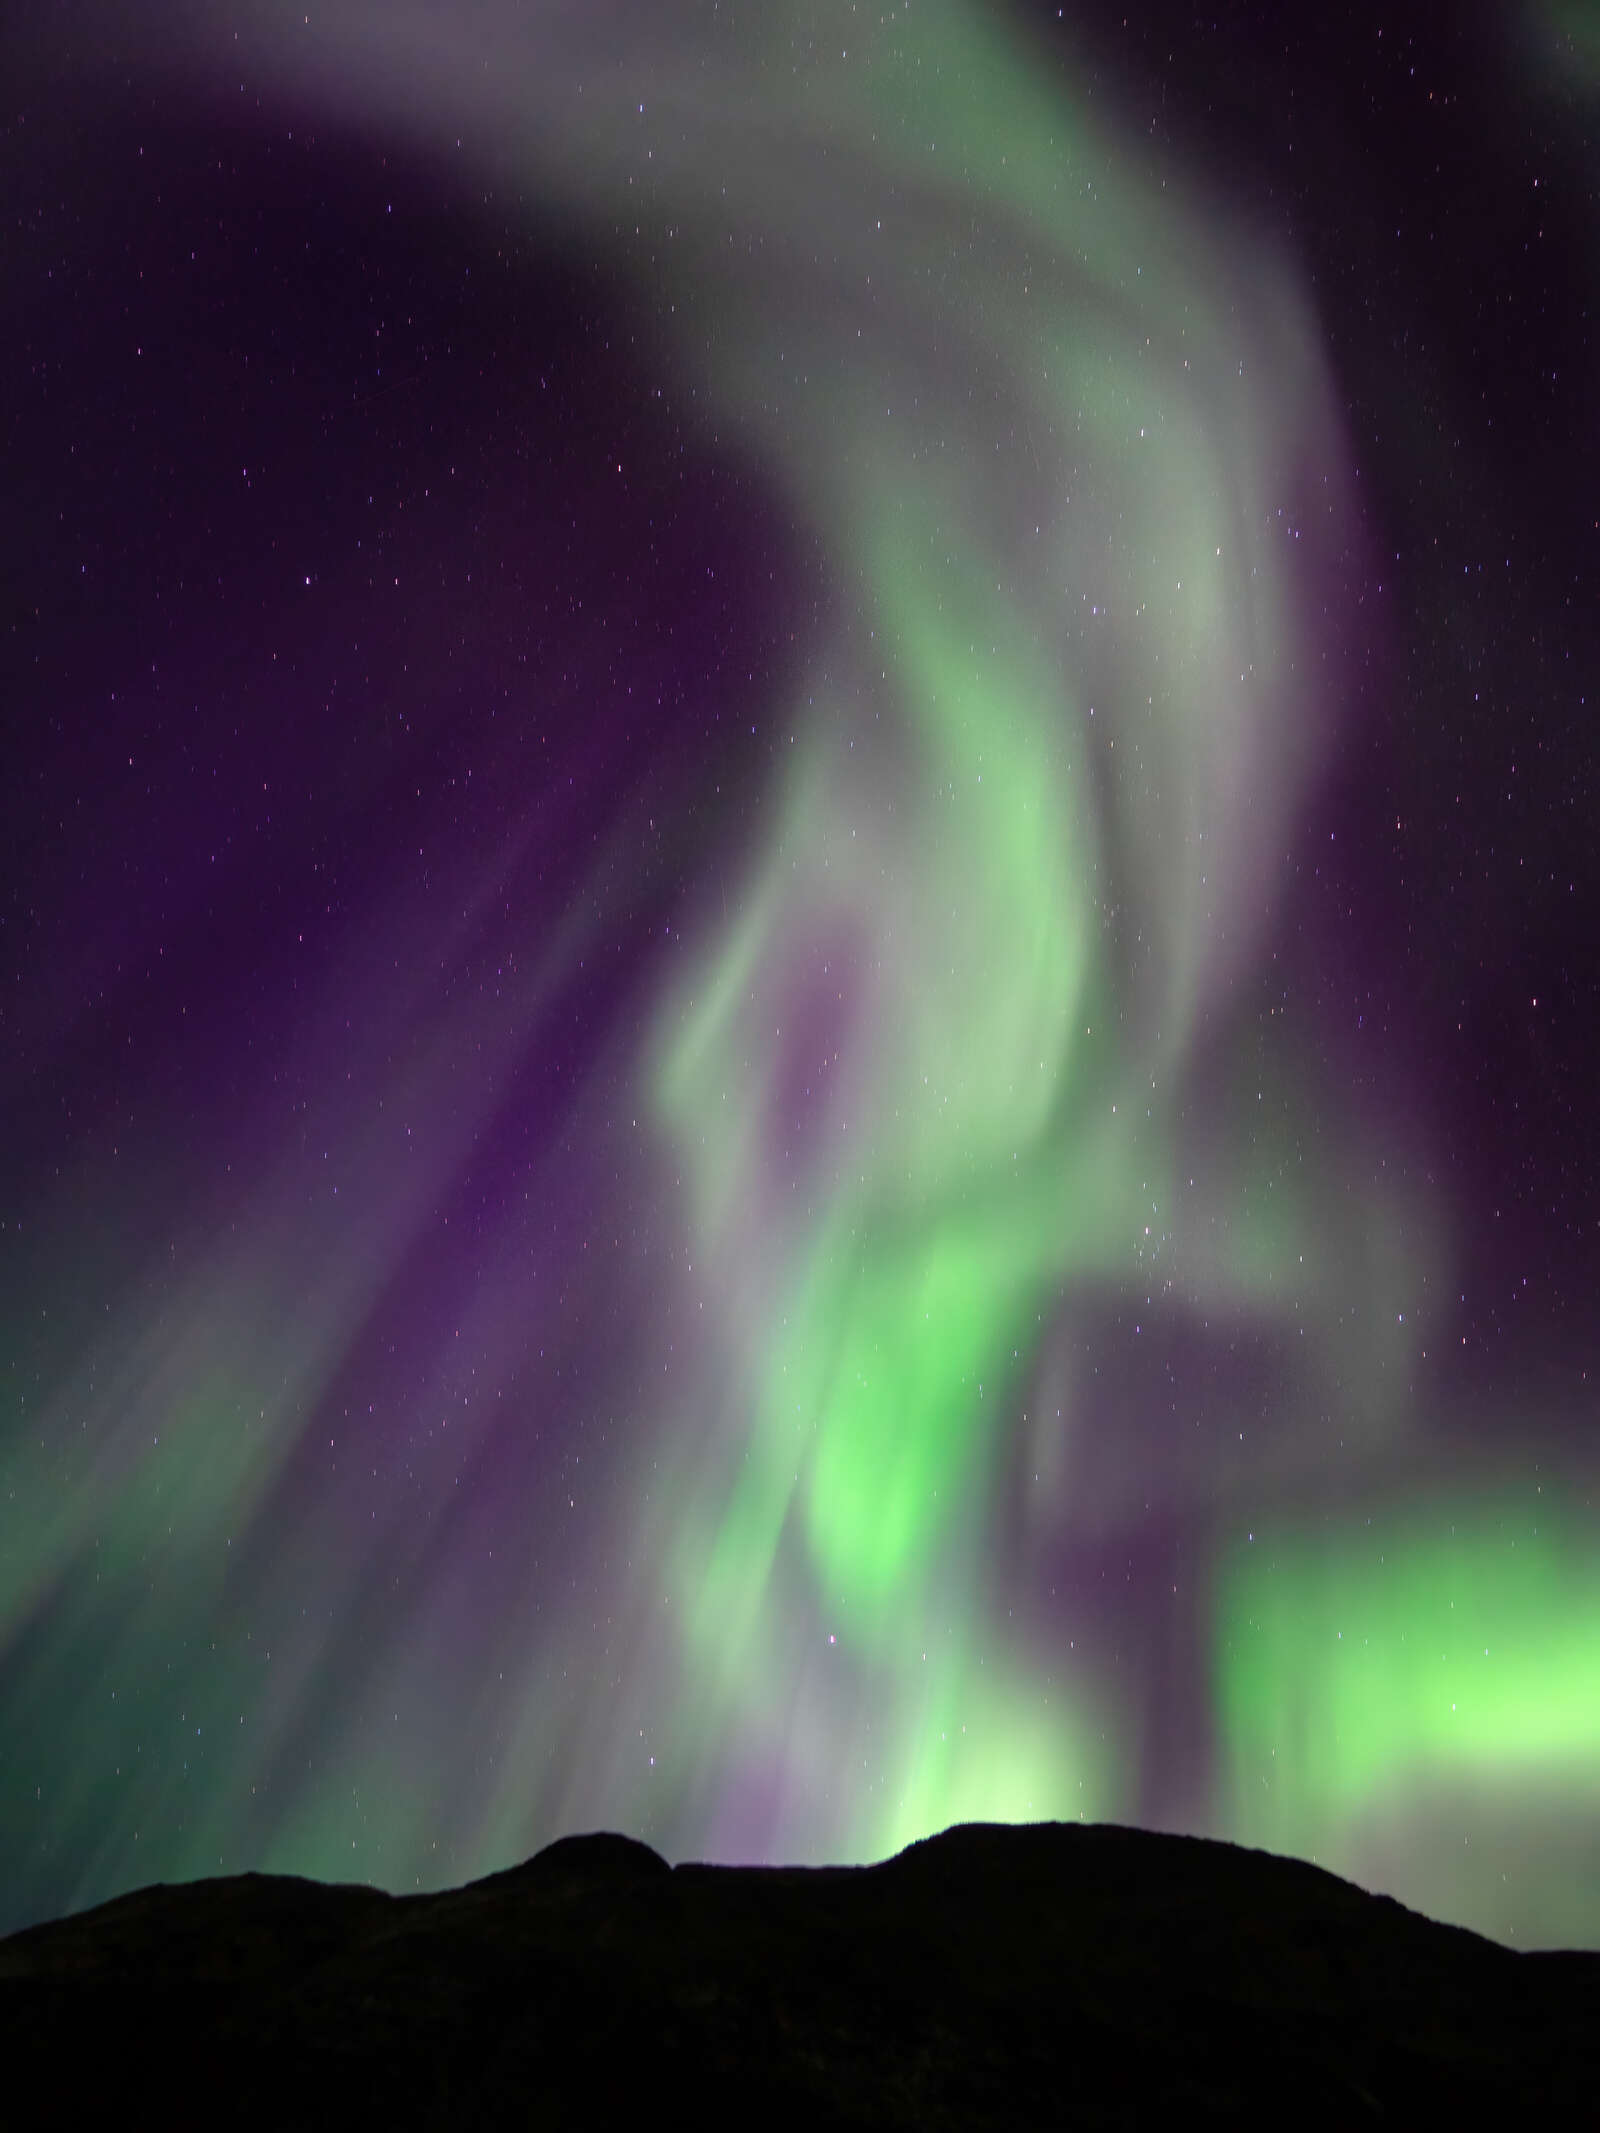
10s | F2 | ISO 400
Where and When
While I will be discussing photographing the Aurora Borealis that occurs in the Northern Hemisphere, the same phenomena known as the Aurora Australis does appear in the Southern Hemisphere. This far southern display often happens far out over the Southern Ocean and Antarctica where far fewer folks have the opportunity to photograph its magic. On occasion during very active nights, it is sometimes seen over the far southern reaches of South America, New Zealand, and Tasmania.
Clear weather is your friend. One thing to keep in mind when hunting the aurora, clear skies are a must. Cloudless nights will be required as the displays happen far above where clouds form and it can be much more difficult or impossible to photograph on cloudy nights. Watch your weather forecasts and don’t be shy about checking the weather often when the other conditions are right for good lights in the sky. On nights when I am leading aurora photography trips and cloud cover rolls in, I am constantly checking the sky for any clearing conditions that may occur.
Preparation is very important for getting ready and putting yourself in position for viewing and photography. Scouting and doing your research can be done in advance and with the internet and some quality apps we have some great tools for being prepared.
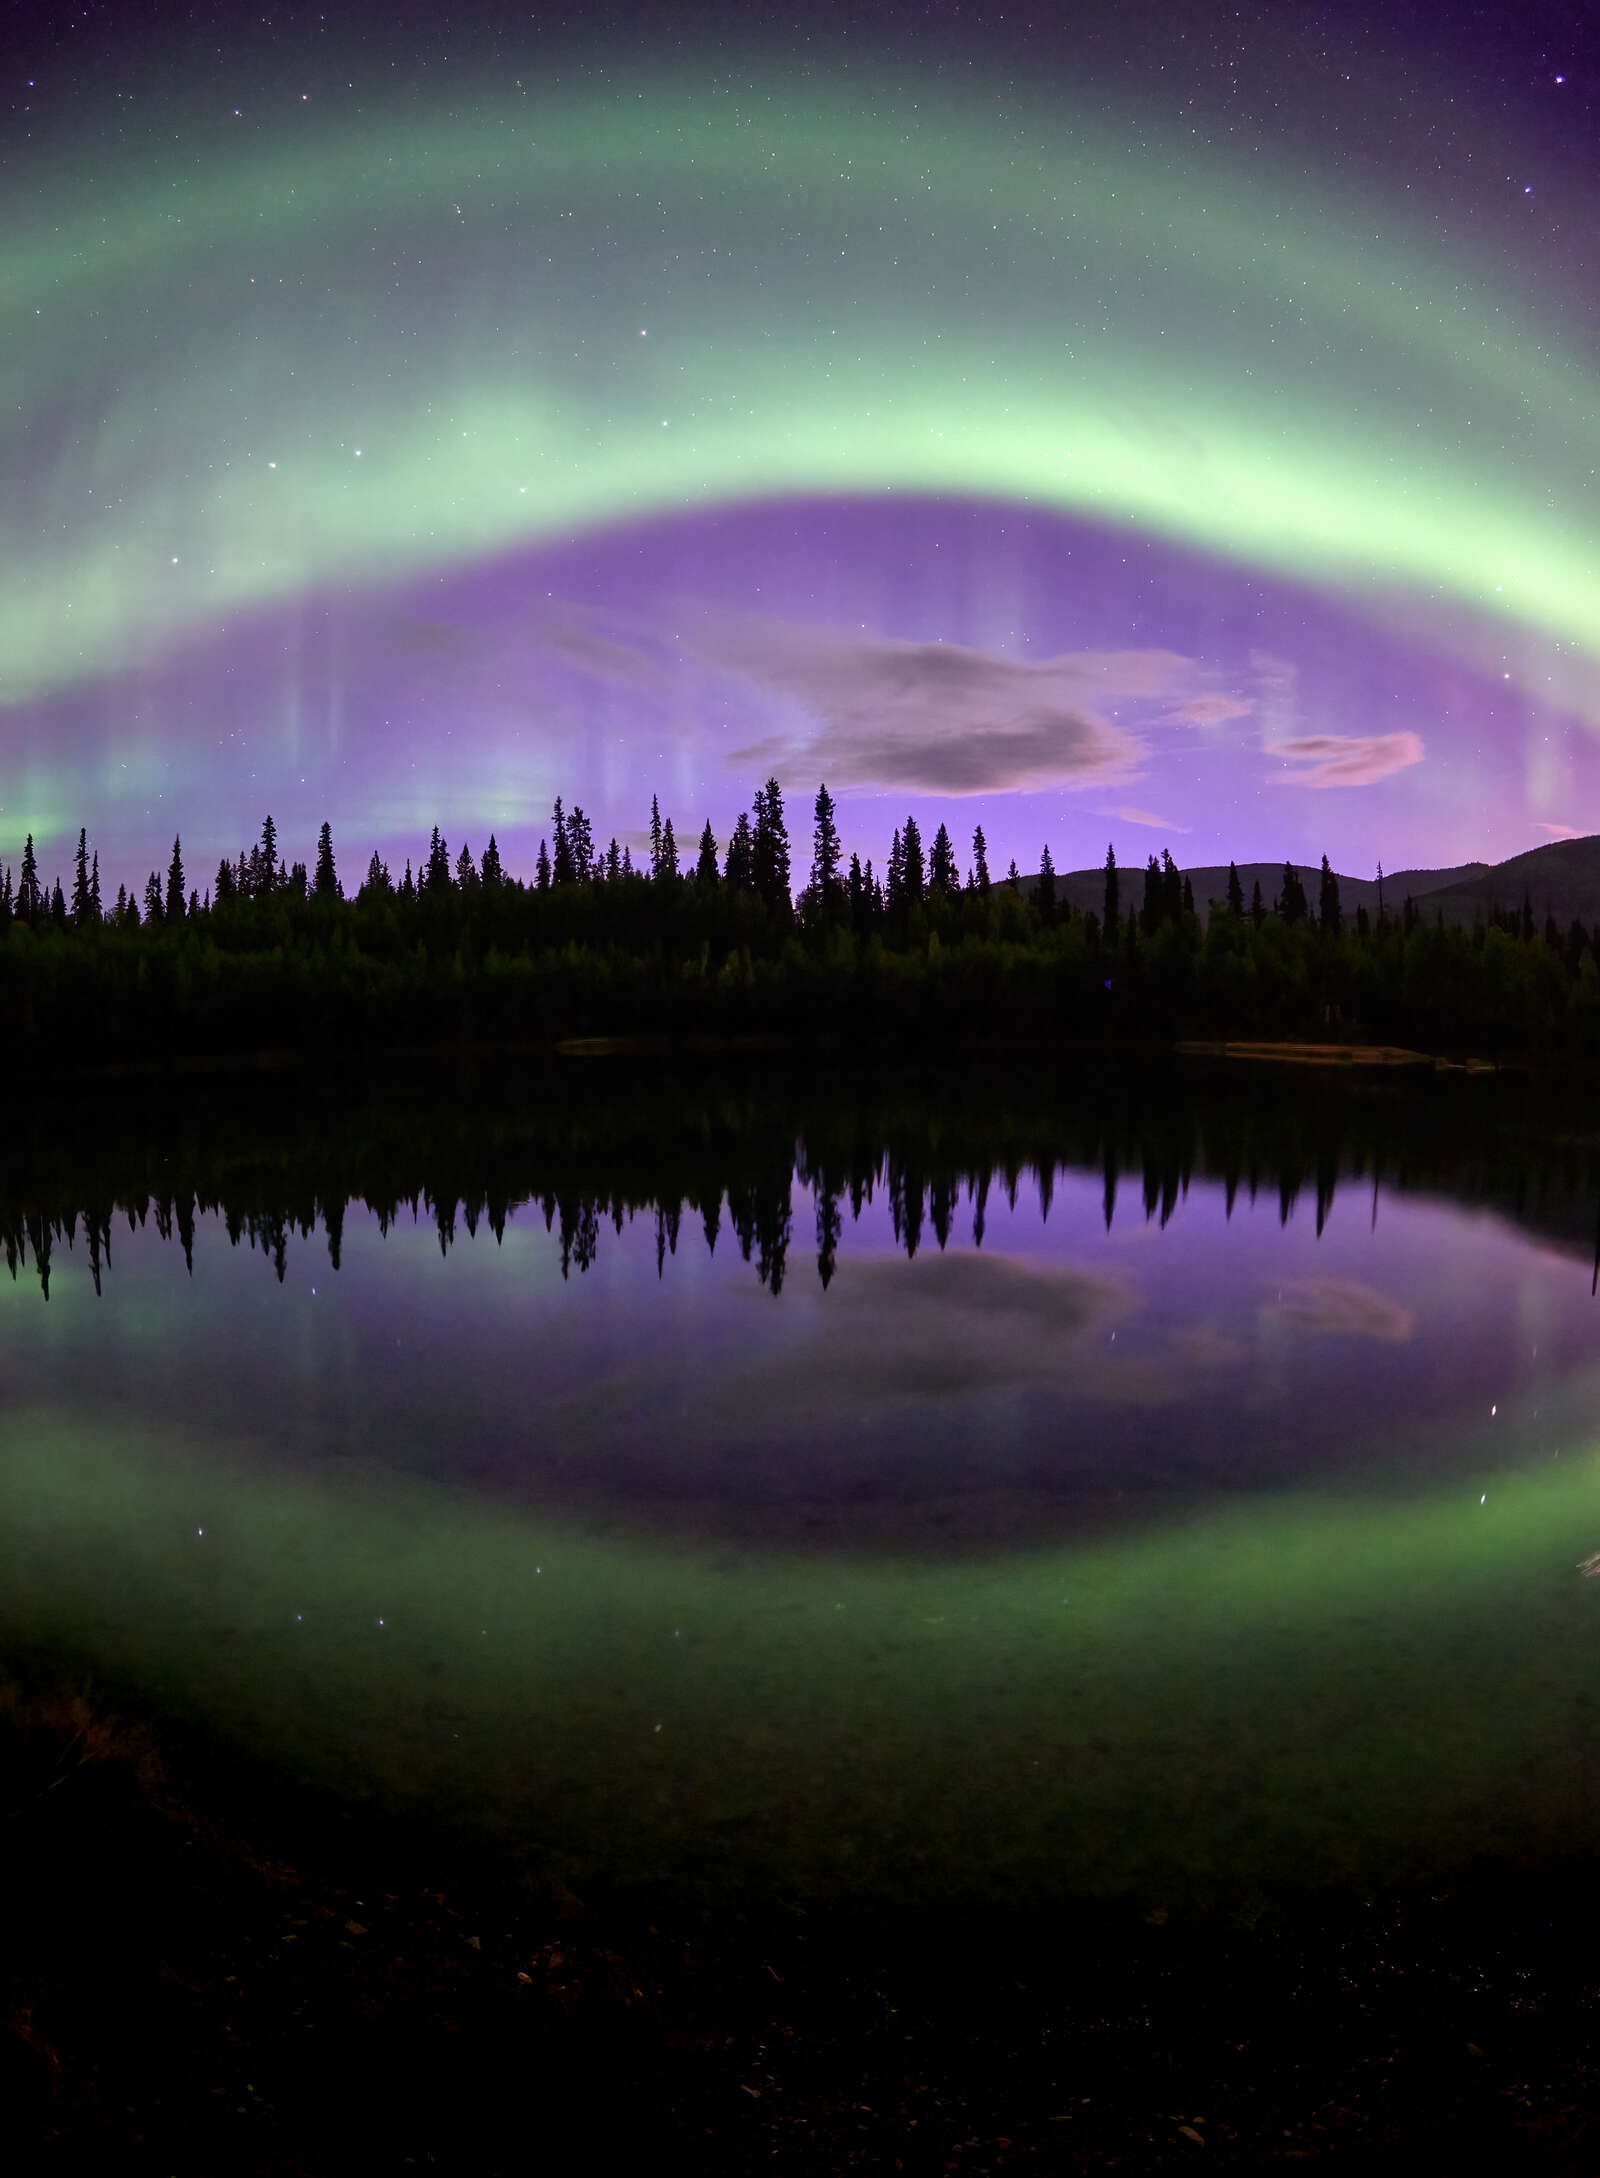
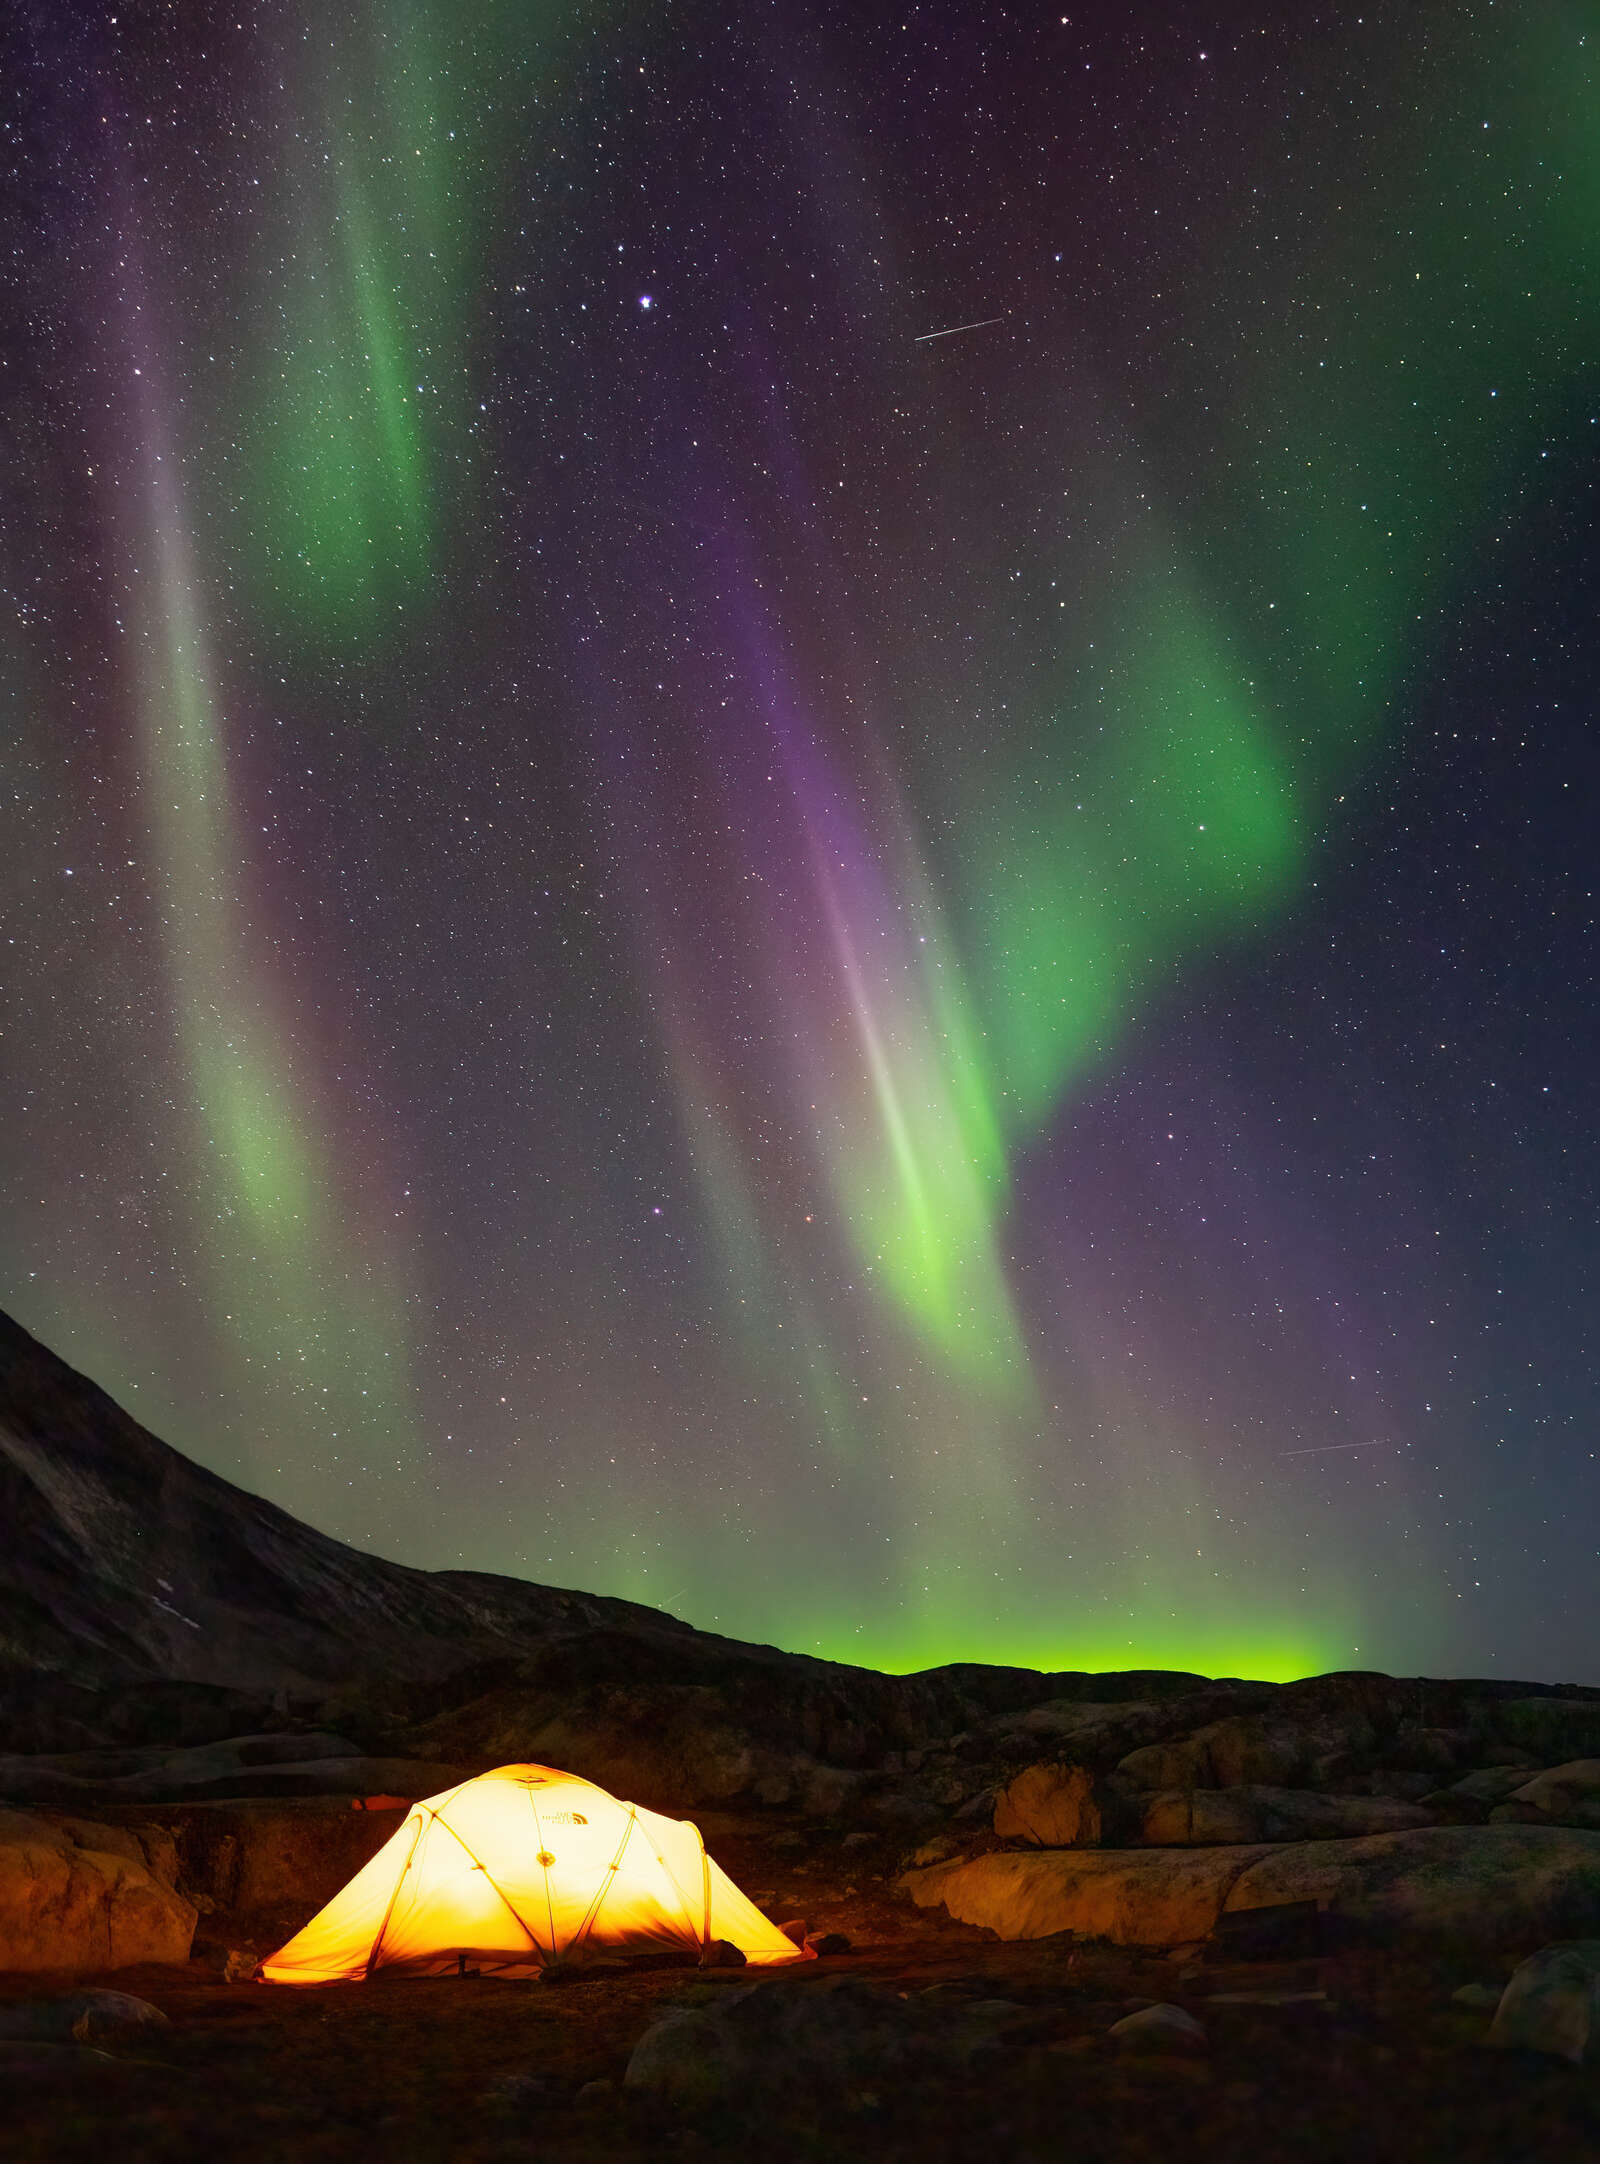
15s | F1.8 | ISO 800
Astronomers and physicists are working all the time to monitor the conditions that produce space weather - the necessary components for aurora to occur here on earth. This research is used to formulate aurora forecasts and can be found online with updates as conditions change. I have a couple of go to websites and check them often when hunting aurora:
Smartphone apps have been a great addition to aiding the success of the aurora hunter. Apps like Aurora Pro will even send out notifications when there is a good chance of seeing auroral displays in your area. That said, I often use apps like the Photographer Ephemeris and PhotoPills more for planning my shoot than relying on alerts when I put myself in good position for Northern Lights photography.
To increase you odds, plan a trip further north to an area of the earth where the aurora is more active. Fairbanks, Alaska, Yellowknife, North West Territories, and Churchill, Manitoba are great locations for North America. While Greenland, Iceland, and most of Norway have great travel locations dedicated to aurora hunting. You would do best to choose a location that has ample daytime photography opportunities as well in order to get the most out of you adventure.
Still, patience is important!
Scouting
I always have a place in mind when looking to watch or photograph the night skies. The first thing I consider is safety - are there any dangers? Steep embankments, open water, or the possible presence polar bears should be researched and planned for.
Secondly, can I find areas of dark skies with out interference of power lines and radio towers? On nights of strong aurora, I have even photographed the displays over villages and cities and have found photographing aurora on nights with a full moon to be rewarding. However, my go to scene is finding a view to the north with plenty of open sky and little or no outside lighting to interfere with my shot.
If you are fortunate to be viewing the aurora from areas to the south of the Aurora Oval you will most likely be framing your view to the north. If by chance you are much further north and under the Oval you might have the chance to frame the lights directly overhead. I have photograph many a nights aurora display while looking strait up into the curtains of light and I encourage everyone to do so if you are so lucky. Most of the time the we should be able to frame the aurora with some sort of foreground detail. I try to pick out something that adds interest to the frame. A tree-lined ridge, a snow clad forest or in warmer climates a pond or flowing stream to add reflected light into the scene.
Being Prepared
To photograph the aurora, you will be photographing at night and it will likely require a tripod, the sturdier the better. In less than adequate conditions you can sometimes shore up a lighter weight tripod with the addition of extra weight by suspending a camera bag from the center post. While the Olympus image stabilization is award winning, under these conditions it would be nearly impossible to hand hold the camera.
Most photographers also don’t have a ton of experience shooting in cold dark conditions so the more you prepare ahead of time, the more pleasant and safe the experience will be.
Let’s start with the dealing with photographing in the dark. The fewer adjustments you have to make in the dark the better. I try to have most of my settings made well ahead of any aurora activity before even going outside. The less light you can work with the better as it can easily take 20 min in the dark for your eyes to adjust to seeing more of the brilliance of the night sky.
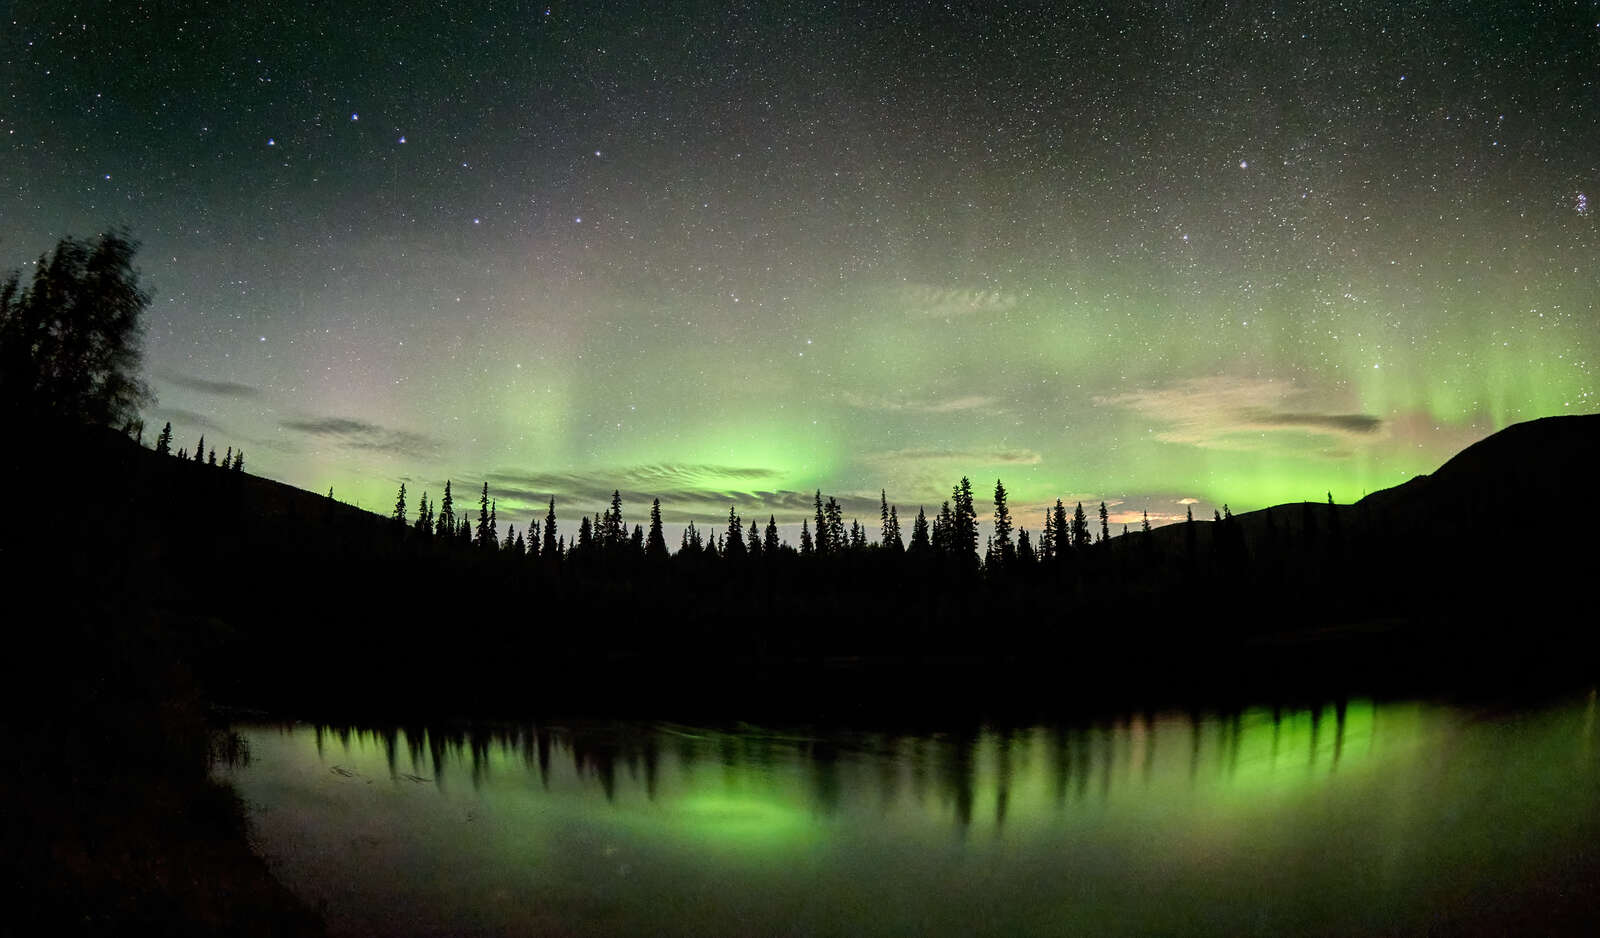
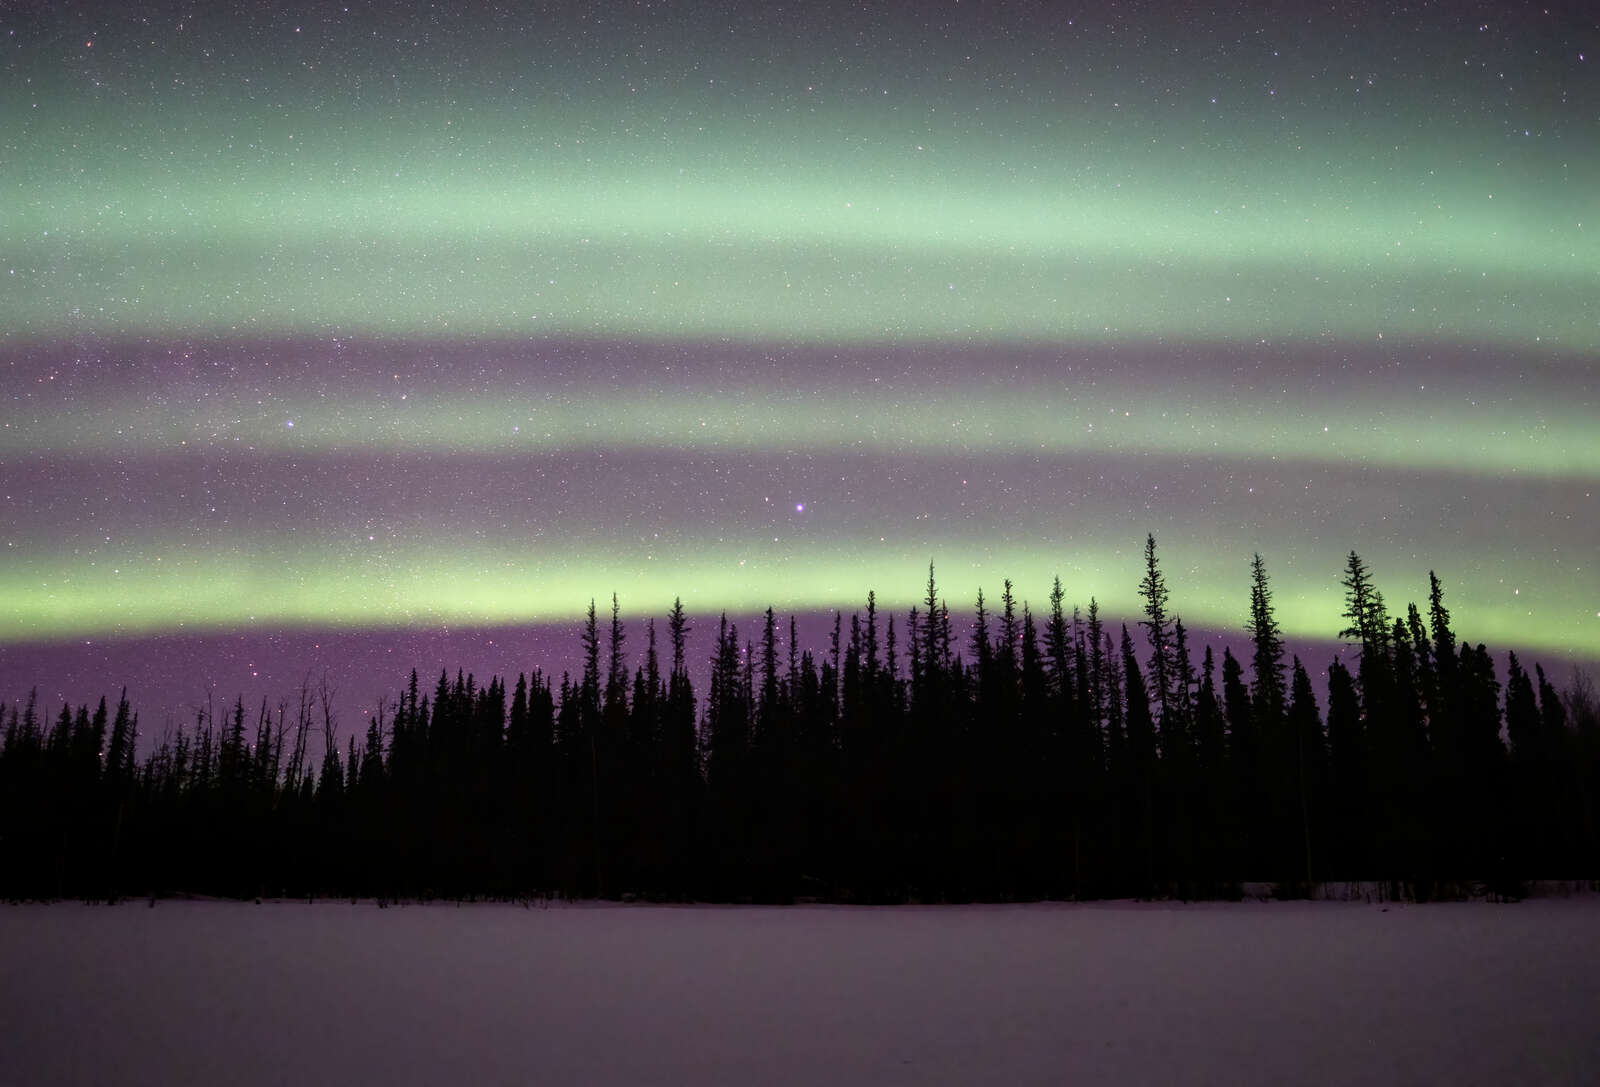
15s | F1.8 | ISO 1600
For lighting, a headlamp with a red filter is best as it keeps your hands free for camera and tripod adjustments. The red lamp or filter helps keep your eyes adjusted for the dark conditions. It’s good to note that you will want to turn off your head lamp when making your exposures to insure your light doesn’t influence the image or any foreground objects in the frame.
Getting ready for the cold is a little more personal and needs to be adjusted for the location and time of the season you will be photographing the aurora. Dressing for autumn in Alaska is considerably different than dressing for winter in Greenland. Be respectful of winter cold and freezing conditions. I have spent what some might consider too many nights out in minus 40 degree temperatures photographing the northern lights and have so far avoided frost bite and hyperthermia.
Whatever the location and season, it will always feel much colder standing outside in the dark after the sun goes down. Layers are your best approach to dressing for the cold. I start with a good base layer and go up from there. Warm sweaters and insulated pants are always part of my attire. Most of the time I have a light fleece jacket or vest under my heavy down insulated jacket. You can always peel off a layer if the conditions are too warm for the full layering. Next would be a warm insulated hat with ear coverings, the warmer the better as you can loose a great amount of heat out of your noggin.
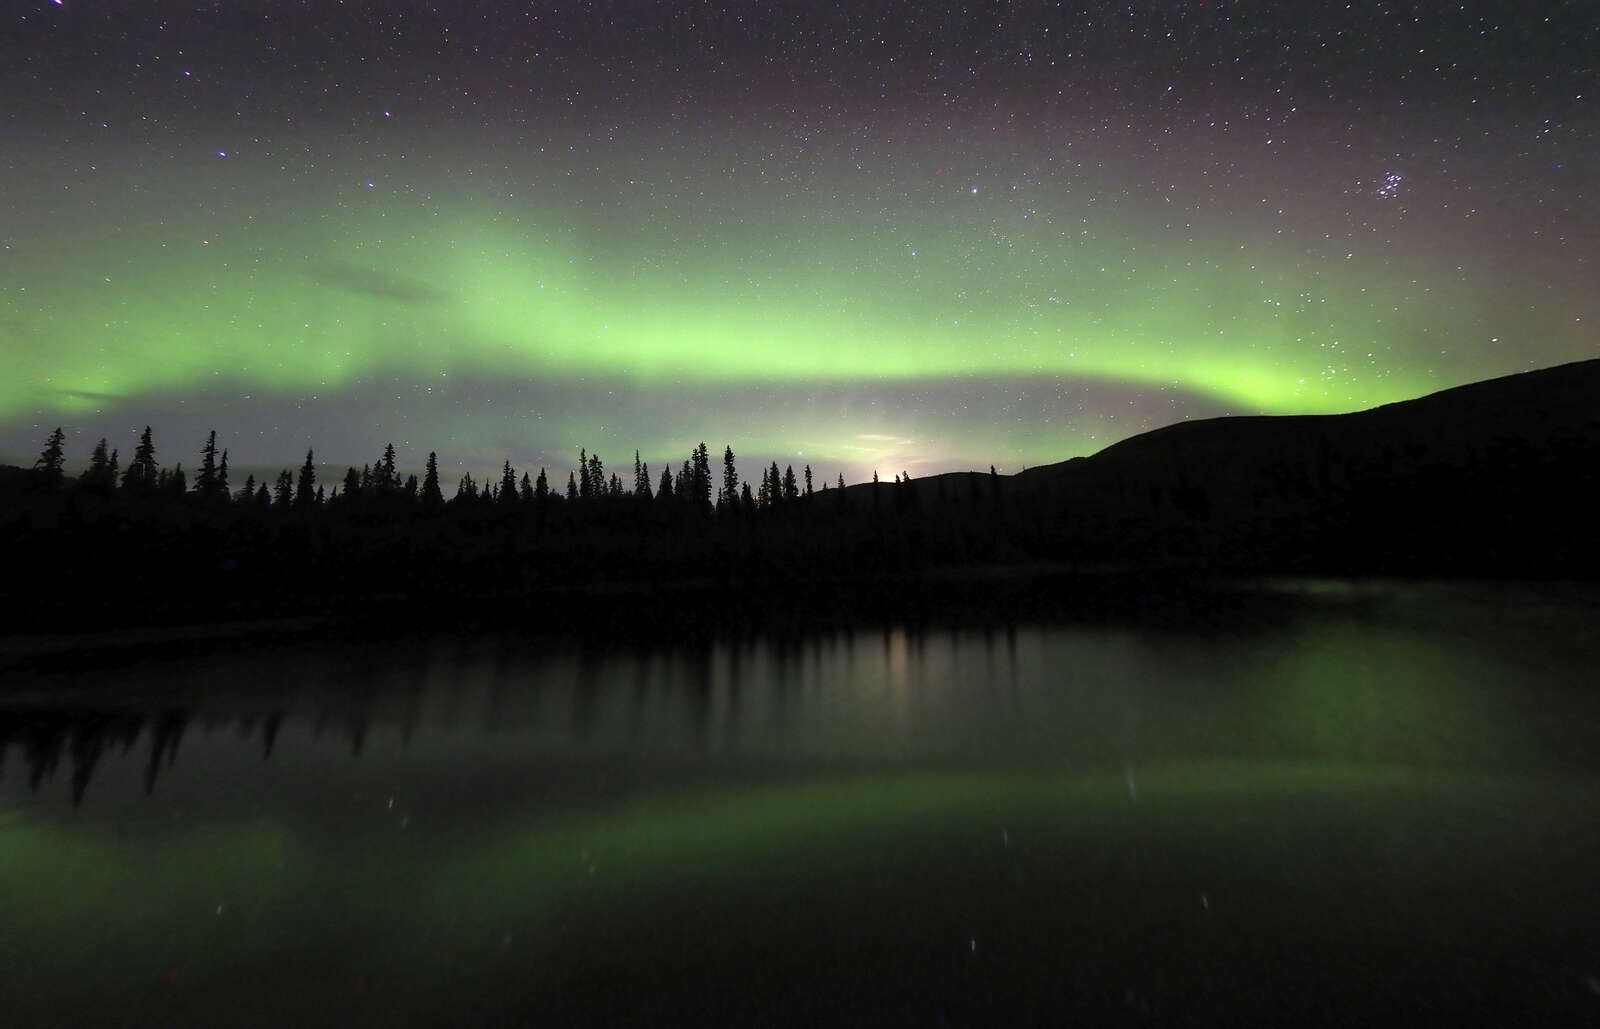
15s | F1.8 | ISO 1600
Hands and feet need to be well insulated especially when out in the extreme winter cold. For footwear I usually trust good insulated, felt Pac style boots, the warmer the better. When waiting for or photographing the aurora, you are usually just standing around. Boots should be heavier than you would want for hiking and a bit roomier for heavy socks. You should be able to wiggle your toes for better circulation and more warmth.
To keep my hands warm, I prefer loose fitting mittens than gloves. Heavy bulky mittens are fine with room for liner gloves underneath. I will also activate a pair or two of the charcoal type hand warmers before heading out into the cold night to photograph. Doing this ahead of time is essential as it can be difficult if you wait to open the package when your hands are already cold, and they can take some time to be fully activated and warm. You can easily keep hand warmers in a coat pocket for when needed or tuck them into the fingers of your roomy mittens when needed.
Better to be warm because nothing is more frustrating than getting cold just as the great displays begin and needing to seek the warmth of your car or lodging.
Another tip for shooting in the cold would be to keep a spare battery or two placed in an inside pocket where they will be warm and ready when needed.
Camera and Lens Selection
Camera selection is easy. All the OM-D cameras are more than capable, but my go-to cameras for aurora photography have always been the OM-D E-M1 line. Right now, I use the E-M1 Mark III, mainly for the starry sky focus feature this camera has to offer.
When it comes to lens selection, wide and fast is the name of the game. Since the aurora is happening at altitudes between 50 and 250 miles, spanning over hundreds of miles of visible sky, you will most likely want to photograph with a wide angle lens. I believe most will find aurora exposures much easier when shooting with a wide aperture of 2.8 or wider. Luckily Olympus has a battery of lenses that meet the criteria. Some of my favorites include the M.Zuiko 8mm F1.8 Fisheye PRO, 12mm F2.0, 17mm F1.2 PRO, 7-14mm F2.8 PRO, and 12-40mm F2.8 PRO. That said, I have been known to swap out a fast moderate telephoto zoom like the M.Zuiko 40-150mm F2.8 PRO for a shot or two when the lights are further off in the distance. (Be careful, with longer lenses the amount of earths movement is magnified and stars begin to elongate at much shorter exposer times).
4s | F2 | ISO 400
Long Exposure Setup
The majority of the set up for aurora photography can be done ahead of time.
I usually start out by setting my camera to write highest quality RAW files. I find the Olympus raw file format to work best for northern lights photography, with plenty of exposure latitude while making it very easy to adjust the color balance in post processing. That said, I usually leave my white balance set to auto and adjust to my liking in post.
My ISO is usually adjusted to around 1600 on the OM-D cameras. While shooting, the aurora may change intensity so I may change my ISO to a lower or higher setting to meet changing conditions. If the aurora gets brighter I adjust it down, rarely going below 400 ISO. If the the aurora dims, I might reach for a higher ISO setting around 3200.
My choice of aperture is easy, I feel confident shooting all the M.Zuiko PRO lenses at the widest or maximum aperture. This is where the F2.8 and wider lenses allow much more light into the camera and onto the sensor for the brightest lowlight shooting allowable.
The final setting to balance for the best night exposures would be shutter speed. I try to keep in mind that I want to maintain shutter speeds under 25 seconds with most of my wide angle lenses to manage the amount of star elongation or trailing that occurs with the earths movement. If you are using a lens in the normal or telephoto perspective, you will need shorter shutter speeds to minimize star trailing. If you are not really deterred by star trailing, no worries! Longer times are okay but if there is a high intensity aurora going on you could easily over expose or loose definition in the patterns in the display.
Since the aurora usually changes brightness throughout the display, choosing the best shutter speed is done by shooting in manual mode and bracketing. I usually start by setting my exposure time at around 30 seconds and bracketing down by a full stop until I get to around 4 seconds. Then I bracket back up the scale again until I return to 30 seconds. I keep repeating this process, often checking my histogram between each series just to make sure I am not bumping any setting out of line.
As an alternative to shooting in manual mode, an easier way for getting the proper shutter speed would be to set your camera meter on full digital ESP metering and set the exposure mode to aperture priority (the A setting). This will allow the camera to adjust the shutter speed automatically. I find setting the exposure compensation to +1 and checking the histogram frequently is the best way to employ this method. It requires less adjustments during your photography so you can enjoy the night sky with less attention on your camera settings. Should you need to make adjustments, simply use your exposure compensation button and dial in any changes you want.
It’s important to rely on your histogram to determine proper exposure as the image in your playback screen will always look brighter in the dark conditions at night.
Other Things to Consider
I turn off noise reduction in camera so that I can take more images during the display. This a personal choice and with the fantastic post processing software out there these days, one that I find works well.
The use of a cable release will allow you to trigger the camera’s shutter with gloves or mittens on and not introduce any movement into the camera during long exposures.
Focus
Originally, focusing had been the most difficult aspect of night photography and aurora photography was no different. With aurora displays happening up to 50 miles above the earth and beyond, focus is more than adequate when set to infinity. I have found, however, that it is not precise enough to simply set most lenses to infinity and just go with that. With the E-M1 Mark III, Starry Sky AF was added and night photography became that much easier. Simply set the camera up in the general direction of your sky, choose the Starry Sky AF option in with the cameras auto focus and touch the shutter button half way. The camera will do the computations and in a few seconds, have you focused to infinity for pin point stars and sharp aurora.
If you are shooting any of the other OM-D models, I would recommend setting the camera/lens to Manual Focus in order to focus the camera to infinity. The focus peaking or focus magnification option will help ensure you are focused correctly. I find this is best done by taking the camera outside in daylight, focusing on a distant subject and using a little gaffers tape to keep the focus ring from moving. I like to tape the focus ring so that gloved or mittened hands have less of a chance of bumping the focus. I also check and recheck my focus throughout any night photography sessions. During these focus checks, I play back the last image and zoom in to ensure stars are pin sharp even when the northern lights maybe moving.
13s | F2 | ISO 400
Framing and Composition
When you have the focus set and beginning exposure dialed in, the last step is framing and will be done when the activity begins.
If you have done your scouting as well as watched the weather and aurora forecast, you will be at your location and ready to place your tripod. A Northern Lights display can begin anyplace in the night sky but for most it begins in the north and can end up in any other location. Whenever setting up and framing, unless you have a great reflective surface like a pond or stream, you will want to fill most of your frame shooting skyward.
Its awesome if you can include some aspect of the foreground to add interest to your composition. A tree covered ridge line, a shoreline of a lake, or cabin under the northern sky will add a sense of place to your image. When you have the ability, you can add a person to the composition for scale and wonder. Make sure that whatever foreground you use, the distance is great enough between the camera and the subject to maintain acceptably sharp focus on aurora as well.
On nights of extreme auroral activity it can be possible to have the lights displaying directly overhead. At these times, I often compose shooting strait up into the lights, doing my best to frame around an easily identifiable constellation like the big dipper. A quick note, these displays are often part of a substorm event and are much brighter, often requiring quick exposure adjustments. Consider yourself lucky if you have the opportunity to witness such a dramatic display.
A solid tip for making your nighttime composing much easier. Employ the Live Boost function (Menu D2) found in your OM-D cameras. I usually set mine to “On 2,” making the display much brighter and, as such, easier to see my composition. Using Live Boost, the image recorded will appear as exposed not as viewed during set up.
10s | F2 | ISO 1600
Conclusion
Just as the solar wind ebbs and flows, each nights auroral display will be different. Practicing your set up and being ready will always favor the best aurora photography. Knowing your camera as well as being comfortable with the dials and buttons will allow you to make minor adjustments as the display changes. In these ways, you are setting yourself up for capturing the images you want.
If all is done in advance, it is mostly about positioning your tripod, turning on your camera and watching as the magic of the light unfold overhead!
Multi-day and nightly tours to photograph the aurora are quite popular and are excellent for increasing your chances of photographing this amazing phenomena. If you are interested in tours, there are private guides and group tours that specialize in photography at most locations where the northern lights can be observed with any frequency. Good leaders will help you navigate every step to getting great photographs.
Instagram: @ericsrock
As a visual storyteller, Eric has been sharing his passion for wildlife and cultural photography by leading nature and travel photographic adventures to many of the earths most remote regions. When not engaged in leading photography trips for Joseph Van Os Photo Safaris, rest assured Eric is out photographing, wherever he may be.