This is going to be a nerdy article, you guys ready? Let’s do it!
I’ve been honored to use the OM-D E-M1 Mark III for a few months now. My favorite type of photography is astro, so I decided it was time to test out the different shooting modes and see what gave us the best overall image quality and shooting experience.
For this I’ll be testing taking single exposures, tracked exposures, tracking and stacking. I’ll also be testing out the High Res Shot Modes on this camera, both “handheld” and “tripod."
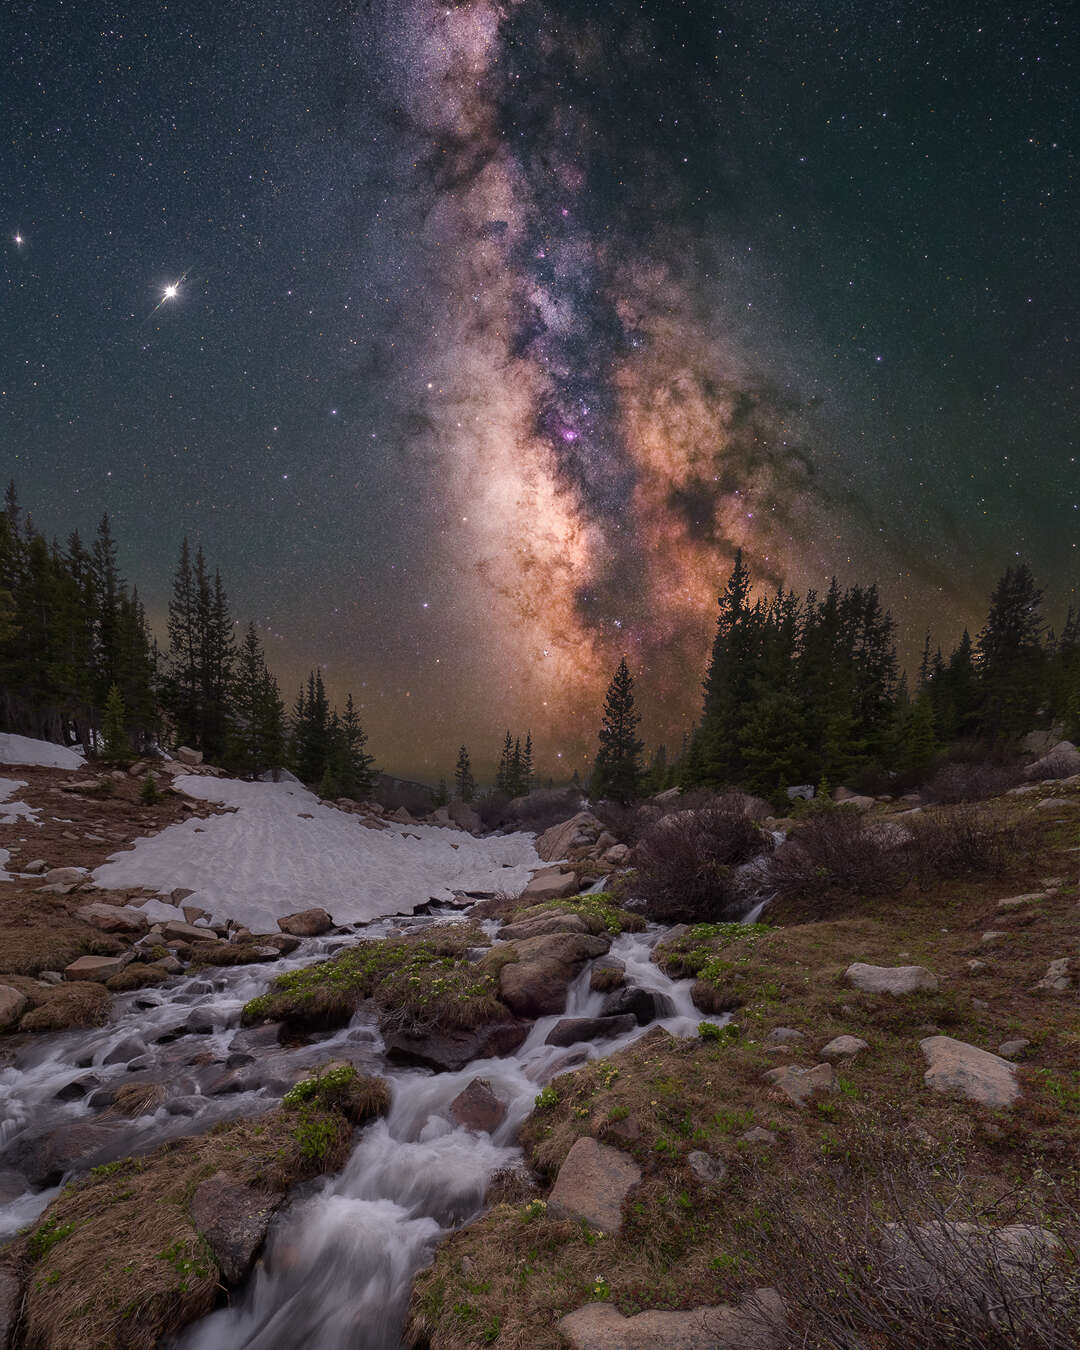
7mm | 60s | F2.8 | ISO 1600
For capturing these photos I’m using the M.Zuiko 17mm F1.2 PRO. It’s an amazingly sharp fast lens. Not exactly “wide angle” at a 35mm full frame equivalent. But I love the perspective of the Milky Way it can give you. It’s a little tighter and more intimate than a super wide 7 or 8 mm lens. The M.Zuiko 12mm F2.0, M.Zuiko 8mm F1.8 PRO, or M.Zuiko 7-14 F2.8 PRO would also be very good options for photographing the stars.
To test the camera I wanted to put myself in a good but not perfect location. I could drive 2 hours north to get to completely dark skies away from light pollution. But let’s face it, most of us don’t have the opportunity to easily access skies like that. So I decided to stay closer to home and shoot from a hill top overlooking the town of Frisco, Colorado.
First, let’s talk about camera settings.
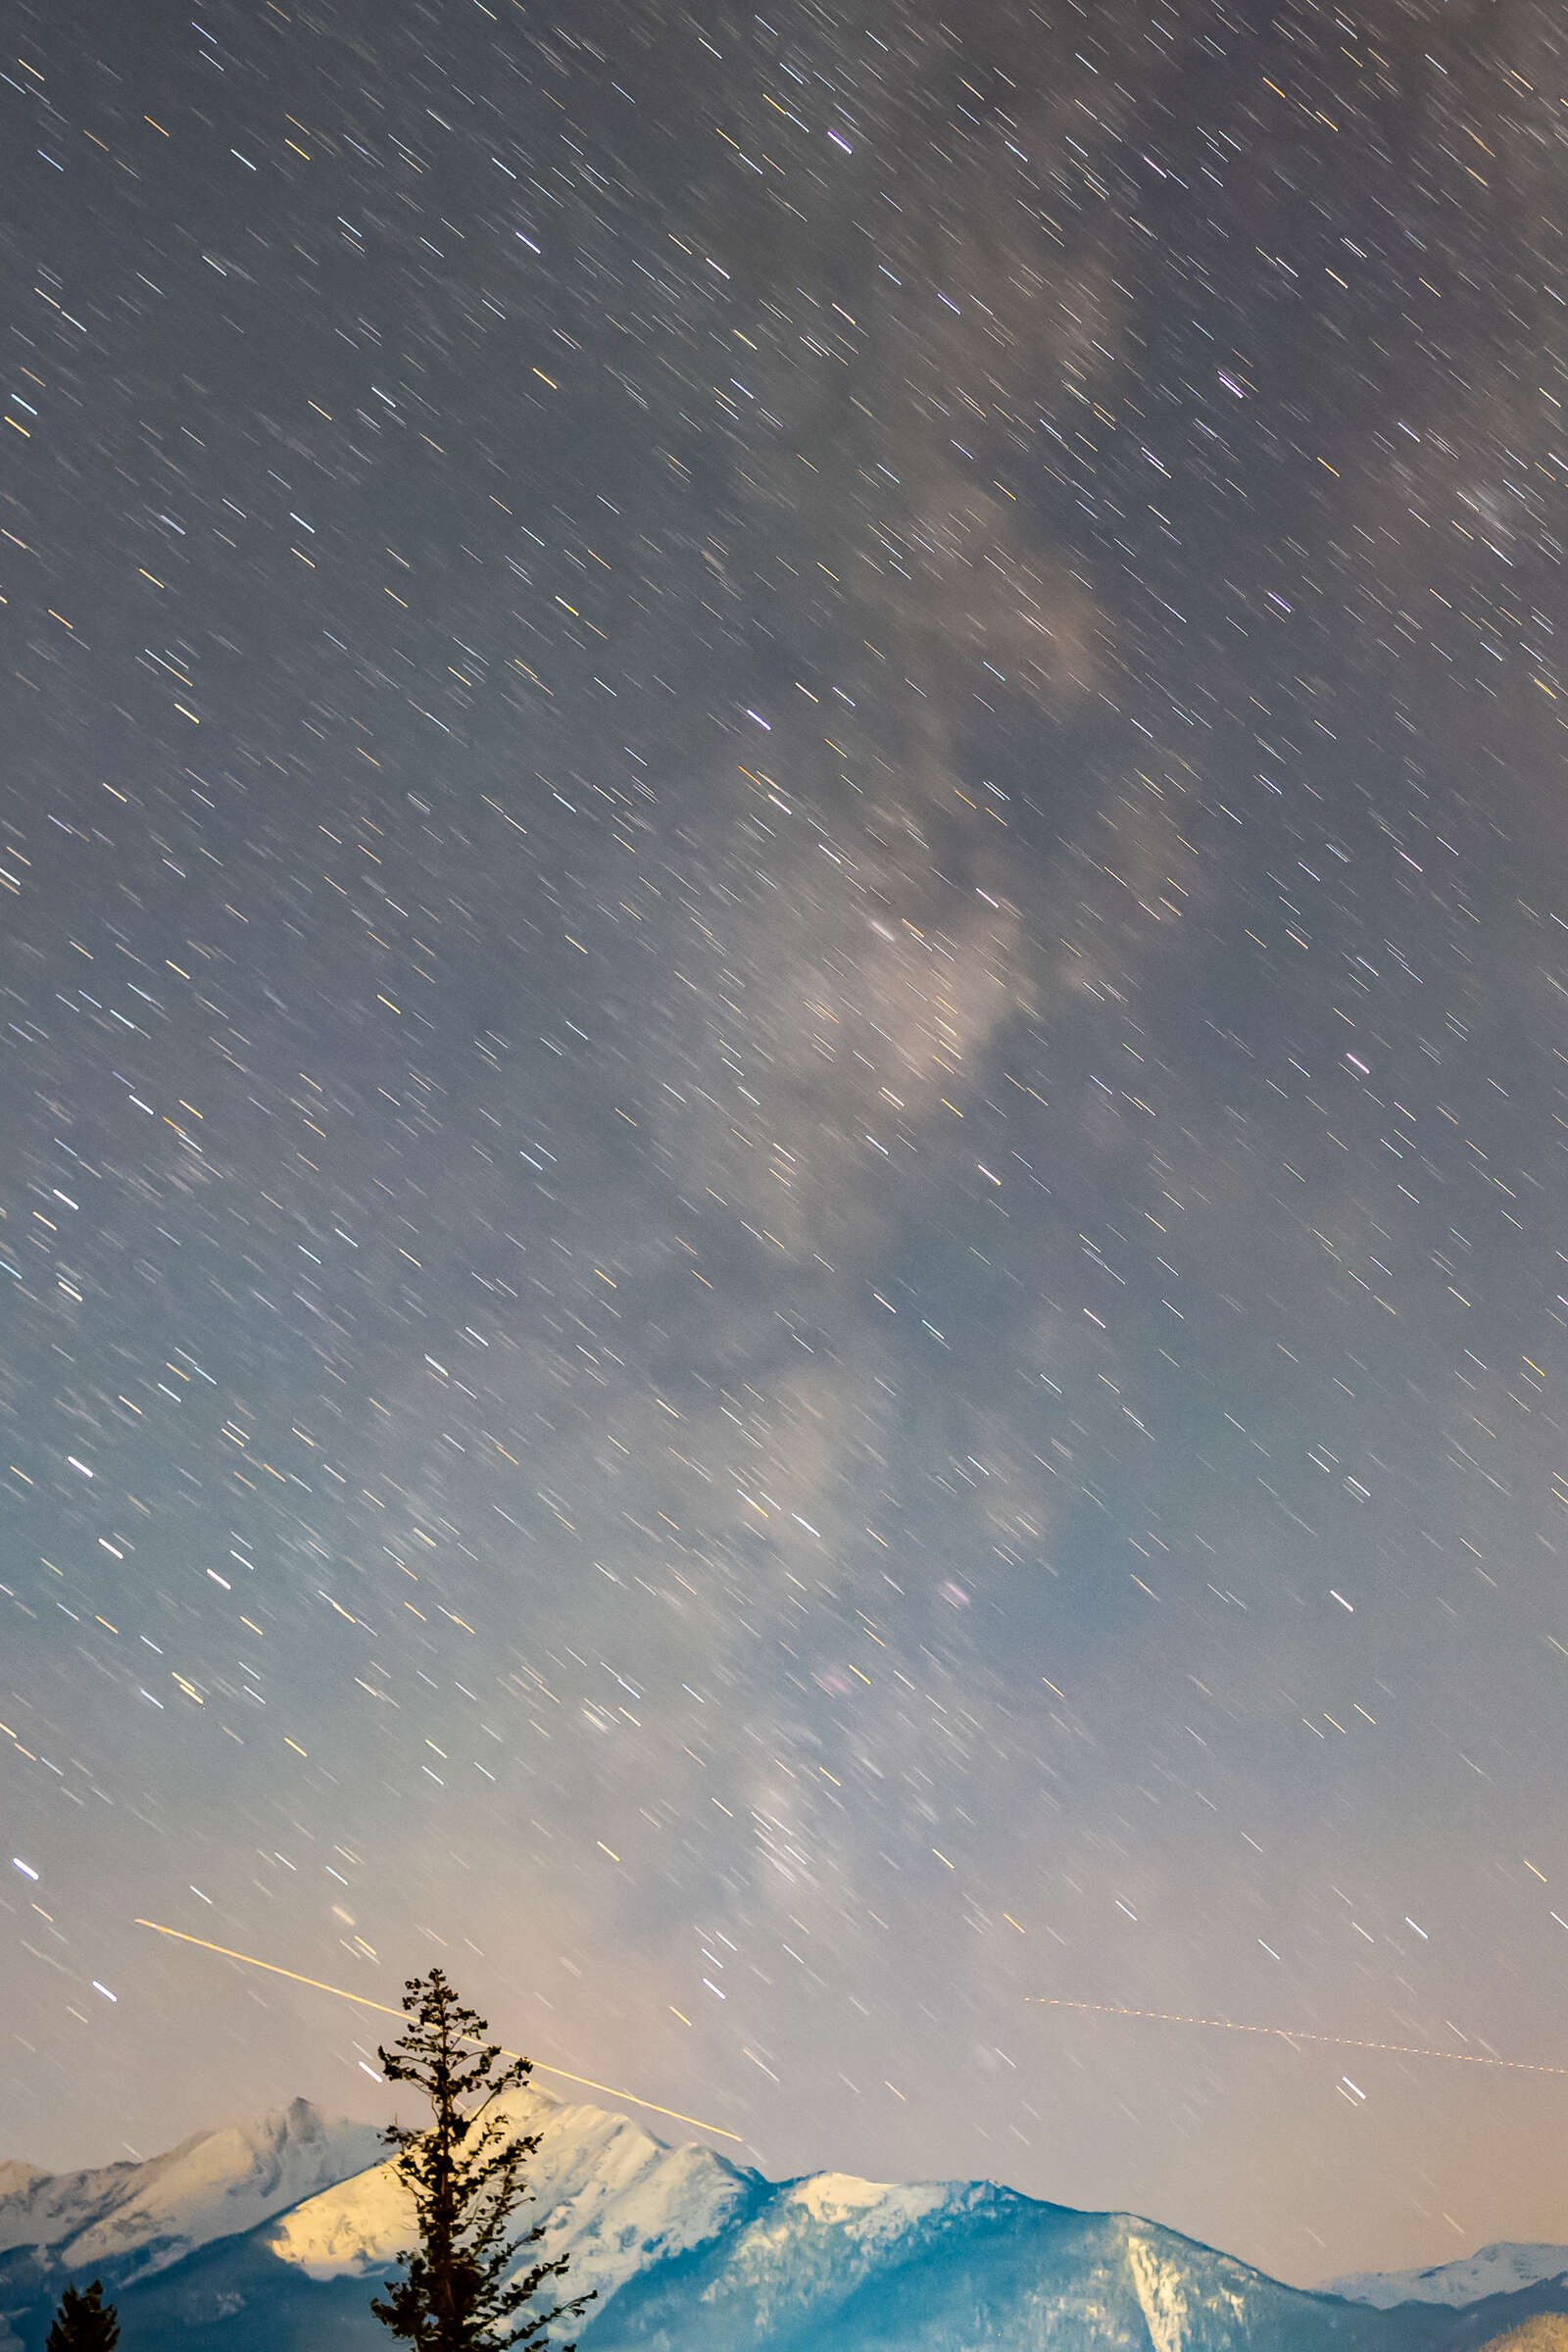
While everything seems peaceful and still out there under the stars, things are still moving! As we spin through space the stars above are moving from our perspective, because of this we need to be careful with our camera settings. Just like freezing the action in sports photography you also have to freeze the action in astro! The picture to the right shows how the stars trail after 110 seconds of exposure time. So how do we find the right setting for our camera? To calculate your max shutter speed: you need to know your camera sensor size and lens focal length, then you can use the rule of 500. It’s not a perfect rule, but it will get us close. The equation for using this rule is 500/focal length/crop factor= max shutter speed. So for this particular set up you would plug in 500/17/2 = 14.7 seconds.
The rule of 500 isn’t perfect, but it’s easy to calculate and remember. If you get the app PhotoPills it has a feature called “spot stars” which uses the much better NPF rule. This takes into consideration your cameras resolution and the f stop of your lens. Punching in the info for this camera lens combo gives us a max shutter speed of 8.12 seconds. I like to split the difference because I’m ok with a small amount of star trails. So for these shots I decided to go with a shutter speed of 13 seconds. I was close to this town so I stopped the lens down to F2.8 and set the ISO at 3200 because shooting “brighter” was washing out the stars from the towns light pollution.
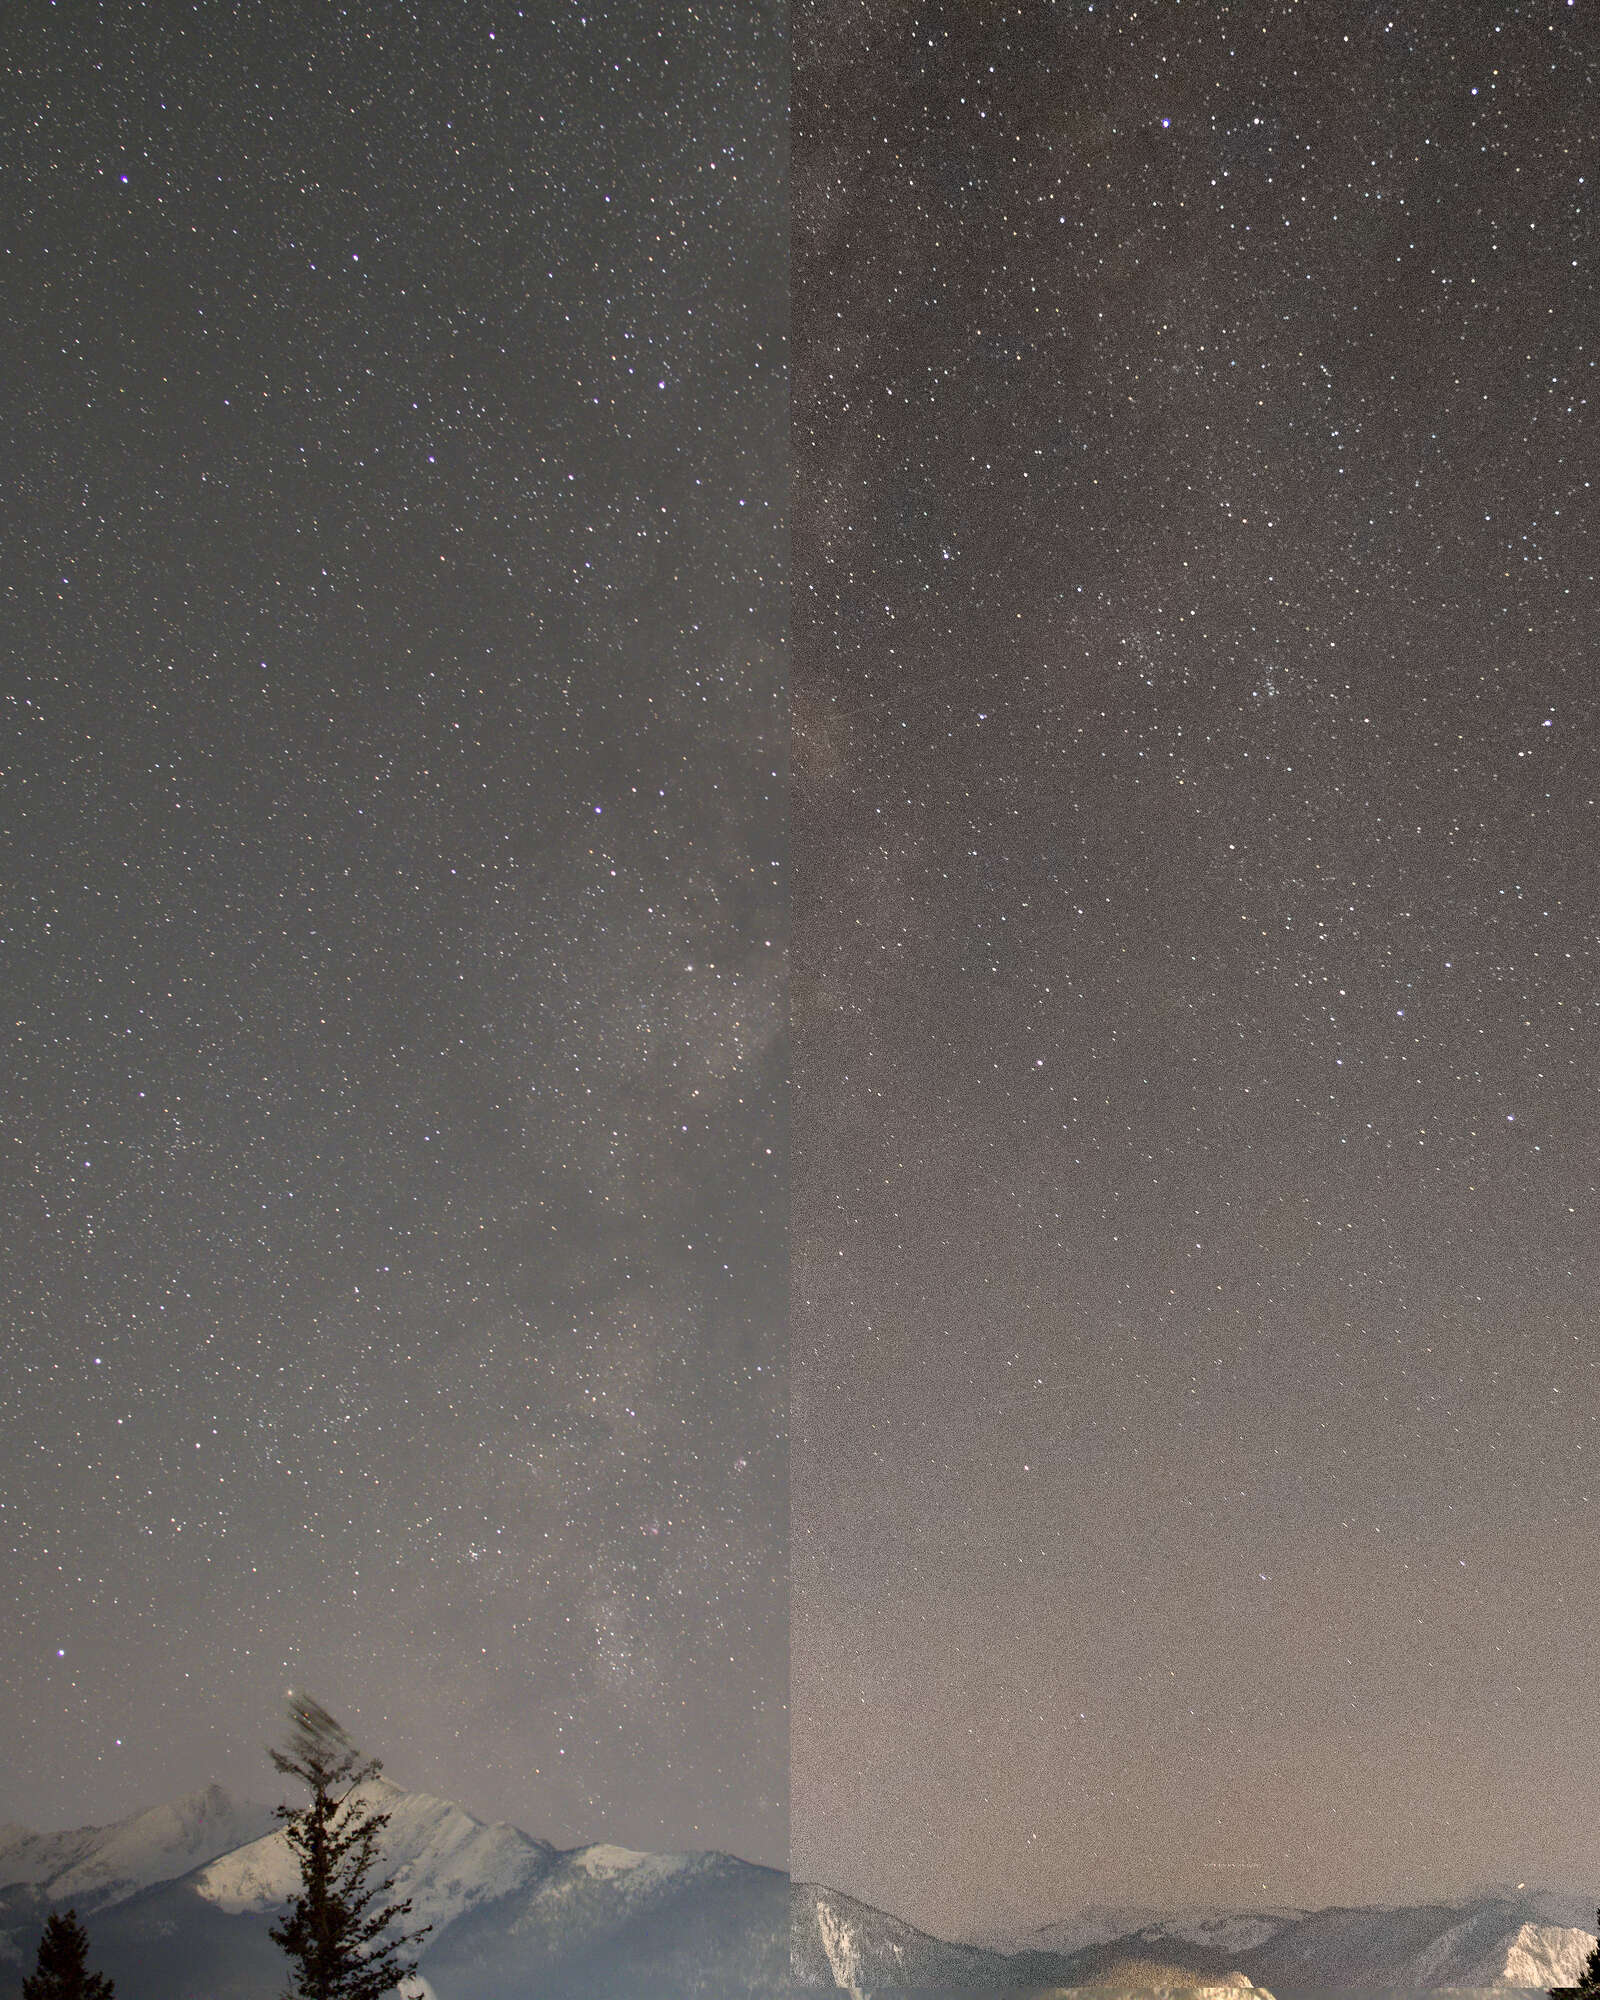
Single Frames vs. Stacked Frames
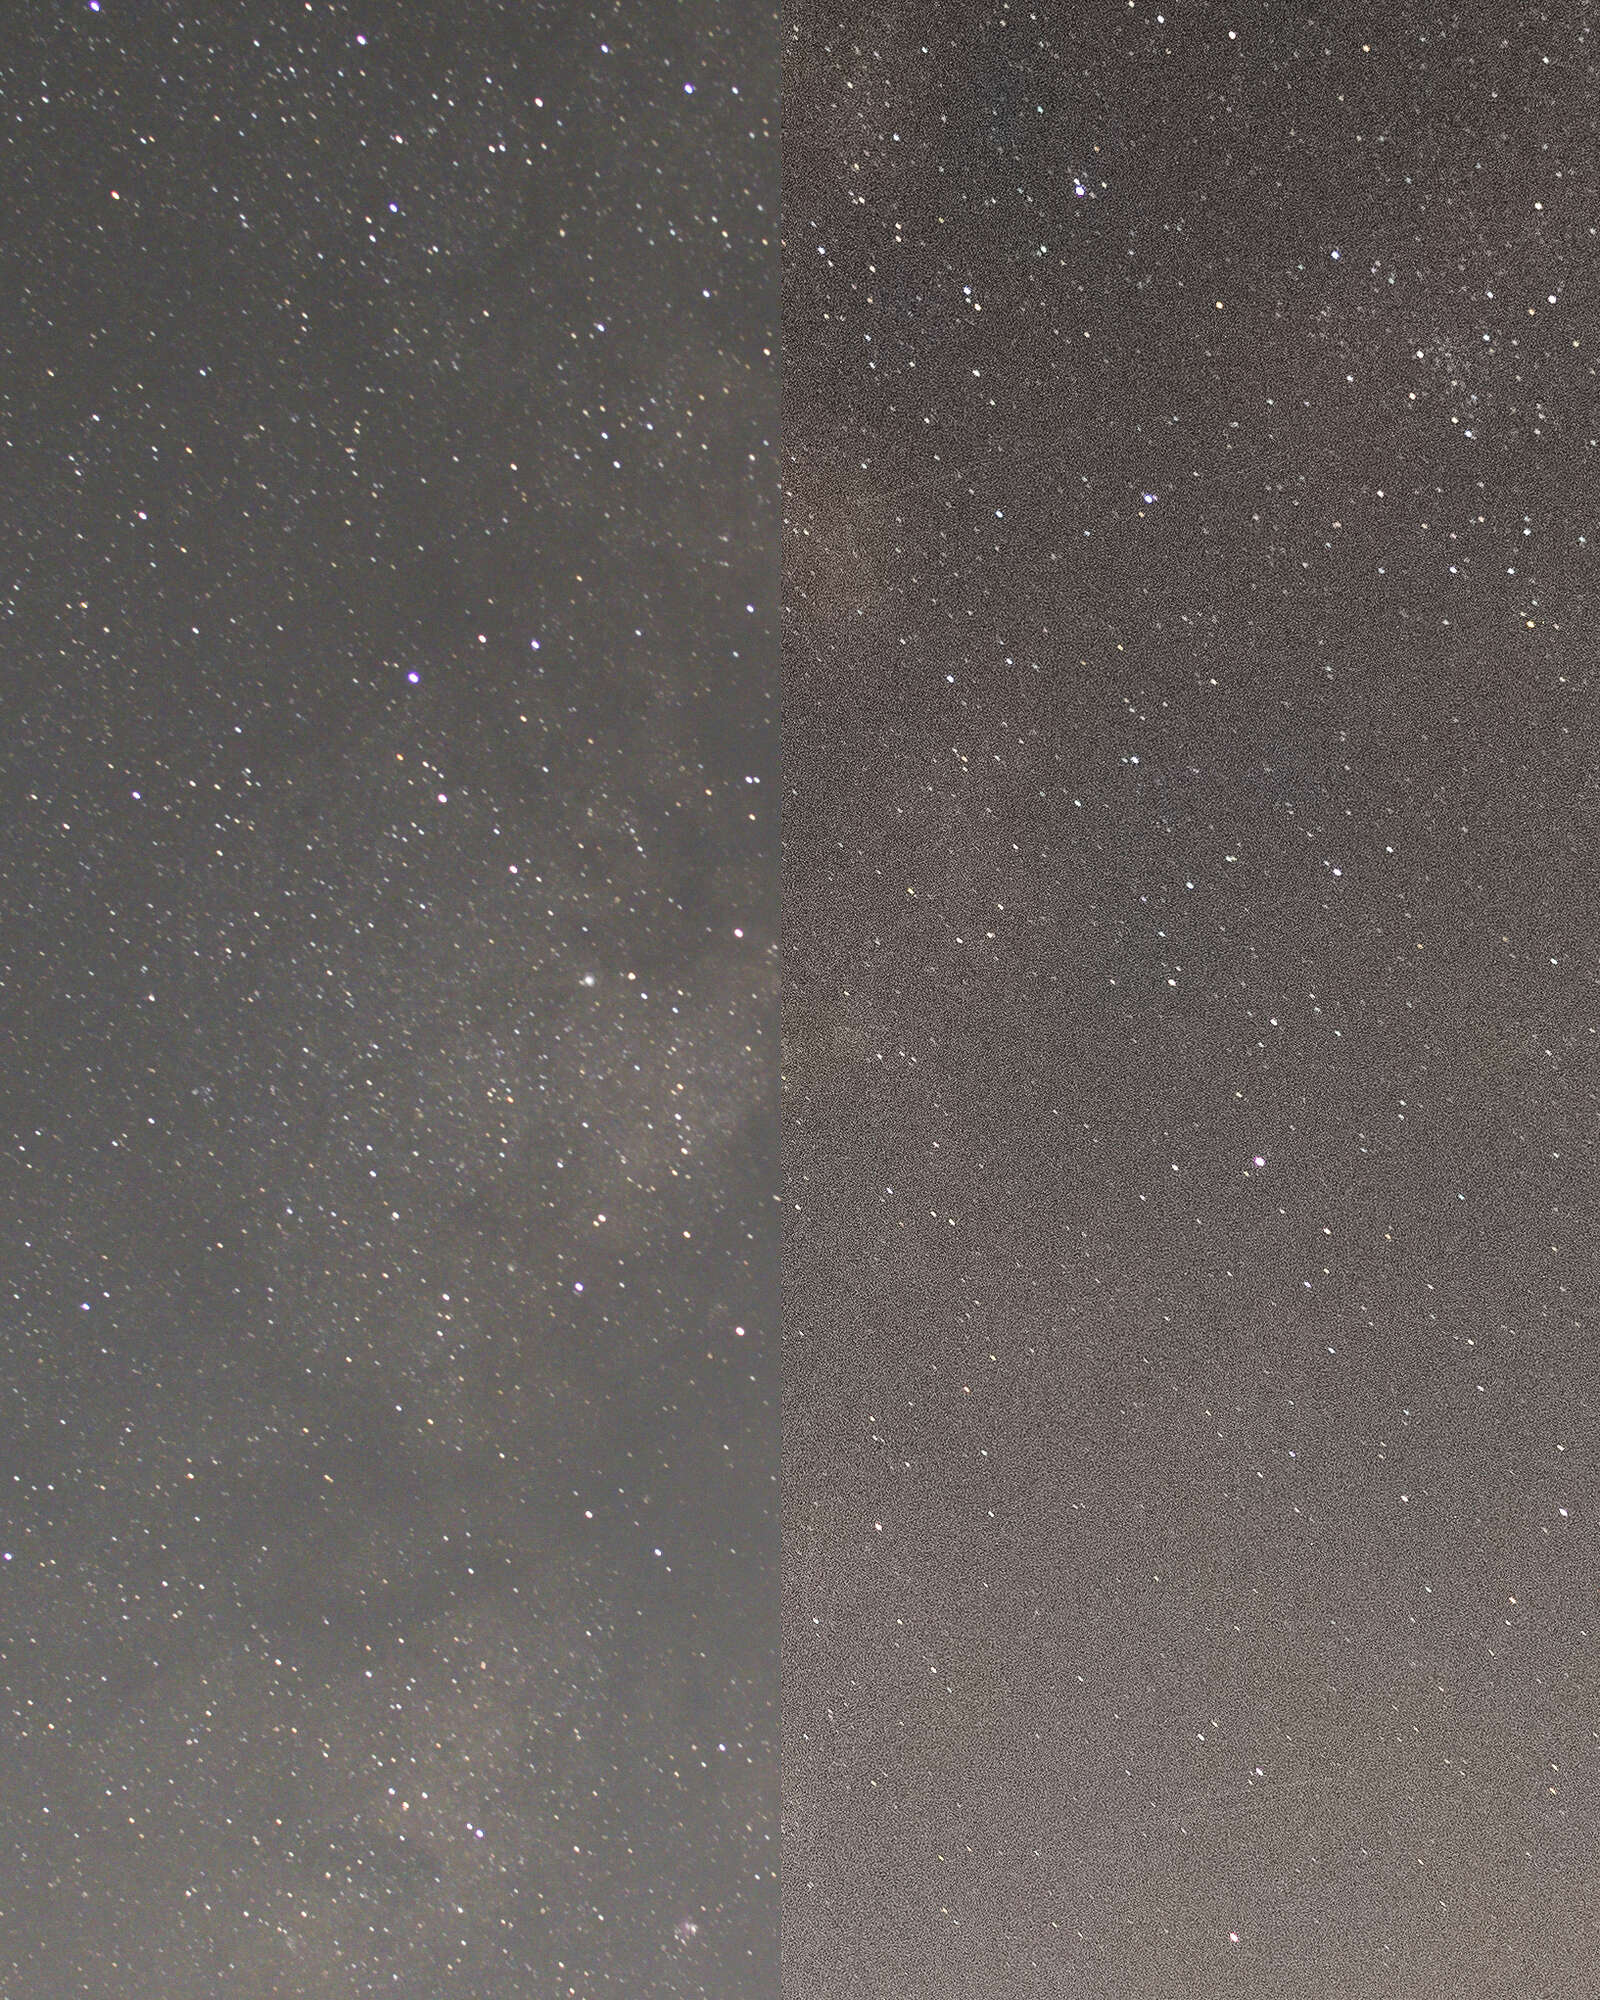
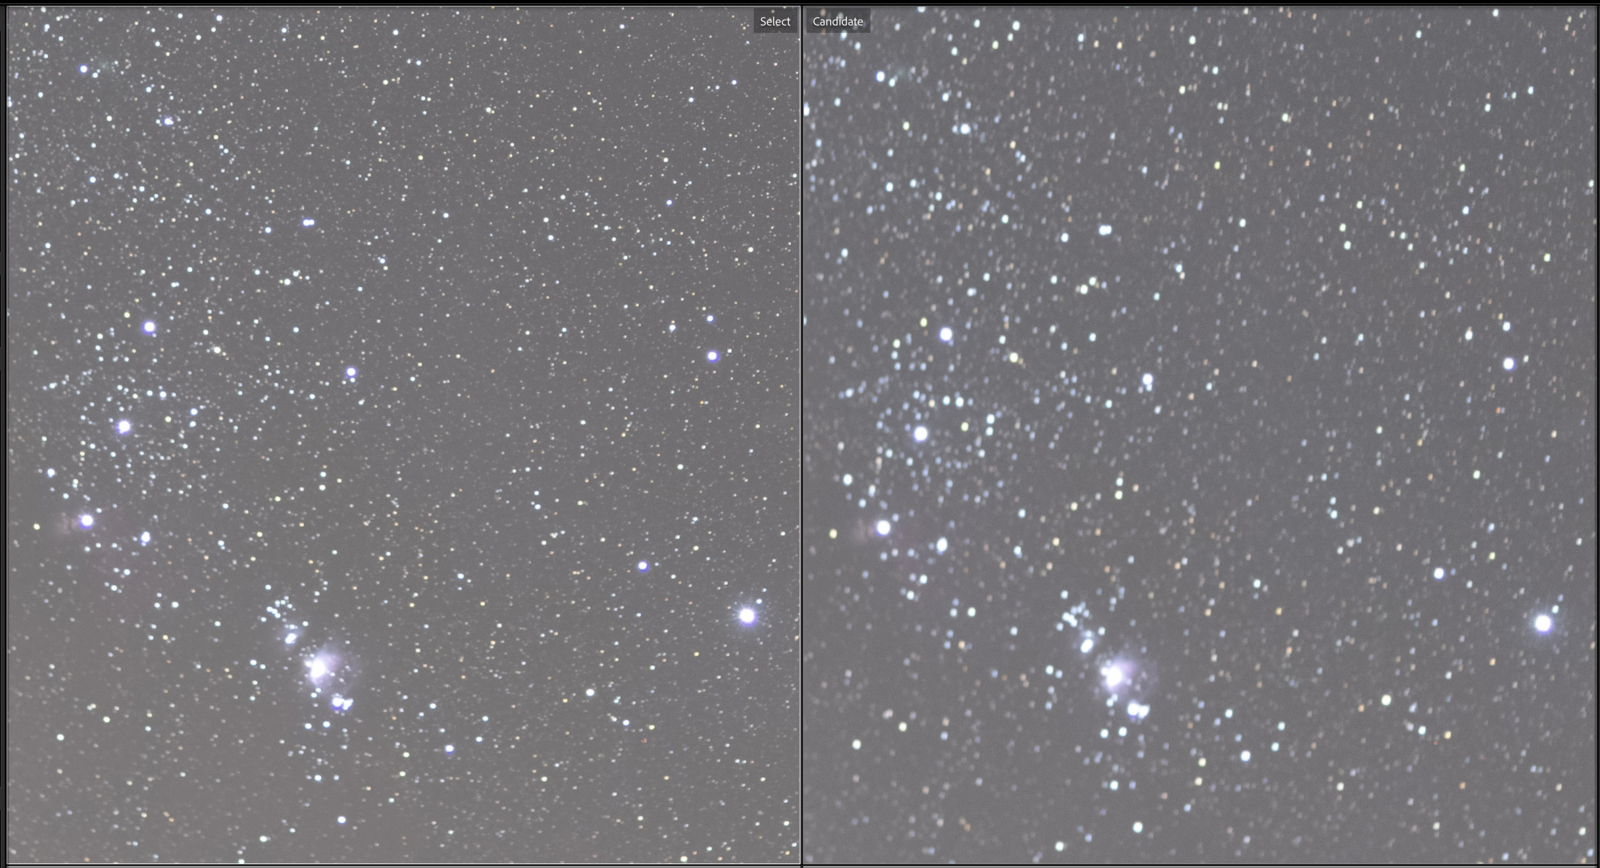
I started off shooting in the regular resolution mode. I wanted to see how much of a difference stacking made. To do this I attached a intervalometer and shot twenty 13-second exposures in a row. In the image below you can see the single exposure (right) and the stacked exposures (left). On a small screen it may be hard to tell the difference but if you zoom in, or would like to print these images you will definitely notice the difference between the two. For one, the noise on the stacked image is greatly reduced. You can also see a bit more detail in the dust clouds of the Milky Way. And, if you include foreground and use a program like Sequator or Starry Landscape Stacker you can have the program align the stars and freeze the ground. Stacking will greatly improve the quality and clarity of the foreground as well as the stars. This is the simplest and quickest way of improving the quality of your astro photos.
Next, let’s test out those high resolution modes.
Olympus offers two high resolution modes: Handheld and tripod. In the tripod High Res Shot Mode, your camera shifts the sensor eight times, in increments of one micron, capturing one exposure per adjustment. These images are then combined automatically to create a single 80MP photograph. In the Handheld High Res Shot Mode, the sensor-based stabilization system turns on and off throughout the sequence of exposures, helping to prevent excessive movement due to motion blur and analyzing the amount of camera movement that occurs during the sequence. The camera uses this information to automatically align the images for the final image and clone out any blurred areas

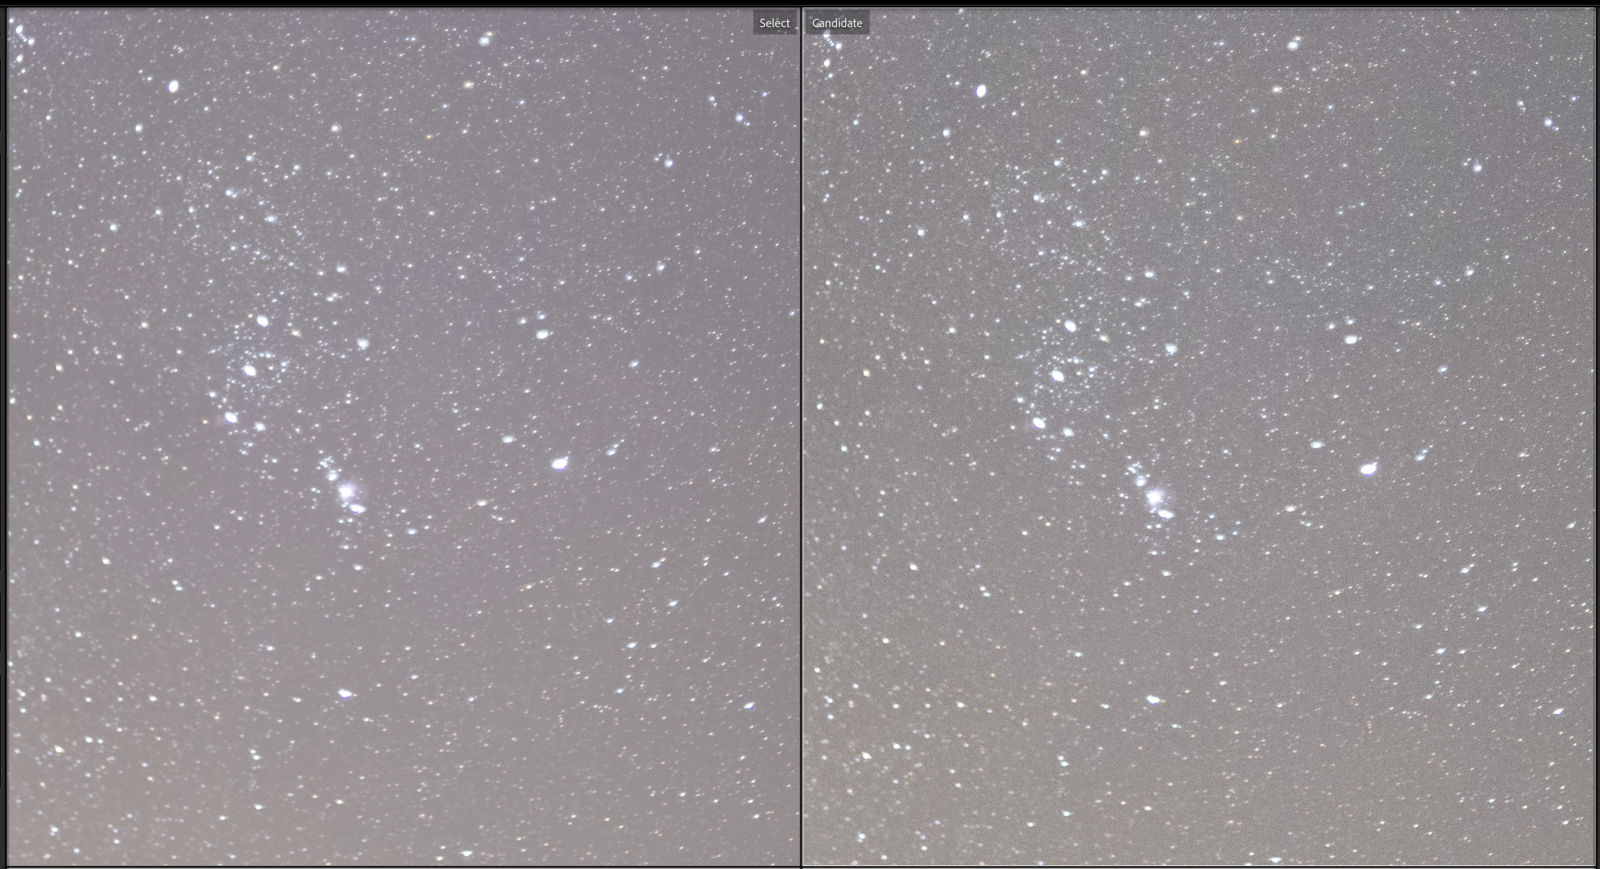
Lets first compare a standard 20 megapixel photo against a Handheld High Res Shot Mode photo.
I went away from light pollution for this shot. These were both shot at F1.2, ISO 6400 ISO, and 13 seconds. In this image, the left side is the high res and on the right is the standard single frame. For this screen shot I adjusted them to have the same field of view… 100% on the right and 63.4% on the left.
With this view there’s a few things that really stand out to me (and my wife when I randomly asked her).
- Different color. The High Res Mode increases the detailed color accuracy of the image. This is because the photosite only actually captures 1 dedicated color either red, green, or blue. Each pixel “borrows” color data from the neighboring pixels to create the image. Because of this, the color in each pixel is only 33.3% accurate. When using the High Res Shot Mode the camera shifts the sensor by 1 photosite unit allowing it to capture accurate data for each color value. No more “borrowing” needed. Thus the color in the high res mode is closer to 100% accurate.
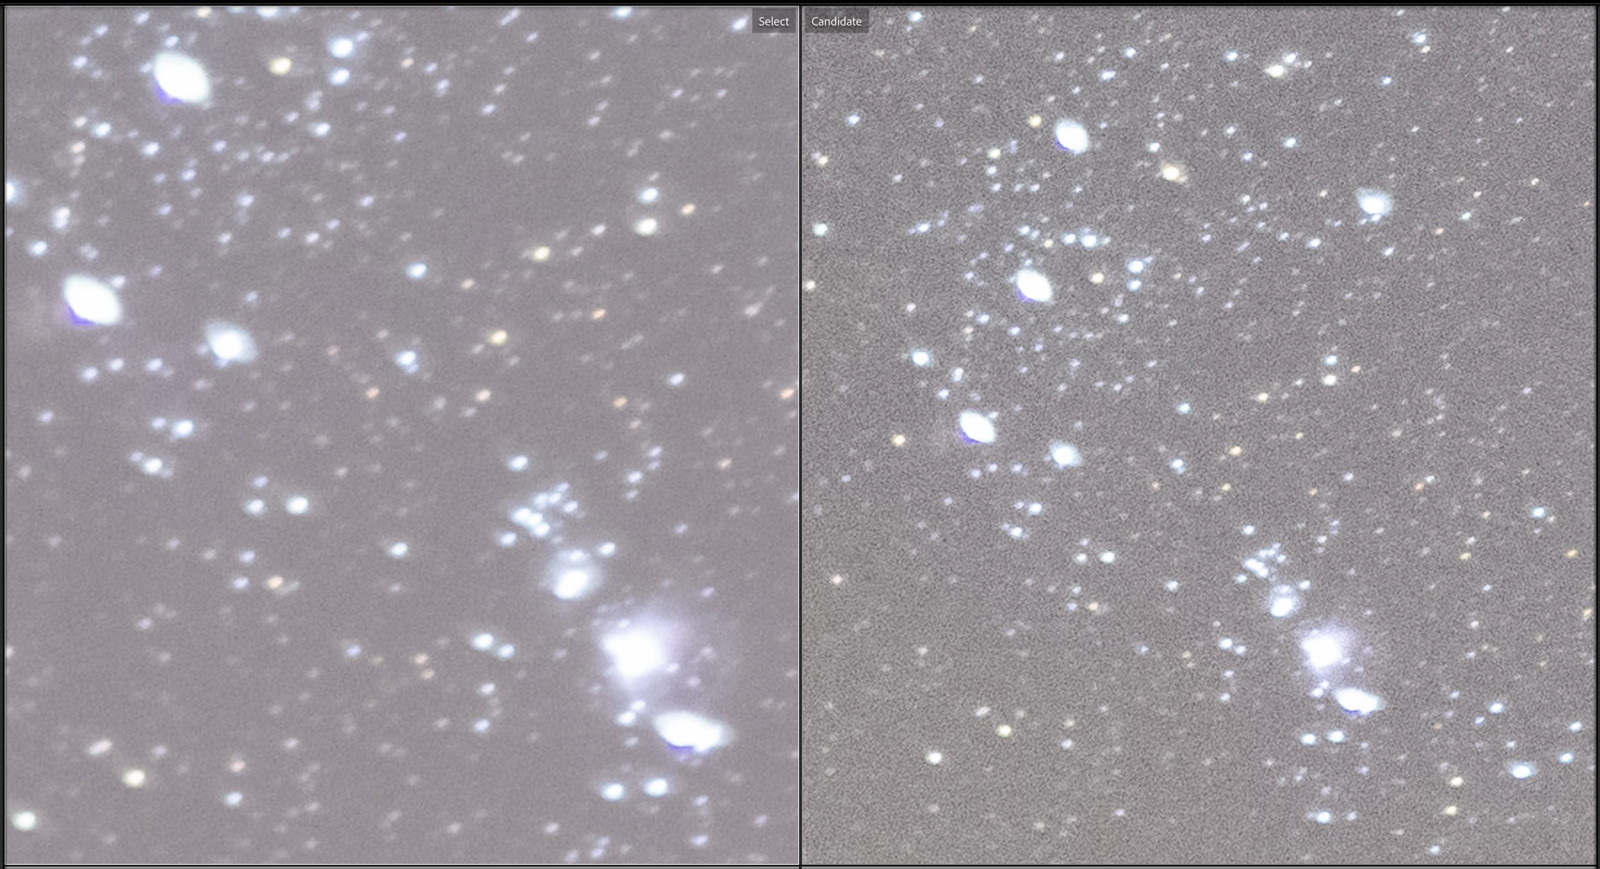
- Each of the 8 images are “stacked” or combined to create the final high res image. That means that the camera is essentially replicating the noise reduction process described earlier. Lets take a look at them both at 300%; here the difference in noise and resolution are very obvious.
Now for the downside. Time.
Being patient out in the cold can be difficult. Especially when dealing with extended exposure times like we do when photographing the stars. 13 seconds is a long time to wait, but when you’re using the hand held high res mode you have to multiply that by about nine. In my testing it usually took the camera around 116 seconds to complete shooting and process the image… this makes sense considering it is taking eight 13-second images and compiling them. If you have the time, the high res mode is worth the patience… but if you’re ever in a hurry, skip it and you’ll still get beautiful results.
Handheld High Res Shot Mode vs High Res Shot Mode
Because the High Res Shot Mode can’t go above ISO 1600, I wanted to use the tracker to extend the exposure time to get the best possible image with these modes. In the below image you can see the Handheld High Res Shot Mode on the left and the tripod High Res Mode on the right.
On the 1 to 1 view, the Handheld High Res shot looks better… but let’s make the field of view the same.
From this example it seems like the Handheld High Res Shot Mode produces cleaner and shaper images than the tripid High Res Shot Mode. This result coupled the fact that you can’t go over ISO 1600 makes me declare the hand held high res mode the winner between the two.
Last step to getting the best possible image quality….. tracking!
What is Tracking and How Does It Help?
A tracker rotates at the same speed as the Earth, just in the opposite direction. This freezes the stars in place relative you your camera. Your exposure time can be up to minutes in duration, and the missing faint stars will show up in your pictures, star trails will disappear, and lower ISO helps to reduce the noise. Finally, you can get clear, pinpoint photos of stars and the night sky. Below is an example of a tracked and stacked image blended with a long exposure foreground (right) and a stacked image processed through Sequator (left).
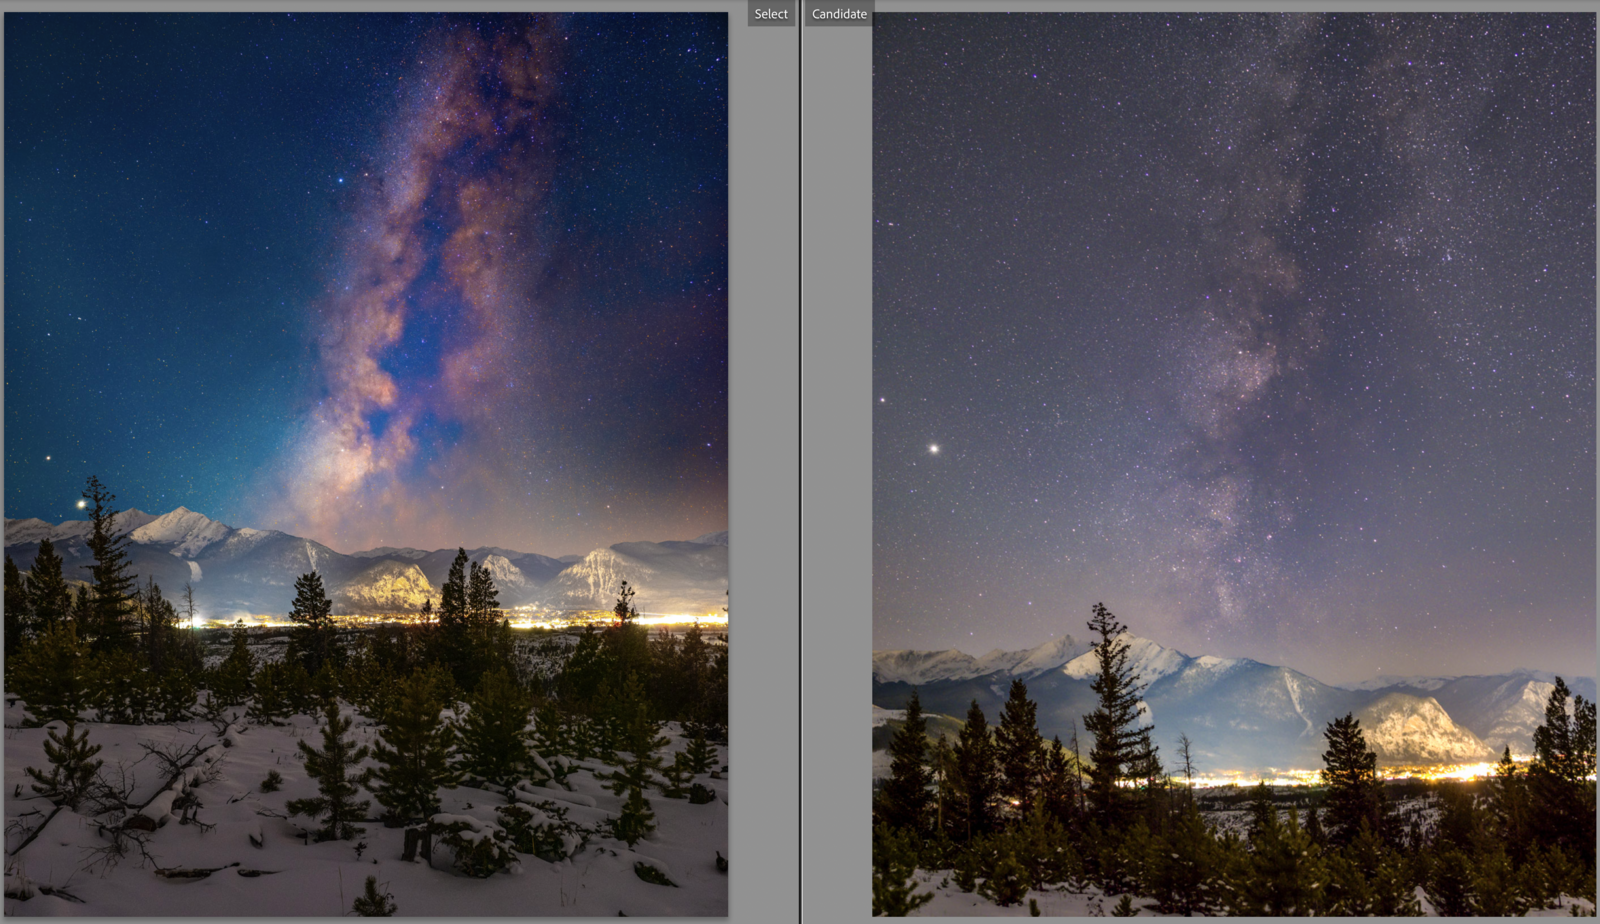
The tracked images on the left are 240s | F2.0 | ISO 800
The exposure values are relatively close to each other; however, the major benefits of tracking are the lower ISO and closed down aperture. Below, on the right photo you can see the lack of vignetting on the tracked image.

In the below picture at 300% you can see the benefits of lower noise from the ISO 800 and the cleaner star shape due to the lack of coma from the closed down aperture. As we discussed earlier, stacking images can help a lot with the noise issue, but tracking still wins!
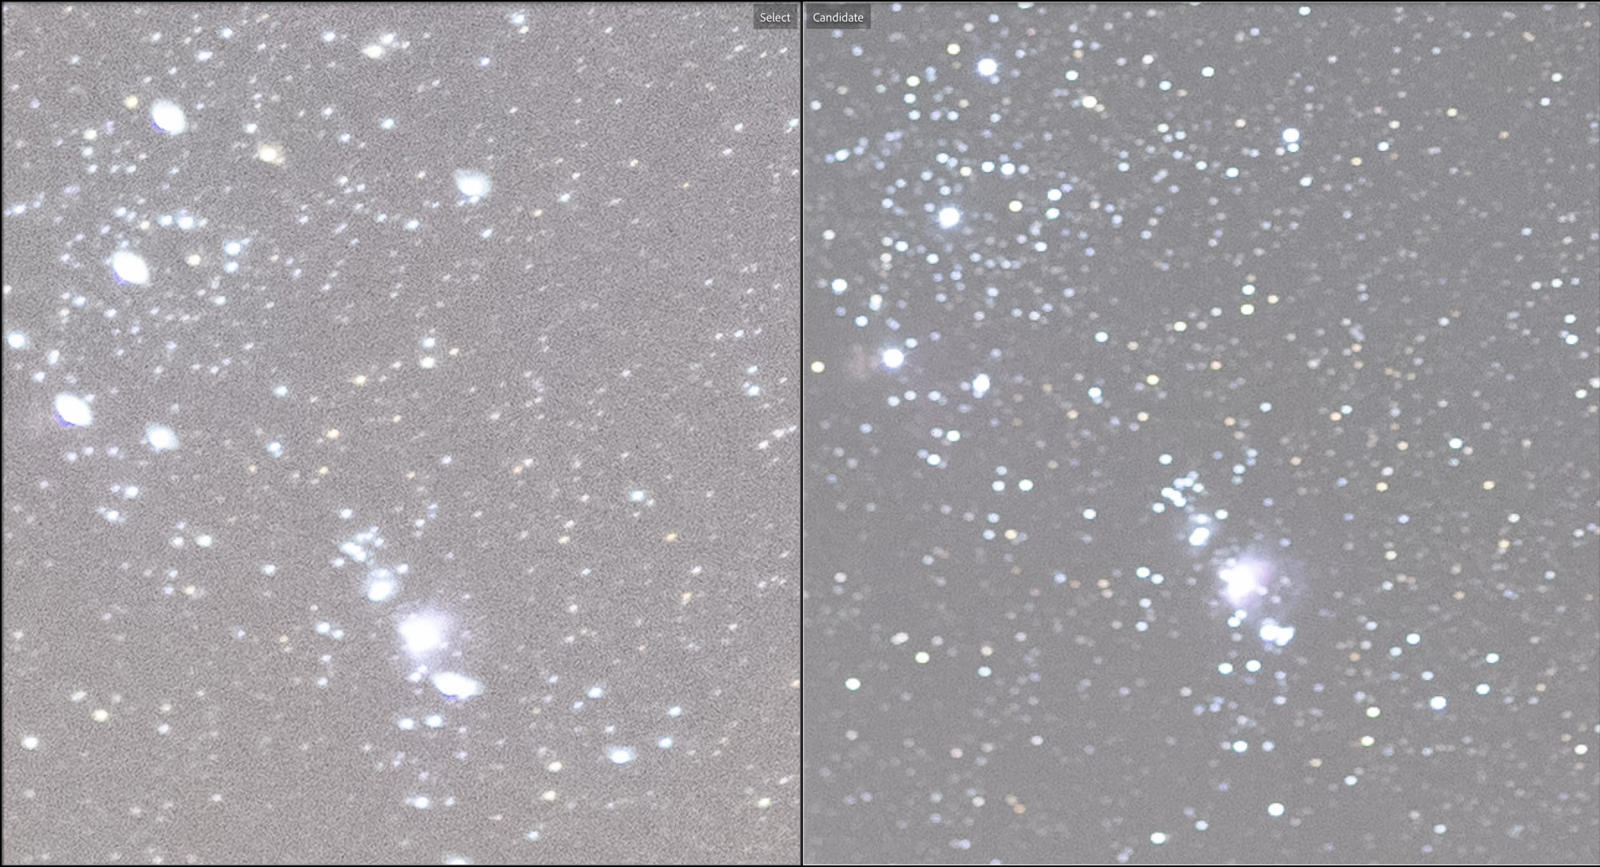
Right: Tracked 300%
Handheld High Res Mode Tracked vs Regular Tracked
This gets interesting.
Handheld High Res Shot Mode has a max shutter speed of 60 seconds, regular resolution mode can go for several minutes at a time. For this comparison the Handheld High Res Shot Mode is 60 seconds, F1.8, ISO 1600 (left) and the regular mode is 240 seconds, F2.8, ISO 800 (right).

Right: Standard res 156.8%
Even with the higher ISO and shorter exposure time… the Handheld High Res Shot Mode has significantly less noise.
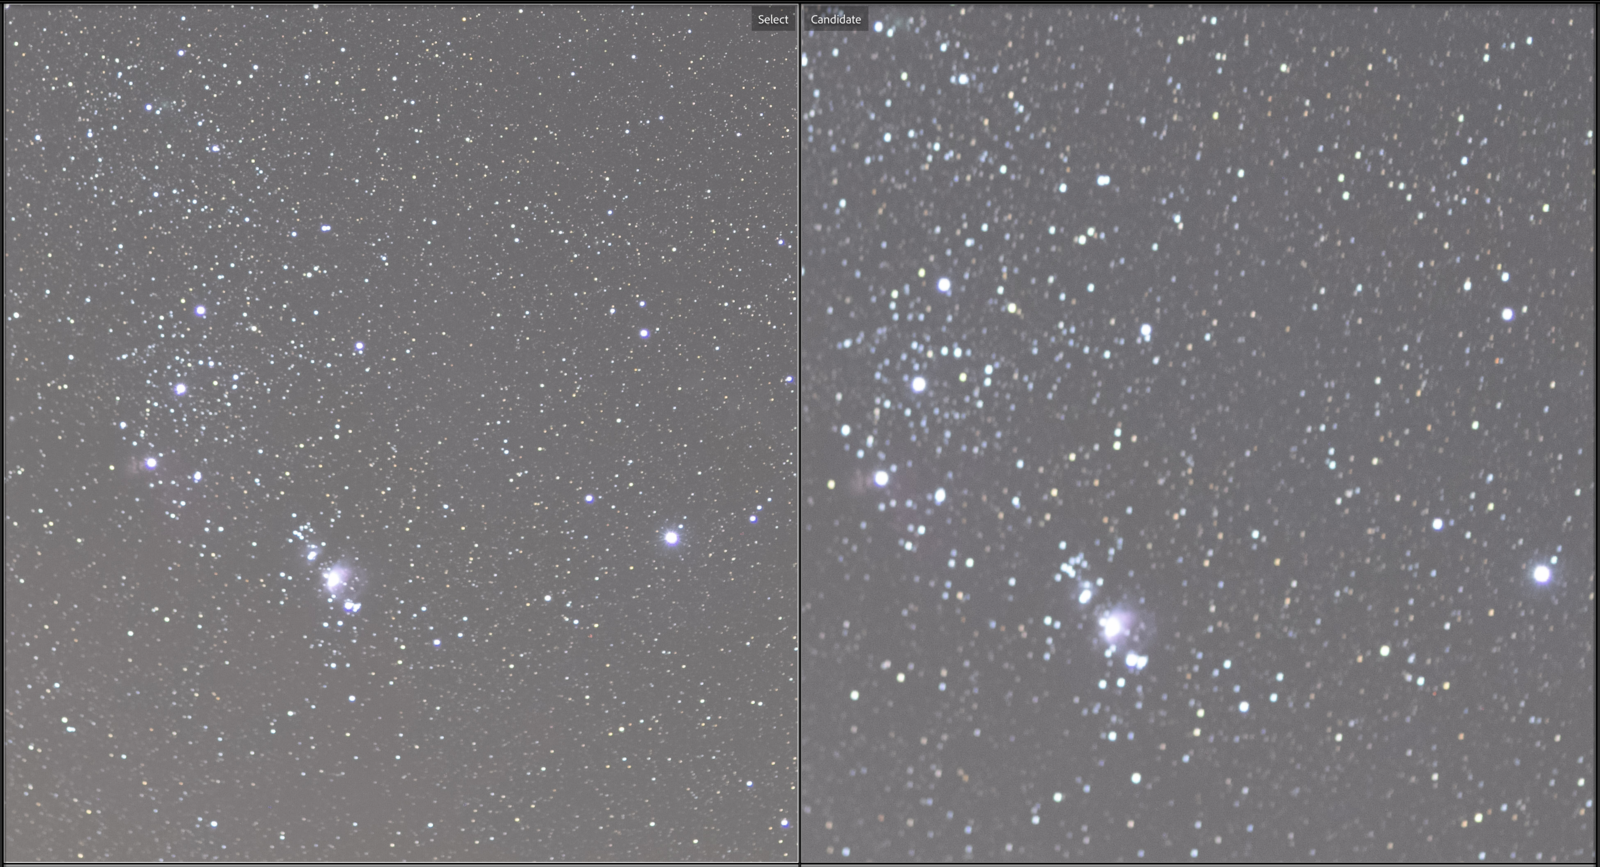
Final battle royal. Handheld High Res Shot Mode tracked vs regular res tracked and stacked! Can you tell which is which? You’ll have to read a little further to find out.
This is the closest race for me. In my mind the tracked and stacked SHOULD look better. It’s shot at a full stop lower ISO and 2 stops longer exposure time with a more closed down aperture. It’s also been combined with 10 friends to fight noise. So can the single Handheld High Res Shot Mode win? You decide.
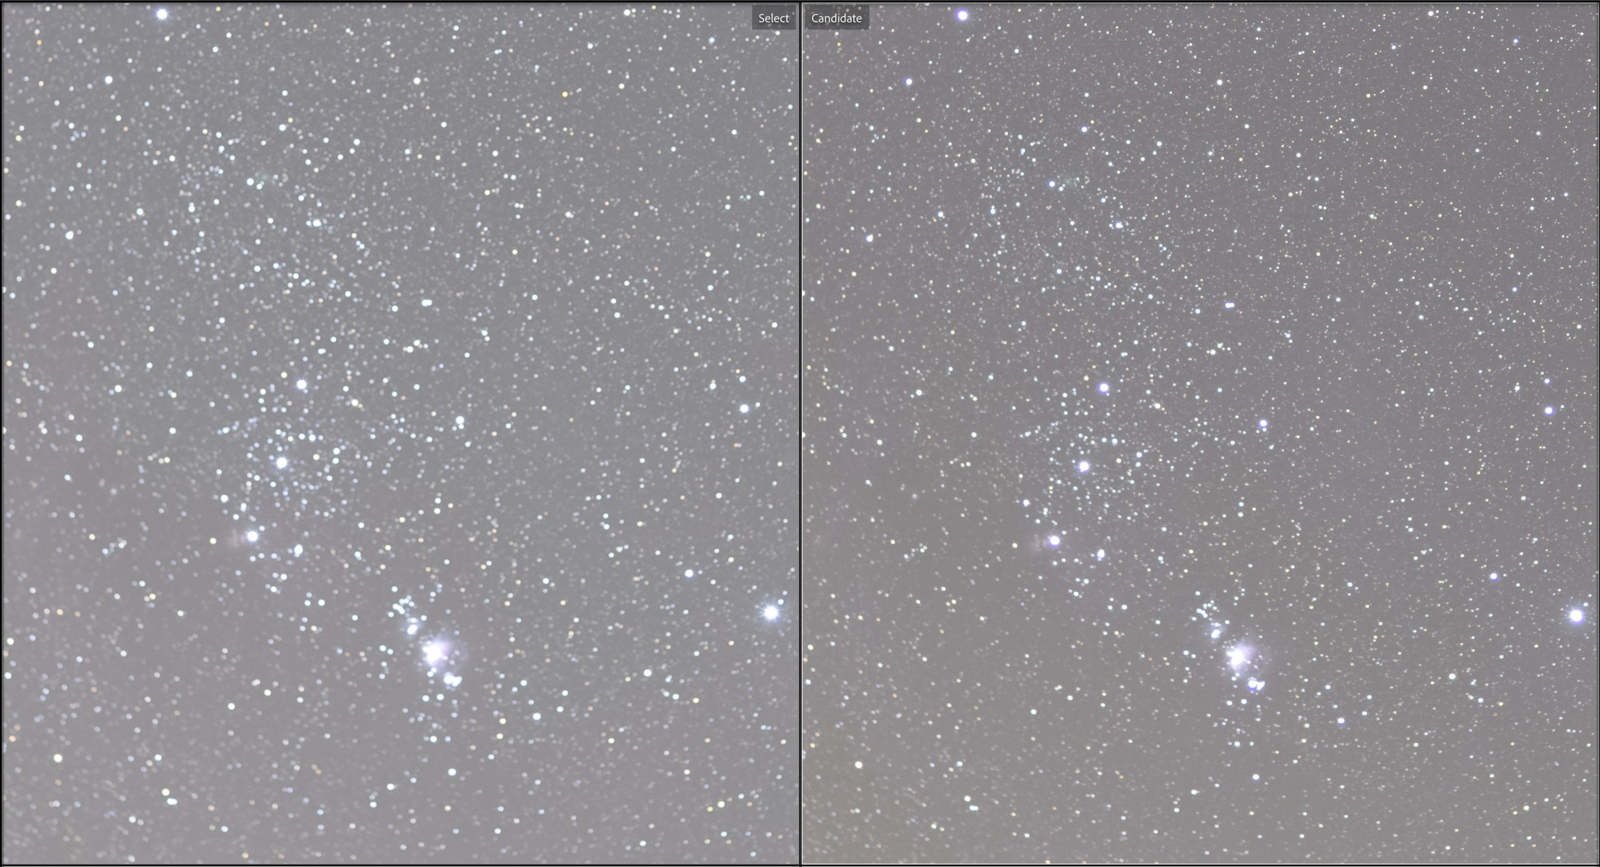
Right: Handheld High Res Mode, tracked, not stacked
Conclusion
If you’re moving quickly or don’t want to wait for several minutes to get one picture, the standard resolution with the proper camera settings your OM-D camera can create GREAT images. However, if you’re looking to get the very best quality the Handheld High Res Shot Mode seems to be the way to go. It has lower noise than a regular resolution image and the ability to go above 1600 ISO means it will create better exposed images than the tripod High Res Shot Mode.
For the really dedicated night shooters, a tracker can make a huge difference. Whether you’re taking 10 exposures that are several minutes long and stacking them OR 1 Handheld High Res Shot Mode exposure at 60 seconds, you can’t go wrong.
Instagram: @chasing.luminance
Alex McGregor was born and raised in the heart of the Rocky Mountains. From a young age, he enjoyed outside activities and was captivated by the night sky. After realizing his love for photography, he joined the two and has focused on astrophotography ever since. Alex enjoys traveling and capturing the night sky in unique locations around the world. When he is not taking pictures, he enjoys free-diving, skiing and backpacking.