Focus bracketing and stacking is often considered the purview of the macro photographer since macro lenses have notoriously shallow depths of field. It is used far less often by landscape photographers and that is unfortunate since it can allow you to present the scene in front of you in ways that you could never really see with the naked eye. It is a technique that I am using more and more often in my landscape work.
1s | F13 | ISO 64
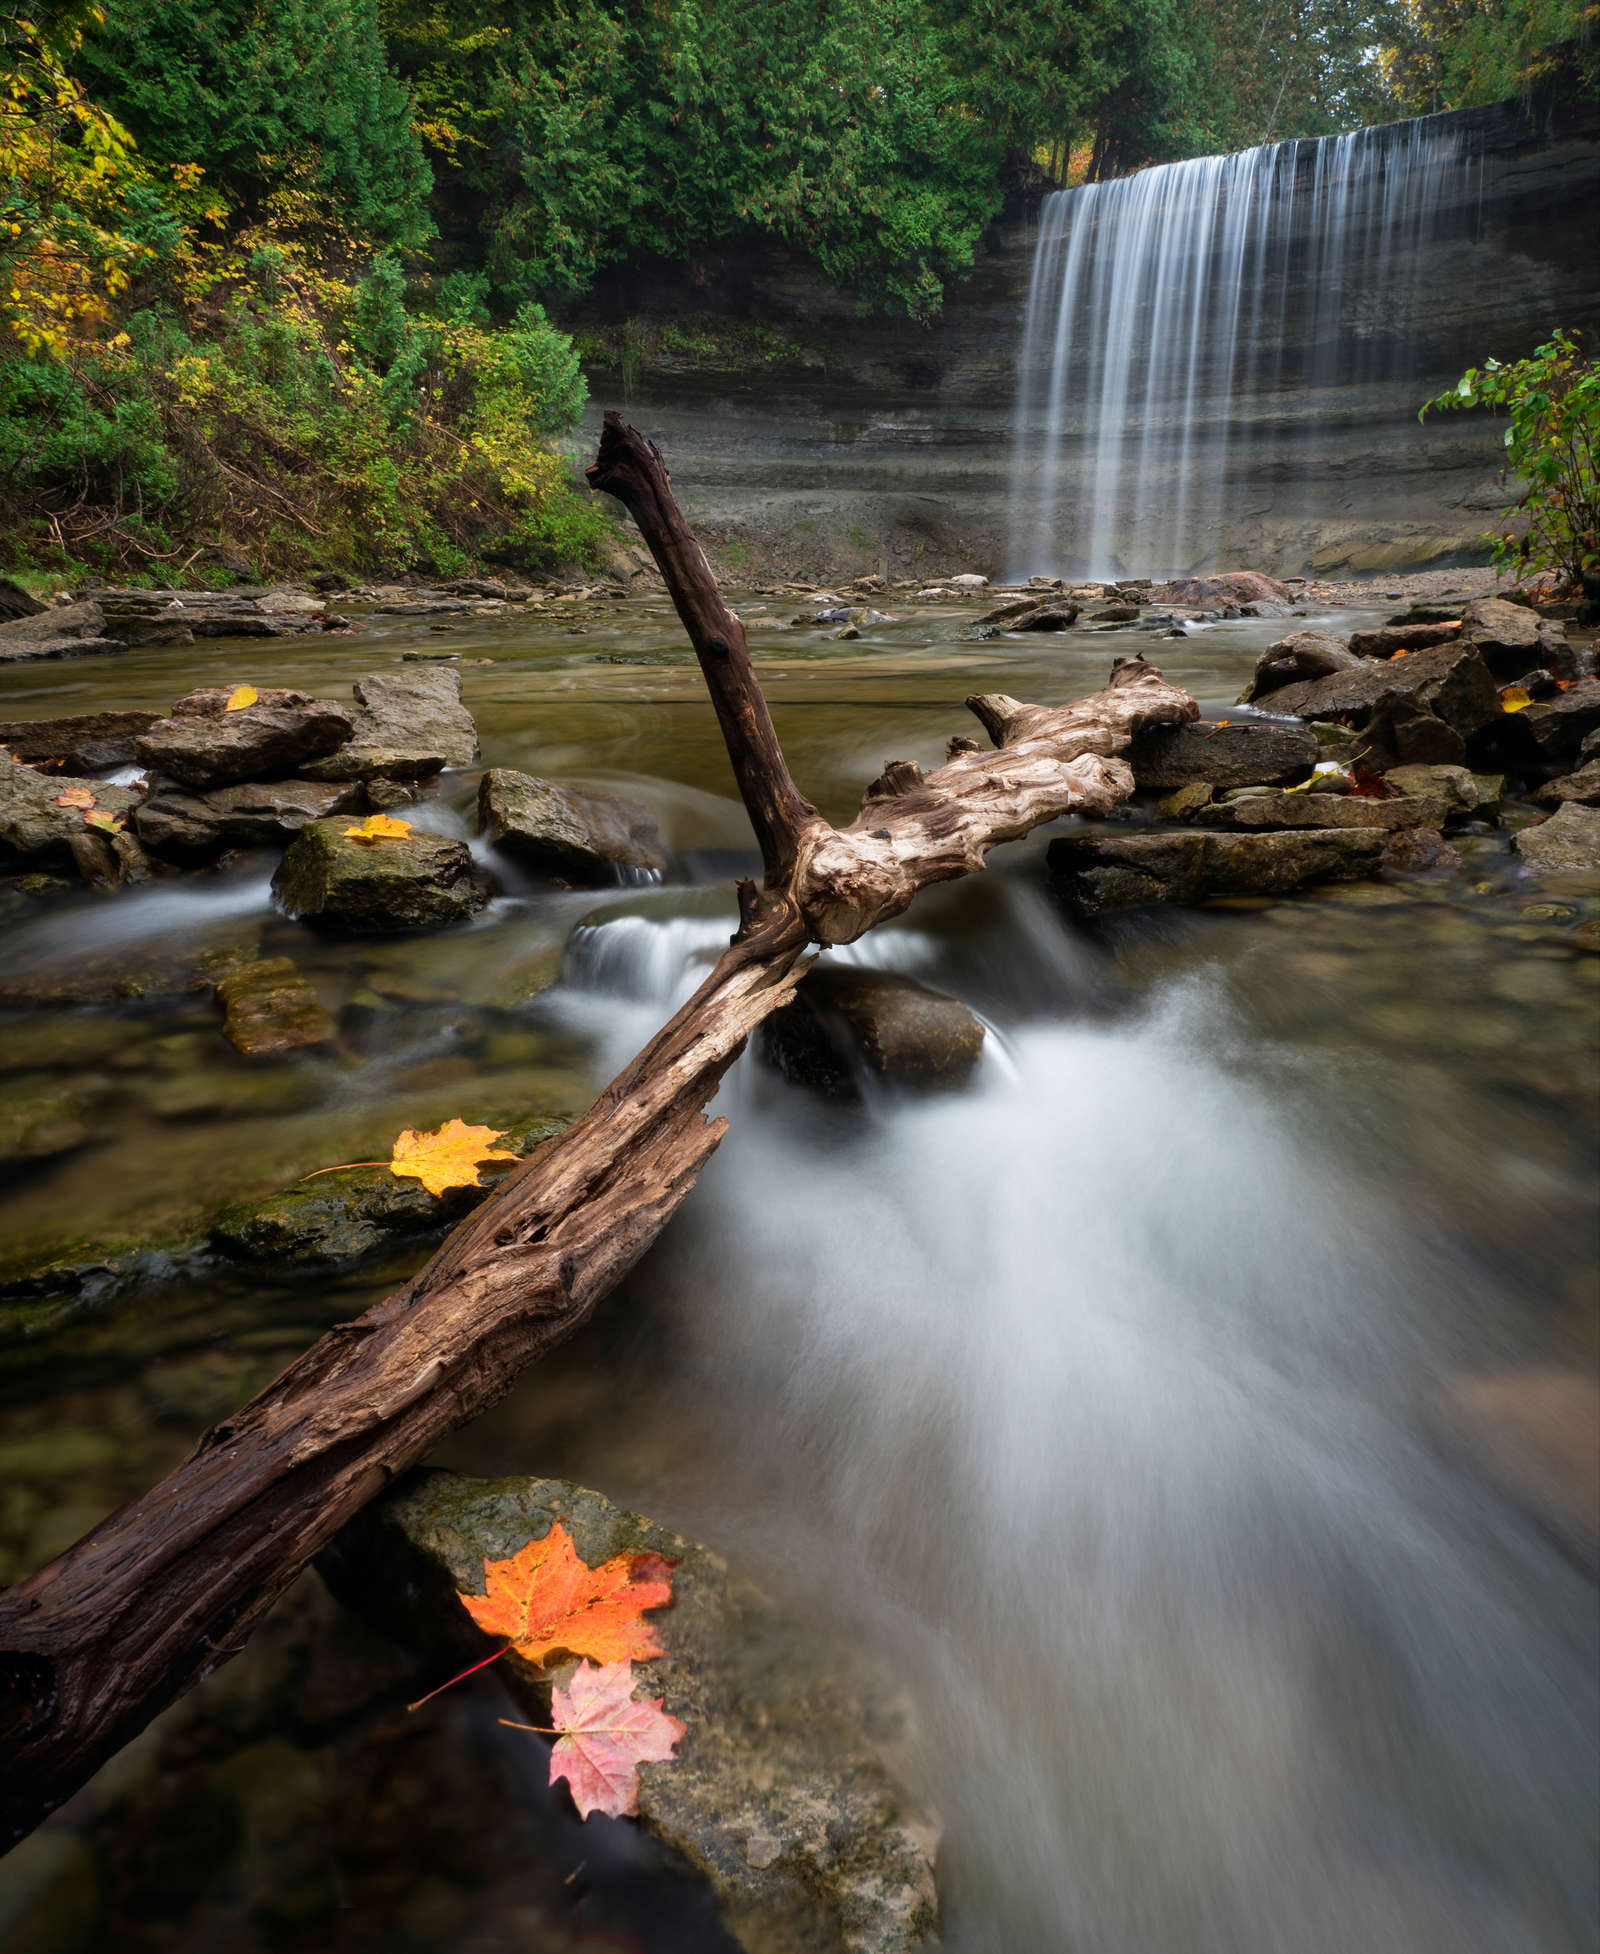
Maximum Depth of Field
When composing many of my landscape images, my goal is to draw the viewer into the photograph by having multiple subjects framed in such a way as to provide strong foreground and background elements. This image is such an example. The main subject is the waterfall, while the leaves, log, and rushing water are secondary subjects that add interest to the shot and hopefully lead the eye toward the main subject.
It was important to have sharp focus throughout the image so I positioned my camera about a meter from the foreground elements, focused about 1/3 of the way into the frame and used a relatively small aperture. This gave me the depth of field I needed. But what if I wanted to put my camera much closer to my foreground, let's say a few inches from the leaves. Would I still be able to achieve sharpness throughout the image? Nope! Not in a single shot, even when shooting at the smallest aperture. This is when I turn to focus bracketing and stacking.

1/100s | F4 | ISO 800
Bracketing vs. Stacking
The concept is a simple one. Take a series of images of your scene at different focus distances (bracketing) and blend them together to create greater depth of field than any single image (stacking). The beauty is that with today's cameras you can do all of this with a single press of the shutter release. With the Olympus OM-D cameras that I shoot with I can choose to simply focus bracket the images or also stack them in camera. For bracketing you can select from 3 - 999 shots, while in the stacking mode you can select from 3 - 15 shots.
Equipment
The following Olympus cameras have built-in focus bracketing and focus stacking. Not every lens is compatible with the focus bracketing/stacking feature. Among those lenses that are compatible, not all are compatible with focus stacking on older camera models. Here also is the most recent list of stacking compatible lenses.
| CAMERAS | M.ZUIKO DIGITAL LENSES |
|---|---|
| E-M1X E-M1 Mark II E-M1 Mark III E-M1 (firmware v.4.0+) E-M5 Mark III E-M5 Mark II (firmware v4.0+) Tough TG-5 & TG-6 (stacking only) |
7-14mm F2.8 PRO |
A tripod is recommended, however, quite a few of the shots in this post were hand-held while for others I placed the camera on the ground.
The Process
The following steps will set up the camera for focus stacking.
-
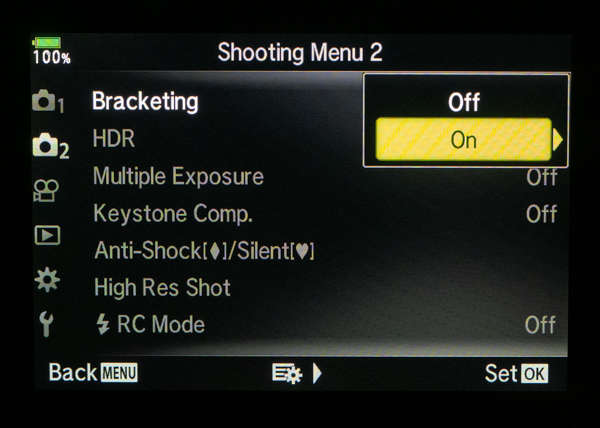
From within the Menu, select the Camera2 options.
- Select Bracketing. You can bracket a variety of settings (Auto Exposure, White Balance, Flash, ISO, Art Filters, and Focus Bracketing). Select Focus BKT.
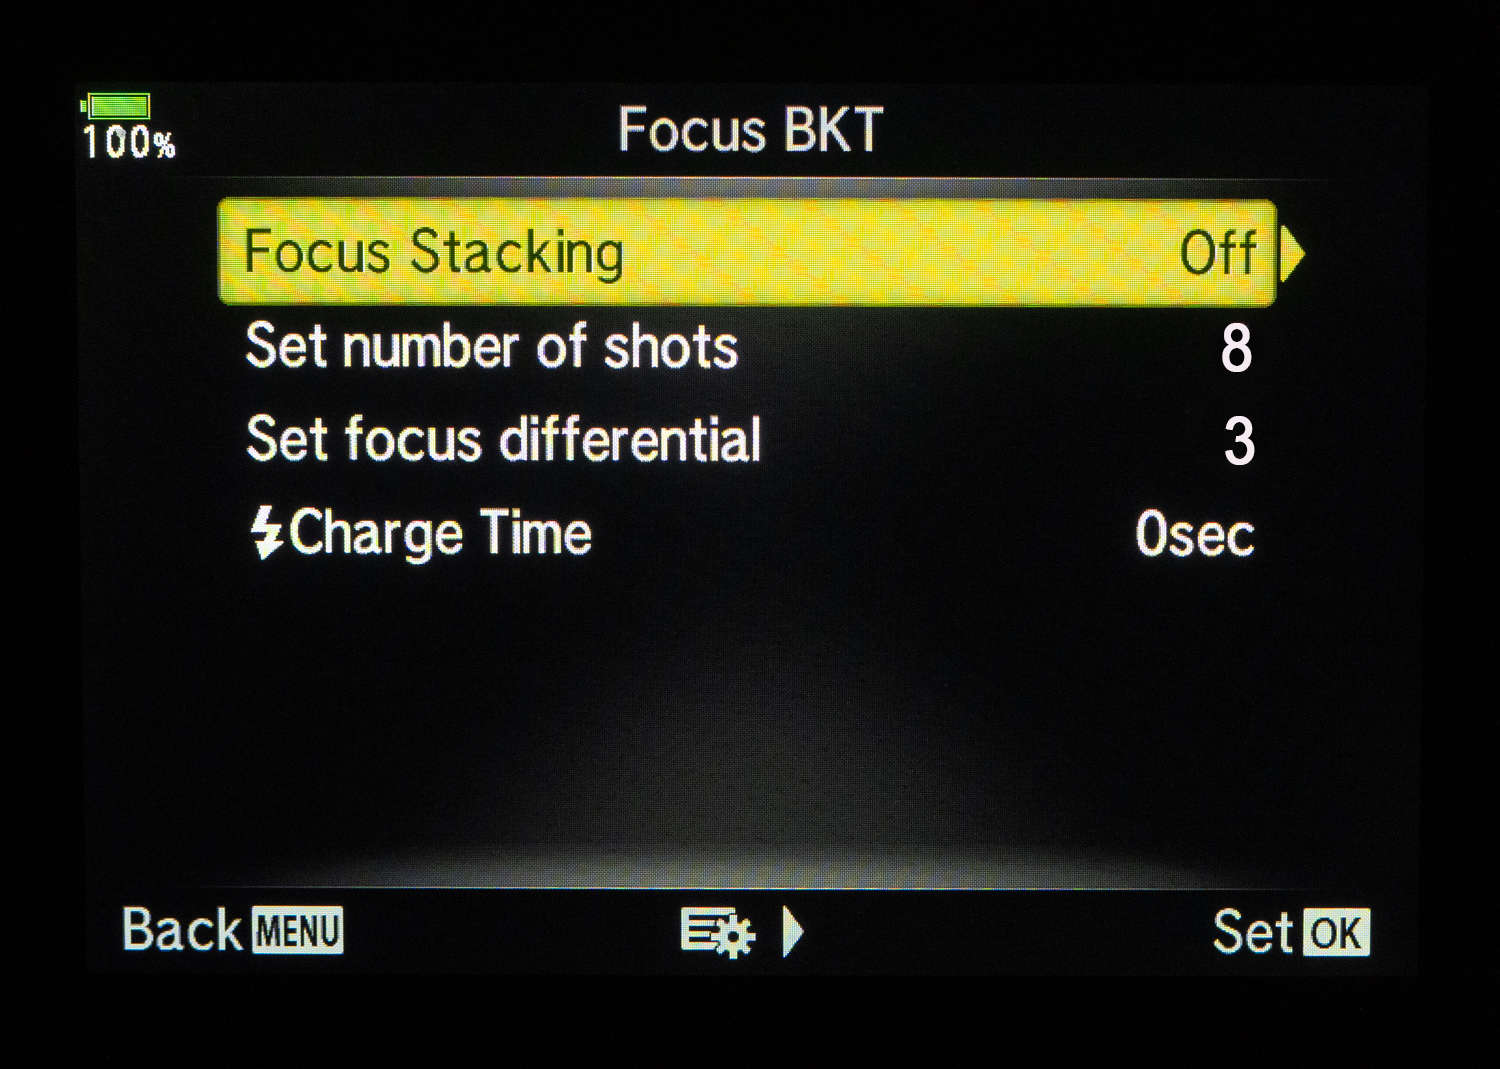
- Turn Focus Stacking On.
- Choose Set number of shots.
- Select Set Focus Differential. Choose a focus differential from 1 to 10. This determines the difference in focus position between shots.
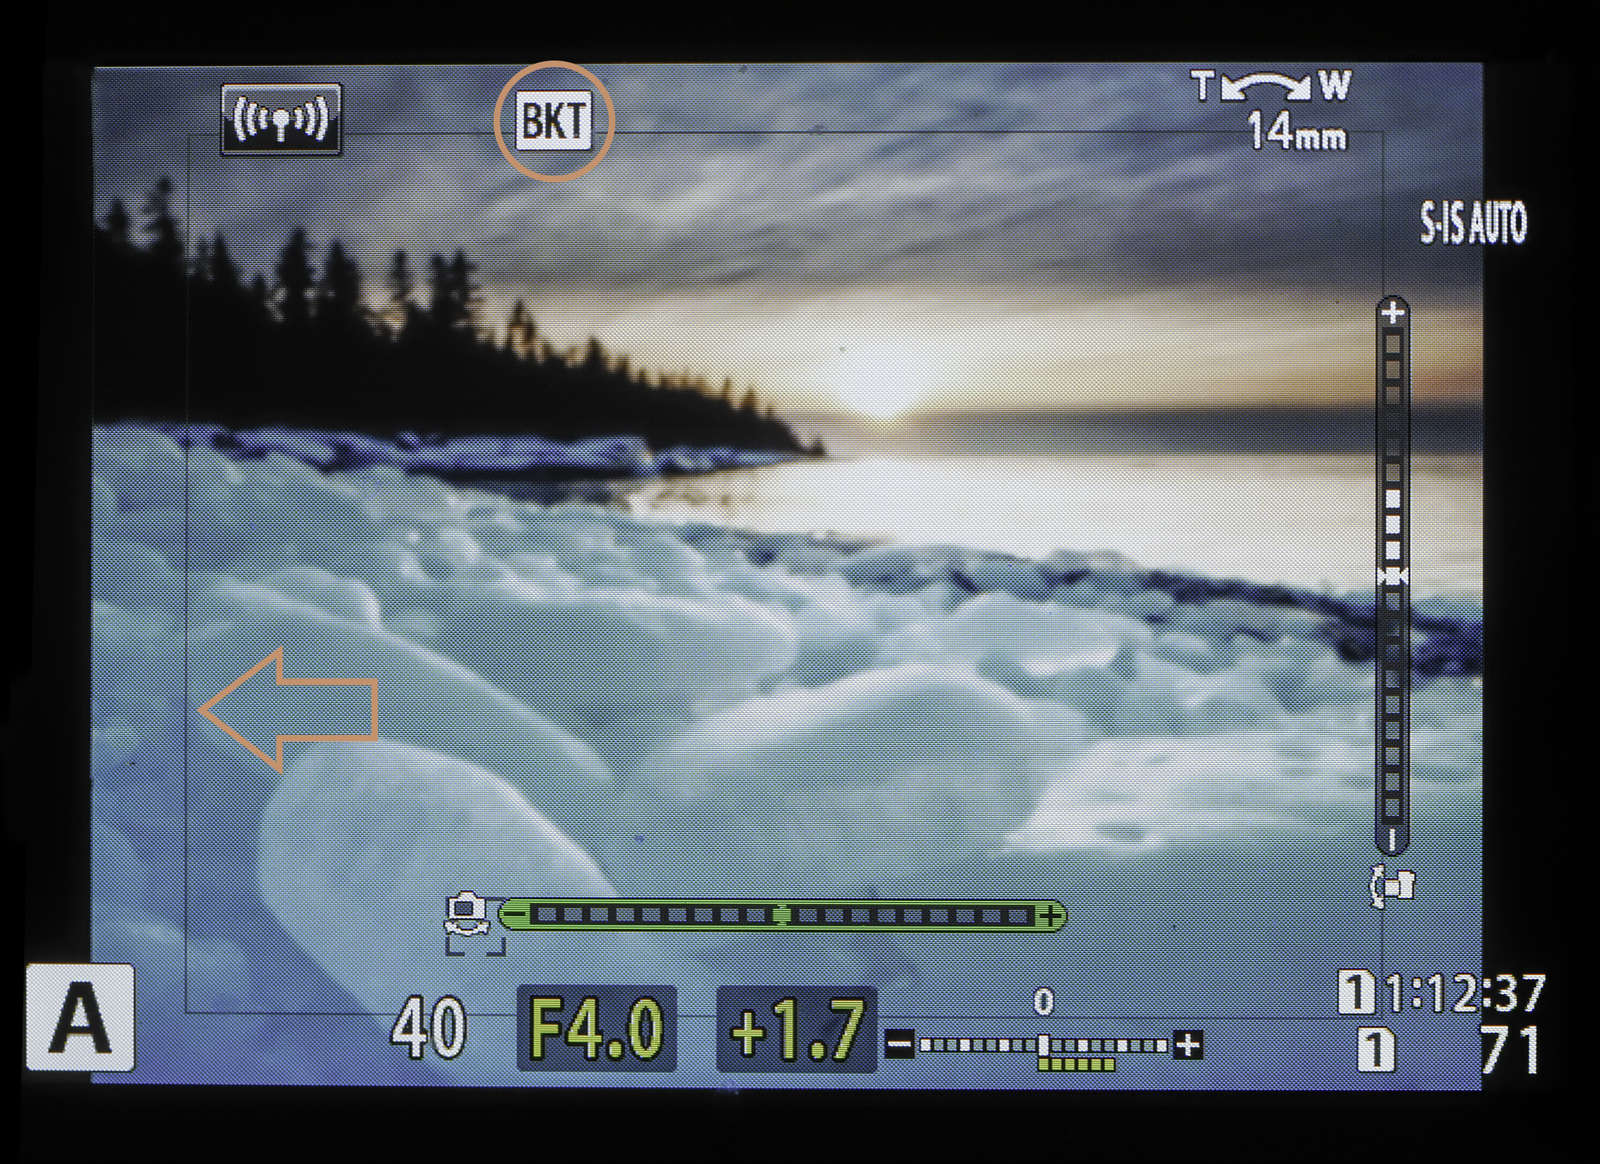
- Press OK repeatedly to engage the settings. You should see the letters BKT at the top of the LCD indicating that Focus Bracketing is set.


The focus stacking feature will shoot your selected number of photos at the focus differential you set and then merge them into one jpeg file at full resolution. The individual images will be recorded as RAW images (assuming you are shooting in RAW). This allows you to stack them later if you'd like, using third-party software like Photoshop or Helicon Focus. Achieving good results is considerably easier when shooting landscape images when compared with shooting macro since you typically have greater depth of field with a landscape lens.
Once engaged, you will see BKT appear on the top of the LCD panel. You will also see a thin border appear when stacking is enabled. Everything outside this border will be trimmed off your final stacked image. This is necessary because as the camera adjusts to different focus points the field of view also changes slightly. Use this border to aid in composing your shot. This guide does not appear when just bracketing is enabled since there is no in-camera stacking going on.
A Typical Scenario
Although the scene may be substantially different from one location to another, the method by which I use focus bracketing/stacking remains fairly consistent. Here is a breakdown of how I go about using this feature.
The Situation
I opt to use focus bracketing/stacking when the foreground lacks larger points of interest and I want to accentuate the details of smaller foreground subjects like ice crystals, sea shells, small rocks, leaves, flowers, etc.
Camera Placement
Get in close! I mean, really close. For many of the images in this article the front lens element was about 6 inches away from the foreground subject. Many of these images were also shot in vertical orientation and with the camera tilted down at about a 45-degree angle. This will give me the field of view needed to capture the foreground, horizon and sky. As mentioned earlier a tripod can be useful, but to be honest, the image stabilization of the OMD line-up is so good that I often forego the tripod. Call me lazy!
Settings
Regardless of which OMD camera body I happen to be using, my goto lens for this type of photography is the 7-14mm f/2.8 PRO. It has a minimum focusing distance of 20cm and a field of view of up to 115°.
- Mode - Aperture Priority (almost all of my landscape images are shot in A)
- ISO - 200; Depending on lighting conditions I may increase the ISO, but I never use AutoISO
- Aperture - usually between f/5.6 and f/7.1
- Focus Point - single point, positioned over your closest foreground object
- Number of bracketed shots - 8; This is usually ample and you could get away with fewer
- Focus Differential - 3; This seems to be the sweet spot so I never change it. The greater the focus differential setting, the more the focusing element in the lens moves between shots. I am often asked if each FD can be translated into a quantifiable depth of field. The short answer is, no. There are too many variables at play for depth of field - the lens, focal length, distance to subject, and aperture. Change any of these and your depth of field changes as well. I find that a setting of 3 works well, so I leave it at that.
So How Does this Work, Anyway?
Once engaged, the camera will take the number of shots you have programmed (in my case, 8). The first shot will be taken at your selected focus point. The next two will focus in front of your selected point. The remaining shots will then focus deeper into the image depending on the focus differential that you have chosen. You might ask, why would I focus on the nearest object when the camera automatically focuses closer for the next two shots? I have two reasons:
- I want to make sure that my selected point is in focus and this guarantees it,
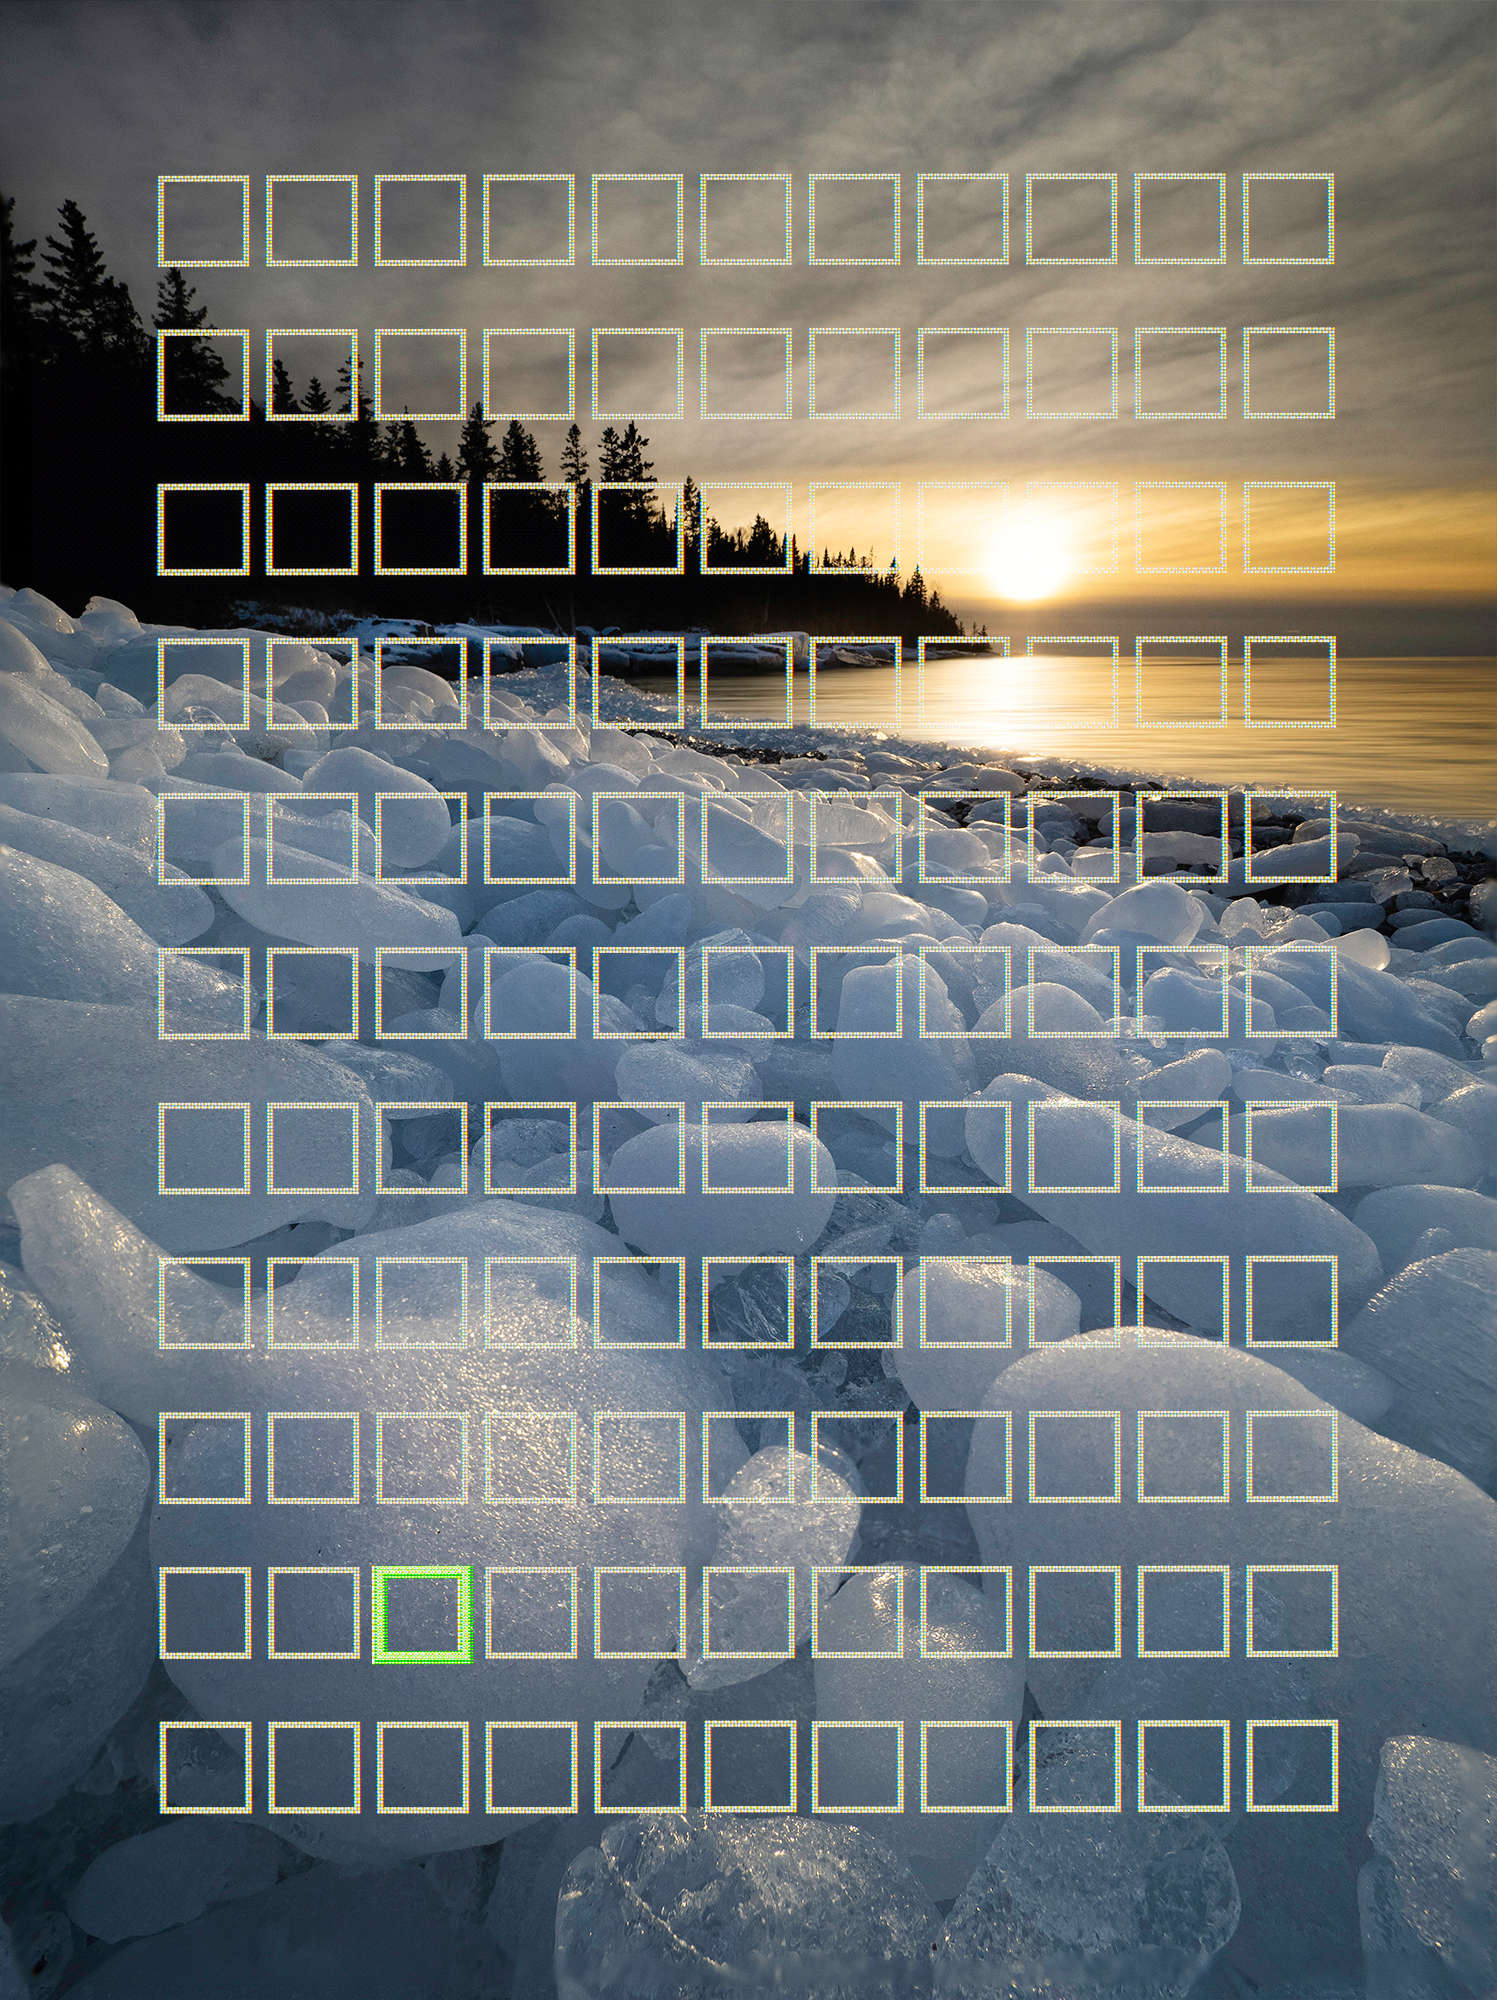
- the focus points don't go right to the edge of the viewfinder and therefore there may be parts of your scene that are closer to the lens than you can't actually focus on. The situation below might help illustrate the point.
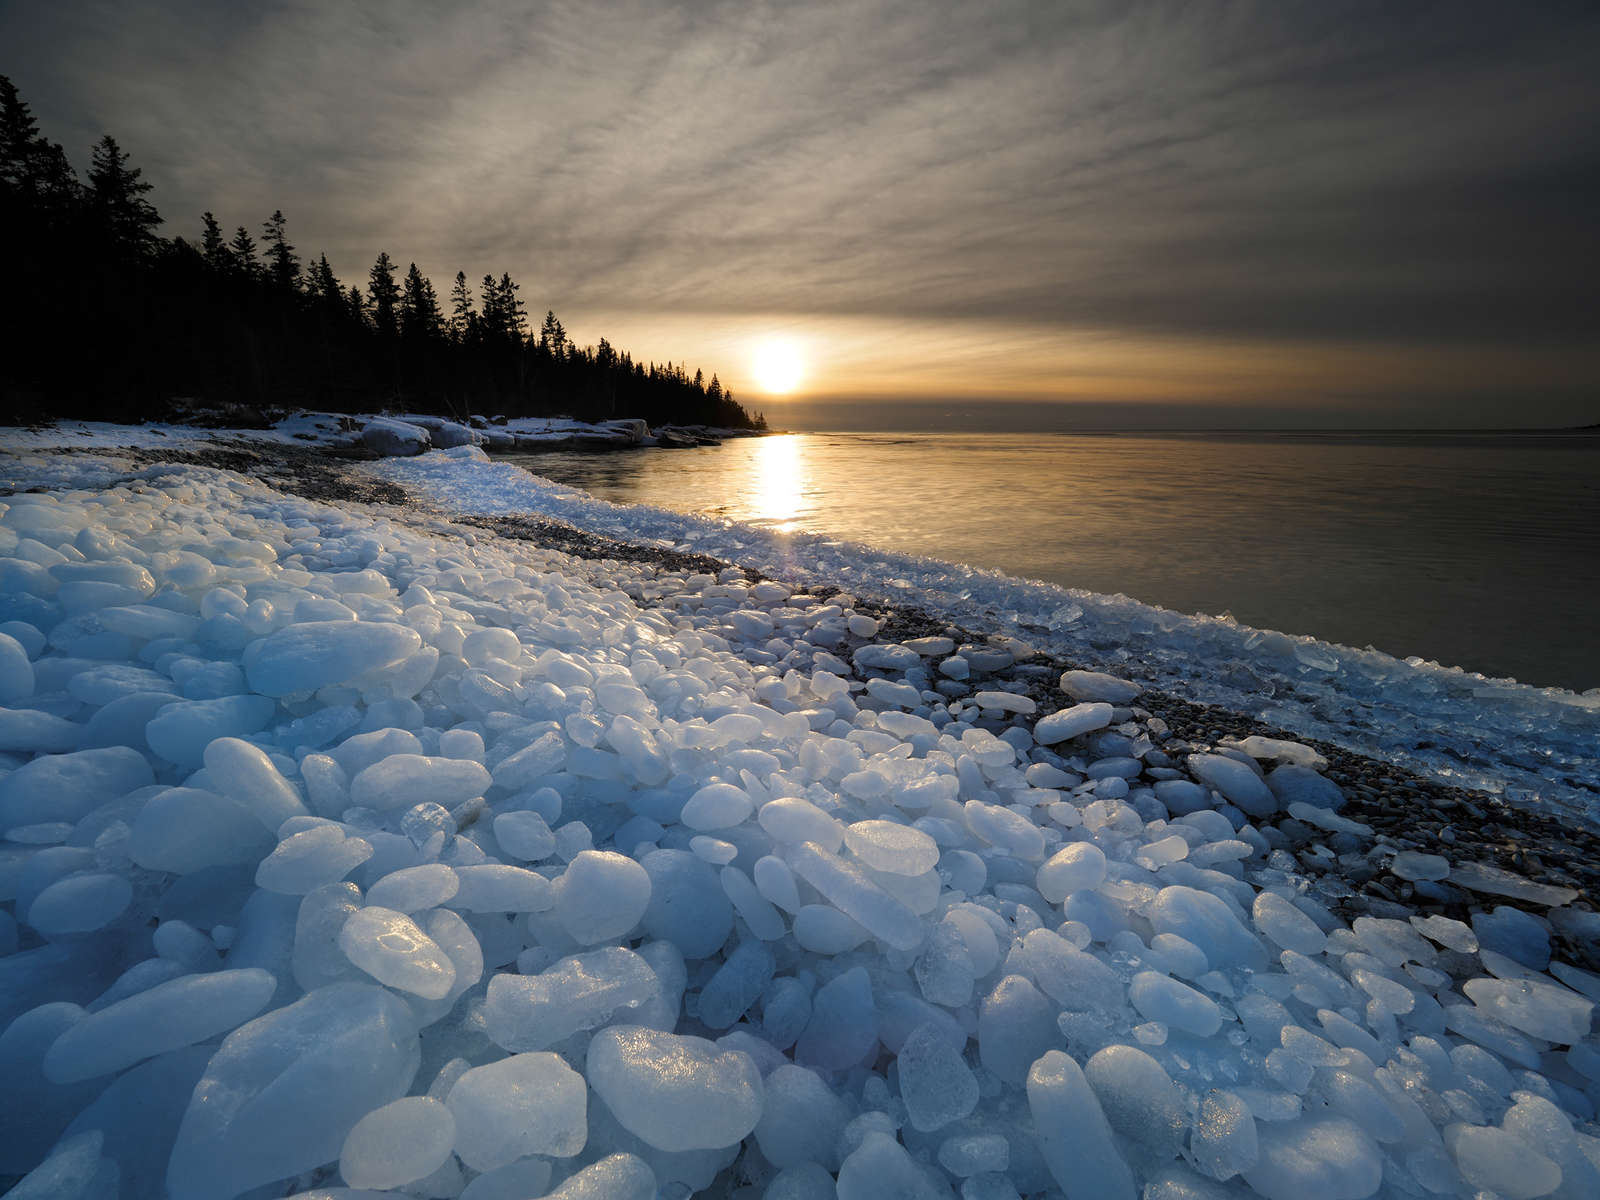
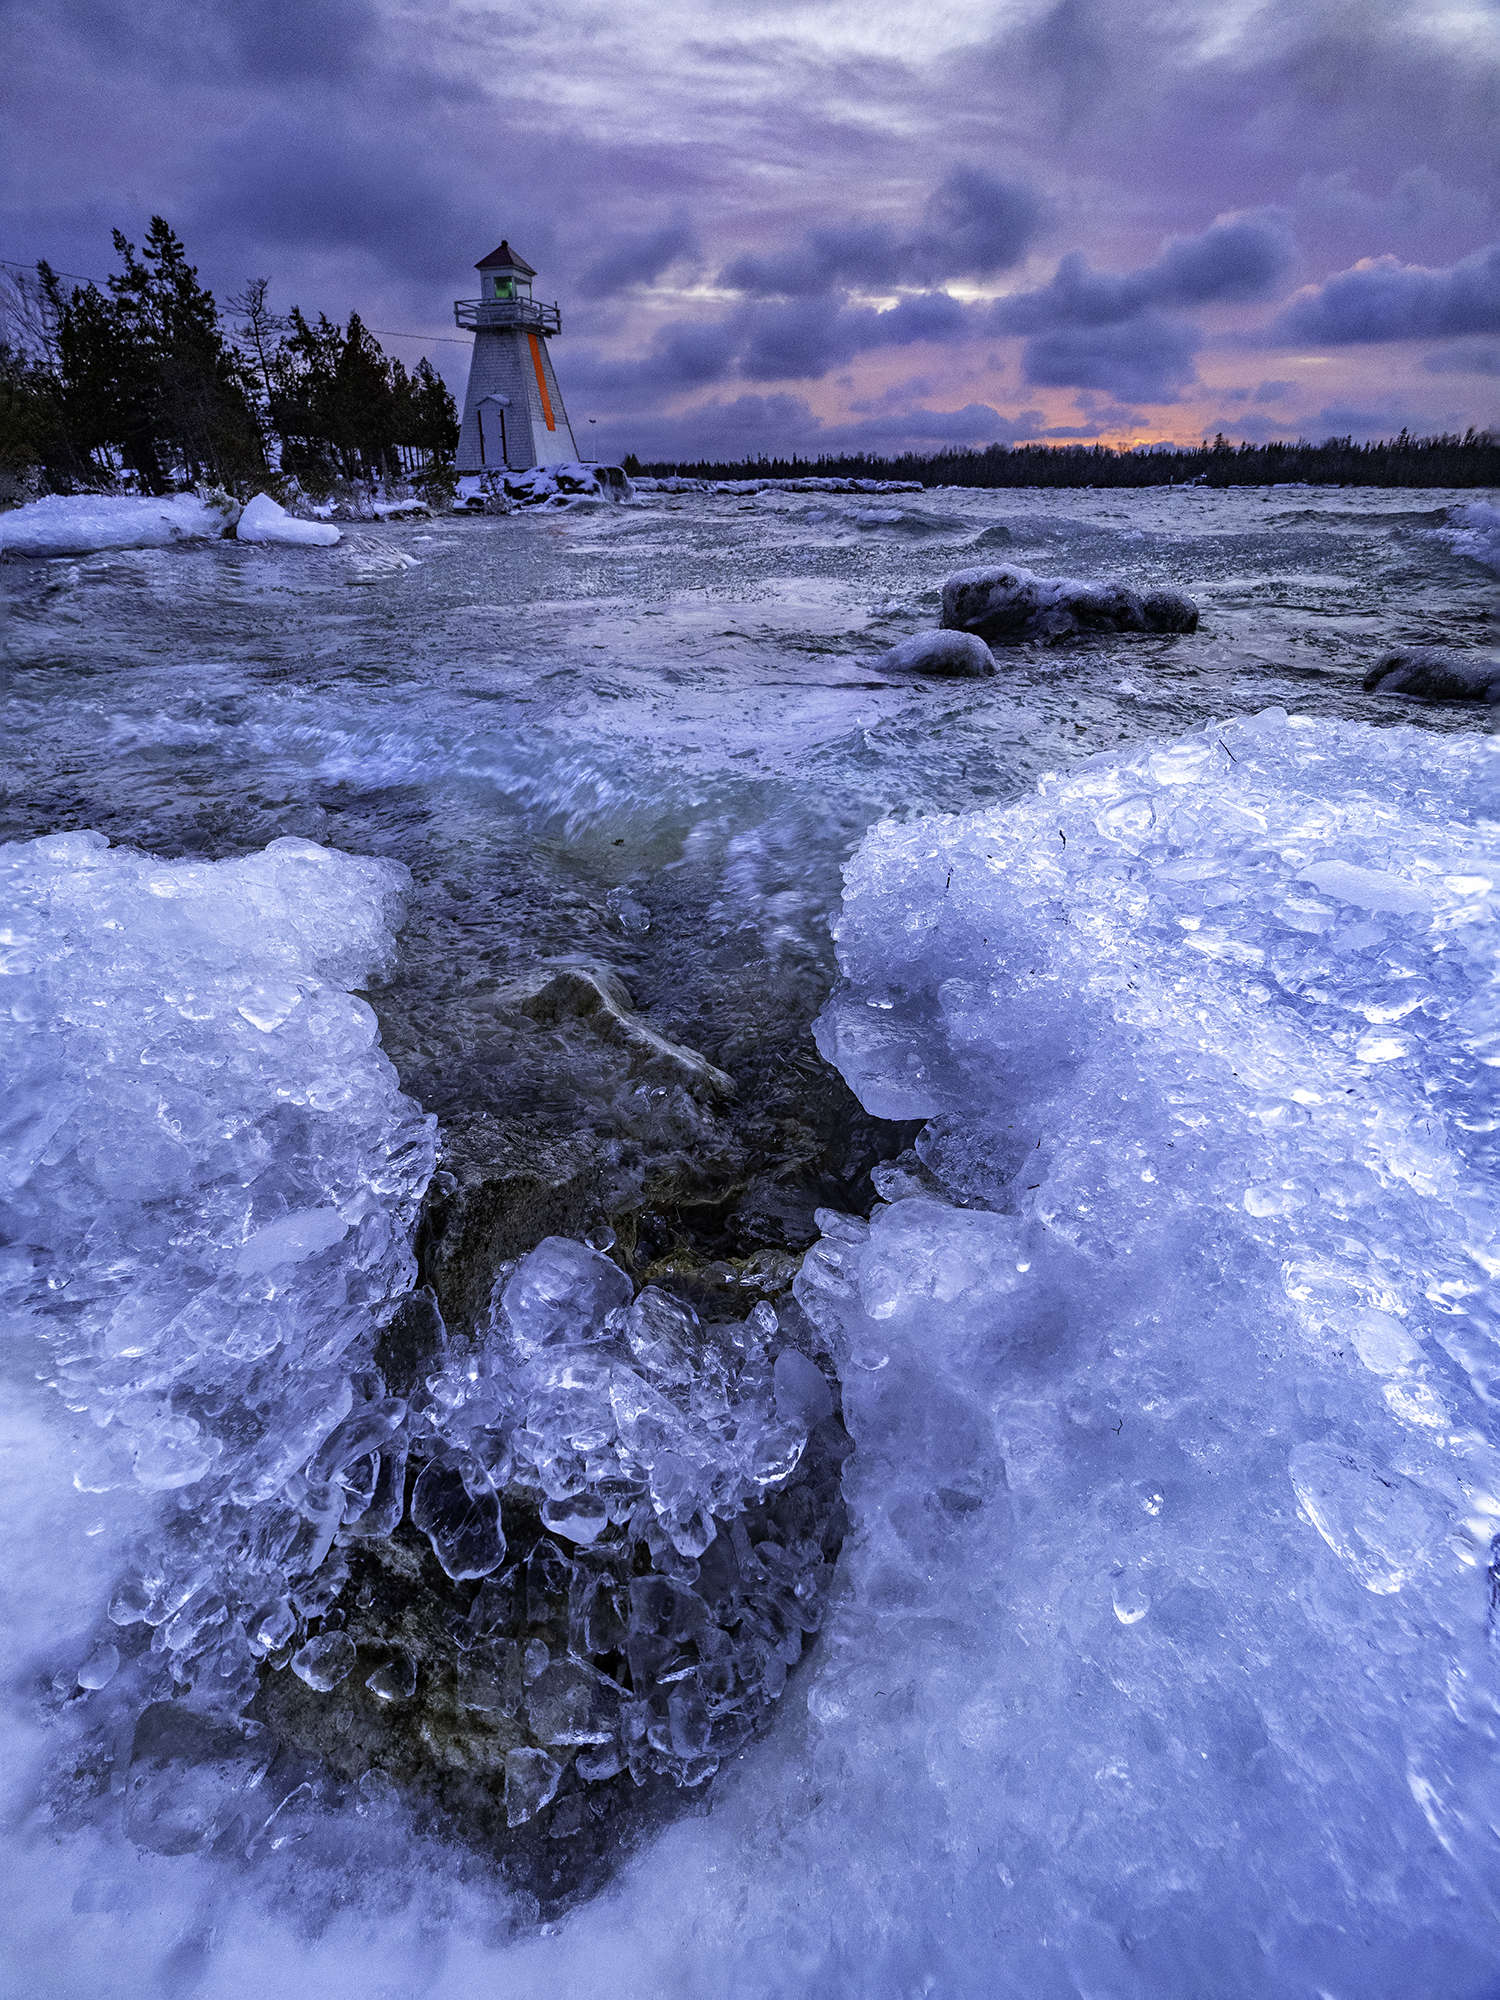
1/160s | F7.1 | ISO 200
I came across this shoreline scene with some very cool 'ice stones' that had been tumbled upon the beach and took this first shot from eye level - no focus bracketing required.
I then switched to focus stacking, crouched down, got in real close and focused on the piece of ice closest to the lens. Since the available focus points don't go right to the edge of the frame, the fact that the first two shots in the sequence focus in front of your selected shot ensures that the closest edge will be in focus.
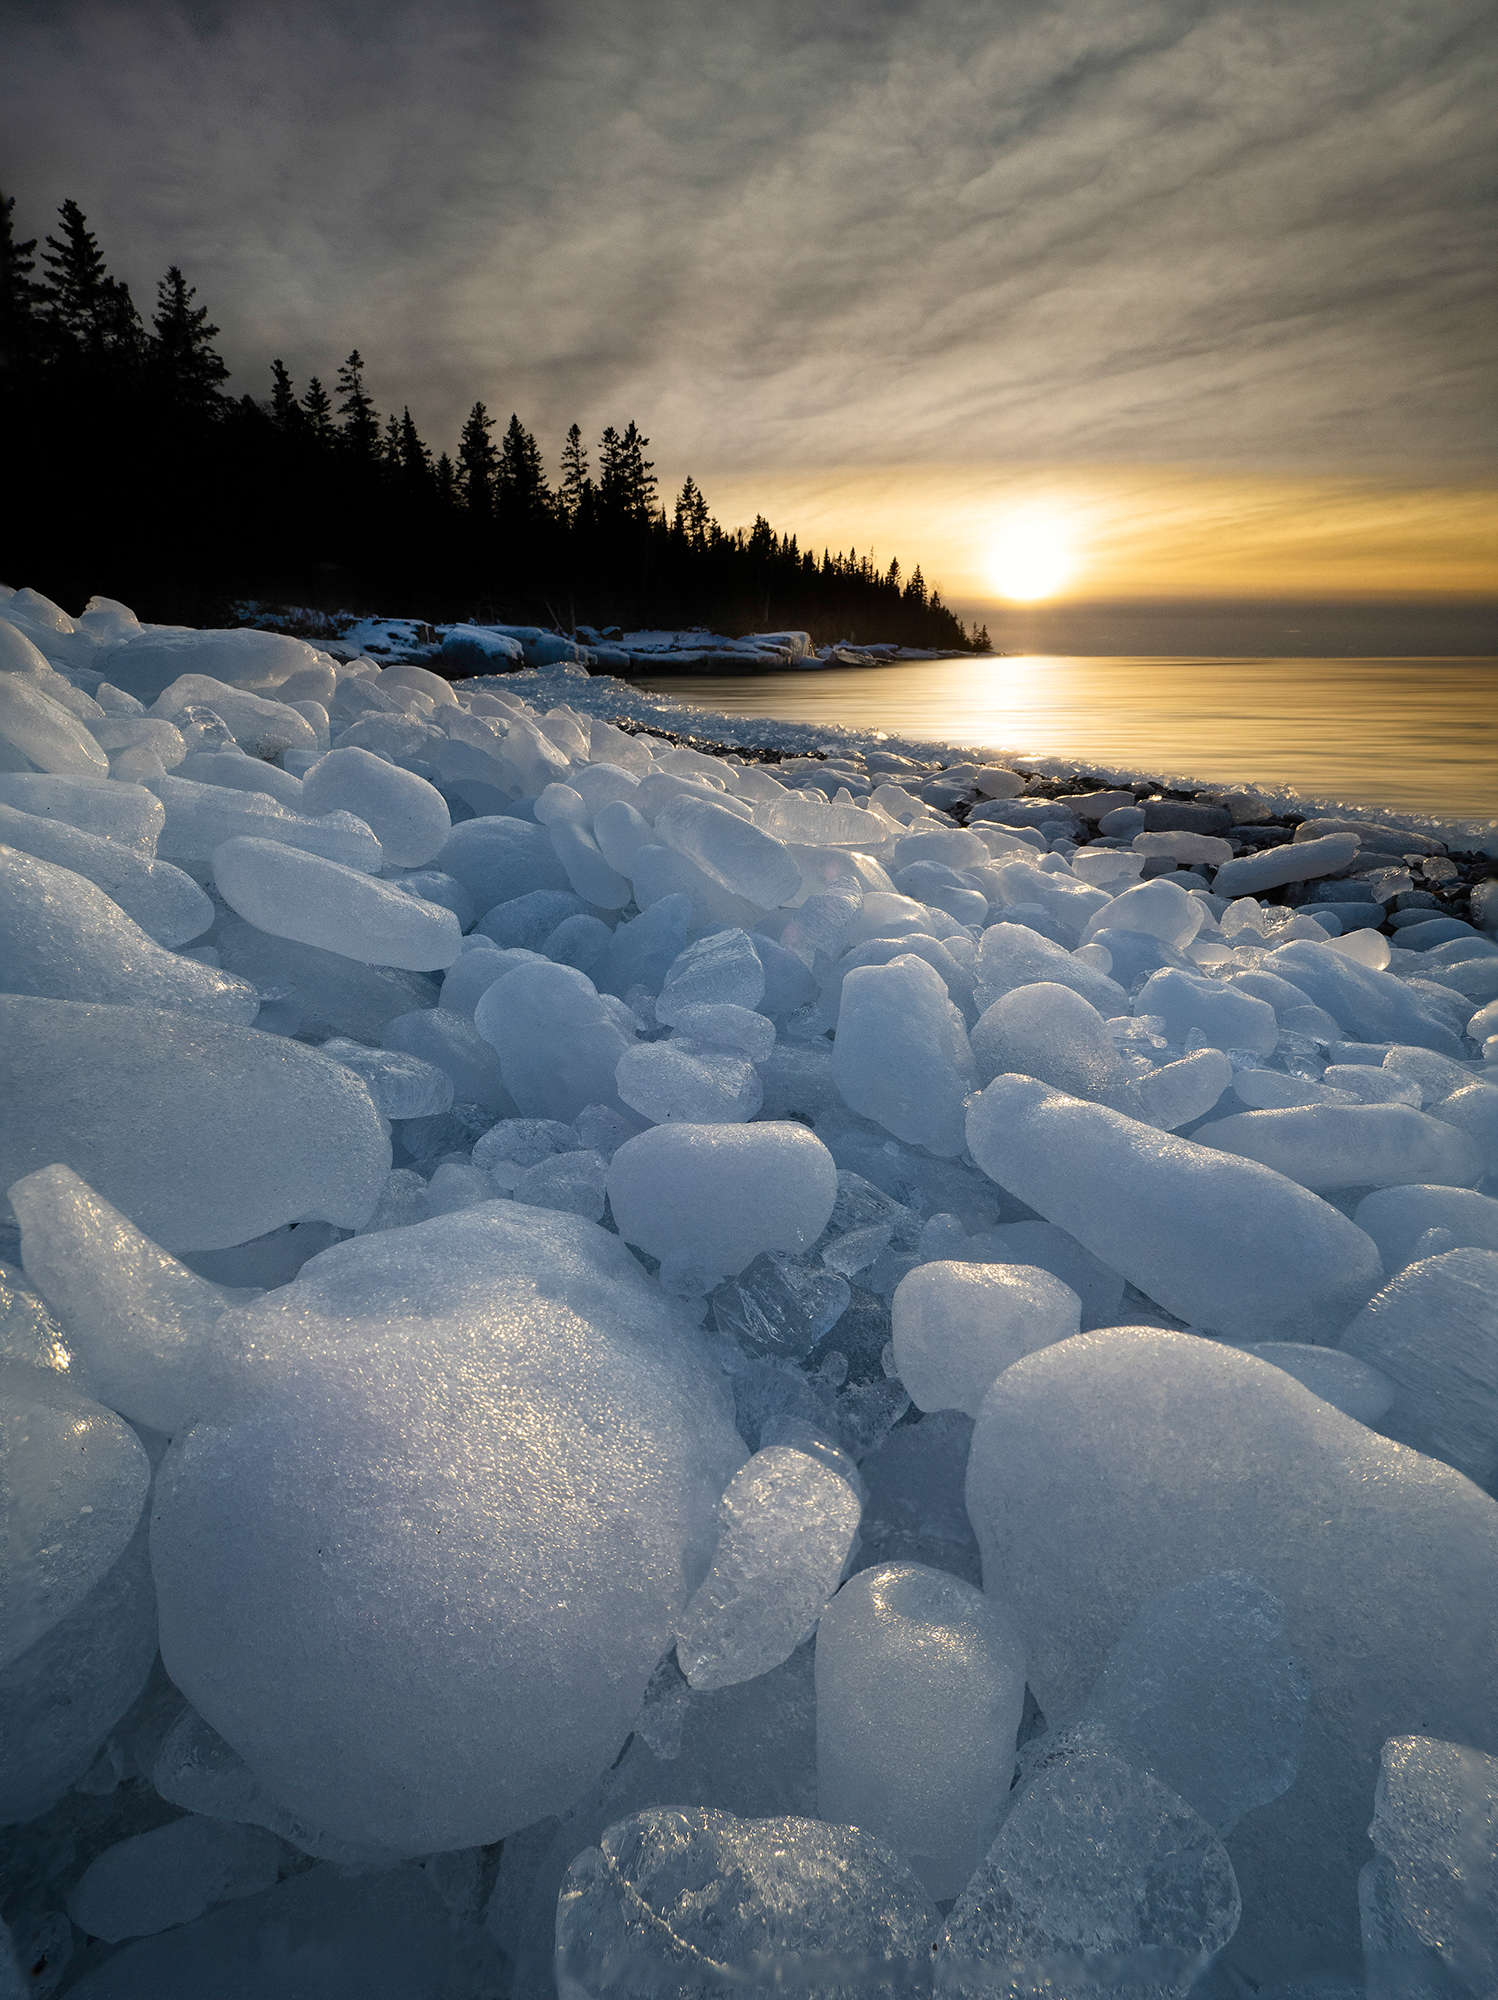
1/160s | F7.1 | ISO 200, Number of Shots - 8, Focus Differential 3
Full Disclosure
I love this feature and use it so often that I have my stacking settings programmed into one of the camera's custom modes. The truth, however, is that I rarely showcase the final stacked image created by the camera. I use it as reference, but since I want as much control as possible I individually process each RAW image and then stack them using Photoshop. One thing to be aware of is that, from the set of bracketed images some will be completely out of focus (remember that this feature was primarily designed for macro shooting). I can then eliminate those and only stack the images that are needed. In the example above, I only used 4 of 8 images. This gave me the depth of field needed, from a few inches to infinity.
Stacking in Post
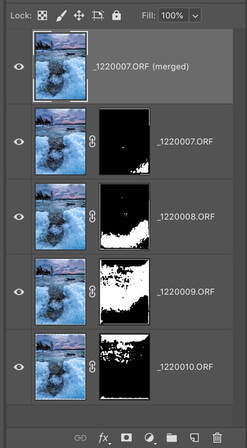
I use Lightroom and Photoshop for most of my editing. Here are the steps I use to create my own stack;
- Identify the best of the stack. After importing the images into Lightroom I will look through the set of bracketed images and choose those that have at least some part of the scene in focus.
- Do an initial edit for one image and sync those settings to the remaining images.
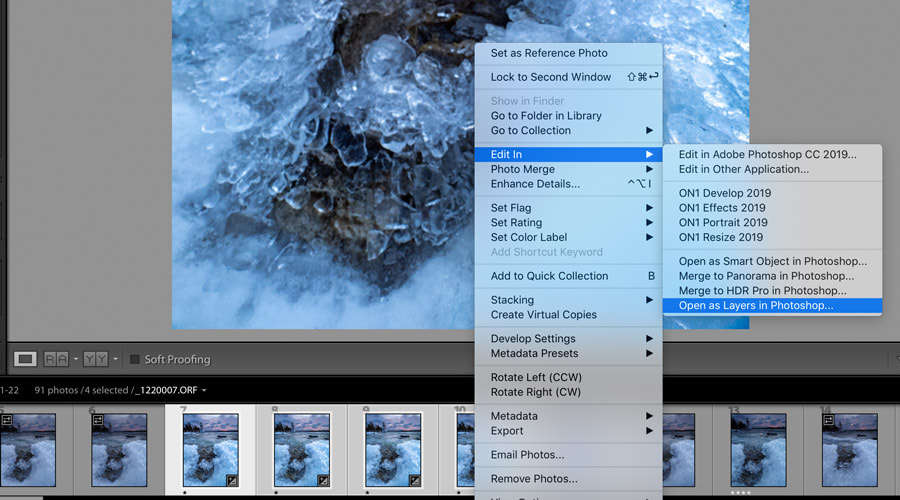
- Select the group of images and 'Open as Layers in Photoshop'.
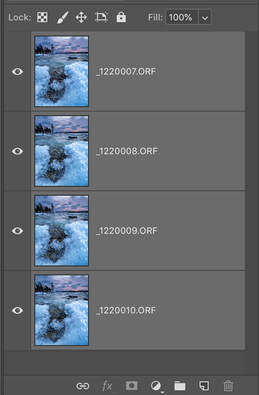
- Select all of the layers.
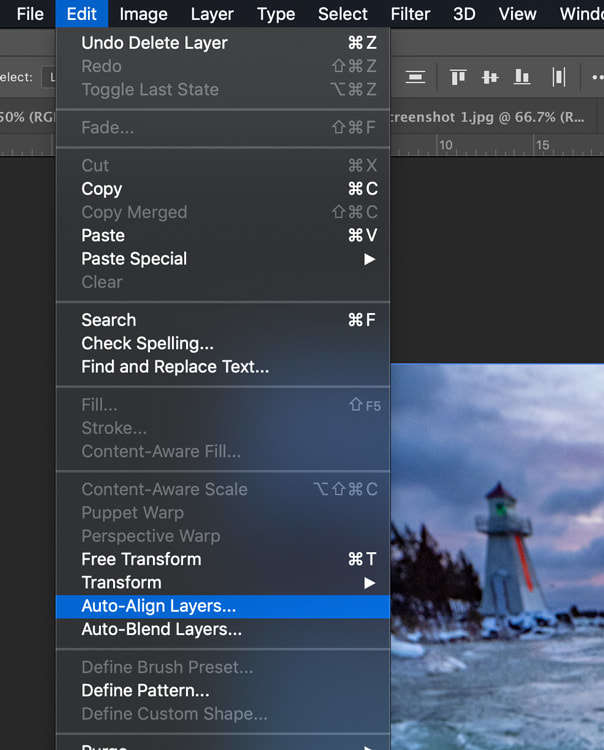
- Go to Edit > Auto-Align Layers... This is an important step since the field of view is slightly different for each image, and, if you're lazy like me and didn't use a tripod, each image will need to lined up properly.
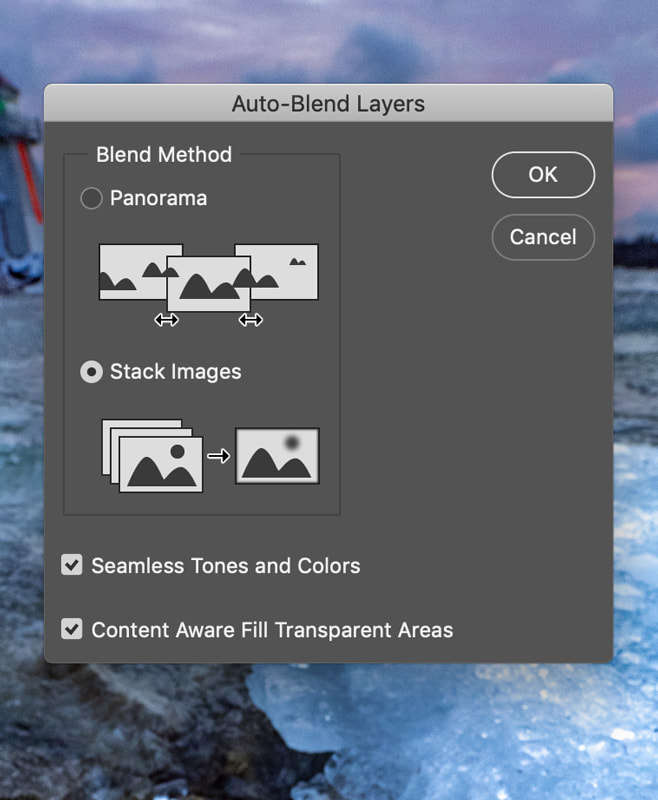
- Go to Edit > Auto-Blend Layers... Select 'Stack Images'. I usually check 'Content Aware...' as it does a remarkably good job at filling in missing areas. If you choose not to, you will need to crop the image as some of the edge will be out of focus.
- Delete the masked layers and complete your final edit.
Final Thoughts and Images
Focus bracketing and stacking has become one of my favorite compositional techniques. It makes me more observant while out in the field since I am on the lookout for the smaller details in a scene that can become a dominant foreground element. It takes a bit more time to setup, and it doesn't always work for a scene, but when it does, the results can be impressive.
For more reading on focus stacking and bracketing, check out my post that is specific to macro shooting.
Republished with permission from Peter Baumgarten's Creative Island Photo blog. To comment on this article or ask Peter a question, please view original post.
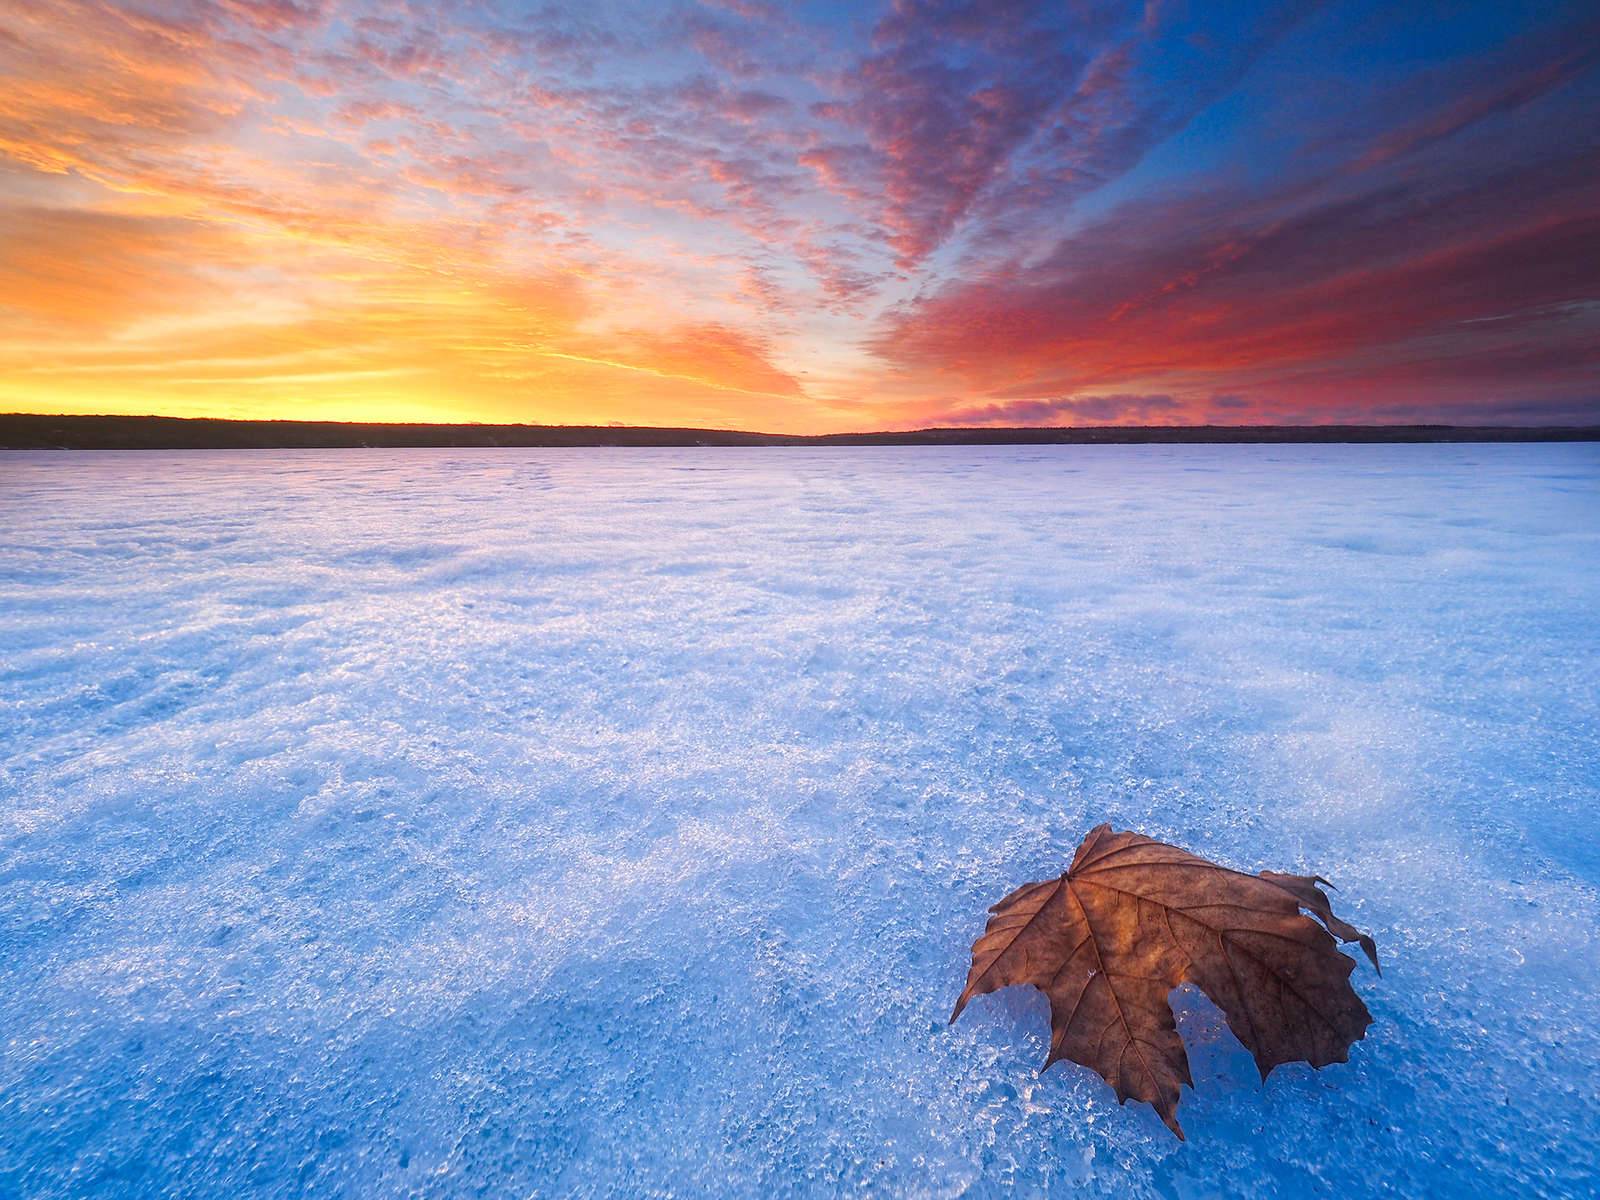
1/15s | F7.1 | ISO 200
This was one of my first focus bracketed landscape shots and was thrilled to see the incredible depth of field that I could achieve.
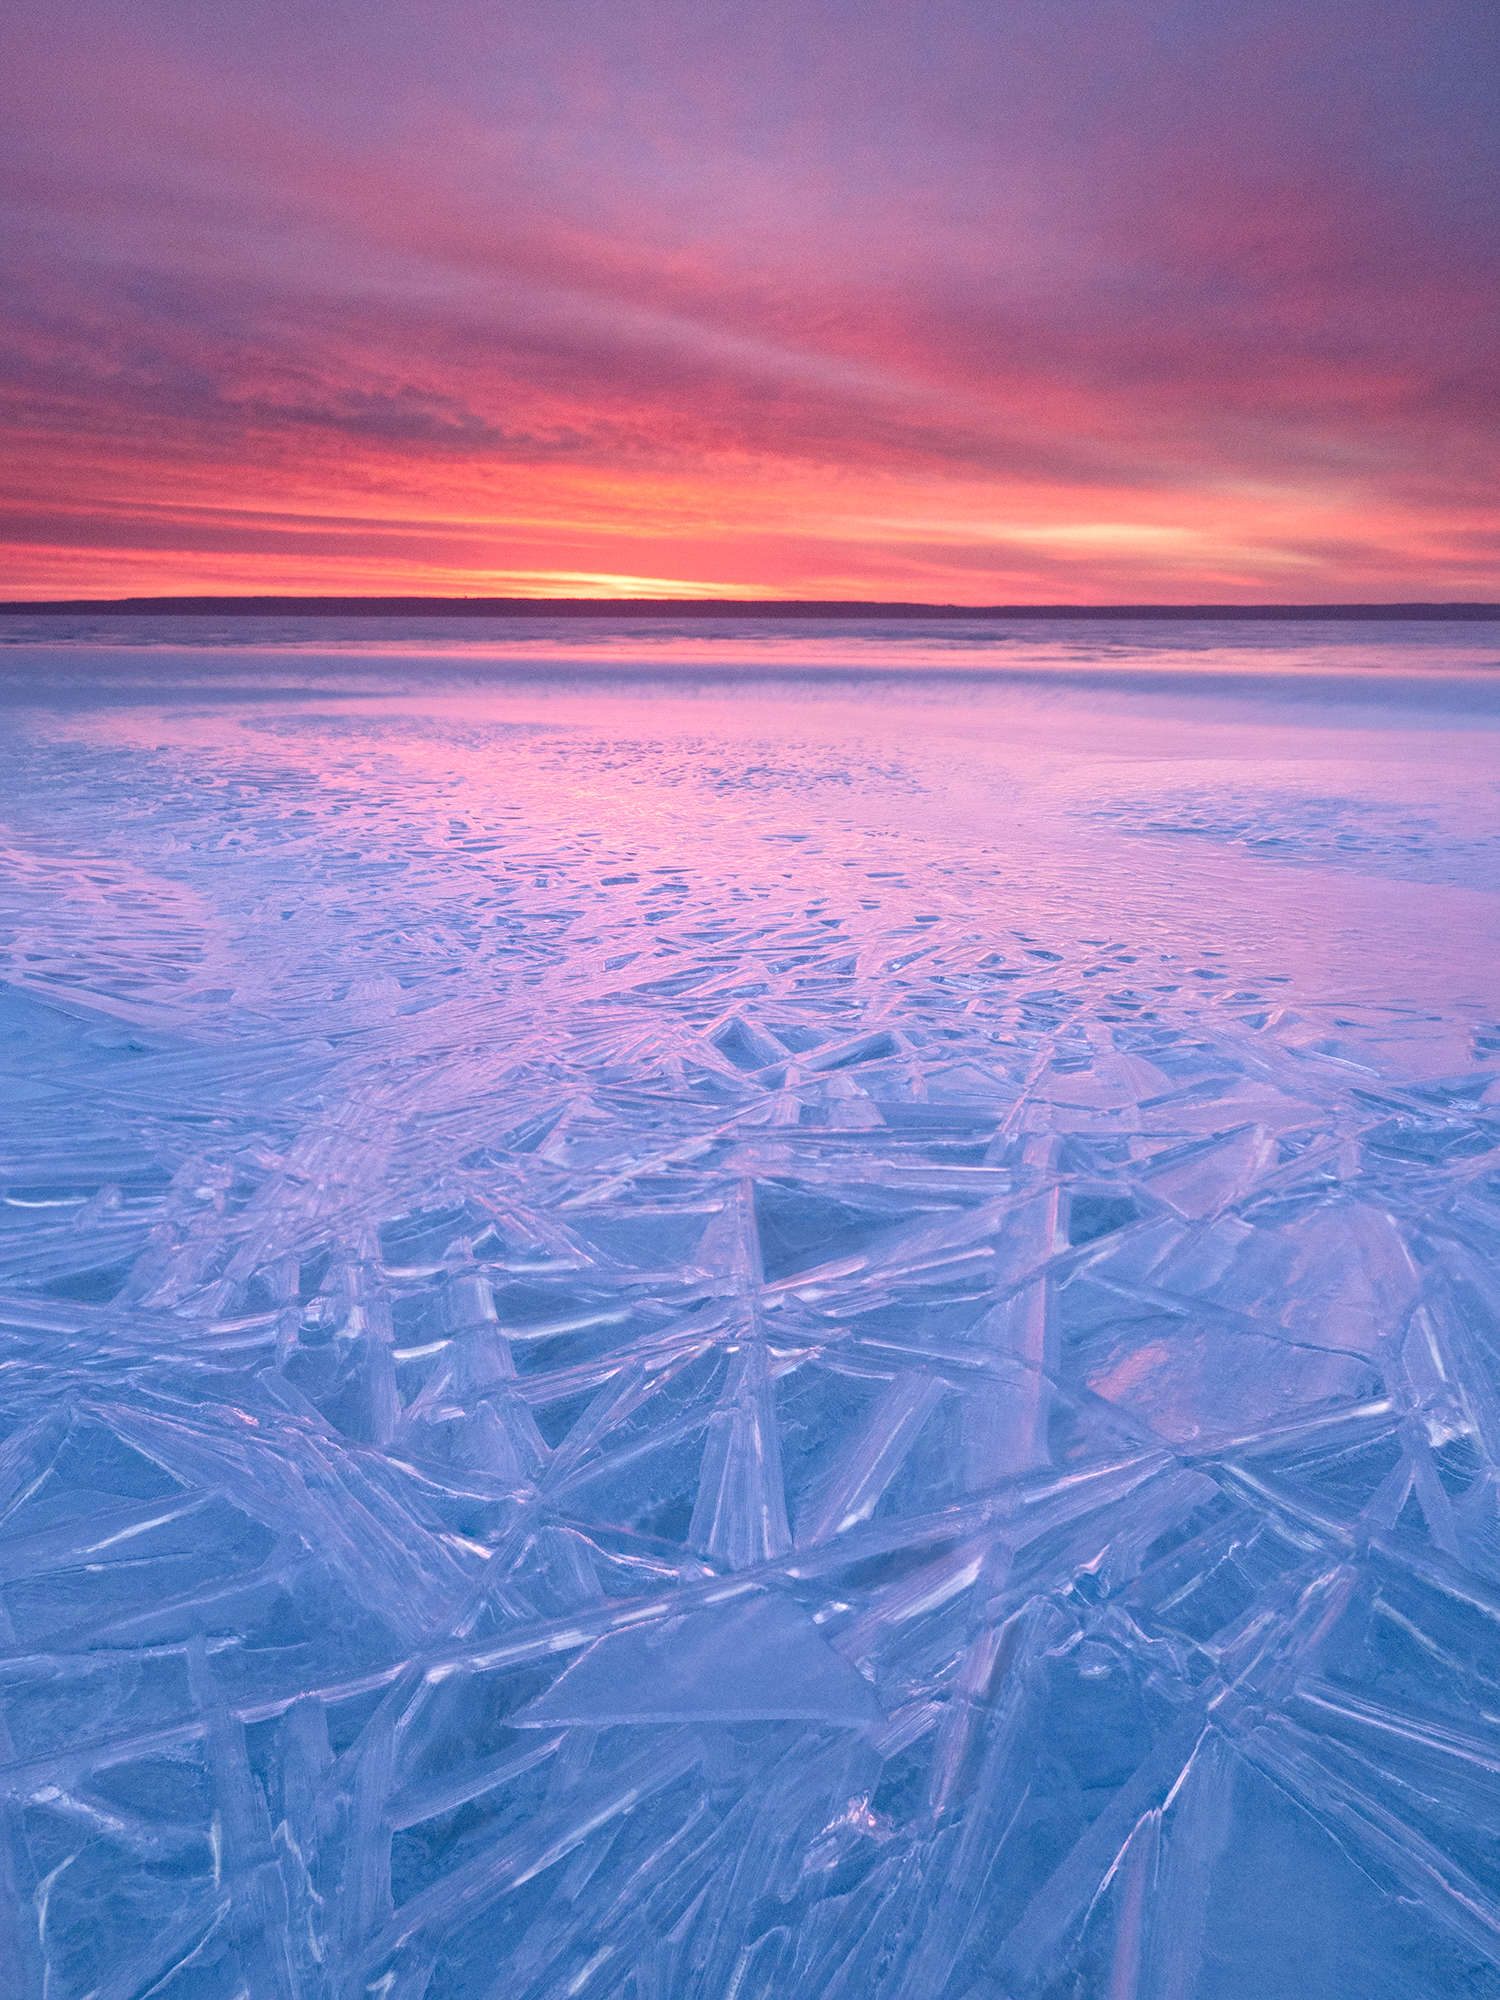
0.4s | F7.1 | ISO 400
With nothing all that impressive in this location to include in the foreground I opted to get in close and show off the interesting geometry of these ice crystals.
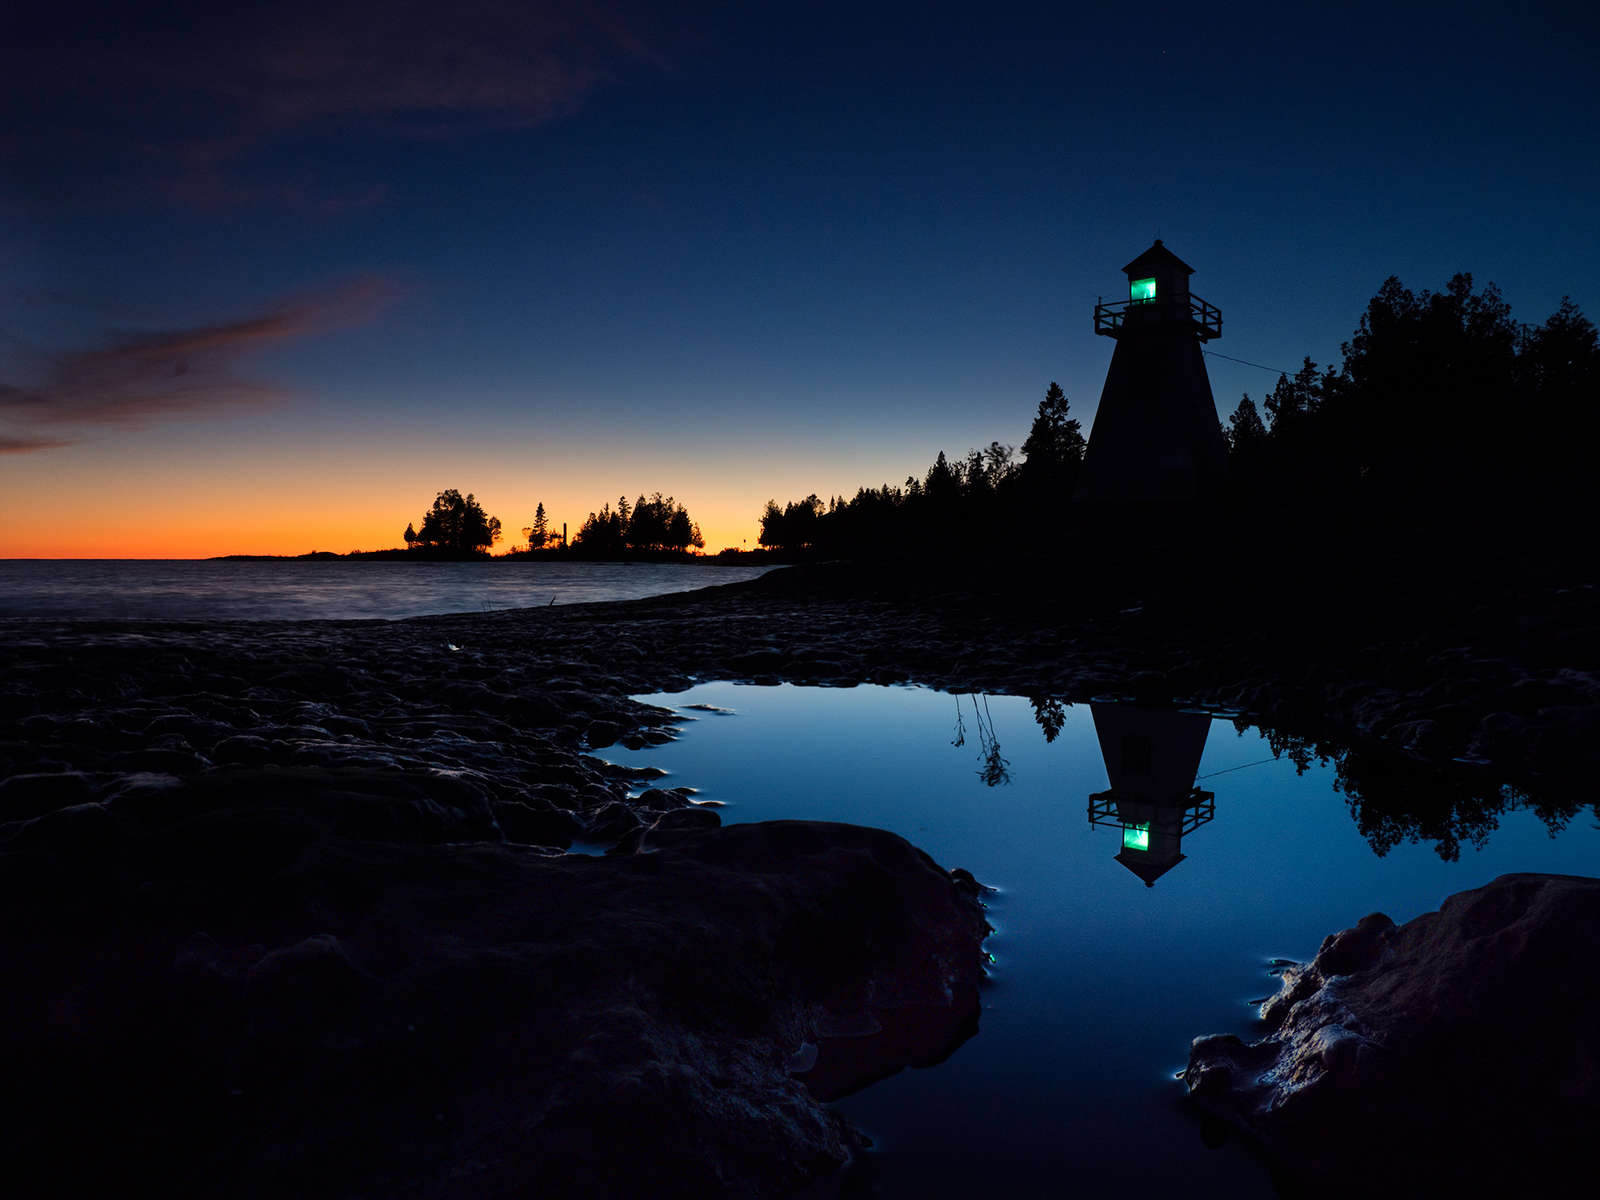
1/50s | F6.3 | ISO 800
In order to capture the reflection of the lighthouse I needed to put the camera right on the ground and hold it steady during the sequence.
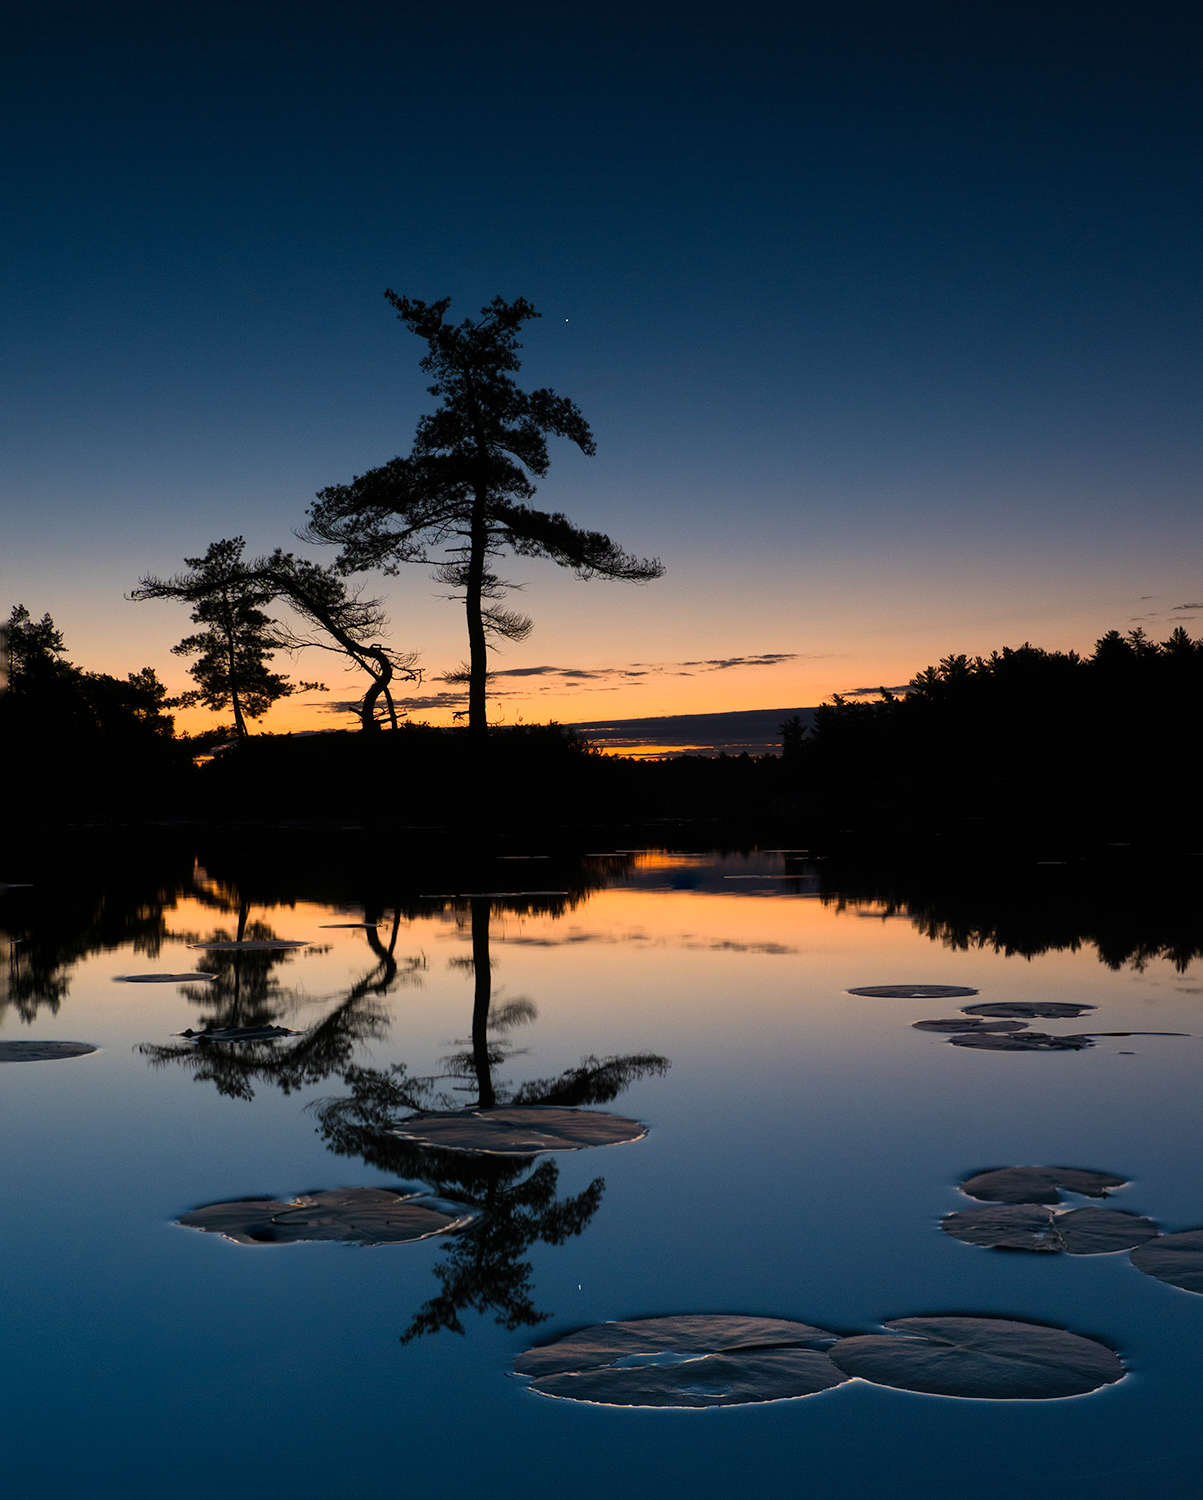
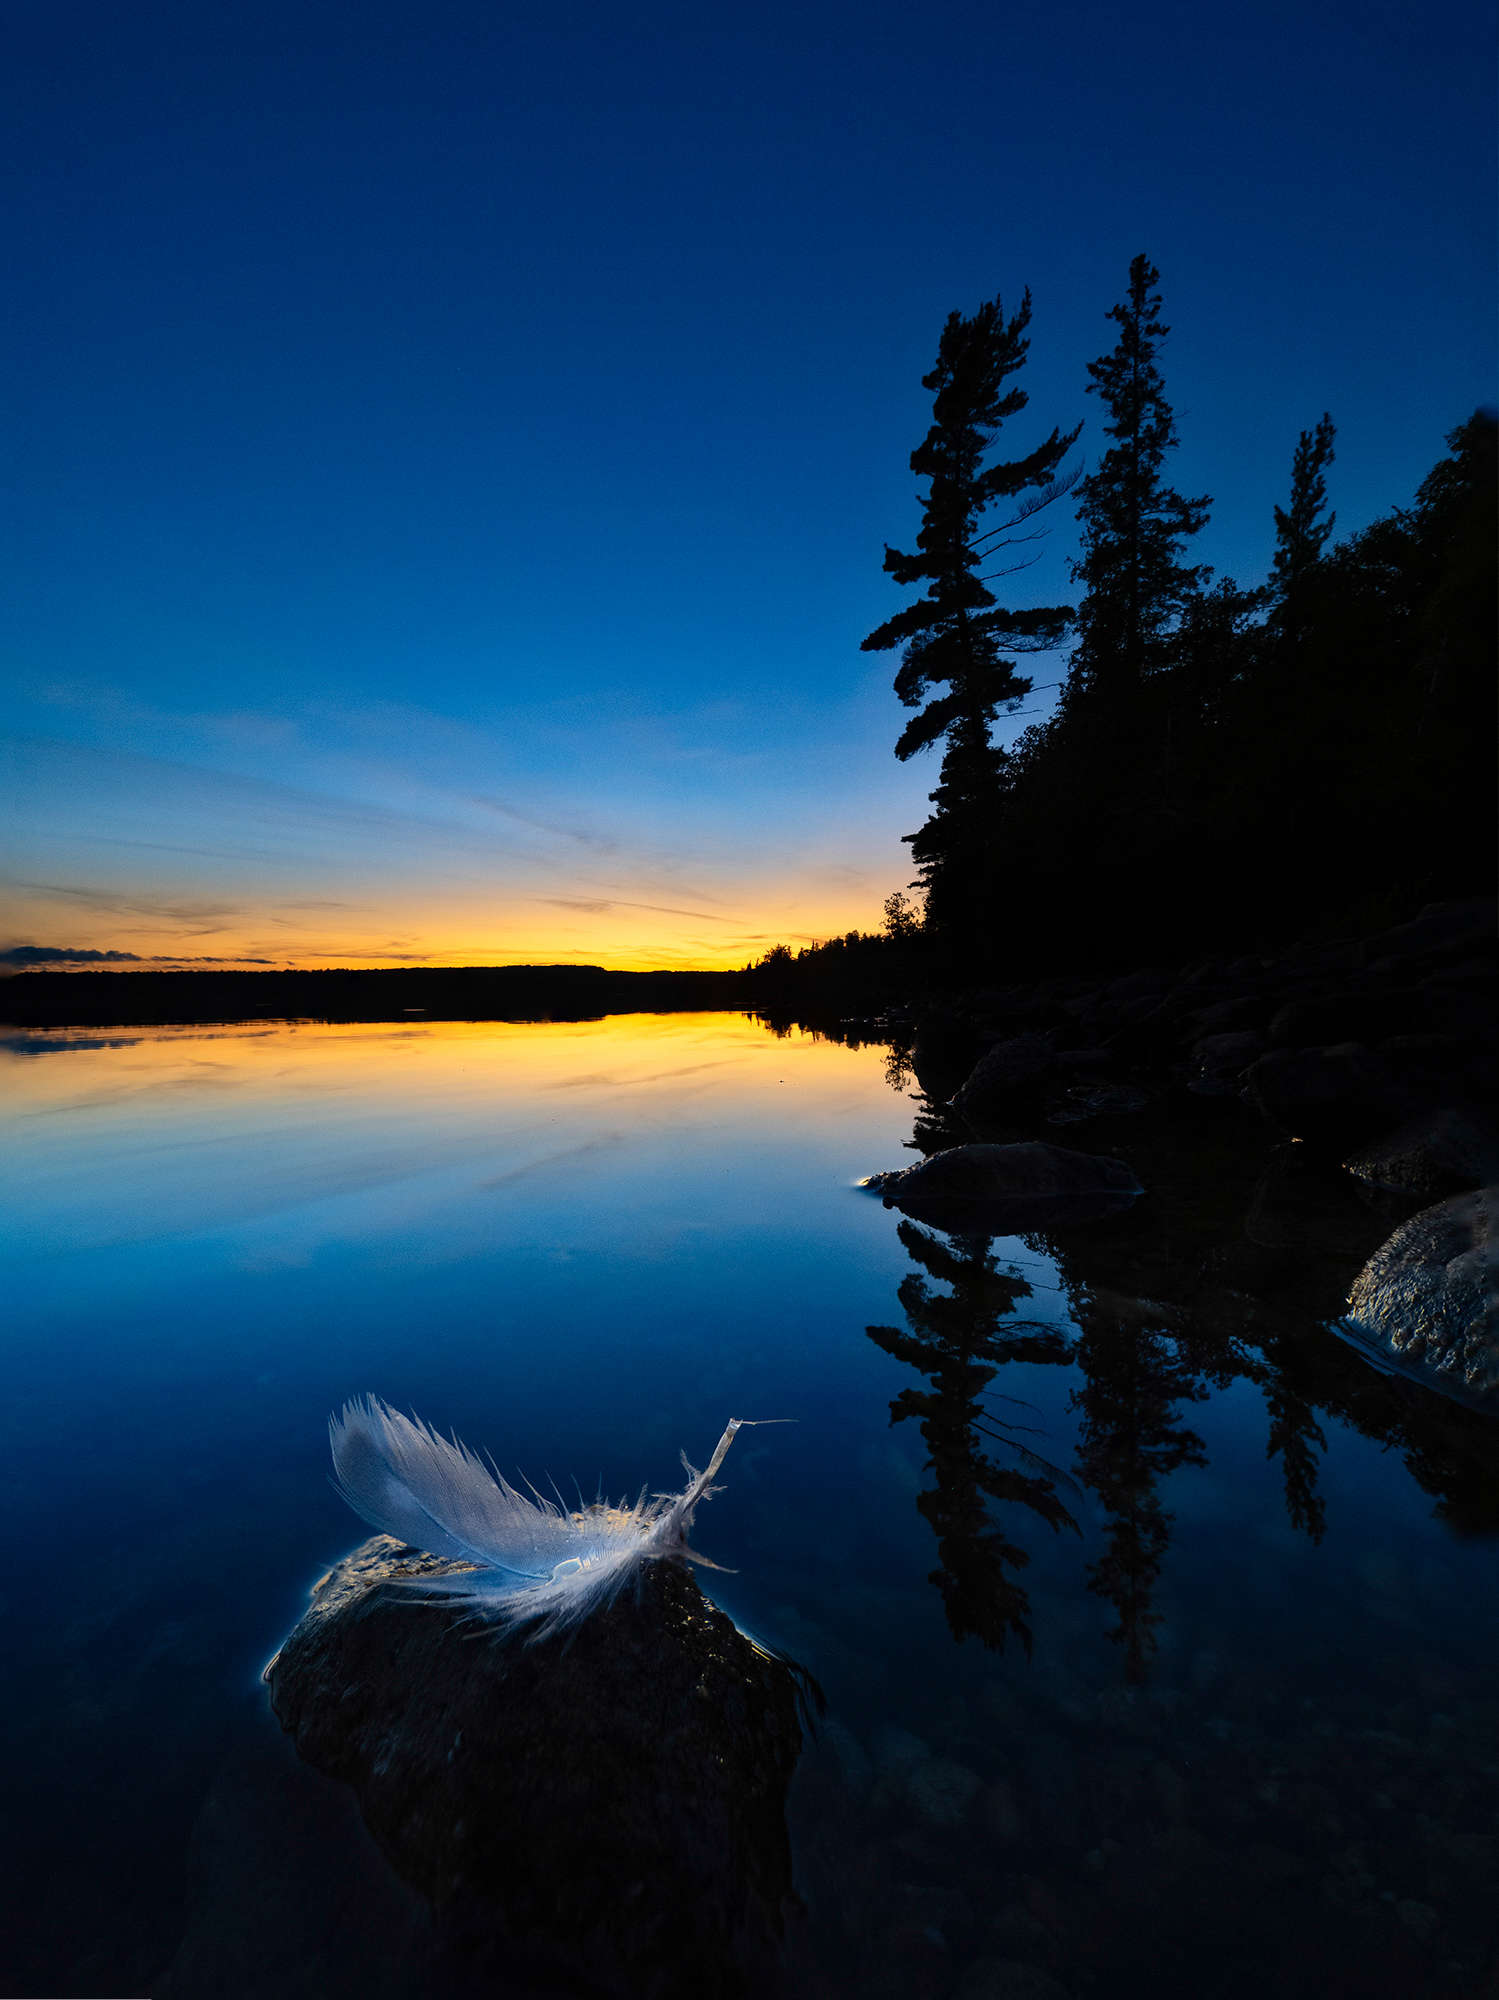
1.3s | F6.3
While kayaking on this small lake I pulled ashore to capture the sunset and saw this small feather that I thought would make for an interesting foreground subject.
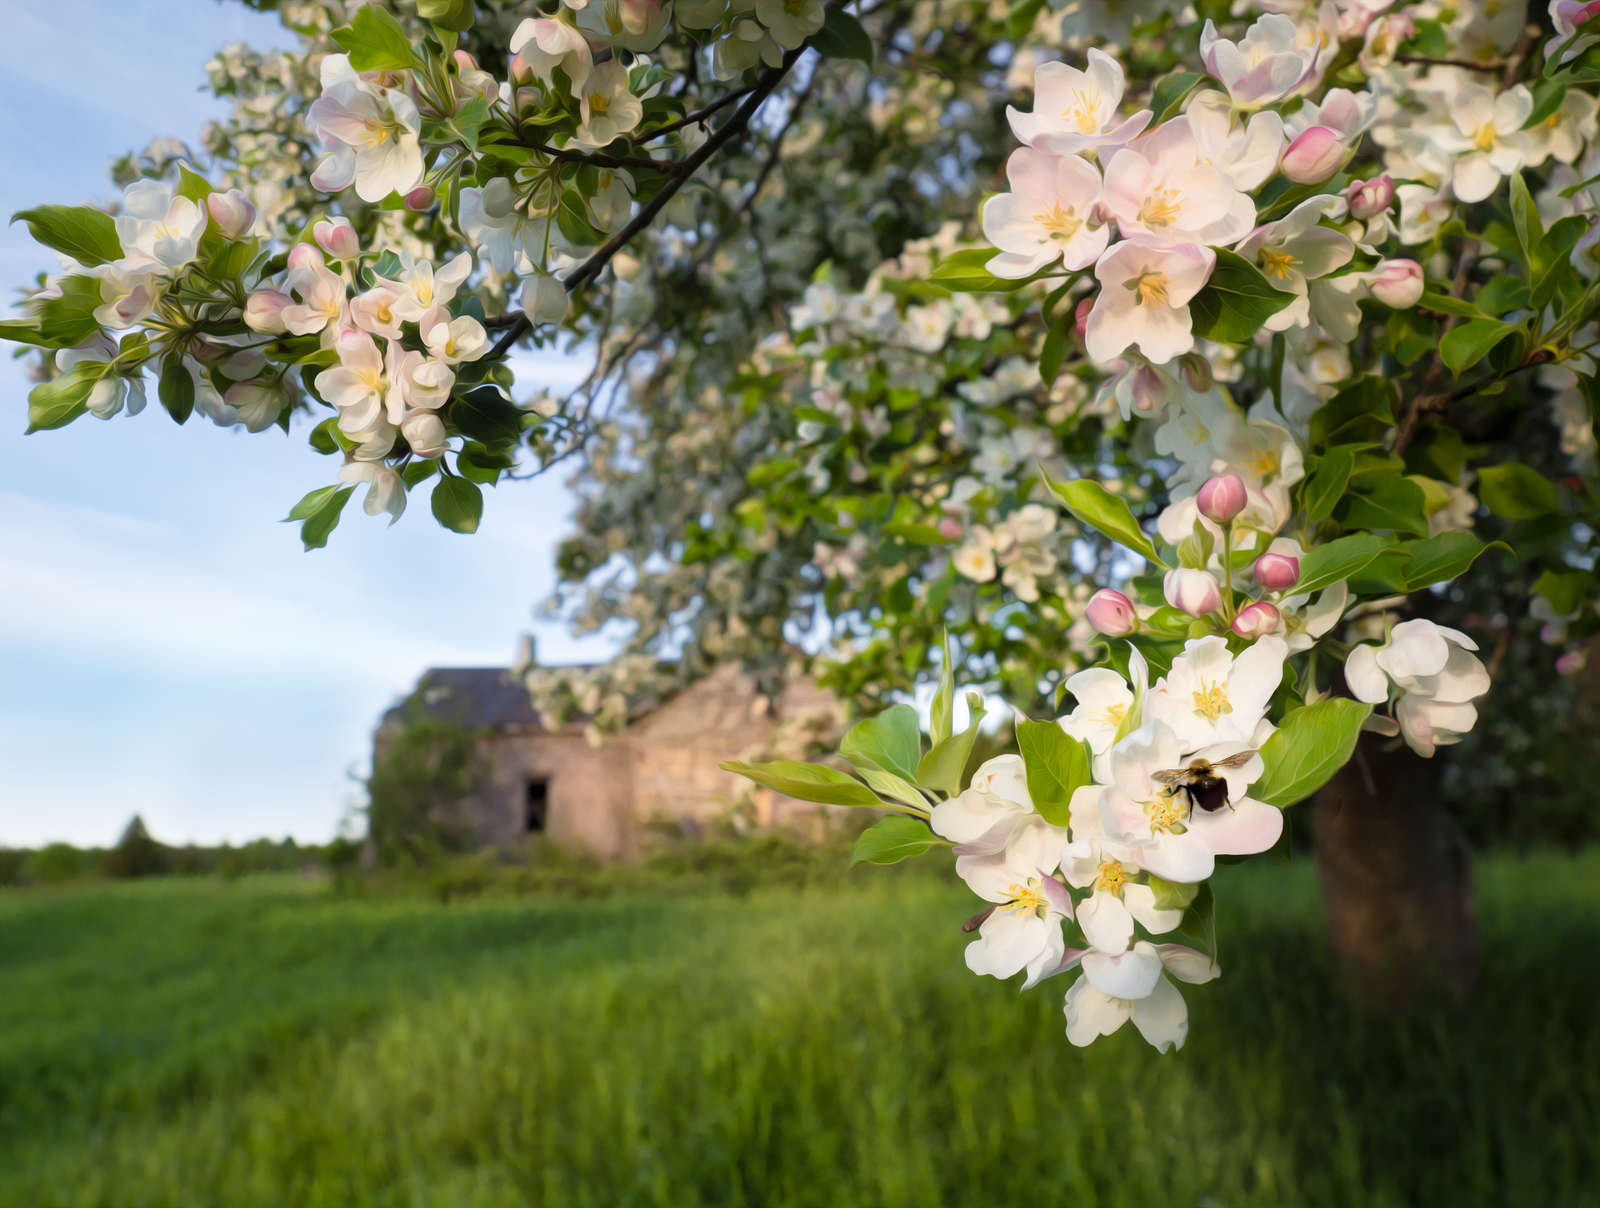
1/13s | F5.6 | ISO 200
I opted to keep the background defocused for this image by only using a few of the bracketed images. I also had to do some additional layer masking around the bee since it moved in between shots.
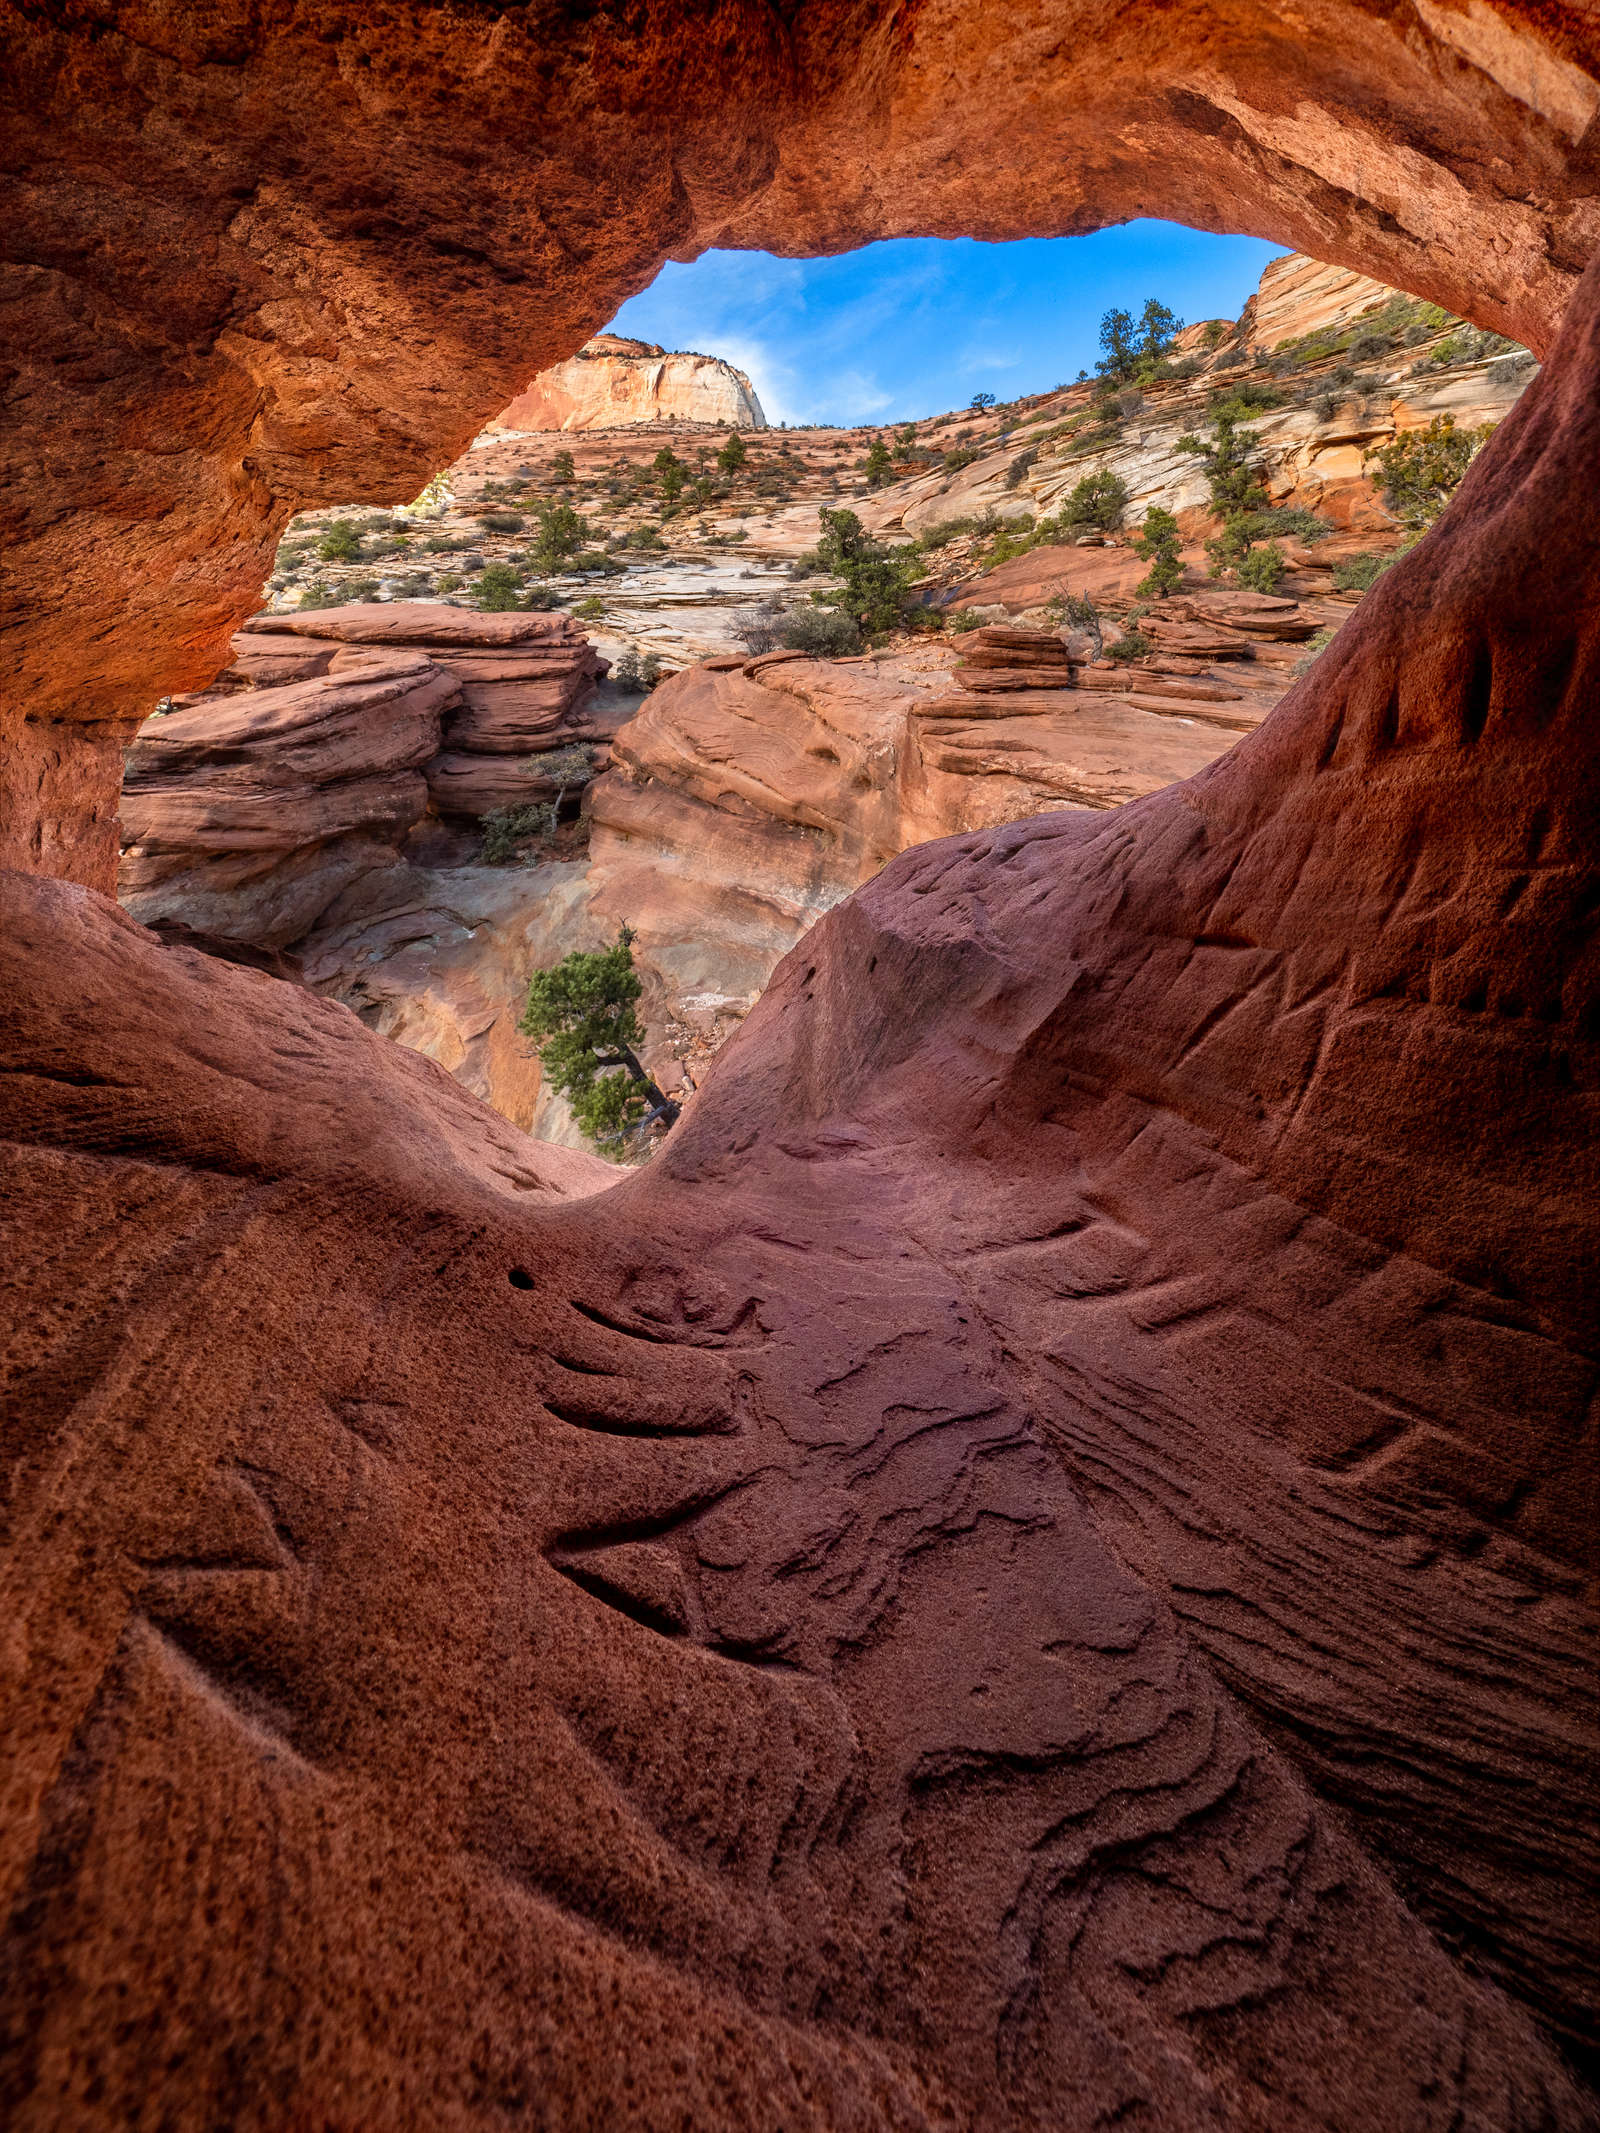
1/500s | F14 | ISO 200
Photographed in a small natural arch in Zion National Park.
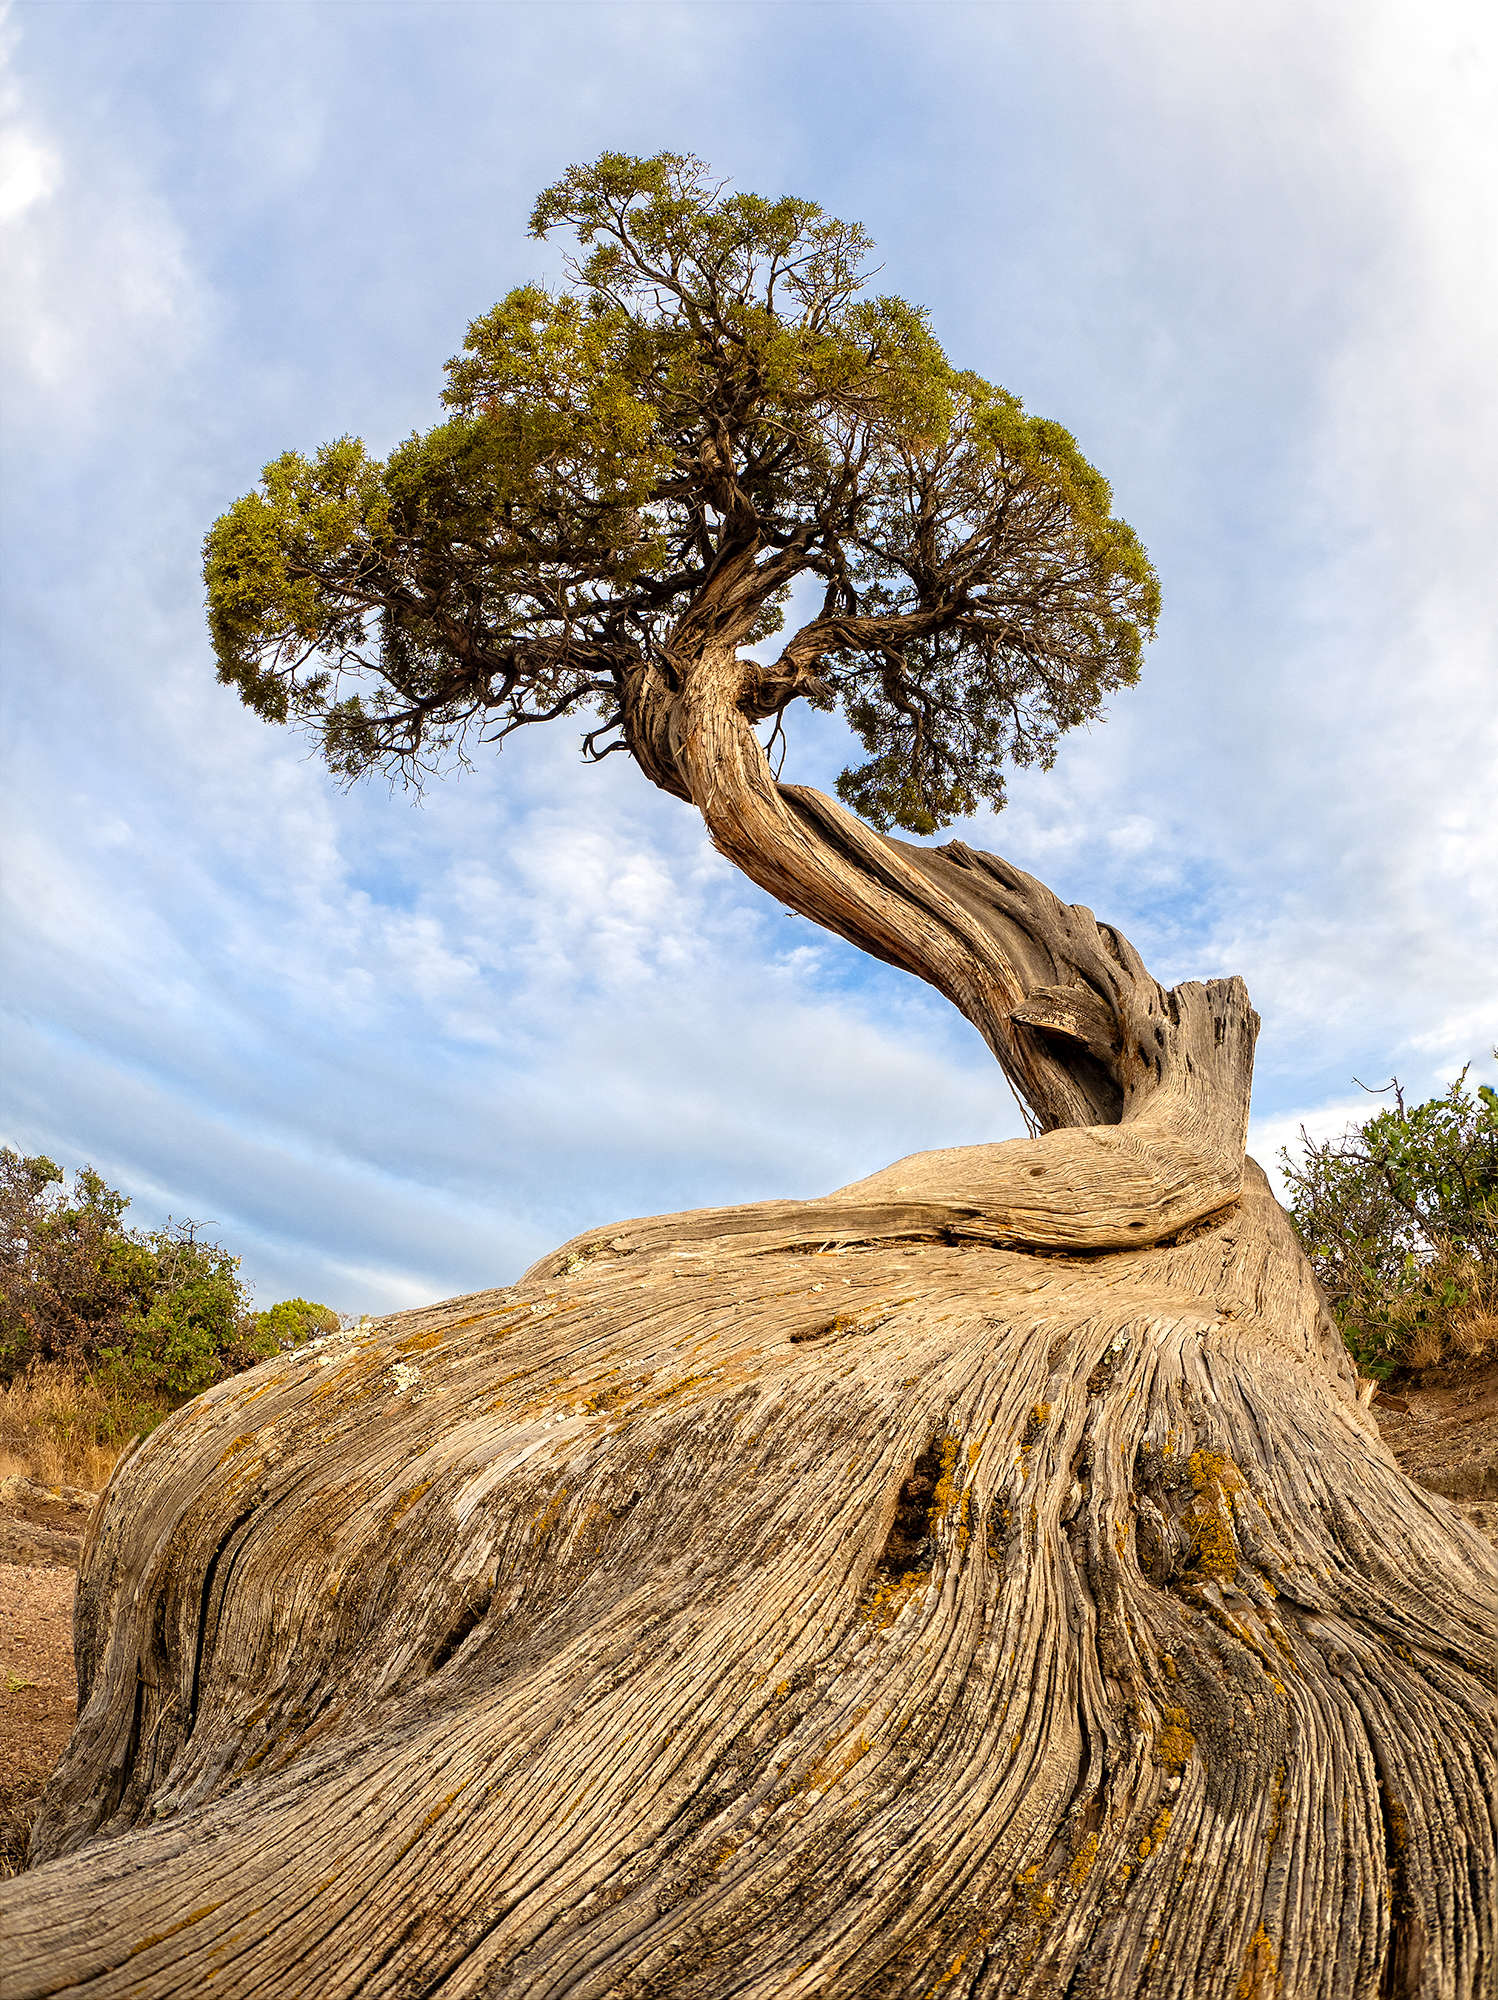
1/13s | F7.1 | ISO 200
It may not look like it, but the crown of this twisted tree was directly overhead. I used a fisheye lens and placed the camera right against the trunk in order to create this composition.
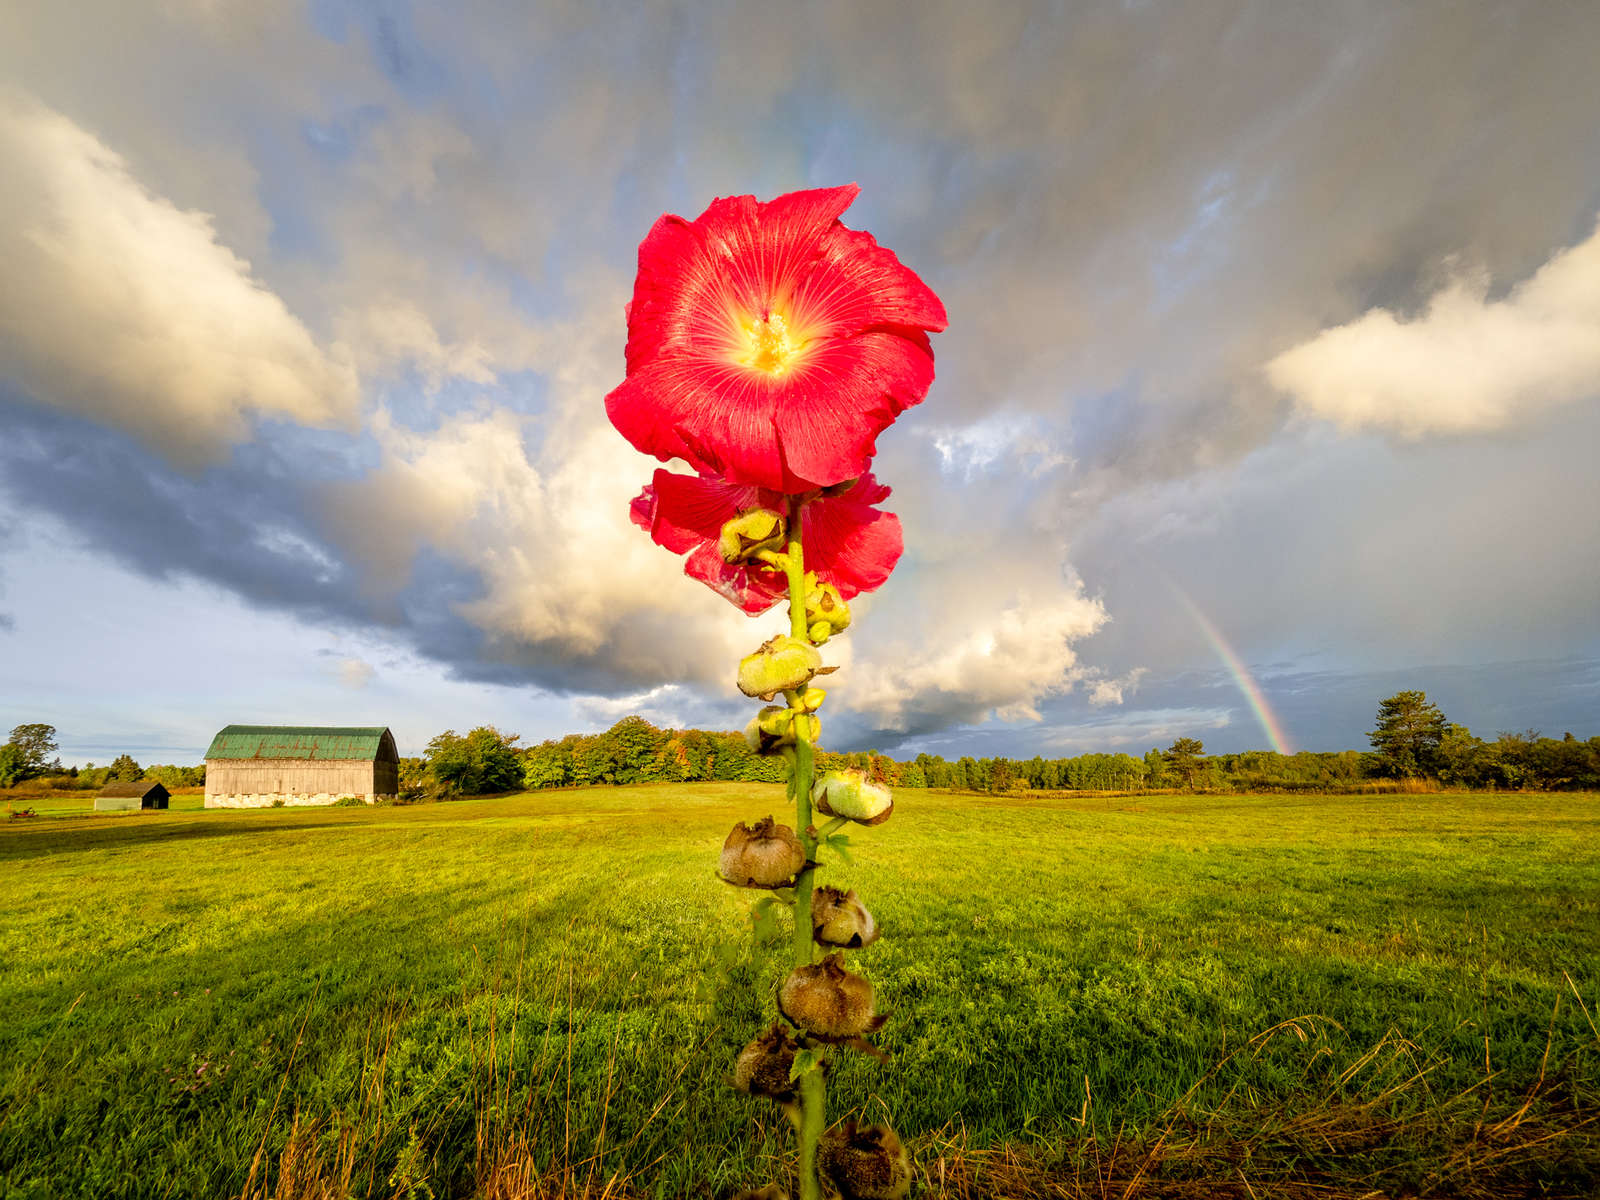
1/50s | F7.1 | ISO 200
Although I shot a total of 8 photos for this image I ended up only needing 2 of them, one for the hollyhock and one for the background.
1/200s | F7.1 | ISO 200
ABOUT PETER
Web: creativeislandphoto.com
Blog: creativeislandphoto.com/blog
Twitter: @creativeisland4
Peter has been a dedicated Olympus shooter for nearly 40 years, and has found a way to combine his passion for photography with his love of teaching to develop photography workshops with a focus on landscape, wildlife and astrophotography. Peter’s work has been published in a number of magazines including Canadian Geographic, Shutterbug and Outdoor Photographer. He maintains his own blog with an emphasis on tutorials that assist others in bringing their photography up to the next level.
Special Features. Special Offers.
Check out August deals and learn about cutting-edge tech like Focus Stacking, LIVE ND Filter, Starry Sky AF and more.
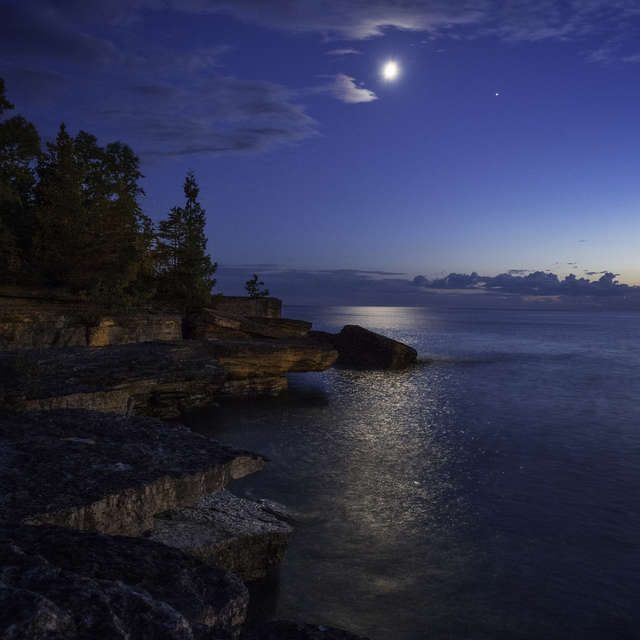
8 Tips for Moonlit Landscapes
Don't limit yourself to daytime landscapes. Extend your landscape opportunities by shooting under the light of the moon.
Achieving More Accurate HDR Images
Learn how to use exposure bracketing to create more accurate and dynamic images.