It's easy to get caught up in the frenzy of acquiring the latest and most expensive gear. But do we really need it to create stunning images?
The truth is that creativity and knowledge of your subject play a more significant role in producing remarkable photographs. Any camera gear gives you the opportunity to push the limits of your creativity and hone your skills.
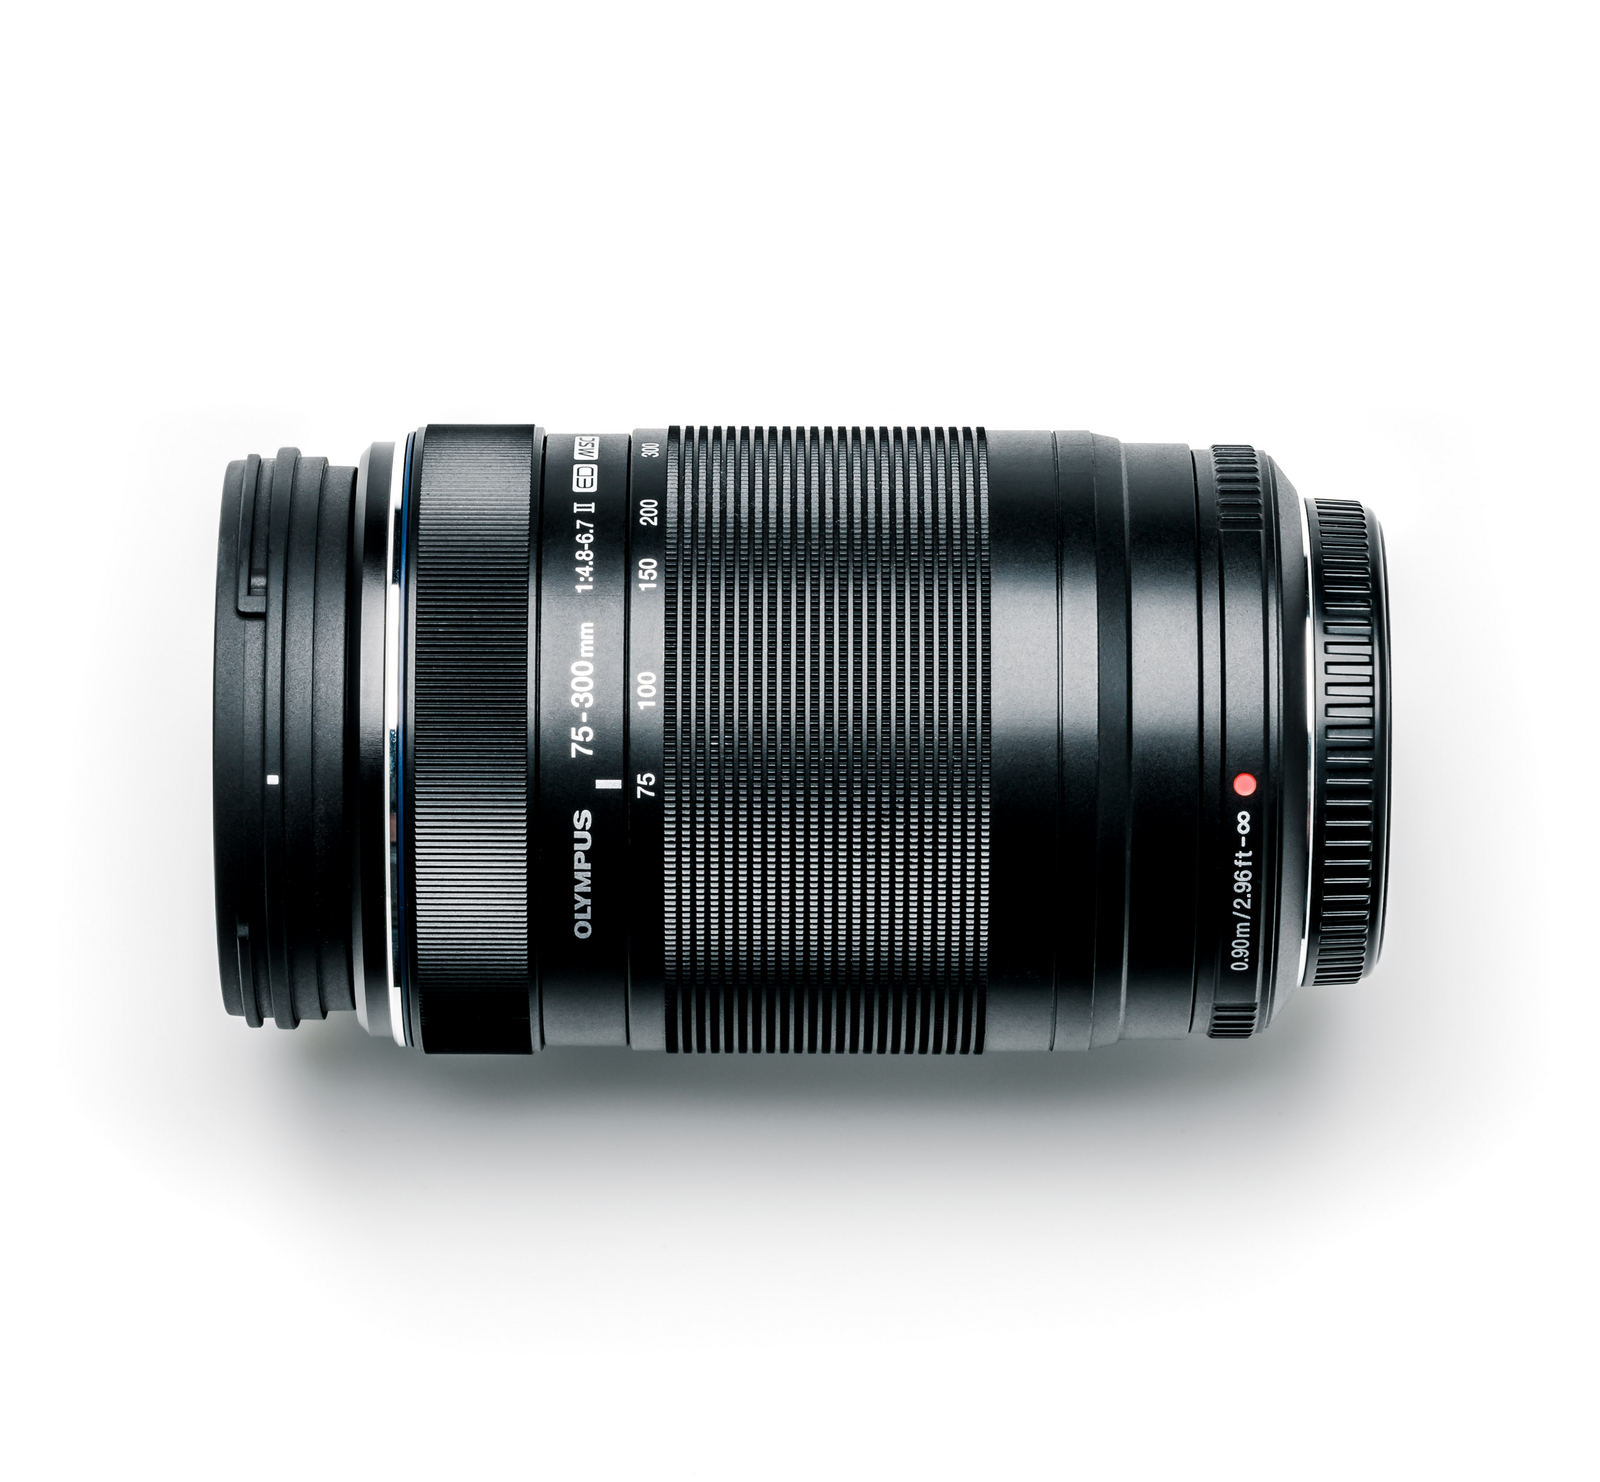
So while gear does have an impact, we shouldn't let budget constraints hold us back from maximising the potential of the equipment we already have. To put this theory to the test, I took on the challenge of using the M.Zuiko 75-300mm f/4.8-6.7 II lens for wildlife photography. Mostly, I used my older E-M1 Mark II camera, but I also tried the 75-300mm on my OM-1 while photographing black grouse. In this post, I'll explore the benefits of this lens and share techniques for achieving impressive results.
Why choose the M.Zuiko 75-300mm f/4.8-6.7 II?
The M.Zuiko 75-300mm f/4.8-6.7 II lens really is a great lens for the money. Pairing this lens with my trusty E-M1 Mark II camera, I set out to demonstrate that you don't need to break the bank to capture eye-catching wildlife shots.
What do you get with this lens?
The main differences between this lens and one that might cost 10 times more is the quality of glass and how fast it is. When photographers talk about how fast a lens is, it relates to the f-stop and how much light the lens lets in. The lower the f-stop, the more light you let into the sensor – this allows you to shoot with faster shutter speeds, which is good to freeze action!
But a lower f-stop also helps to create bokeh – the soft out-of-focus backgrounds and foregrounds you often see in photos that helps make the subject stand out in the frame. However, a low f-stop isn’t the only factor when it comes to out-of-focus backgrounds and foreground, and really making those images pop. So let’s look at tips for creating those images using a simple three-step process.
Steps for creating bokeh (blur)
Low F-Stop and longest zoom
First, choose the lowest f-stop that your lens can go to and use the longest zoom of your lens. On the M.Zuiko 75-300mm f/4.6-6.7, the furthest reach and lowest f-stop is f/6.7 at 300mm (though is is a 4/3, which on a full frame equivalent is x2, so 600mm)
Choose further-away backgrounds
By starting to consider the background of the animal you’re photographing you’ll instantly start improving as a wildlife photographer. This is about not just taking the image from where you stand, but really thinking about your approach to an animal.
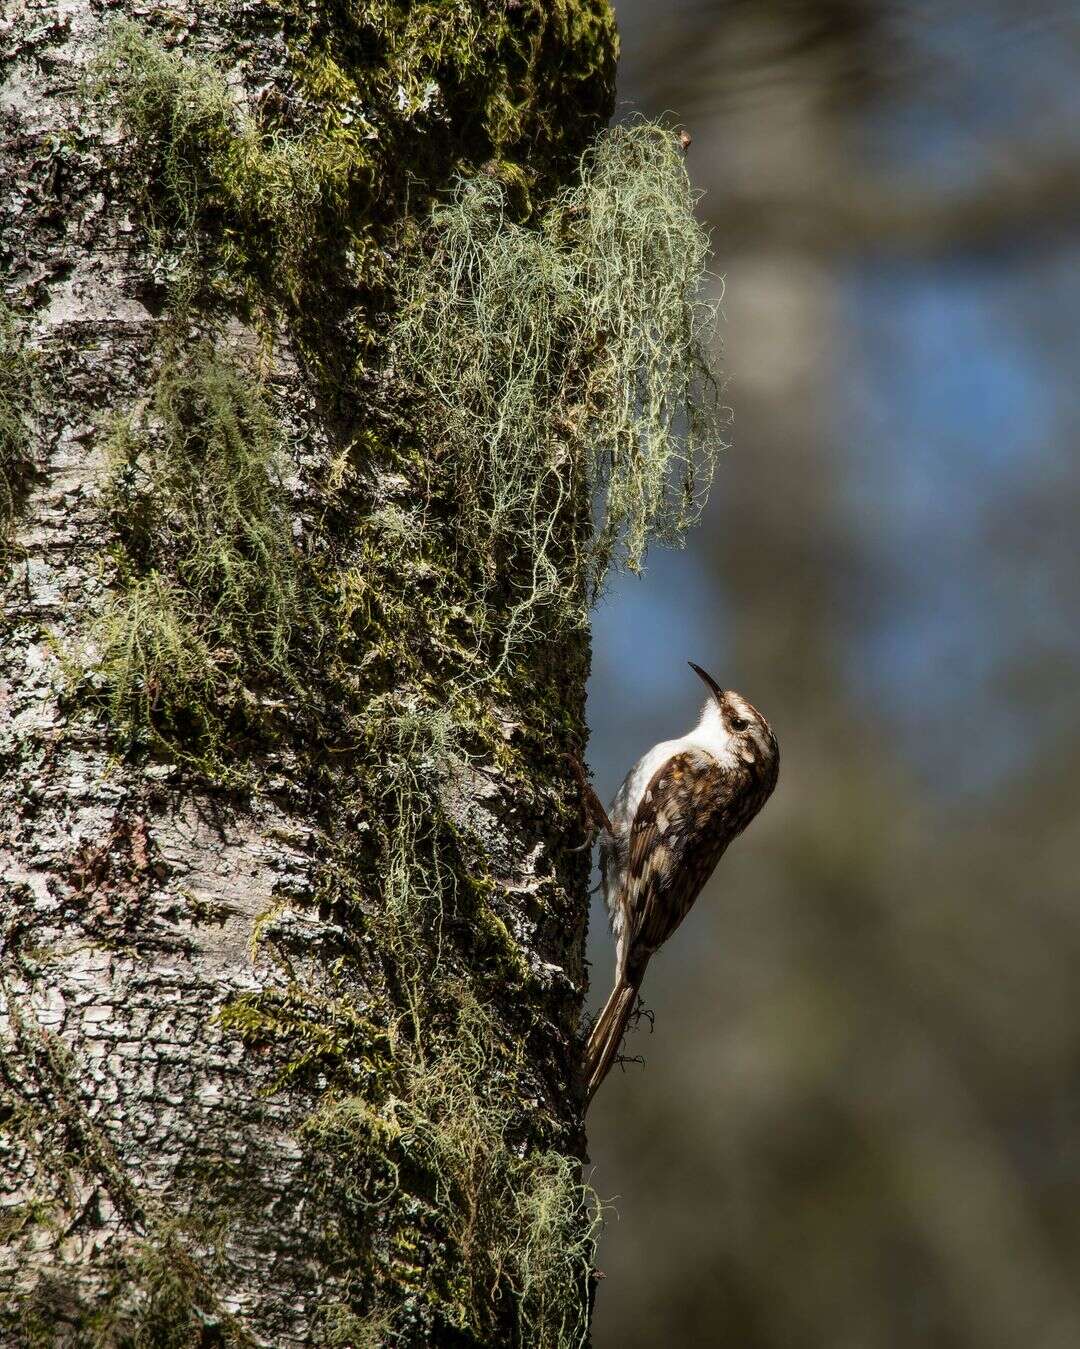
Think about what angle you need to approach from to get a background that’s far away and ideally complements the subject. A blue or white sky is usually a very boring background, but an out-of-focus dark forest can really compliment your subject and the overall feel of your image.
Even making micro adjustment to make sure a branch or other clutter just behind the bird is removed from your frame can make a world of difference.
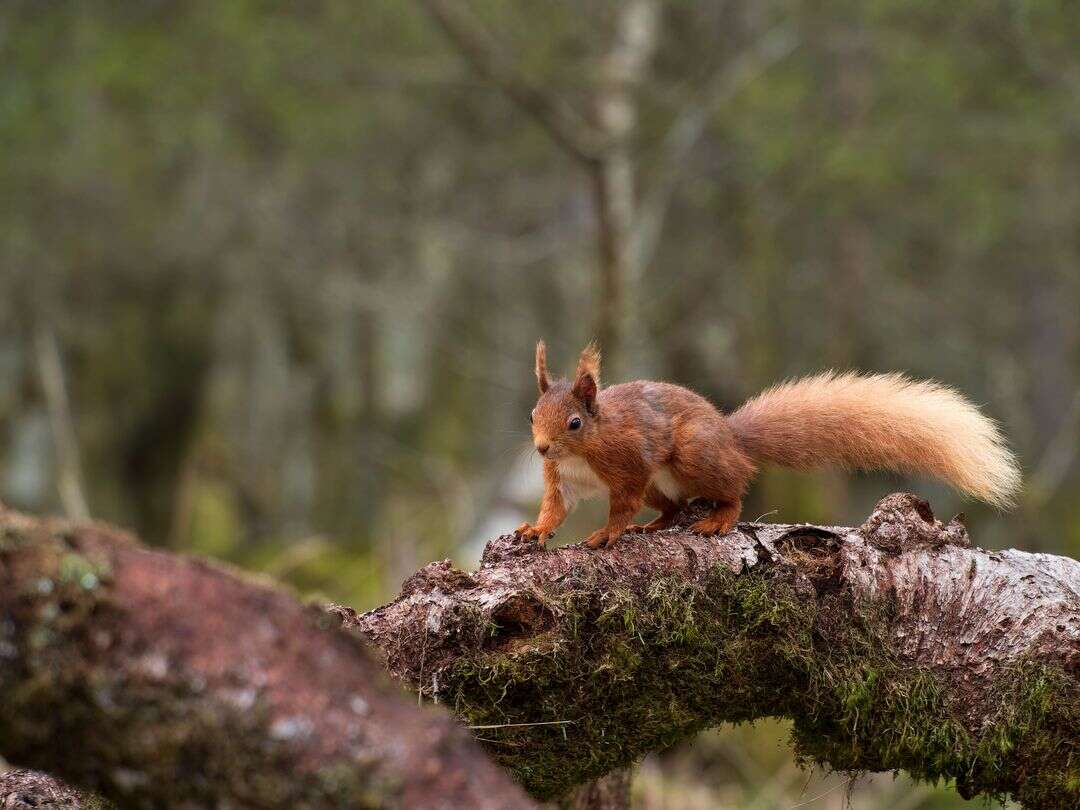
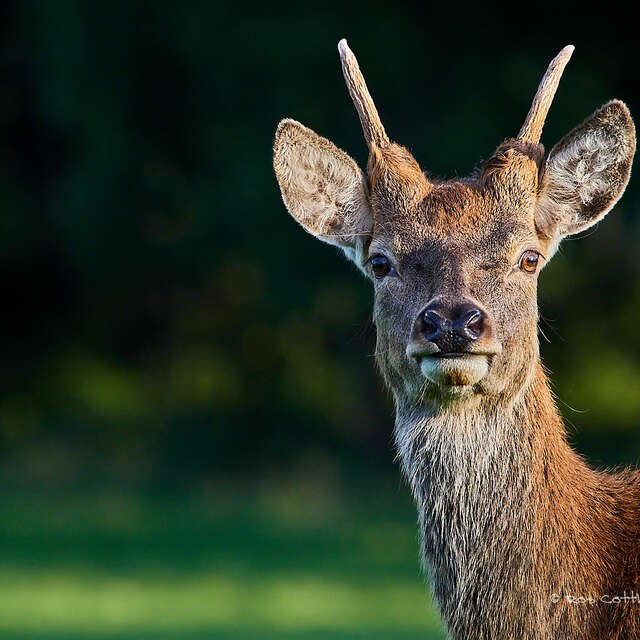
EM1 Mark II | 75-300mm f/4.8-6.7 II | 300mm
F/6.7 | 1/640s | ISO 250
Get close to the animal
If you can get close to your subject, your background doesn’t need to be as far away as if you’re not that close to your subject.c
A handy little rule to keep in mind is that you ideally want to be positioned half the distance or closer from you to the subject, as the subject is from the background. For example: 2m from you to the subject = 4m or more from the subject to the background.
If you can get closer to your subject, the more bokeh or blur you will get – and the more your subject will pop in the frame.
Rule of thumb: be at least 1/2 the distance from your subject as your subject is from the background
Tips for composing your image
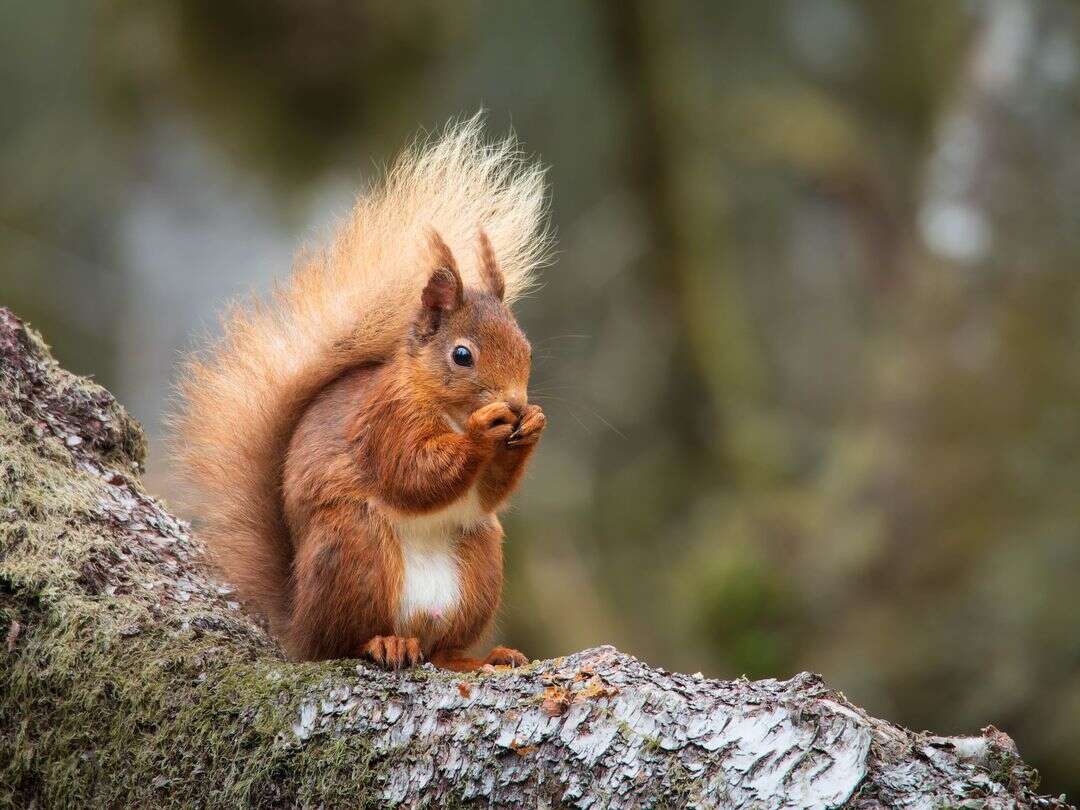
Consider your foreground
The foreground in your image can also be distracting, but we can blur this out in similar ways as the background. I like to photograph birds in shrubs such as gorse, which has really nice yellow flowers in spring. I often make sure to get some yellow gorse as my foreground and blur it out. Something to be aware of is that if the foreground is too close to the subject it won’t be blurred out, and if the foreground is very close to your lens it might cause a lot of the frame to be slightly blurry and affect the subject itself.
Aim for a foreground that’s about half-way between you and the subject or slightly closer to you - and experiment!
Below are two images of a whitethroat on a gorse shrub. The first one I took by carefully considering my background, making sure to pick a background that was much further away, with nothing distracting in it. In the second image I similarly considered my background, but I also moved into position so that I could use another gorse shrub that was in between me and the bird as my foreground.
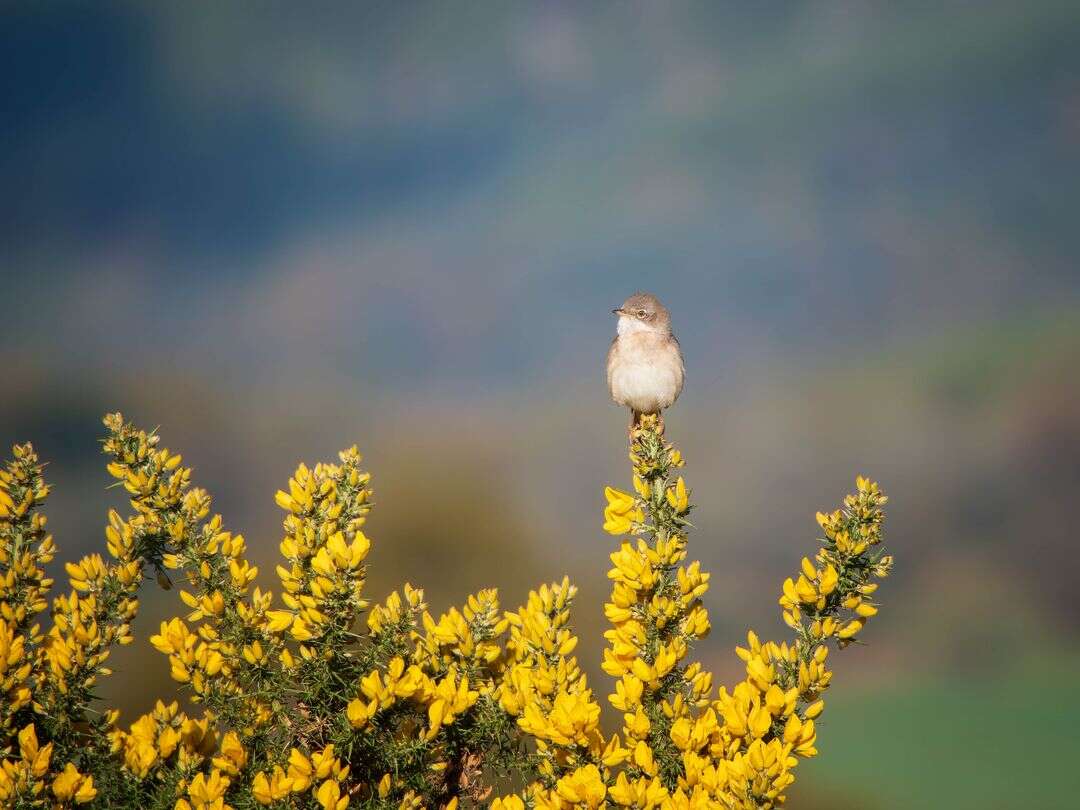
E-M1 Mark II | 75-300mm F/4.8-6.7 II
F/6.7 | 1/500s | ISO 200
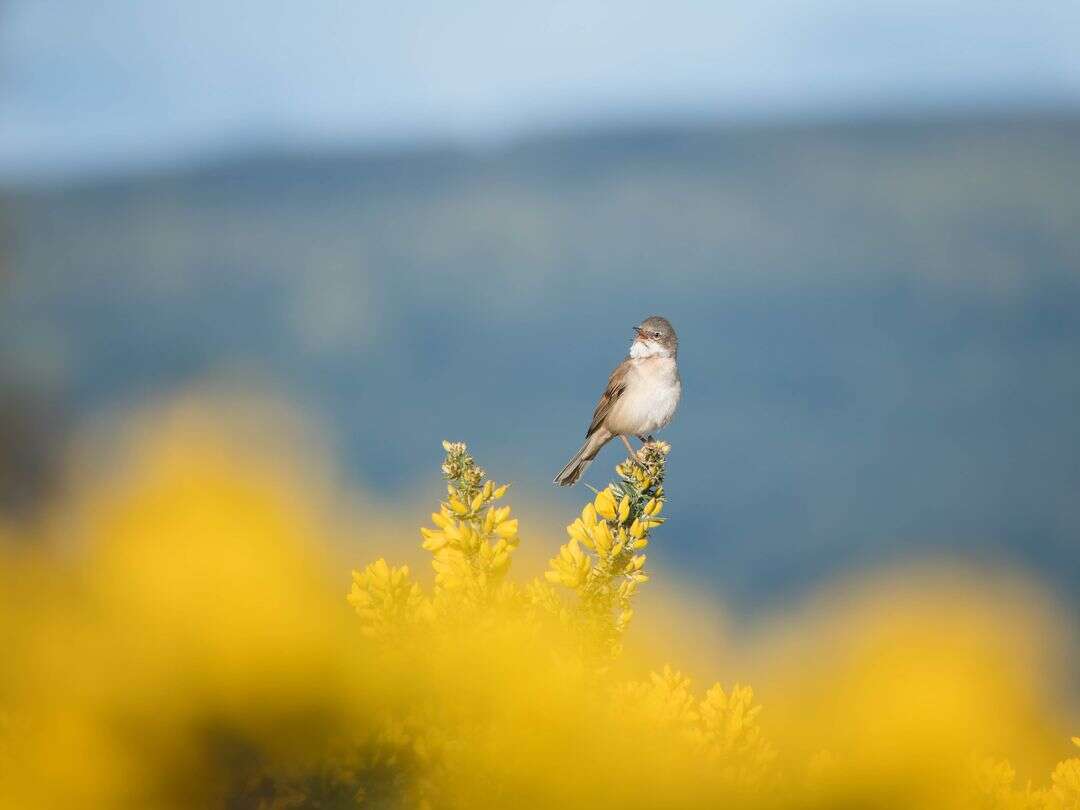
E-M1 Mark II | 75-300mm F/4.8-6.7 II
F/6.7 | 1/640s | ISO 250
I made sure not to be too close to my foreground, because it might blur my subject as well. I also made sure the foreground wasn’t too close to the subject, because then it would almost be sharp and most likely end up being a distraction in the final image. I think they’re both nice images, but my eye is definitely drawn more to the second image with the blurred out foreground.
Try different perspectives
By shooting from a lower angle, you can change the background from being the ground directly behind the subject to something further away. This viewpoint also provides an eye-level view of the animal, resulting in more captivating images. Experiment with different perspectives and see what you can create!
Learning about the black grouse and how they gather at leks at certain times of the year helped me plan ahead and use a hide to be hidden at ground level before the grouse arrived in the morning (photo below).
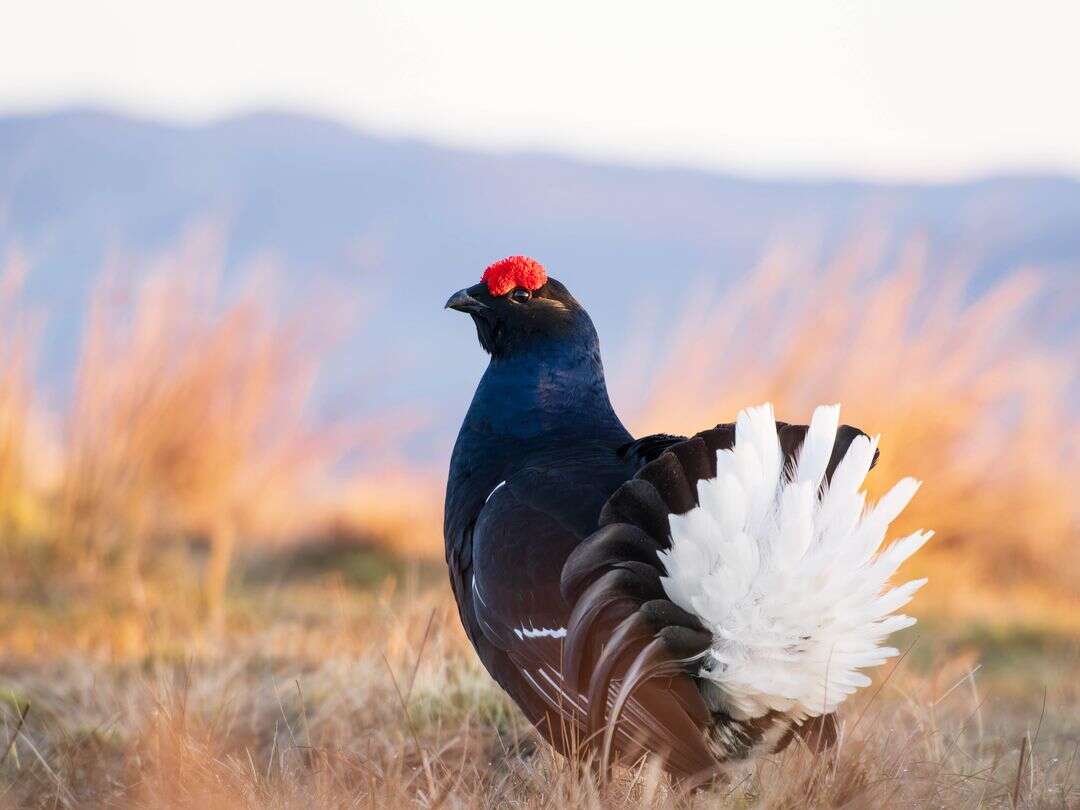
OM-1 | 75-300mm f/4.8-6.7 II
187mm | F/6 | 1/250s | ISO 2000
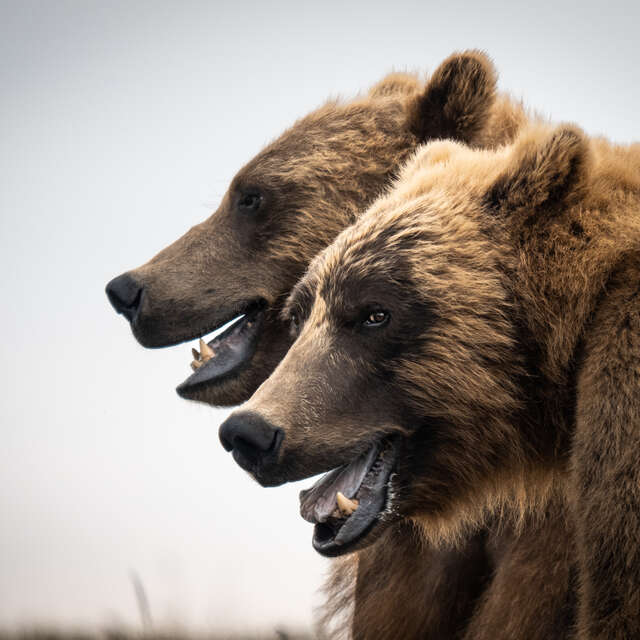
E-M1 Mark II | 75-300mm f/4.8-6.7 II
F/6.7 | 1/1000s | ISO 400
Classic composition rules
Composition is a fundamental aspect of photography that doesn't depend on the camera you use. Develop an eye for captivating compositions, such as the rule of thirds, leading lines, symmetry, or minimalism. Practice framing your subjects thoughtfully and experiment with different perspectives to create visually engaging photographs.
Getting the most from your gear
Work with the light
Light obviously plays a crucial role in photography, regardless of the gear used. Learn to identify and work with different lighting conditions.
Besides the beautiful golden light just after sunrise and before sunset, a very light overcast day is ideal for wildlife photography. As the light is filtered through the clouds it creates a soft type of light which you can shoot in all day. This type of very light cloud cover also helps to reveal the fine details of the subject.
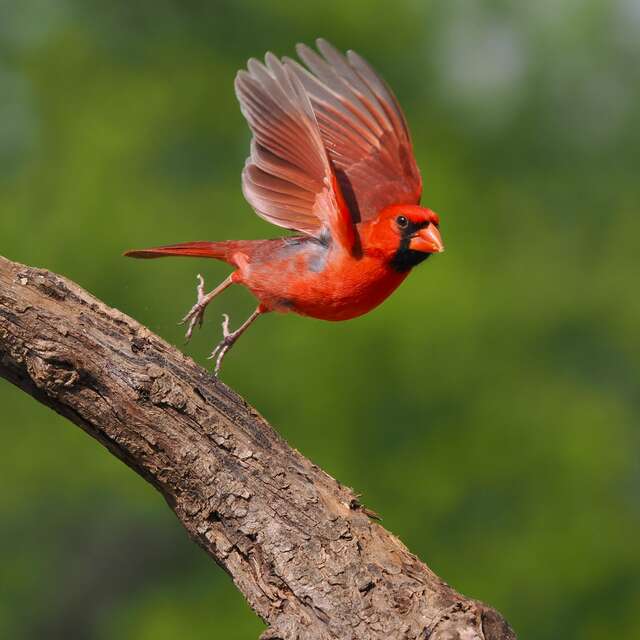
E-M1 Mark II | 75-300mm f/4.8-6.7 II
F/8 | 1/80s | ISO 800
Learn about your subject
Understanding and learning about the animal that you’re photographing is probably one of the best things you can do for your photography. Knowing when and where you’re likely to see a particular animal means that you can really start planning what type of photos you want to make. An understanding of an animal’s behaviour can also help you predict certain behaviour you want to capture, like I did for the black grouse.
Learn from the photography community
Join online photography forums, social media groups, or local photography clubs to connect with fellow photographers. OM System also has a range of learning tools from their highly active YouTube Channel.
Engaging with a supportive community allows you to share experiences, gain inspiration, and receive constructive feedback. Learning from others who have mastered their craft using budget gear can provide valuable insights and inspire new ideas.
Learn about your gear
Knowing your gear inside out is essential for making the best images possible – there’s not much point upgrading if you aren’t using your current gear fully, and completely know its limitations. Instead of seeing your gear as a hindrance, consider it a creative challenge. Embracing limitations encourages you to think outside the box and find innovative solutions like the ones I’ve mentioned above.
Customising your camera so that you can use it quickly and efficiently in the field also means you're not going to miss those elusive shots that happen in a split second. Luckily the OM System cameras have some incredible special features that can help get those images, and they are highly customisable so you can set them up exactly how you need them. Want to learn more about setting up your OM SYSTEM for wildlife photography?

OM-1 | 75-300mm F/4.8-6.7 II
F/5.9 | 1/1000s | ISO 5000
OM SYSTEM for Wildlife Photography Course
If you’re new to the OM SYSTEM or just want insights into how I set up my cameras for wildlife photography, check out my course on the OM SYSTEM for Wildlife Photography. In the modules I dive into all the settings I use and show you how to set it up on the various OM SYSTEM cameras including the OM-1 with the new menu layout.
Camera gear should never limit your imagination and your photography goals. By embracing creativity, field skills, composition and mastering technical skills you can unlock the full potential of any camera set-up.
It might take patience, dedication and practice, but you can create extraordinary images with whatever equipment you have. That’s why they say: the best camera is the one you have in your hand.
Featured Products:
Bio - Espen Helland
ABOUT ESPEN HELLAND
IG: @espenhelland
Website: www.espen-helland-photography.teachable.com
Espen Helland is a Norwegian wildlife photographer and OM SYSTEM Ambassador based in Perthshire, Scotland.
With a background in wildlife biology and conservation Espen has a passion for the natural world and believes it is our duty to keep as much wildlife and ecosystems alive for ourselves, for future generations, and for nature’s own sake.
The study of the natural world and its processes is a lifelong pursuit and such an important aspect of wildlife photography. Espen's favourite way to capture animals is in their natural habitat, exhibiting natural behaviours without disturbing them, and for this, knowledge of subject, habitats and ecological processes all contribute towards getting the perfect image.