“But, I don’t want to go outside. It’s too cold!”
I have to admit that even though I love winter, I have definitely had that internal dialogue. Given that I live in a part of the world where having five months of winter is normal, it’s important for my own sanity to embrace the coldest season. Photography has been an important winter activity for me and my favourite times to shoot are the bookends of the day. We often think of winter as being dull and grey, and there are certainly times when that is the case, but ice and snow can do amazing things with the coloured light at sunrise and sunset.
I regularly turn to my telephoto lenses in order to capture a landscape shot. It allows me to pull in distant features and eliminate distractions. This is also a two-shot vertical panorama.
Planning and Prep
Good photography doesn’t just happen. It requires effort. When I need the extra push to get outside I have to remind myself that “the photos won’t come to you, you have to go to them”. Some planning and preparation is required to increase your chances of success. For me that starts with checking the conditions outdoors, but this involves far more than just a quick peek out the window.
Read the Weather
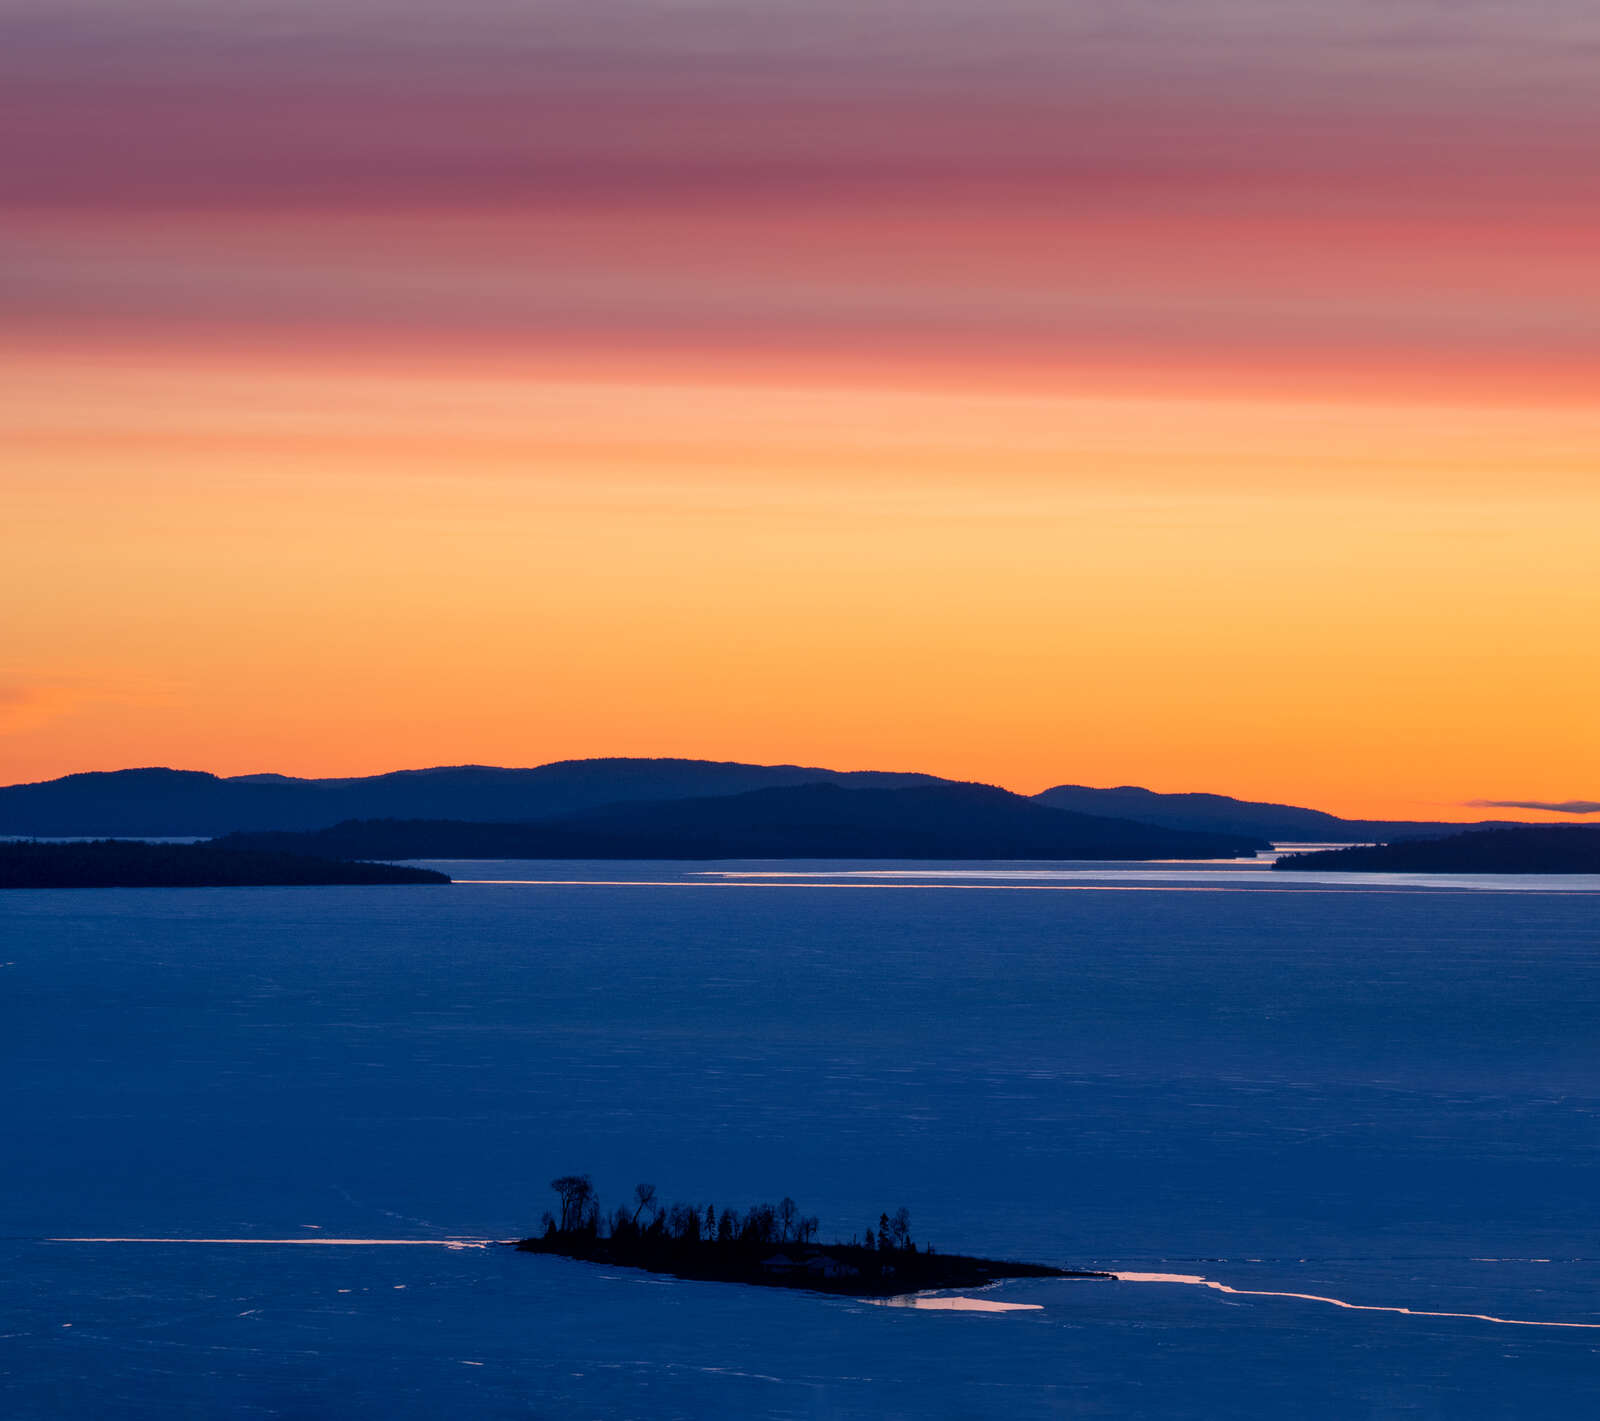
Check out a detailed forecast for the area in which you are planning to shoot. I usually look at hourly forecasts to see how the weather is changing. I will often use the website clearoutside.com. This site provides incredible details about the atmospheric conditions. The quality of a sunset is often determined by the amount of cloud cover, so this is usually my primary focus. High clouds will provide you with beautiful pastels that stay coloured for longer periods of time, while medium and lower clouds result in more intense colours, but of a shorter duration.
A View from Space
This may come as a shock, but meteorologists can sometimes be wrong. But a satellite image doesn’t lie. Before heading out I always check an up-to-date image that shows the existing cloud cover, or better yet, an animation that shows how the clouds are moving. This gives me a good sense of how dramatic the sunset might be. Check out the following websites:
- For the U.S. - https://www.star.nesdis.noaa.gov/GOES/index.php
- For Canada - https://weather.gc.ca/satellite/index_e.html
- For Europe - https://en.sat24.com/en/eu
- For the planet - https://zoom.earth/
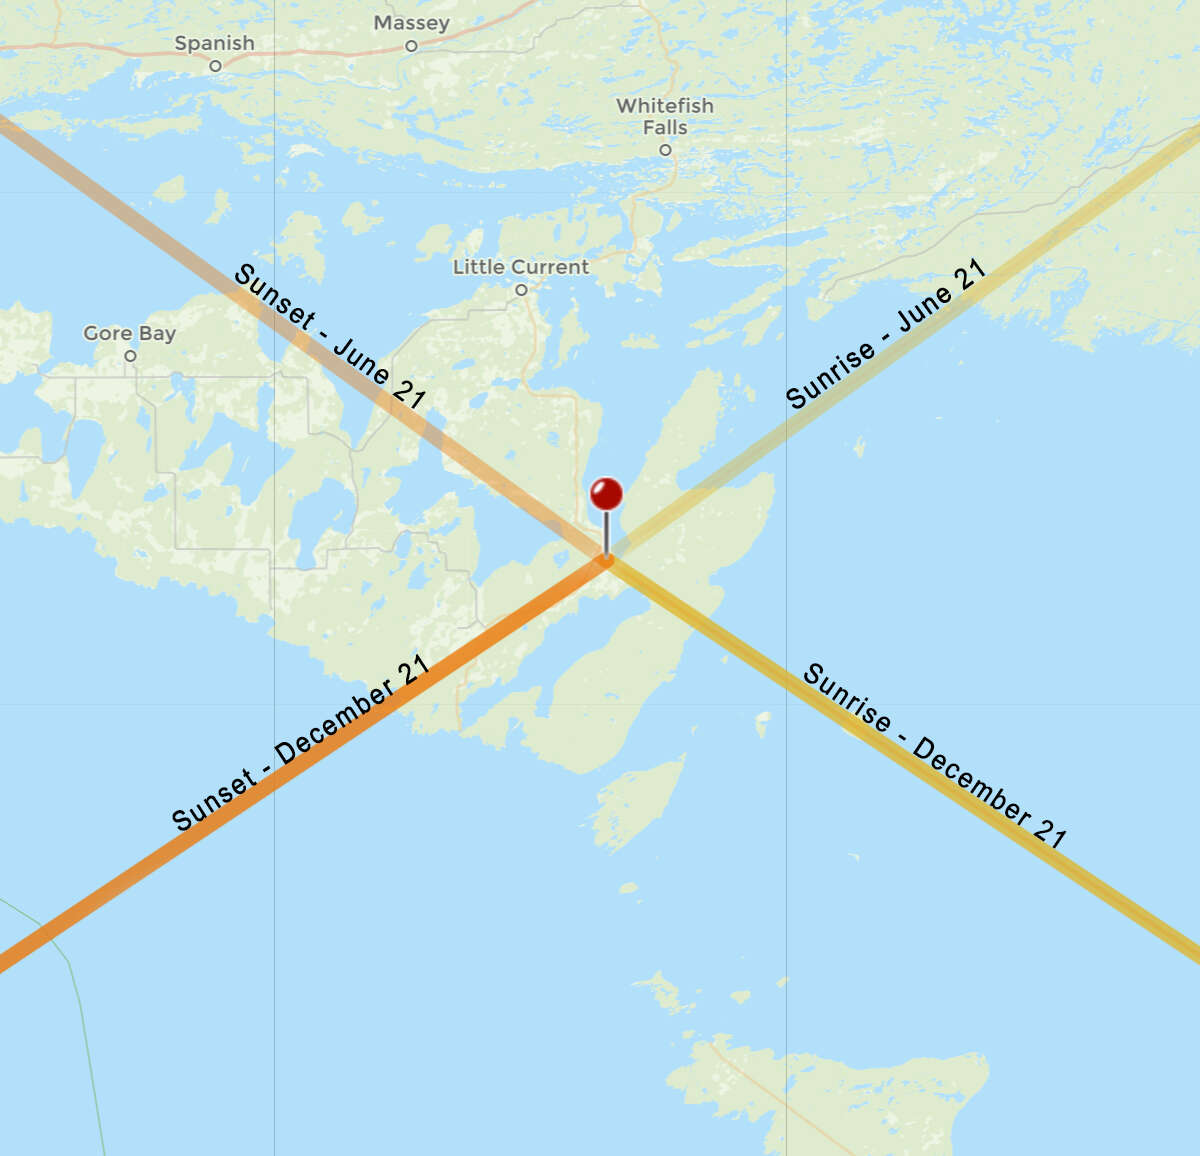
Where is the sun?
If you have been more of a summertime photographer you may not be aware of just how far south the sun has migrated when winter arrives especially if you live in the mid-latitudes. Knowing exactly where the sun will set can make a big difference to your overall composition. An app like PhotoPills or a website like The Photographer’s Ephemeris can help in planning your next sunrise or sunset photoshoot.
Get Comfortable
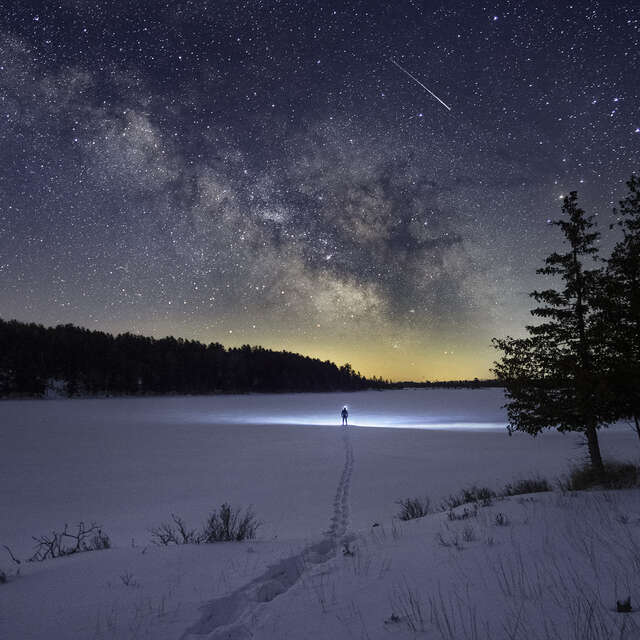
Nothing will stop your winter photo session sooner than being uncomfortable. Dress for the conditions. Chances are you will be standing around for at least an hour so put on more layers than you might typically do for a winter hike. The biggest challenge is keeping your hands warm. Winter photography gloves may be fine when the temperature is hovering around the freezing mark, but will do nothing to keep your hands toasty in sub-freezing temperatures. I usually use heavily insulated gloves that are rated to -30C. Yes, they are rather clumsy to operate the camera with, but I have discovered that taking them off for a few seconds to change settings is better than thinner gloves that won’t keep your hands warm for the duration of your shooting session. I also carry a few chemical hand warmers in my camera bag. I rarely use them, but they are a good backup for your hands or feet. For many of my winter excursions I also wear additional traction on my feet (Yaktrax are my cleat of choice). The increased security on slippery surfaces has allowed me to get shots that I otherwise wouldn’t have attempted.
Planning in Practice
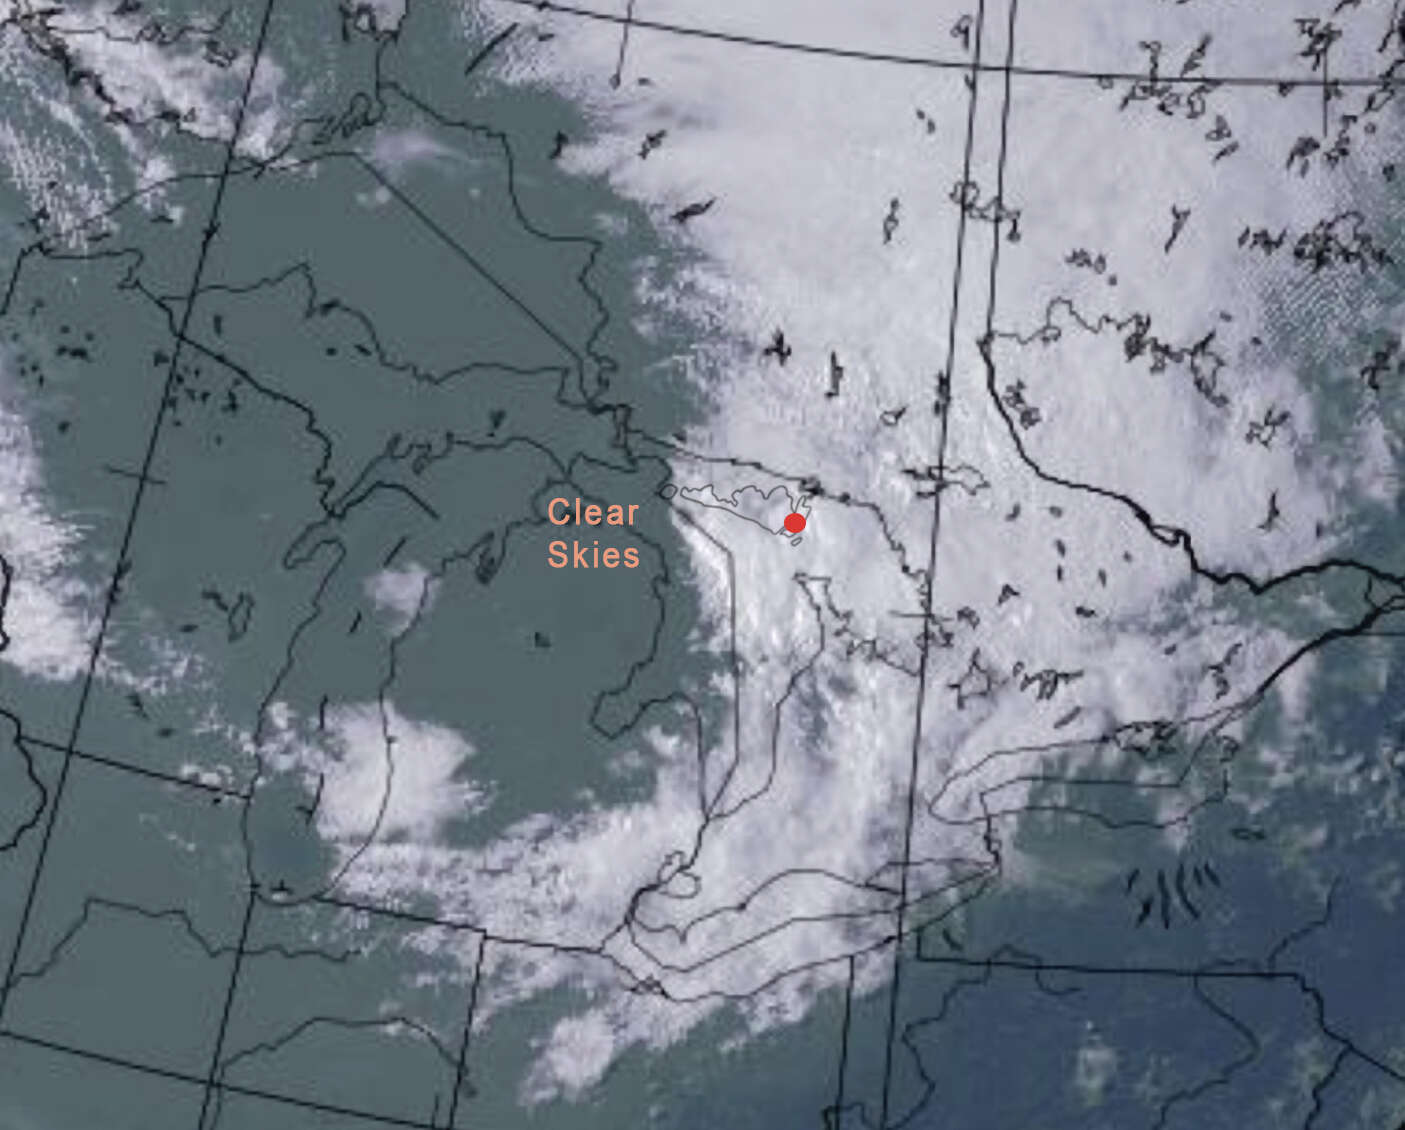
One afternoon in March I was in the mood to do some shooting, but the skies were completely overcast. Rather than giving up on the possibility, I fired up my computer and checked the local satellite image. Sure enough, I was nestled under a thick blanket of clouds. But what I couldn’t see out the window were the clear skies to the west. I knew that as the sun set it would peek out from below this blanket and light up the underside of the cloud layer. I then checked Photographer’s Ephemeris to see where the sun would set. I chose a promising location, hopped in my vehicle for the 45-minute drive, and arrived in time to test out some possible compositions. Planning made all the difference to getting a shot that I was happy with.
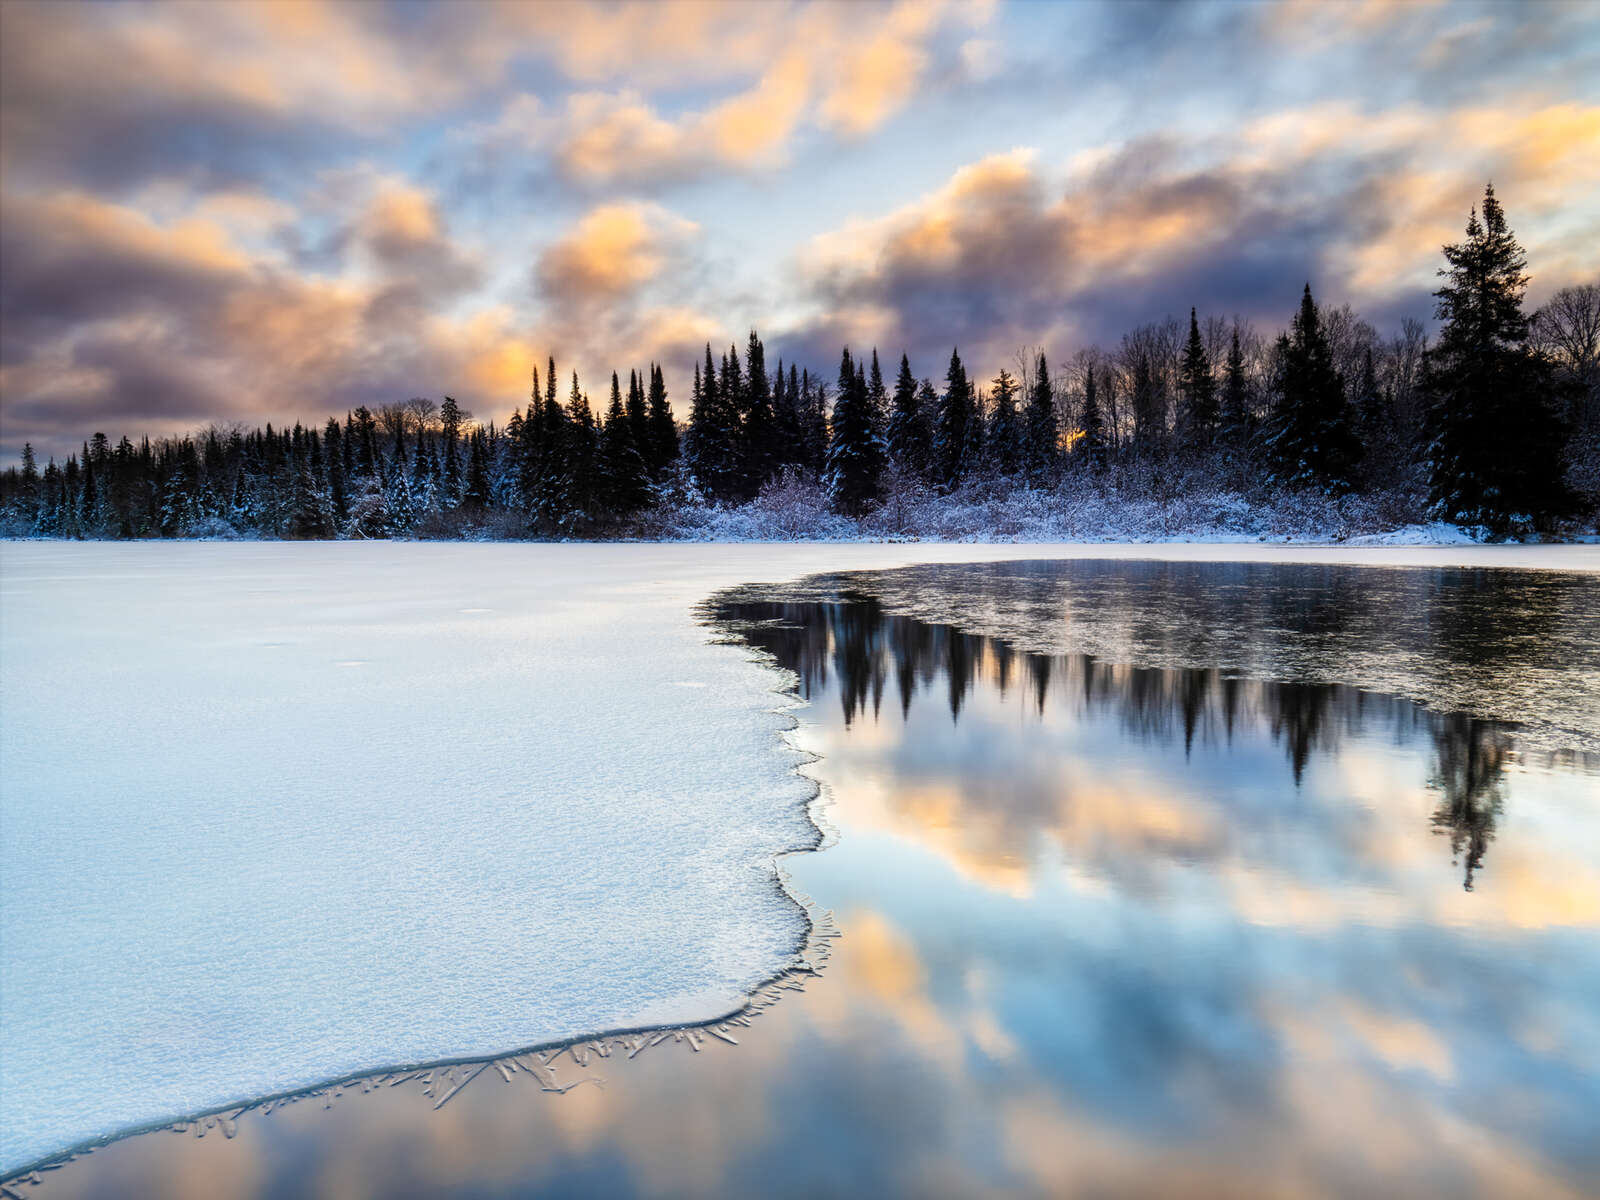
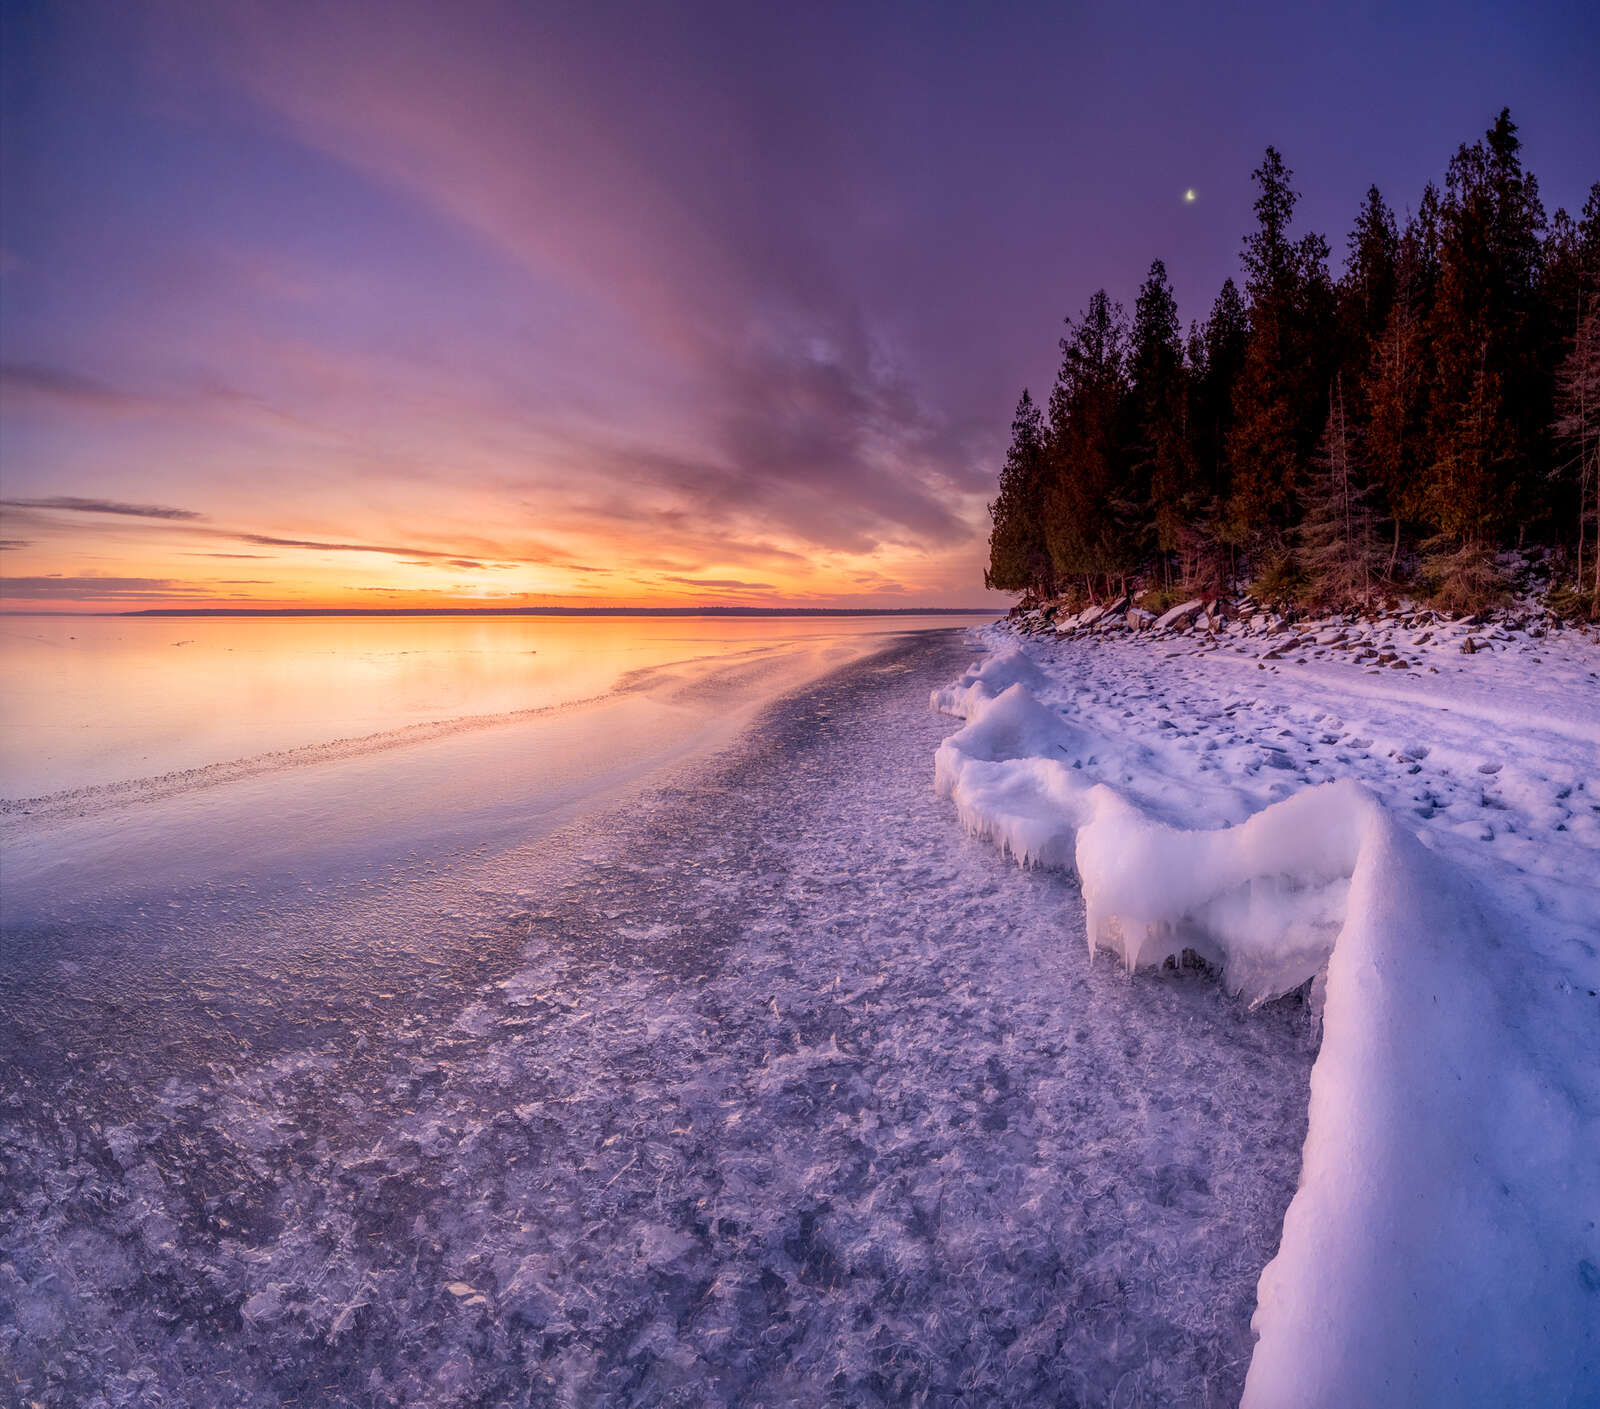
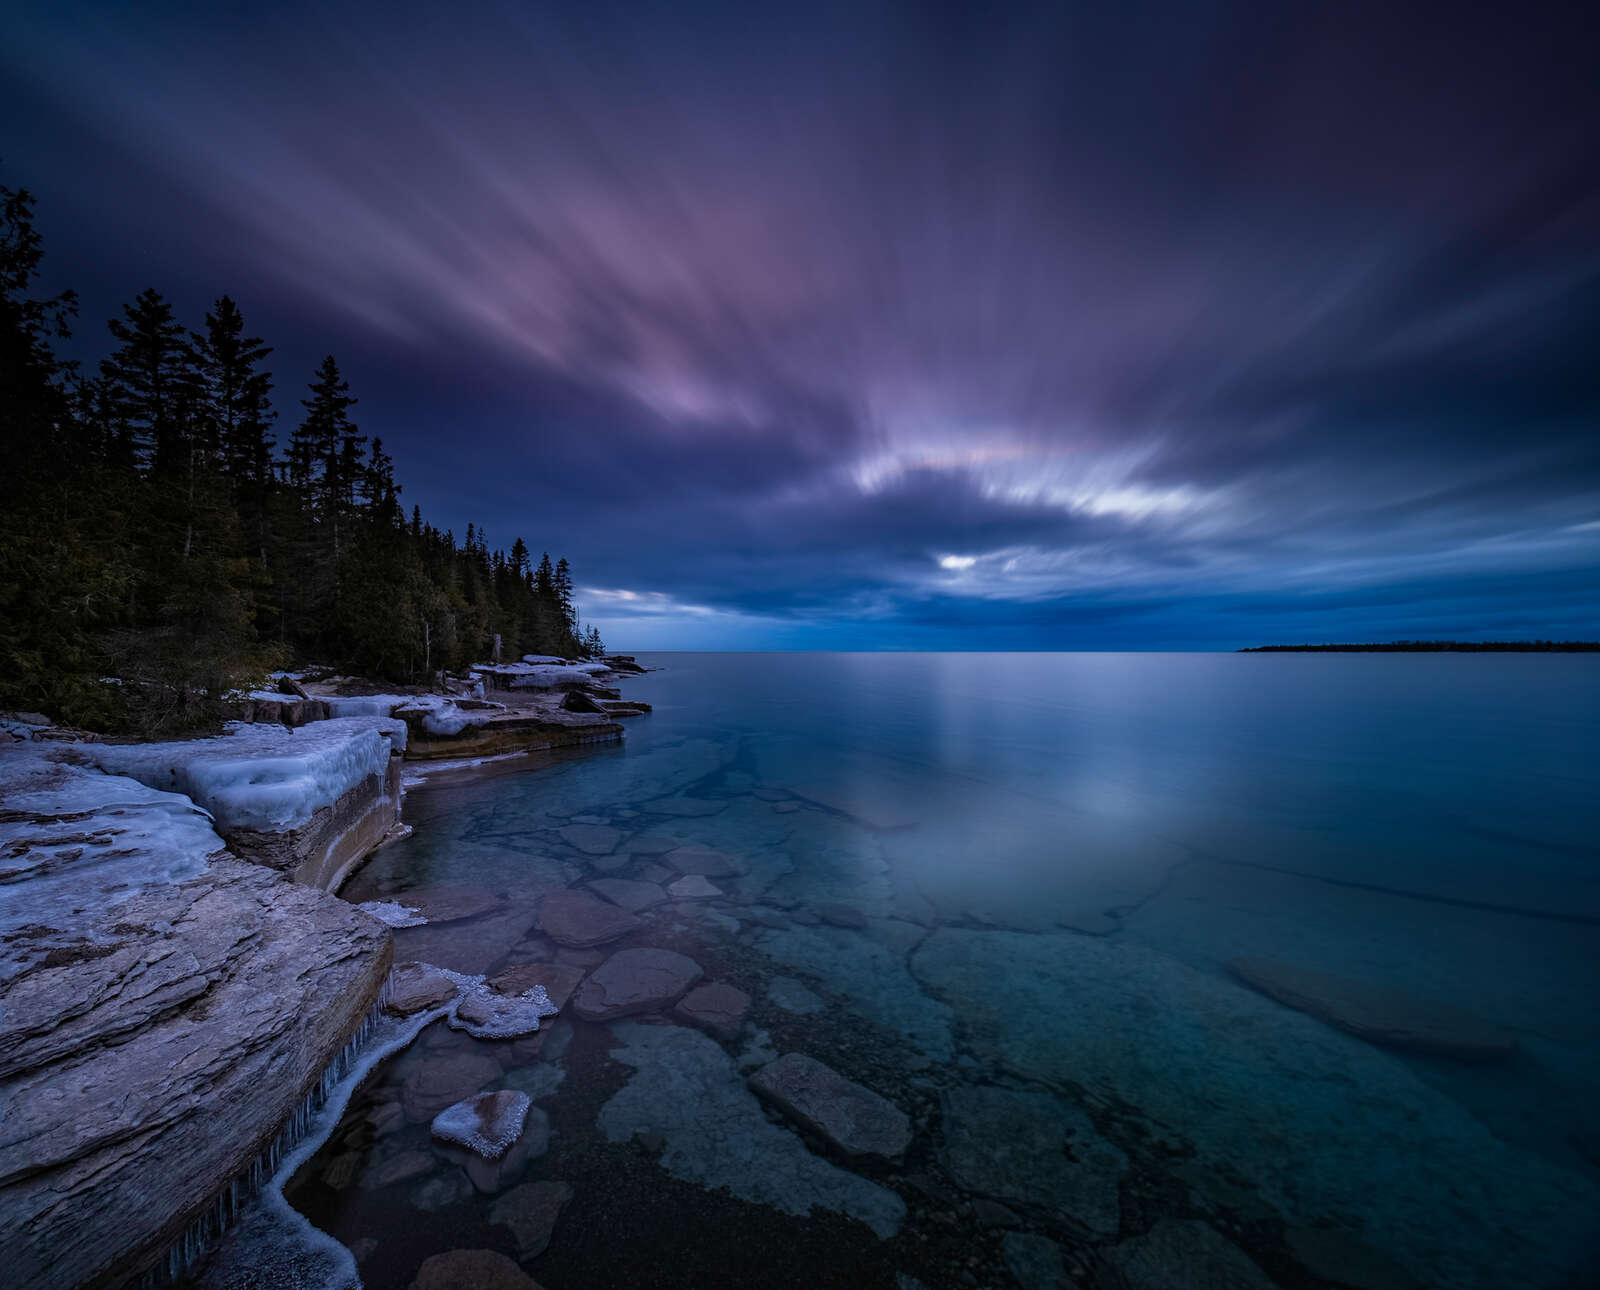
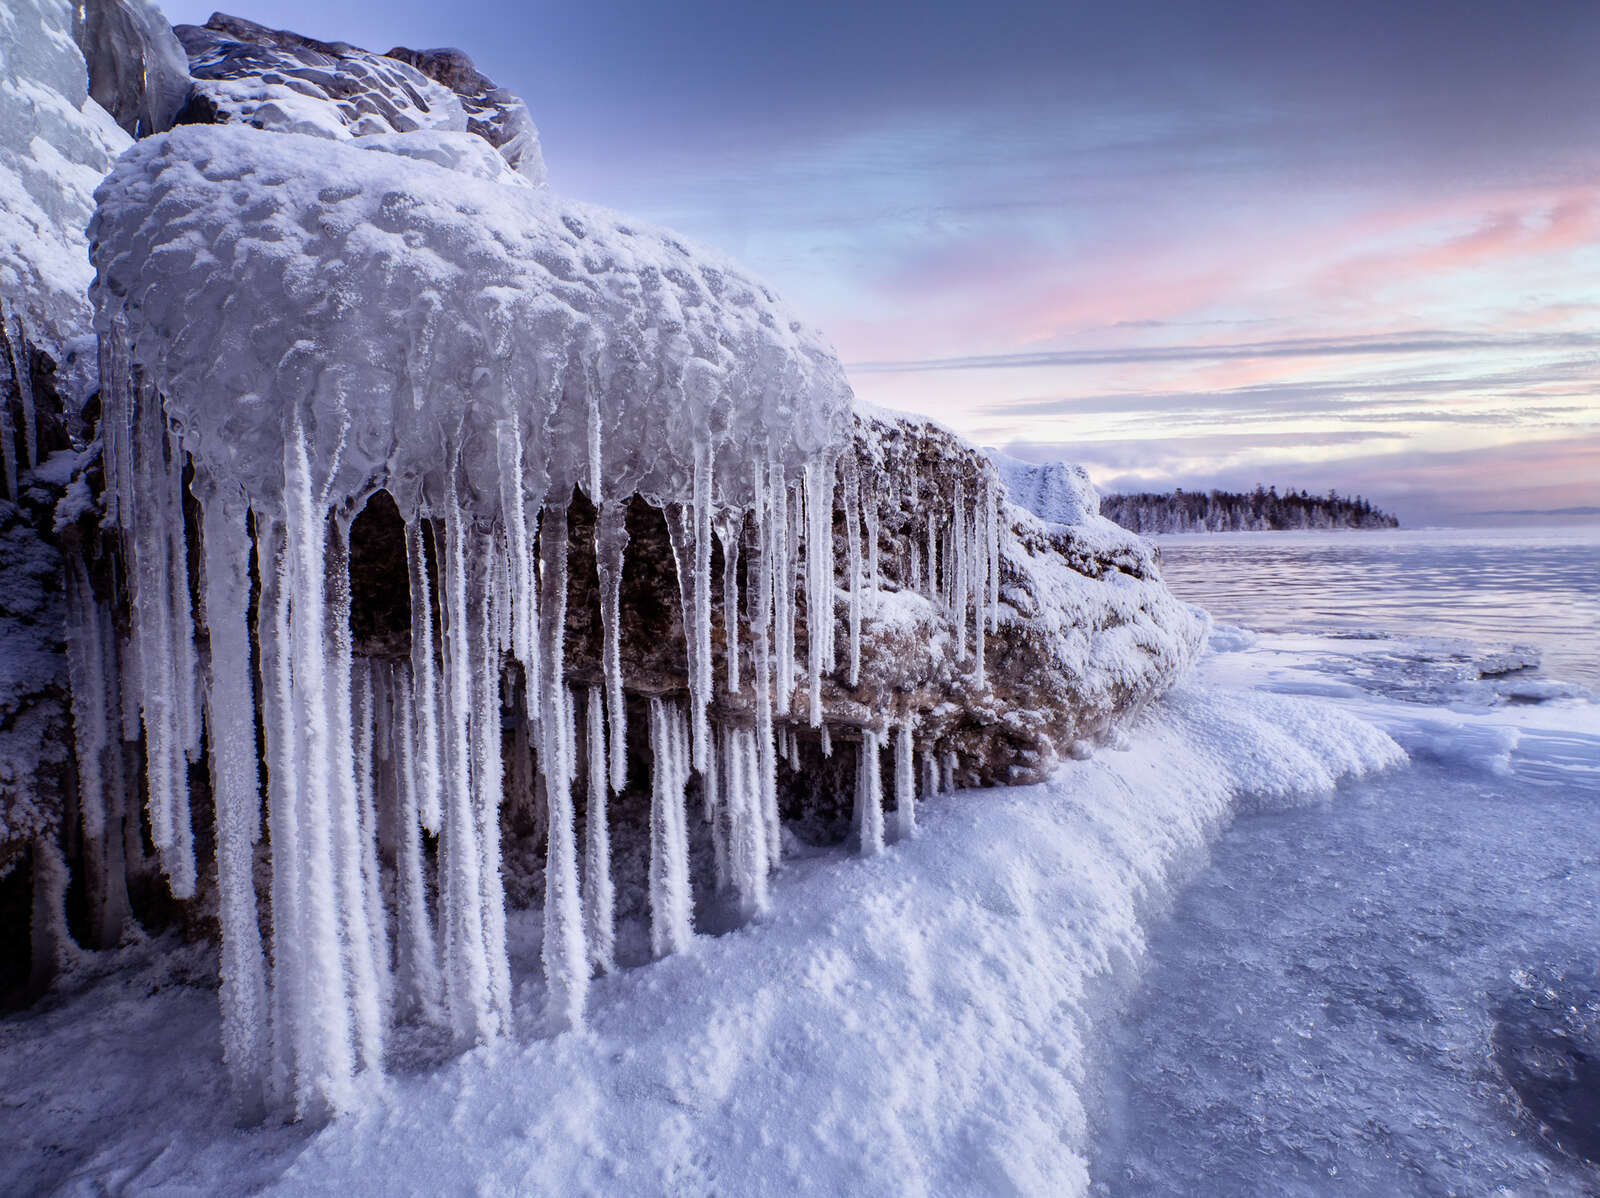
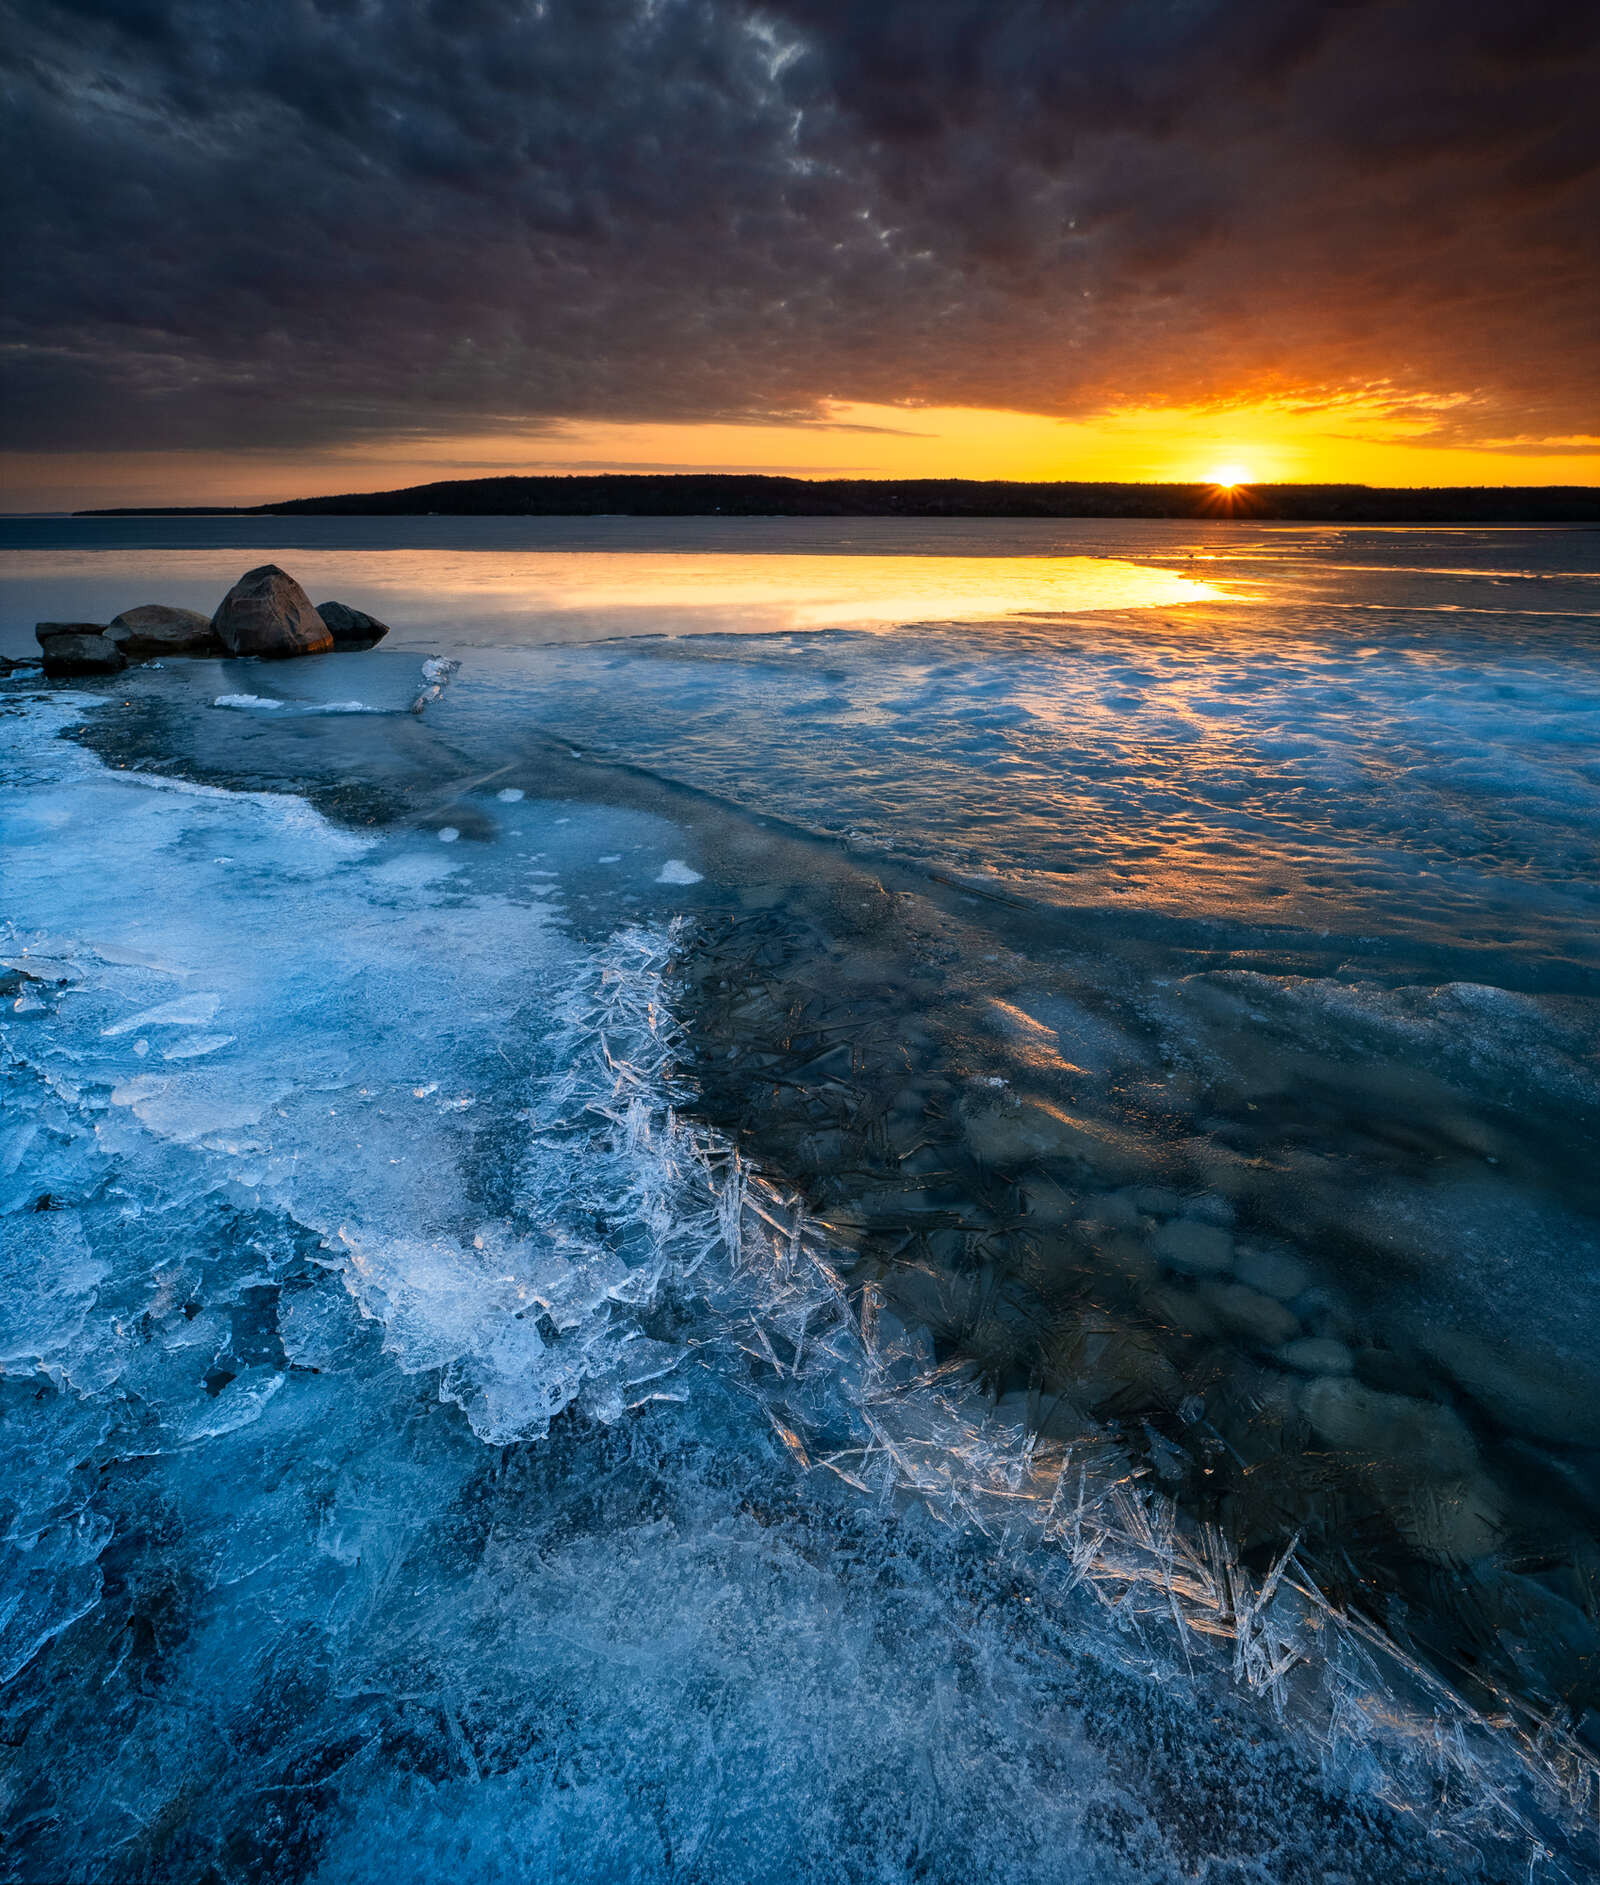
Icy shorelines can make for some great foreground subjects and can change dramatically over the course of the winter.
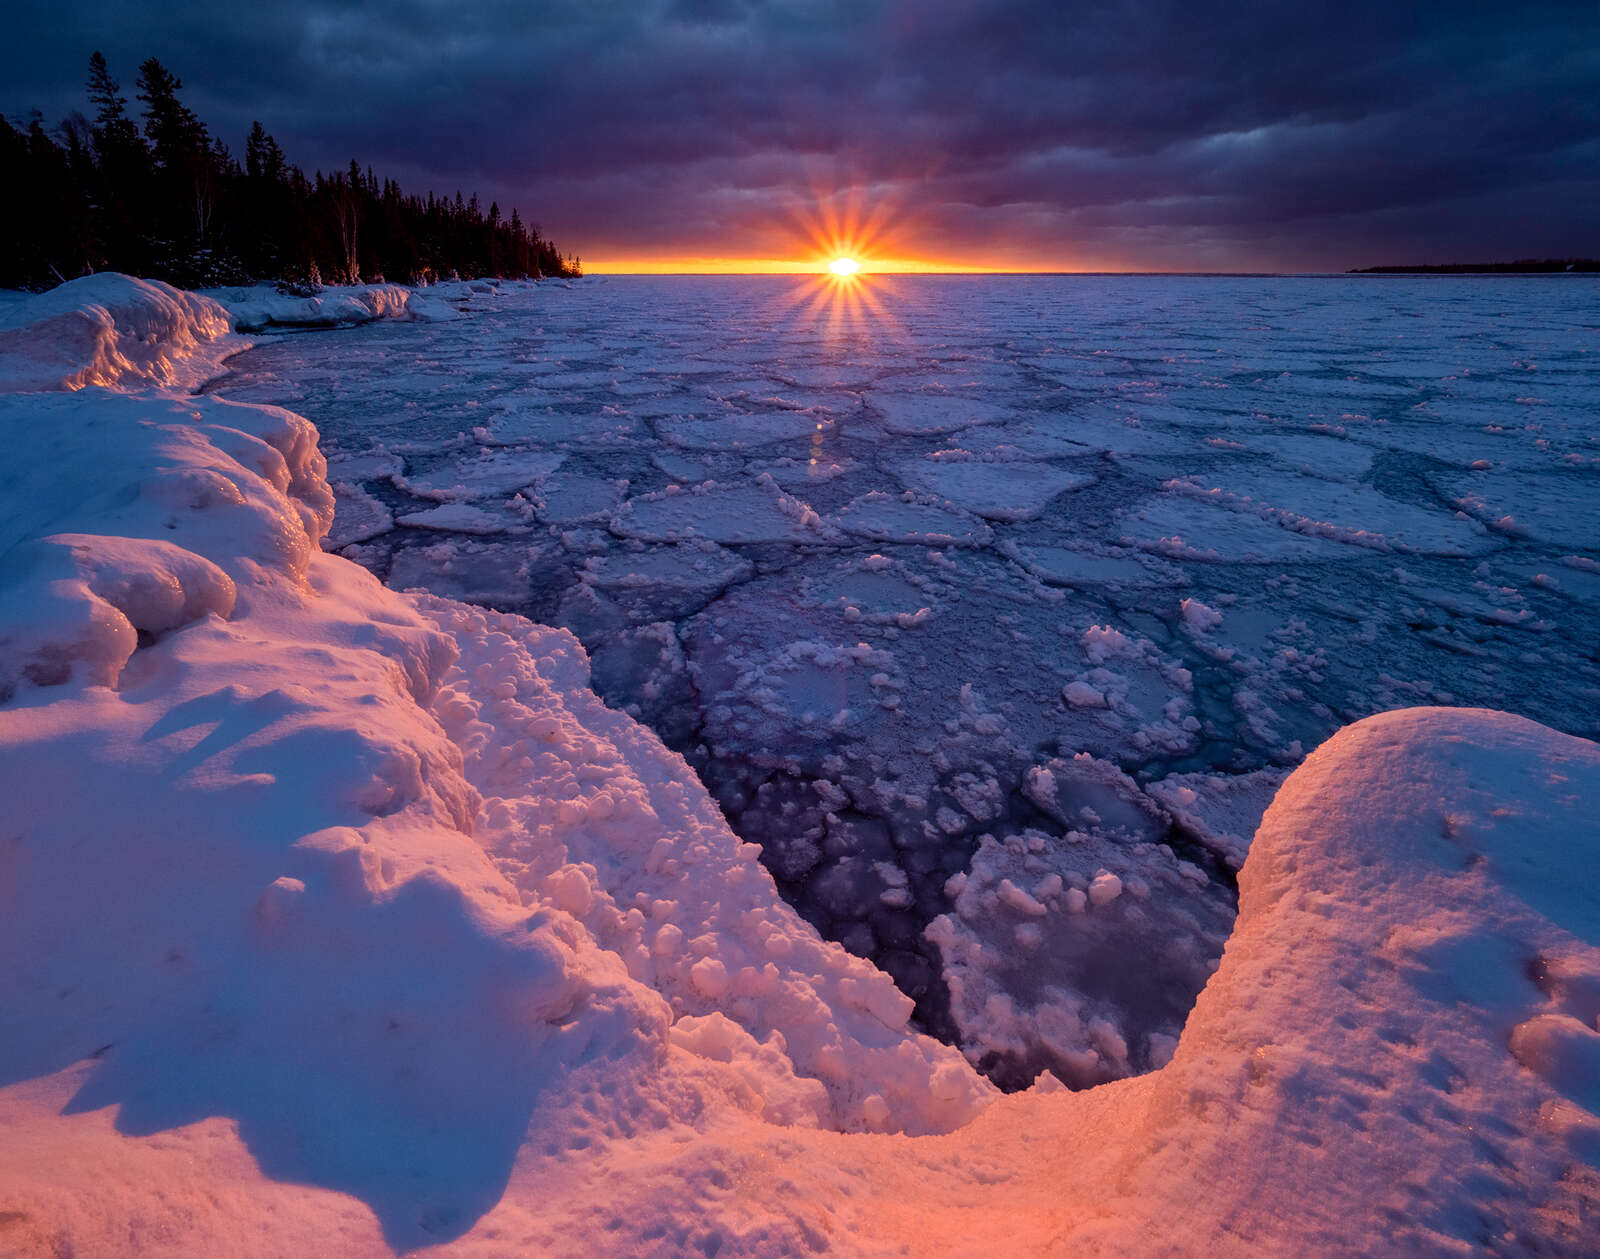
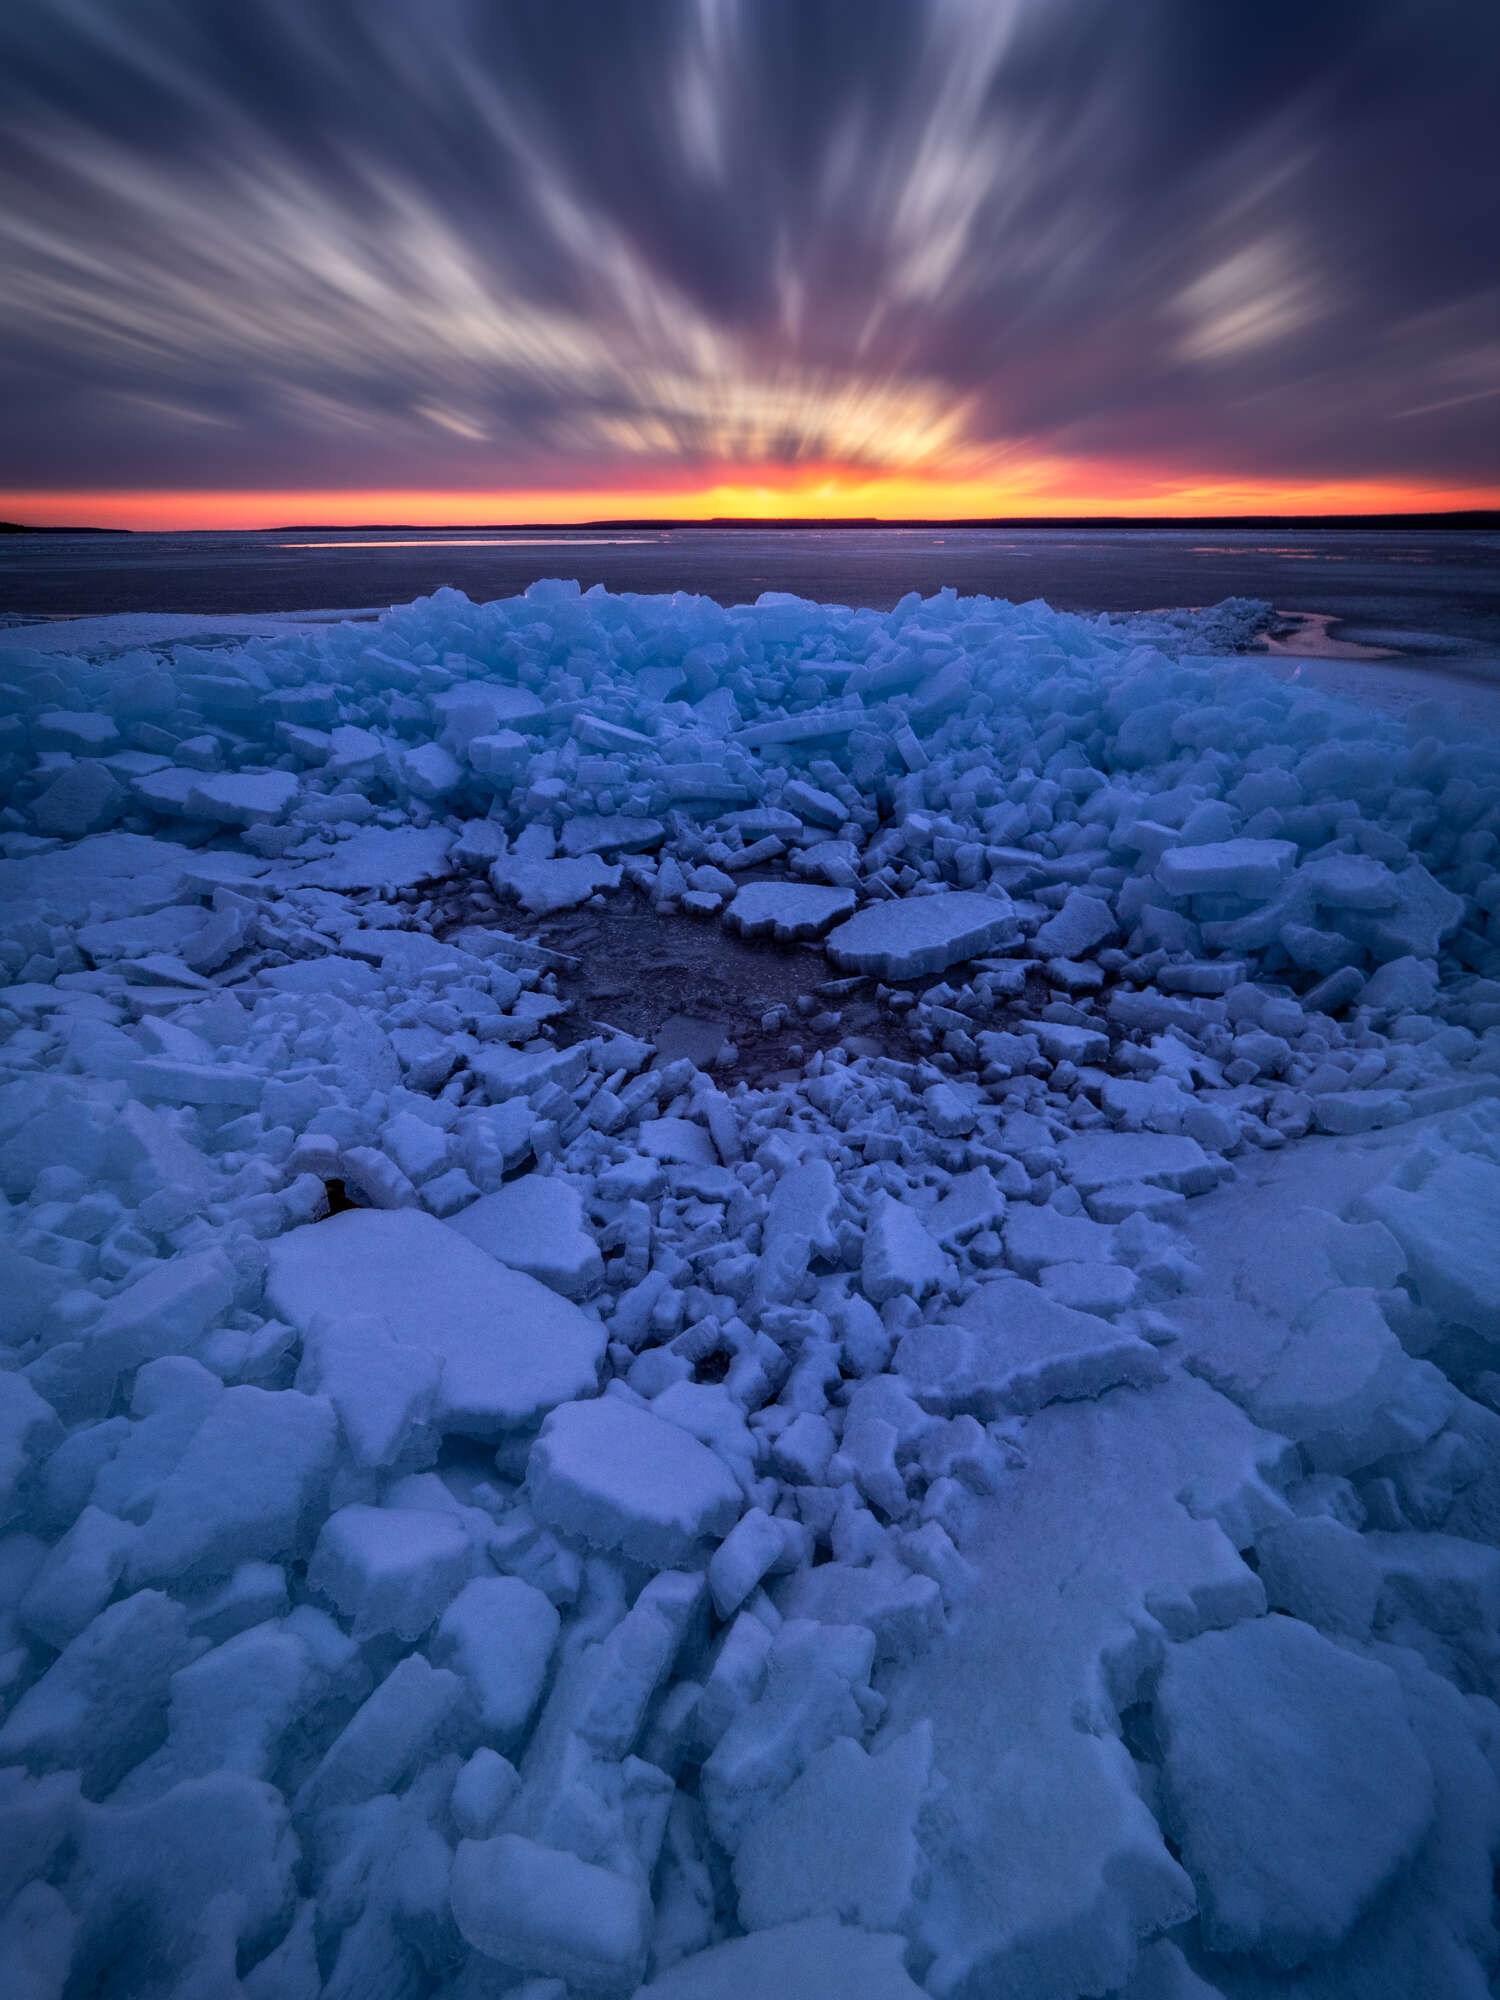
This scene only lasted a few minutes before the sun settled below the horizon, but the time and effort that went into creating this shot was definitely worth it.
Controlling the Light
Shooting at sunrise or sunset can make getting the proper exposure difficult. Try these tips:
- The Sun at your Back – A snow-covered landscape will force your camera to underexpose the image as it tries to capture the scene at ‘middle grey’. This can lead to dull, grey scenes. If the sun is behind you, use exposure compensation to lighten the scene. Bumping up the exposure by +0.7 to +1.0 EV is usually ample.
- Shooting into the Sun – Whether the sun is still in view or has dipped below the horizon, the sky will be considerably brighter than the foreground. To balance the exposure between the sky and foreground use a good quality graduated neutral density (GND) filter. It’s like adding sunglasses to the top of the frame that darkens the sky and lightens the foreground. For the locations that I shoot in I typically use a 4-stop hard filter.
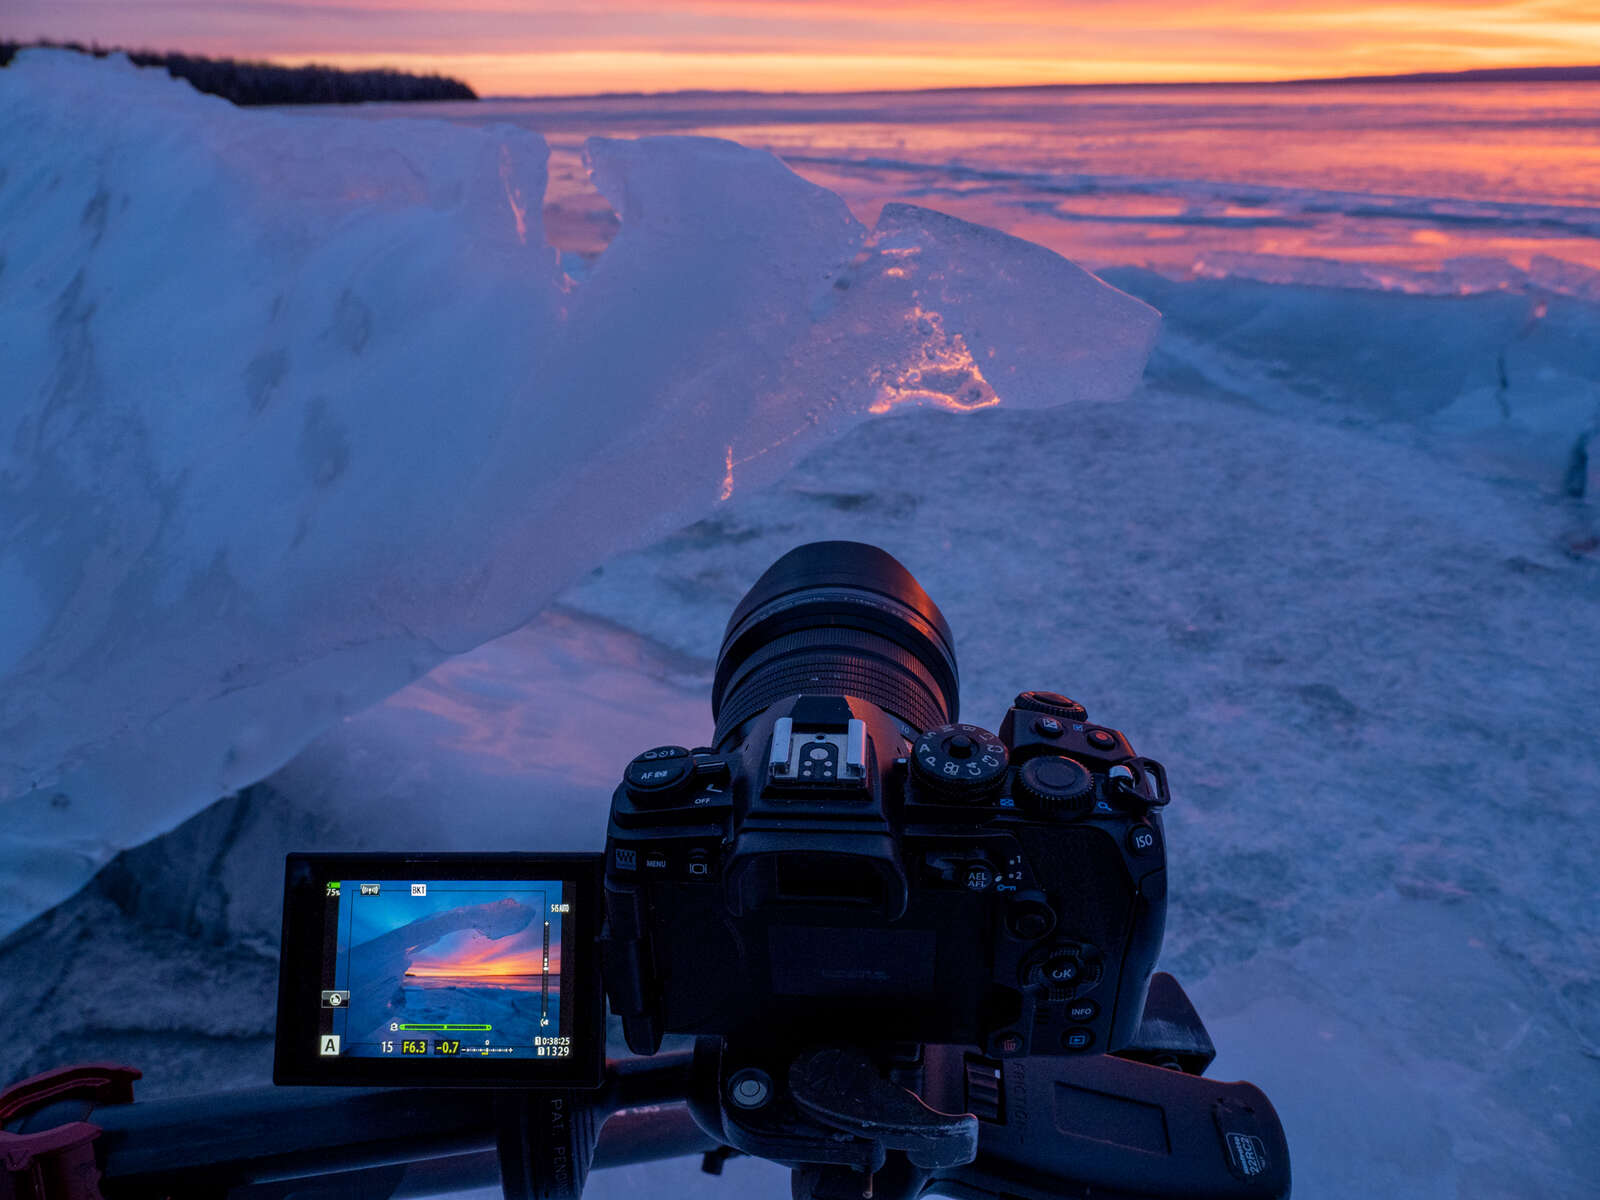
- Bracket your Shots – If you don’t have a GND filter, or in cases where part of your subject reaches into the sky, use exposure bracketing. Since you will have to blend a series of images it is best to use a tripod when bracketing. This will ensure that your shots remain nicely aligned. You can bracket manually by changing the EV between shots or use one of the automated settings in the menu. I usually use the camera’s HDR feature under the Camera 2 menu. My go to is the 3f 2.0EV setting. With one press of the shutter release I get 3 images at different exposure values. I can then use these in post to create a natural-looking HDR image.
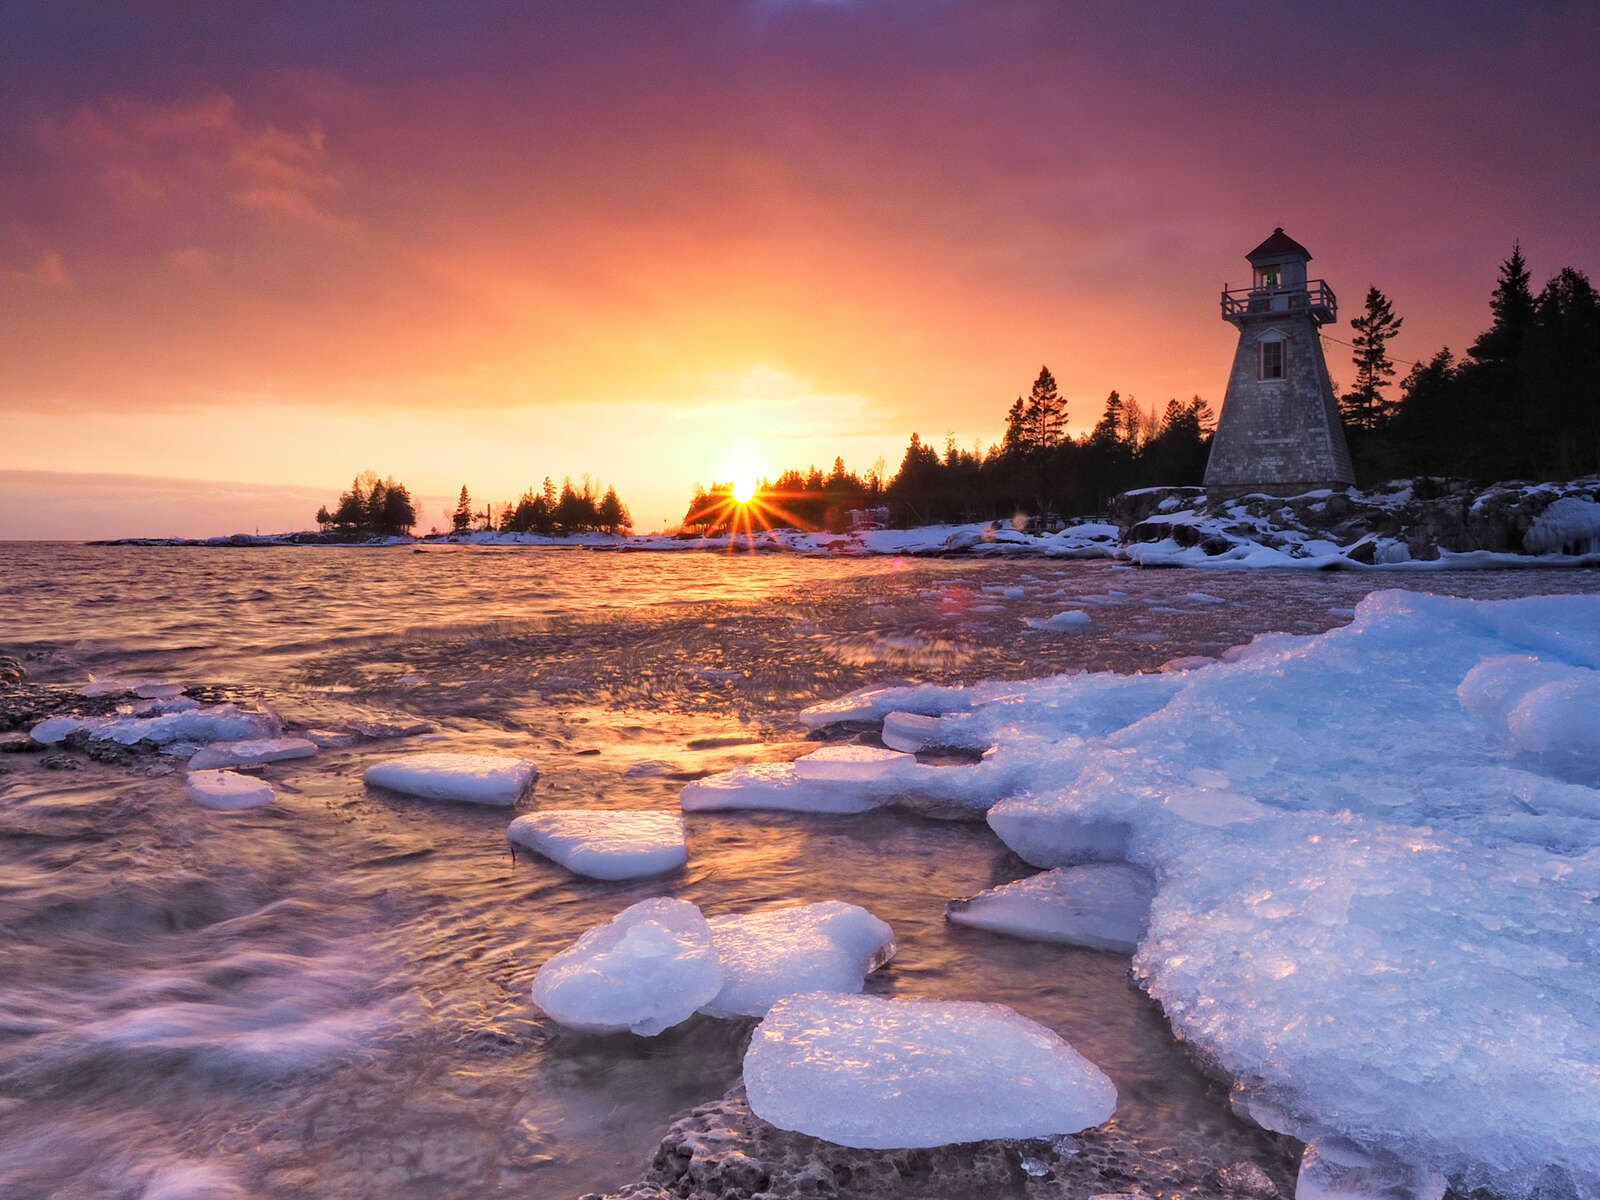
A GND filter helps balance the overall exposure between the sky and the foreground.
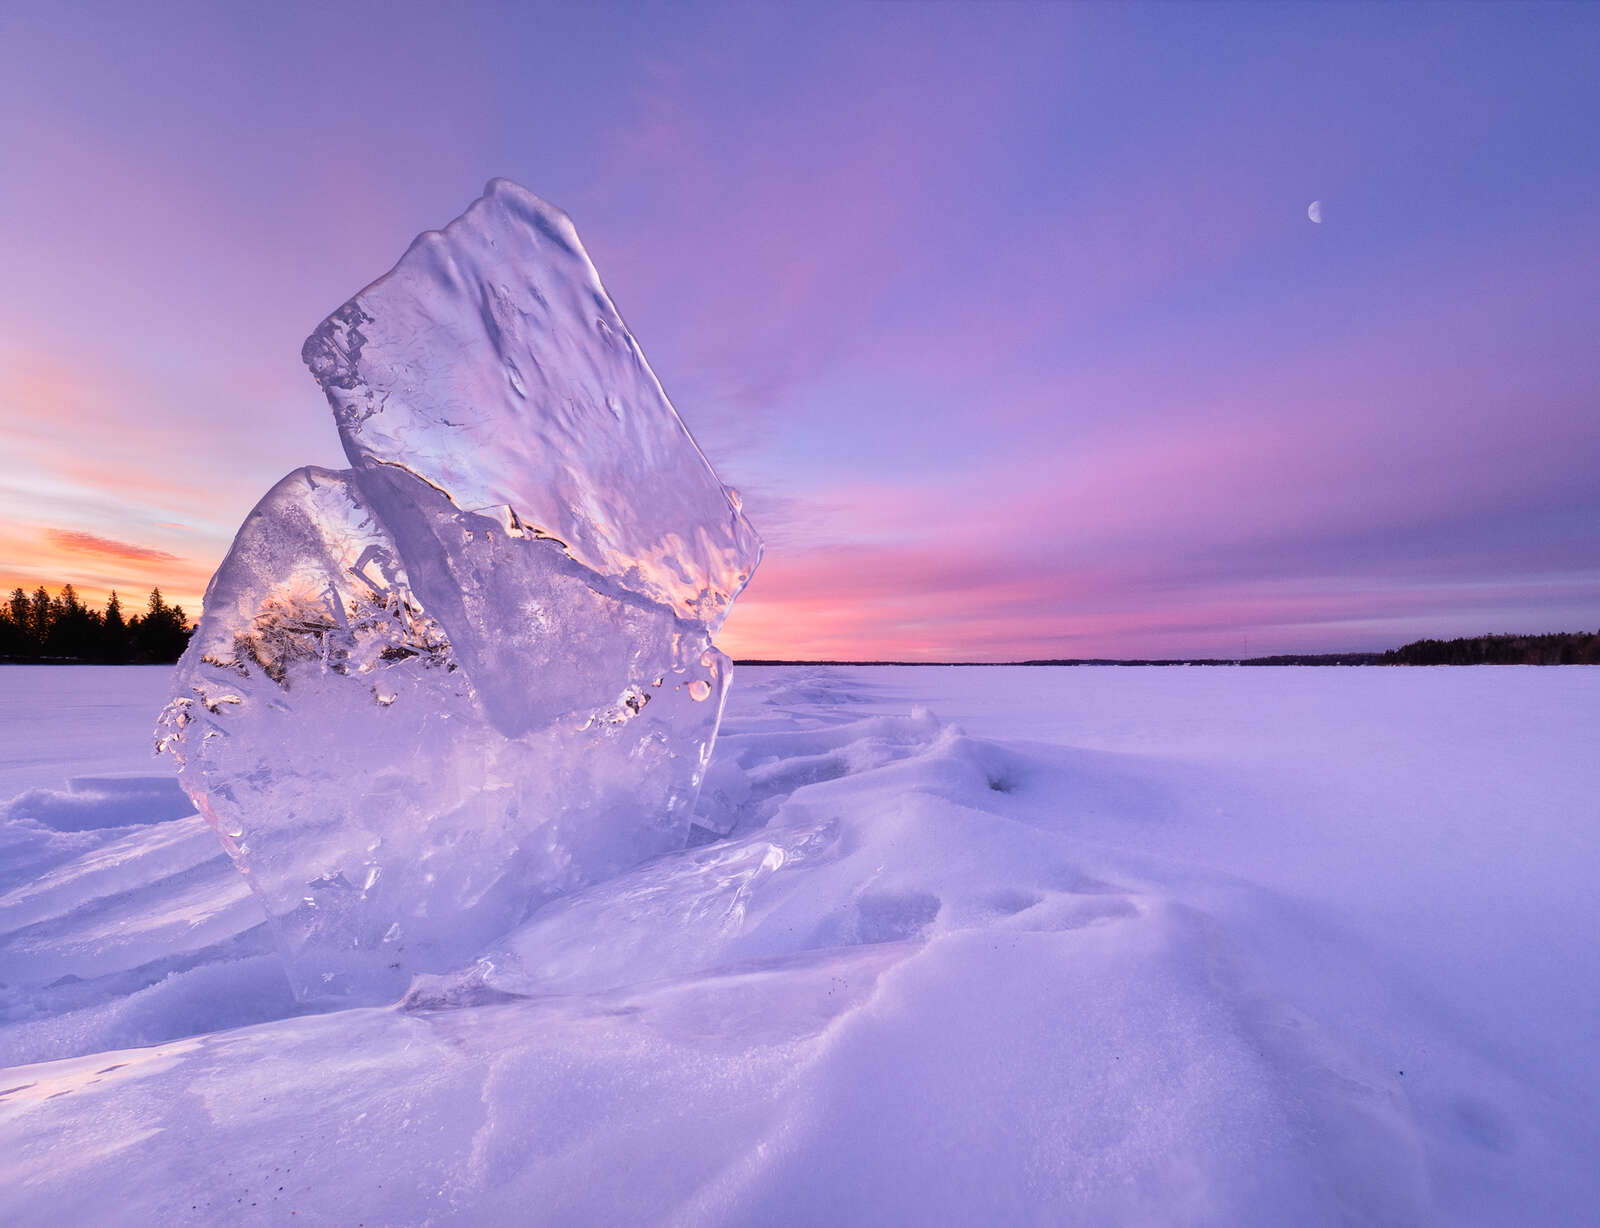
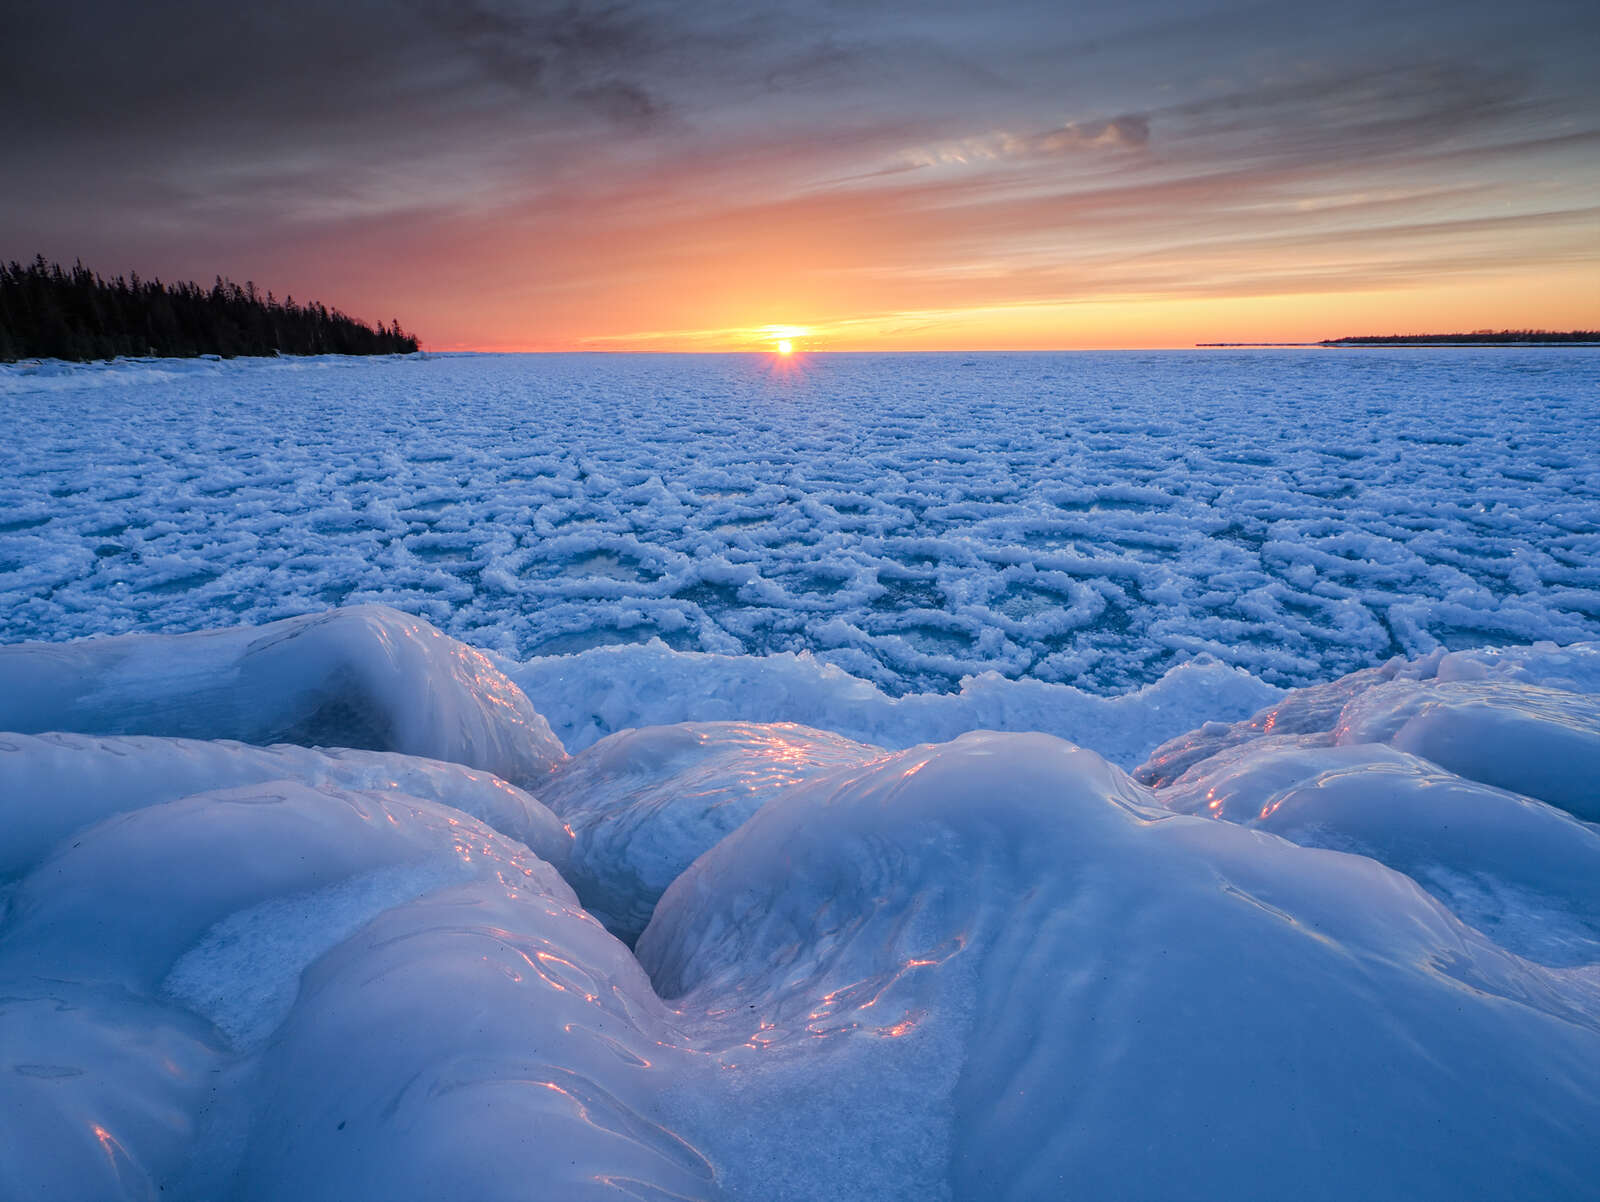
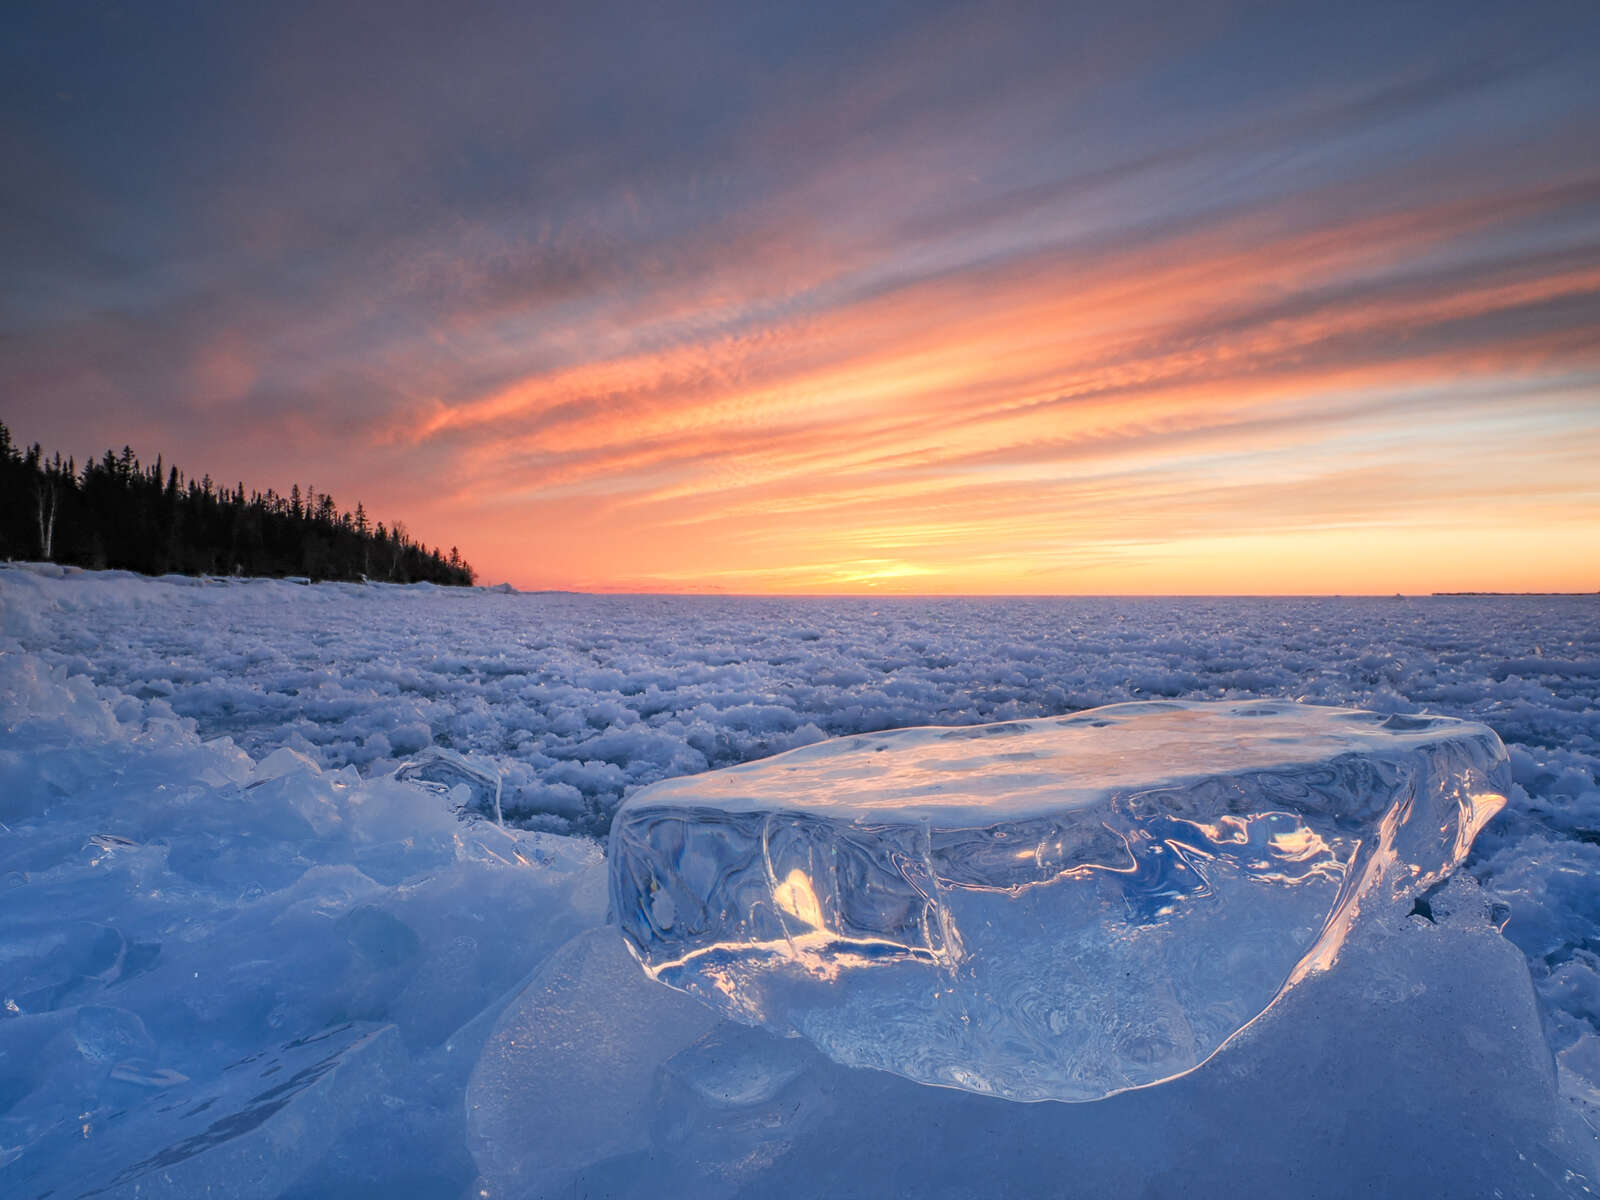
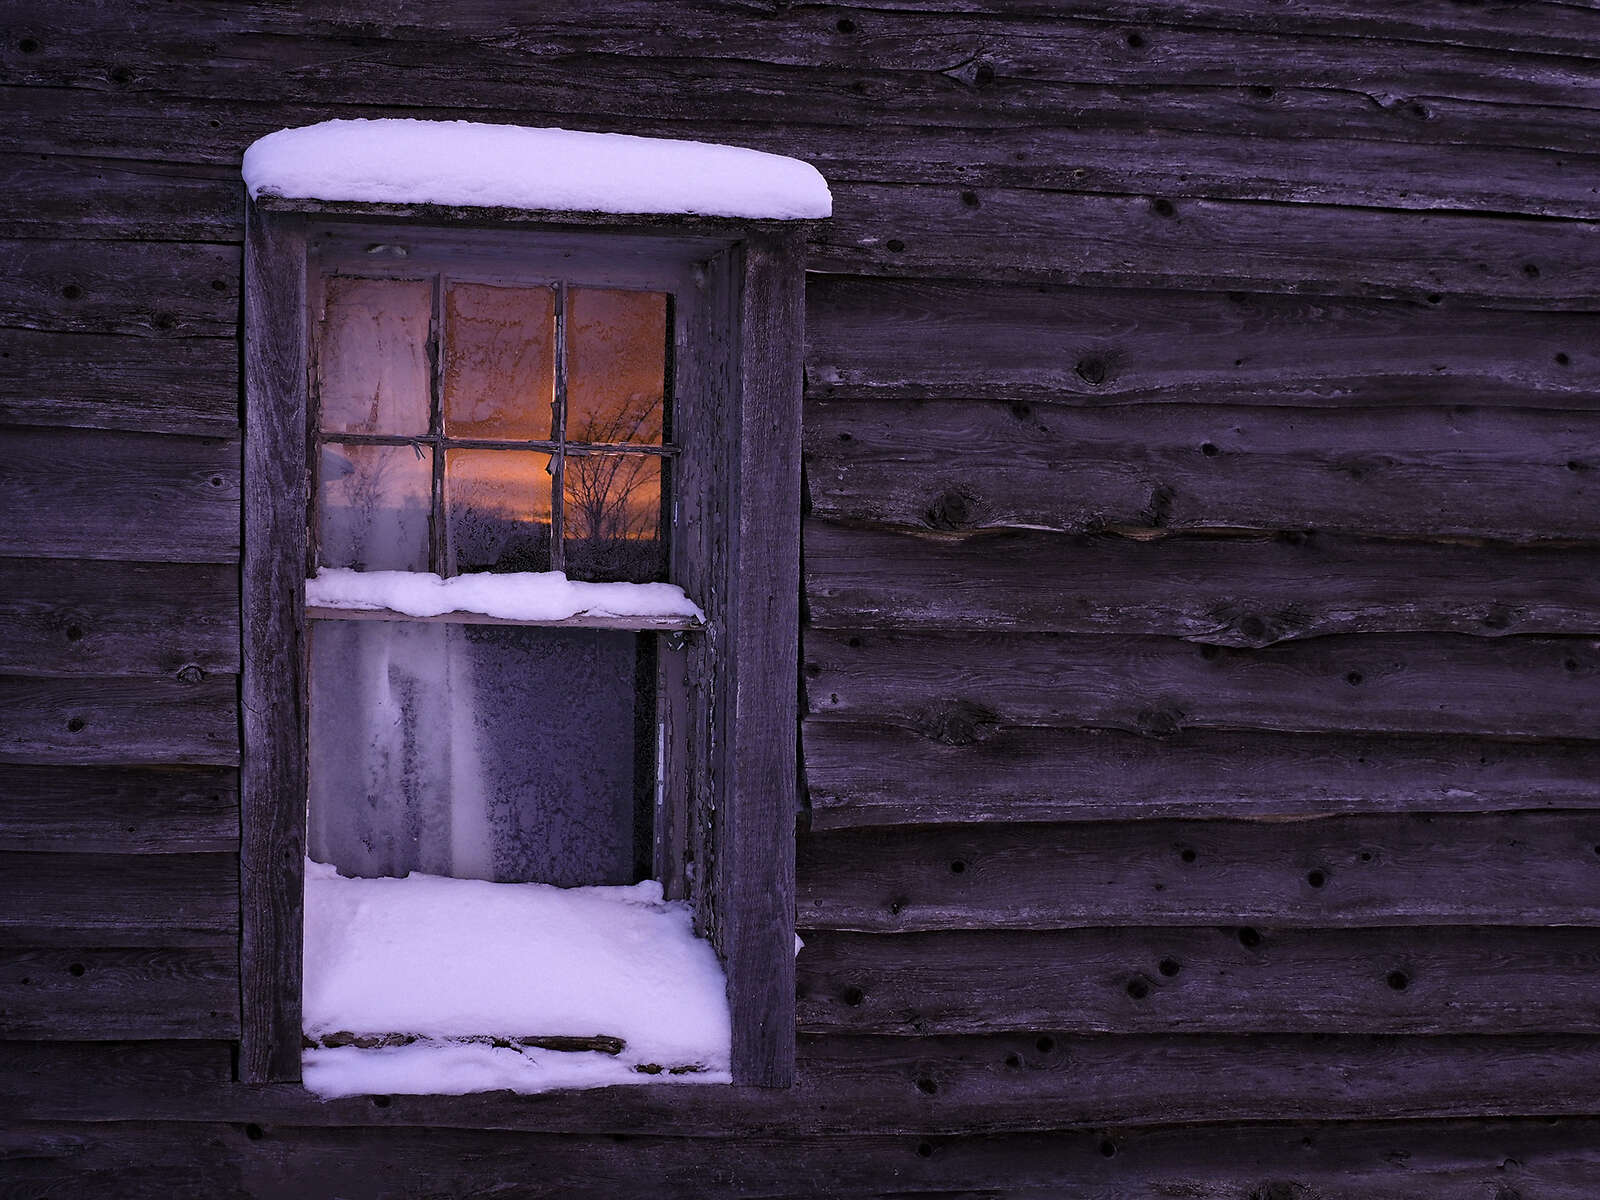
Higher clouds created some beautiful pastels, which were reflected by the blanket of snow and transmitted by the ice.
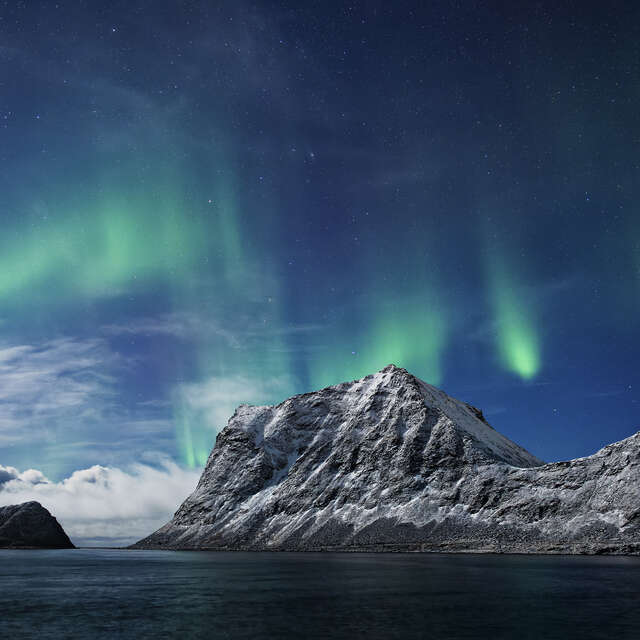
Eyeing the Ice
I love ice (unless it is coating the roadways). Its translucent quality allows it to transmit light in interesting ways. There is a magical look to ice that can’t be found with any other subject. Regardless of how large or small the ice feature is, try shooting from a variety of perspectives to see how the light behaves. Just remember that safety comes first. Before venturing out onto a frozen lake, know the ice conditions. I carry a small pair of retractable ice picks. I’ve never needed them, but it’s good to have a bit of insurance.
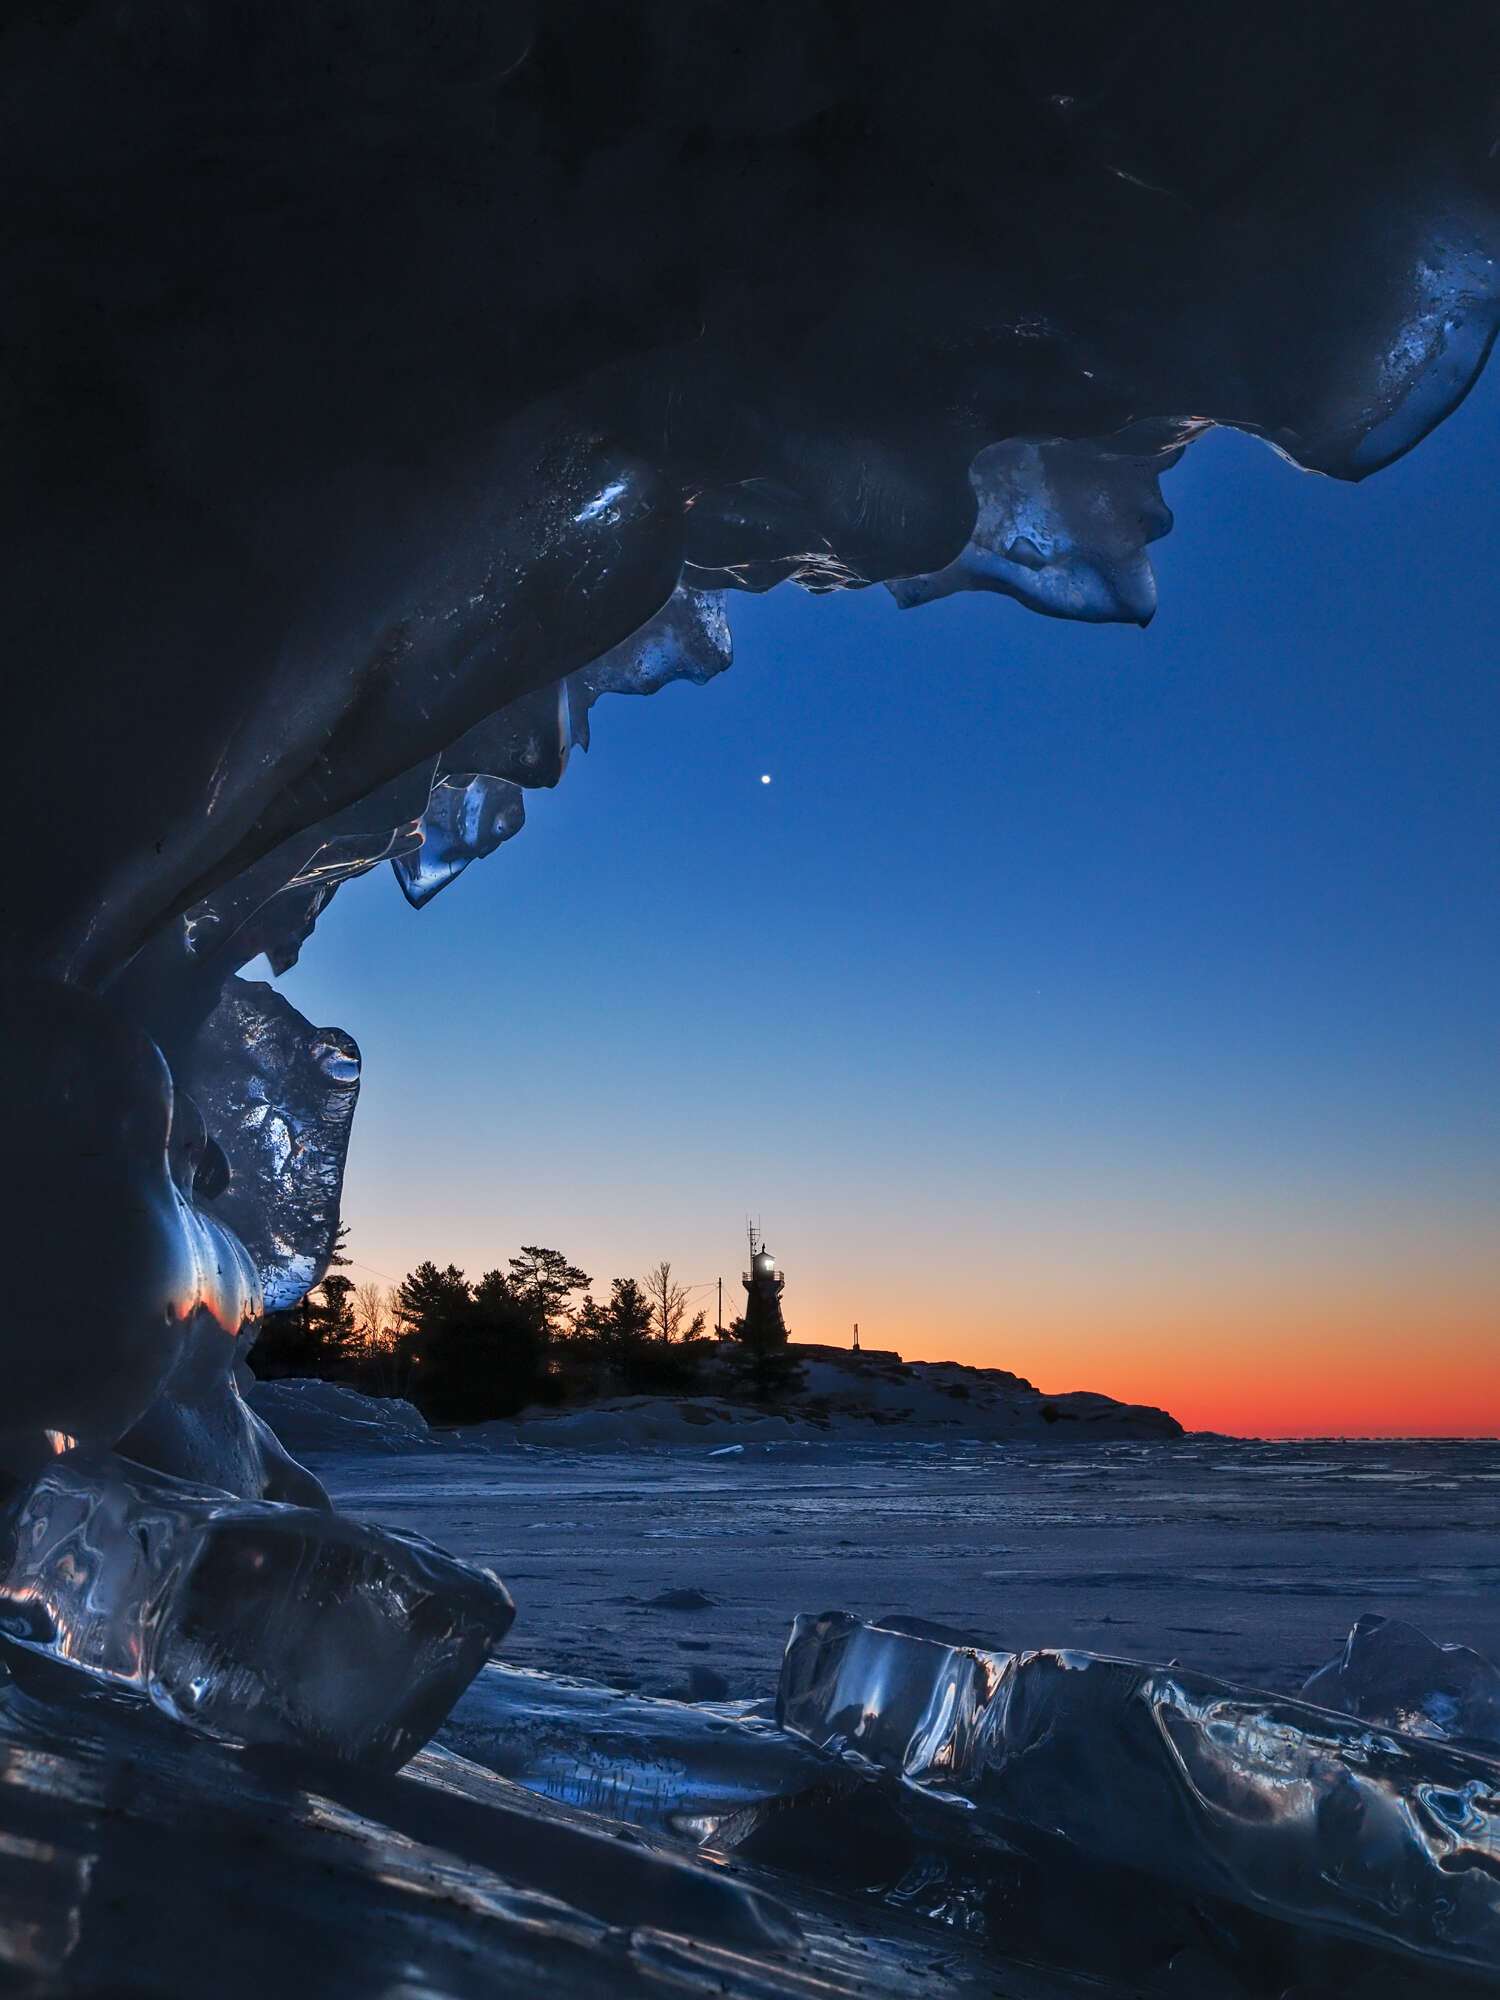
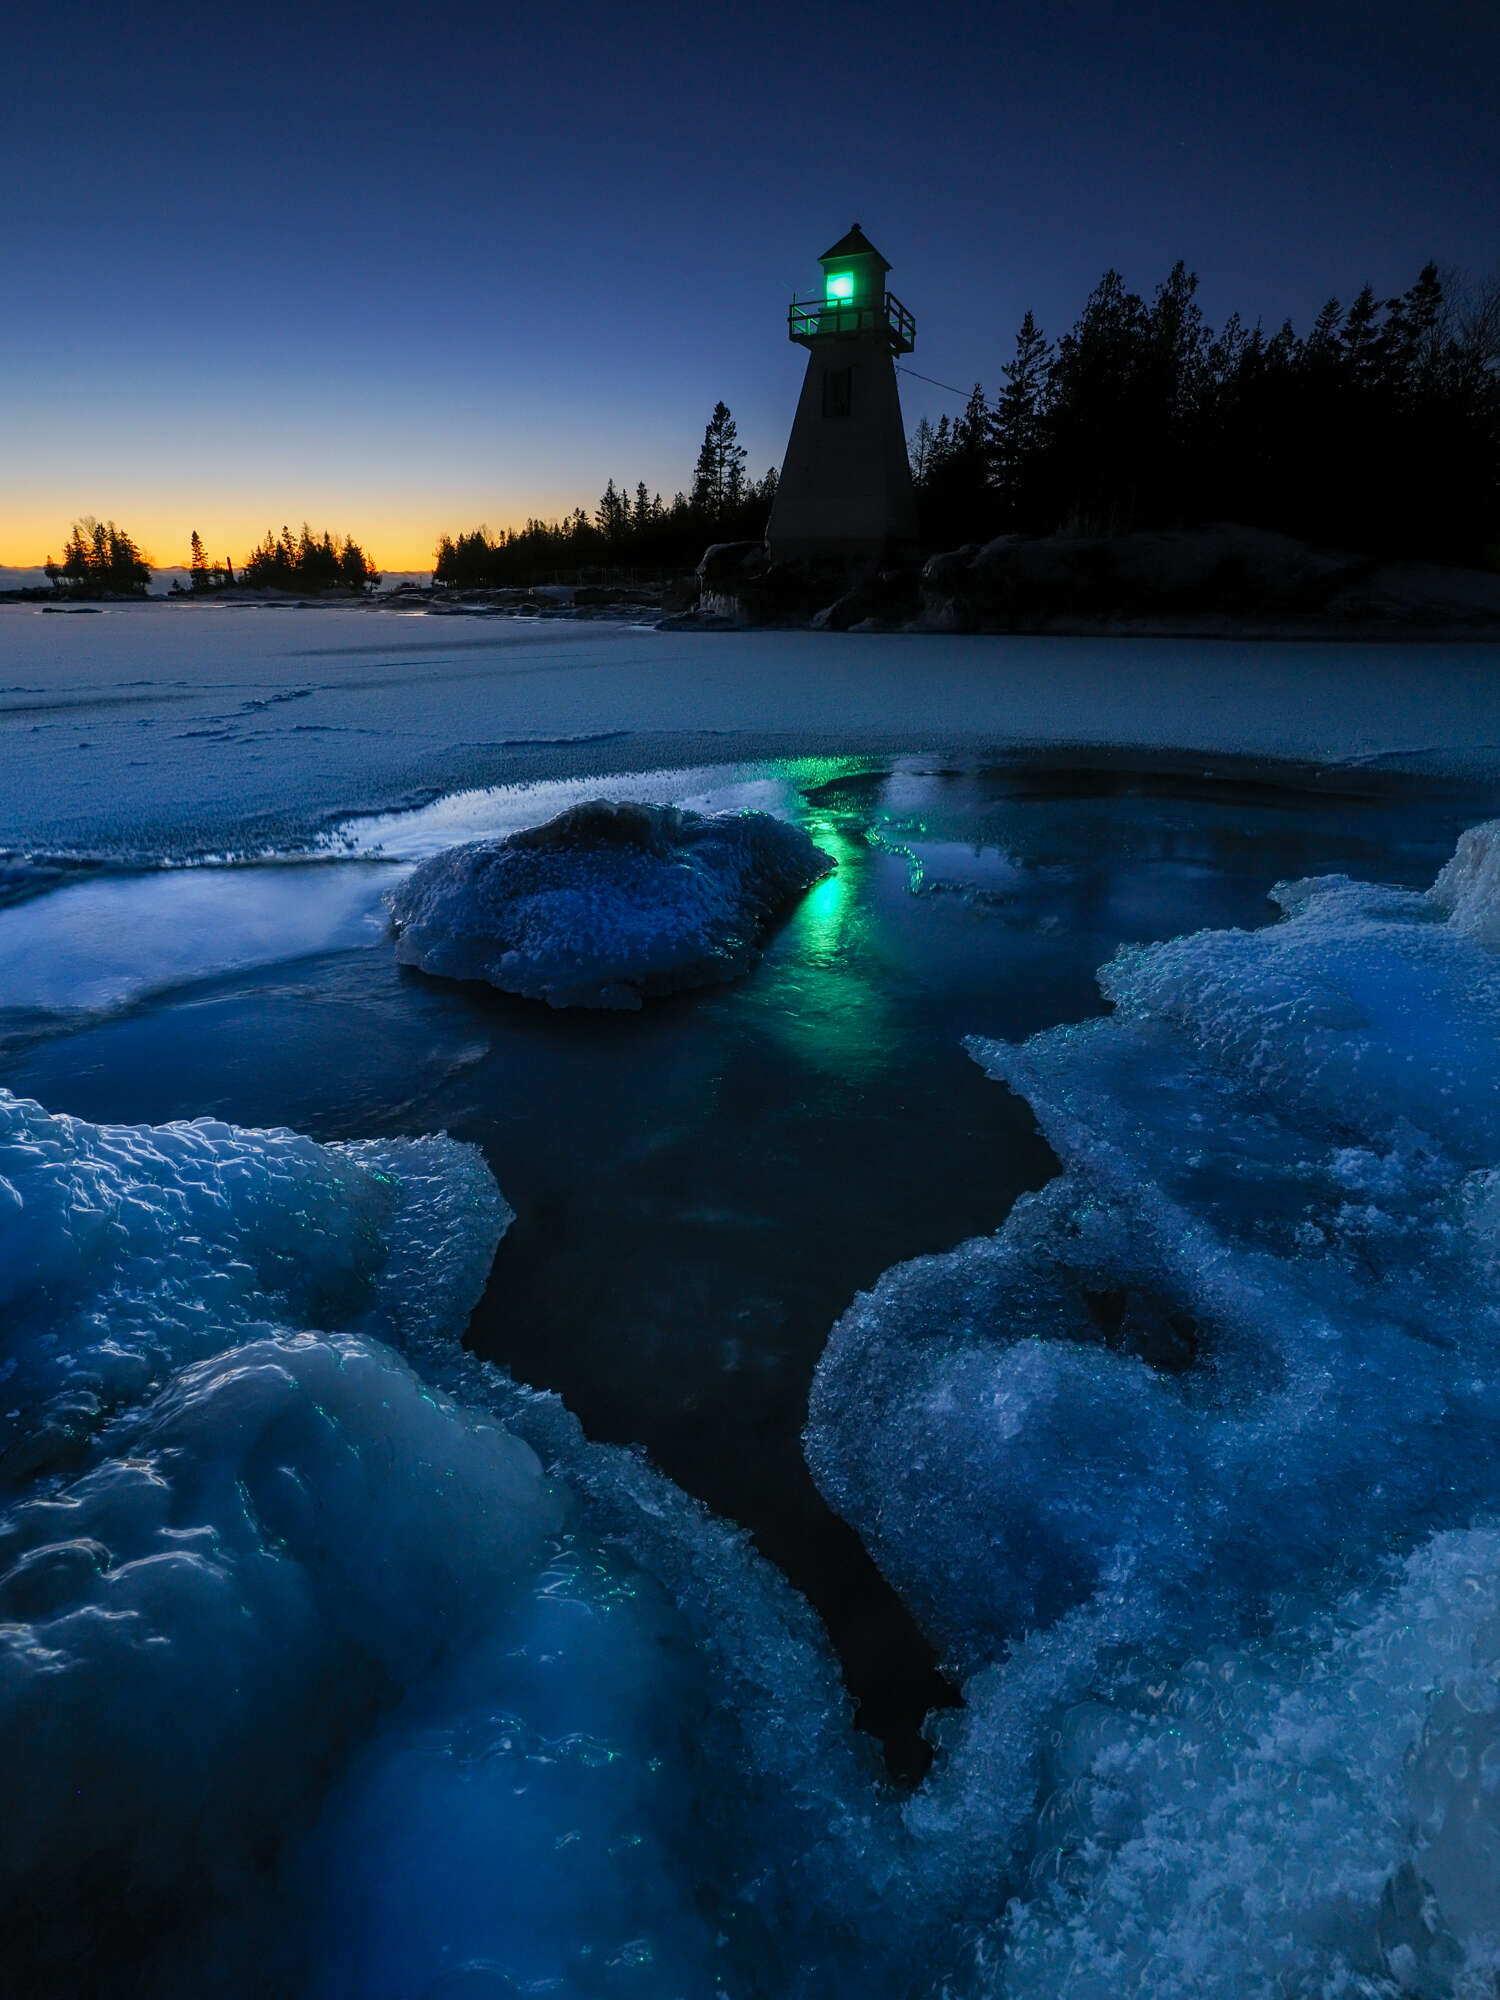
When I arrived in this location I was a bit disappointed to see a rather plain sky. In order to add some interest I opted to use a small ice feature to frame the distant lighthouse. To keep everything sharp I used the built-in focus bracketing feature.
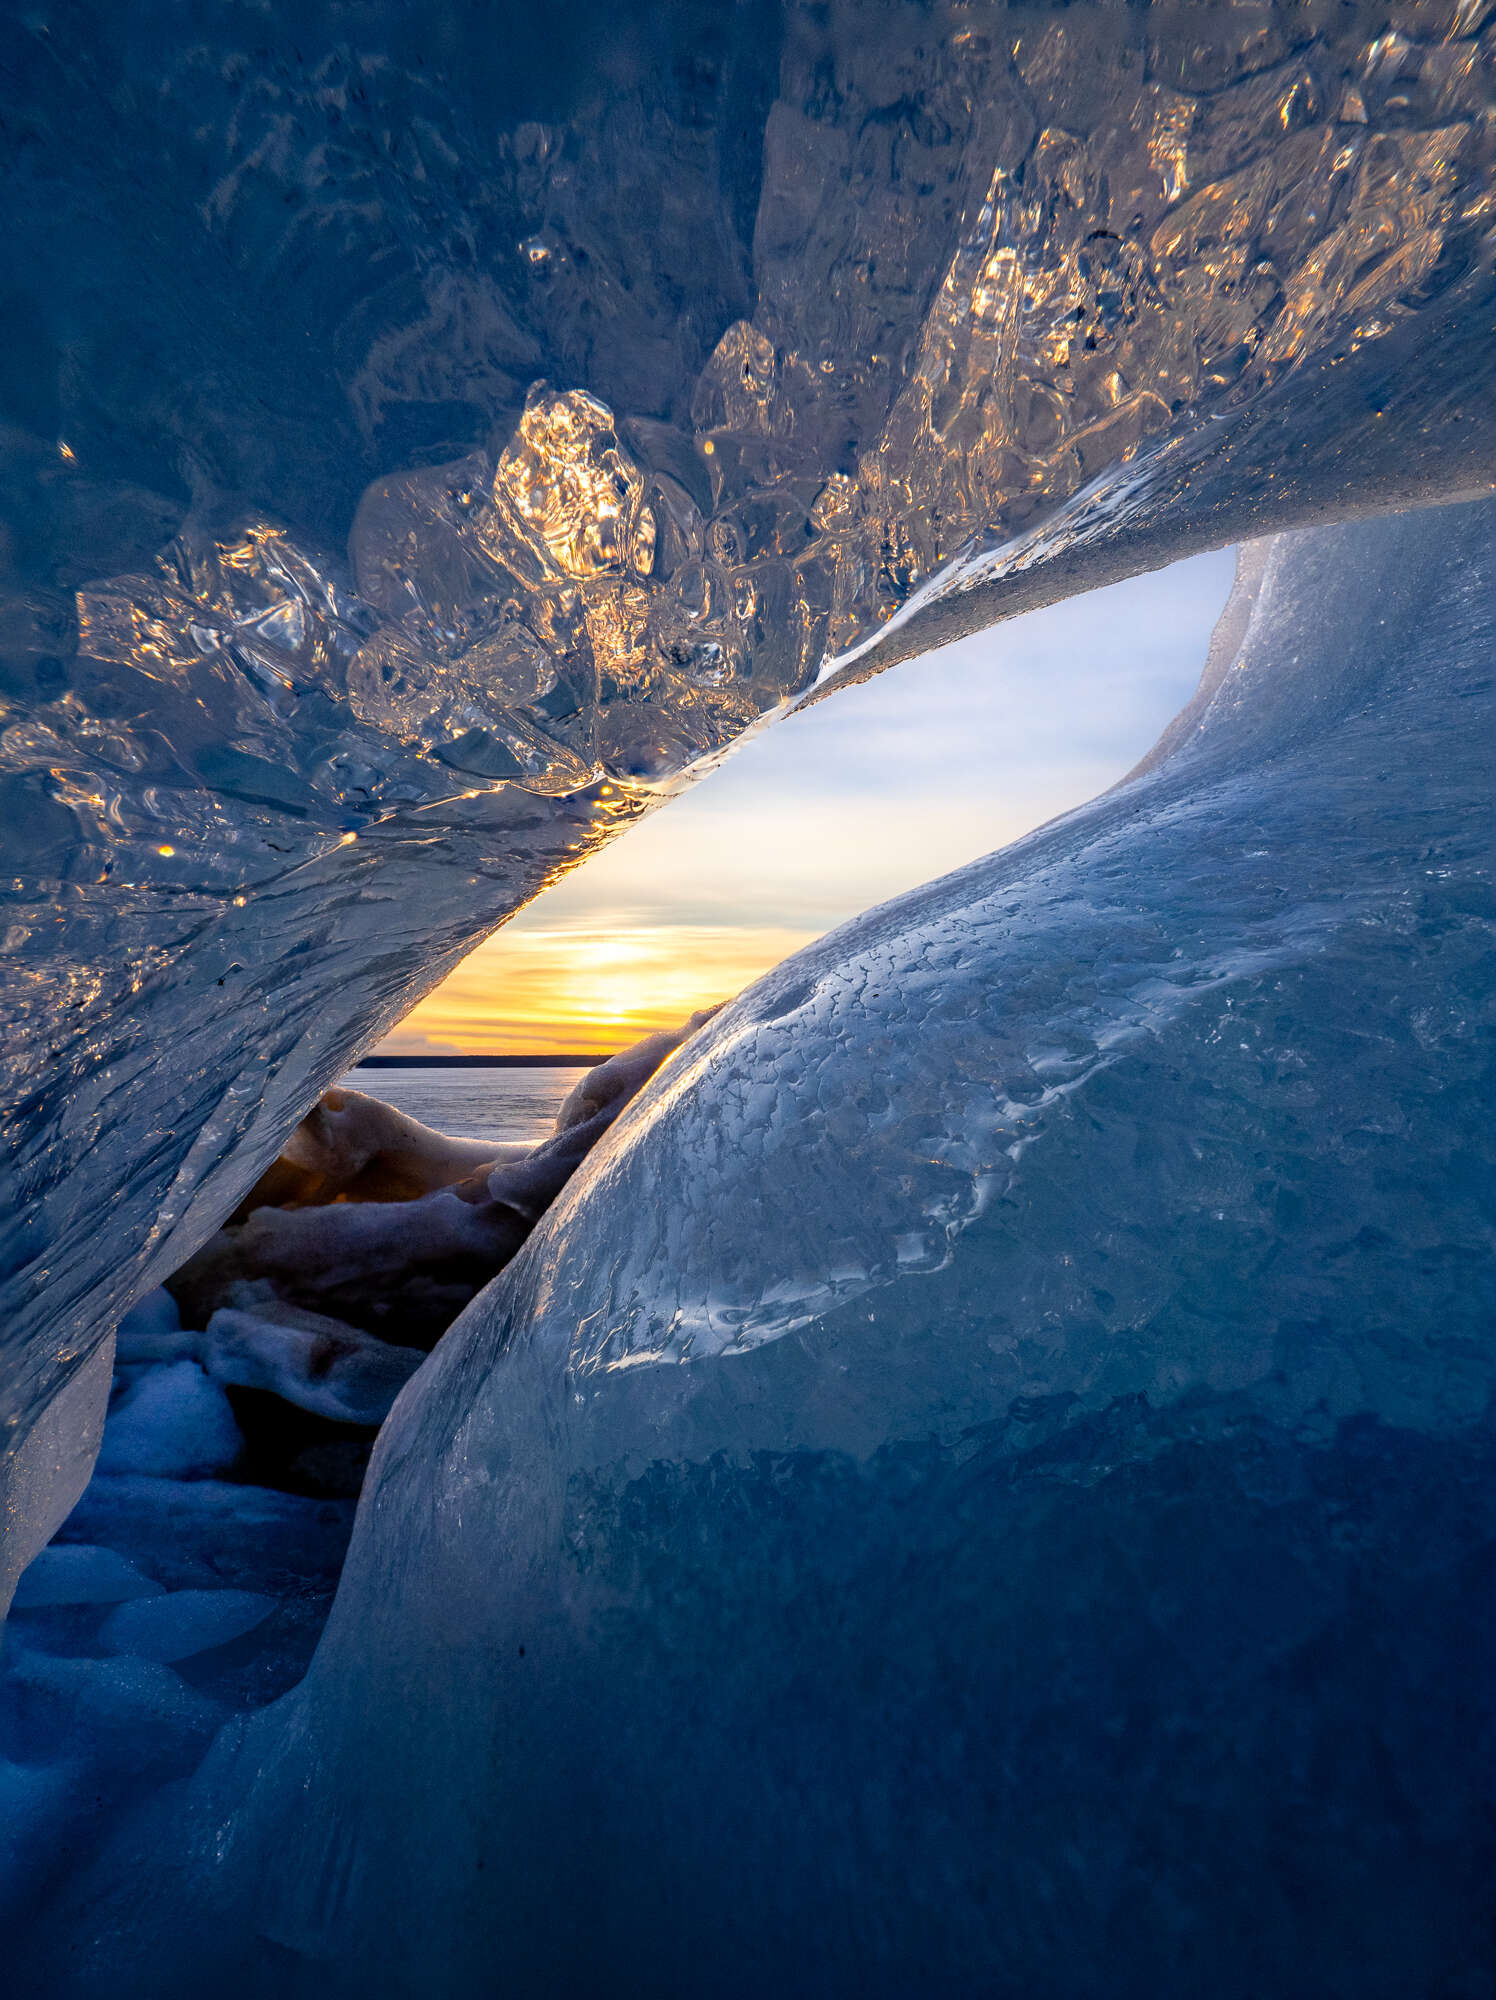
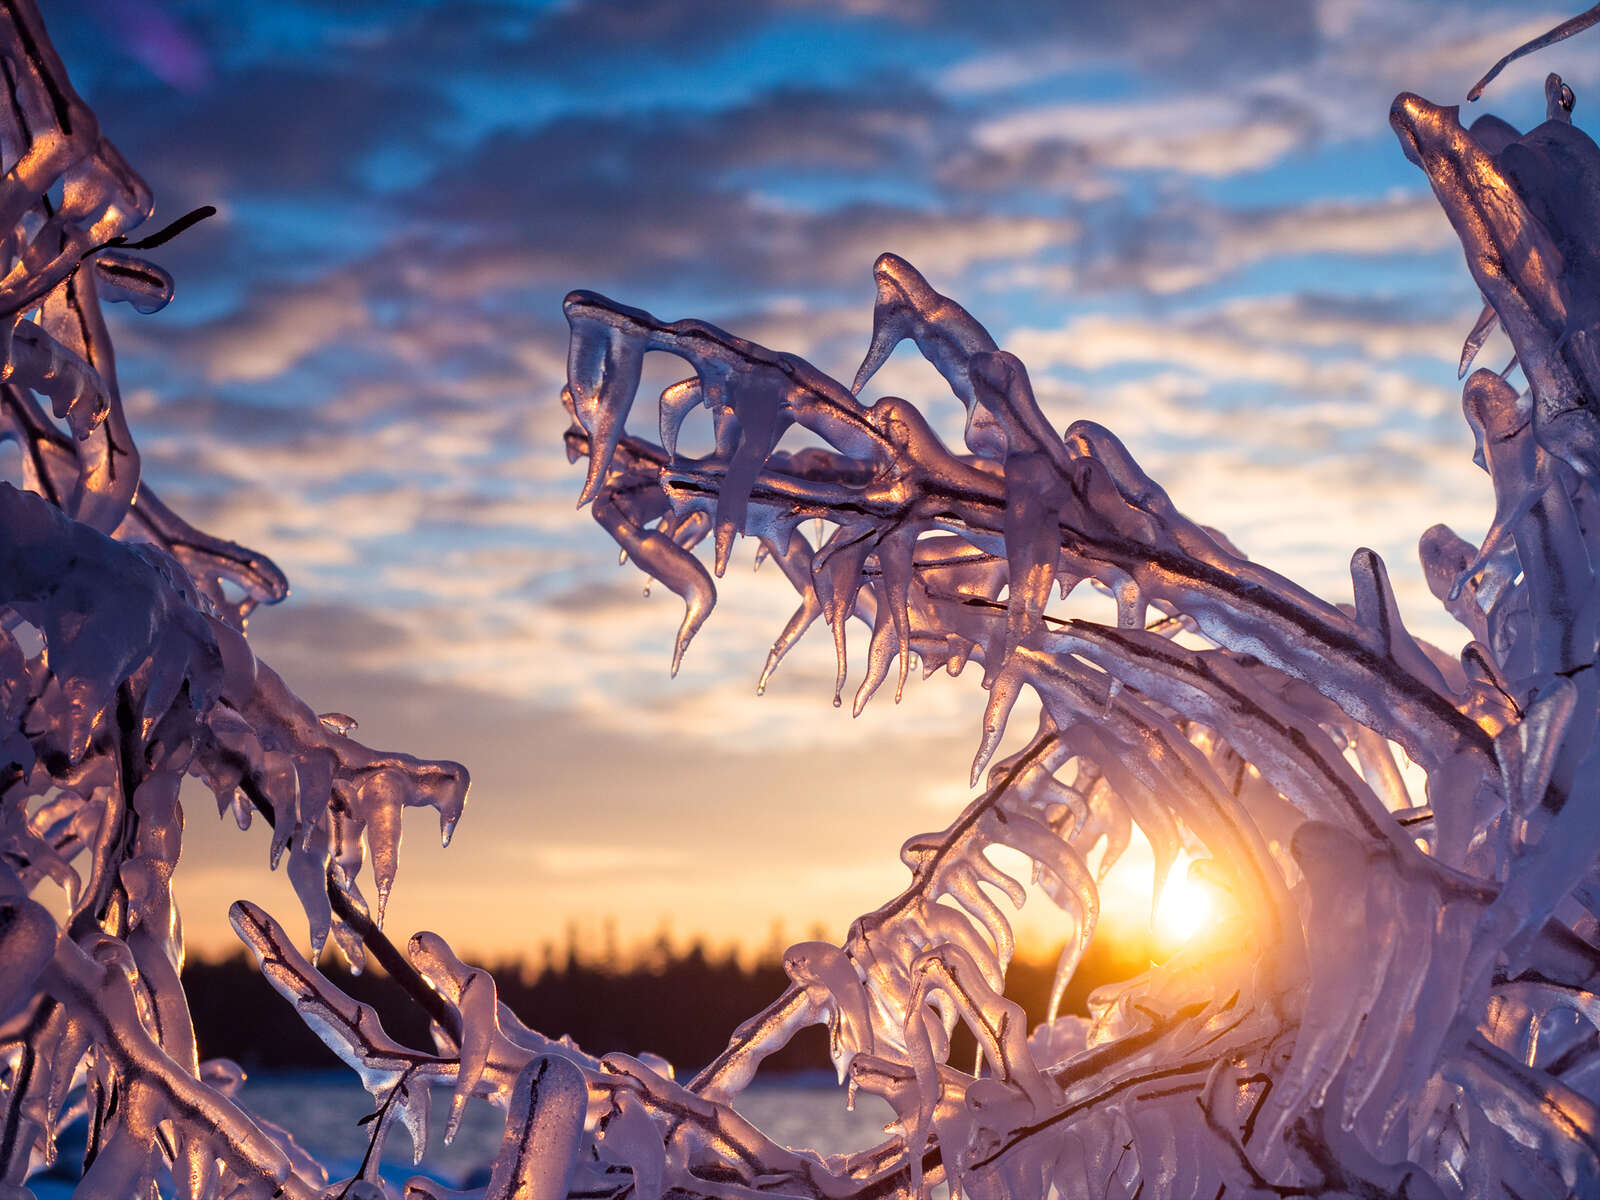
While exploring an ice ridge I came across this small opening through which the rising sun was shining. In order to capture all the details I initiated the Focus Stacking feature on my OM-1.
Focus on Your Foreground
Regardless of the season, the brilliant colours of a sunrise or sunset should only be viewed as a beautiful backdrop. It’s what you put in front of those colours that will make or break your image. With many of my sunset shots the sky itself takes up just a small fraction of the frame. The foreground is much more important, so spend the time to find interesting features to focus on.
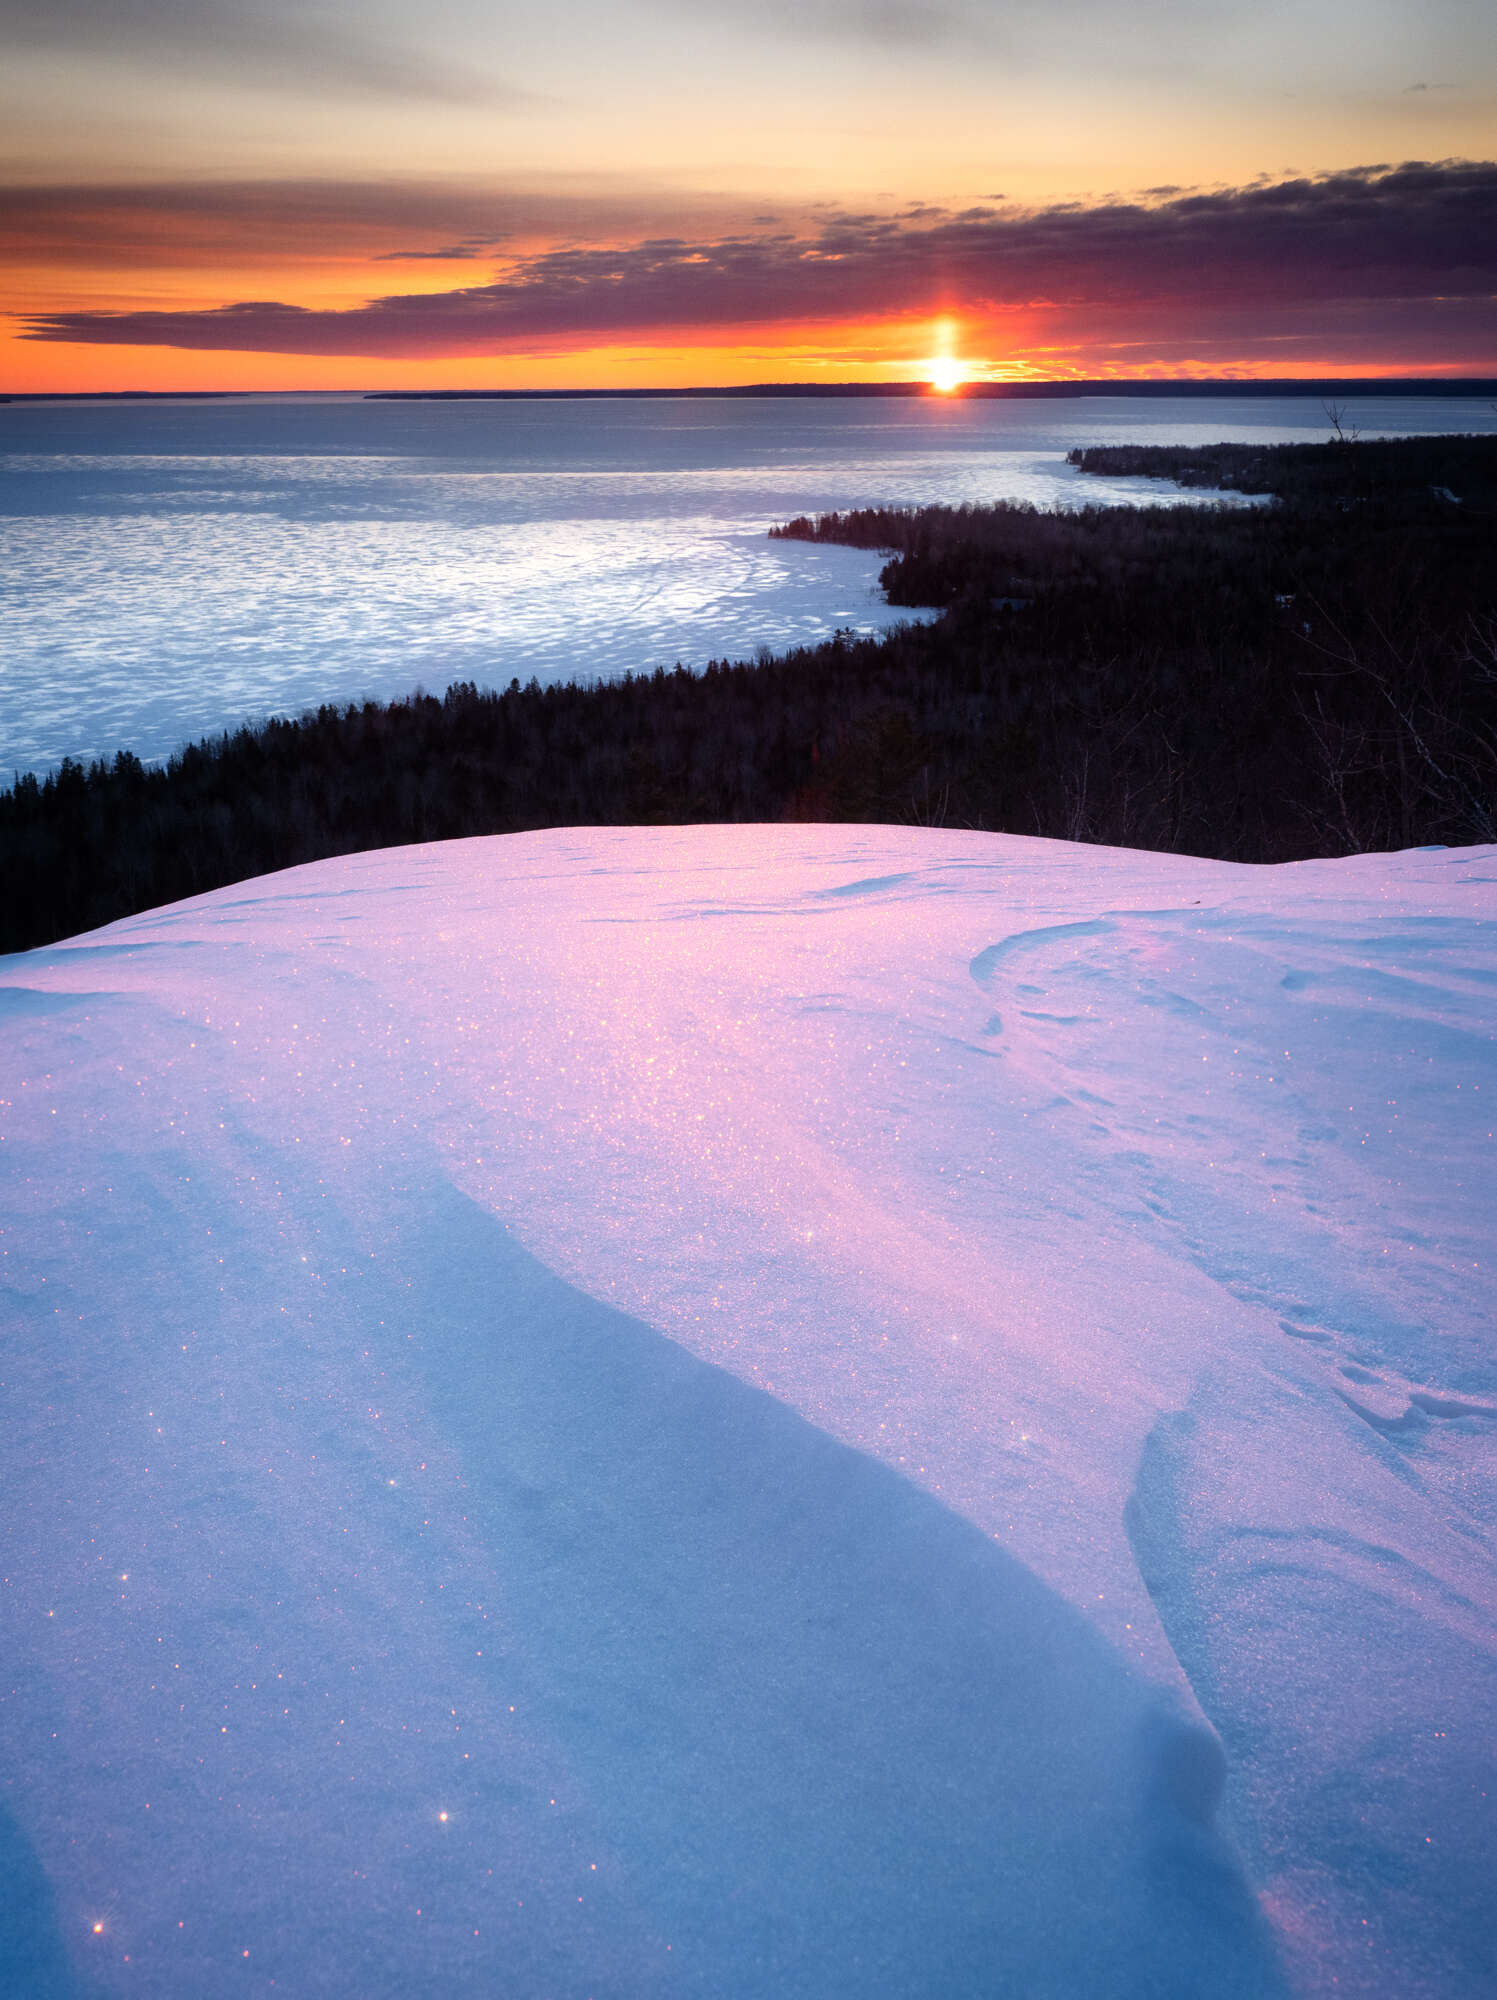
For many of my sunrise shots only a small part of the frame is dedicated to the sky. A simple snowdrift can make for an interesting foreground element under the golden light of a sunrise.
To showcase smaller foreground features I will often use focus bracketing/stacking. This allows me to highlight features that might otherwise be overlooked.
This ice ridge made for a perfect leading line. In order to include enough of the ridge as it snaked along the shore and the colourful sky I opted to create a two-shot pano.
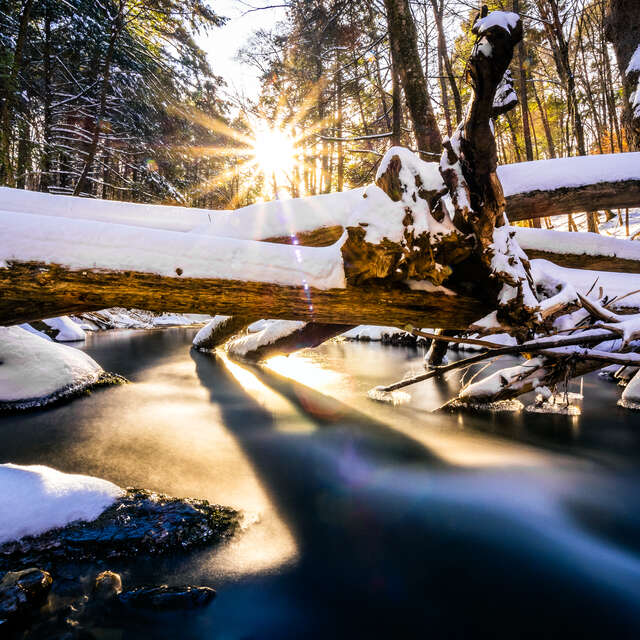
Try Longer Exposures
One of the great things about photography is that it allows us to see the world in ways that our eyes just cannot. Using longer exposures can completely change the look of a landscape. Use the Live ND feature or a neutral density filter to lengthen your shutter speed. Stretching your exposure to 30 seconds or a minute will smooth out rougher water and add a painterly effect to the sky.
An exposure of 60 seconds accentuated the colours in the sky and completely smoothed out the water.
1/40s | F8 | ISO 200
Location, Location, Location
I live in an area where winter hits hard, but in writing an article such as this, I recognize that not everyone lives in a winter wonderland. Every location is going to have different opportunities. If you live in an area where you only get the occasional snowfall, do some scouting ahead of time so that you are ready when the snow does come. Even a small dusting of snow can make for a great seasonal shot.
Travelling farther afield in winter certainly comes with its challenges, but there are rewards for those who venture to more wintery destinations. Winter can be a great time to visit more rugged locations like National Parks. For me, there is a great appeal to being in a popular park with very few people around.
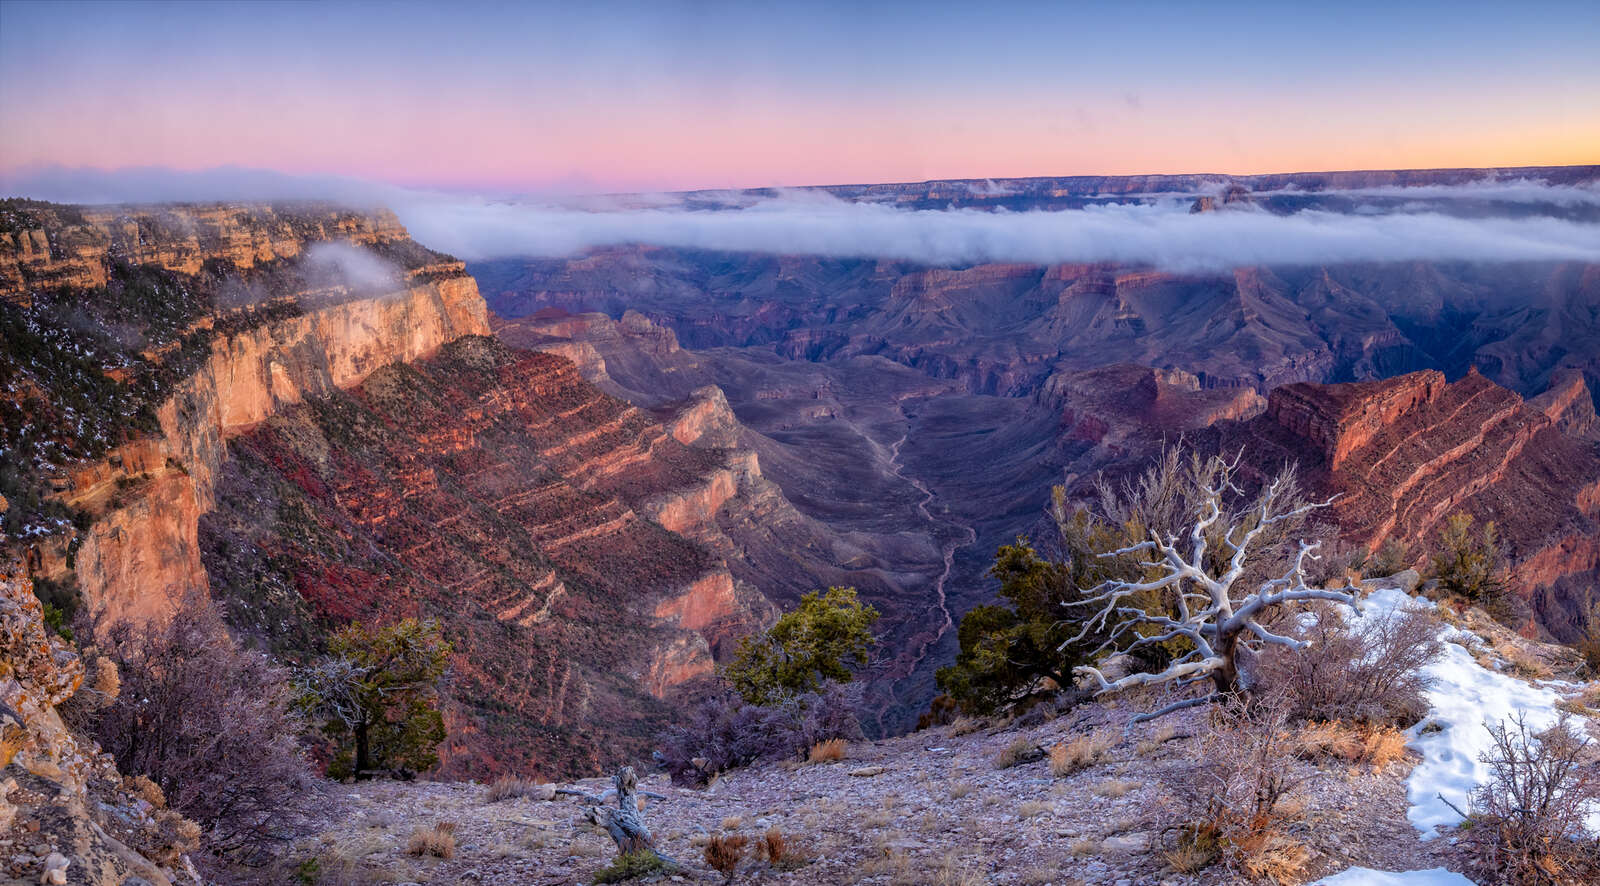
Sunrise on a December day on the South Rim of the Grand Canyon. For two hours I had this location completely to myself.
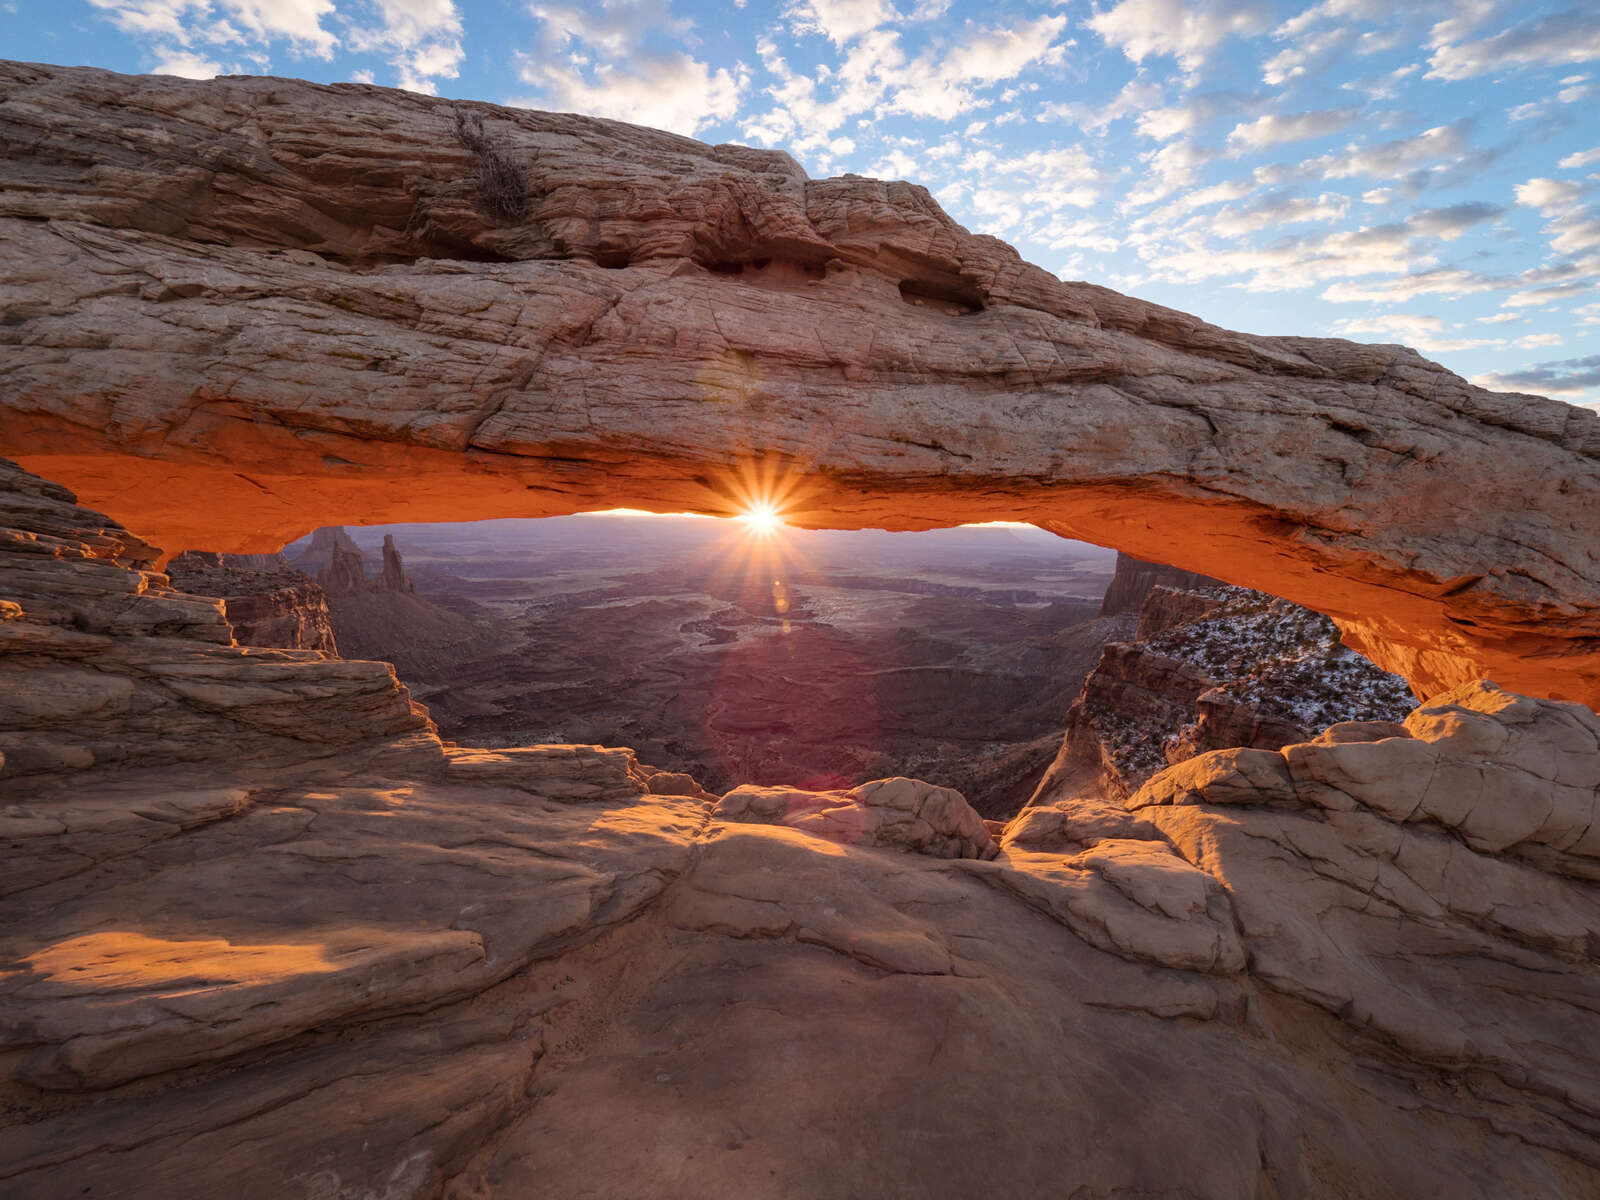
Mesa Arch is a very popular spot to photograph the sunrise. On this winter morning I shared this view with only one other photographer.
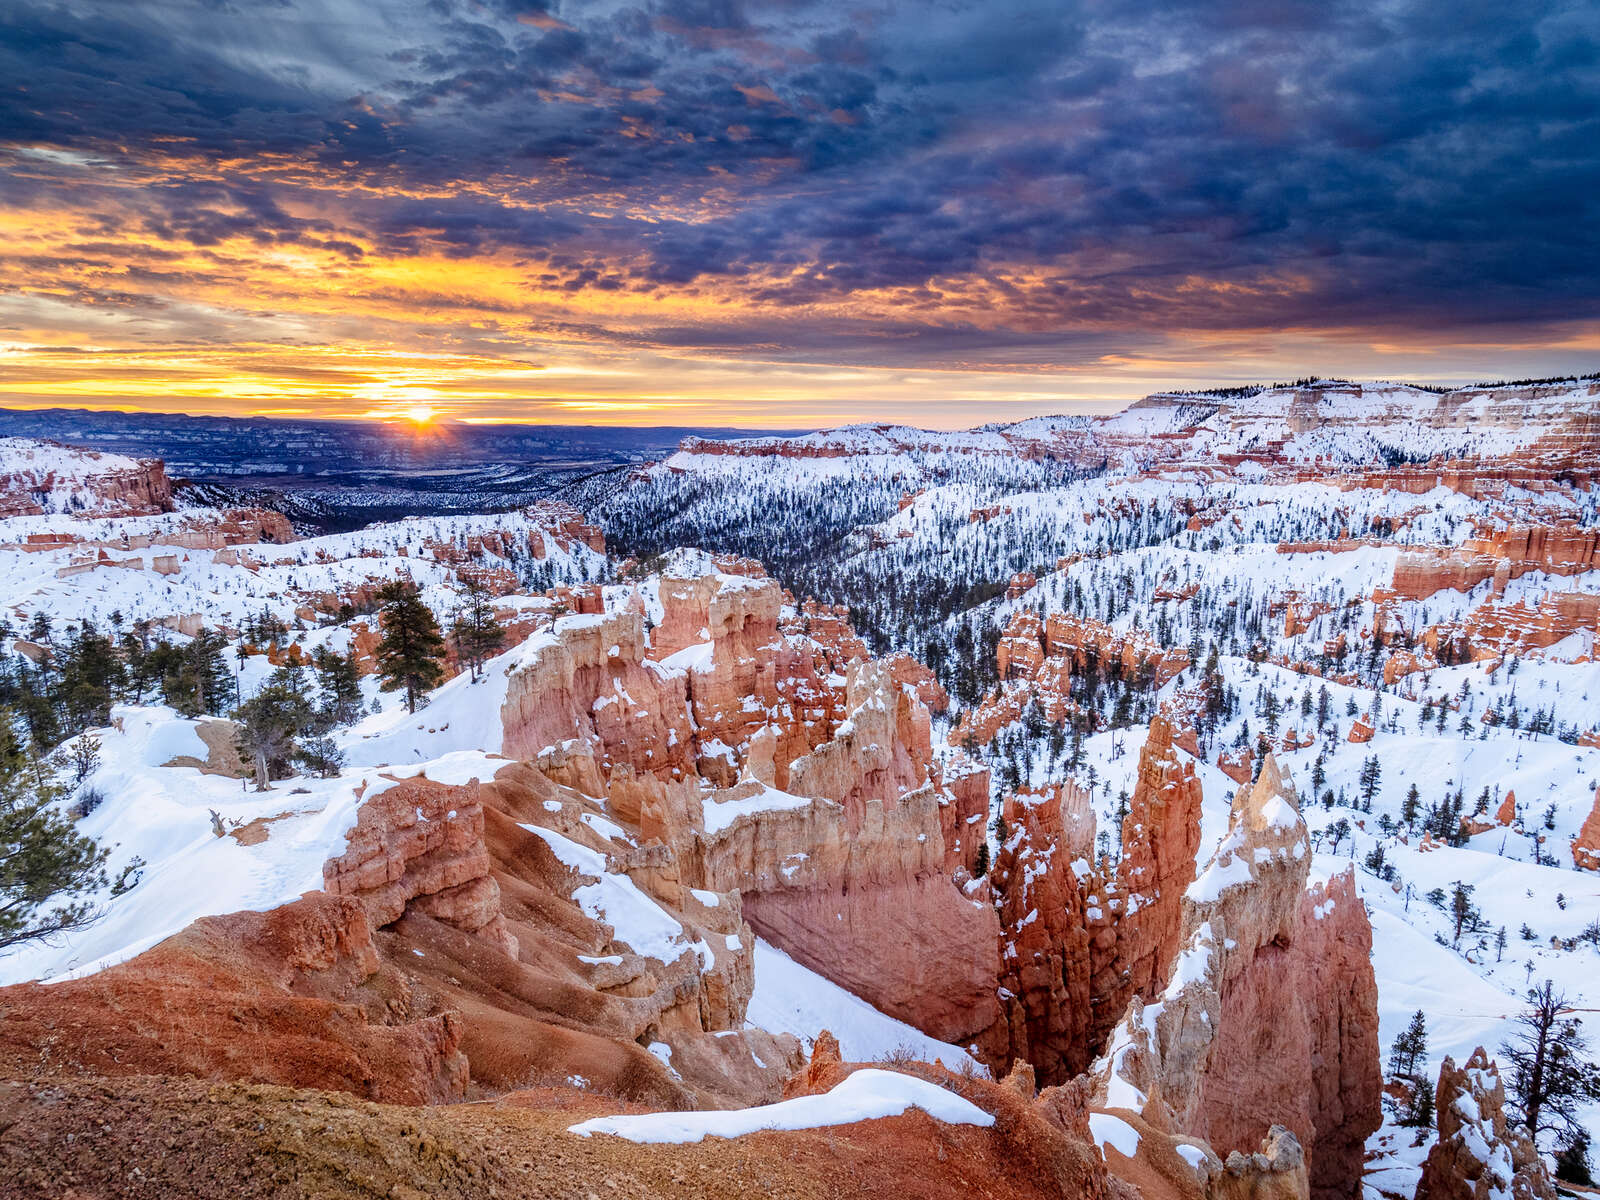
Bryce Canyon National Park
Don’t Forget the Details
As a landscape photographer it’s easy to get drawn into the ‘big picture’; to try and capture the entire scene in front of you. Don’t forget to tighten the frame and focus in on some of the interesting details. Get in closer to your subject or use a telephoto lens. This will help eliminate distracting elements in the scene.
Sometimes the details in a scene make for a far more interesting shot than the 'grand' landscape. Get in close and try using the focus stacking feature.
Final Words and Images
When I look through my collection of sunrise and sunset photos, most of my favourites are shot in the winter. A blanket of snow ‘cleans up’ the foreground while ice formations play with the light in magical ways. And with dramatic changes in weather the scene may look completely different tomorrow. Just another reason to get out and shoot that next winter sunrise.
Your photo session doesn't have to end when the pastel colours of sunset fade. The blue hour can make for a great time to photograph your favourite landscape spot.

Featured Products:
- OM-1
- M.Zuiko Digital ED 8-25mm F4.0 PRO
- M.Zuiko 7-14mm F2.8 PRO
- M.Zuiko 12-40mm F2.8 PRO
- M.Zuiko 12-100mm F4.0 IS PRO
- OM-D E-M1 Mark III
Share Your Photos:
View and share sunrise and sunset photos in our User Gallery.

ABOUT PETER
Web: creativeislandphoto.com
Blog: creativeislandphoto.com/blog
Twitter: @creativeisland4
Peter has been a dedicated Olympus shooter for nearly 40 years, and has found a way to combine his passion for photography with his love of teaching to develop photography workshops with a focus on landscape, wildlife and astrophotography. Peter’s work has been published in a number of magazines including Canadian Geographic, Shutterbug and Outdoor Photographer. He maintains his own blog with an emphasis on tutorials that assist others in bringing their photography up to the next level.