Like most people, I own a smart phone. And, like most phones it has a built-in camera. But, unlike most people I never use my phone for selfies. As a matter of fact, I don't think I've ever photographed myself with my phone. So why am I writing an article on selfies? Because this post isn't about snapping a shot of yourself in front of the Grand Canyon or with your friends at the mall. It's about creating a photographic work of art that just happens to include you.
WHY A SELFIE?
Regardless of the style of photography you engage in, a good image should trigger an emotional response. It could be wonder, intrigue, sadness, joy, calm, curiosity, or the myriad of other emotions that exist. As a landscape photographer I try to keep this in mind and present a final image that will attract and maintain the attention of anyone who sees it. One way of doing this is by including people in your shot. Adding the human element to one of your landscape images can draw the viewer in and tell a more complete story.
So why do I include myself and not someone else? The main reason, but certainly not the only one, is that most of the time, I'm the only person around. I am usually out shooting at odd times of the day and in locations that are very much off the beaten trail. As well, I can usually visualize the image before the shutter is released and know exactly what I'm looking for. Stepping into the frame can sometimes be easier than giving instructions to your model.
TRIGGERING THE CAMERA
Once you step away from the camera you need to have some way of releasing the shutter in order to include yourself in the image. There are three ways of accomplishing this task with each having some advantages and disadvantages.
SELF TIMER
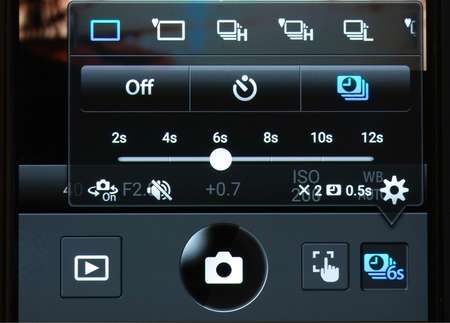
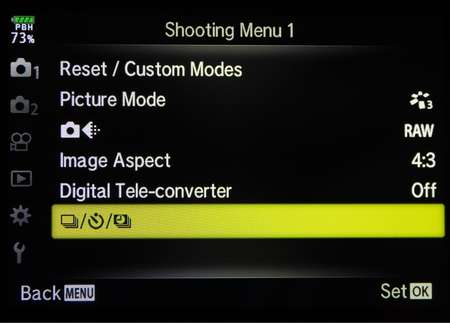
Using the built-in self timer is certainly the easiest method of triggering the shutter. Cameras have had self timers for decades. Newer models, like the OM-D series from Olympus now allow you far more control.
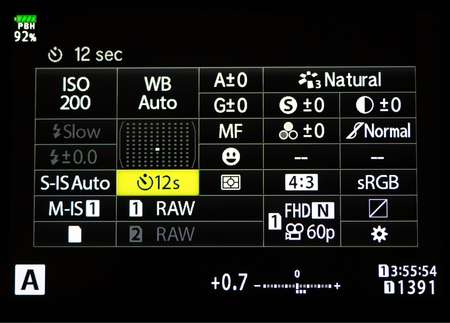
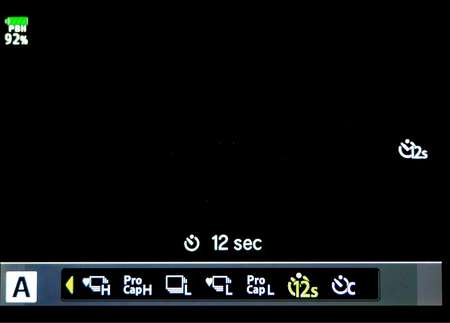
Although the timer function can be accessed via the menu, the easiest method is by using the Super Control Panel. For the screenshots above the delay has been set to the 12-second option. After pressing the shutter release you have twelve seconds to get into position. An orange LED lights up on the front of the camera and with two seconds left begins blinking, indicating the shutter is about to be released. The disadvantage here is that you only get one shot, and must return to the camera in order to trigger it again.
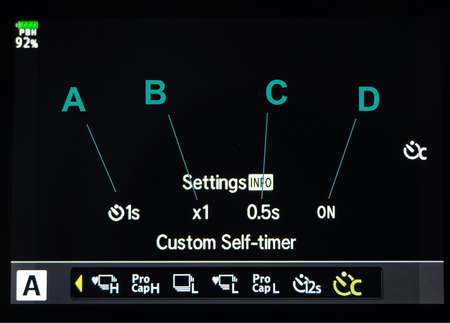
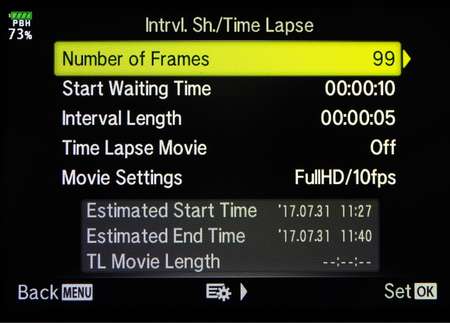
A better option is to use the custom timer. Essentially, it is a less robust time-lapse feature that provides control over the following settings:
A - Timer Delay (from 1s to 30s)
B - Number of Frames (from 1 to 10)
C- Interval Length between frames(from 0.5s to 3s)
D - Every Frame AF (On or Off)
REMOTE SHUTTER RELEASE - OI.SHARE
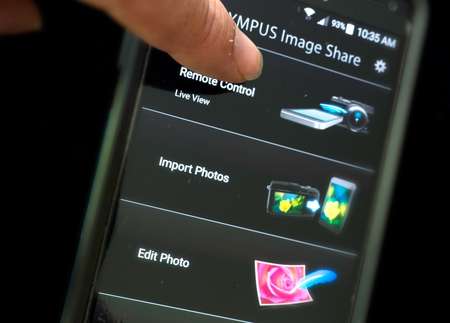
With their own Wi-Fi hotspot, the OM-D line-up of cameras can be triggered remotely from your smart phone using the OI.Share app which can be downloaded free from Google Play or the App Store. Once the camera and phone are paired, you can control practically any setting directly from your phone. The app also displays a live view of exactly what the camera sees. The big advantage here is that it makes composition of your selfie relatively easy since you can see yourself once you step into the frame. Under most circumstances you would want to engage the self-timer so that you have time to hide the phone before the photo is taken. The main challenge with the app is maintaining a solid connection between your phone and camera as distance and obstructions can impede the signal.
TIME-LAPSE
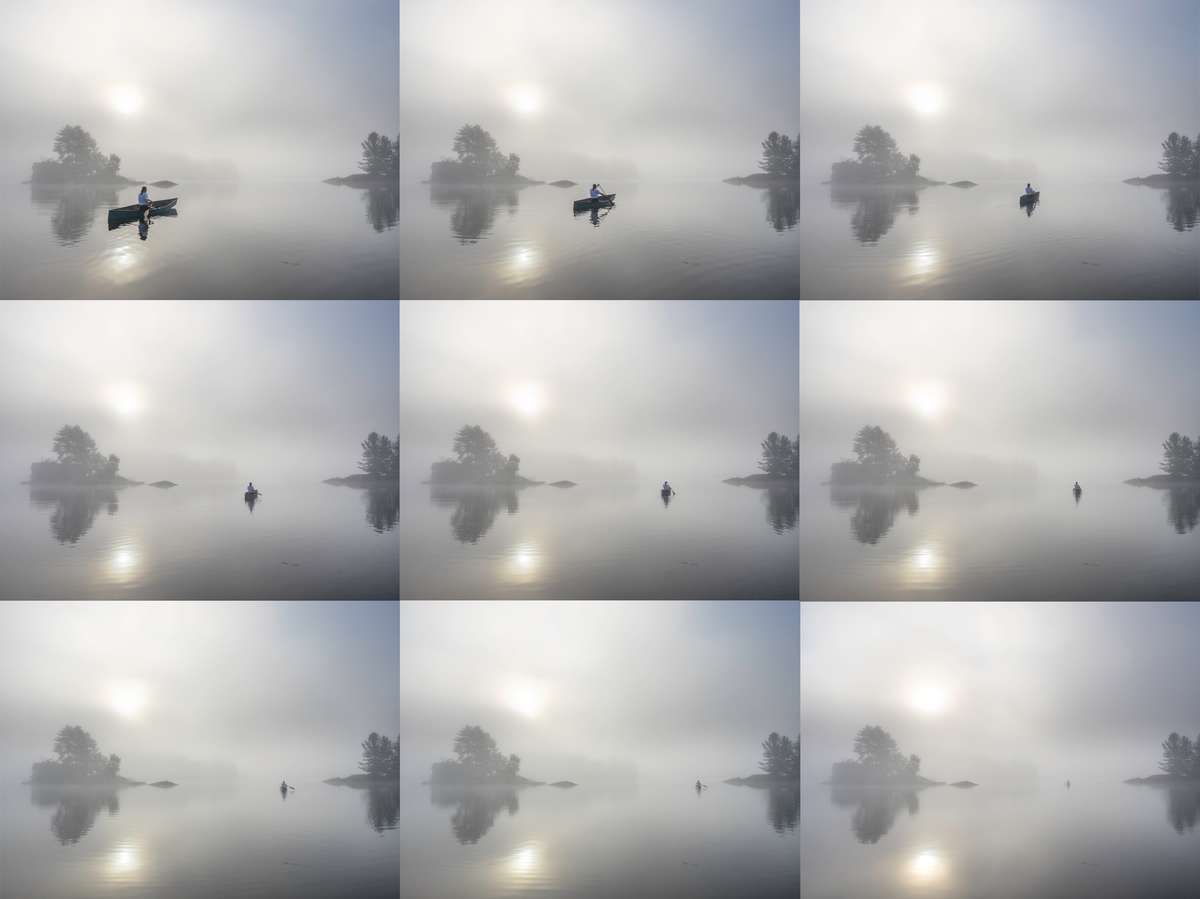
Although I have used the built-in camera timer and the OI.Share app many times, I have to admit that I rarely use them to take a selfie. I much prefer the time lapse feature. It's easy to set up, flexible enough to allow for just a few photos or hundreds of them, and is equally effective regardless of how far you are from the camera. Depending on the type of selfie that I am aiming for I will usually set the time-lapse for approximately 100 photos, shot at a 2-6 second interval. On most occasions I will stop the sequence long before the camera reaches the maximum number of images.
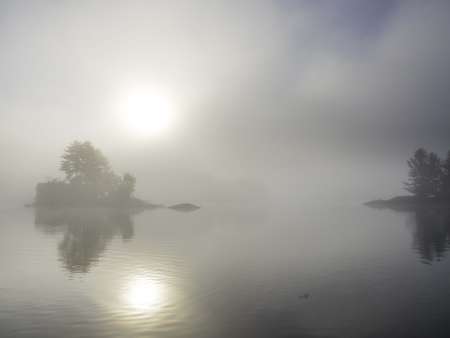
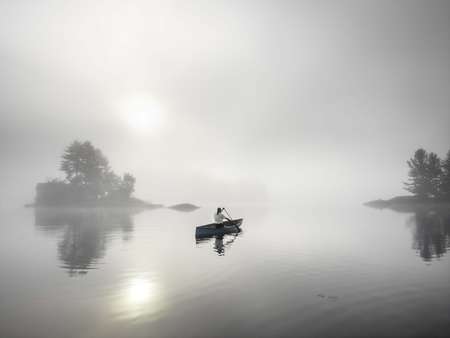
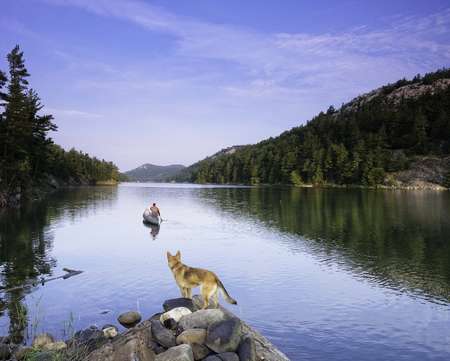
The images below show some of the results from a time-lapse sequence that I photographed of myself canoeing on a beautiful misty morning. After returning to my camera I had a few dozen images from which to choose from.
TIPS FOR A SUCCESSFUL SELFIE
Composition comes first
This is my rule for every photo that I make and it applies even more when I include myself (or any other person) in the image. The big question is... does including a person add to the overall composition? If the answer is "no", then stay firmly planted behind the camera. If including yourself adds to the shot, carefully consider your placement within the frame.
Don't just stand there, do something!
Your photo should tell a story and your actions, however simple will frame that story. Although I have been guilty of photographing myself just standing there staring off into the distance, I am rarely happy with those shots. The challenge is to perform an action that fits with the scene and adds interest for the viewer. Common actions can work quite well - walking along a path, running through a field, sitting by the water reading a book, climbing a rock face, jumping a stream. They all tell a story, albeit, short (more like a Tweet than a novel).
Planning is Key
One of the key skills that I discuss in my photography courses and workshops is the need to visualize your final image before the shutter is released. Can you see the photograph in your mind's eye? Although many of my selfies are spur-of-the-moment shots, they still require planning, even more so since you are leaving the view finder behind. Beyond the typical decisions I make when composing an image, there are a number of other questions I ask myself. Where will I place myself in the scene? What will I do? What poses will I try and will they look natural or completely contrived? How large will I be in the frame? If I am moving through the frame how will I set up the time lapse feature to ensure I get enough shots to choose from?
I need support!
This may go without saying, but the instant you walk away from your camera you need some way of supporting it. My tripod is always in my vehicle and if I think there is even a chance of doing a selfie I will bring it along. That being said, I have shot numerous selfies with the camera firmly planted on the ground with something supporting the lens.
Prop yourself up
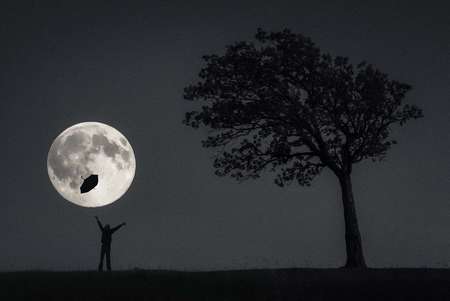
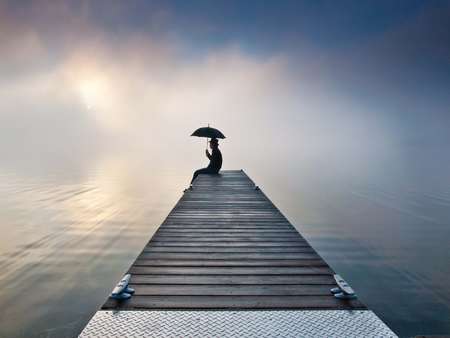
I know photographers who hate the idea of using props in their photos. I'm not one of them. I view the world in front of my lens as a stage, and when on stage I don't hesitate to use a prop of some kind, but only if it adds to the story. You can see several photos in this post that incorporate an umbrella. That happens to be one of my favorite props to use. There is something about the geometry and symbolism of an umbrella that appeals to me.
Double-check settings
Once you walk away from the camera you will be focused on your position in the frame, not the camera's settings. There are a few things to consider. For most selfie shots I use an aperture around f/8. This should guarantee good sharpness throughout the image. I also choose a focus point close to where I think I will be standing. If I plan on freezing any movement during the shot I also check my shutter speed. A speed of 1/125s should work for most action sequences.
This ain't no portrait
This may simply be personal preference, or the realization that I'm not particularly photogenic, but I usually position myself such that I am only a small element of the whole composition. For this type of shot, I am not interested in capturing detailed facial expressions.
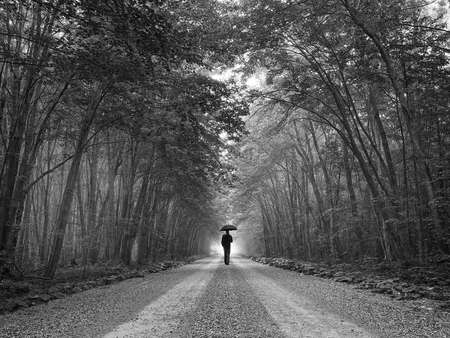
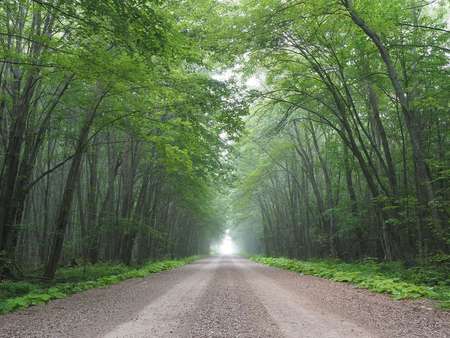
Let's revisit the first photo in this article to see how it came to be. I was out exploring on a rather grey, misty morning when I drove down a side road lined with tall maples that created an interesting tunnel effect. I liked the look, so I pulled over and took a few shots. The images had some appeal, but I was left wanting. So I decided this was a good time to experiment with a selfie.
I set up the tripod fairly low to the ground in the middle of road, attached the camera and set the time-lapse interval to 3 seconds. Then I started walking away from the camera for about 50 meters and turned around and walked back. I looked at a few of the images on the LCD and wasn't happy with them. The reason was that I was walking on the left side of the road (like my mommy taught me) and the composition looked out of balance. I decided to do it again by walking in the centre of the road. I also grabbed my umbrella out of the car to help emphasize the conditions in which I was shooting. This time I was much happier with the result. From start to finish the process took about 20 minutes. Thankfully, not one other car came by during that time.
As I looked through my favorite selfie shots I realized that they could be divided into three categories - landscape, astrophotography, and what I call, stylized.
LANDSCAPE
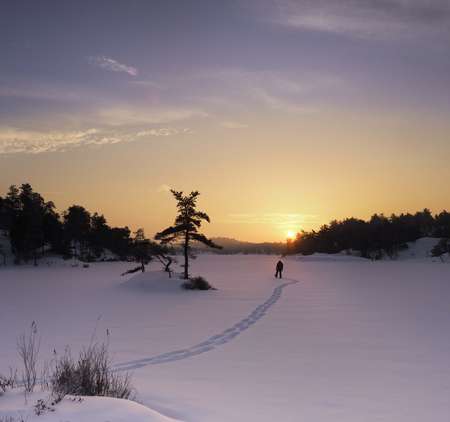
I rarely go out with the intention of shooting a selfie. It is usually a spur-of-the-moment idea that occurs after I've shot several images and am looking for the human element to invade the photo. The first photo below is an exception. This was a planned shot. Following a fresh snowfall I thought it would be interesting to capture a winter hiker traipsing through the snow toward the rising sun.
ASTROPHOTOGRAPHY
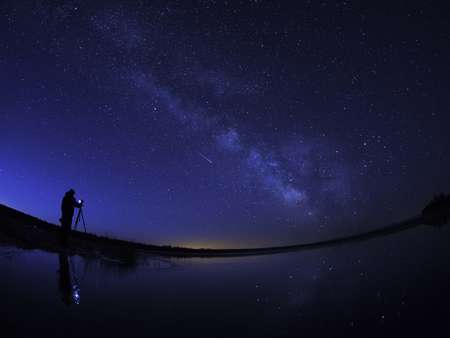
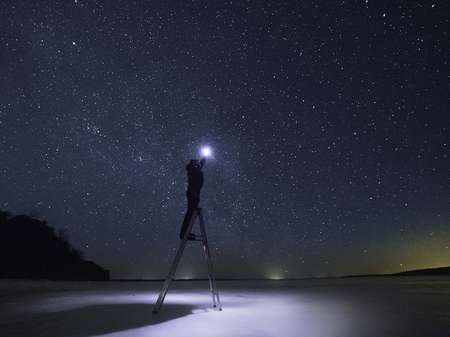
I'm always looking for interesting ways to photograph the night sky. Sometimes that means including myself in the image. The real challenge is keeping perfectly motionless for the duration of the long exposure.
STYLIZED CREATIVE SELFIES
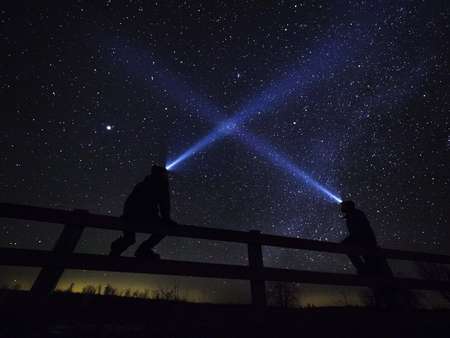
There are times when an idea for a more creative selfie enters my mind - a more artistic selfie per se. The three images below are examples. They all required a fair amount of planning and definitely some visualization ahead of time.
FINAL WORDS
Within my collection of thousands of photographs, I have only about two dozen creative selfies. It is certainly not my primary photographic interest, and besides I am far more comfortable behind the camera than in front of it. That said, including myself in the image is definitely an important way of expressing my creativity.
ABOUT PETER
Web: creativeislandphoto.com
Blog: creativeislandphoto.com/blog
Twitter: @creativeisland4
Peter has been a dedicated Olympus shooter for nearly 40 years, and has found a way to combine his passion for photography with his love of teaching to develop photography workshops with a focus on landscape, wildlife and astrophotography. Peter’s work has been published in a number of magazines including Canadian Geographic, Shutterbug and Outdoor Photographer. He maintains his own blog with an emphasis on tutorials that assist others in bringing their photography up to the next level.
