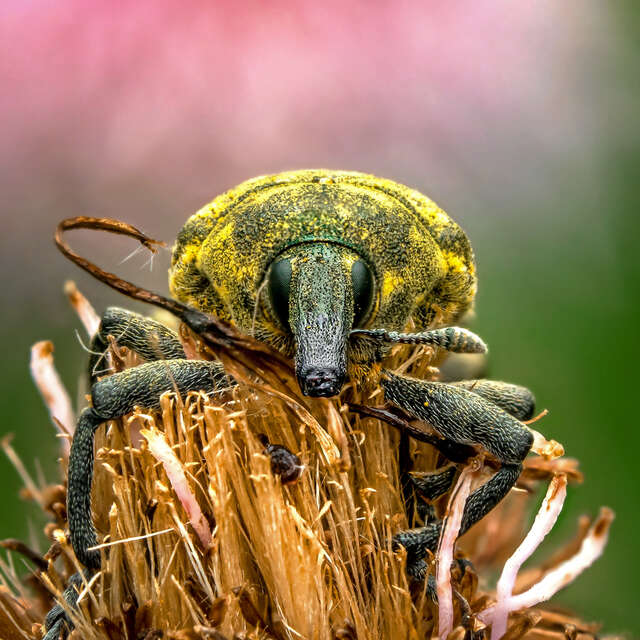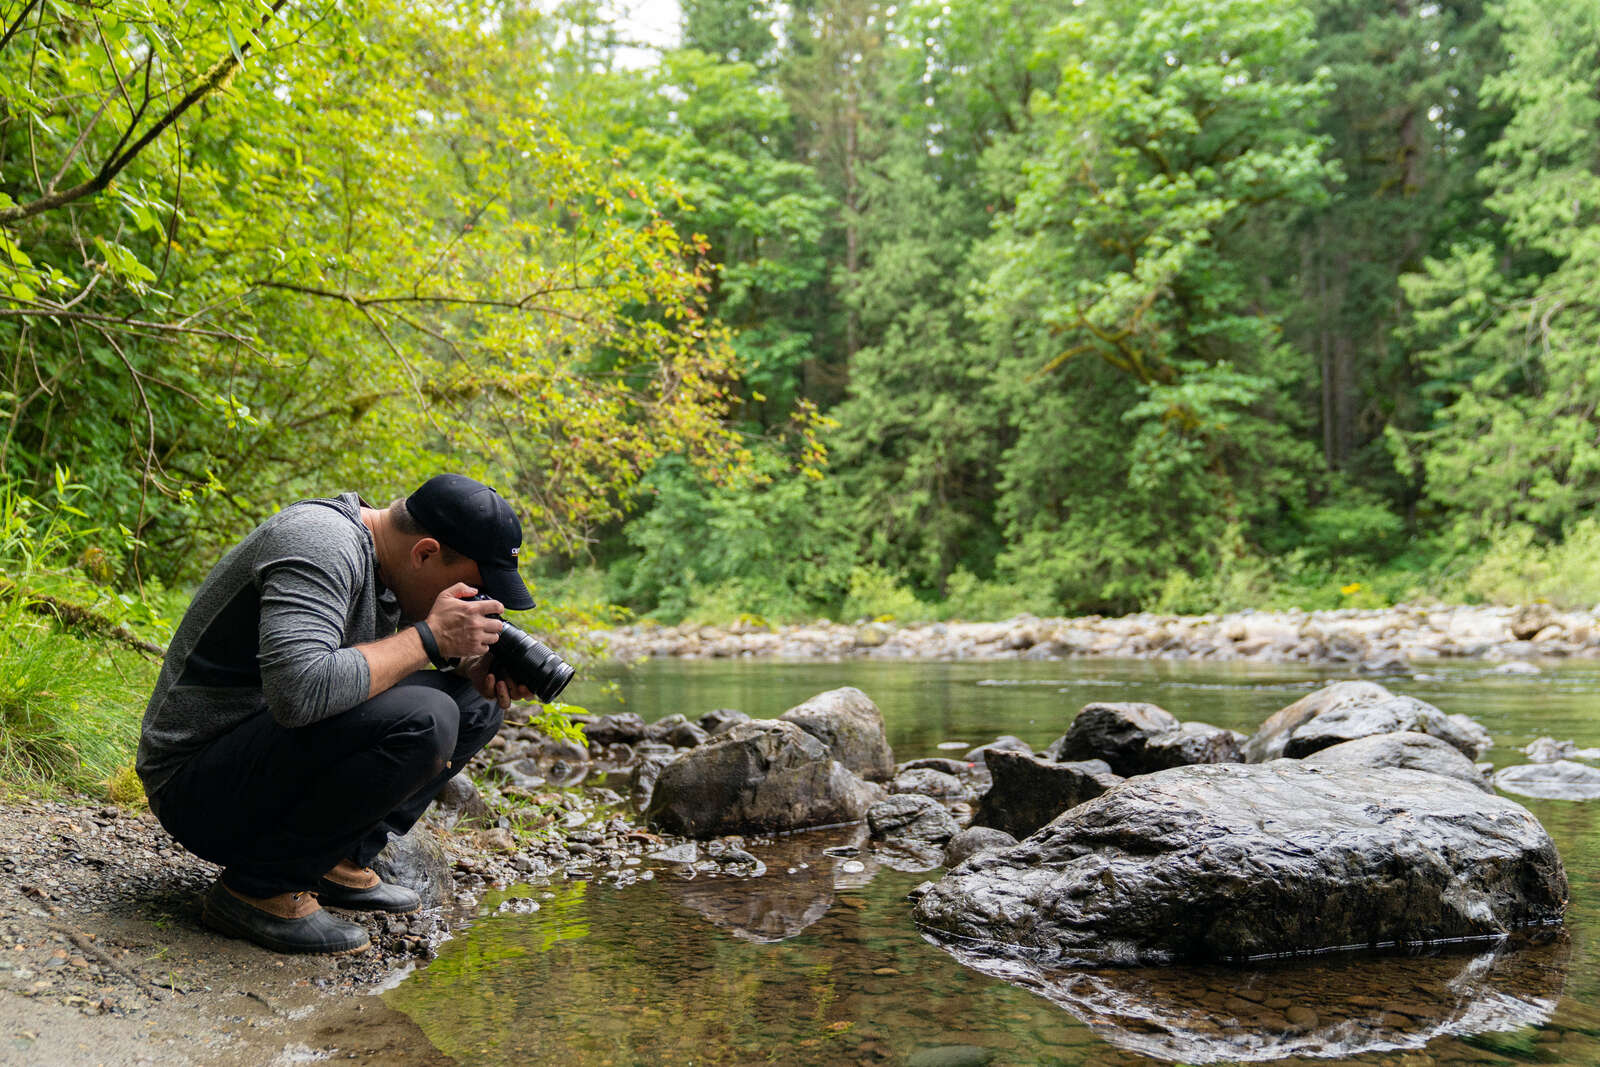
Regardless of what you like to photograph, it’s important to arm yourself with the right gear. Personally, I’m interested in capturing the intricate details of insects and spiders in their natural habitats, and I need gear that will let me do just that. Before getting into my preferred kit for field macro, I actually want to mention something that I don’t bring with me – a tripod. While some macro photographers lug heavy tripods into the field, I prefer the freedom of handheld shooting. The combination of a lightweight, image-stabilizing OM-D body and a super-sharp, ultra-portable macro lens lets me move freely so I can take advantage of opportunities as they present themselves.
Now let’s get to my gear.
The Essentials
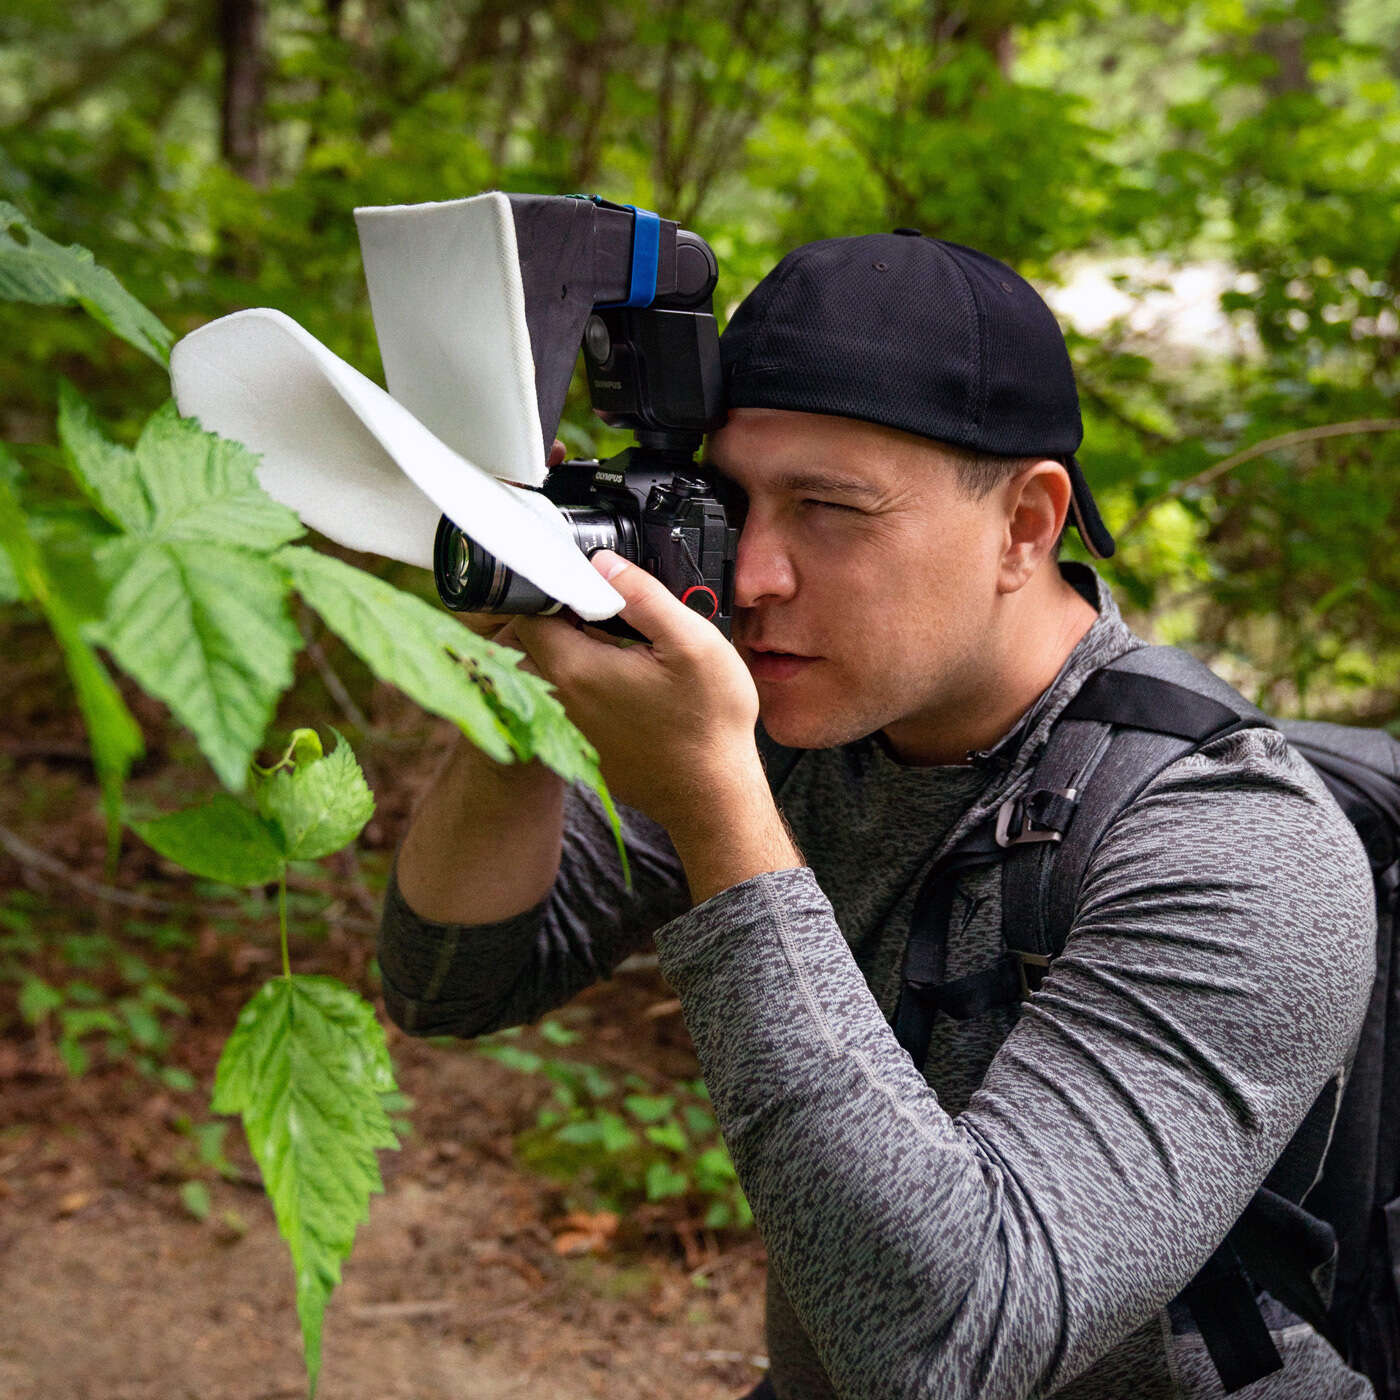
The foundation of my kit is four essential items: my camera, macro lens, flash, and diffuser. Since 2017, I have been shooting with the OM-D E-M1 Mark II. Besides its beautiful image quality, this camera is really compact, weathersealed, has incredible IS, and produces greater depth of field than traditional DSLRs. I also love how customizable it is. By custom setting the C1 position on my Mode Dial, I have all of my favorite macro functions right where I want them.
Ever since I purchased my E-M1 Mark II, it has had a best friend—the M.Zuiko 60mm F2.8 Macro. This tiny (3.23”) lens is capable of some truly outstanding output. It has a focus limiter, 1:1 shortcut switch, amazing clarity, and just like my camera body, it’s weathersealed. You can even use it for non-macro situations such as portraiture! In addition to my camera and lens, my OM-D is almost always outfitted with a flash. A flash illuminates my subjects’ details and lets me shoot at significantly slower shutter speeds.
If you have never tried a flash for macro, I highly recommend it. I distinctly remember the first time I photographed insects with a flash. I snapped a photo, looked at the LCD, and thought “oh, this changes everything.” I like to keep my setup nimble and find the FL-700WR to be the perfect solution. Besides being compact, it can blast off ten frames per second (at 1/16th power) and—you guessed it—it’s weathersealed. Last but not least, I need a way to direct and soften the light from my flash. I’m forever experimenting with new diffusion solutions, but it’s usually some sort of homemade softbox that affixes to my flash to disrupt the light before it hits my subject. I suggest testing various materials to see what you like best.
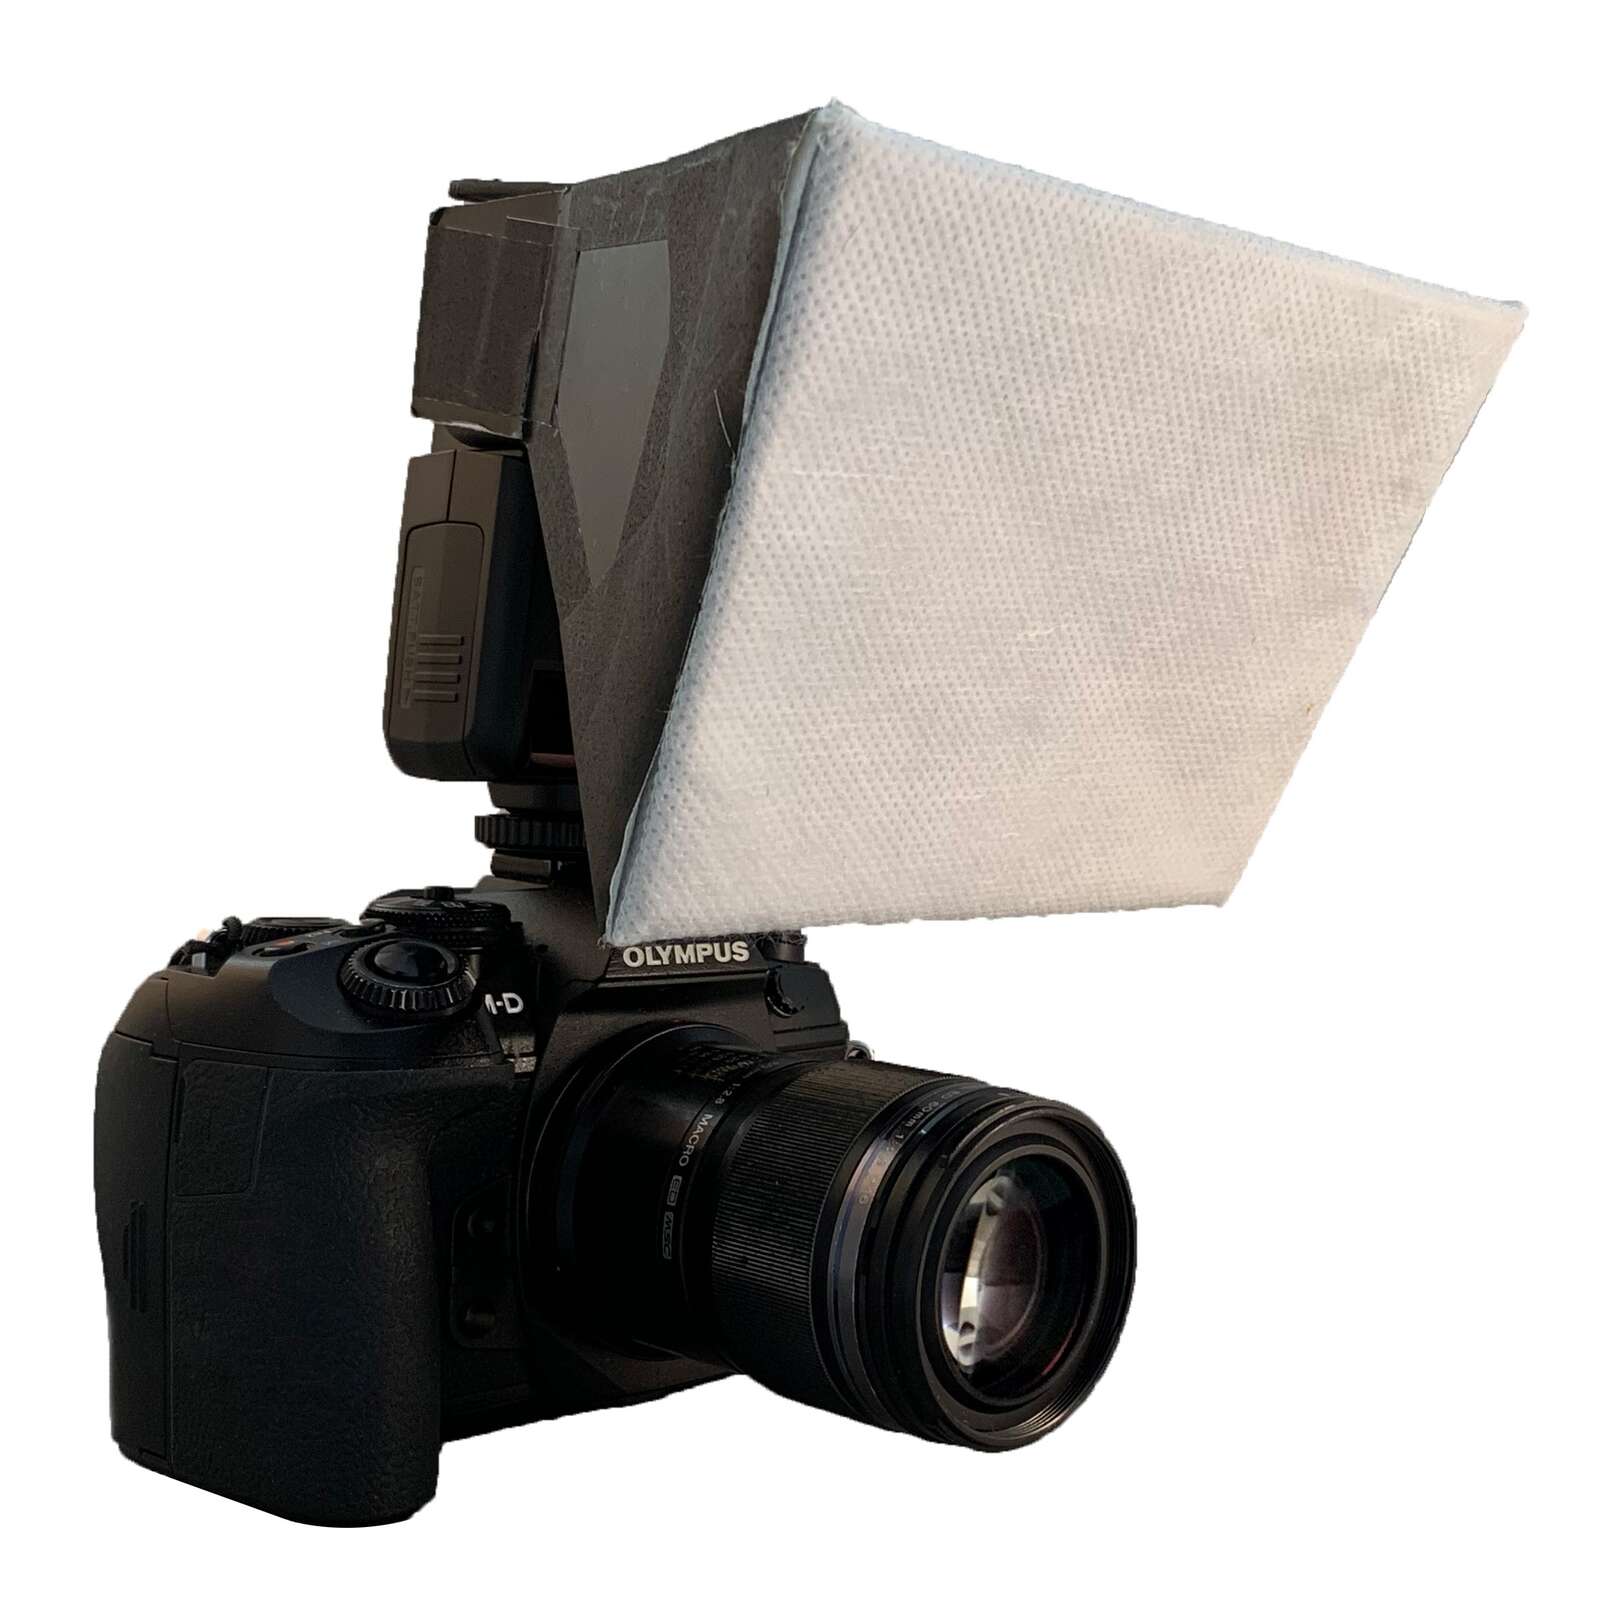
Do-It-Yourself Diffusion
After extensive research and discussion with several accomplished macro shooters, I designed and built this one myself. As you start to understand how light impacts your macro photos, I suggest personalizing a diffuser of your own. My macro softbox has a cardboard shell that’s lined with aluminum foil. The face is made from white nonwoven polypropylene fabric (try multiple layers for more diffusion). The whole thing is held together with gaff tape and attaches to my flash with Velcro strips. For even more light softening, try attaching a layer of 3/8" packing foam to the end of your lens with some elastic. It’s really inexpensive and can be used with or without a softbox!
Beyond the Basics
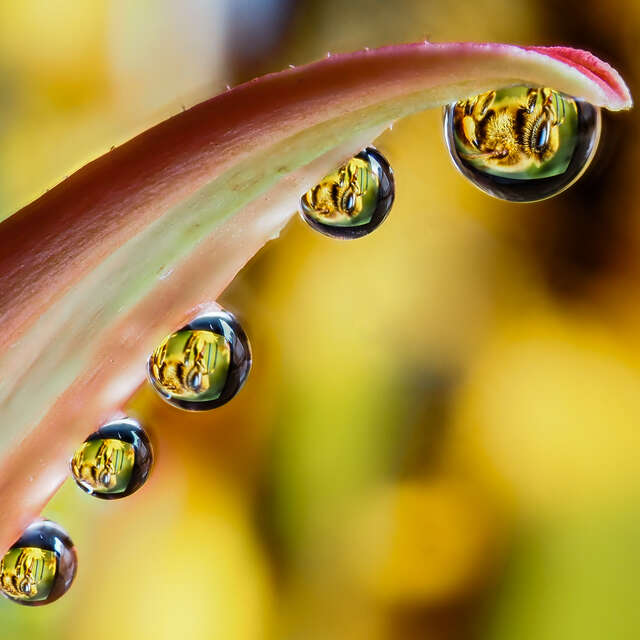
Beyond my standard gear, I leverage a few other items to produce my macro images. For instance, when I am working with more skittish subjects like butterflies or dragonflies, I’ll pull out the M.Zuiko 40-150mm F2.8 PRO. While not really a “macro” lens, the 40-150 (80-300 FFE) has a short working distance that yields ≈1:4 magnification. Sometimes, I’ll even add the M.Zuiko MC-14 1.4x Teleconverter into the equation. The MC-14 is placed between the camera body and the 40-150mm PRO lens to extend reach (112-420mm FFE). Since it doesn’t increase the minimum focusing distance, the MC-14 gives the lens a slight magnification boost.
When I find particularly small subjects and want a little extra magnification, I’ll use a Raynox DCR-250 super macro conversion lens or a set of extension tubes. While either choice will give my 60 Macro a similar increase to its native magnification, I tend to prefer the Raynox. I like how quickly the adapter can be attached to (or removed from) my lens by using a 46mm to 43mm step ring.
The last piece of gear that helps me in the field is the EP-13 Large Eyecup. I really welcome the extra bit of comfort from the slightly oversized EP-13. It also seems to help block more sunlight from the periphery to give me a better look at my subject through the viewfinder.
Final Touches
Once my photos are captured, it’s time to finish them on my phone or computer. If I’m traveling and/or want to share right from the field, I’ll simply edit JPGs with my iPhone. For more complex edits or focus stacking, I’ll start by importing raw (ORF) files to my computer.
Regardless of whether I’m on my phone or at my computer, my first top is Adobe Lightroom. I use Lightroom to handle the bulk of my adjustments. Those adjustments include (but aren’t limited to) modifying composition, tweaking color, pushing shadows and highlights, addressing areas of noise, etc. Once I’m satisfied with the result, I’ll right-click my photo and choose ‘Edit in Adobe Photoshop.’ If I’m attempting a focus stack, I’ll export my bracketed series as 16-bit TIFs.
With my image open in Photoshop, I begin the more serious retouching, but the actual degree of retouching depends on the photo. In some cases, I make very few (or zero) edits in Photoshop. For others, there might be removal of some dirt or rogue background distractions. I also like to use the dodging and burning tools to accentuate certain areas. On occasion, I’ll use Photoshop for short focus stacks—but I usually leave the stacking to Helicon Focus. The final touch from Photoshop is a watermark. Once that’s in place, I save my result so I can share it online.
My last editing tool is Helicon Focus by Helicon Soft. If you're interested in focus stacking, I highly recommend giving it a try. Although Photoshop can get the job done, Helicon Focus is significantly faster, has multiple rendering methods, and lets you easily fine tune your results. I don’t focus stack all of macro images, but when I do, it’s usually with Helicon Focus.
1/800s | F4 | ISO 400
Beyond the Photos
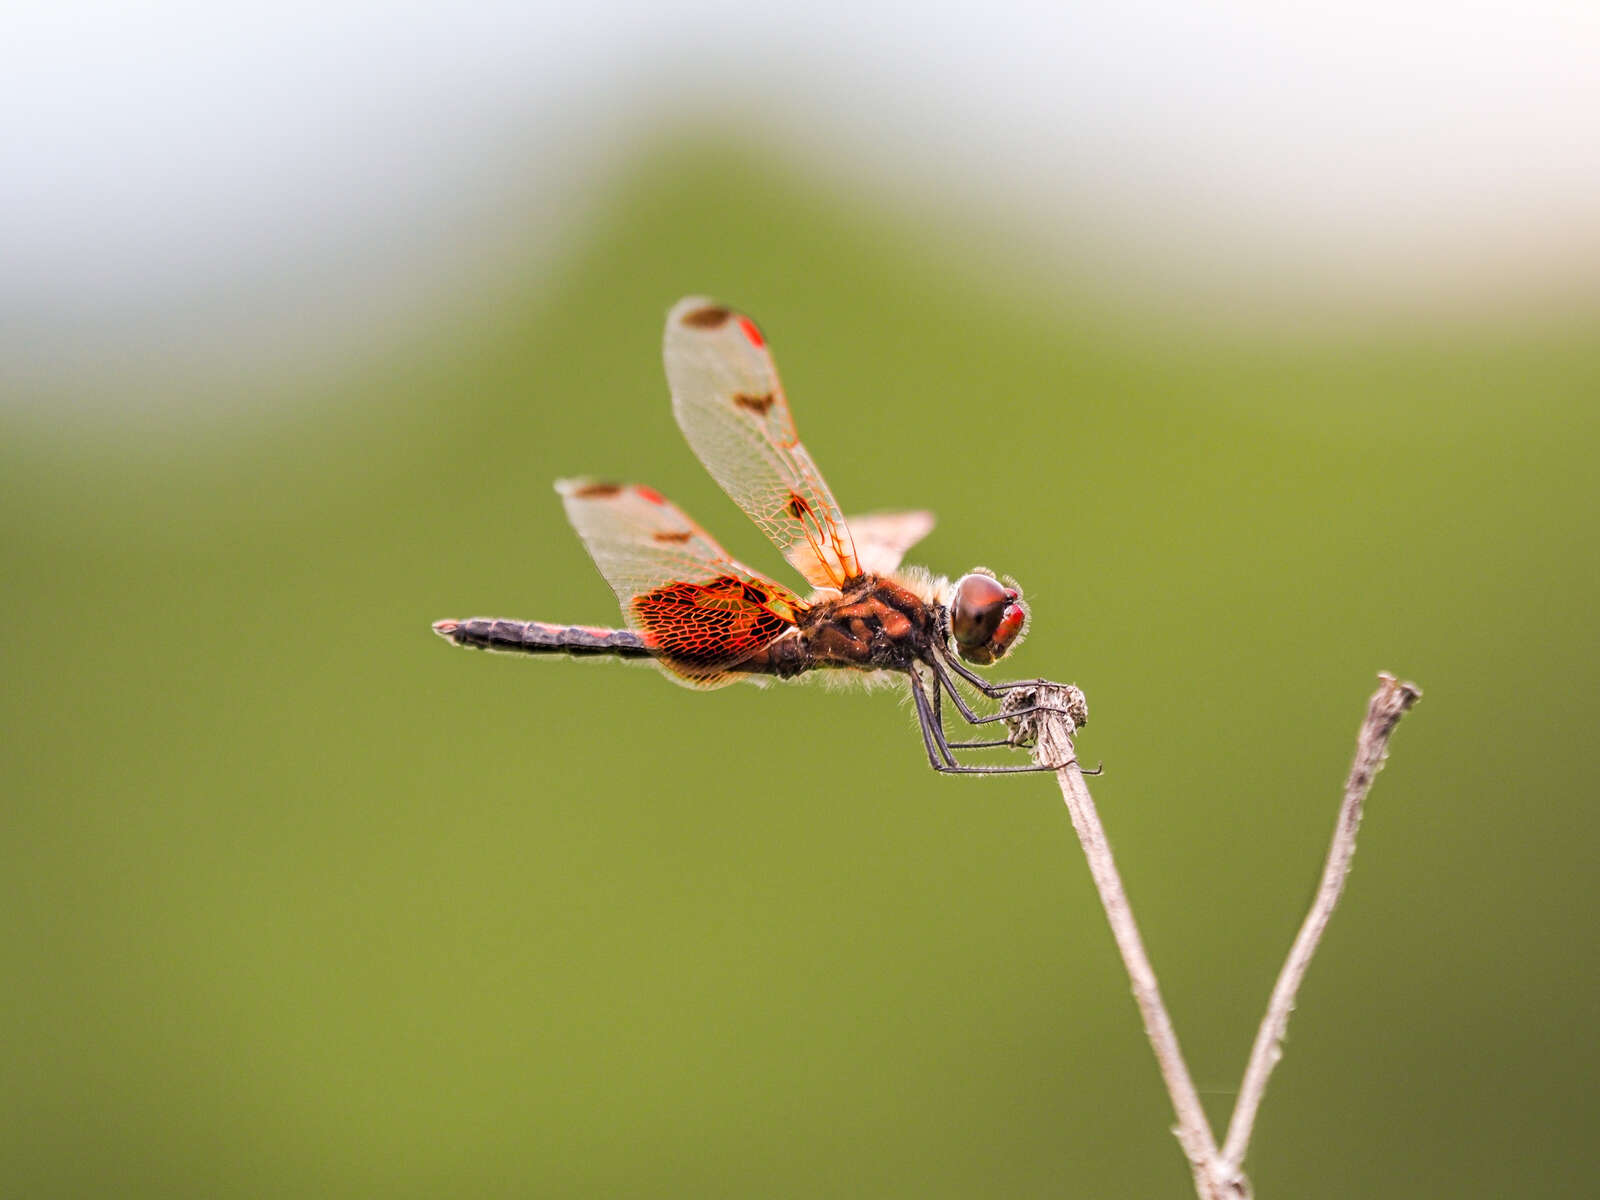
As I got more involved with macro photography, I became more and more drawn to the world of insects and spiders. I loved discovering and learning about new (new to me) creatures, but identifying subjects was incredibly difficult. Field guides are great, but two resources really help me when I want to identify what I’ve found. I use the iNaturalist app and the database at bugguide.net to determine exact species. The iNaturalist app cross-references my photo with a massive catalog of other users’ photos to suggest potential species. It isn’t always perfect, but it usually narrows the possibilities to the point where I can continue my search on Bug Guide—an online community of naturalists who enjoy learning about and sharing our observations of insects, spiders, and other related creatures—to make a proper ID.
Instagram: @innis2winnis
Chris McGinnis is a macro photographer based in Bethlehem, PA. Since 2016, Chris has been getting up close and personal with tiny creatures as he aims to showcase the wonder and beauty of their existence that often go unnoticed.