Astro-landscape photography is one of my favorite styles of photography and it has become a very popular style for photographers of all skill levels. Simply put, it means capturing the night sky in a landscape setting. The “night sky” however, can involve a number of different subjects; the milky way, meteor showers, the moon, comets, and constellations. I enjoy photographing all of these, but for me, there is one phenomenon that is the crown jewel of night photography, and that is the aurora. Unfortunately, it is also the most frustrating subject to try and capture. All of the other celestial subjects are quite predictable. With a bit of research, it is easy to figure out exactly where and when they will appear in the night sky. The northern lights are far less predictable, and even though forecasting has improved in recent years the forecasts are not always accurate (hmmm… sounds like the weather!).
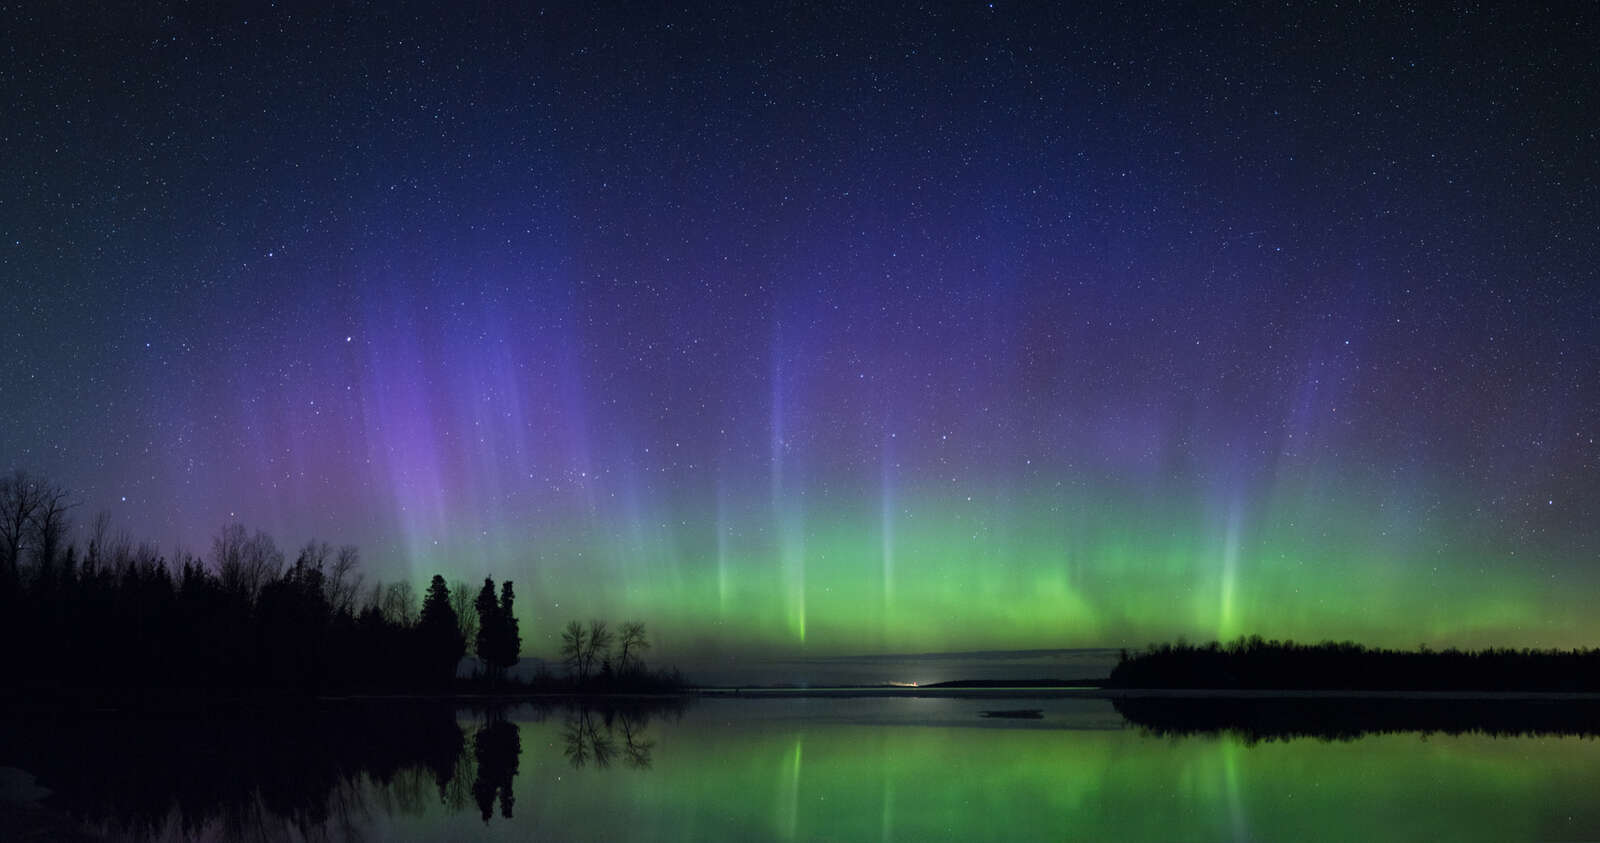
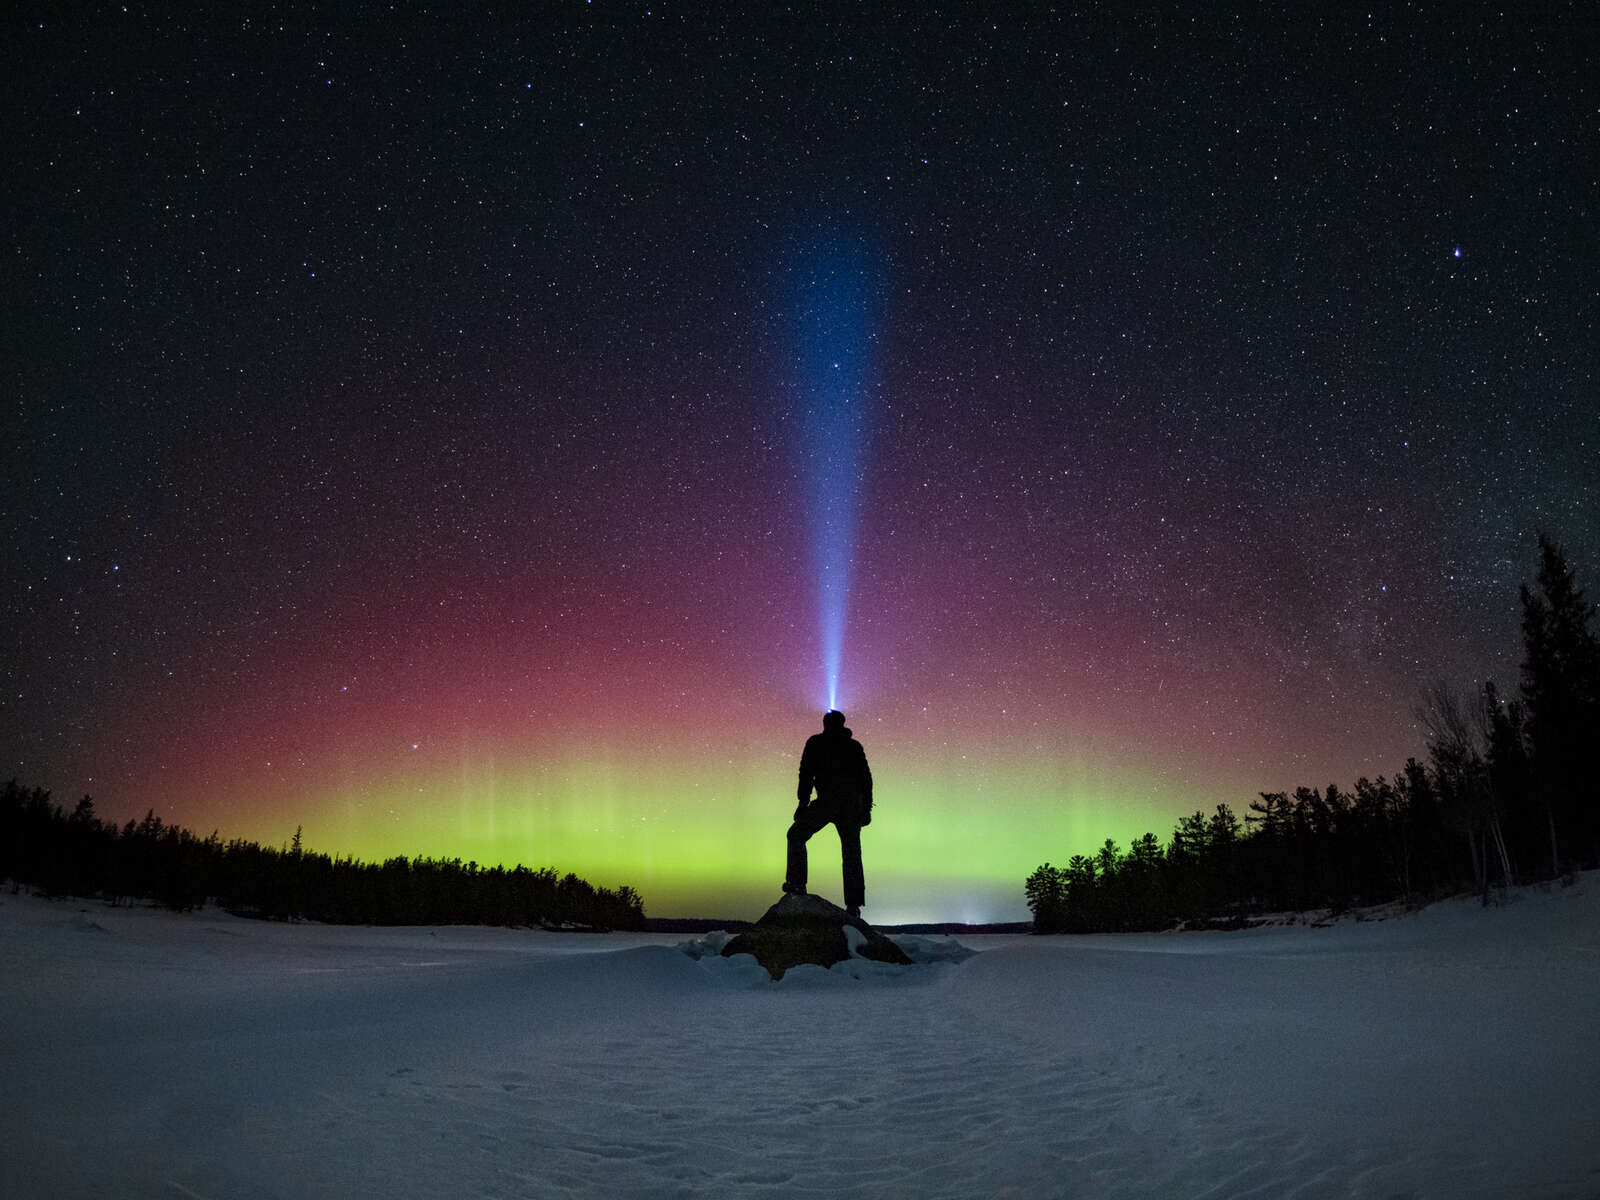
The aurora are perhaps the most rewarding night sky phenomena to witness and photograph.
The What, Where and When
The aurora is caused by explosions on the surface of the sun called coronal mass ejections. These large expulsions of plasma and electrically charged particles from the sun’s corona can travel great distances in space and eventually collide with the earth’s magnetic field. Most are deflected, but some are captured by the magnetic field and driven down toward the poles where they collide with molecules in the atmosphere. These molecules enter an ‘excited’ state and begin to glow. Oxygen molecules tend to glow green, while nitrogen glows purple, pink and red. The characteristic pillars and curtains of light are caused by the lines of force in the magnetic field. The strength of the CME will determine the intensity of the aurora. Geomagnetic activity is measured using the Kp Index, a scale that goes from 0 to 9. The greater the CME, the greater the kP value and the more intense the resulting aurora will be.
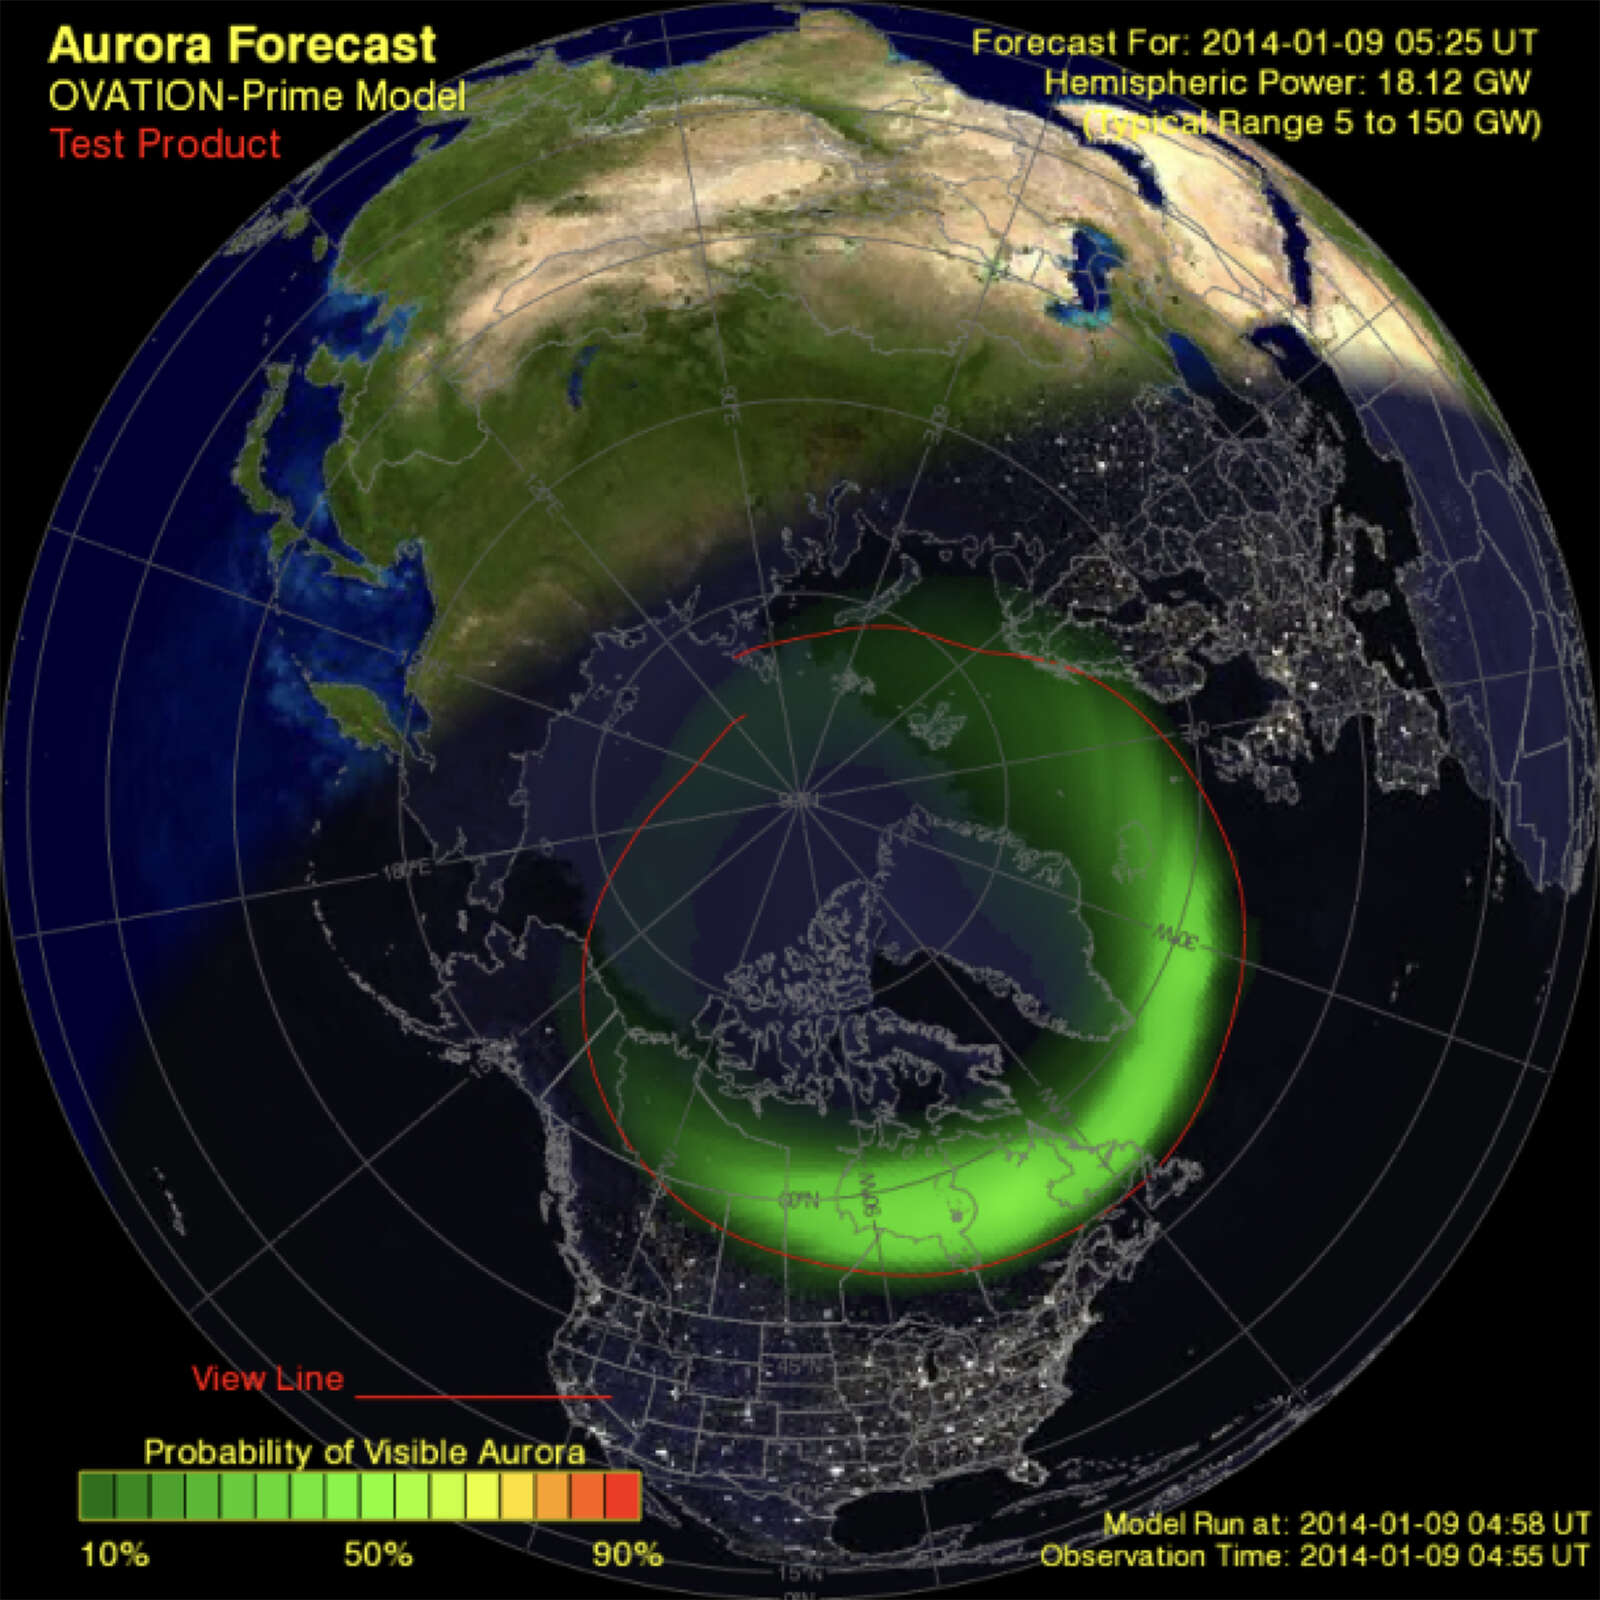
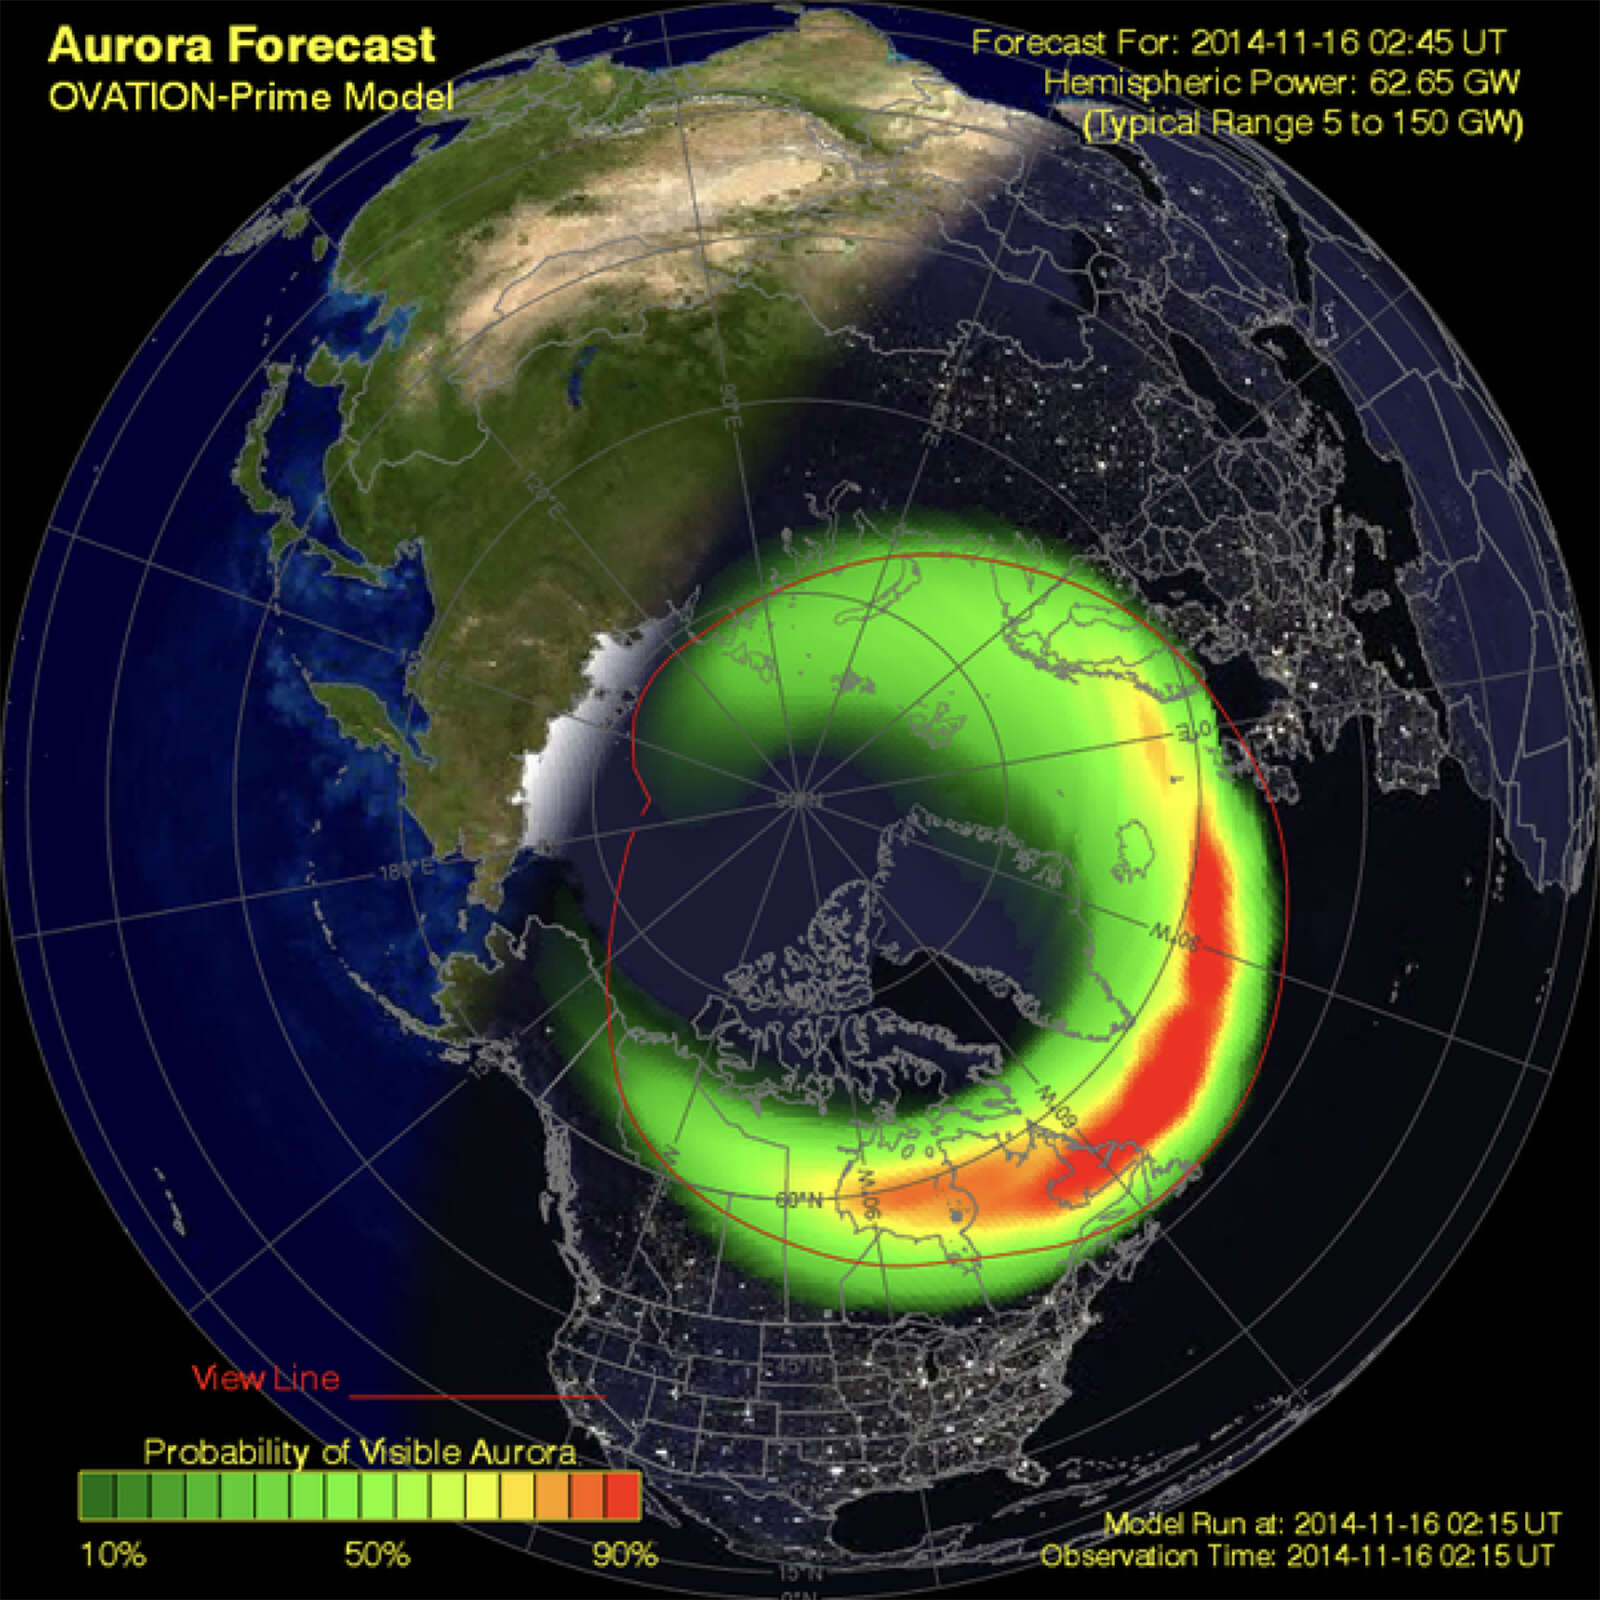
Since solar storms are somewhat random it can be difficult to predict when the aurora will occur. Several apps and websites exist that can improve your chance of seeing the northern (or southern) lights. My preferred ones are;
• App – My Aurora & Alerts (Android and iOS)
• Websites – Soft Serve News
Your chances of seeing a good display increases at higher latitudes. Alaska, northern Canada, Iceland and Norway are popular destinations for those wishing to witness the northern lights. Although the aurora is not seasonal, the longer nights of winter can be a great time to plan a trip to these locations. At these latitudes the aurora can be seen at Kp2 and Kp3, which is fairly common. A solar storm is needed in order to view the northern lights at more southerly latitudes. I live at 45 degrees north and require at least Kp5 in order to view the aurora and even at that level they are rather faint. At Kp7 the aurora can be viewed in the northern U.S. Extreme storms of Kp8 and Kp9 are quite rare, but the resulting displays are incredible to witness… and to photograph.
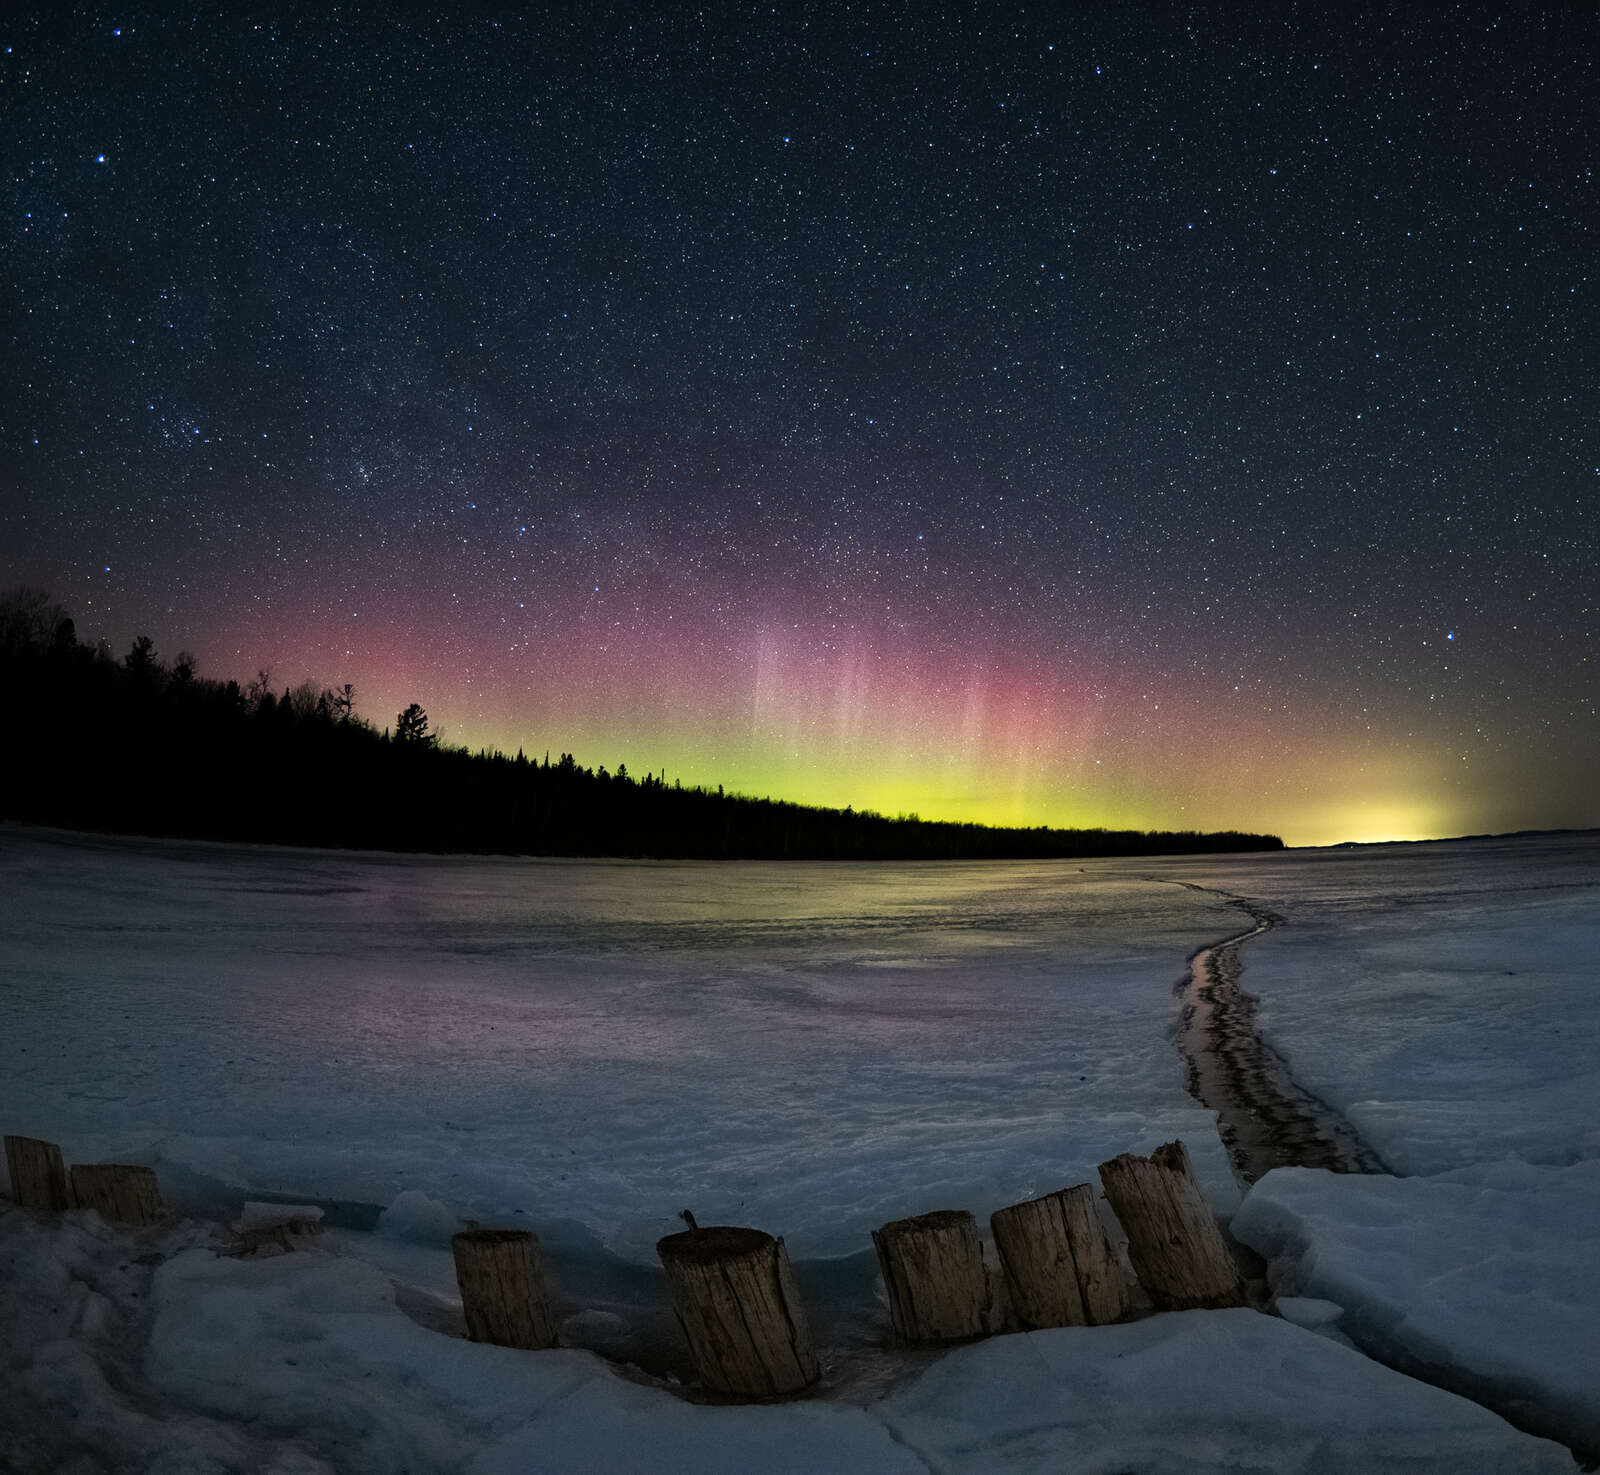
This display was barely visible to the naked eye, but could be easily picked up by the camera.
Viewing and Photographing the Aurora
With all night sky photography there are certain things that will increase your chances of success. First and foremost is the need to be in a dark sky area. The aurora cannot compete with the artificial light in urban areas. Of course, moonlight can also interfere with your viewing. And nothing is more frustrating than to have a blanket of clouds covering you when you know the lights are dancing in the sky, so check out weather forecasts and satellite images. As well, be prepared to wait. Even if the sky conditions are perfect it is not unusual for the aurora to wane for a period of time during a solar storm. Also, keep in mind that the aurora is never as bright and colourful to the naked eye as it is in photographs. Our cameras can see the night sky in ways that we just can’t.
Camera Settings When I first started my journey into astro-landscape photography I clearly recall being intimidated by which camera settings I should use when shooting at night. I quickly discovered that once you know the settings for your camera/lens combination they hardly ever change. This is because once it’s dark out you can shoot for hours under identical lighting conditions. This certainly applies for most situations where I am photographing the milky way. Unfortunately, when it comes to photographing the aurora, things aren’t quite that simple. The intensity of the northern lights can change dramatically through the night, or from one display to the next. As such there isn’t a specific formula that you can use, unlike for general astro shooting. The basics of night sky photography is beyond the scope of this article, so if you are new to this style of photography check out the following, Astrophotography 101.
With extra light hitting your sensor you can get away with shorter shutter speeds and lower ISO settings. How much will depend on the situation, but generally I try to keep the shutter speed between 5 and 10 seconds. The pillars and curtains of light can move fairly quickly and with longer shutter speeds they will blur together and create a ‘mushy’ feel to the image.
Editor note: If the aurora is dim (which may be the case depending on your distance from the north) or if you prefer a smoother glow, experiment with longer shutter speeds.
By using a shutter speed of only 5 seconds the pillars of light remained distinct and didn't 'mush' together. Shot with the M.Zuiko 17mm F1.2 PRO, this image is a 5-shot panorama to create a wider field of view
As for gear, I usually use the OM SYSTEM OM-1, although all of the cameras in the OM SYSTEM line-up are quite capable of capturing the beauty of the night sky. Your choice of lens will have a bigger impact on your image. My three favorite lenses for shooting at night are the M.Zuiko 8mm F1.8 PRO Fisheye, the 12mm F2, and the 17mm F1.2 PRO. They are all faster lenses with a wide field of view. A lens with a maximum aperture of f/2.8 or greater will work, but you will need to increase your ISO, shutter speed, or both. The chart below illustrates my typical settings when shooting with the OM-1 and 12mm F2 for both the milky way and the aurora.
| Milky Way | Aurora | |
|---|---|---|
| Shutter Speed | 15s | 5 - 8s |
| ISO | 3200 | 640 - 1600 |
| Aperture | f/2 | f/2 |
| White Balance | 3800K | 3800K |
| Noise Reduction | Off | On |
As mentioned there is some variability in my settings when photographing the aurora because each display is different. For my milky way shots, I keep noise reduction off because I stack images in post to help reduce noise. This is not as effective when shooting the aurora so I ensure the NR is on. Make sure to take a test shot and examine it carefully in the viewfinder, especially to make sure that the stars are in focus. If your camera has Starry Sky AF, be sure to use it.
Once you have the best settings dialed in for the conditions, and you’ve taken a couple of test shots, it’s time to compose that killer shot.
Composition
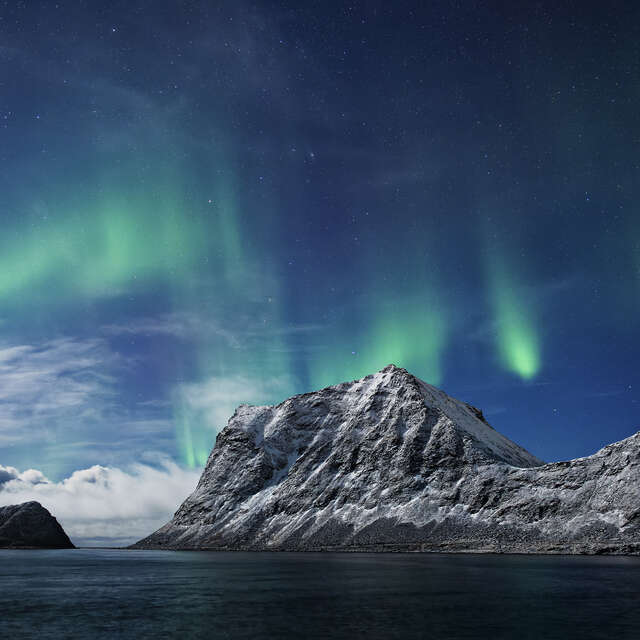
Now comes the fun part, and for me, the most important part. After each major aurora event there will be a flood of images on social media. Getting yours to stand out will depend in large part on how you compose the shot, more specifically what you put in your foreground. I view photographing the northern lights in the same way as I look at capturing a spectacular sunset. The colors make a great backdrop, but it is your foreground that will make or break the shot. A flat horizon with a sky full of color may show off the beauty of the aurora, but makes for a rather uninteresting and forgettable photograph.
As impressive as the aurora is in this image, the foreground lacks interest, thereby making a rather dull photograph.
Keep the following in mind;
• Choose a location with one or more points of interest. A silhouetted tree, a mountain peak, a reflection in a tree-lined lake, an abandoned farm house – these are all great foregrounds that will add interest and staying power to your aurora photo.
• Know your location and scout out possible options during the day. It can be surprisingly difficult to find that really cool tree in the middle of field when it’s dark out.
• For some subjects a bit of light painting or low-level lighting might help bring out some interesting details.
• Have one or two backup locations in mind if your primary spot isn’t working out as you imagined it would.
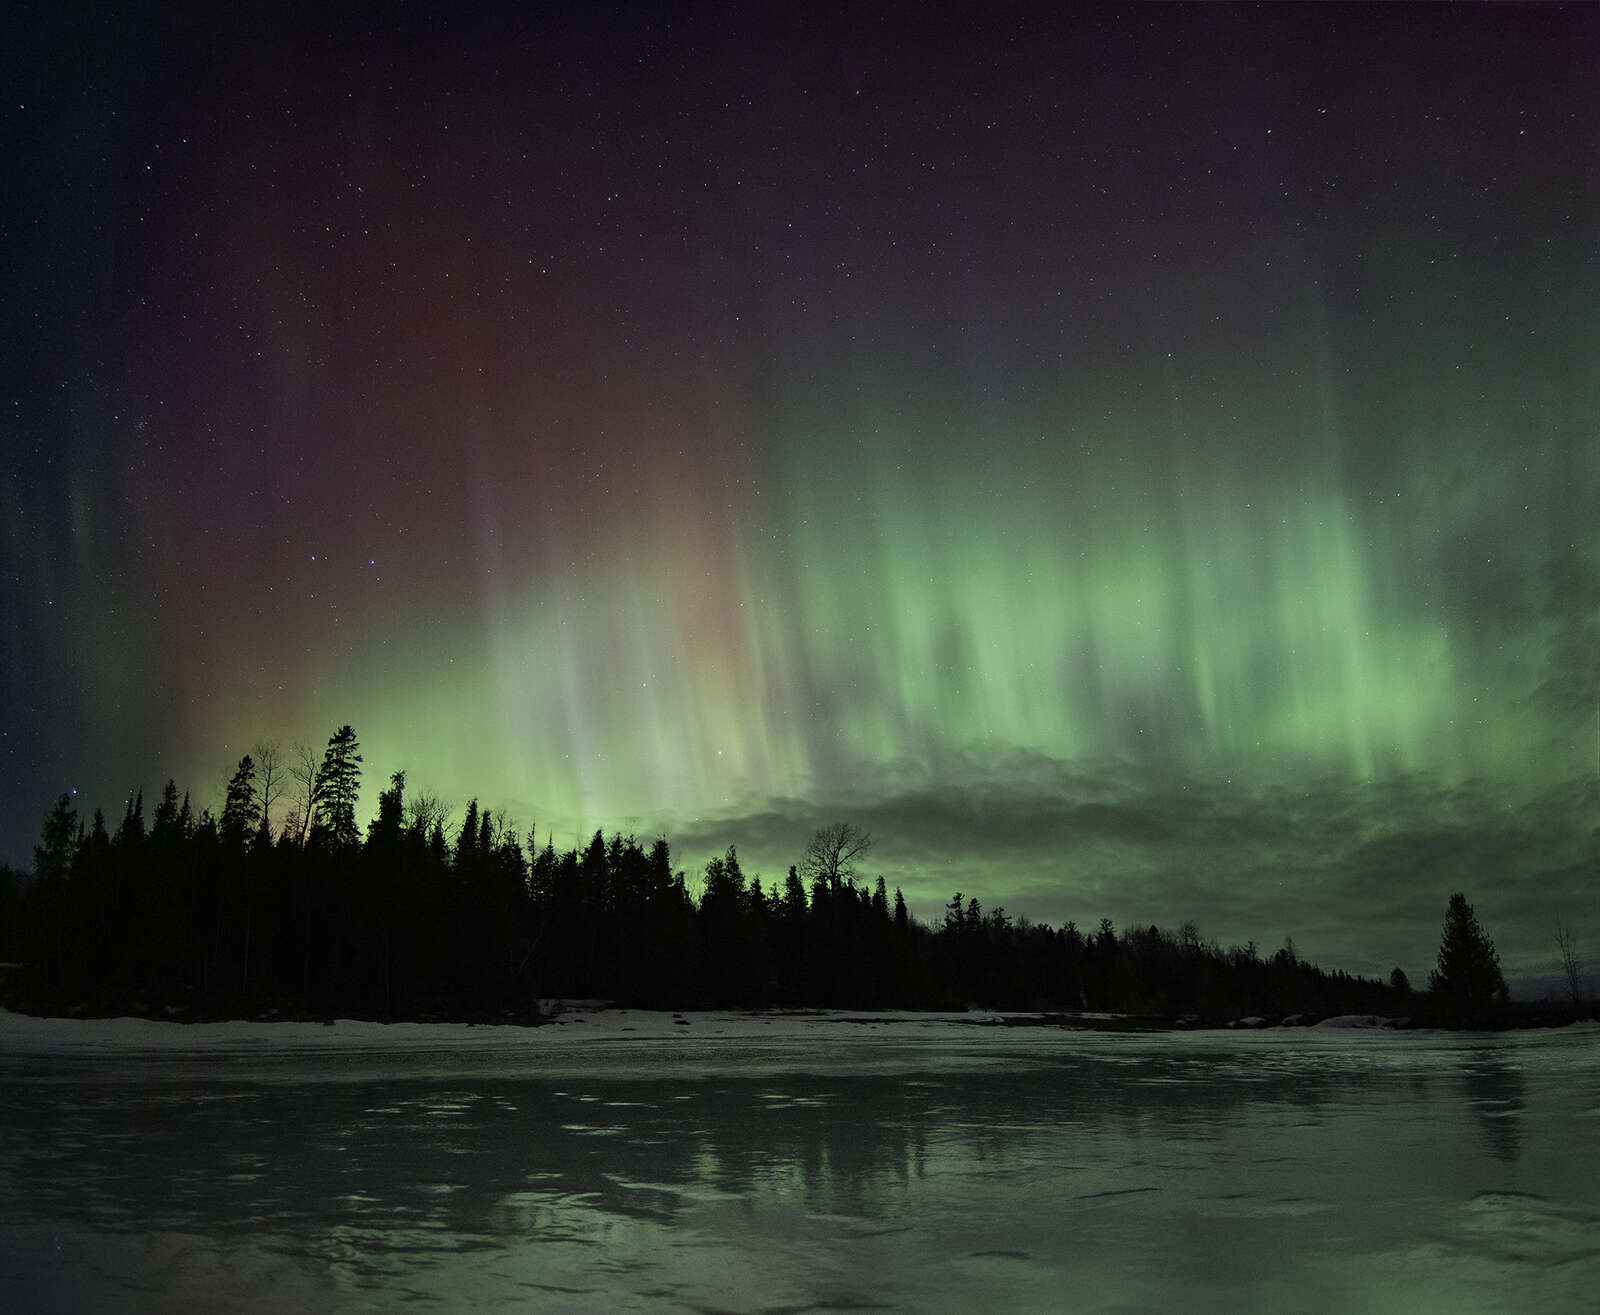
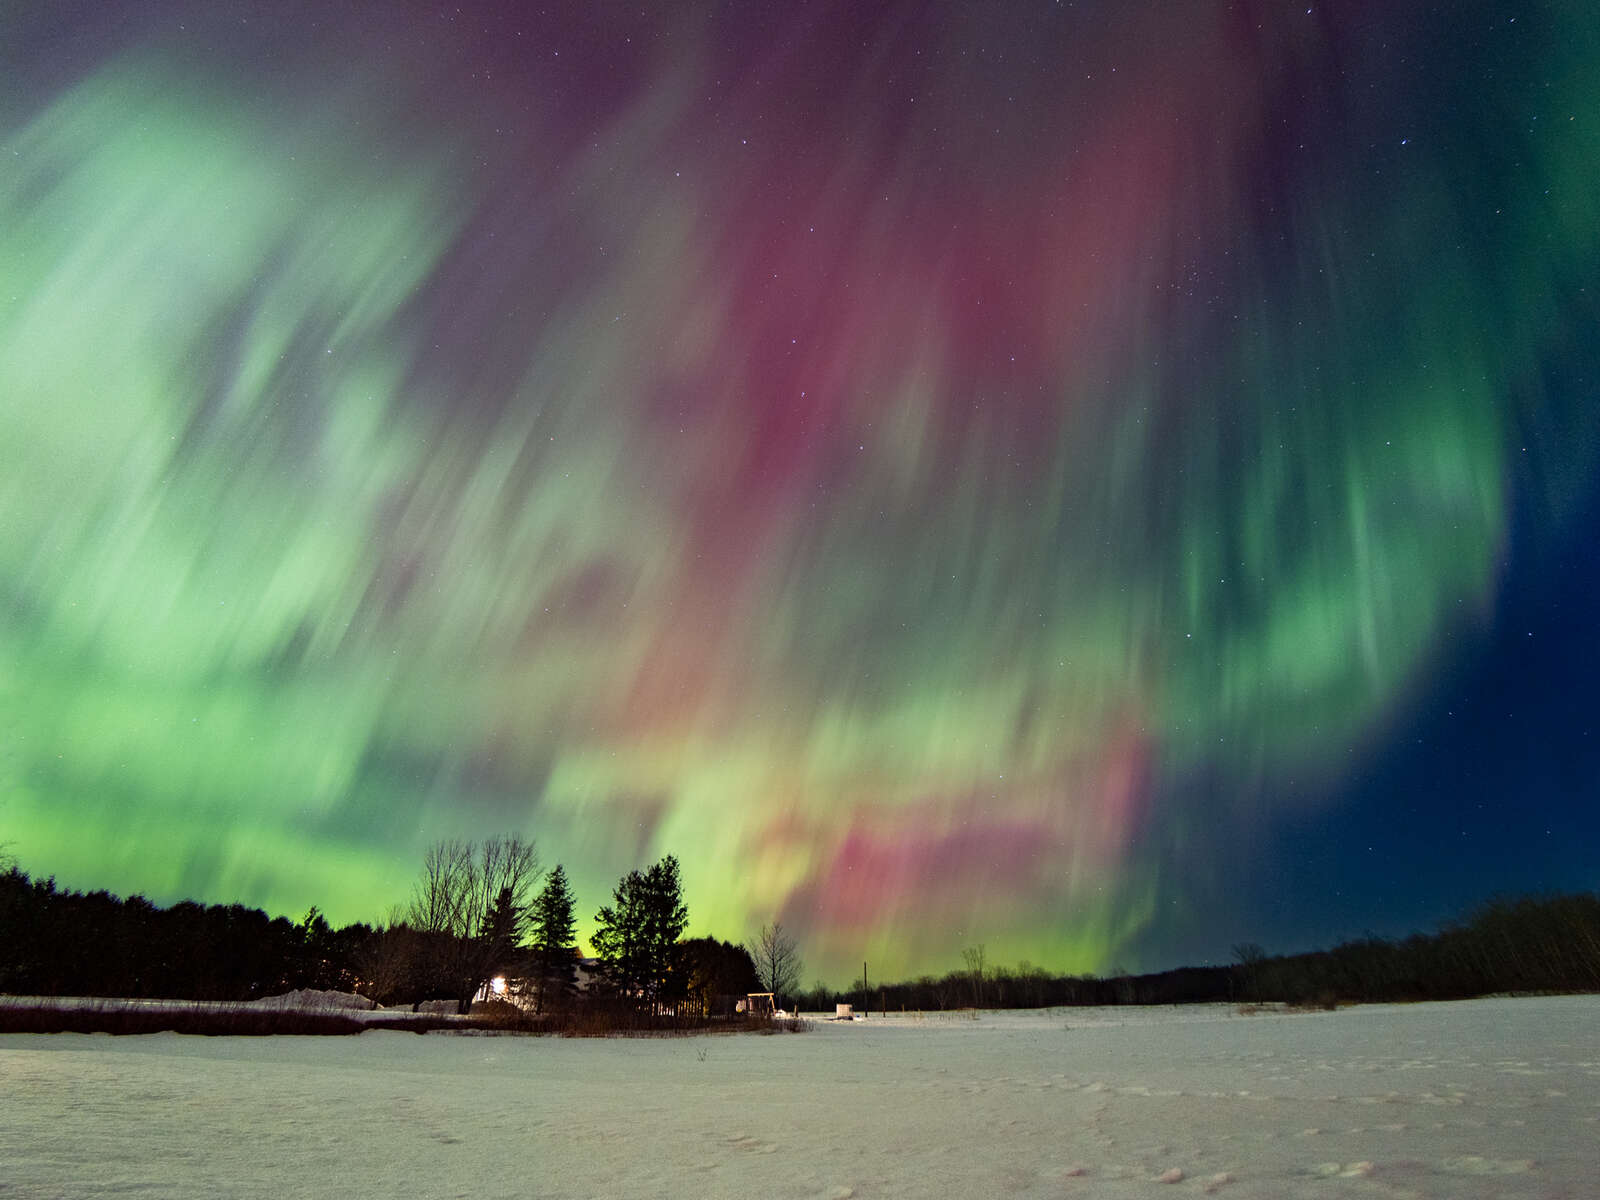
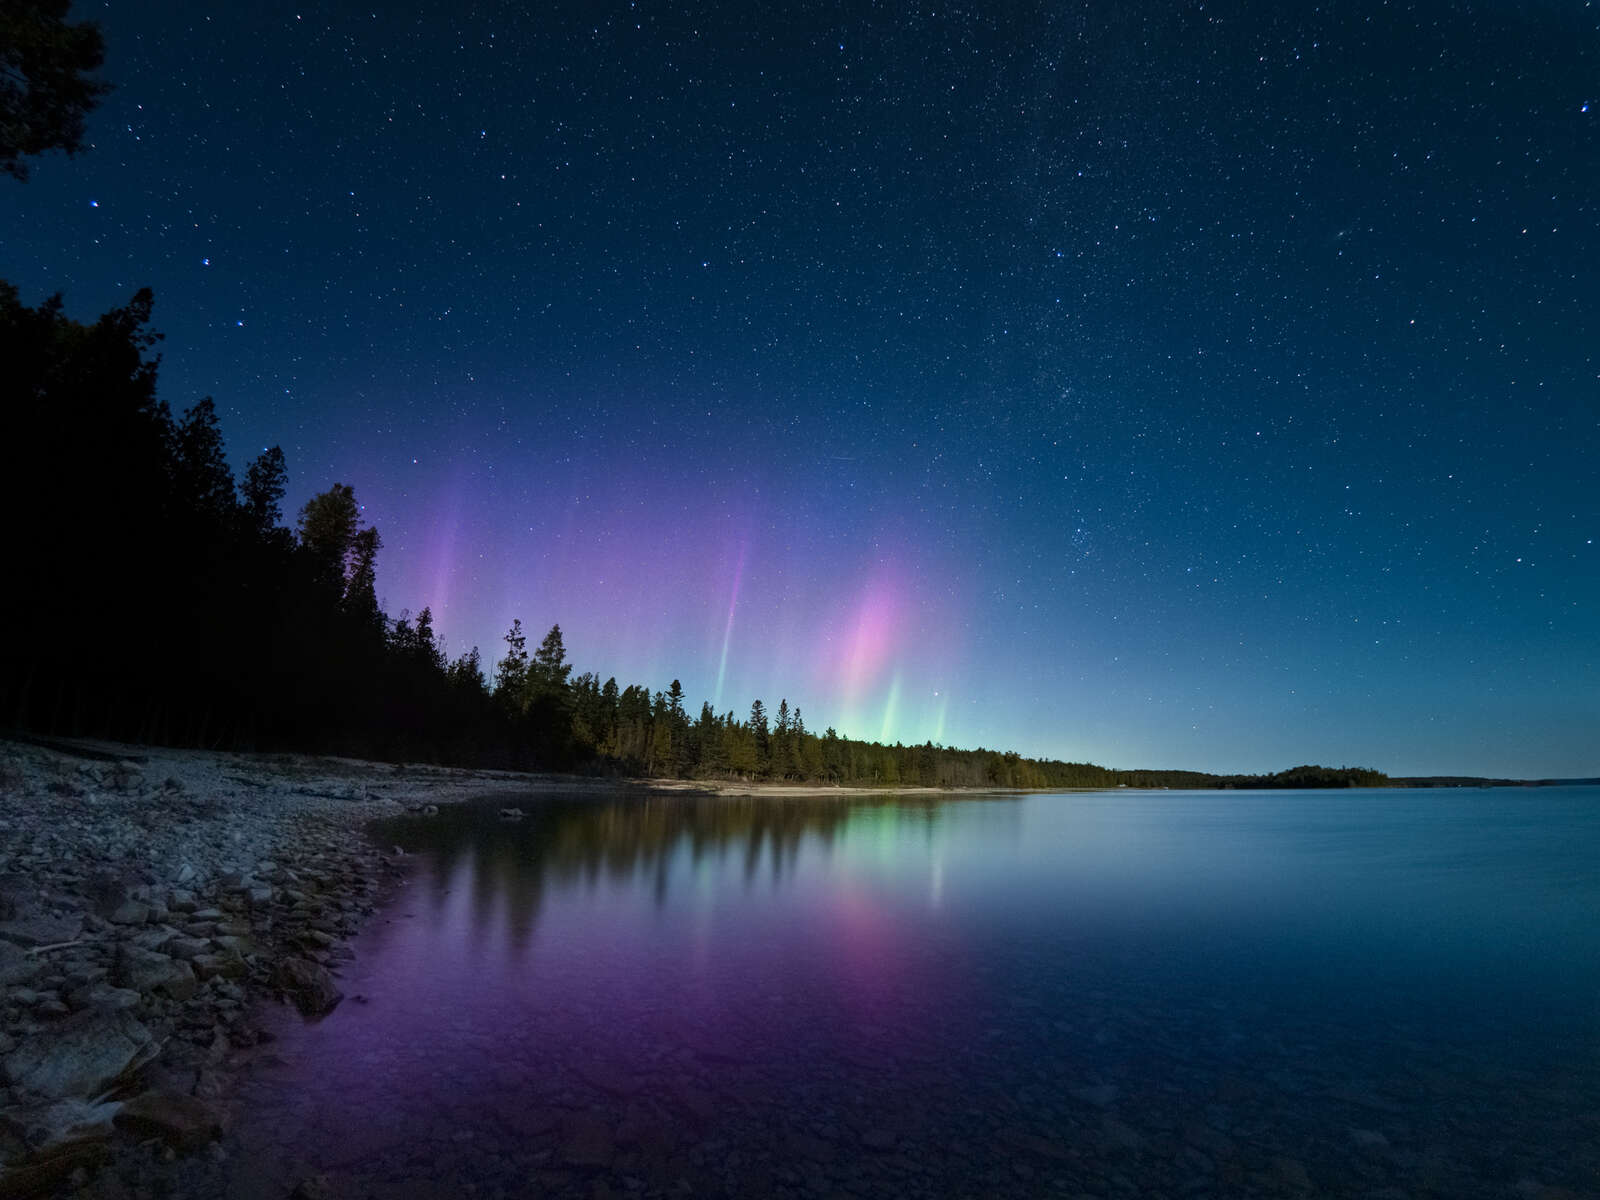
This image was shot about 10 minutes after the previous photo. Taking the time to find a more interesting foreground subject paid off with a far more pleasing photograph.
Post-Processing
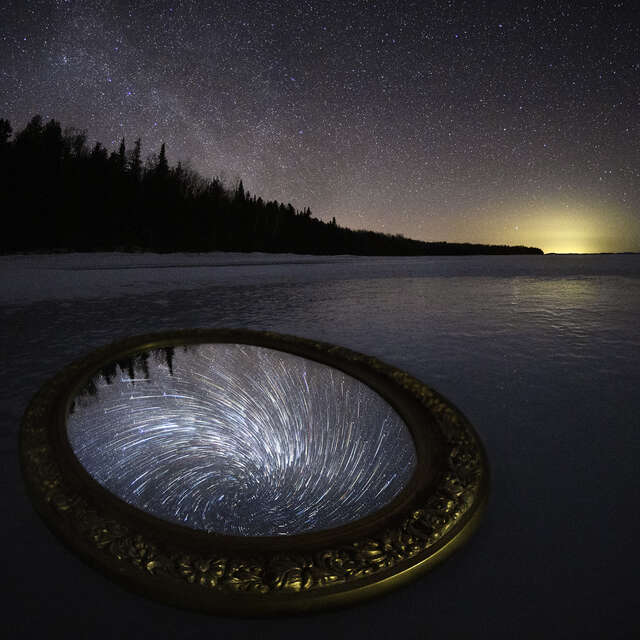
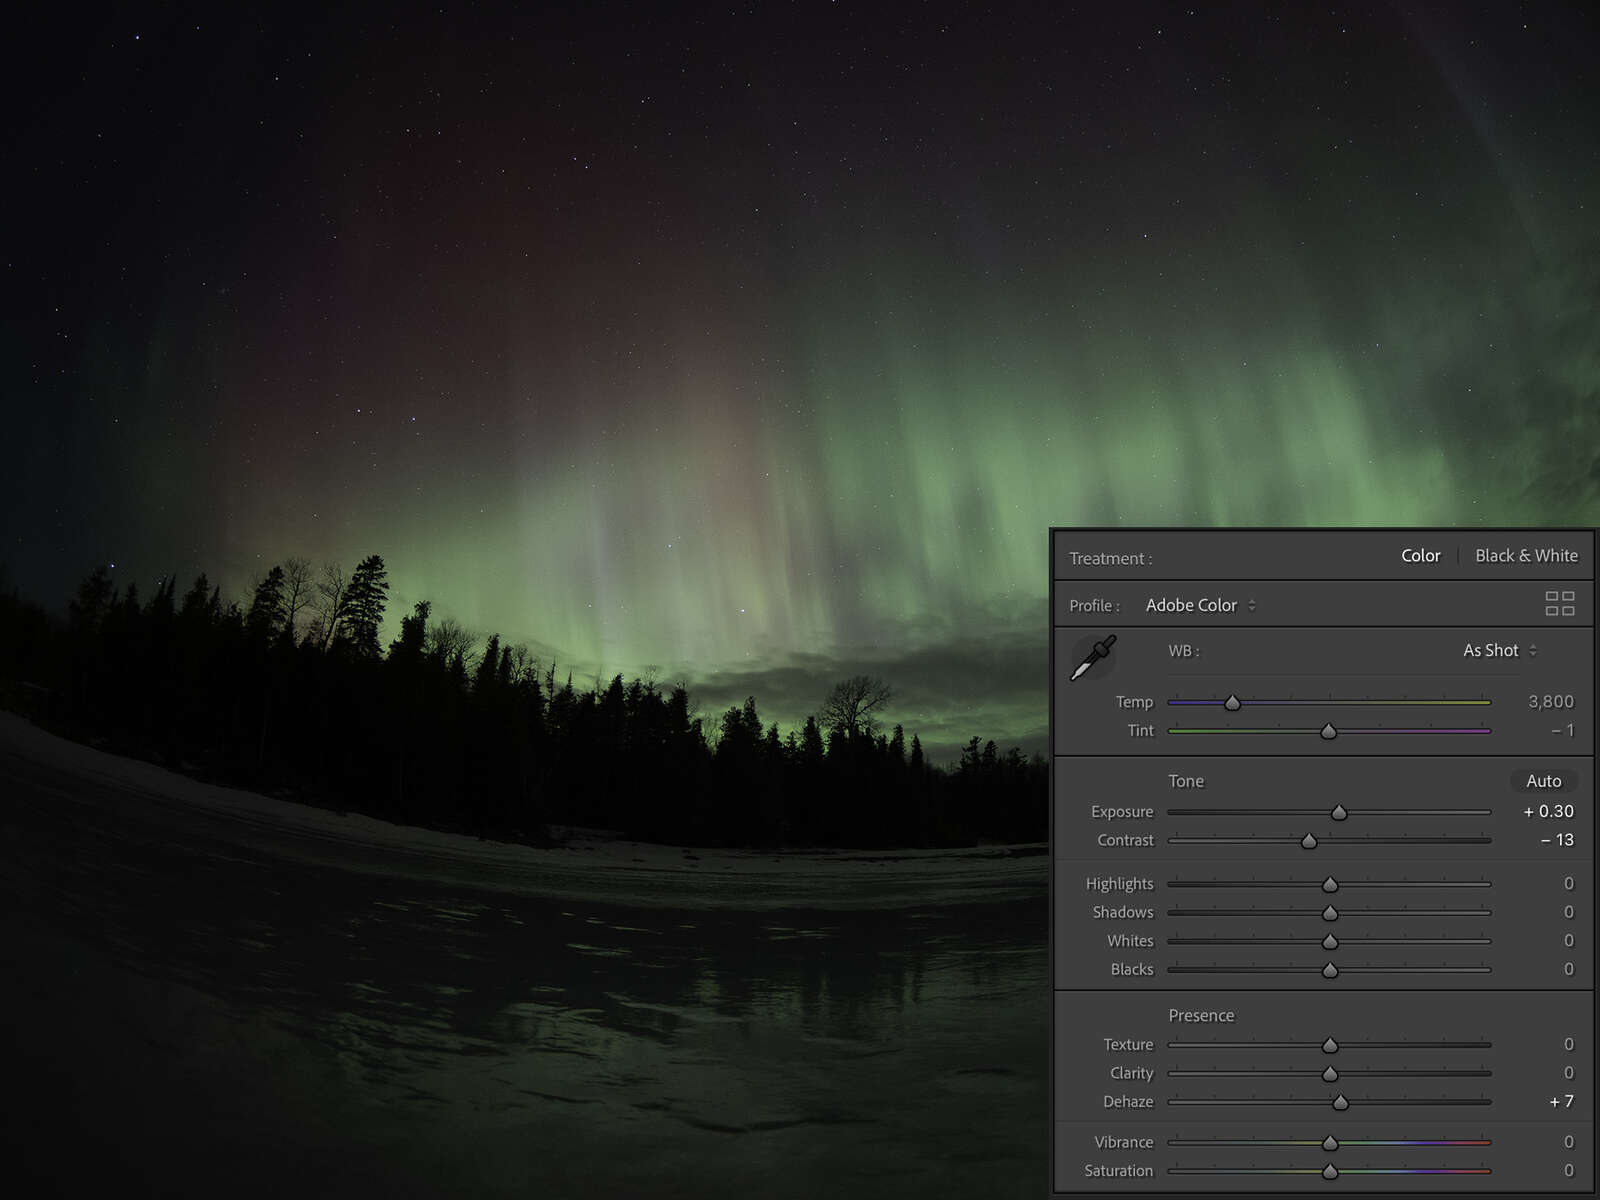
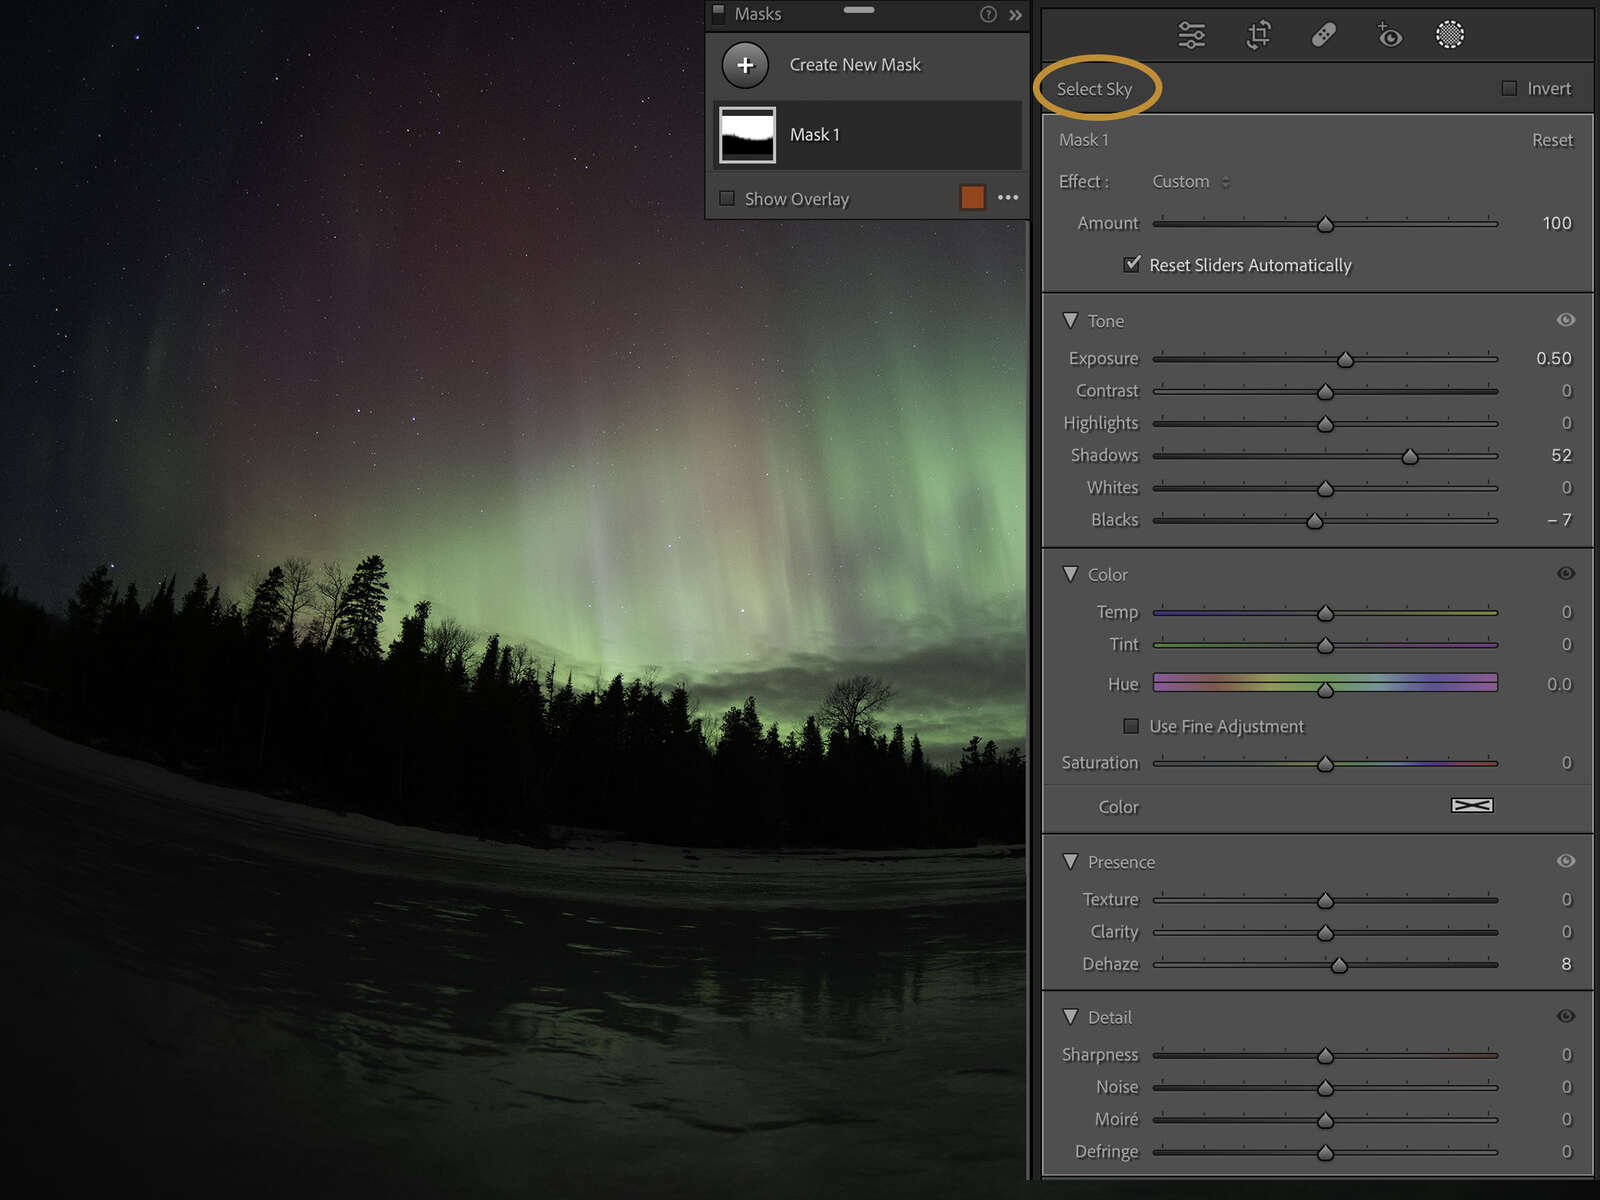
Every image of the night sky will require some post-processing in order to bring out the details. When it comes to my photos of the aurora I use a three-step approach. Using Adobe Lightroom Classic I first apply some basic global adjustments, then I apply a mask to the sky and make adjustments that will best bring out the details and colours in the aurora. Finally, I will copy and invert that mask and make adjustments to the foreground. In some instances, I will finish it off by making a few more refinements to the overall image. The screenshots below illustrate the process used for the very first image in this article.
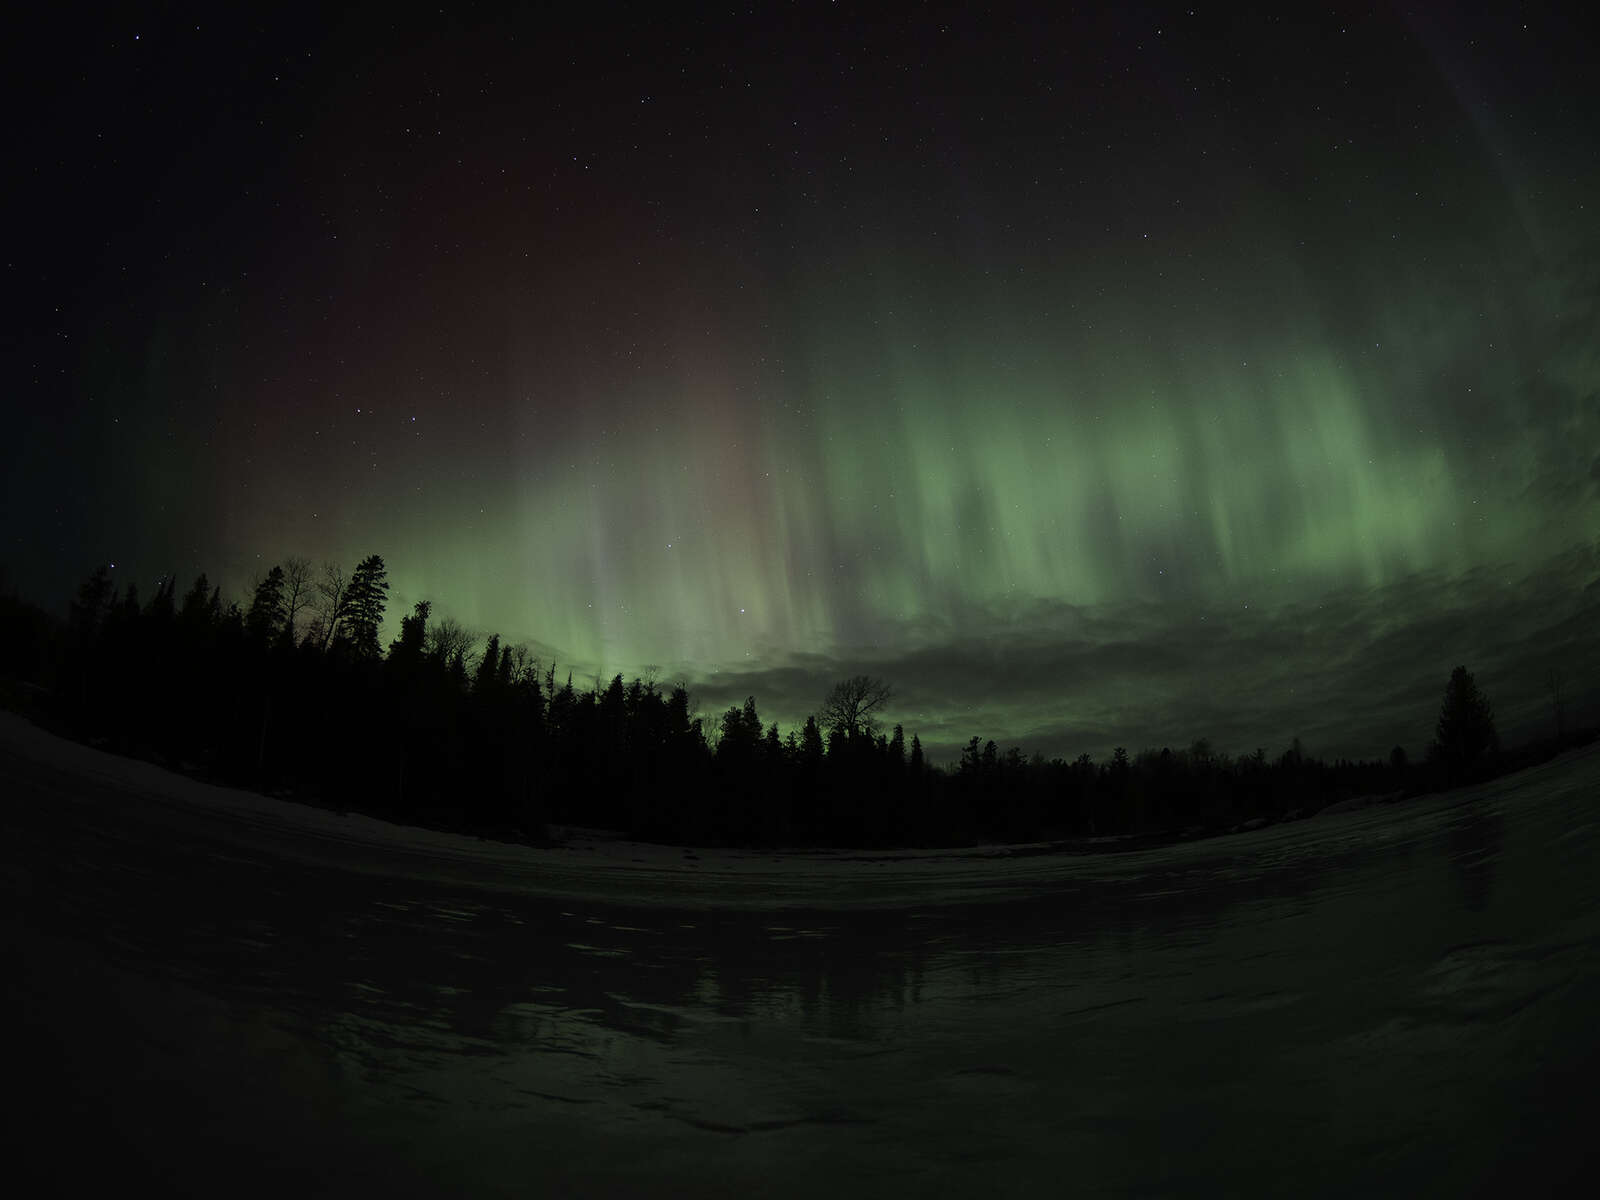
Figure 1 RAW image with no post-processing
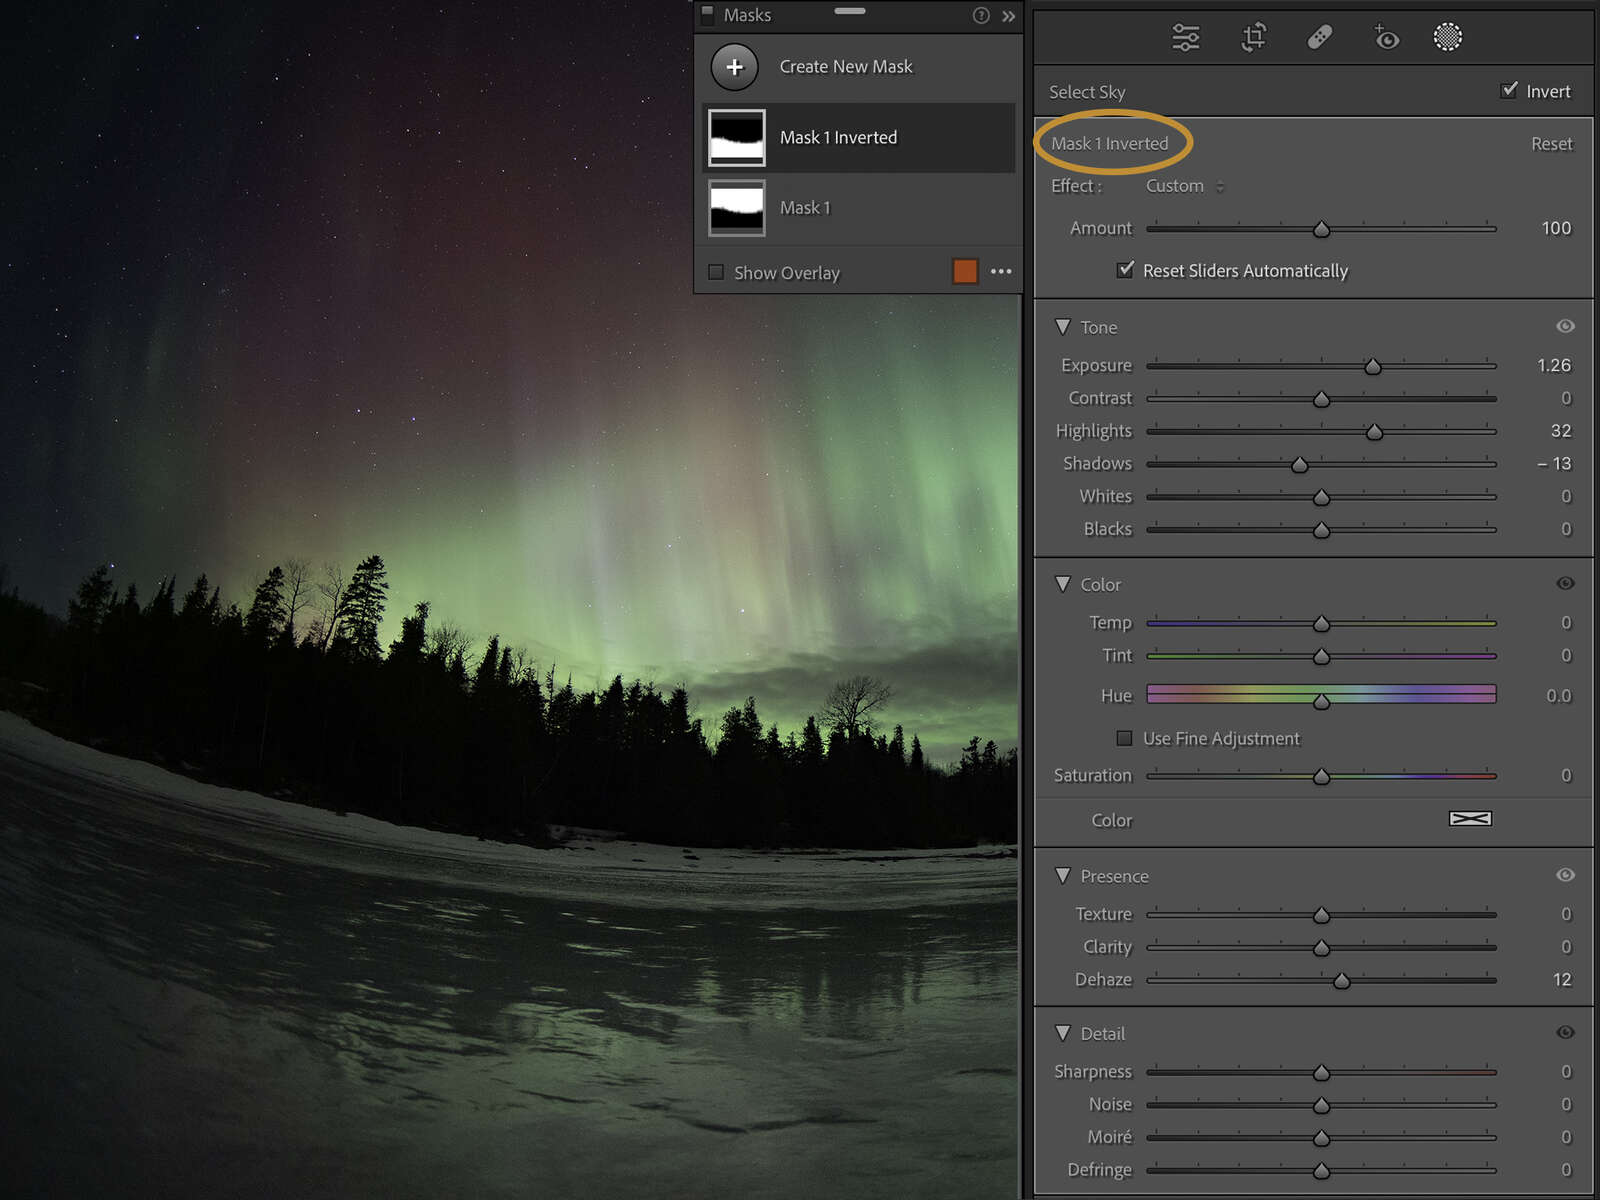
The final step for this image was to bring it into Photoshop and use the Warp Tool to correct some of the distortion in the horizon caused by the fisheye lens. I may also tweak colors and exposure using various adjustment layers.
Final Thoughts and Images
The surface of the sun is full of intense activity; sunspots, solar flares and coronal mass ejections. This activity fluctuates in intensity on an 11-year solar cycle. 2025 marks the solar maximum. That means that the aurora should increase in frequency and intensity until that time and gradually decrease after that for a few years before increasing again. I have found that capturing the northern lights is one of the most rewarding experiences that I have had as a photographer. It can be incredibly frustrating when the conditions prevent them from being seen, or worse, to find out that I have slept through an incredible display, but that just gets me more excited for the next one. And there will always be a next one.
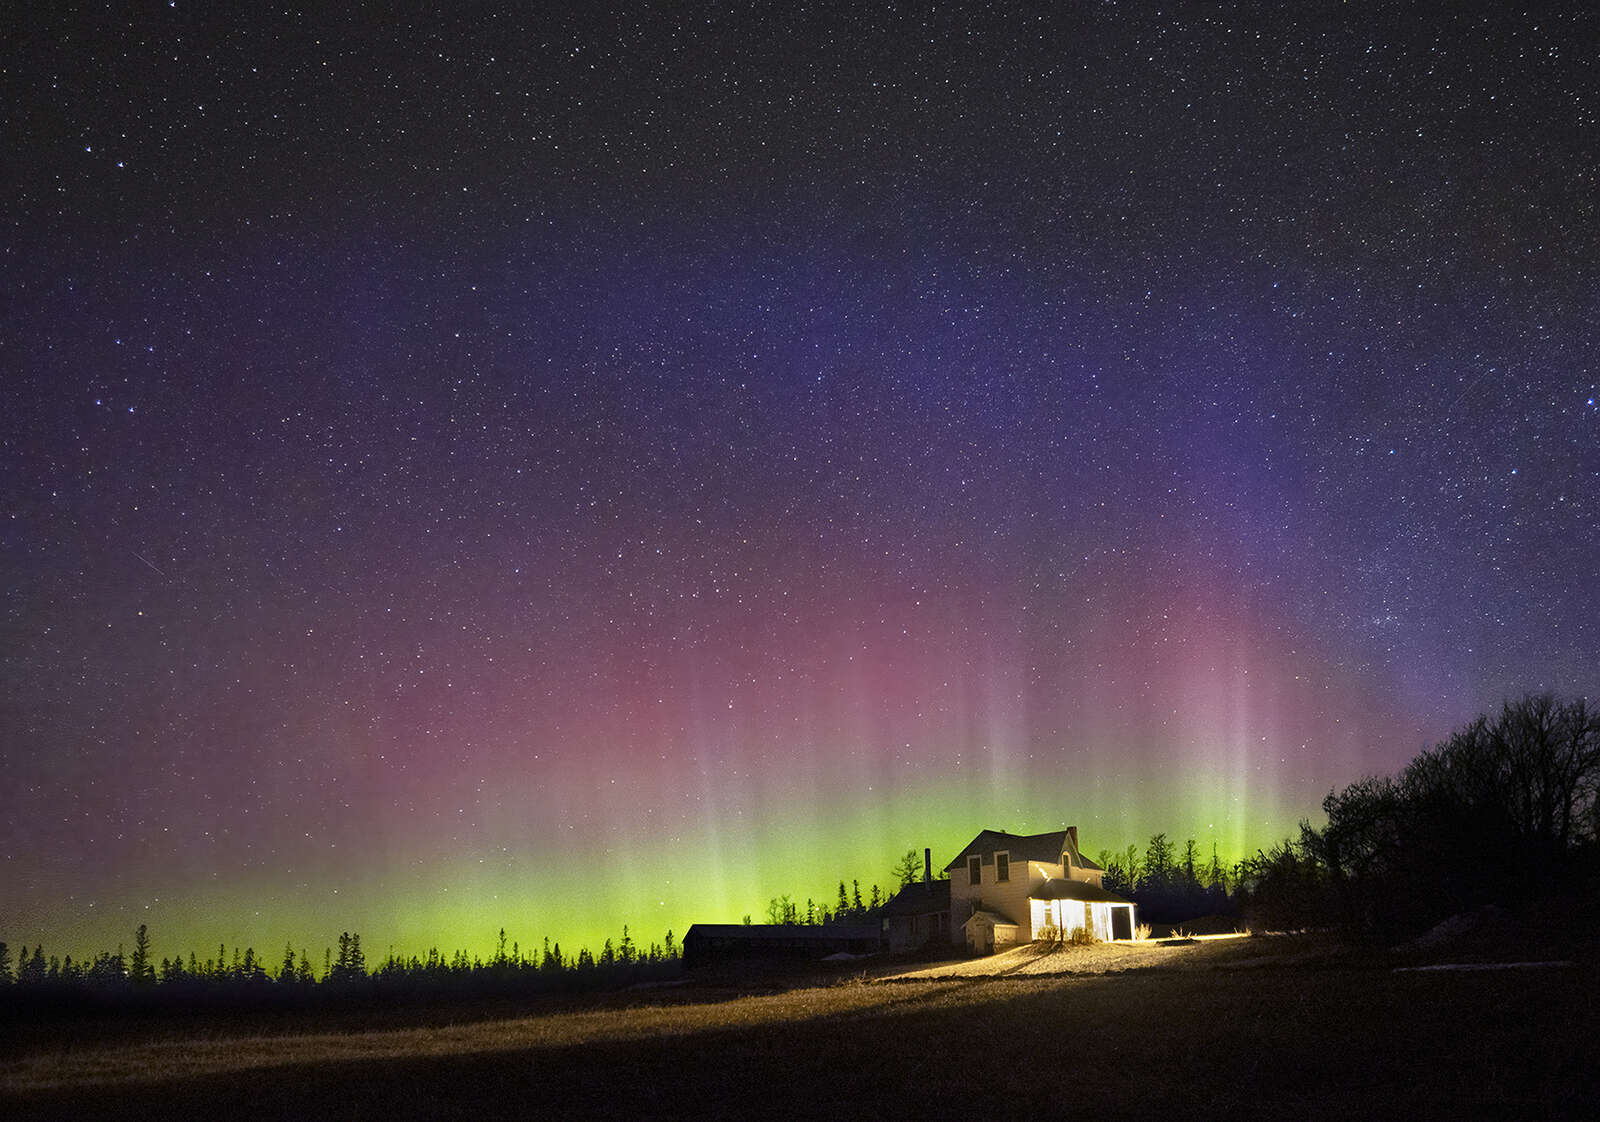
Even a relatively small display can make for an impressive landscape shot.
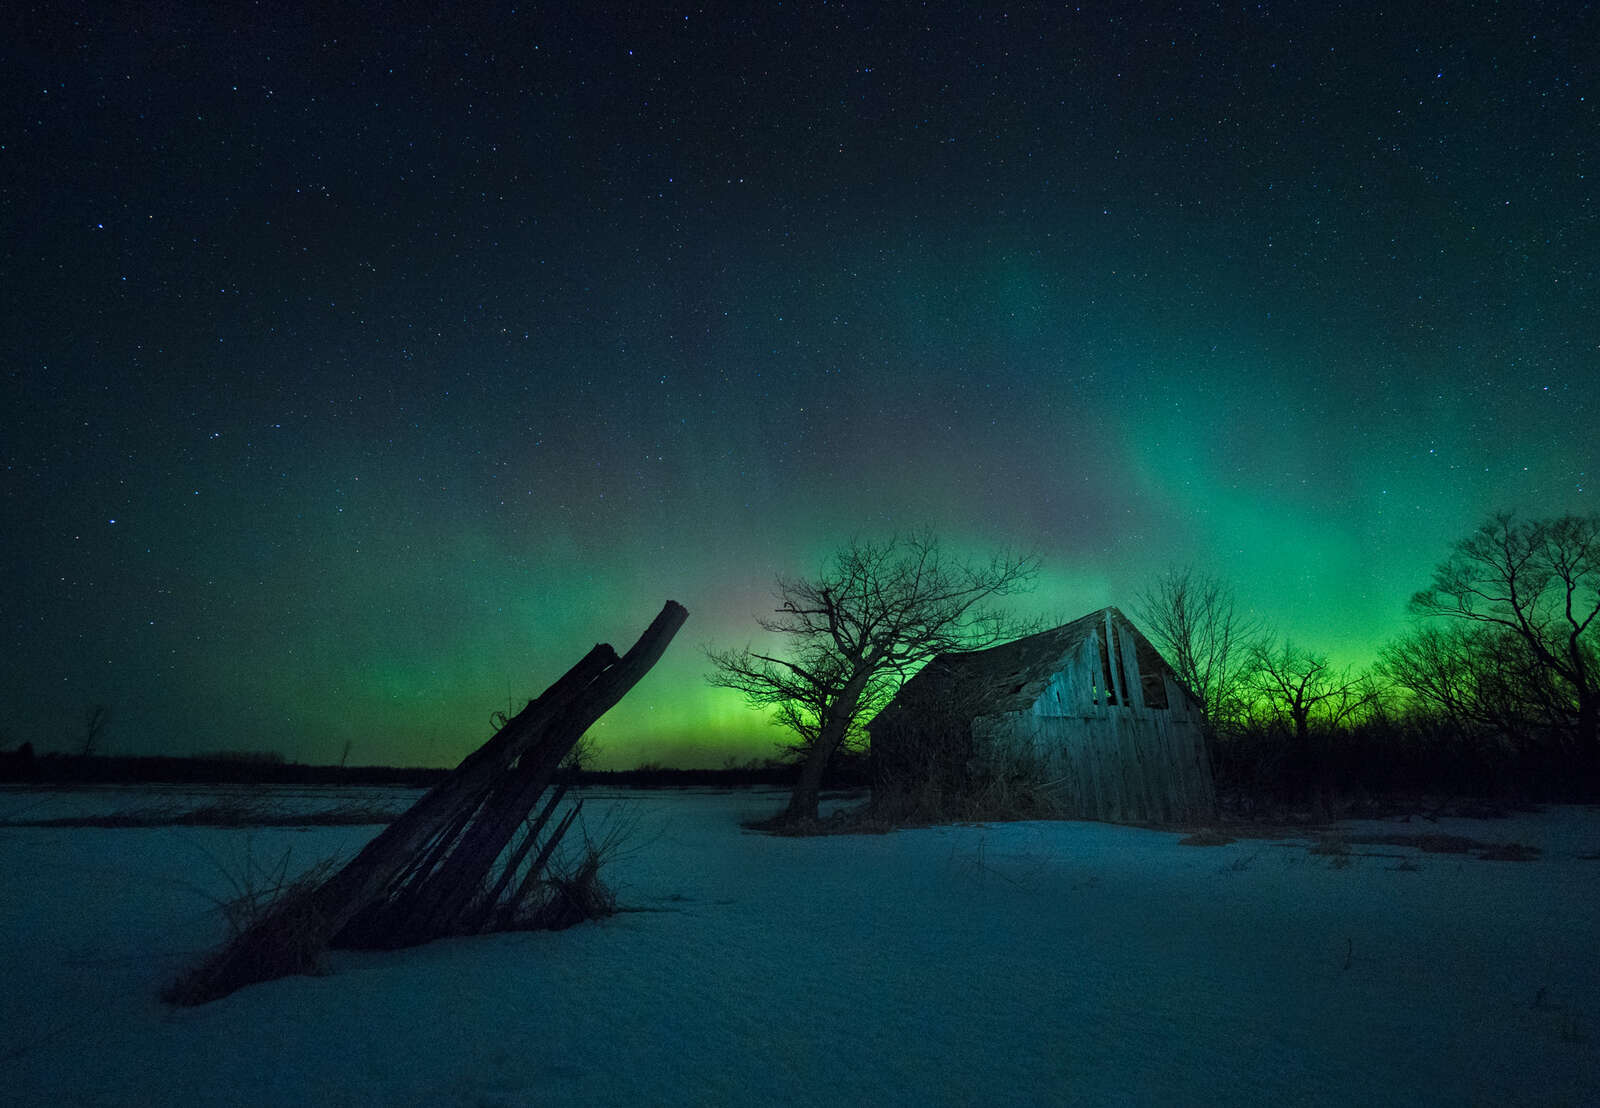
For this shot I used my headlamp to do a bit of light painting on the snow and the old shed.
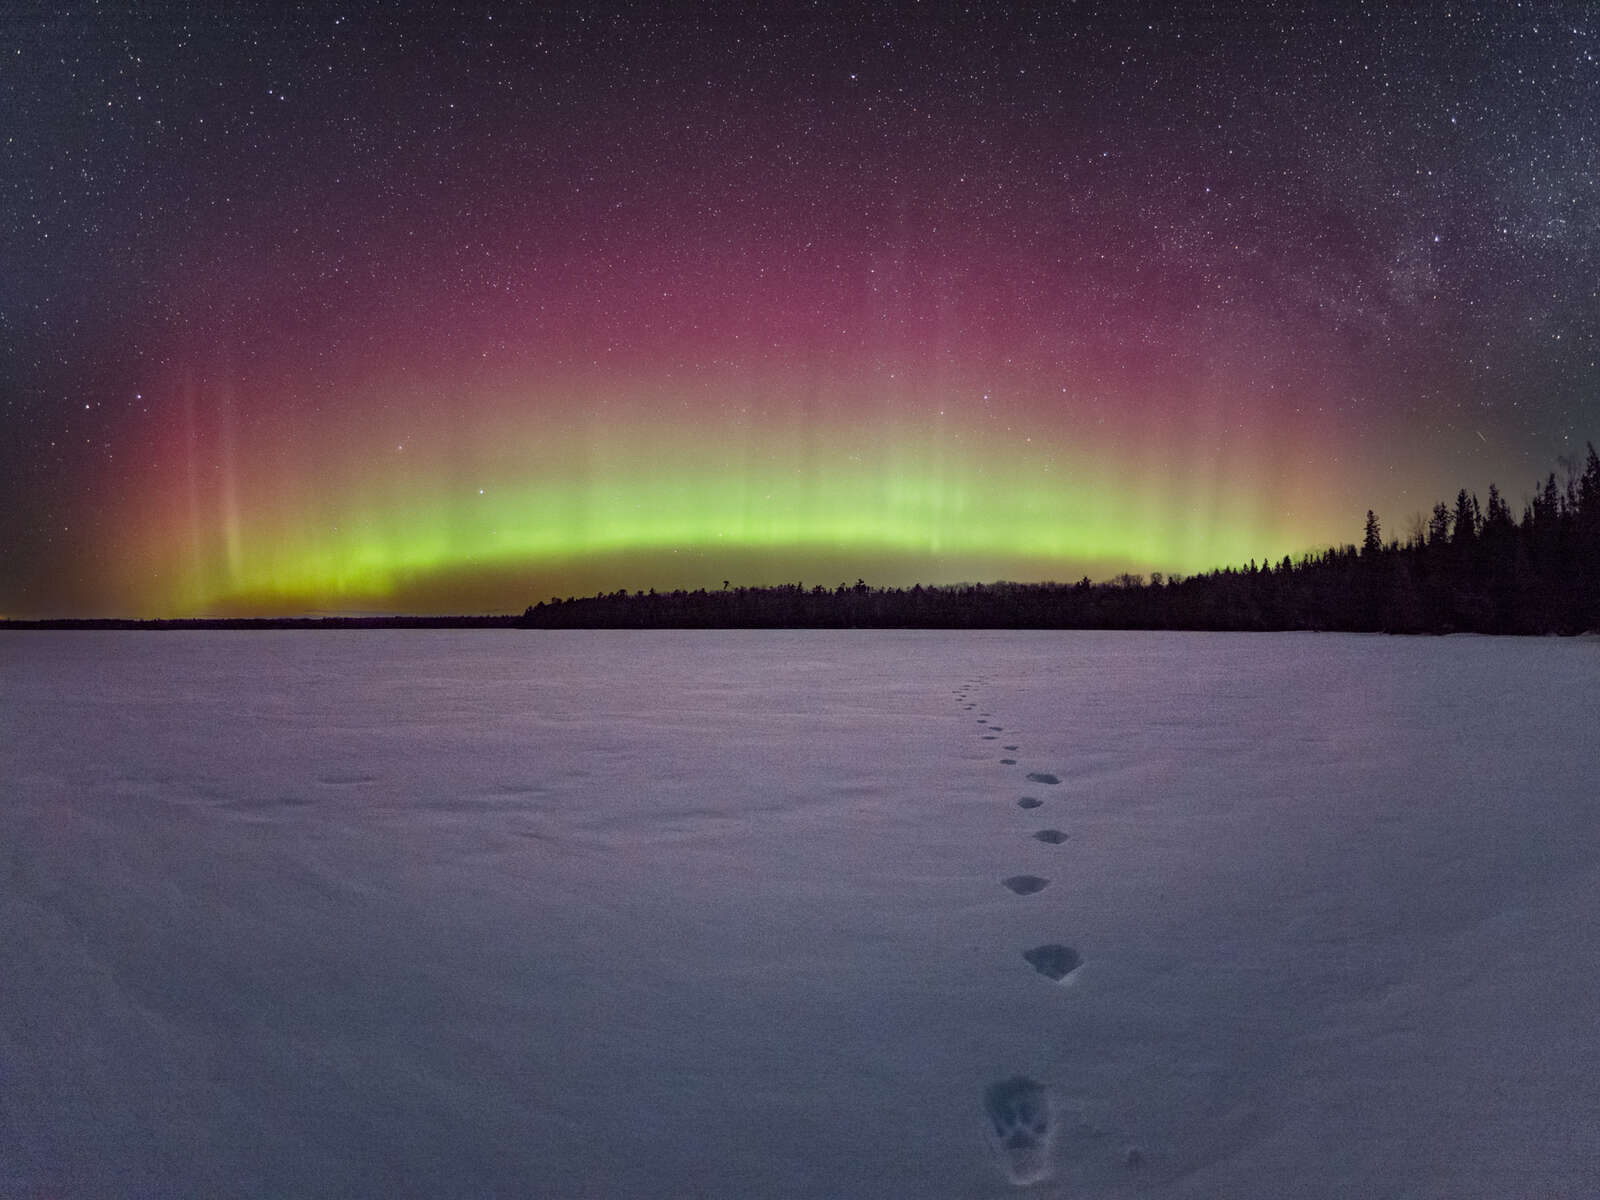
Fox prints in the snow add a leading line and simple point of interest to this aurora photo.
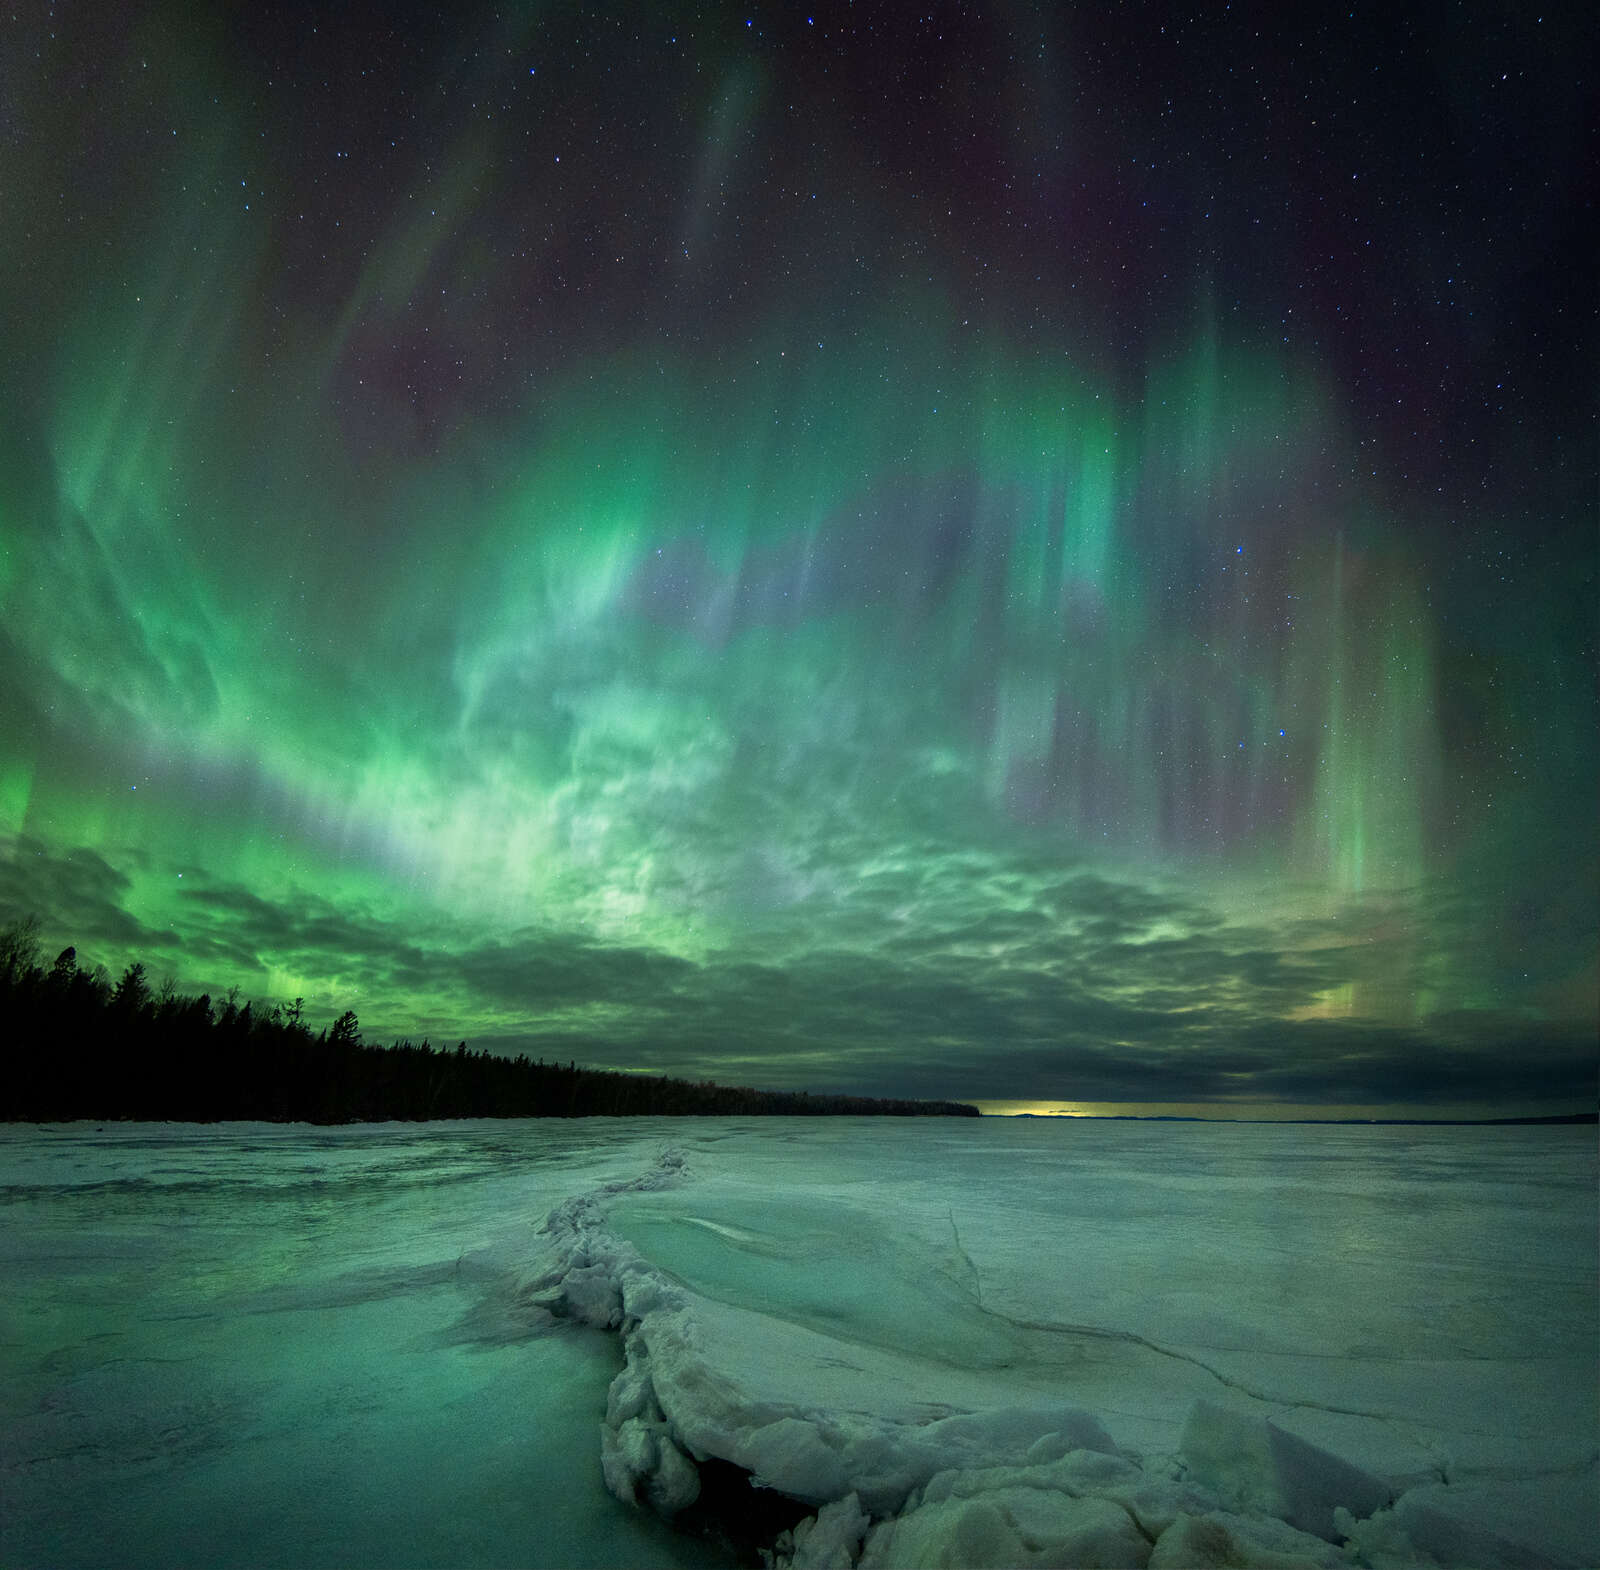
Although clouds can be the nemesis of the aurora photographer they can add some interesting texture to the sky. This is a two-shot pano.
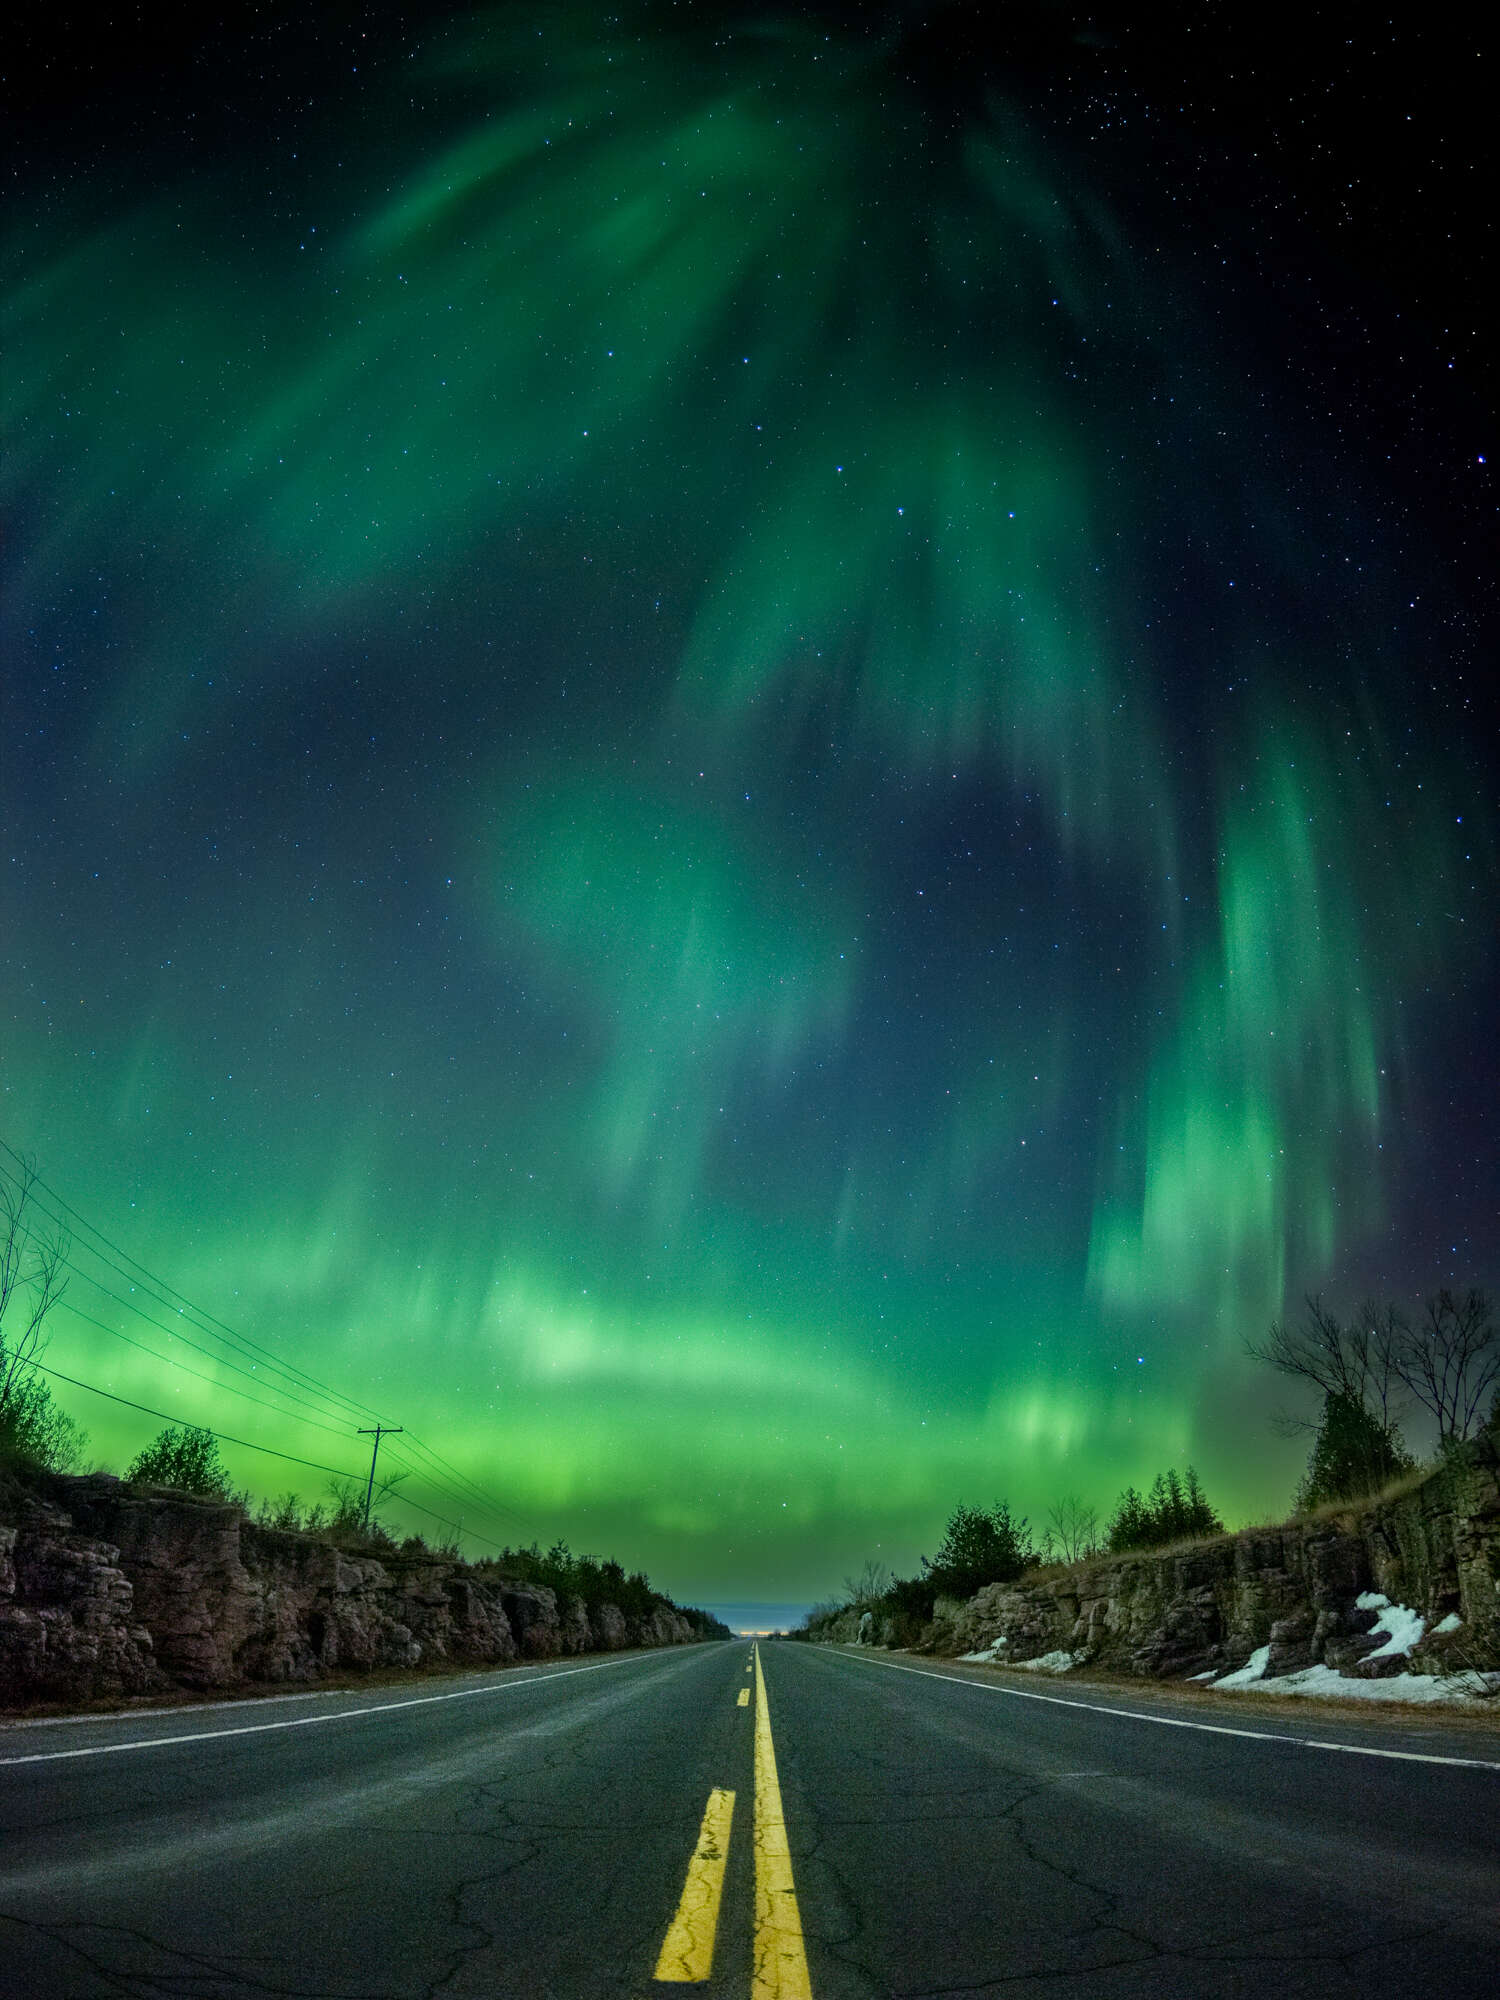
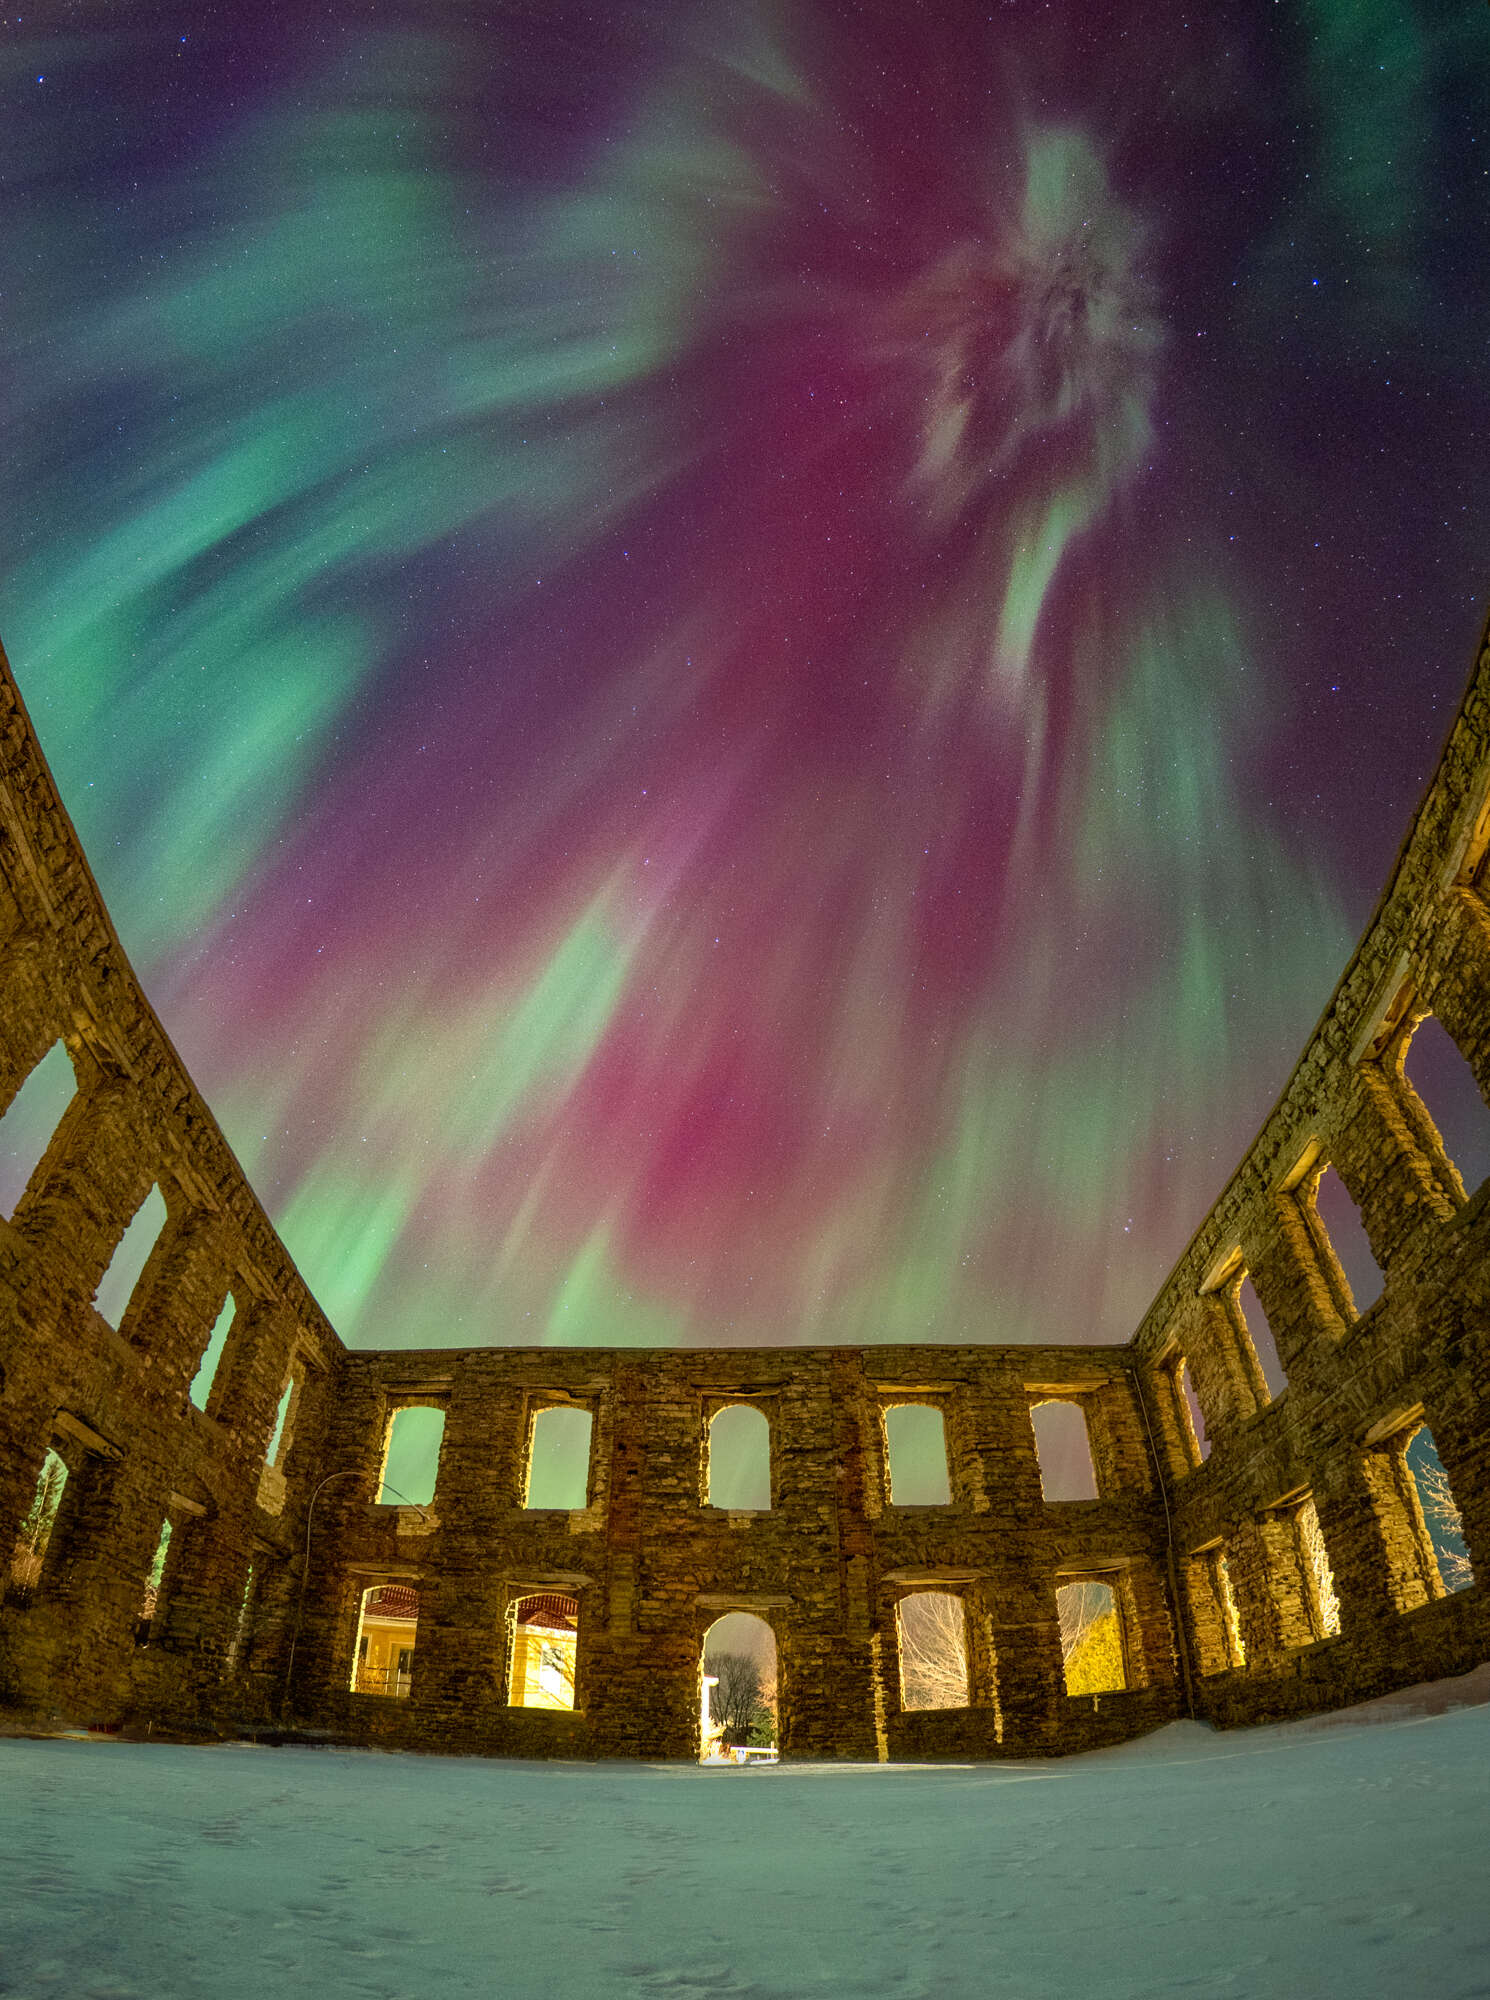
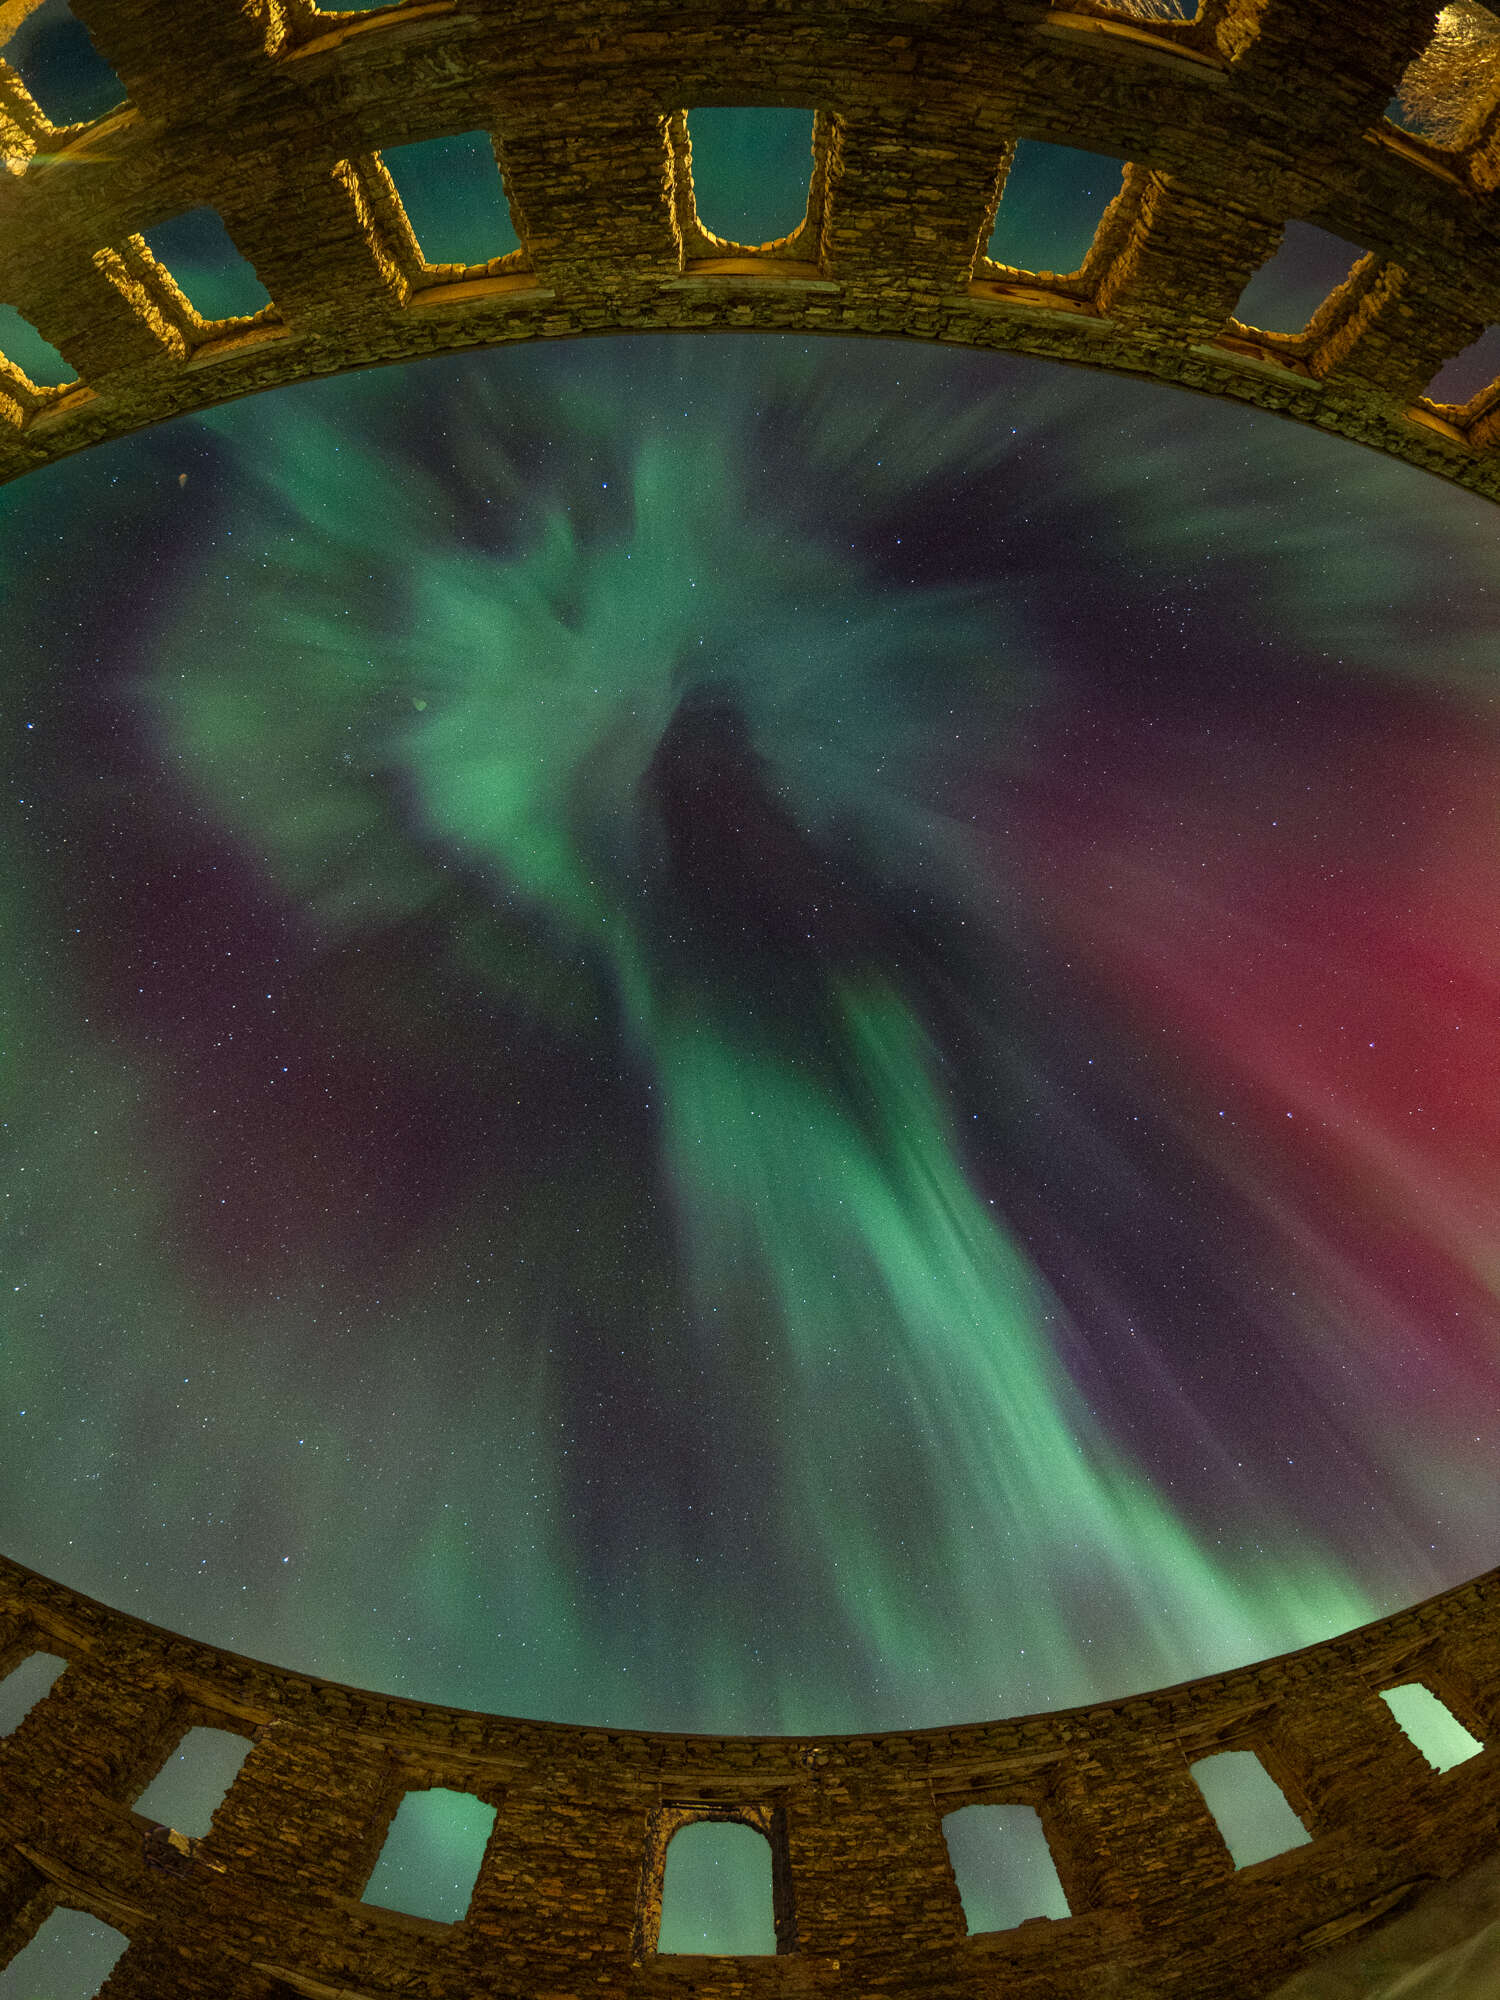
I find the fisheye lens to be perfect for capturing the 'big picture'. There is obvious distortion with this type of lens but it is relatively easy to correct in post.
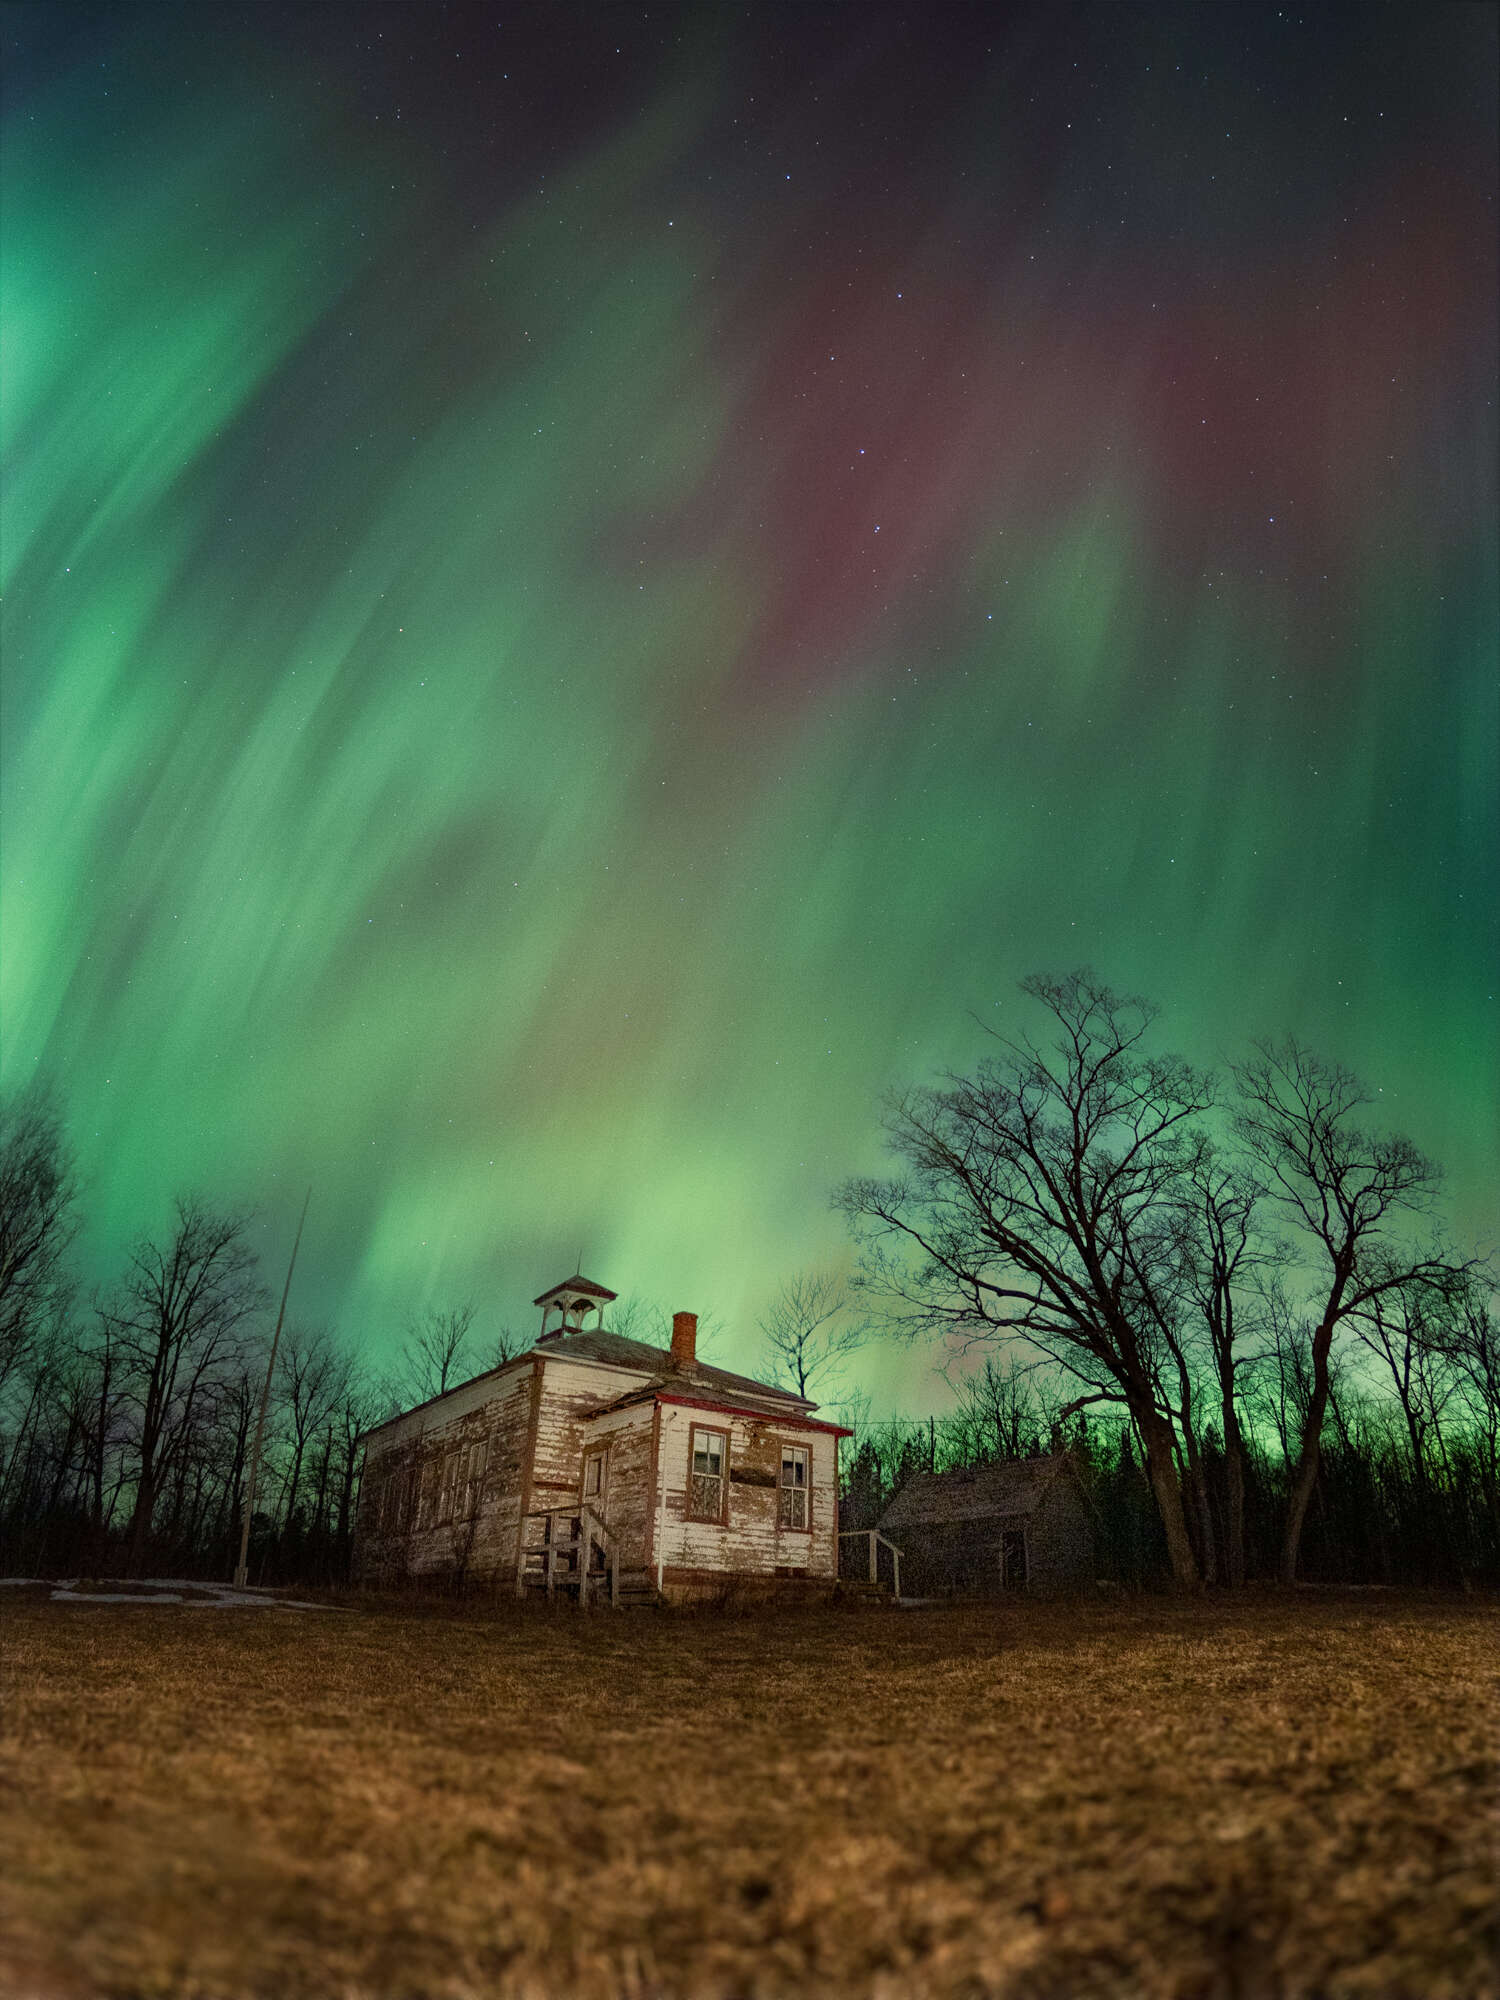
Low-level LED lighting was used to provide even illumination of the foreground and the old schoolhouse in this photo.
Featured Products:
ABOUT PETER
Blog: creativeislandphoto.com/blog
Instagram: instagram.com/creativeislandphoto
Peter has been a dedicated OM SYSTEM shooter for nearly 40 years, and has found a way to combine his passion for photography with his love of teaching to develop photography workshops with a focus on landscape, wildlife and astrophotography. Peter’s work has been published in a number of magazines including Canadian Geographic, Shutterbug and Outdoor Photographer. He maintains his own blog with an emphasis on tutorials that assist others in bringing their photography up to the next level.
AURORA GALLERY
Get inspired by these photos of the Northern Lights or share your own awesome aurora images in our User Gallery.